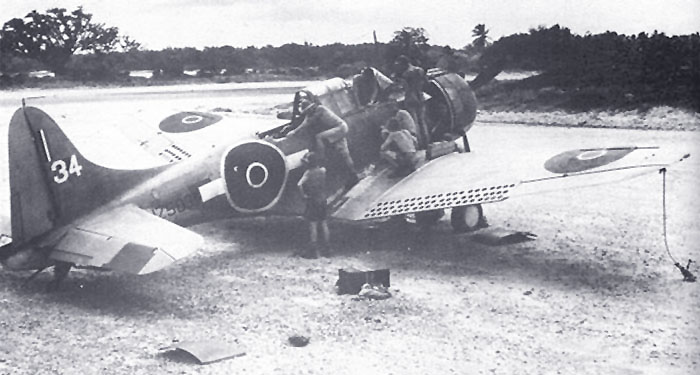
No. 25 Squadron, RNZAF at Bougainville

No. 25 Squadron, Royal New Zealand Air Force, was formed as its only dive bombing unit at Seagrove in July, 1943 under Squadron Leader T. J. MacLean DeLange. Initially equipped with SBD-3s from Marine Air Group 14, there were 12 air crews plus maintenance staff. The aircraft were in poor condition and it was another week before training could commence. In September, they received nine SBD-4s and trained with them on three style of attacks, 75 degree dive, a 45 degree glide and low level (masthead height) attacks to be used against enemy submarines. By the time they were ready for deployment in early 1944, each crew had approximately 100-200 hours logged time.
In January, the Squadron was transferred to an interim location on Espiritu Santo in the New Hebrides (now Vanuatu) for further practice and training. Here, they received eighteen SBD-4s from the US Marines. Later in January though, they were issued twenty-four new SBD-5s. These aircraft were assigned serial numbers in the NZ5000 range and it was with these SBDs that the Squadron transferred to Bougainville on March 22, 1944 to begin their combat operations.
The Squadron flew missions against Rabaul in conjunction with other RNZAF units and often US Marine units too. A typical mission consisted of forty-eight SBDs, twenty-four Avengers plus fighter escort. Targets were typically the areas surrounding Simpson and Vunakanau airfields about ten miles south of Rabaul.

No.25 Squadron served an eight week tour with each crew averaging about thirty strike missions. Their losses were not inconsiderable; two aircraft and crews were lost over the Rabaul area, one in April and one in May. Three aircraft were written off due to operational damage. Accidental losses include one which went missing along with its pilot on a ferry flight and another which went missing with its crew on a training flight. A third crashed at Henderson Field on Guadalcanal. Finally, one aircraft, ‘176’ which never received an RNZAF serial number, was ditched on a ferry flight from Guadalcanal to Piva.
On 22 May the Squadron moved out, returned their aircraft to the US Marine depot on the Russell Islands, and went home in No.40 Squadron Dakotas.

As a post-script, No.25 Squadron, having been disbanded upon its return to New Zealand was reformed on October 30, 1944 as a fighter squadron and training commenced in F4U-1 Corsairs.
For a more detailed description of the deployment, please visit Peter Mossong’s excellent RNZAF website (also listed below in the References and Credits section). There, you will find many more images and a full description of the formation, training and operations of No.25 Squadron as well as some excellent and very informative RNZAF history.
Pictures in this section are copyright Royal New Zealand Air Force Museum via Peter Mossong
DOUGLASS SBD-4 WALK-AROUND
USS ALABAMA MUSEUM, MOBILE, AL USA
I am fortunate that one of my former jobs took me to many locations throughout North America and Europe. On one trip to Mobile, Alabama I had time to stop by the USS Alabama Museum and was delighted to find several aircraft. Below are ten pictures I took of the SBD-4 they have there.


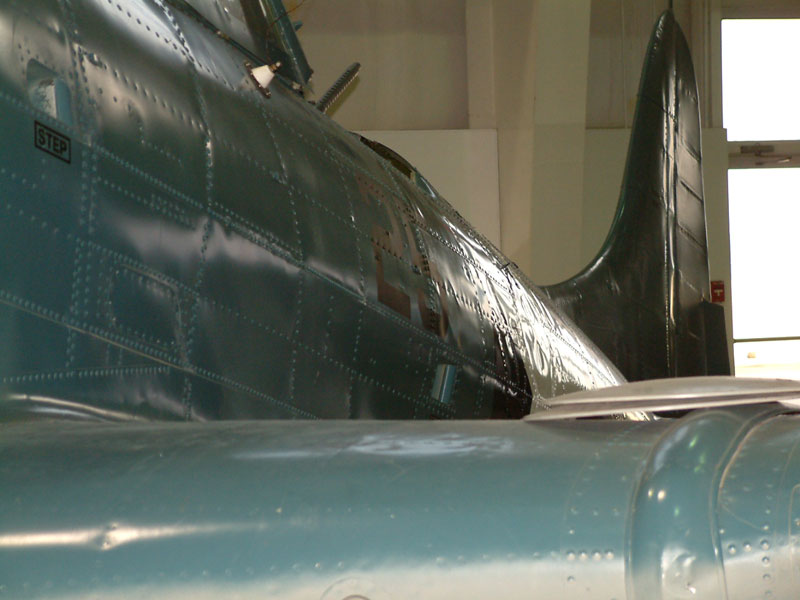

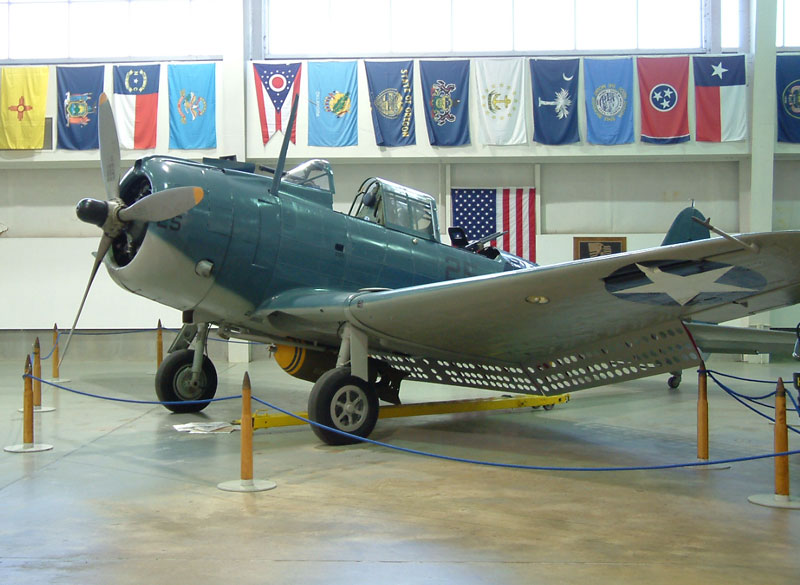


Images this section Copyright 2004 Mark Beckwith
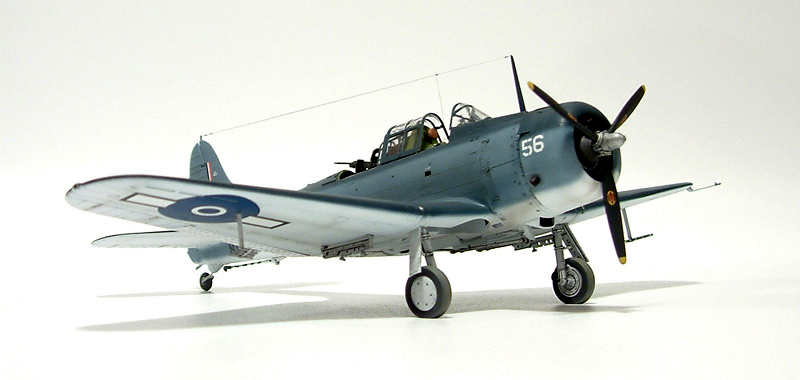
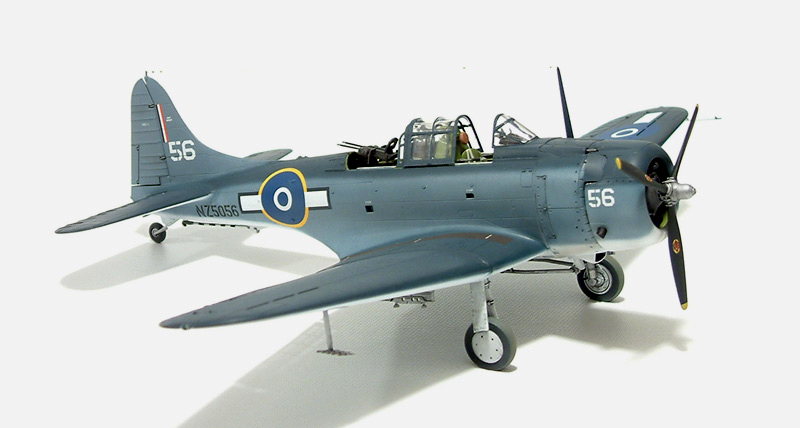
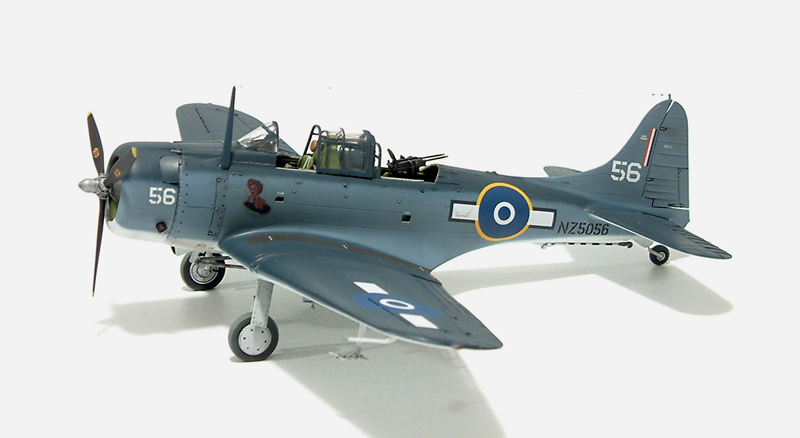
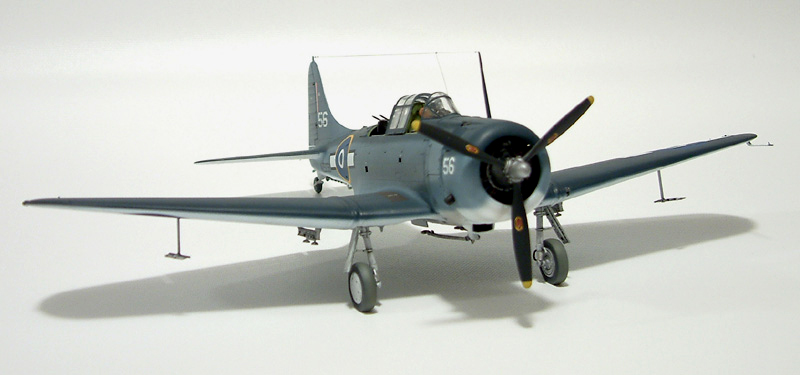
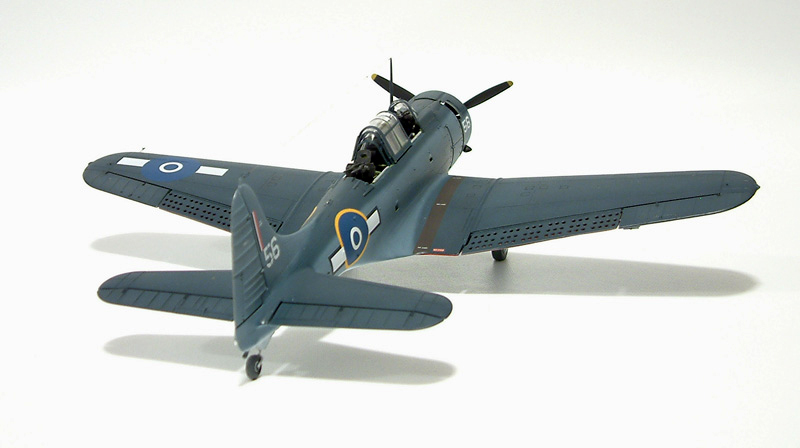
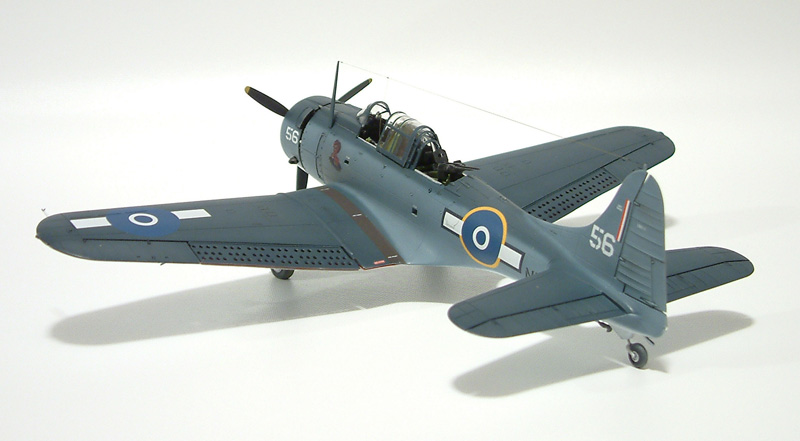
1/48 Scale Accurate Miniatures Douglas SBD-5 Dauntless

Construction

I built this one sometime in 2005-2006 and remember it as a build that was a joy from start to finish. Accurate Miniatures produce(d) some of the best models ever, I have build a few now and they are all excellent. The SBD is no exception. Construction begins with a nicely detailed cockpit which is good enough that no resin aftermarket detail set has been produced to replace. I followed the instructions for construction and only deviated from the colour call-outs where my references showed more detail. Click the small images below to view the results.
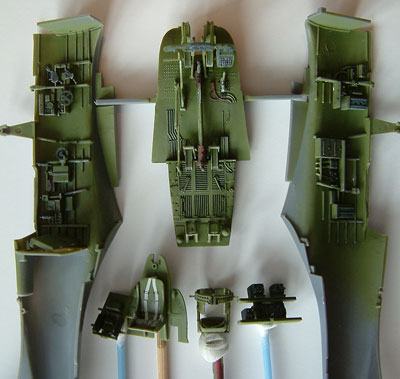


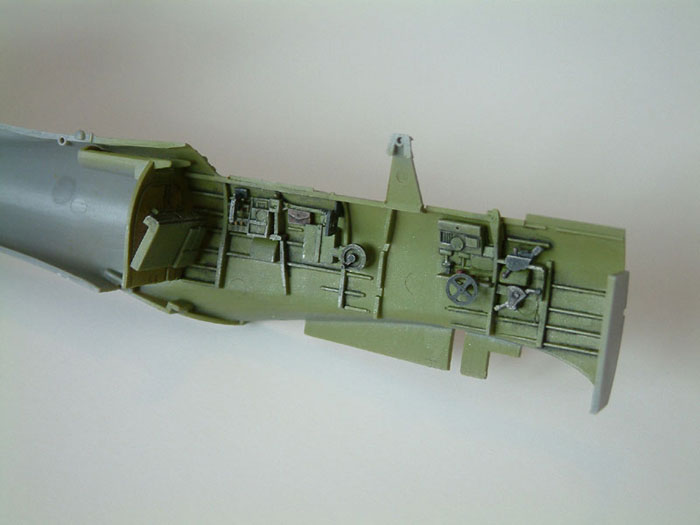

Once I had the cockpit completed, I began the rest of the construction which went surprisingly well. I found the fit to be excellent except for a little fiddling on the underside where the wings join the fuselage and some minor clean up at the horizontal stabiliser fillets.
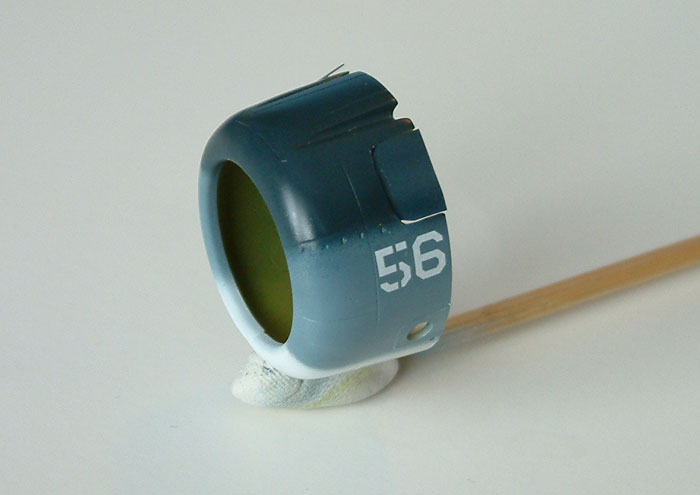
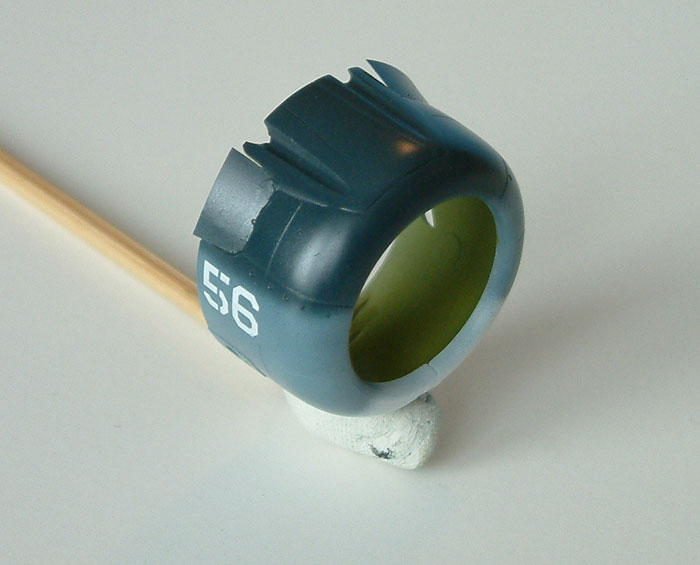
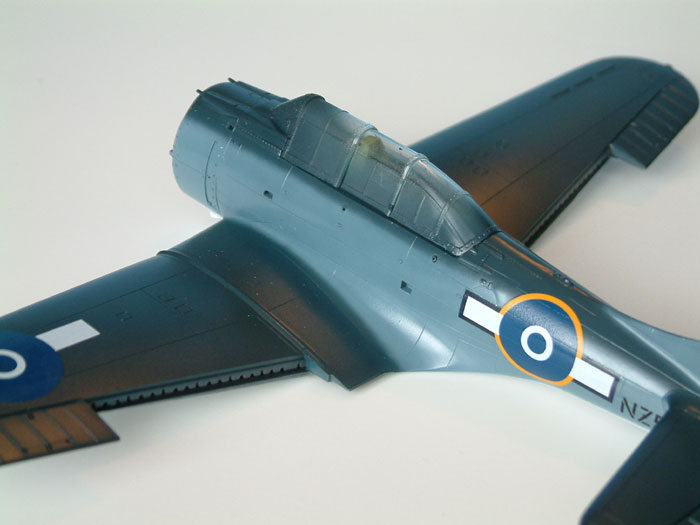
In the course of my research, I noticed that most, if not all, SBD-5s had their cowl flaps open on the ground. The kit parts are molded closed so I decided to try and show them opened. I cut the molded flaps out of the cowl and used the spaces created as a template to make new ones out of soda can. The operation went surprisingly well, I had the new flaps cut and installed inside twenty minutes, secured with fillets of can material so that the flap position is even variable. I left the cowling unattached as I held the model with a dowel inserted in the hole in the fuselage where the engine attaches.
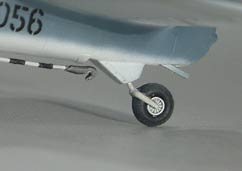
The only other mod that I made was to cut off the moulded tail wheel in preparation to receive a replacement larger pneumatic wheel that land based SBDs almost always carried – certainly NZ5056 had a larger wheel. I found a suitable wheel in the spares box which I modified with a piece of hypodermic needle to represent the shaft.
The kit comes with the option of either an open or closed canopy so I temporarily attached the closed canopy to the model to cover the cockpit for painting. I masked the windshield with Parafilm and attached it with white glue and masked the canopy pieces with a combination of thin (0.125″) strips of Tamiya masking tape and MicroMask. I mounted these on toothpicks with blue-tack and set them aside for painting.
I did a final seam check and rescribed some lost detail on the underside in preparation for the paint. I drilled out the position lights on the underside of the fuselage in preparation for a different treatment which I hoped would look better than simply painting the moulded detail. I filed of the raised detail representing the wingtip and turtle deck navigation lights as I wanted to try something different with these too.
Paint and Decals

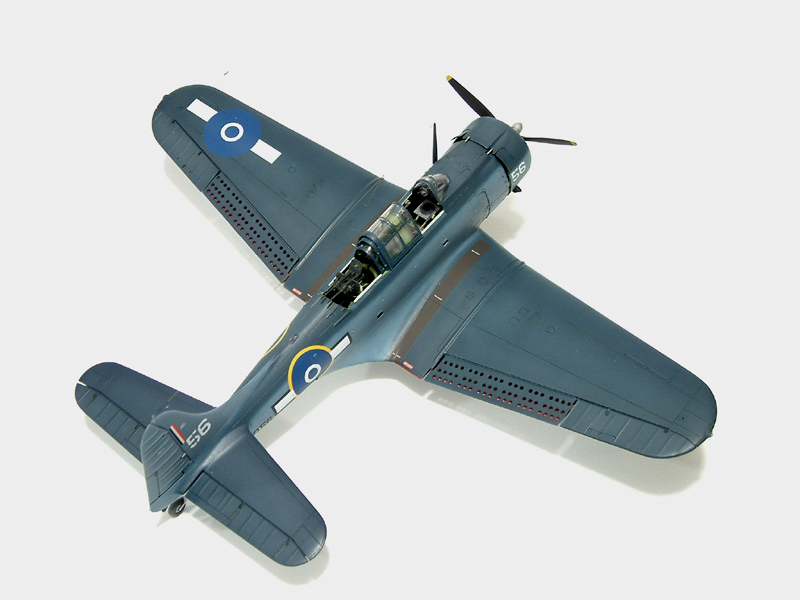
Painting was a blast. I used Tamiya acrylics throughout which necessitated mixing. First, I sprayed the white underside. When that was dry, the real fun began. I used the mixing chart found on the Jackal Squadron website (see references) and first made up a batch of Intermediate Blue, ready thinned to a slightly higher thinner ratio than I have used in the past. I thinned with Tamiya thinner and used an Aztec 470 with the black tip to apply it. I made myself work sloooowwly, working with the regulator set at about 15psi and just freehanded it.
Next, I mixed up the Dark Blue for the upper surfaces, again slightly thinner than I have done in the past, and applied the dark blue – again freehand. I am happy to say, and remember that everything is relative, that I was really pleased with how it turned out – even on the first run through. The key was patience, for me, and well thinned paint. I had to go back and forth a couple of times, including mixing up new batches of the colours. I wasn’t worried about getting slightly different shades as I thought that would look realistic in any event. As it turned out, I couldn’t see any difference in shade between different mixes.


With the paint applied and well cured, I used Pollyscale clear gloss in preparation for the decals. This was my first time with the product, and I used it on the recommendation of several modellers on Hyperscale as I was never really happy with Future. Suffice to say that I liked it. I thinned with Rubbing Alcohol and shot four or five light coats, the last being a little heavier to get a smooth clear finish for the decals.
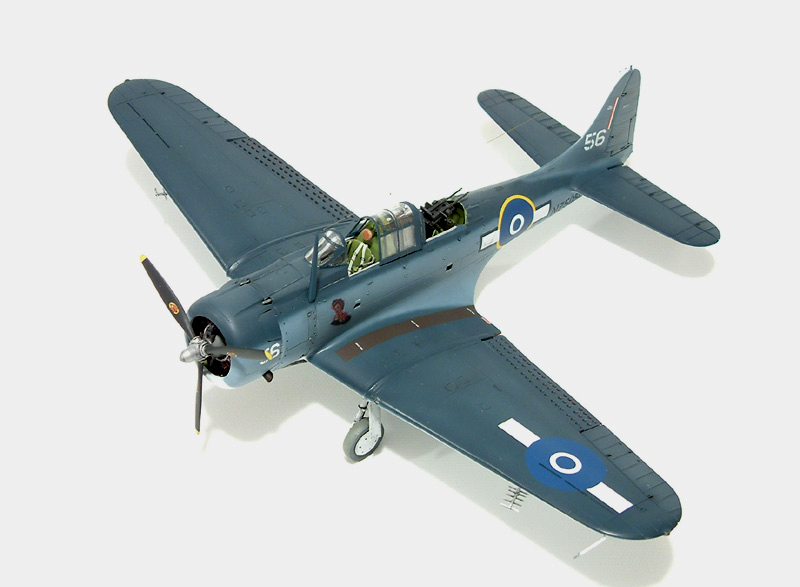
Believe it or not, it wasn’t until I was already painting that I decided to do a RNZAF SBD-5. I thought I had some left over RNZAF roundels in my spares box but they weren’t there. So, I put out a request for roundels (I could make all the other decals I needed) and was answered by Tom Hensley of North Carolina who sent me all of the SBD decals on his Aeromaster RNZAF decal sheet. Thanks Tom! The Aeromaster sheet did not include the markings for the aircraft I wanted to do, NZ5056 “Paddy’s Mistake”. Making the decals for the squadron and serial number was simply a matter of cutting parts of the other decals to make the required numbers.
I was trying another new (for me) product for the decals, Mr. Mark Setter, a Gunze product. Amazingly (if you’ve read my other articles, you’ll know that I SUCK at decaling and always seem to have them silver) I had no real problems with them. I attribute this to the Mr. Mark Setter, which I found to be excellent. I applied the decal on to a small puddle and let it suck the decal down – no blotting of interference of any sort. I did have trouble getting the fuselage roundels to conform properly, but that just took patience and several applications and eventually they melted down very well.


The nose art was a challenge, I ended up using a picture of my wife, which I merged with a piece of pin up art I found on the web and processed it heavily with Photoshop make it look like a painting. When I was happy with it, I printed on clear decal sheet. As you see my nose art has darker hair whereas the original was a blond, this was a necessary compromise as my homemade decals would not print light colours; I was unable to print “Paddy’s Mistake” for the same reason (Update 2019 – I now know there are decals available). We’ll just say the model is depicted at that moment in time when the art was finished but the name was not yet painted on.
Weathering and Final Assembly

With the decals on and dry, I sealed them with a coat of clear gloss and again set the model down to cure. I made up wash of Windsor and Newton oil paint and naphtha and applied the wash to the control surfaces and some access panels around the engine and on the wings only.
Next, I loaded up the airbrush with very heavily thinned light grey and shaded the upper panels (including over the decals) and also accented some areas of wear and dirt on the underside. The goal was to break up the uniformity of the finish by fading the hue in certain areas without making the model look like a mosaic of different coloured panels. I applied a heavier lightening to the upper surfaces of the control surfaces though, I wanted them to look more faded than the metal panels.

Once the shading was complete, I sealed it with a flat finish, again using a new-to-me product, Pollyscale acrylic flat. I liked the result, I tried to leave just a hint of sheen. I applied the flat to the upper surfaces more than the sides and underneath to simulate a greater fading due to sunlight.
I used pastels very sparingly on this one having done most of the weathering with the airbrush, only using pastels for the dust on the wheels.
For the final assembly, I worked from the bottom up, attaching the undercarriage, Yagi Antennas and tail wheel before turning the model over. While I was working on the lower side, I painted the drilled out formation lights with silver first,then with Tamiya clear colours and finally filled the recess with MicroClear. I did much the same thing for the navigation lights and was pleased with the result.

I glued the engine on, then the cowling; and added the antenna post. All of these parts were painted and weathered at the same time as the airframe, by the way. The last job is the aerial wire, which I used stretched sprue for, attaching each end with CA glue and snapping it tight with a smoking bamboo kebob stick. Amazingly, I got it first time.
Conclusion

This is a very fine kit, easy to assemble and most modelers should have no trouble making a really fine SBD with it. As for my effort, this is the first in a while that I have been quite happy with the result, even my wife said it looks nice!
Gallery


References and Credits
Printed Sources:
“SBD Dauntless Units of World War 2” by Barret Tillman ISBN 1 85532 732 5
“Cockpit” by Donald Nijboer and Dan Patterson
“Flying Legends” by John Dibbs
“Aircraft of World War Two” by Michael Sharpe, Jerry Scutts and Dan March
Web Sources:
http://www.warbirdalley.com/sbd.htm
http://rnzaf.hobbyvista.com/
http://www.kiwiaircraftimages.com/sbd.
Individual Correspondents
Peter Mossong – Peter’s web site is the key reference for this piece and his helpful and friendly correspondence was invaluable.
Tom Hensley – without whom I wouldn’t have had any decals for this bird, many thanks Tom.
Copyright: As usual, I make no claim of original work in this article except for the photos of the models and text describing their construction and painting. Except where noted otherwise, I sourced all images and photos from the internet and are used under fair-use. Any copyrighted material will be removed or credited forthwith upon request by its owner.


Leave a comment