
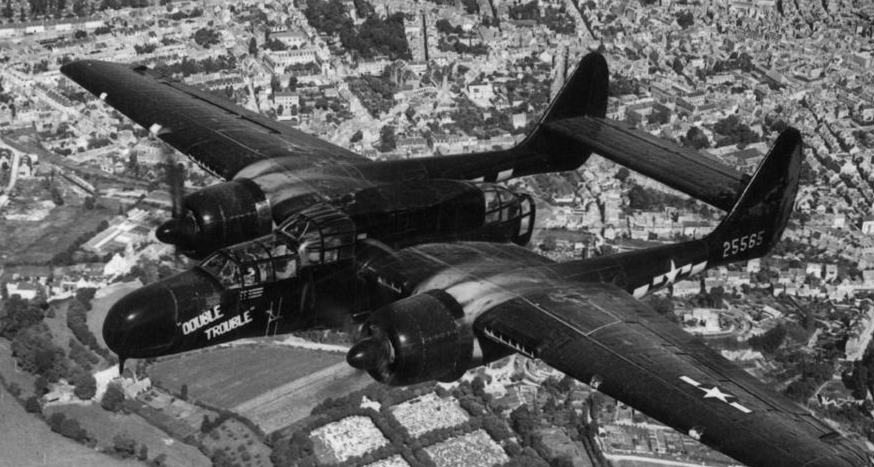
The P-61 Black Widows of the Seventh Fighter Command; Iwo Jima and Ie Shima 1945
The Night Fighter Squadrons of Iwo Jima are possibly best known for the nose art applied to their aircraft, after all it was perhaps some of the best in the entire war. But, that does the men of the 348th, 349th and 6th Night Fighter Squadrons a disservice as there’s far more that they deserve to be known and remembered for.
One would imagine that units classified as a night fighter squadron would seem to have a very clear cut mission. It would seem even clearer if the aircraft they flew was the first purpose-designed and built night fighter of any combatant in the second world war. It might therefore come as a surprise to learn that these remarkable aircraft, flown by equally remarkable men achieved very much more than pretty nose art and “simply” chasing off and shooting down enemy night intruders.
The Iwo Jima part of their story begins with the arrival of the 548th NFS on D+8. Formed eight months earlier in March 1944 flying P-40’s they had transitioned to P-61’s in June of the same year. They trained relentlessly through 1944 and into early 1945 before a shipping out in March to Iwo Jima, now as part of the Seventh Fighter Command. Their number included some crews from the experienced 6th NFS. Soon after, the 6th joined them (from Saipan where it had distinguished itself defending the B-29 airfields there) and a little later still, the 549th NFS.

Upon its arrival, the 348th led by Lieutenant Colonel Jimmy Alford began their primary mission in the provision CAP to protect the airfield from night raids by Japanese Betty bombers. Iwo Jima was not yet completely secured and newly arrived P-51 Mustangs of the 15th FG were flying close air support missions for the Marines.
By 25th March the island was thought secure, the last Japanese commander sending a final goodbye message two days earlier on the 23rd. The Marines were beginning to pull out and the Japanese switched from defending Iwo Jima to attacking it with bombers. Two P-61’s of the 6th NFS were up on CAP that night and engaged at least two Japanese bombers, downing one for the first night-fighter kills over Iwo Jima. This wasn’t the main action that night though; around 300 Japanese troops climbed out of their hiding places and attacked the sleeping pilots and ground crew inflicting many casualties while being virtually wiped out themselves. Now, finally, Iwo Jima was secure.
By June, the P-51’s were flying escort for the B29’s attacking the Japanese home islands and delivering ground attack missions in earnest. The 548th, 549th and 6th NFS’s were maintaining an effective CAP over the airbase. Other duties were now being assigned to them.

General Micky Moore, Seventh Fighter Command’s leader became concerned that the Japanese would follow the fighters (and bombers) back from their raids on the Japanese mainland and in doing so inflict great damage on the returning planes. He was also concerned they may even mount a daylight raid on the island airbase. In order to protect the returning aircraft the P-61’s were sent north in daylight to meet the returning bombers and fighters to provide cover for them. In doing so, the P-61’s were also able to provide much appreciated navigational assistance to the fighters who were often so low on fuel that they had very little margin of error in navigating the 650 miles back to Iwo Jima from Japan. Later on the P-61’s provided navigation assistance to the outbound fighters too.
One of the most appreciated duties the P-61’s took up was rescue assistance for downed pilots in the ocean. Their mission was to spot pilots who had had to parachute from their stricken aircraft and guide rescue submarines or destroyer to pick them up. This particular duty wasn’t limited to the returning bomber and fighter streams from Japan, they also provided this cover on the frequent attacks on Chichi Jima and other targets.


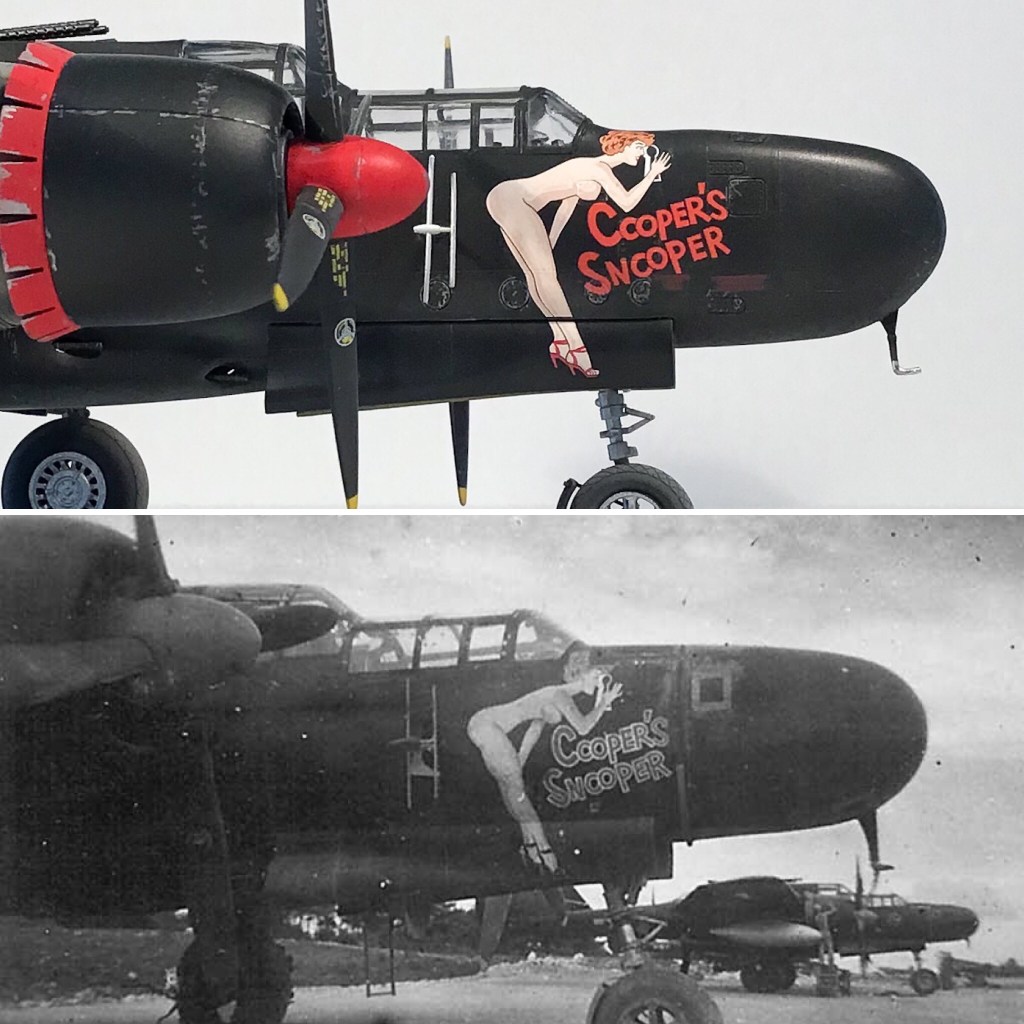
Some of the nose art for which the Night Fighter Squadrons are rightly famous
One of the more unusual extra duties occurred in early June. A damaged B-29 radioed that it still had its bombs on board following damage sustained by Japanese flak over Osaka. The hit had killed the aircraft’s commander and wounded the copilot. Crucially, it had also jammed the bomb bay doors preventing the bomb load being delivered or even subsequently jettisoned. With no hydraulics and a full load the bomber could not land so the crew parachuted over Iwo Jima leaving the bomber on auto-pilot, still carrying it’s dead commander. The task of shooting it down came to First Lt. Arthur Shepard of the 548th in his P-61. It took two passes firing all eight of the Black Widow’s guns to bring the big bomber, and its unfortunate commander, down.
Soon after, in mid June the 548th was sent to Ie Shima to provide night CAP over the air bases there, scoring their first night kill soon after arrival. However, it was on Ie Shima that another mission type was assigned the P-61’s. Assuming the 318th’s role in delivering the much disliked “Heckler” missions the 548th’s P-61’s were to fly to the Japanese mainland and deliver ground attack on air bases and other military targets. These missions were extremely dangerous. Ground attack was now added to the P-61’s repertoire.

The P-61’s of the 548th, 549th and 6th NFS undoubtedly were a huge part of the success of the Seventh Fighter Command in its mission to protect the bombers and assist the ground troops. Whereas the Mustangs were required to complete the extremely hazardous VLR missions (imagine 1,300 miles over water in a single engine fighter!), the P-61’s provided night and day time CAP over the air bases; there and back navigational aid to the fighters; search and rescue services to downed pilots; and even “Heckler” night time ground attack raids on the Japanese mainland.
More than just pretty nose art, indeed.
Great Wall Hobby 1/48 Scale P-61B

This kit was my first experience with a Great Wall Hobby model kit. I had wanted to make a P-61 for a long time but the reputation of the Monogram kit had put me off. Coming across the GWH kit was an accident; I think I was browsing Modeling Madness one day and I bumped into Tom Cleaver’s review of the kit. That a new kit existed was a revelation to me, that the kit was apparently a good one was a decision-maker. I bought one.
I started with the cockpit and put in a bit of an effort with it because the amount of glass on the P-61 makes it quite visible. As a whole, the kit contains a ton of parts, including a PE fret and while I found some of the engineering unnecessarily complex the results do speak for themselves. I’m not the most talented cockpit builder but I was a bit pleased with how it turned out.
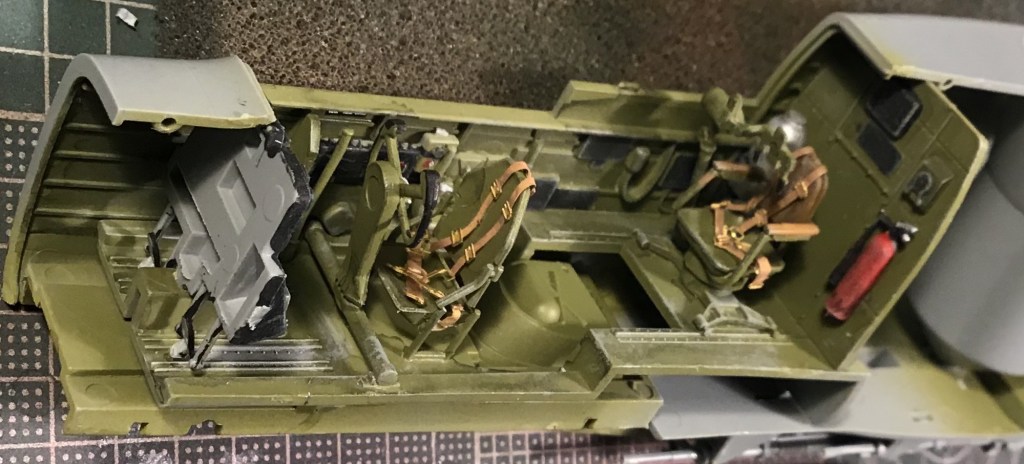

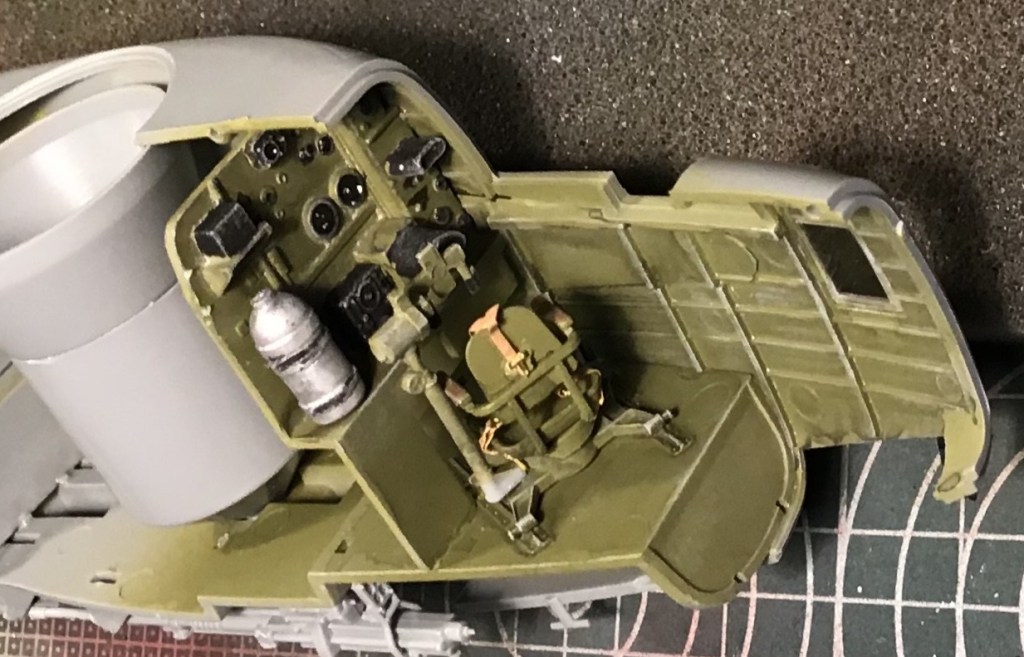
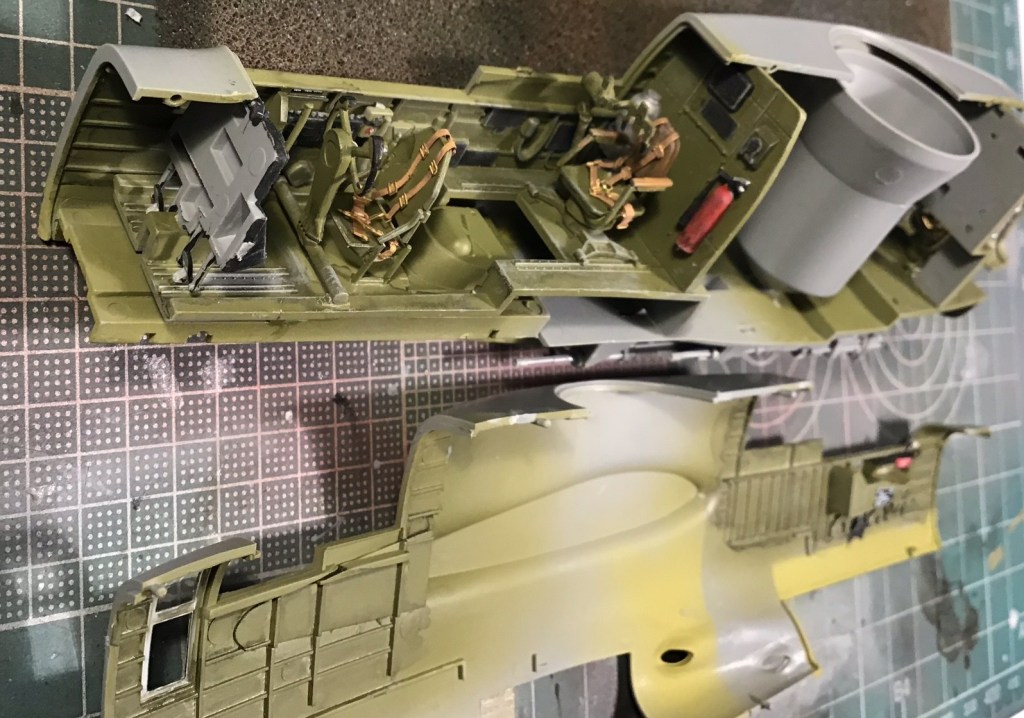
Cockpit detail which should satisfy all but the most detail driven modeler
Constuction then moves on with the airframe through a reasonably logical progression. I did get confused with the belly guns and had a little difficulty closing up the main fuselage but it was nothing that posed too much trouble.
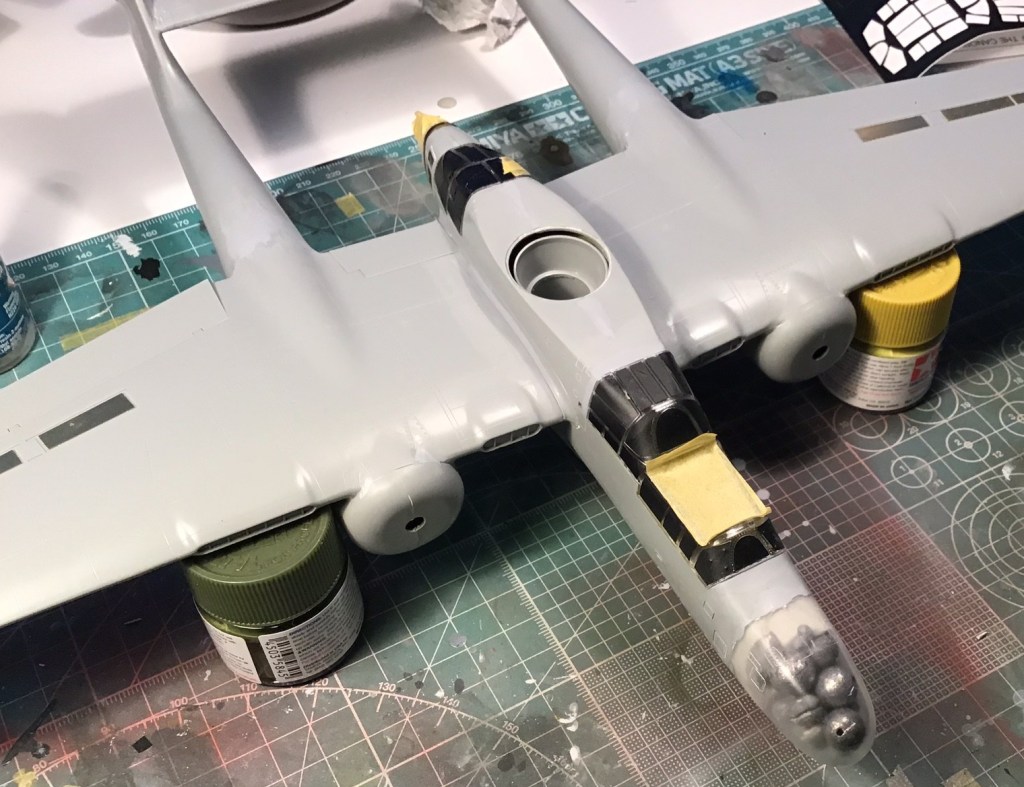
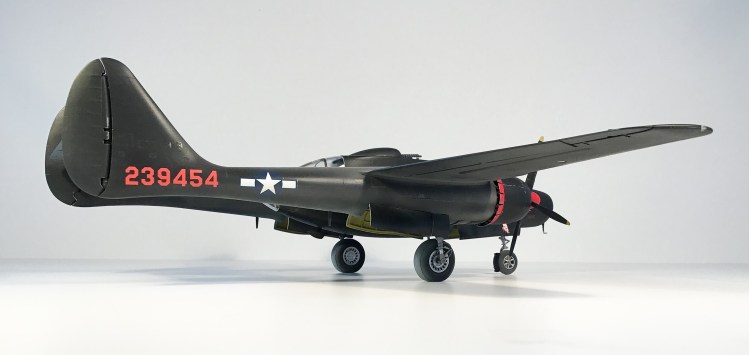
As I’ve mentioned many times before, I am not very good at construction so there were seams to fill and clean through most of the assembly. Working methodically the model came together and was ready for paint. The instructions clearly remind the modeler to add weight to the nose to avoid tail-sitting. Luckily, my chosen scheme had a painted radar cowl and hiding the lead shot was easy. After construction was complete I cleaned up and applied the masking to the glass.

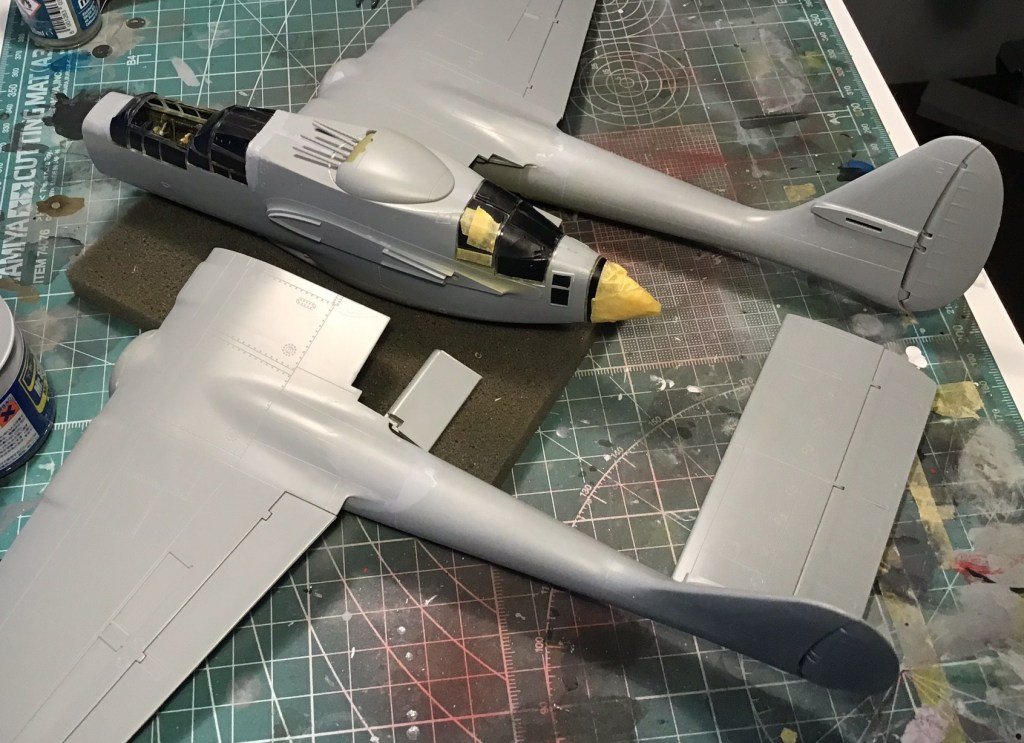
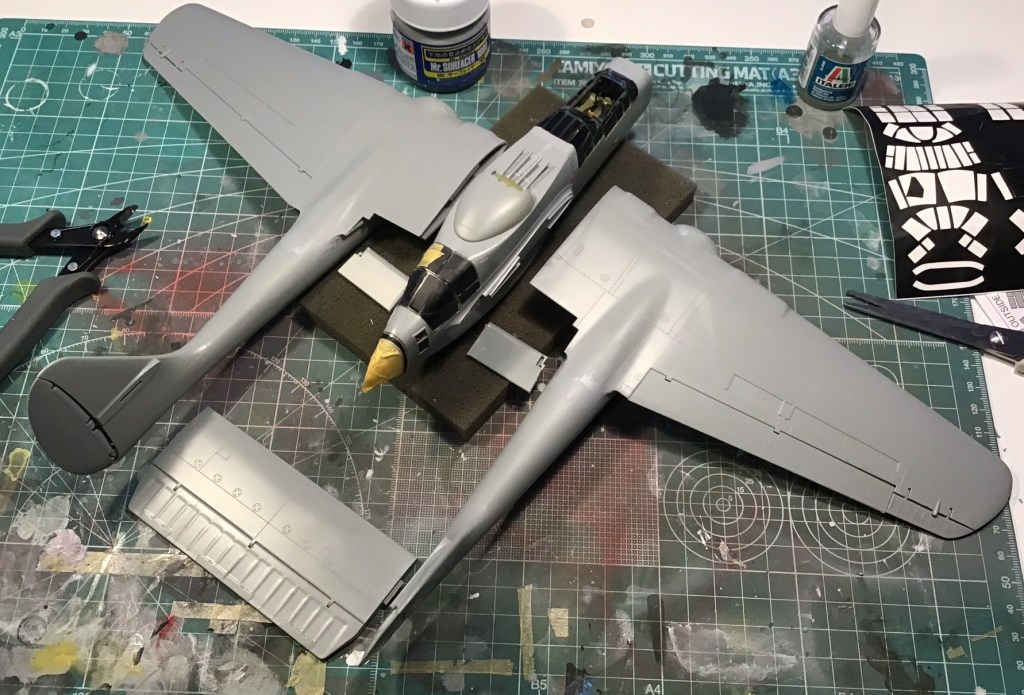
Ready for paint, and definitely not going to be a tail-sitter with all that lead in the nose!
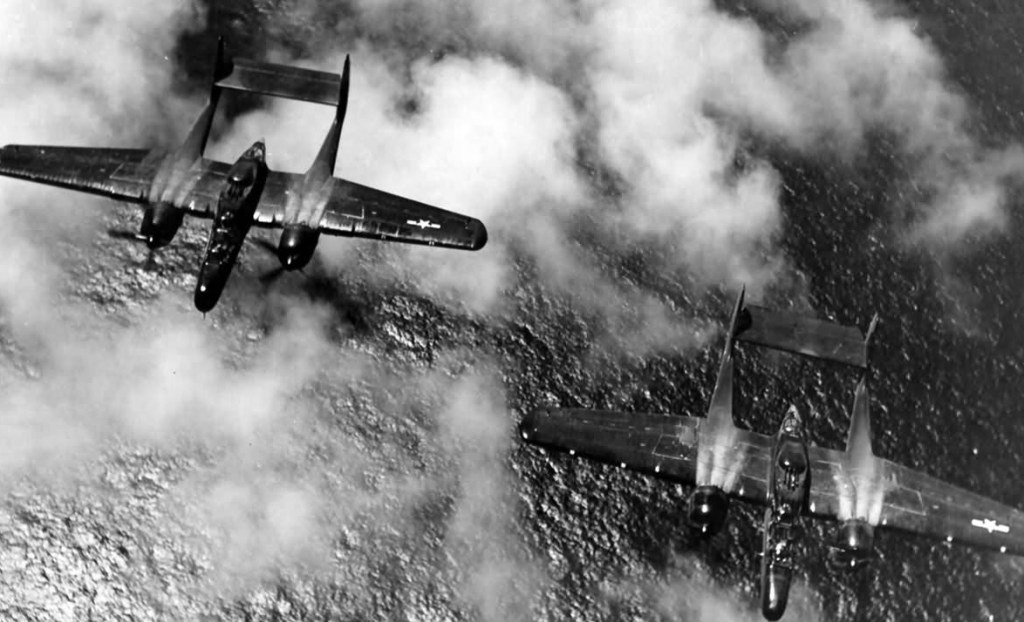
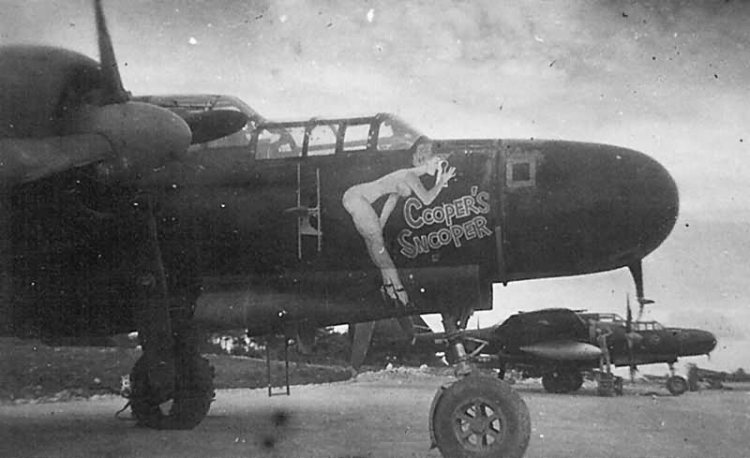
An all black colour scheme might seem to be fairly easy but I wanted a weathered airplane that didn’t look like a toy. First, I studied a bunch of images of the Iwo Jima P-61’s to get a feel for how the finish really looked, and more importantly how they weathered in terms of the paint finish and the wear and tear.


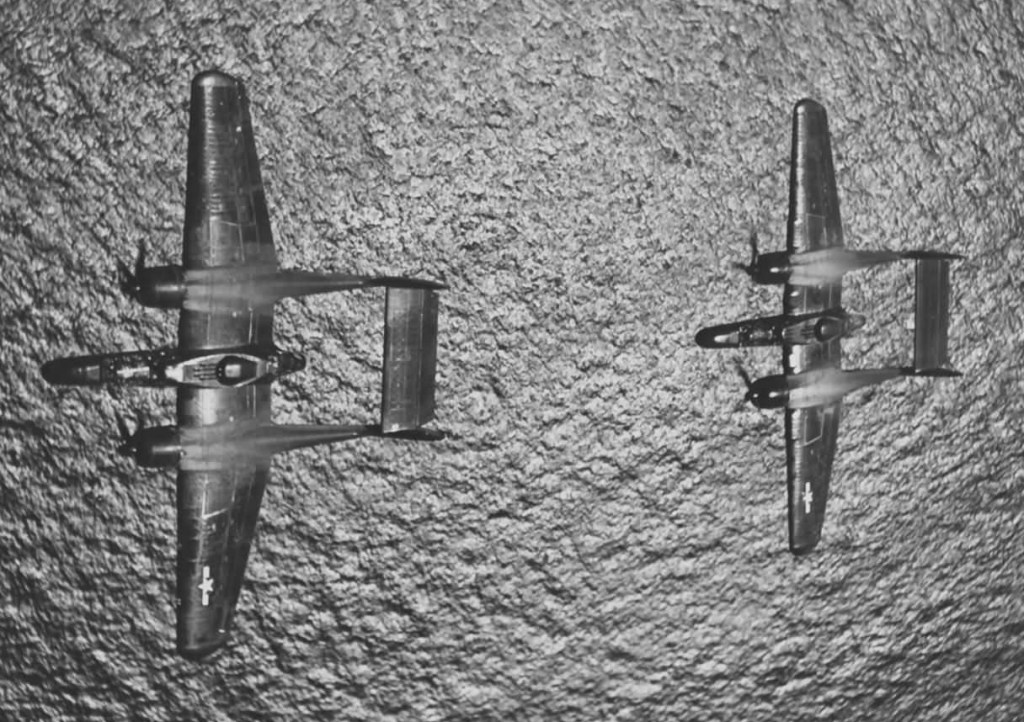


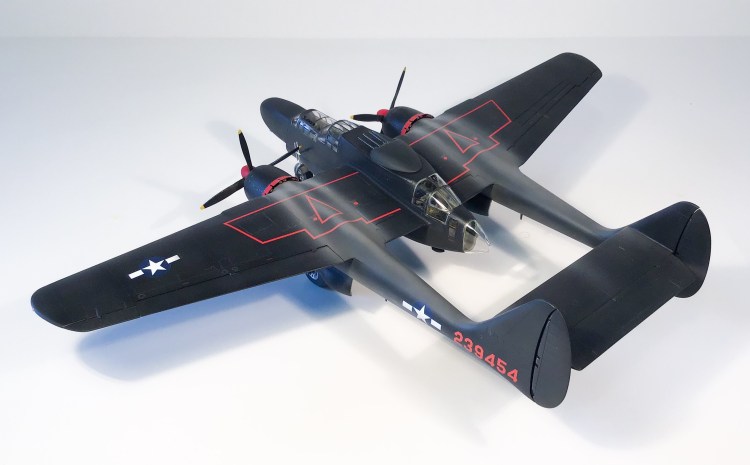
In studying the collection of images above and many more besides, I came to the conclusion that the finish on my Black Widow should be a somewhat faded black – but not a grey as is often used – with some variation in tone and a very subtle panel line accent. It should have an overall satin finish with a greater sheen on the engine cowls. Many aircraft showed extensive paint chipping and general wear from the harsh volcanic dust on Iwo Jima, so I felt it important to represent that too.
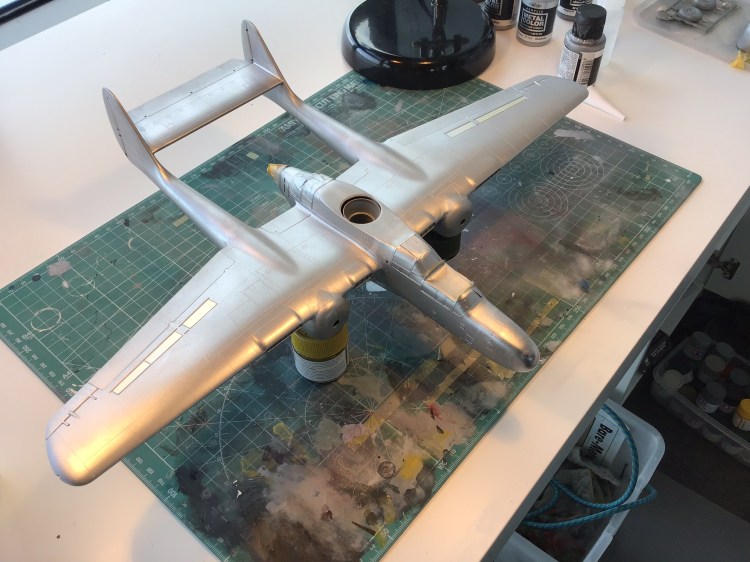
To facilitate the chipping I decided to paint the model overall aluminium prior to the black with the idea that I would remove some of the black later to represent the paint loss.
With the undercoat applied I set to with Tamiya Nato Black as my foundation. With that applied, I worked in some light post-shading of Tamiya Flat Black on the key panel and access areas to accentuate those. I also darkened the undersides a little more as they would not have been subjected so much to the sun fading. I then hit some other more worn areas with a post-shading of lightened Nato Black.
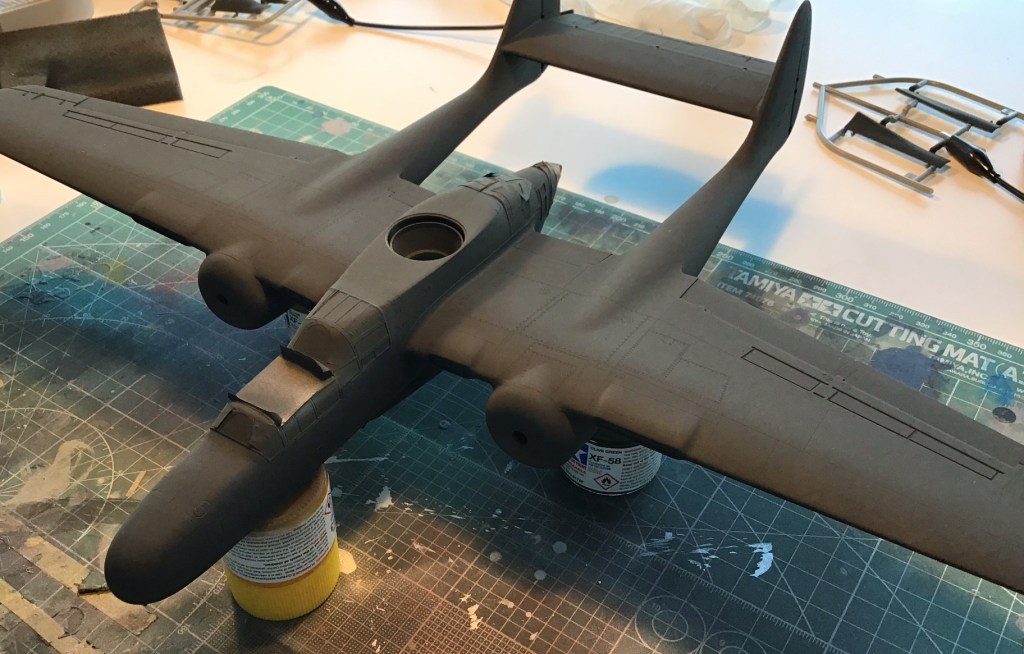

At this stage I now had a very flat, variable tone finish which I was happy with. The pictures above don’t quite do it as much justice as I’d like but I hope you get some sense of the completed paint scheme. Next I tried something that an earlier accident had shown me can lead to a very interesting finish for a weather paint scheme. I rubbed the model down, firmly, with kitchen towel. This distresses the finish just a little, but it hardens up the paint, makes it very smooth (which helps immensely with decal application) and creates yet more variation in the tone depending on how much and how hard the paper towel is rubbed.


At this point the finish was so smooth I considered forgoing the gloss finish in preparation for the decals but in the end went with one to ensure the decals would not silver and to protect the paint from the setting solution(s) I usually use. As an extra precaution, I even polished the gloss coat.


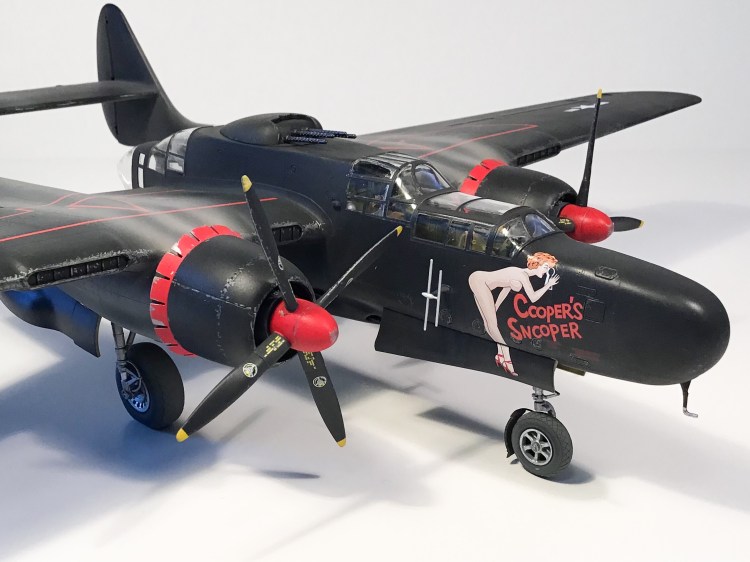
The pictures above show the results; decaling itself went quite smoothly, with even the red walkway lines on the wings posing no problems. I used the kit decals for stencils and insignia and Kits-World “War Birds ” P-61 Black Widow (KW-148003) decals for the nose art and serials. I chose “Cooper’s Snooper” because it was a B version and had a painted radar cowling allowing the easy installation of the nose weight. Looking around the internets, it seems that most modelers have the same idea! With the decals on, I sealed everything in with a light gloss coat and then applied the base flat coat in preparation for the weathering.
Weathering is by far my favourite part of modeling and I was looking forward to this one from the day I ordered the kit. There were two main elements to the weathering this model; the paint chipping and the dust and exhaust staining. Although the model had a base coat of aluminium, I decided to use a silver pencil for the paint chipping and my airbrush for the dust and exhaust staining.
To apply the chipping I simply dot the silver pencil lightly and repeatedly on the model to build the effect I’m after. Patience is the key with this approach. The effect is, to my eye at least, very convincing and I like how it turned out on this model.


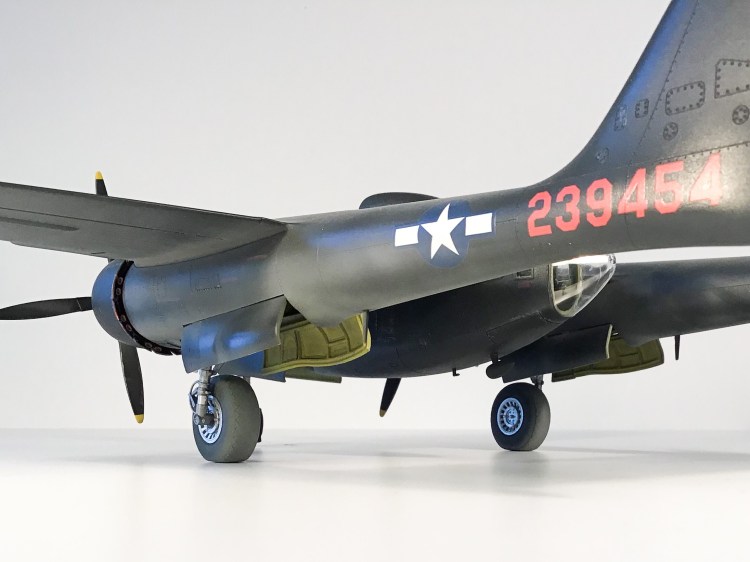
To apply the exhaust and general dust I used my airbrush with some heavily thinned mixture of grey and tan. I varied the mix as I applied to avoid the trap of a too uniform application that always looks like a model rather than a replica. I applied the exhaust staining to line up with the engine exhausts and the general dustiness on the underside and around the areas that would have had foot traffic for maintenance and/or rearming.


When I was happy with the weathering I applied some more clear flat until I was happy with the variable sheen. All that remained now was the undercarriage and other bits and pieces to finish it off. As is my habit I turned the model over and completed the underside – undercarriage and covers, antennas, etc. and then flipped it on its wheels for the topsides. I ran into a little difficulty removing the masks on the glass which required some clean up but overall it came out well.

I was very impressed with the kit and quite pleased with the result I achieved. An obvious short-coming in the kit however is the lack of auxiliary fuel tanks, unless my kit was mysteriously missing them. One day I’ll find a suitable kit to take some from and add them to this model. Aside from this one complaint however I will certainly making another of these one day, I have plenty of nose art remaining!
Gallery


References and Credits
- ” The Pineapple Air Force” by John W. Lambert
- “VLR P-51 Mustang Units of the Pacific War” by Carl Molesworth
- “The Last Fighter Pilot” by Don Brown and Jerry Yellin
- Wikipedia – Seventh Fighter Command
- 7th Fighter Command Association Web Page
- World War Photos
- 318th Fighter Group Ie Shima
- Tom Cleaver’s review of the GWH kit on Modeling Madness
Copyright: I claim original work and Copyright 2019 for the text in this article and the photos of the model. Except where noted otherwise, I sourced all other images and photos from the internet and are used under fair-use. Any copyrighted images will be removed or credited forthwith upon request by its rightful owner.


Leave a comment