
East of the Courtenay Plantation, 16 May 1969
On 16 May 1969 SAS Patrol 15, a four-man team of Australia’s 1ATF’s elite SAS Regiment in Vietnam came into contact a large enemy force near the Courntenay Plantation on the northern border of Phouc Tuy Province to the west of the Song Rai river and was in danger of being overrun. The RAAF’s 9SQN was tasked with extracting them before that could happen. Three of the squadron’s utility Bell UH-1H “Huey” helicopters callsign “Albatross” (the three Albatross were assigned numbers 01, 02, and 03) and three Huey gunships using the callsign “Bushranger” (assigned numbers 71, 72, and 73) assigned to the mission. The plan was simple, while the Albatross flight were extracting the SAS team with ropes the Bushrangers were to maintain constant suppression fire on the enemy positions.

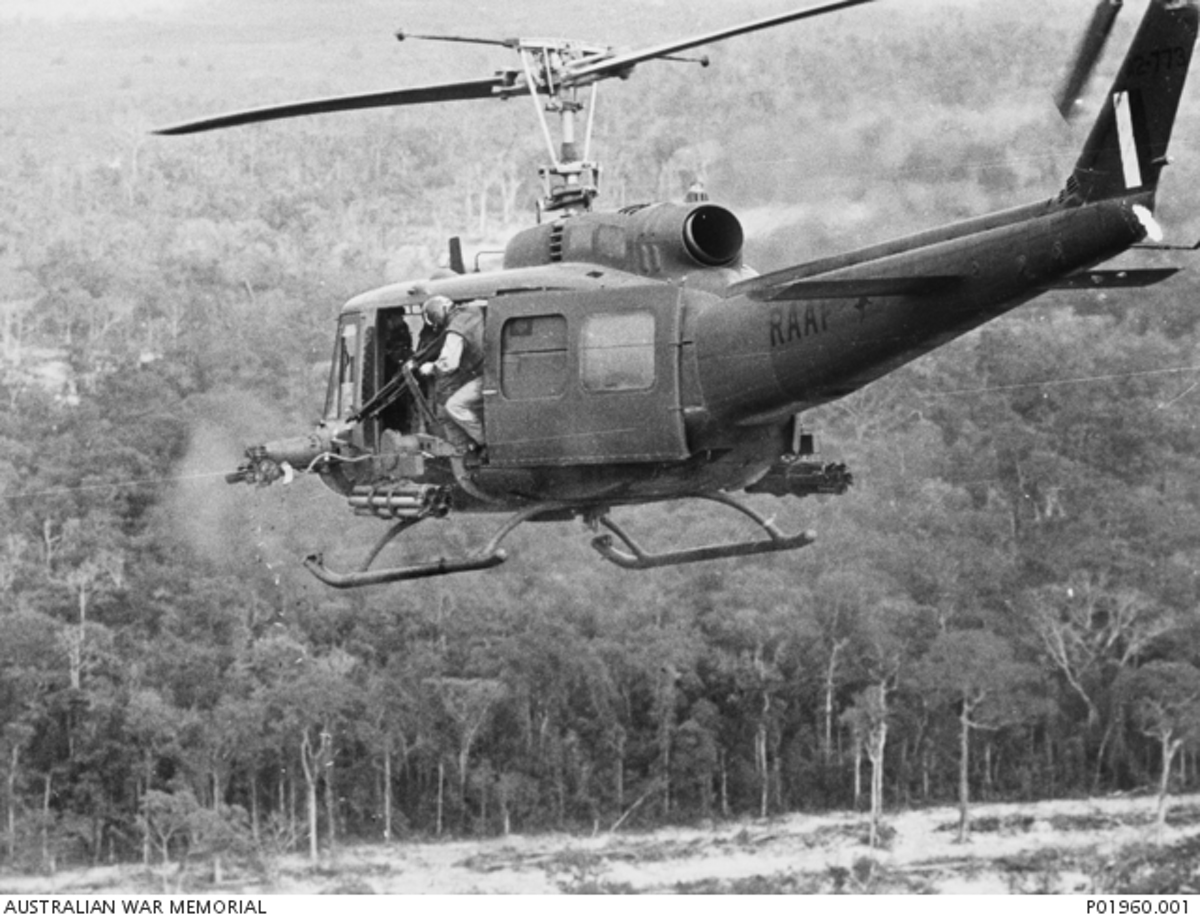
Leaving their base at Nui Dat the six Hueys covered the 25km north north east to the stricken SAS team within minutes. Radio traffic from the ground indicated the SAS Team were becoming heavily engaged and required urgent extraction. Albatross 02 piloted by New Zealander FLG/OFF Trevor Butler and FLT/LT Tony Wheal immediately descended towards their position with its extraction ropes already deployed and ACs Allan Lamb and John Gibson manning their M-60 machine guns in the waist positions. The men on the ground were unable to gain the ropes due to the increasingly heavy contact with the enemy and as a consequence Albatross 02 was becoming the focal point of a great deal of ground fire.
As Albatross 02 had descended to pick up the troops on the ground, the 3 Bushrangers set up their ground suppression circuit. Unike the Americans who typically used two gunships, the RAAF used three in order to maintain a constant fire on target. Flying a circuit approximately 800m long by 200m wide, one Bushranger could be firing its forward weaponry at the the target area while the Bushranger which had just completed its pass would maintain fire on the target zone with its M-60s firing to its rear. Meanwhile the third Bushranger was reached the top of its circuit and make its turn for its [next] firing pass, which coincided with the first turning away from the target.
As SQNLDR Brian Dirou in Bushranger 71 [A2-383] completed its firing pass the ground troops urgently radioed for closer support, “Bring it in closer Bushrangers, they’re right on top of us“. On the next pass Dirou “fired a rocket aiming for about 20m in front of the hovering Huey [Albertross 02]” but once fired, its flight looked certain to impact the front of Albatross 02‘s rotor disk. For the two seconds it took the rocket to arrive on target time seemed to stand still. Fortunately the rocket passed a couple of metres in front of Albatross 02’s windscreen and exploded in the adjacent jungle but that didn’t prevent the normally reserved New Zealander at Albatross 02’s controls calling out “Hey! that’s getting a bit bloody close!“, understandably not a little concerned!
The situation on the ground was still intense for SAS Patrol 15 so the Bushrangers were forced to direct their fire just off the rotor disk of the the hovering Huey, and maintained their fire to point blank range. This meant they pulled out of their firing pass over the enemy below who began to return fire on them as they flew around. But, the effort was paying off, “That’s shit hot Bushrangers, you’re right into them” was the reaction from the grateful SAS troops on the ground.
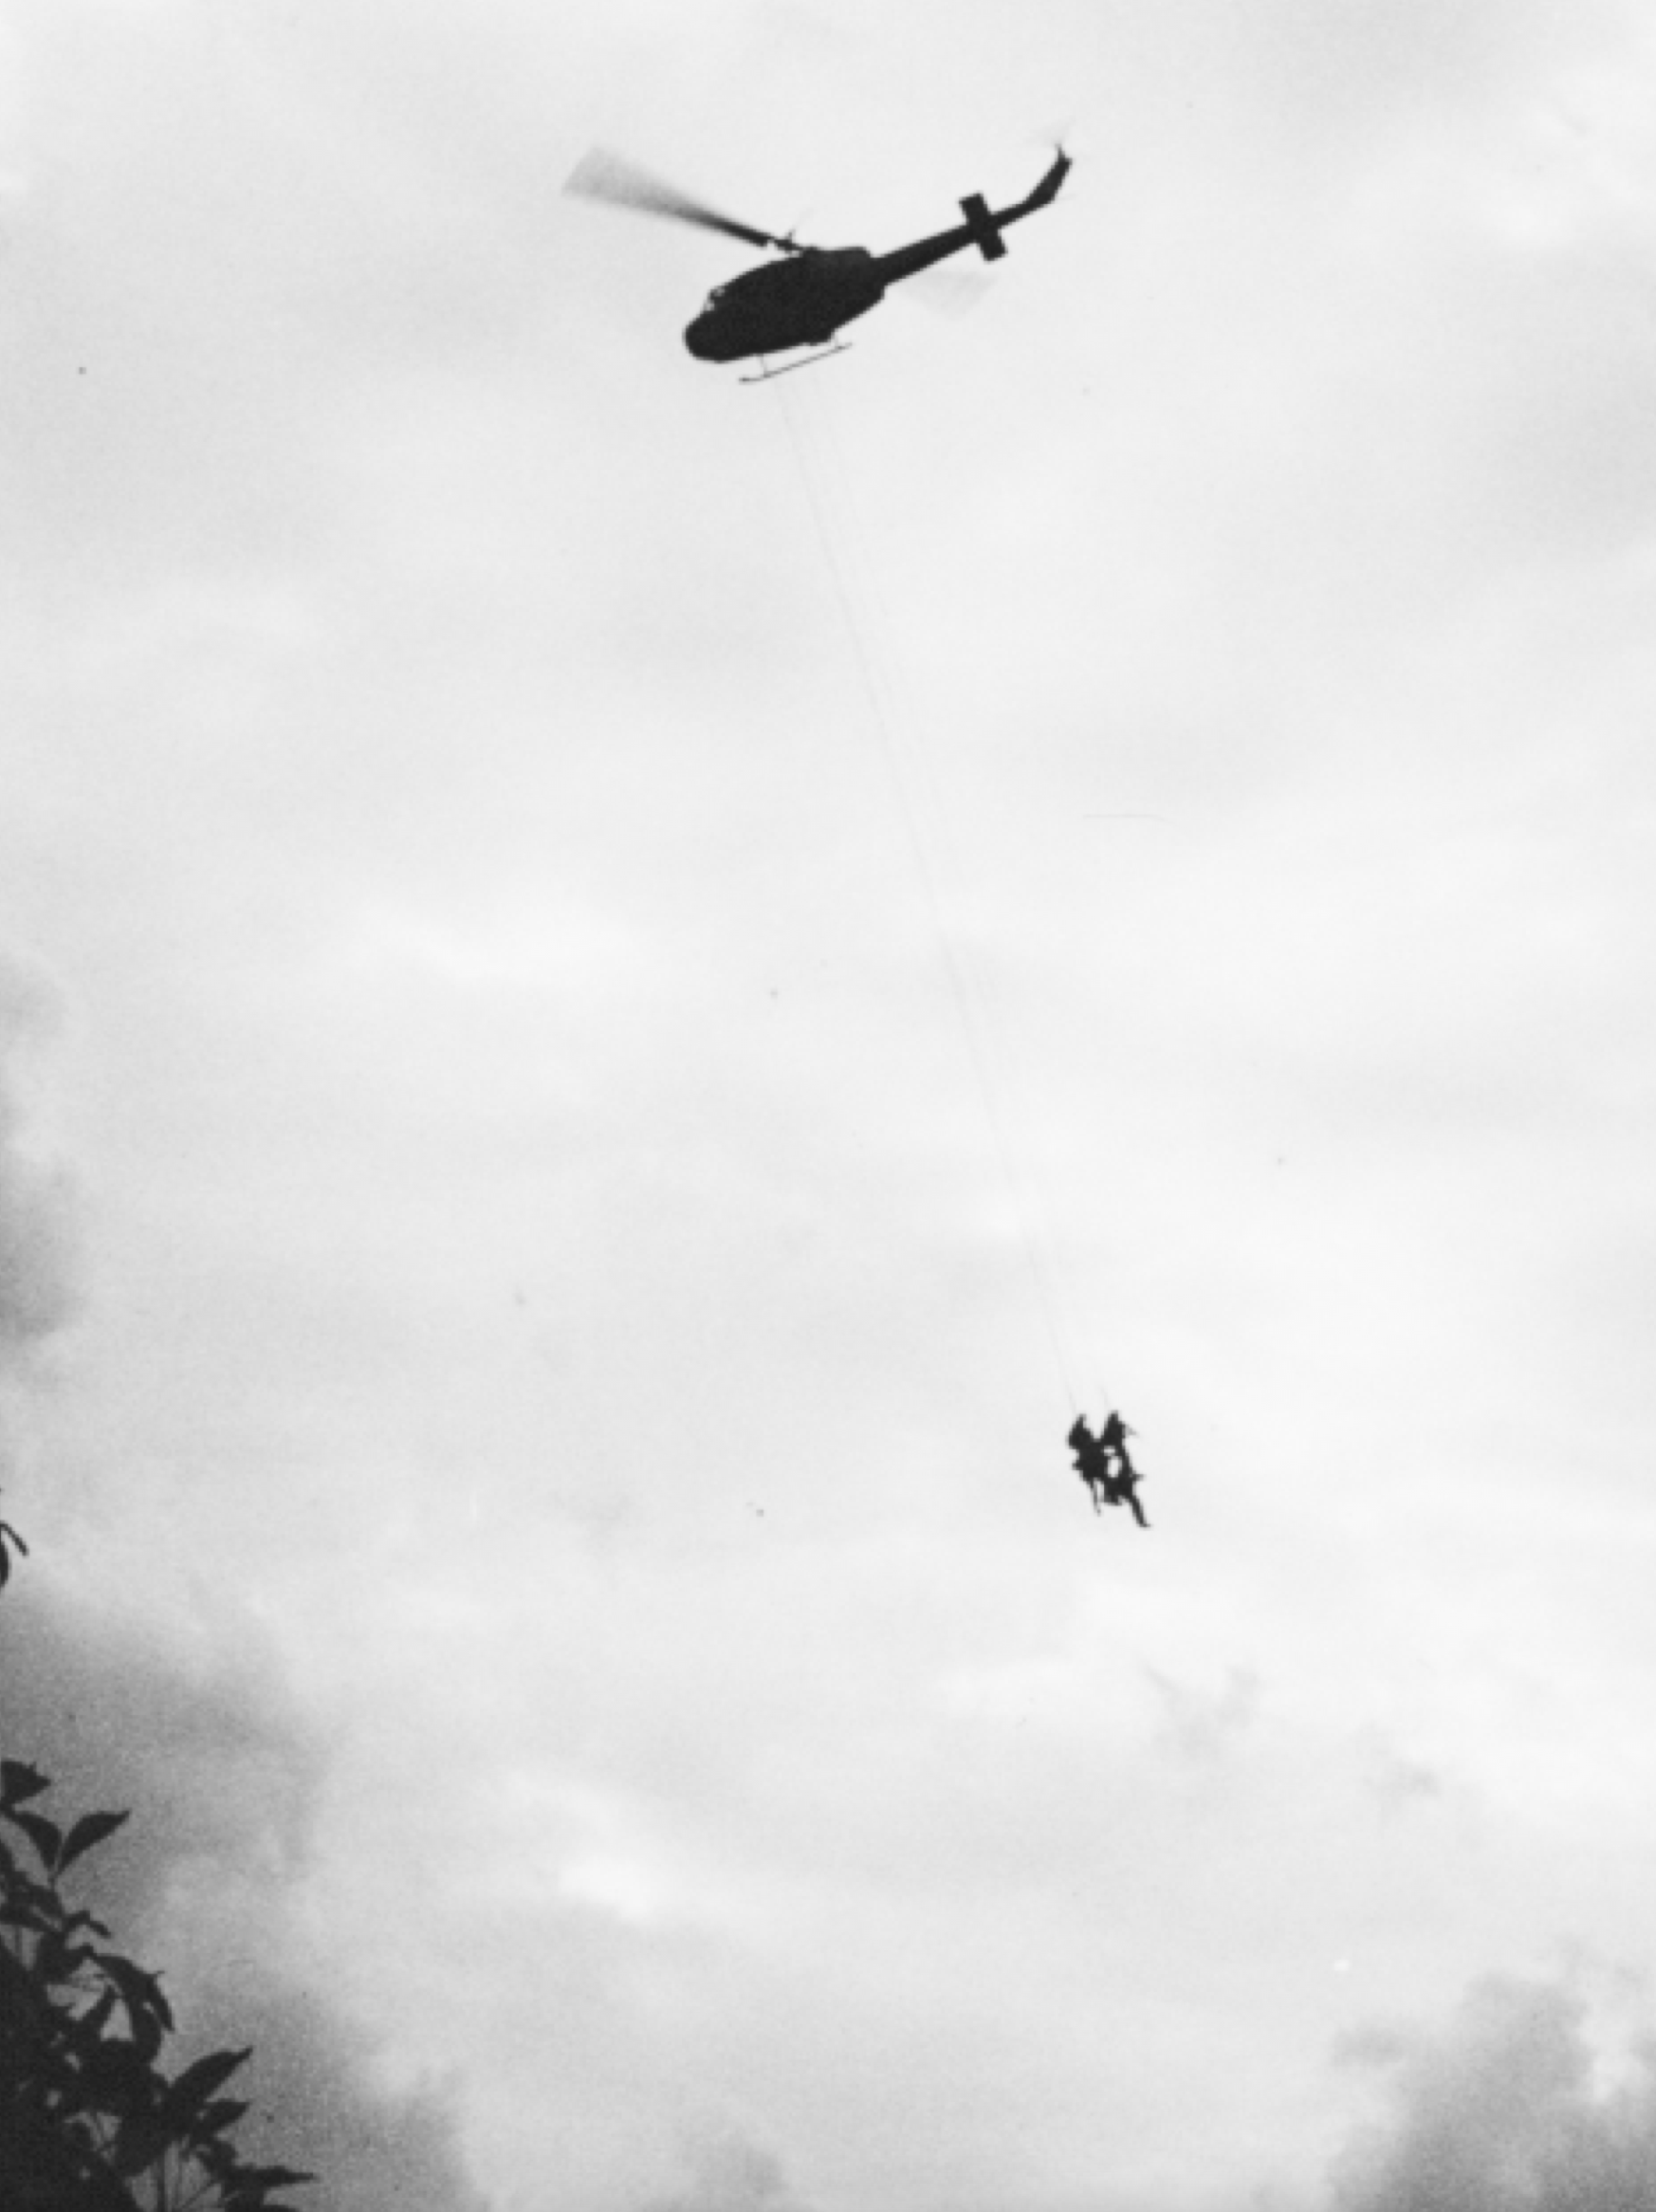
Photo Credit: Bob Upham
Finally, with their ropes finally attached Albatross 02 lifted the troops out of the jungle and the flight pulled away to a nearby clearing. The ground fire reached a crescendo as the Vietnamese tried to effect some sort of result for their efforts but the Bushrangers took no hits and were soon safely away.
While it’s not certain that the account below is from the same extraction operation, it likely describes the events of 16 May just as well.
“On one patrol in May 1969, south west of the Courtenay rubber, my patrol was surrounded. We had enemy that I could actually see to the north, south and to the west, and I was pretty sure that they were in the thick country to the east of us. We waited there for about three hours and finally, as the sun was going down, I got a call that the Bushranger was on their way in – that was the Australian light fire team. I asked him to put rockets 20 m to the north and 20 m to the south of us…
After the rockets came in a lone helicopter came across the top of the trees and dropped four ropes to us. Both door gunners were firing, we were firing. We hooked onto the ropes and we came out and there was tracer absolutely going everywhere. We could see the enemy firing at us as we were pulled up through the trees. And I’ve got to say that my patrol owes its life to that very gallant pilot in 9 Squadron.
9 Squadron and Lady Luck saved many SAS teams from certain death.“
Chris Roberts
A Note on Sources
The foregoing is largely based on the superb monograph on the development and history of the Bushrangers written by the RAAF’s Wing Commander Brian Dirou DFC entitled “The Bushranger Story; …and so, a gunship was born.” Wing Commander Dirou led the Bushranger development program in Vietnam and his account is as primary as one can find as a primary reference. See reference section below for more information. I chose to limit the scope of this piece in order to encourage readers to interested in the history of the Bushrangers to read Wing Commander Dirou’s history.
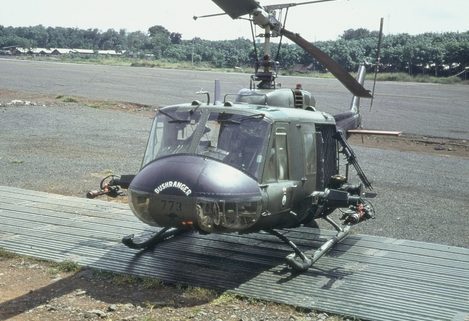
Original of the Species; Bushranger A2-773
AWM Photograph P02866.008
Through 1968 the RAAF had been working on the development of its own helicopter gunship platform after an assessment of the US version proved it to be unsuited to RAAF operations. The Ned Kelly as it was called had its weapons system mounted as seen below, with the machine guns and rockets both mounted to the rear of the cargo area.

Later, once they could be procured – some by normal channels, some by less conventional means, the M-60s mounted on the pylons were replaced by M134 mini-guns.

This configuration was flight tested in May 1968 and while flight characteristics were fine, the stability of the weapons systems themselves were difficult to manage and the blast noise form the mini-guns was deafening for the pilots. The concept worked well, but a configuration change was needed.
The new UH-1H was becoming available to the Australians in the second half of 1968 and one of the first of the new model delivered, serial number A2-773, was chosen as the test bed of the new Bushranger configuration. Now, the M134 mini-guns were to be placed on their own pylon mounted just rear of the pilot’s door. Work began in July 1968 and by September it was already through flight trials and had taken part in operations. Now, official approval was required before the other five Hueys designated for the role could be converted to Bushranger duties. The Australian Minister for Defence Rt. Hon. Malcom Frazer was due to visit Vietnam in November and A2-773 was prepared as the demonstration gunship for his review. Just three weeks after his visit the Bushranger program was given official funding.

A2-773 went on to fly for the remainder of the RAAF’s engagement in Vietnam. Aside from five occasions where it received small arms damage it came through unscathed and brought its crew home safe every time it went out. Its M-60s fired at least 350,000 rounds, its M134 mini-guns fired more than 1.5 million rounds and it launched approximately 4,000 rockets. In three years of nearly constant operations it suffered damage only five times, and that being minor from small arms fire.
Following its Vietnam service 773 remained with 9 SQN before joining 35 SQN as well as B SQN 5AVN ARMY before transfer to the Australian Army 1st Aviation Regiment (updated August 2022 – see references below). Its final operation was in 2001 at Christmas Island to assist with refugee management in late August through early September of that year. Then, after a career spanning 33 years the ex-“Bushranger” was retired and placed into long-term storage.
Some years later A2-773 was acquired by the Australian War Memorial and was subsequently transferred to its storage facility in Mitchell, a suburb of Canberra in the Australian Capital Territory. A2-773, the original Bushranger is destined some day to be restored to its Bushranger configuration for eventual display at the museum.
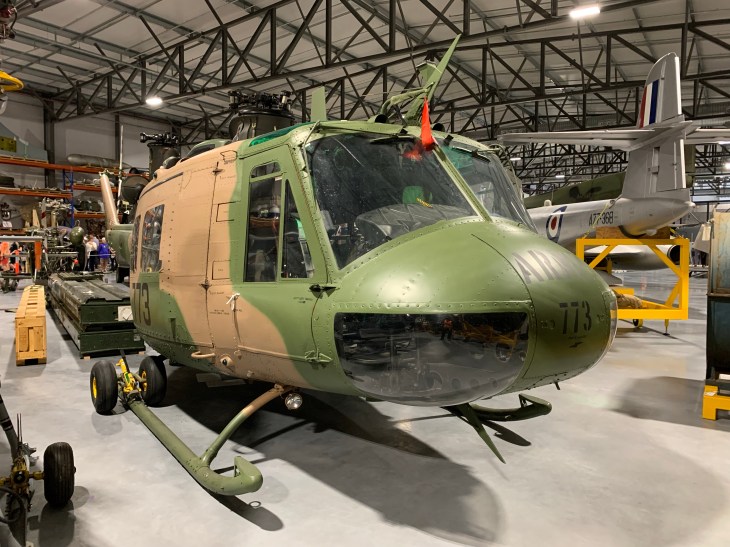
March, 2022
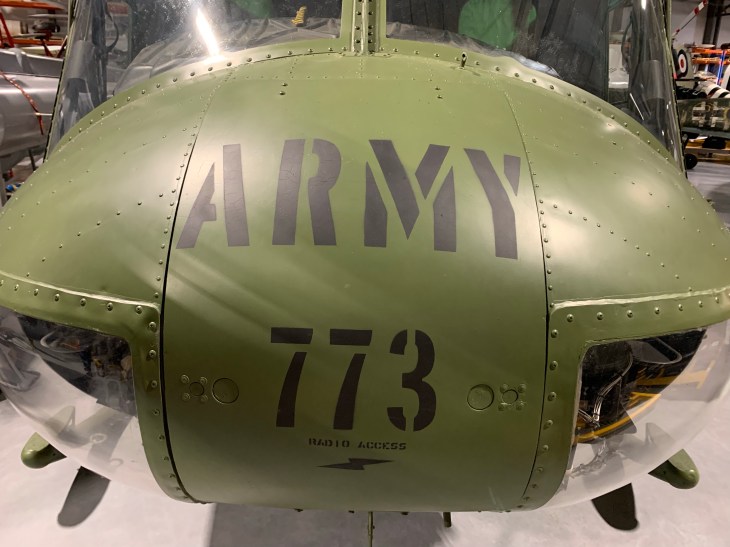
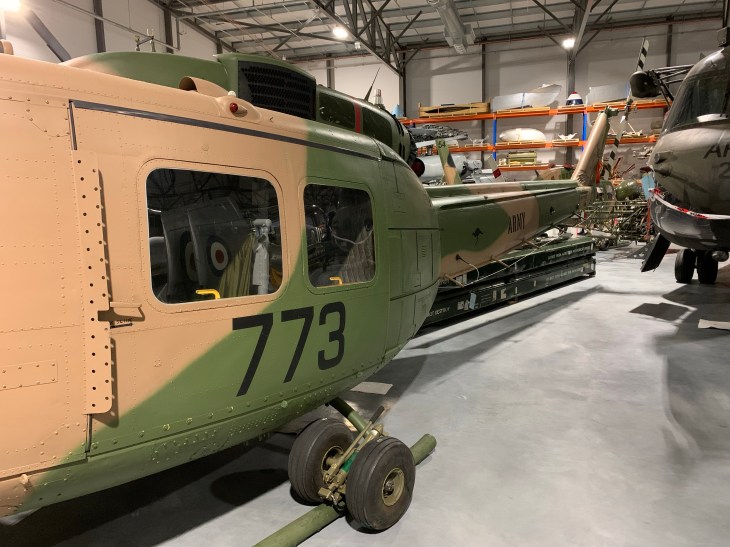
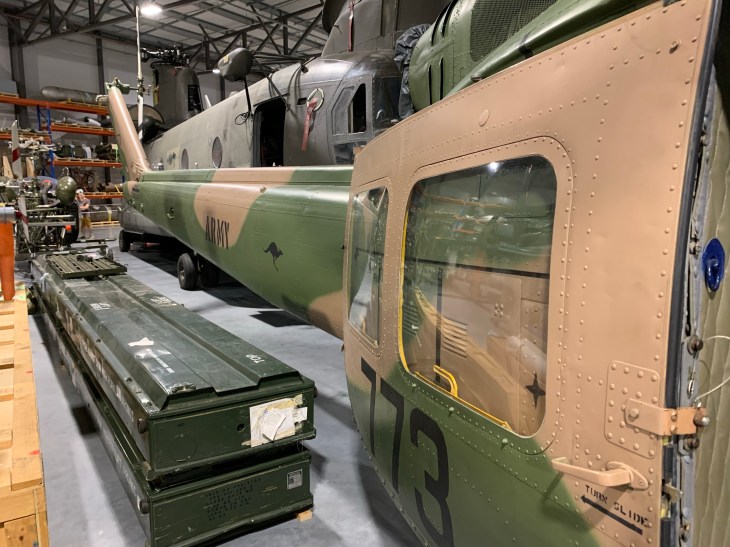
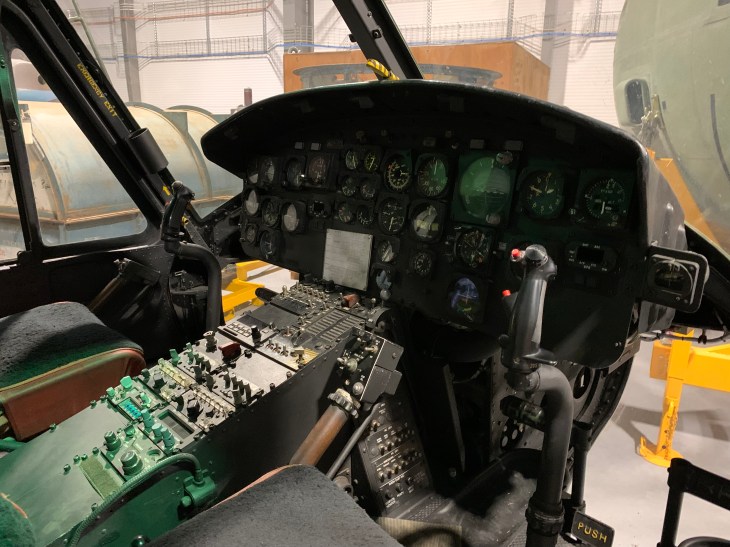
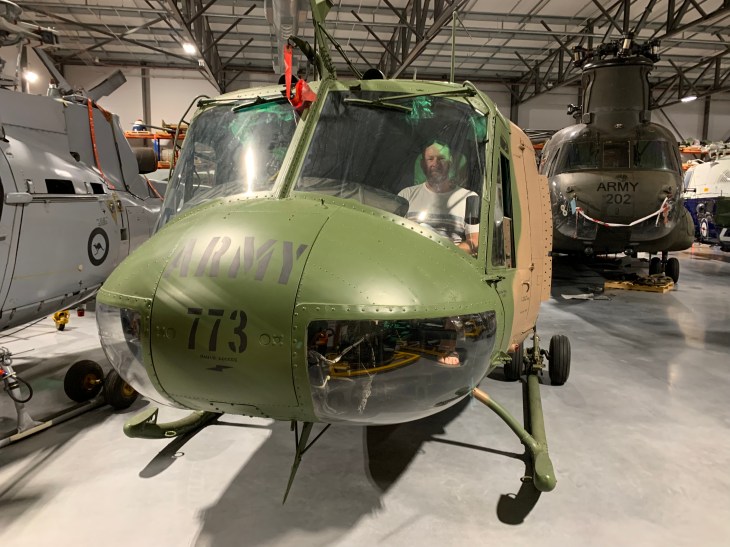
Every year or so the AWM opens its storage facility in Mitchell to the public. This year, after a two year hiatus due to COVID restrictions the facility was once again opened and I had the chance to visit A2-773. It sits in the very back, surrounded by other aircraft, and parts of aircraft, in remarkably good condition. Painted still in its last operational camouflage scheme one would be hard pressed to guess its illustrious past, let alone its age.
I was fortunate to be granted a little extra access to take some detail photos, a few of which are in the gallery below. And yes, I did get to sit in it thanks to a kind AWM curator who allowed me up close when I explained my interest in this particular exhibit.


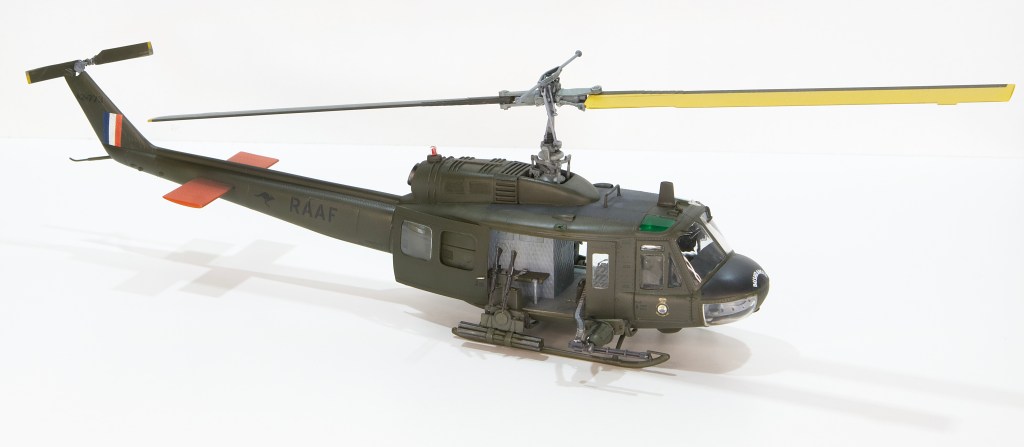
Italeri 1/48 Bell UH-1D “Huey”
This project came about as an indirect result of moving interstate last year. In an effort to reduce the effort of packing up my finished models I offered some for sale. One of the respondents asked if I built helicopters, specifically Hueys. Subsequent discussion led to me offering to build one for him; he want to present it to his father who was an Australian Vietnam veteran whose life was in-part saved by a Bushranger. Because it was a special build, I wanted to do a full-on job with it and various aftermarket parts were sourced to help me in that goal.
The Kit
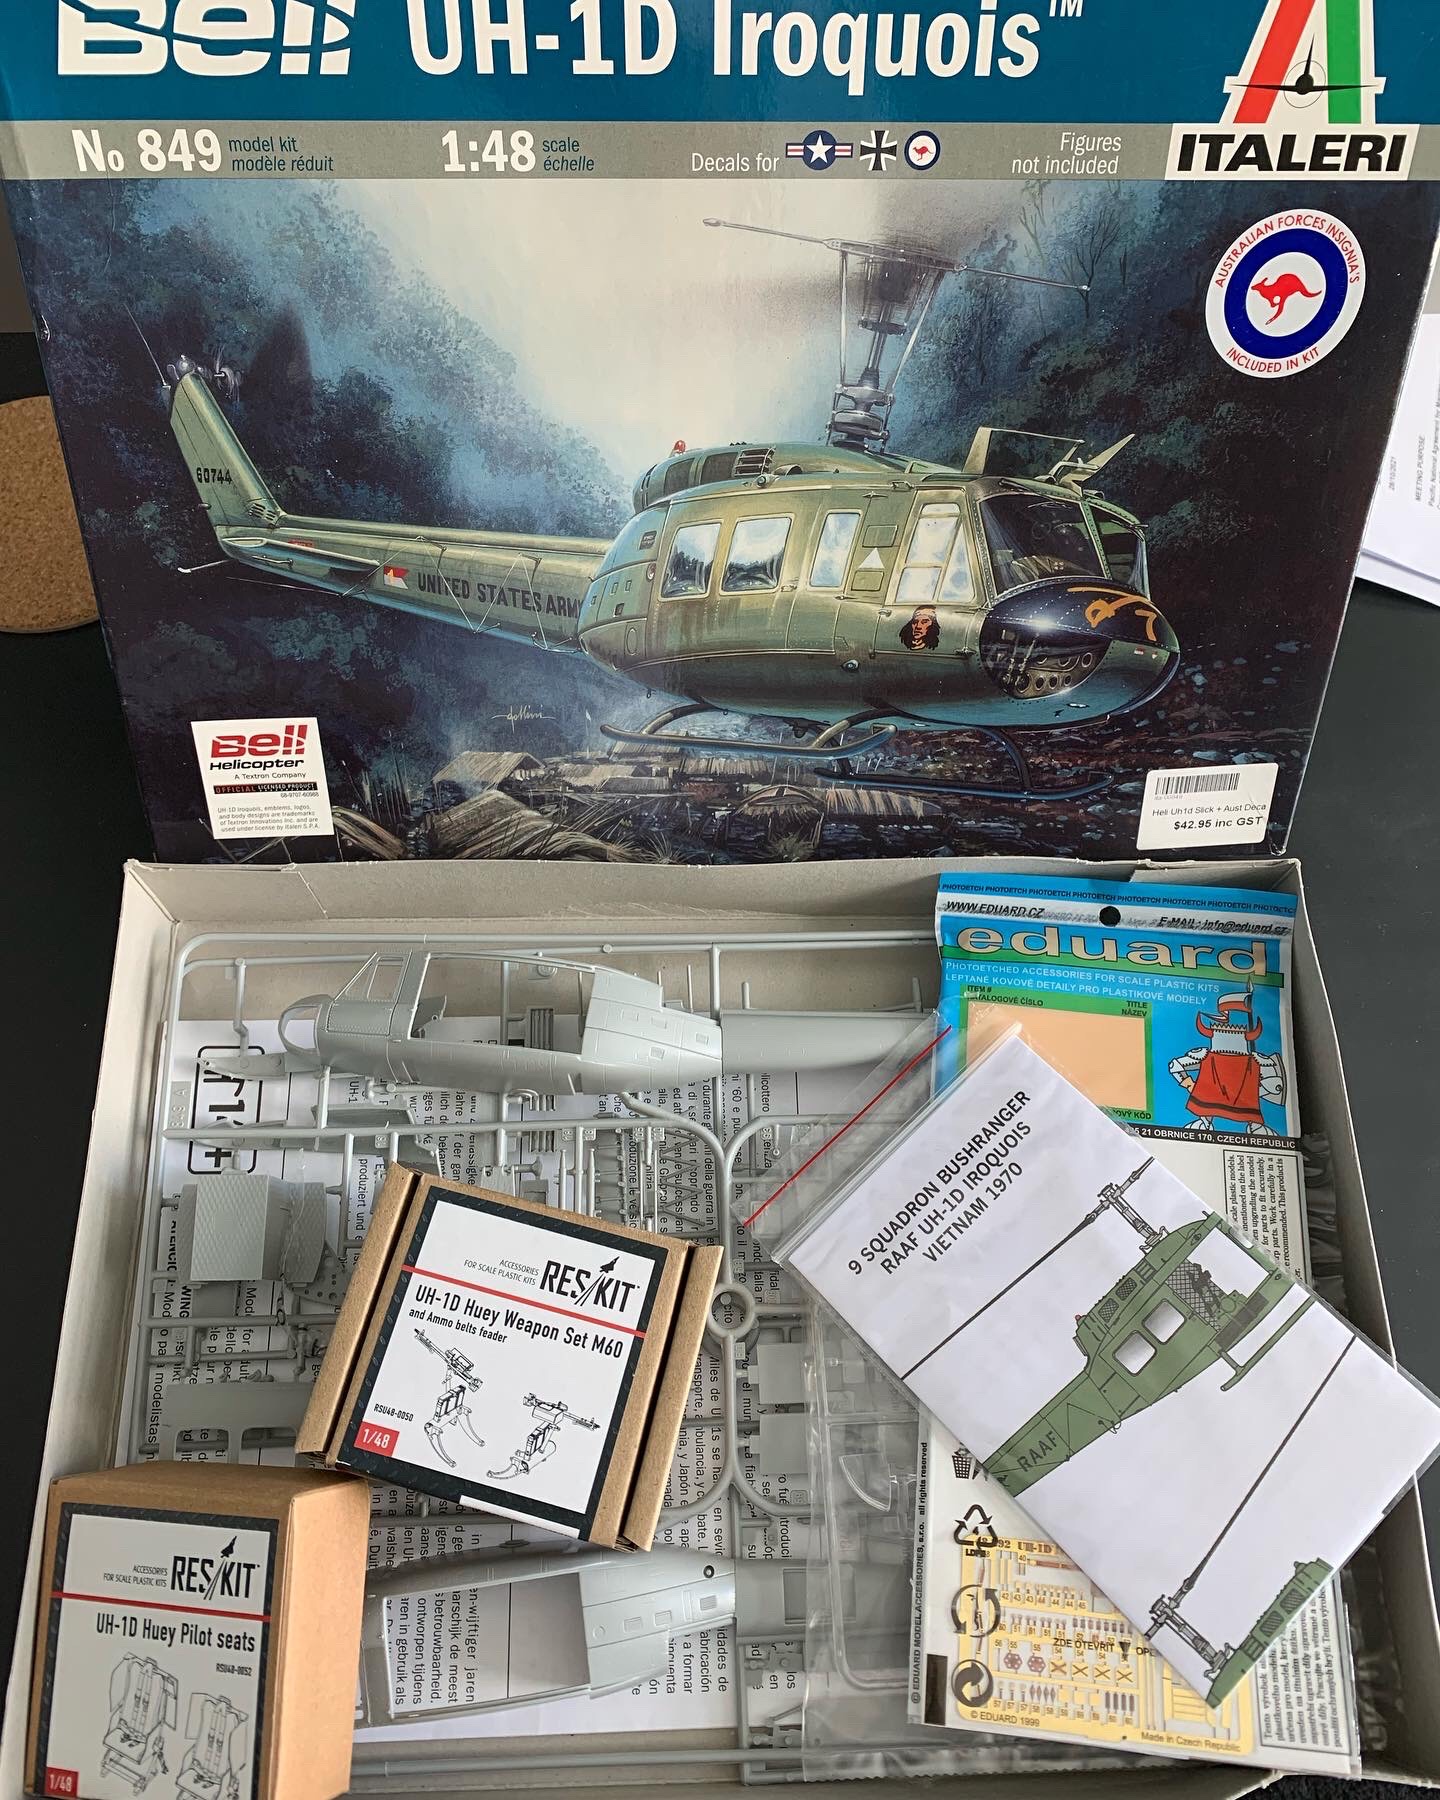
Interior
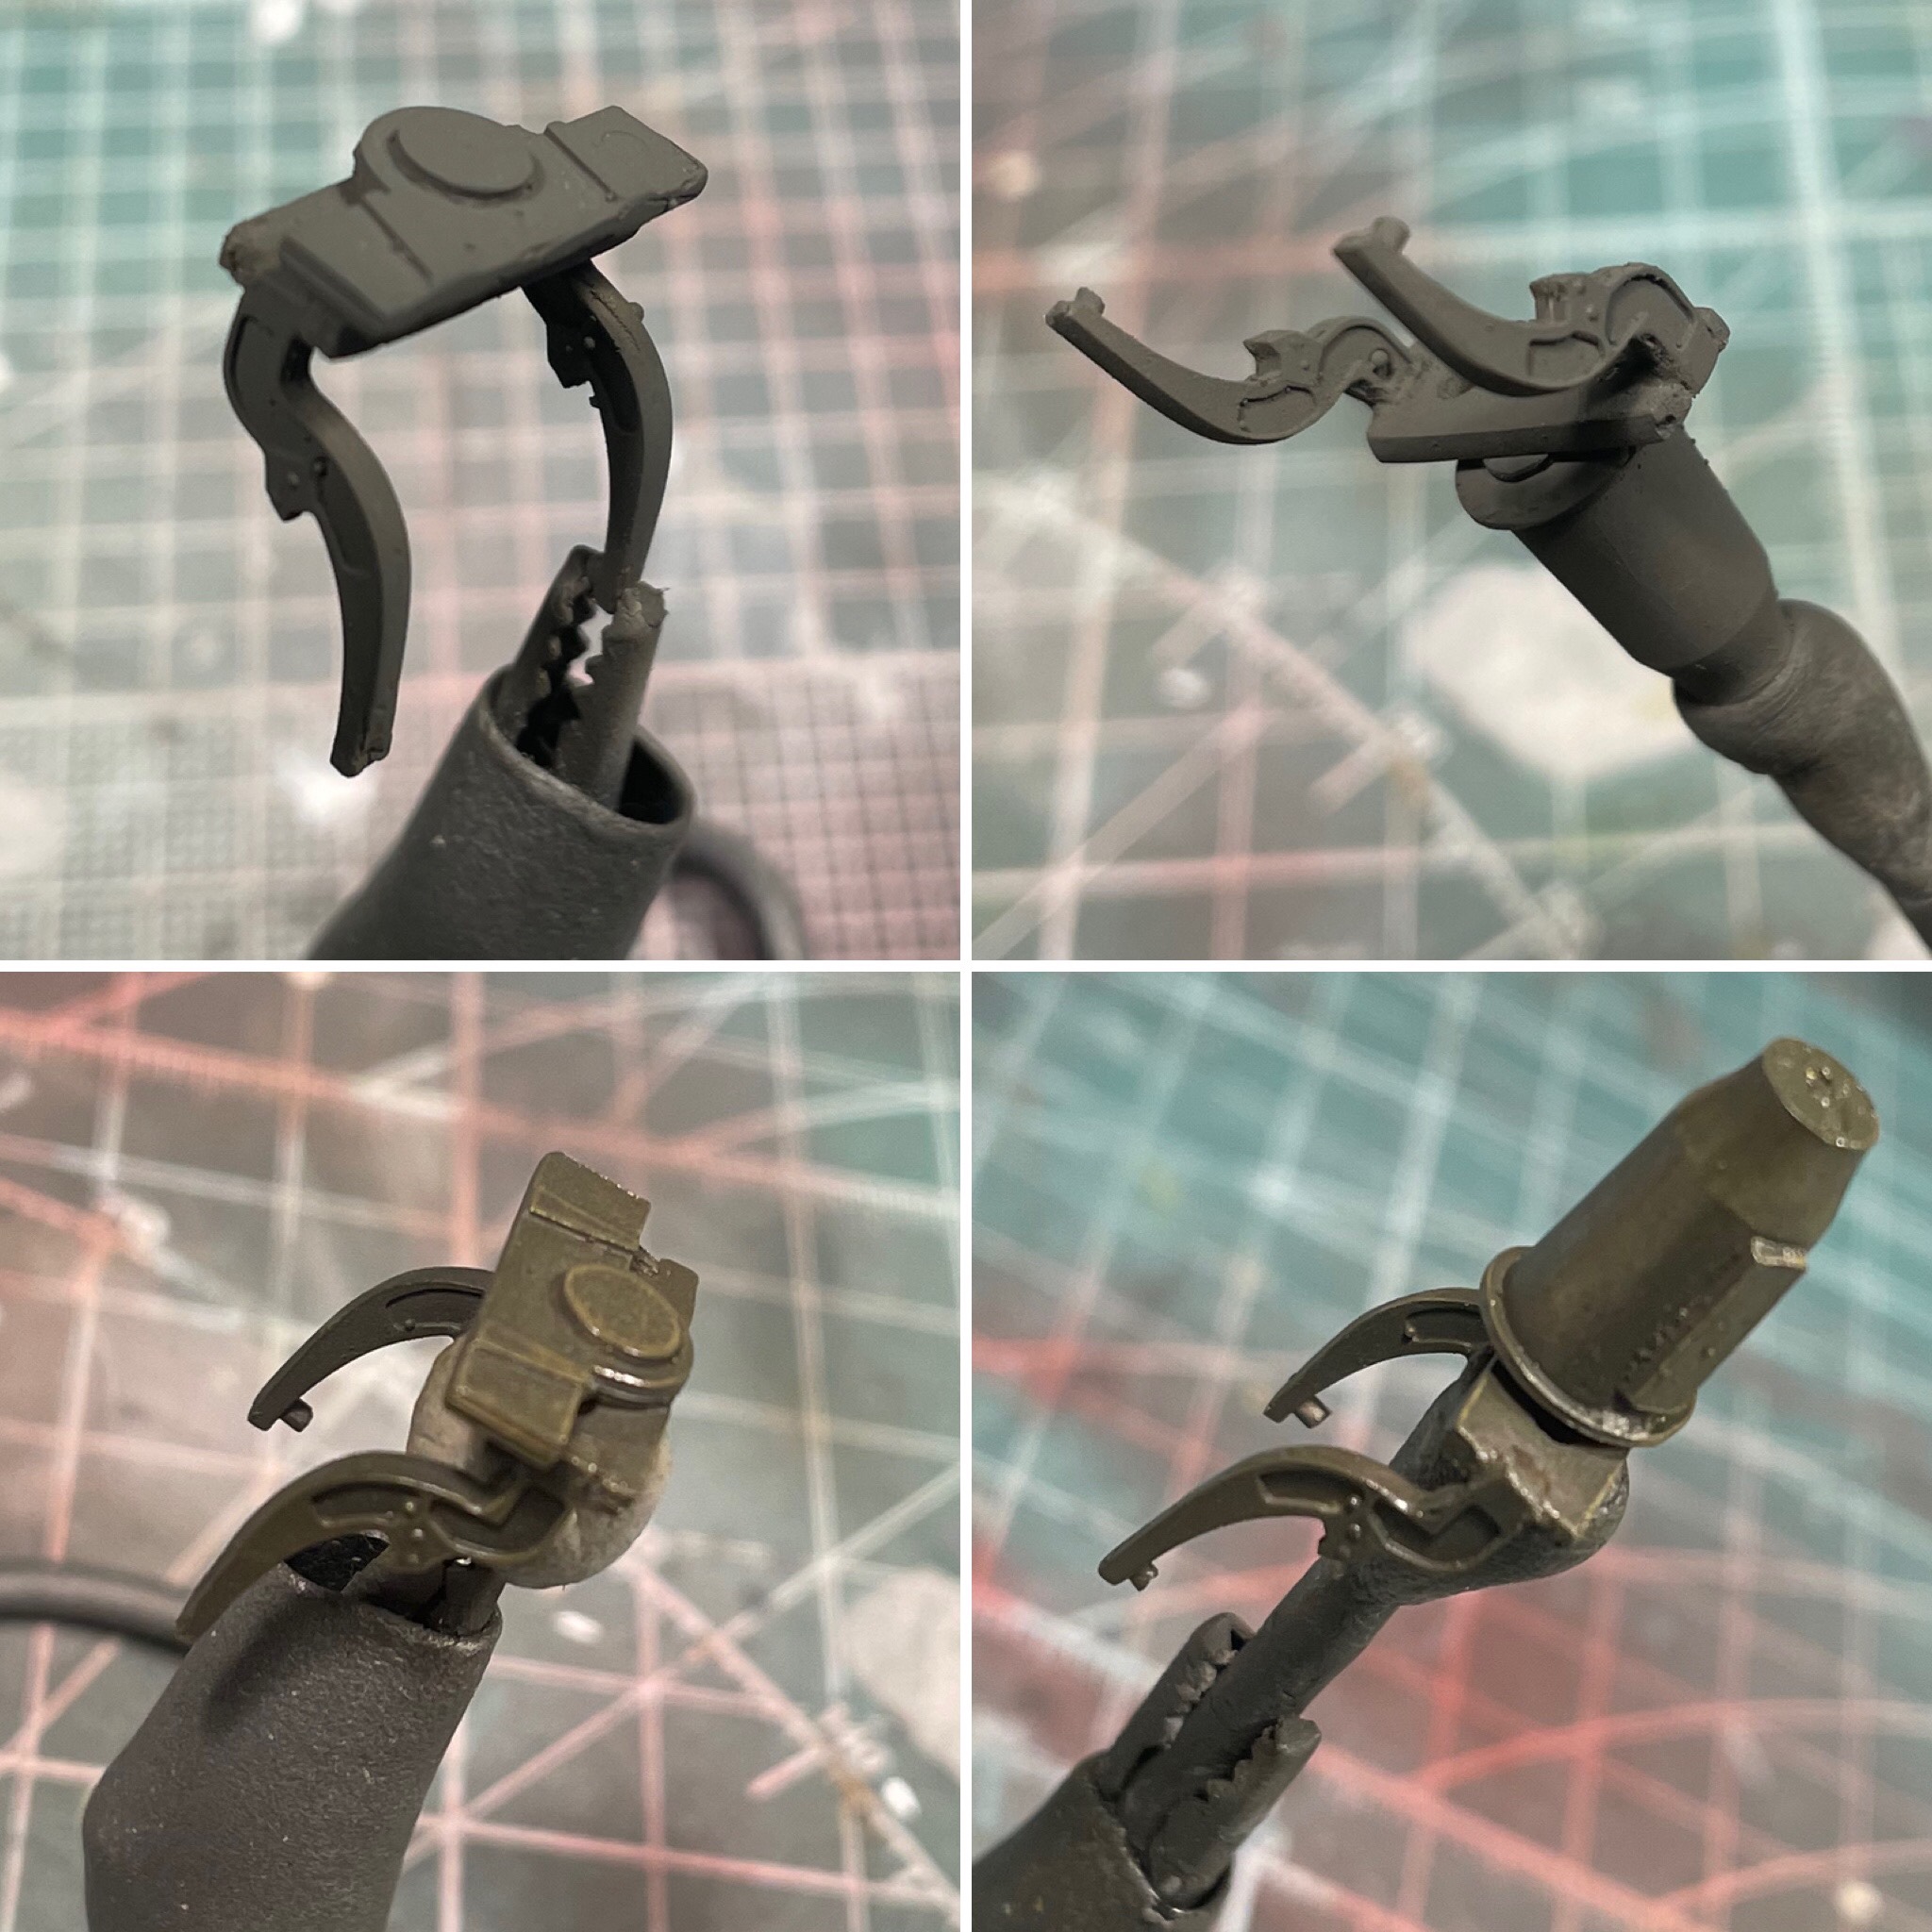
Construction begins with the interior. While the kit parts are adequate, I used Reskit armoured seats up front. They are little kits in themselves and turned out very nicely.
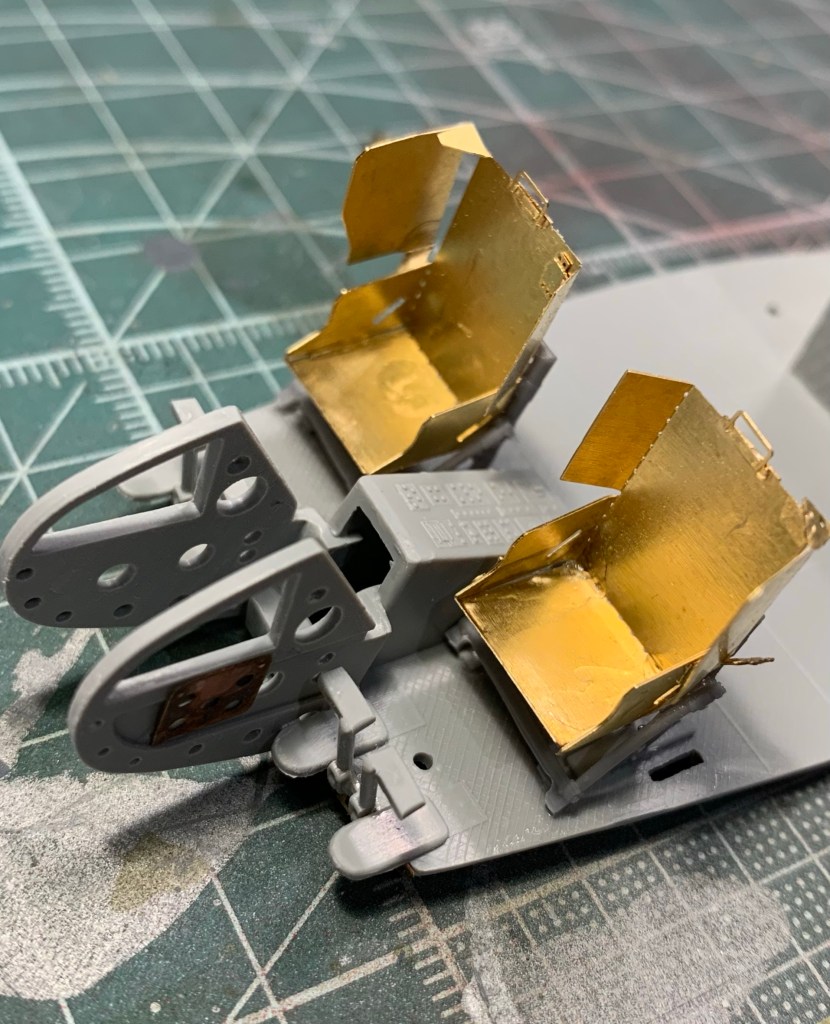
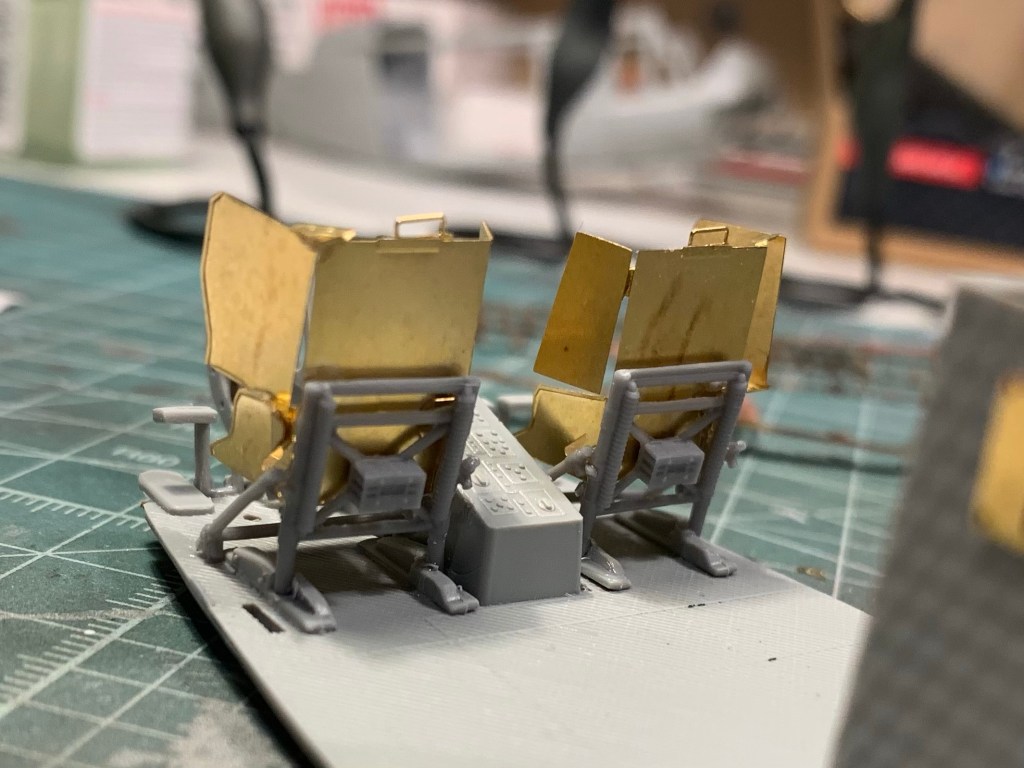
I used an Eduard interior set for the seatbelts. I made an error in the order of action and had to use some random instrument decals for the centre console.
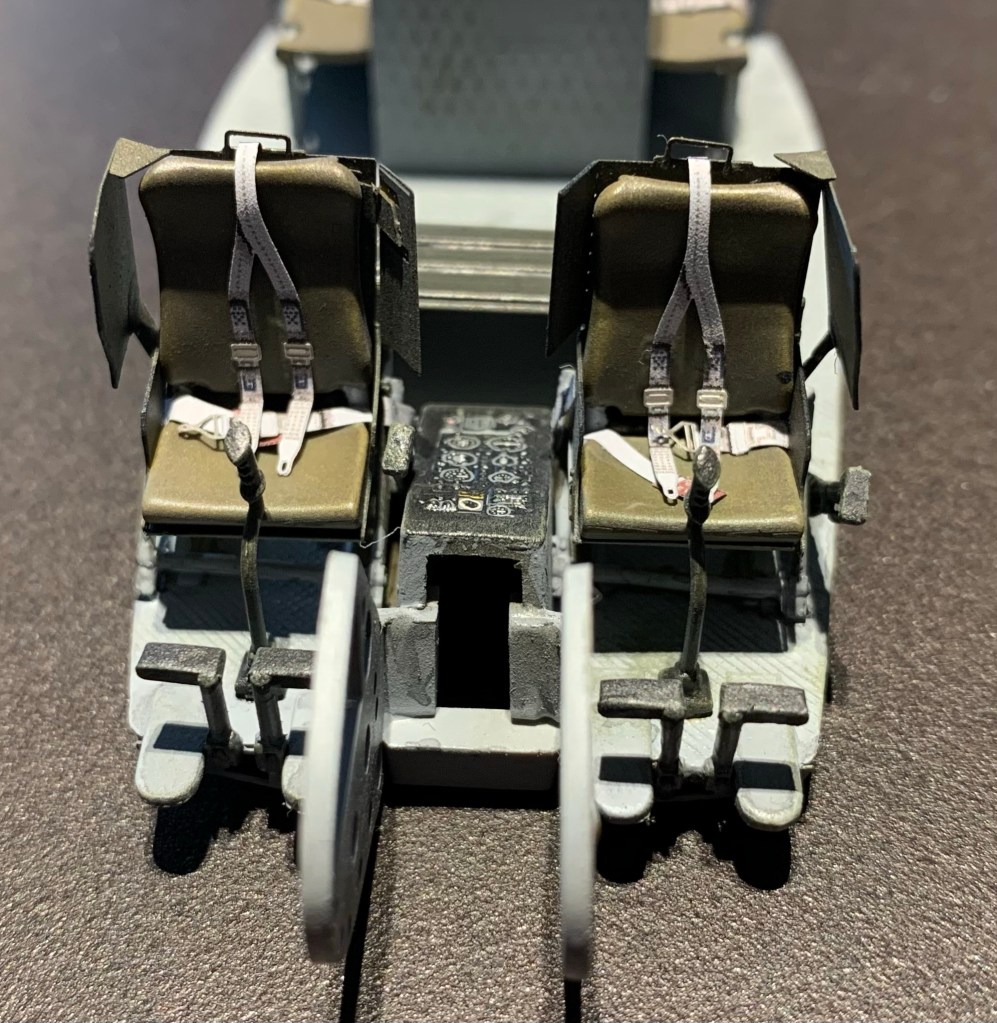
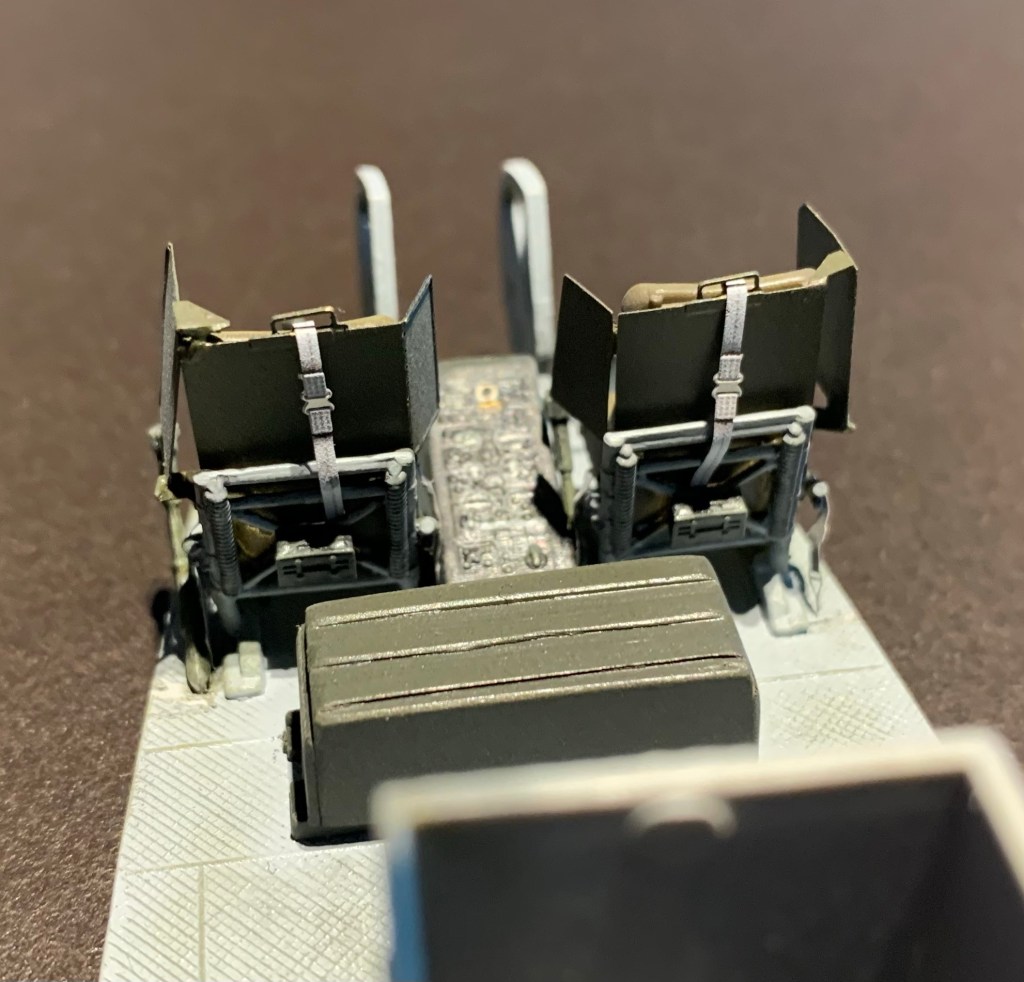
Next I added the ammo boxes and then fabricated tie-down straps for them from more PE seatbelt.
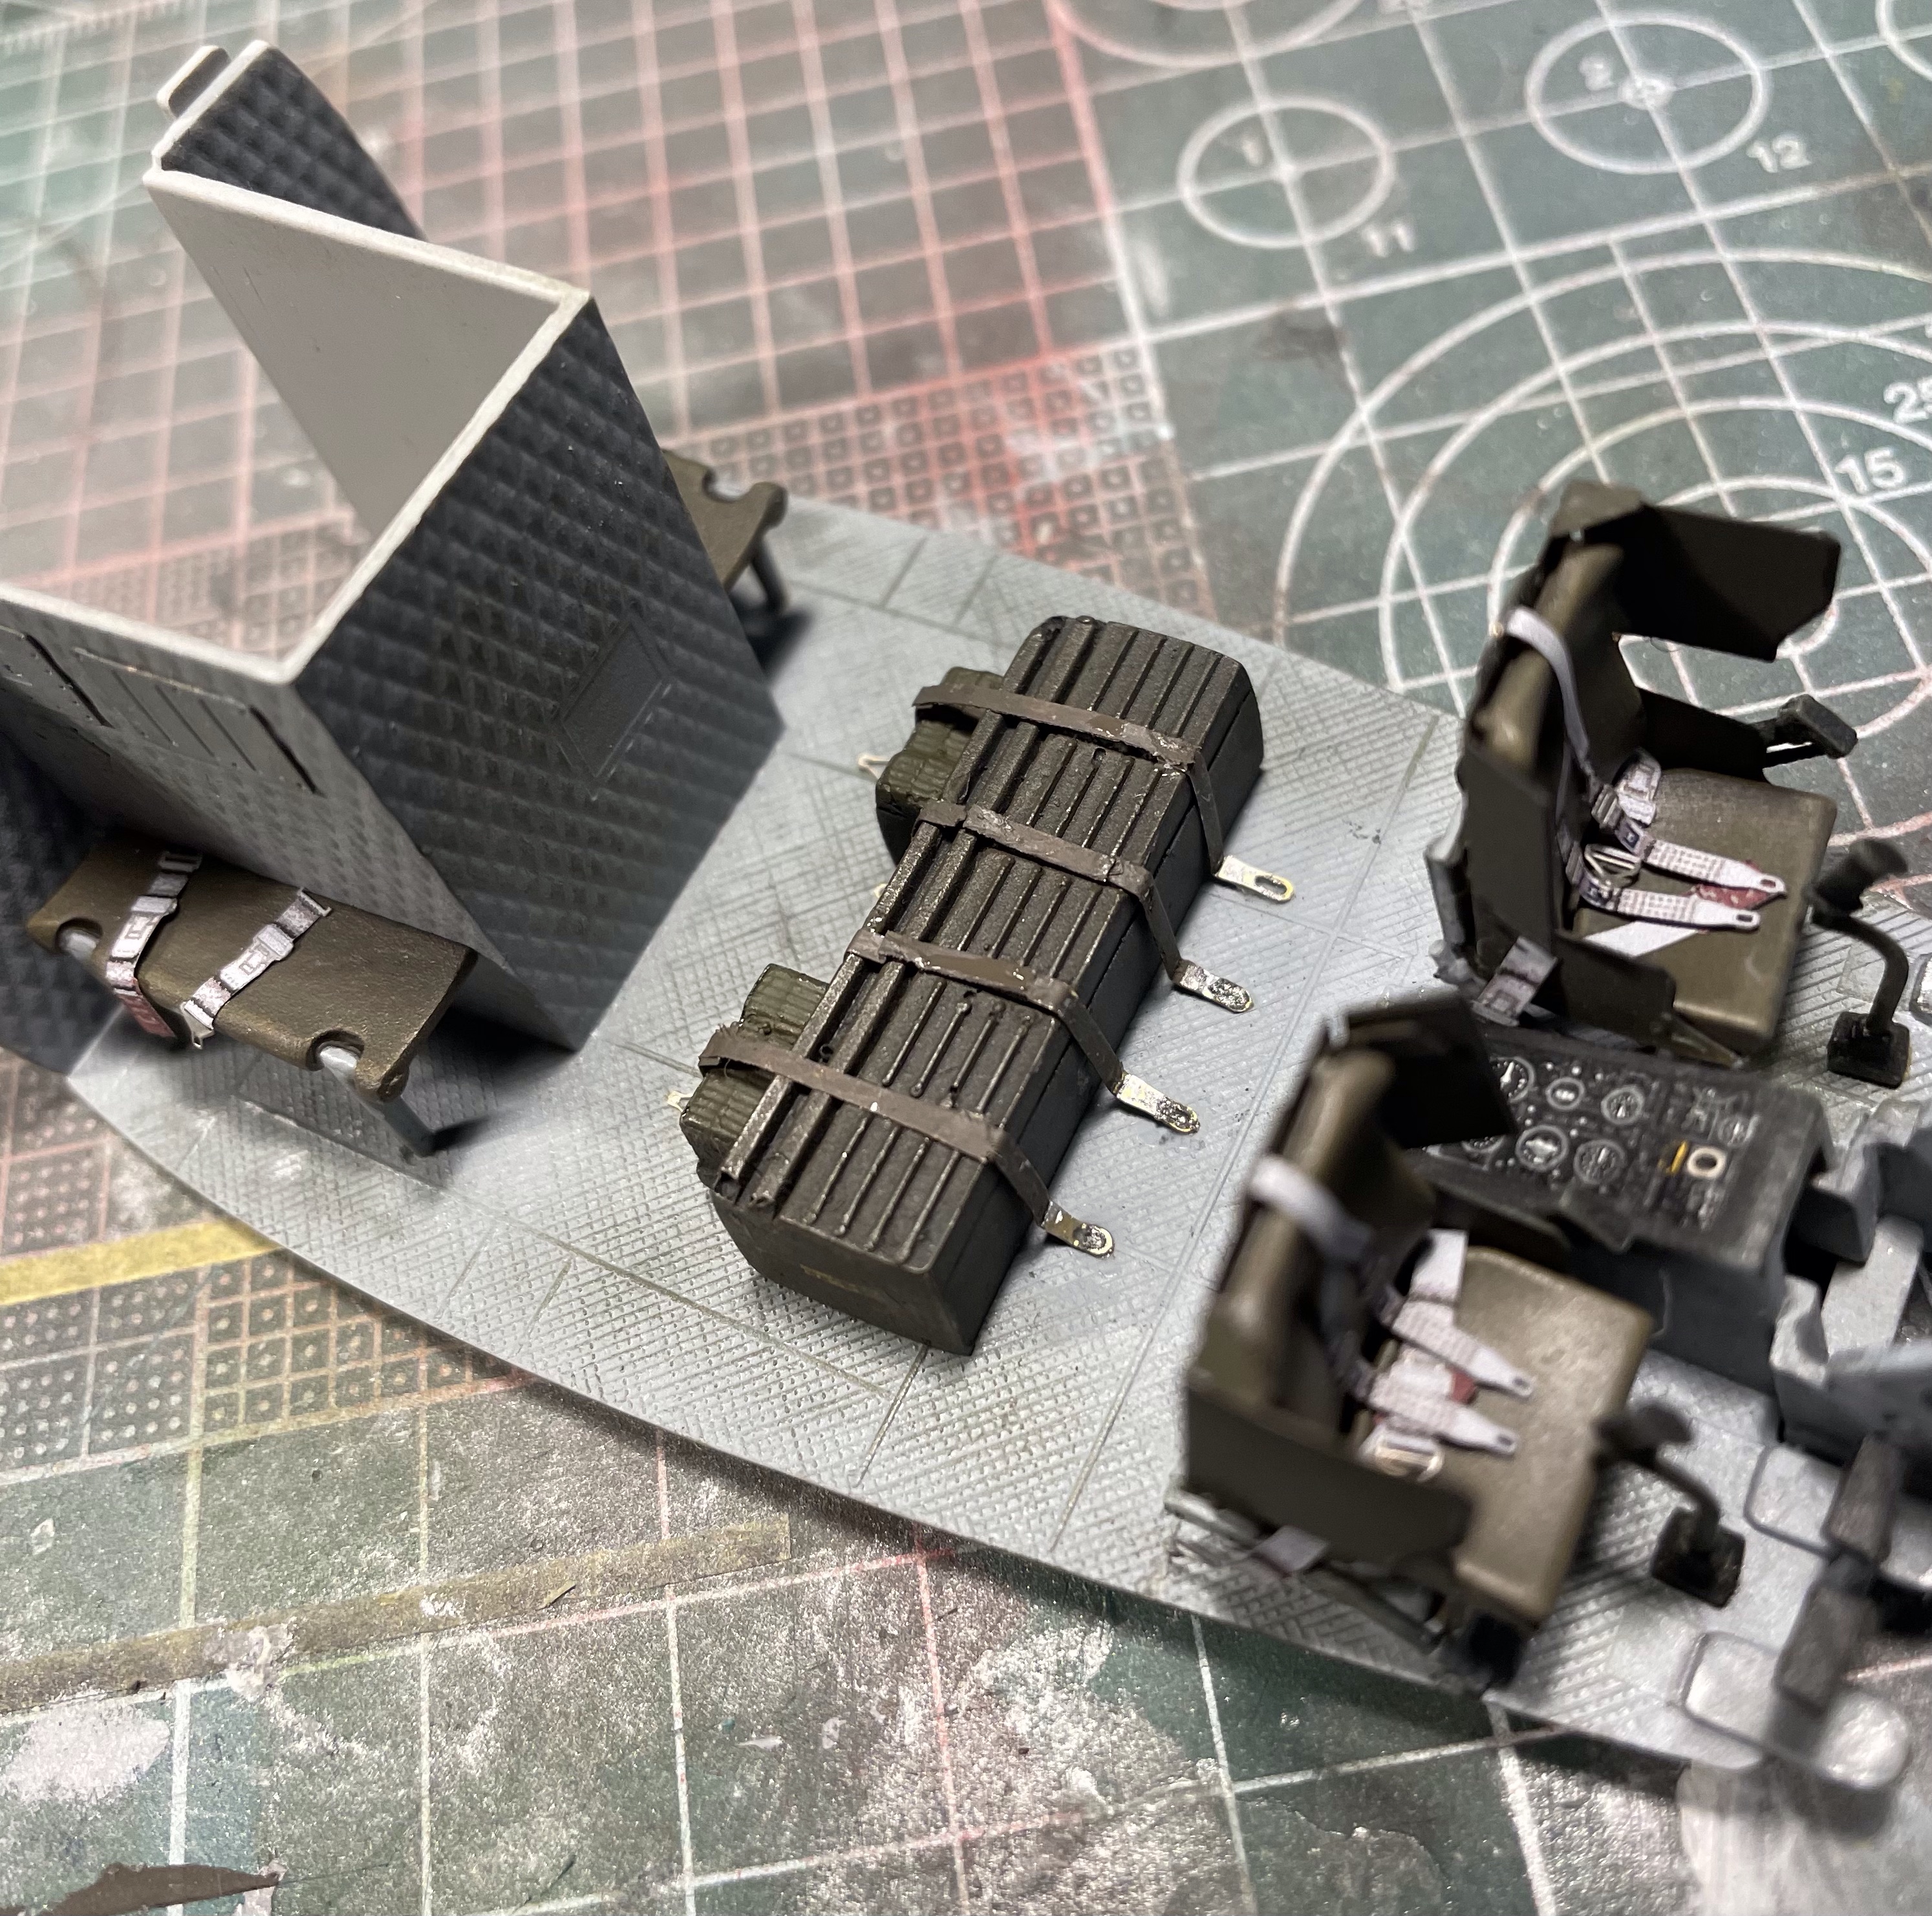
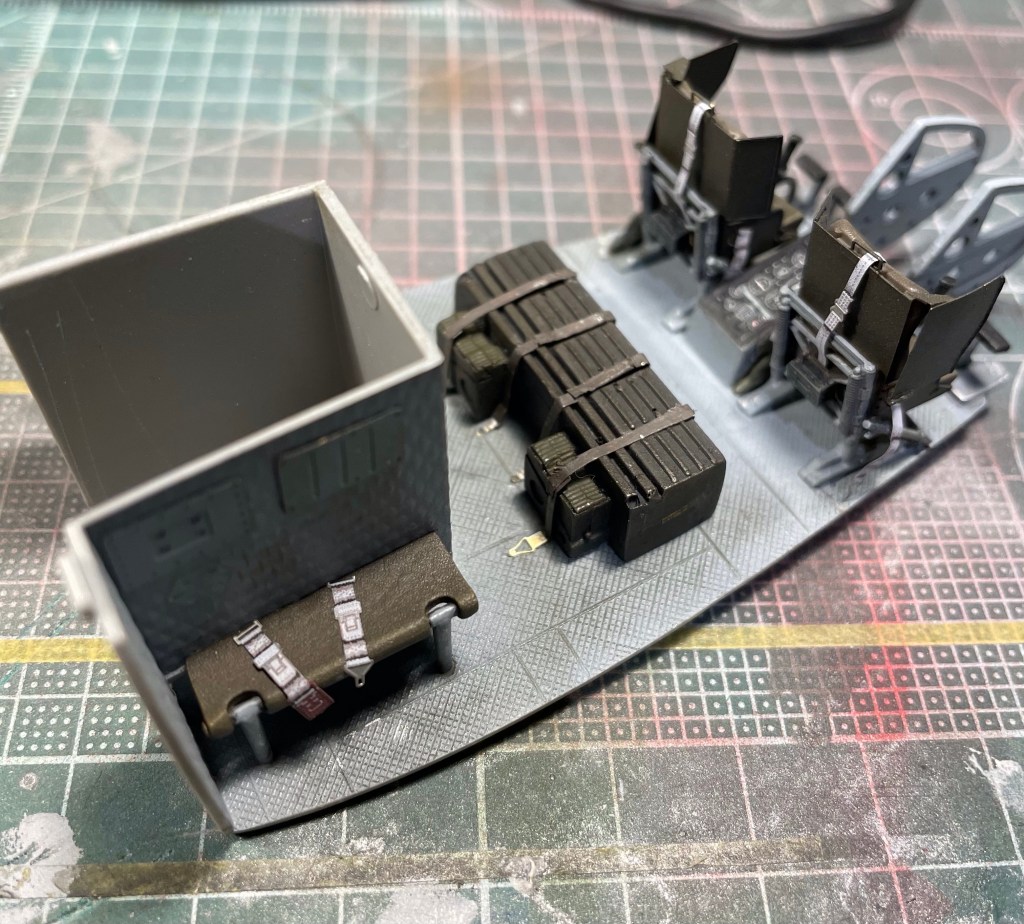
Next I assembled the instrument panel and installed it. It would have a good idea to have taken a photo of it before installation but for some unknown reason I didn’t. You’ll have to take my word for it that it looked very good.
Airframe Assembly
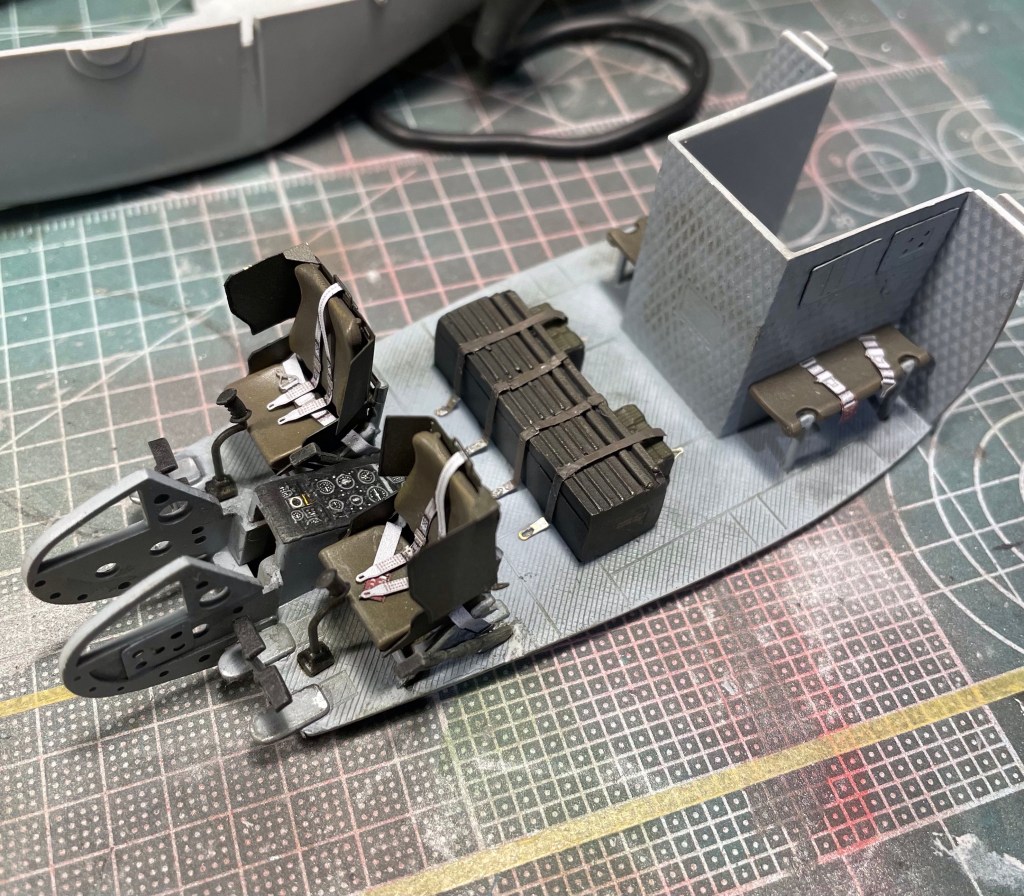
With the interior completed it was time to focus on putting the airframe together. The only real effort required was making sure the windscreen fitted correctly which I accomplished by installing a temporary spreader with sprue.
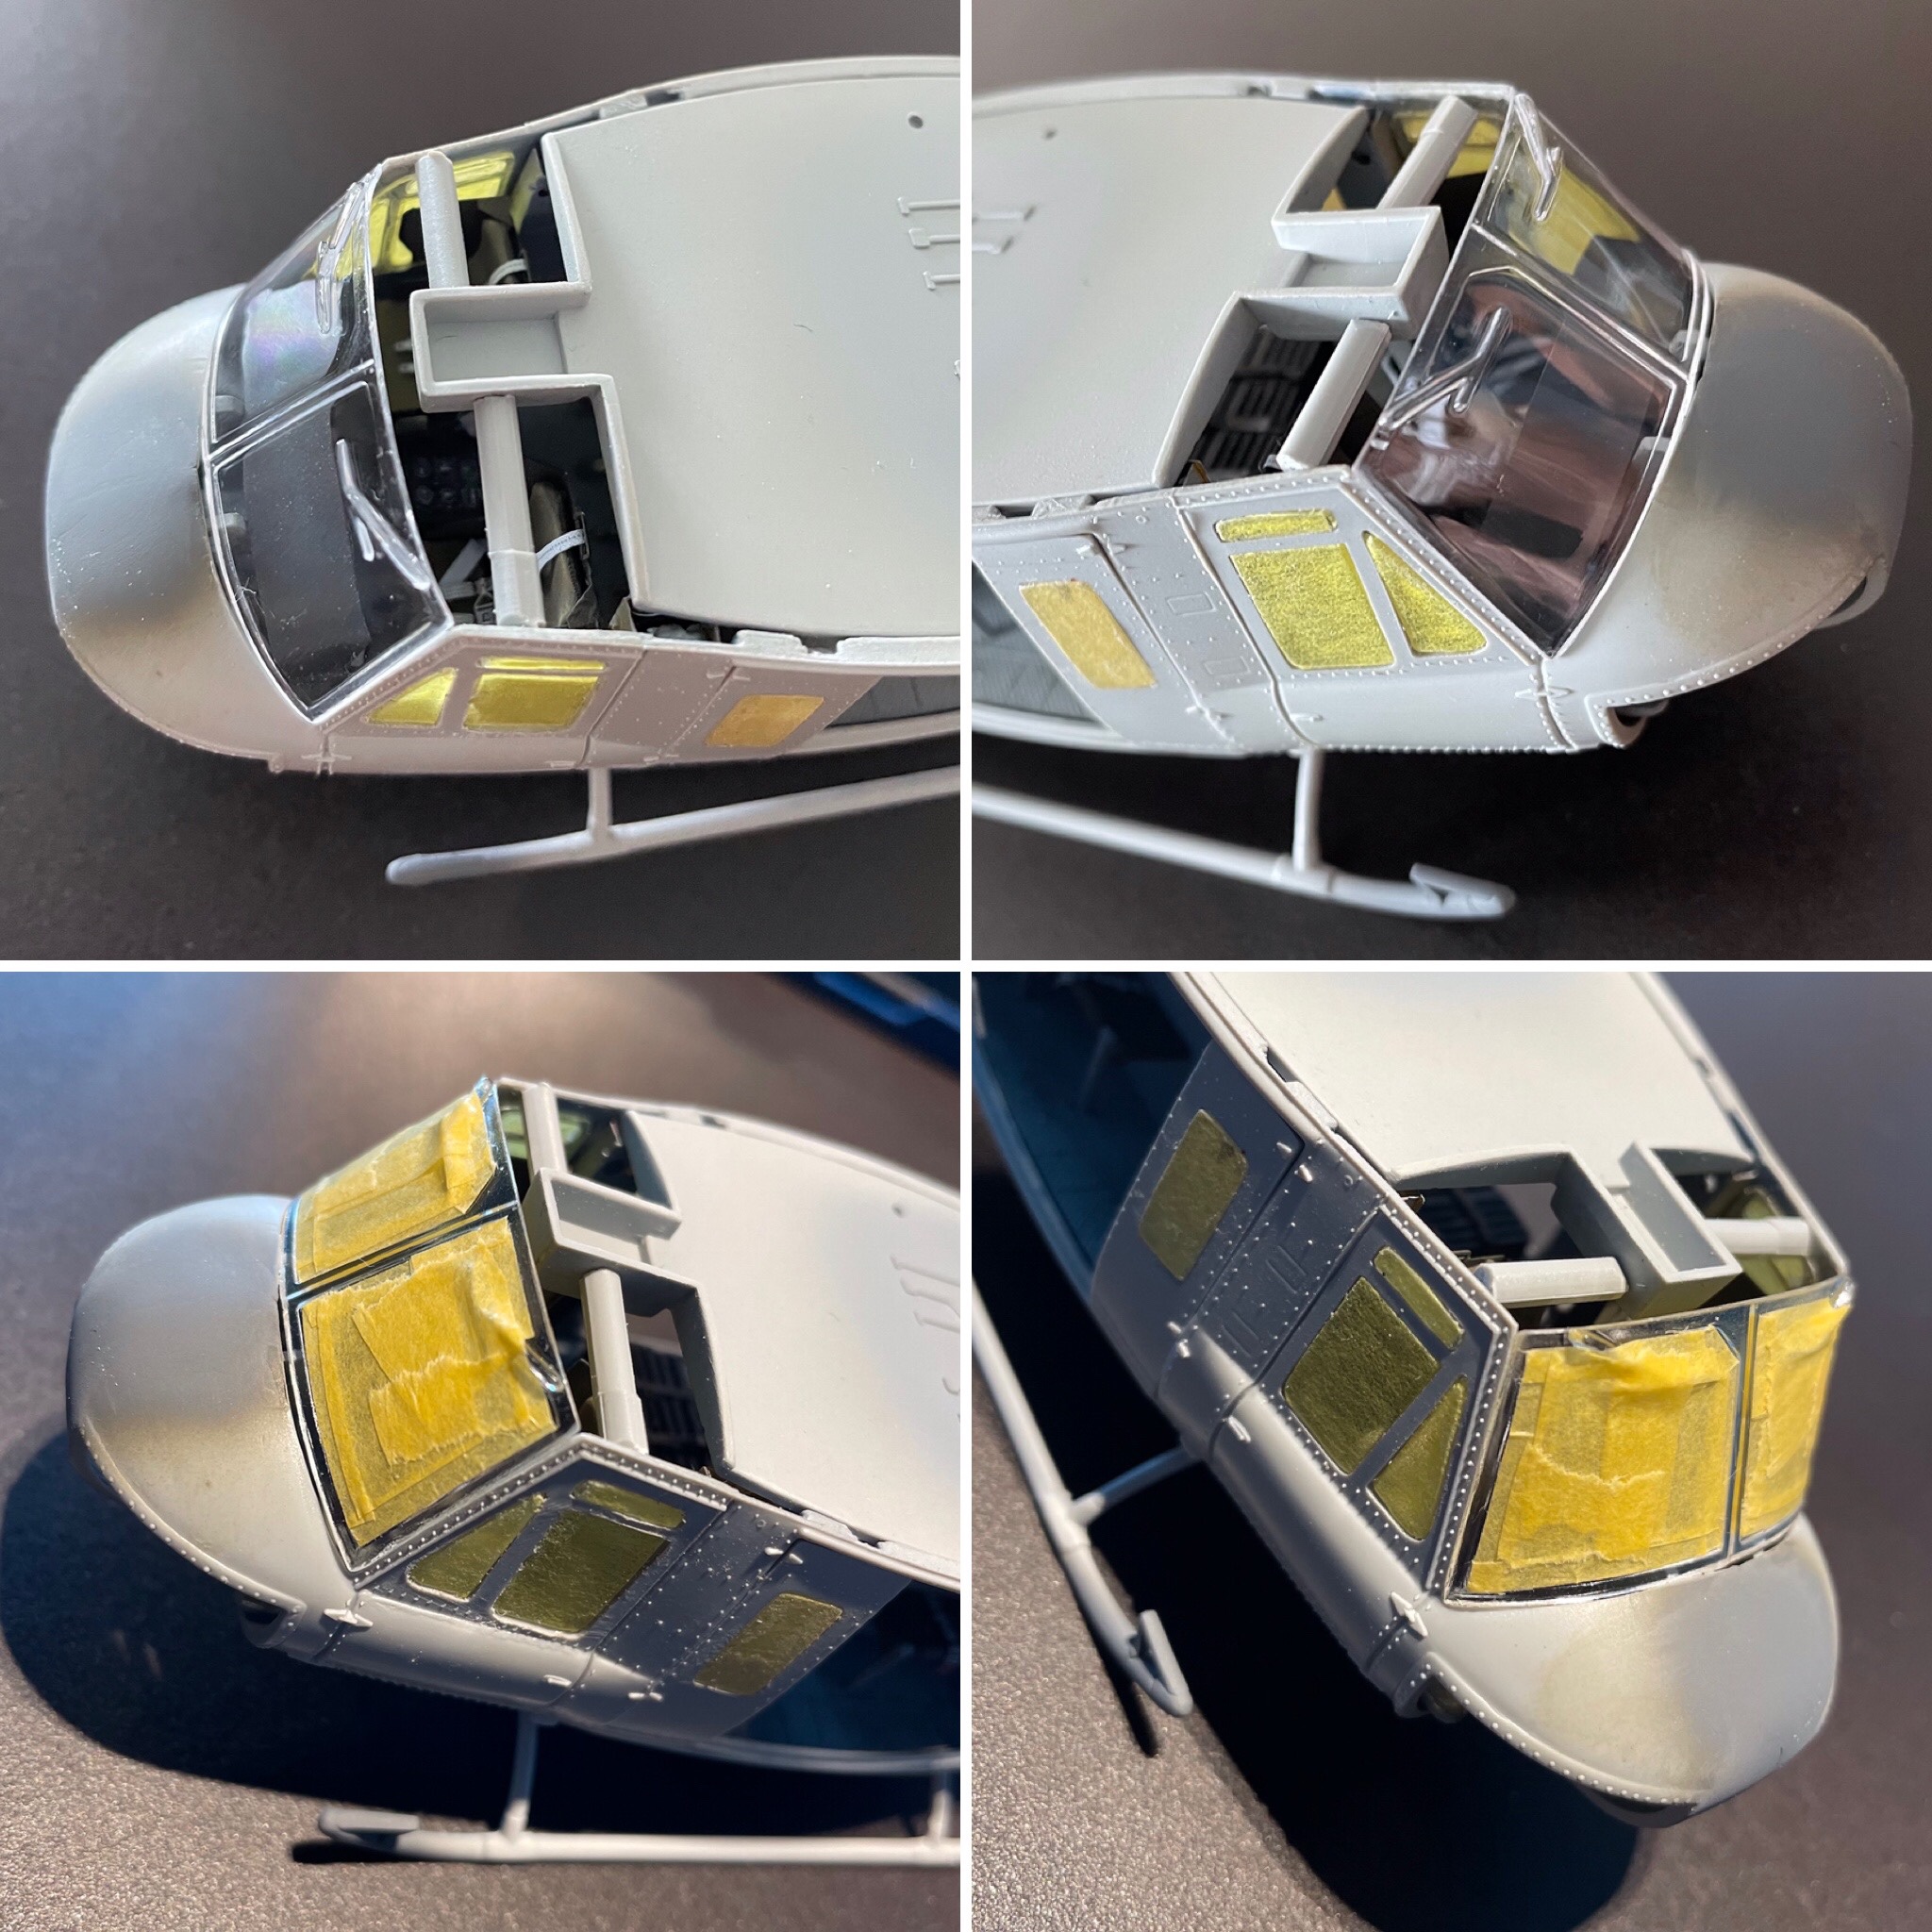
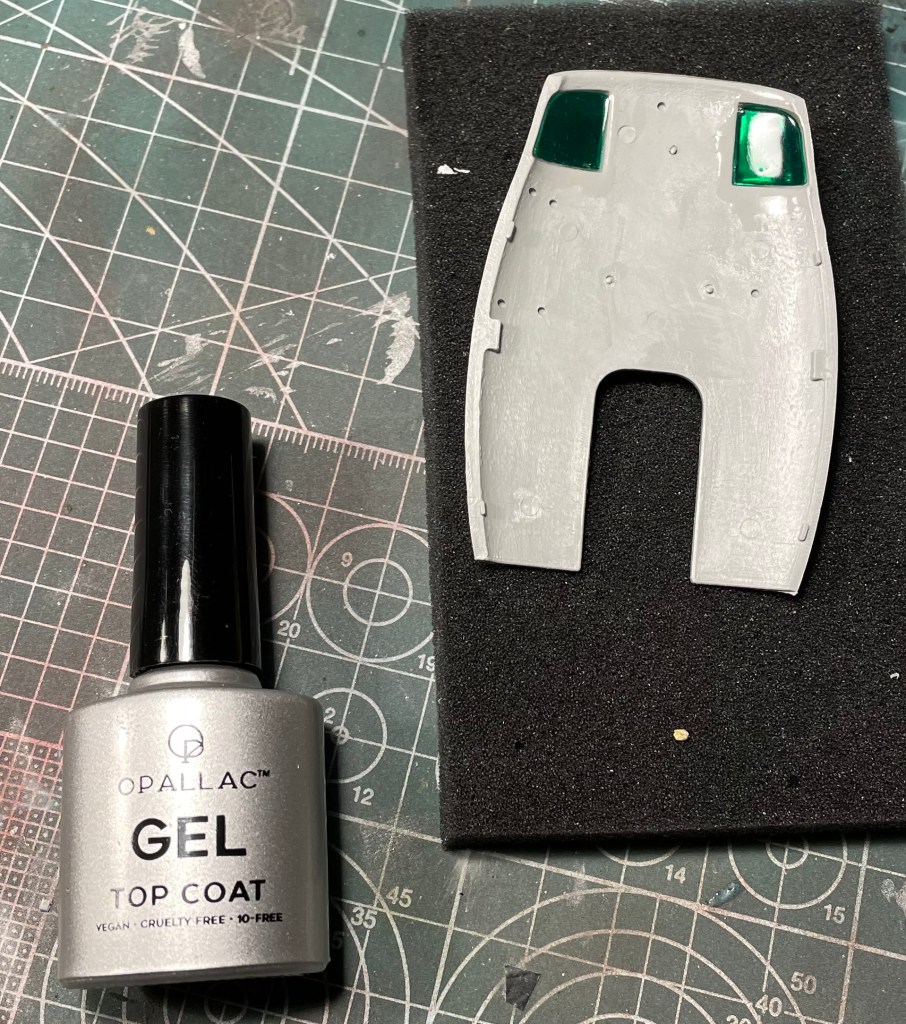
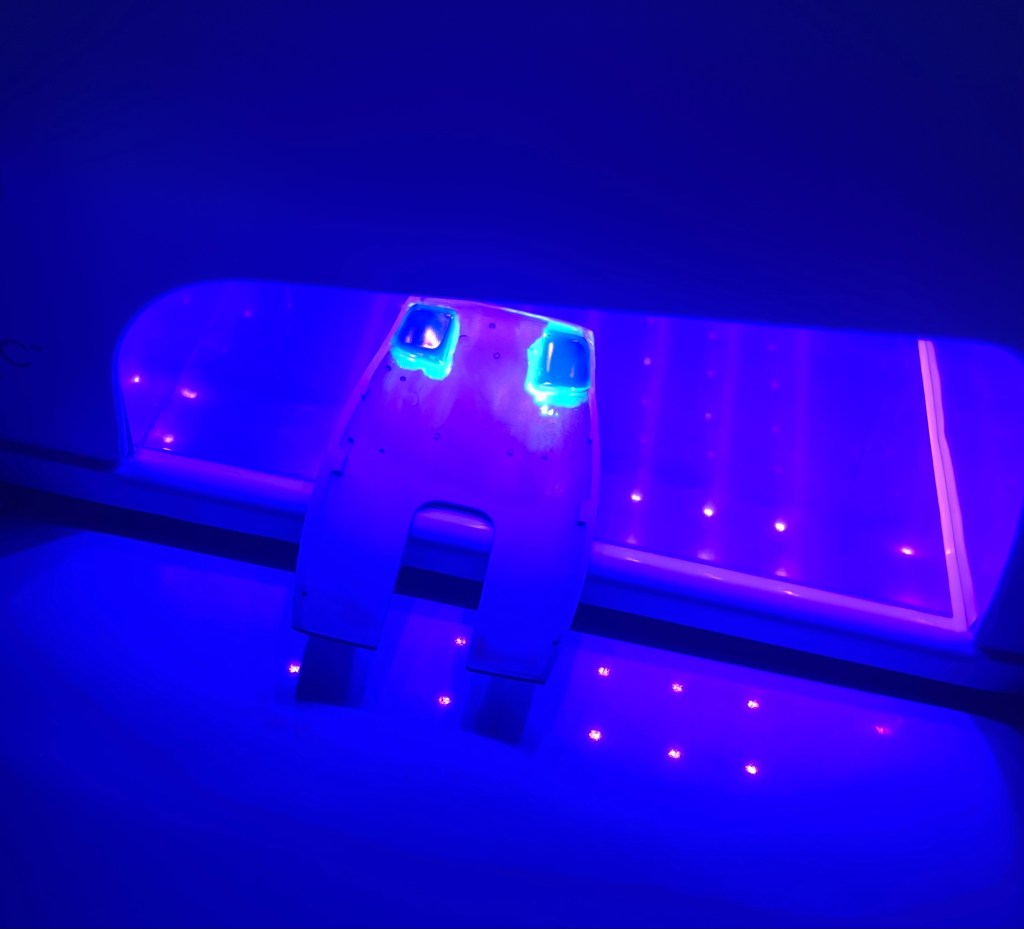
The worst fit issue was the ceiling windows. After painting them with clear green I installed them. The gaps were filled with clear nail gel which I cured with UV light. A little touch up with more clear green and they were done.
I dded some detail to the engine cowling with adapted PE from the spares box as well as one of the Eduard kit parts and a Reskit engine exhaust.

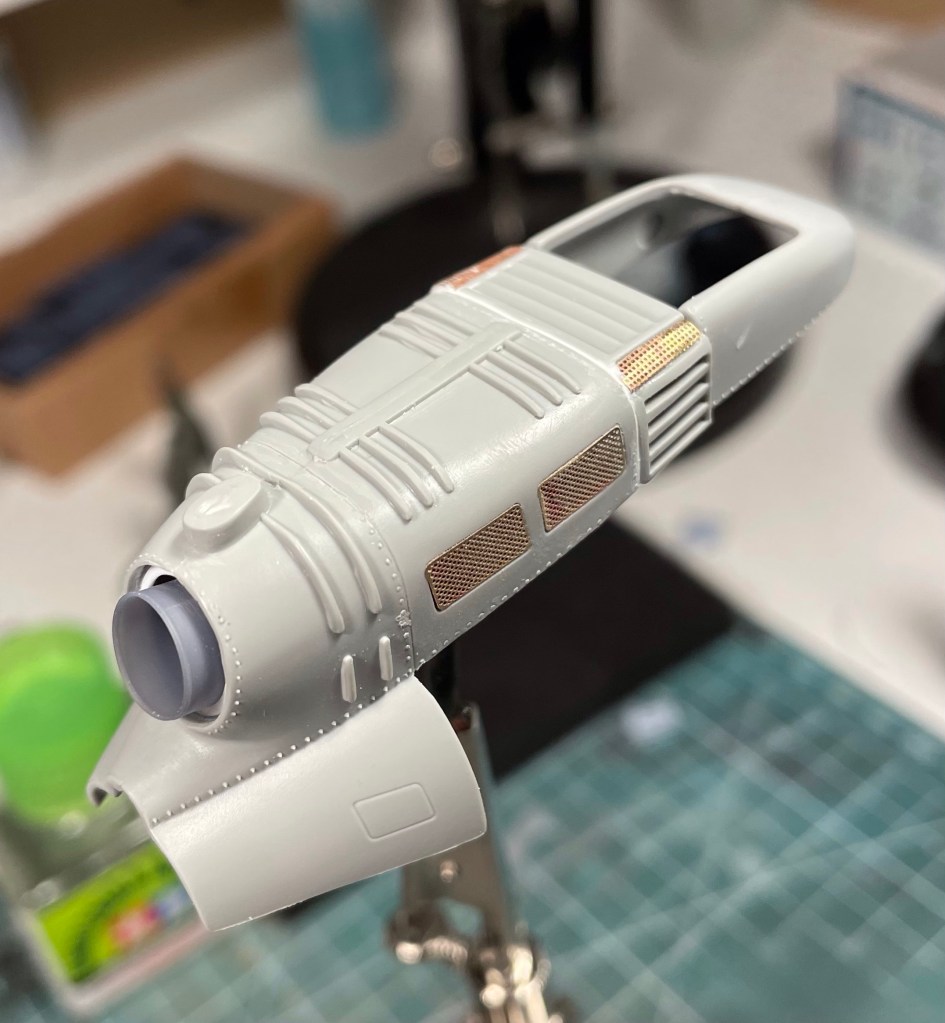
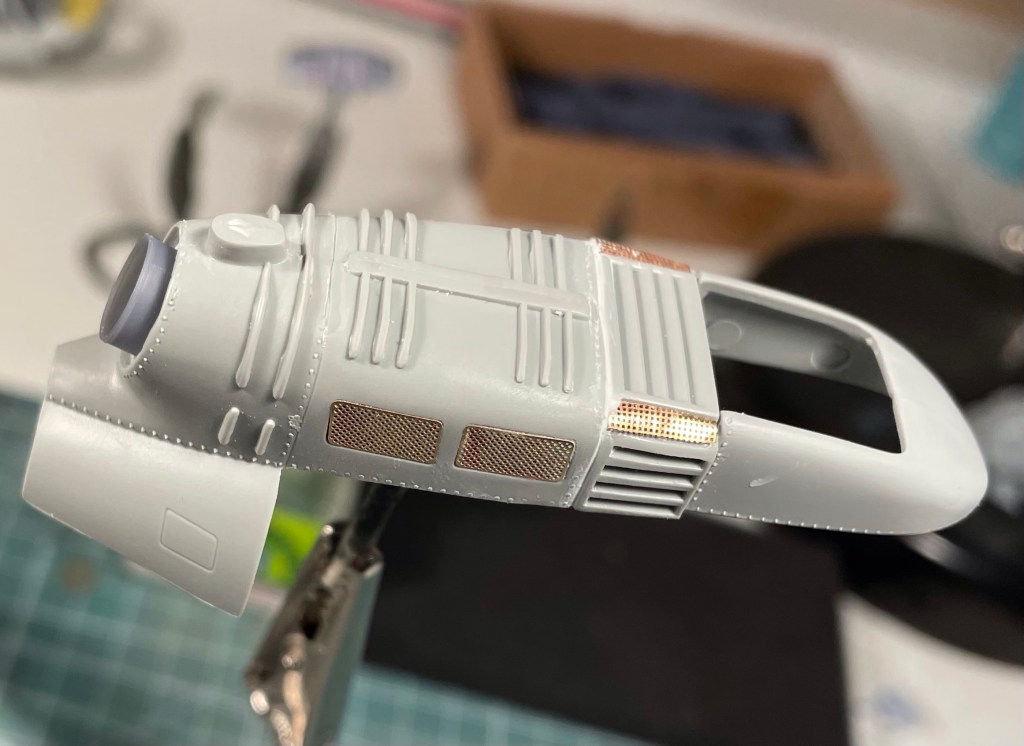
Final assembly of the airframe was quite straightforward after that.
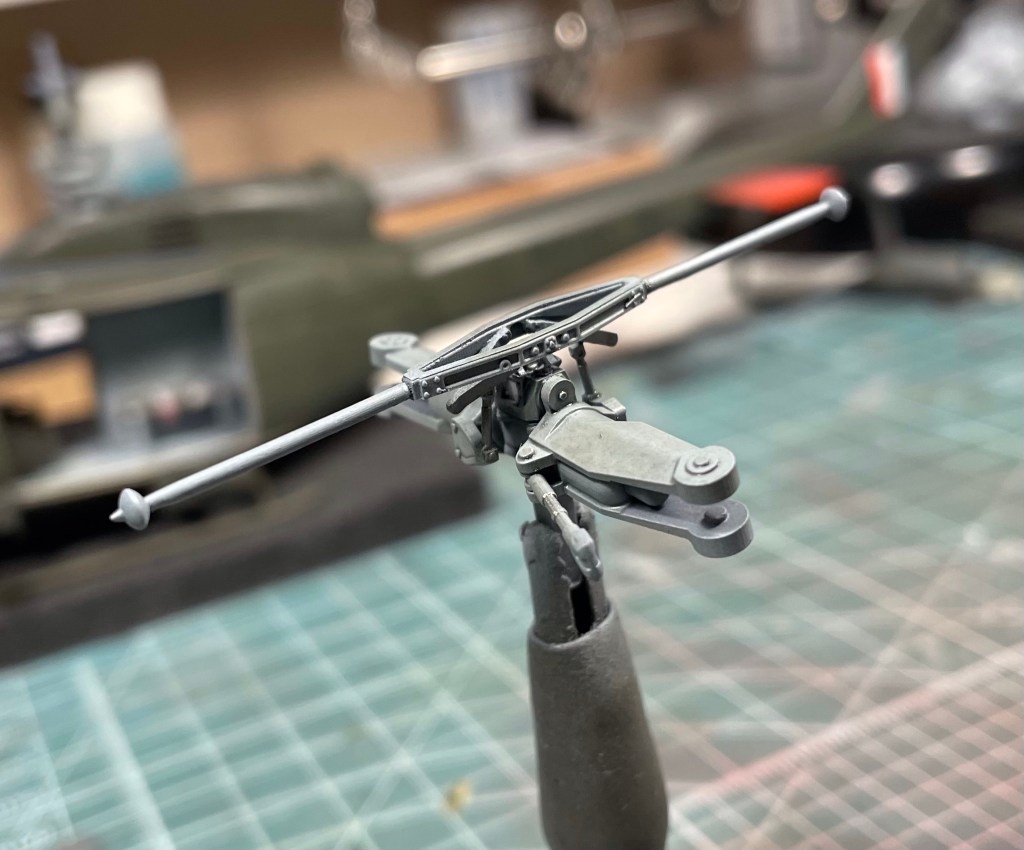
Next I worked on the rotor. I used a Reskit kit for this too, and I’m very happy with the result. It was another kit within a kit but the quality of the product and clear instructions meant that I was able to produce a fine looking result.
I decided to paint and weather it prior to installation…
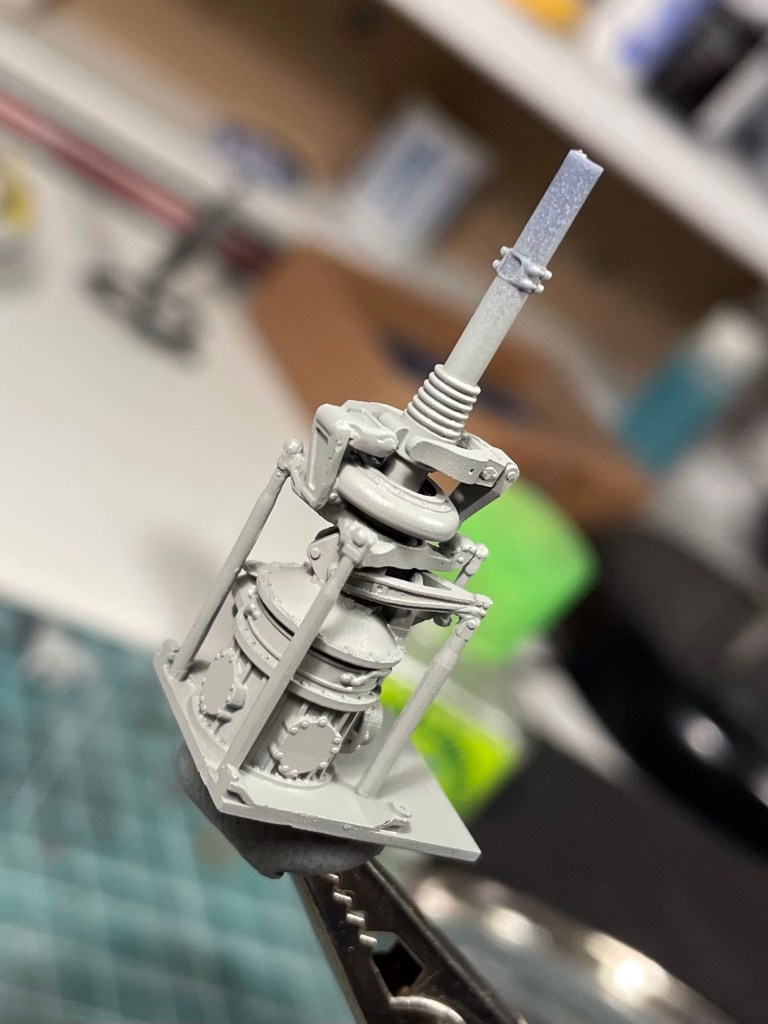

After applying a light grey base coat I weathered with a dark wash and then a dry brush with a lighter grey. I picked out the metallic parts with Vallejo Duraluminium and then glued it to the top of the fuselage.
Painting and Markings
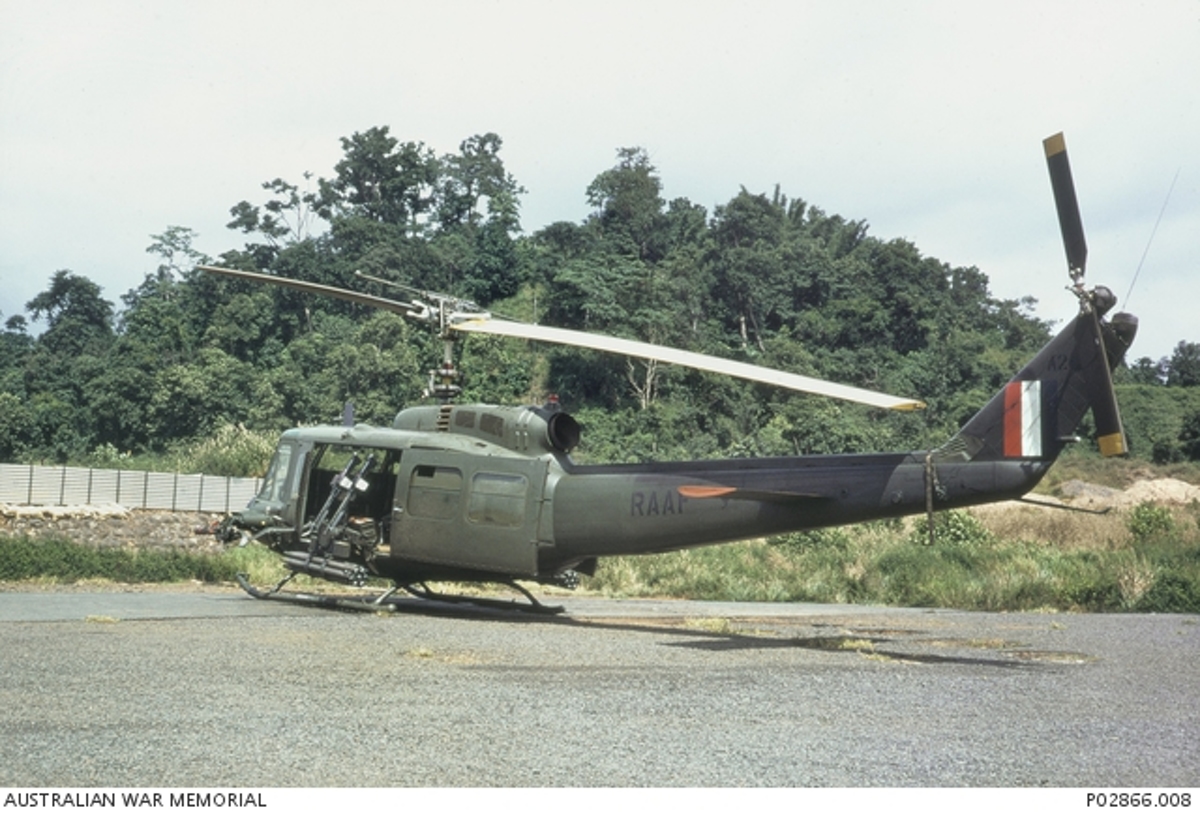
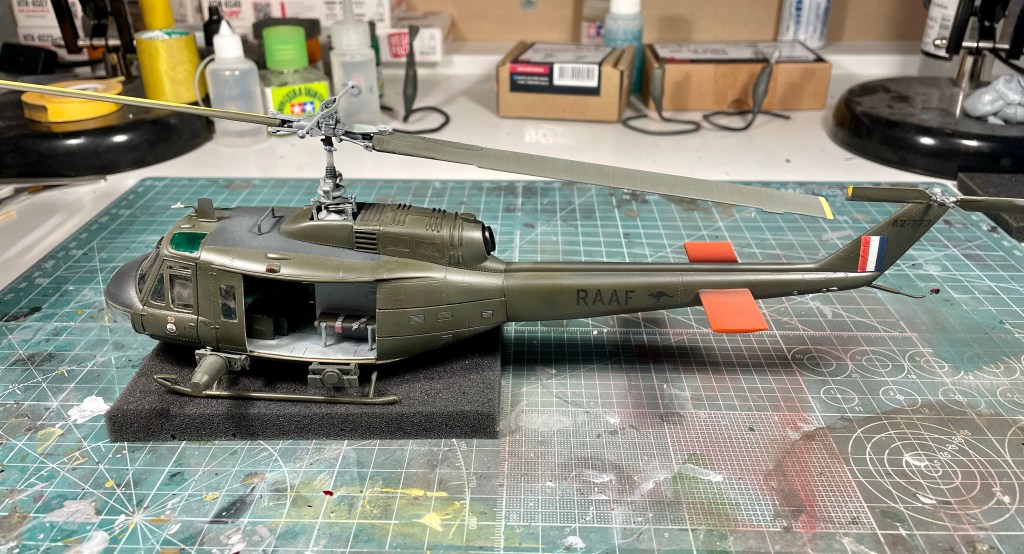
I chose A2-773 as my subject as it was the original Bushranger and is perhaps the most storied of them all. There are also some excellent photos available on the AWM website, one of which is below.
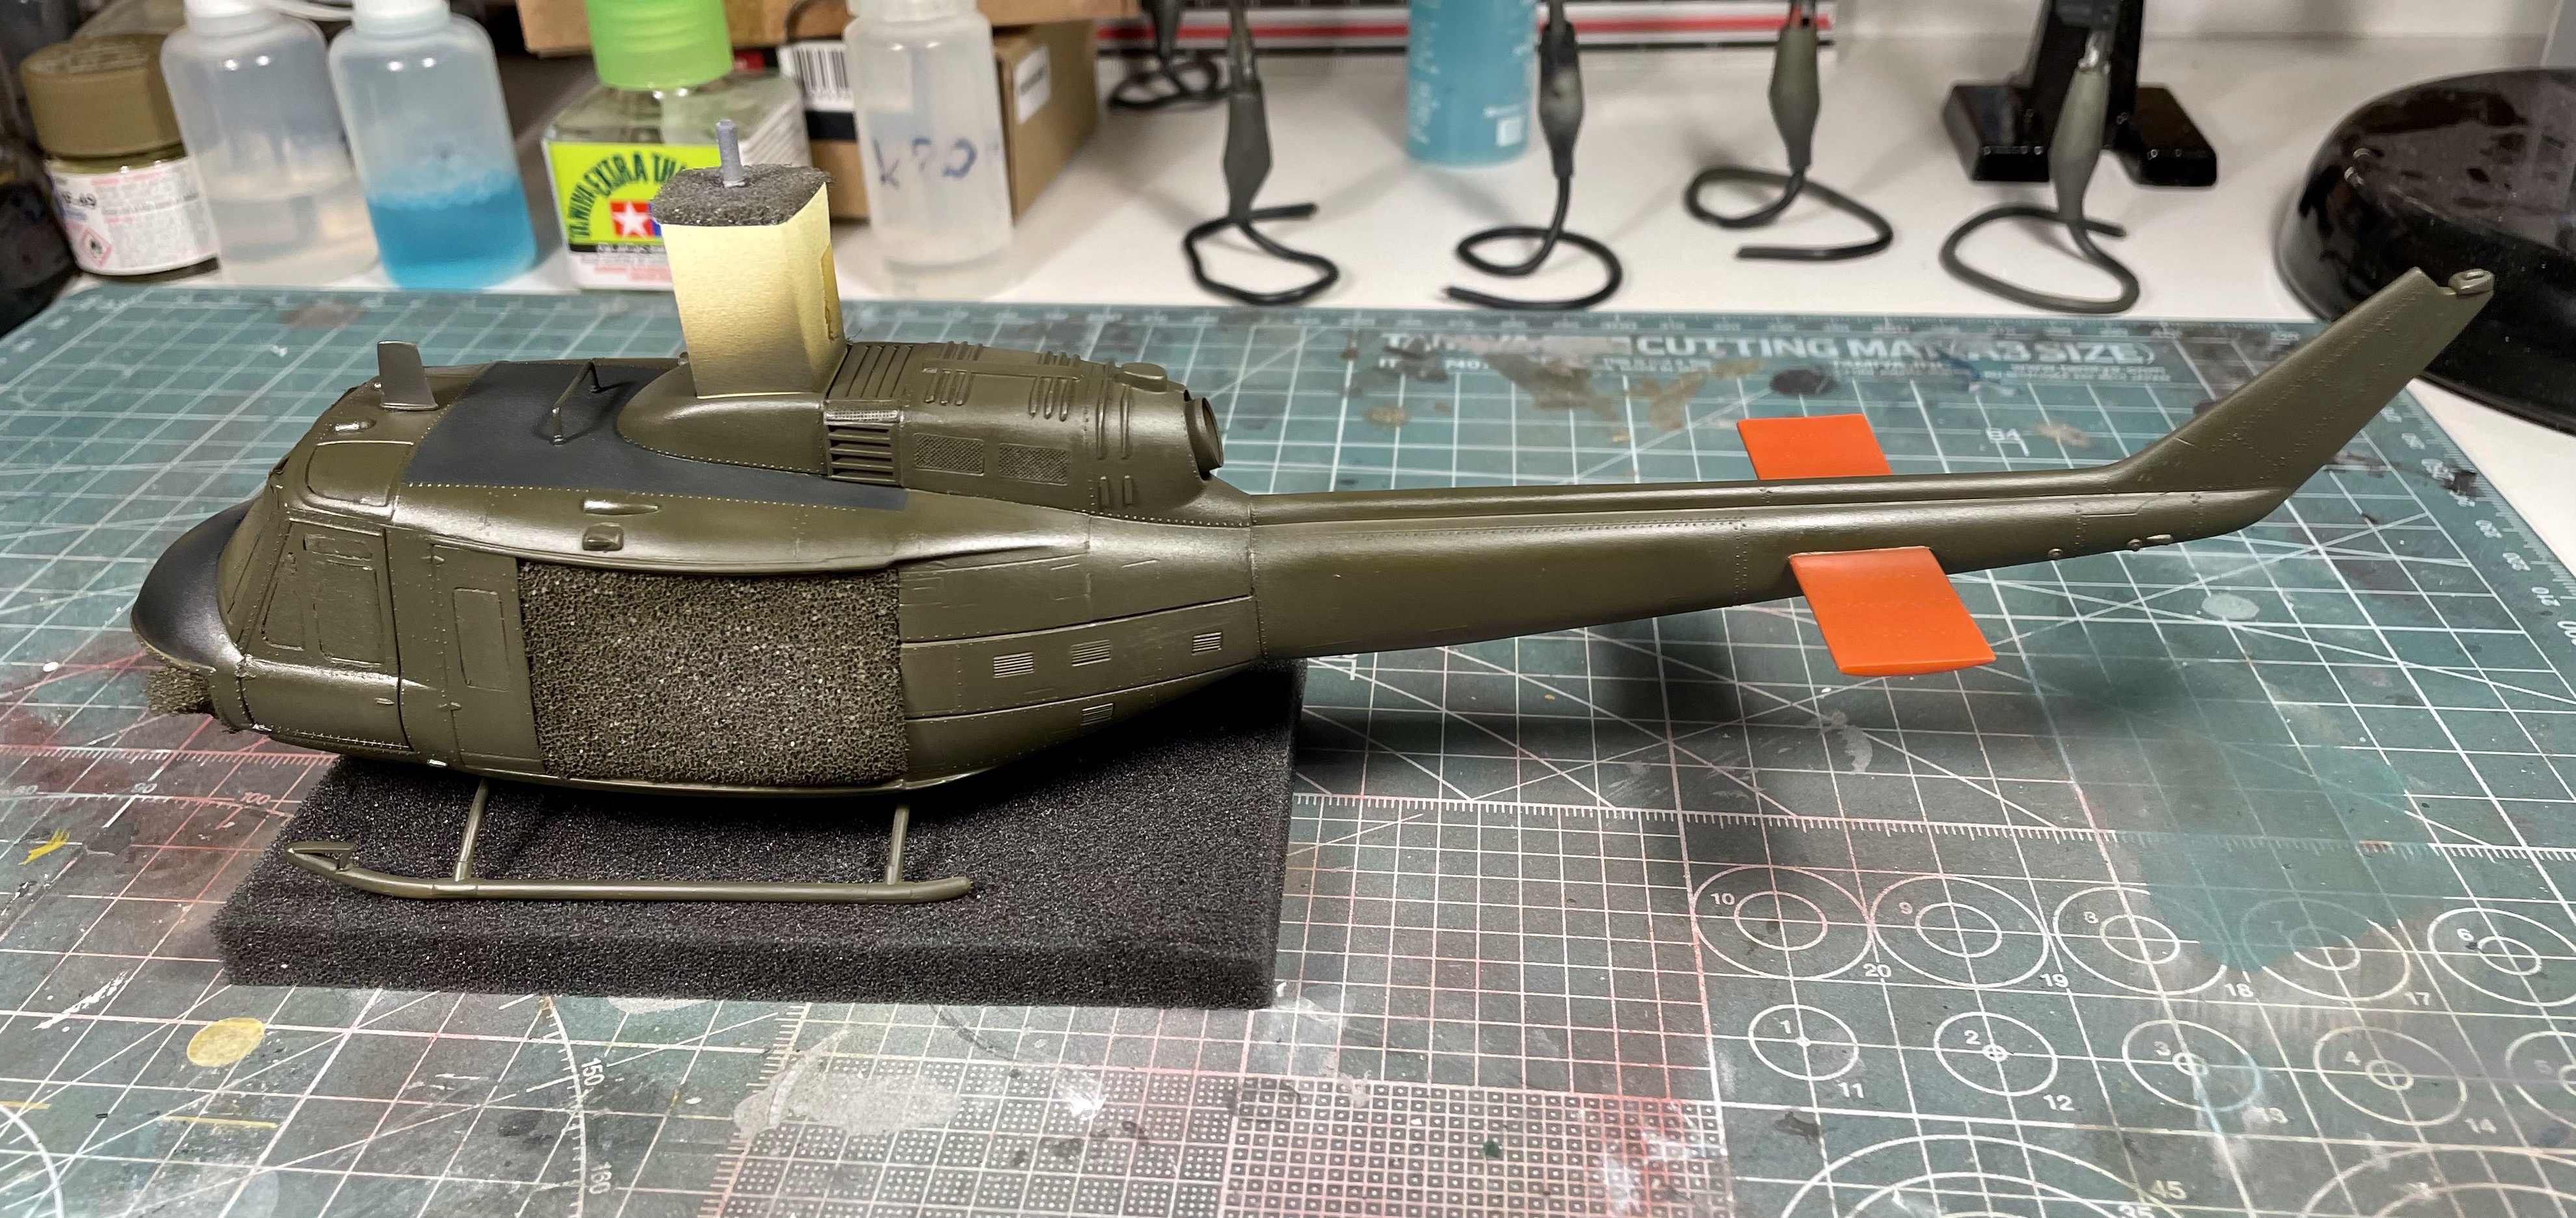
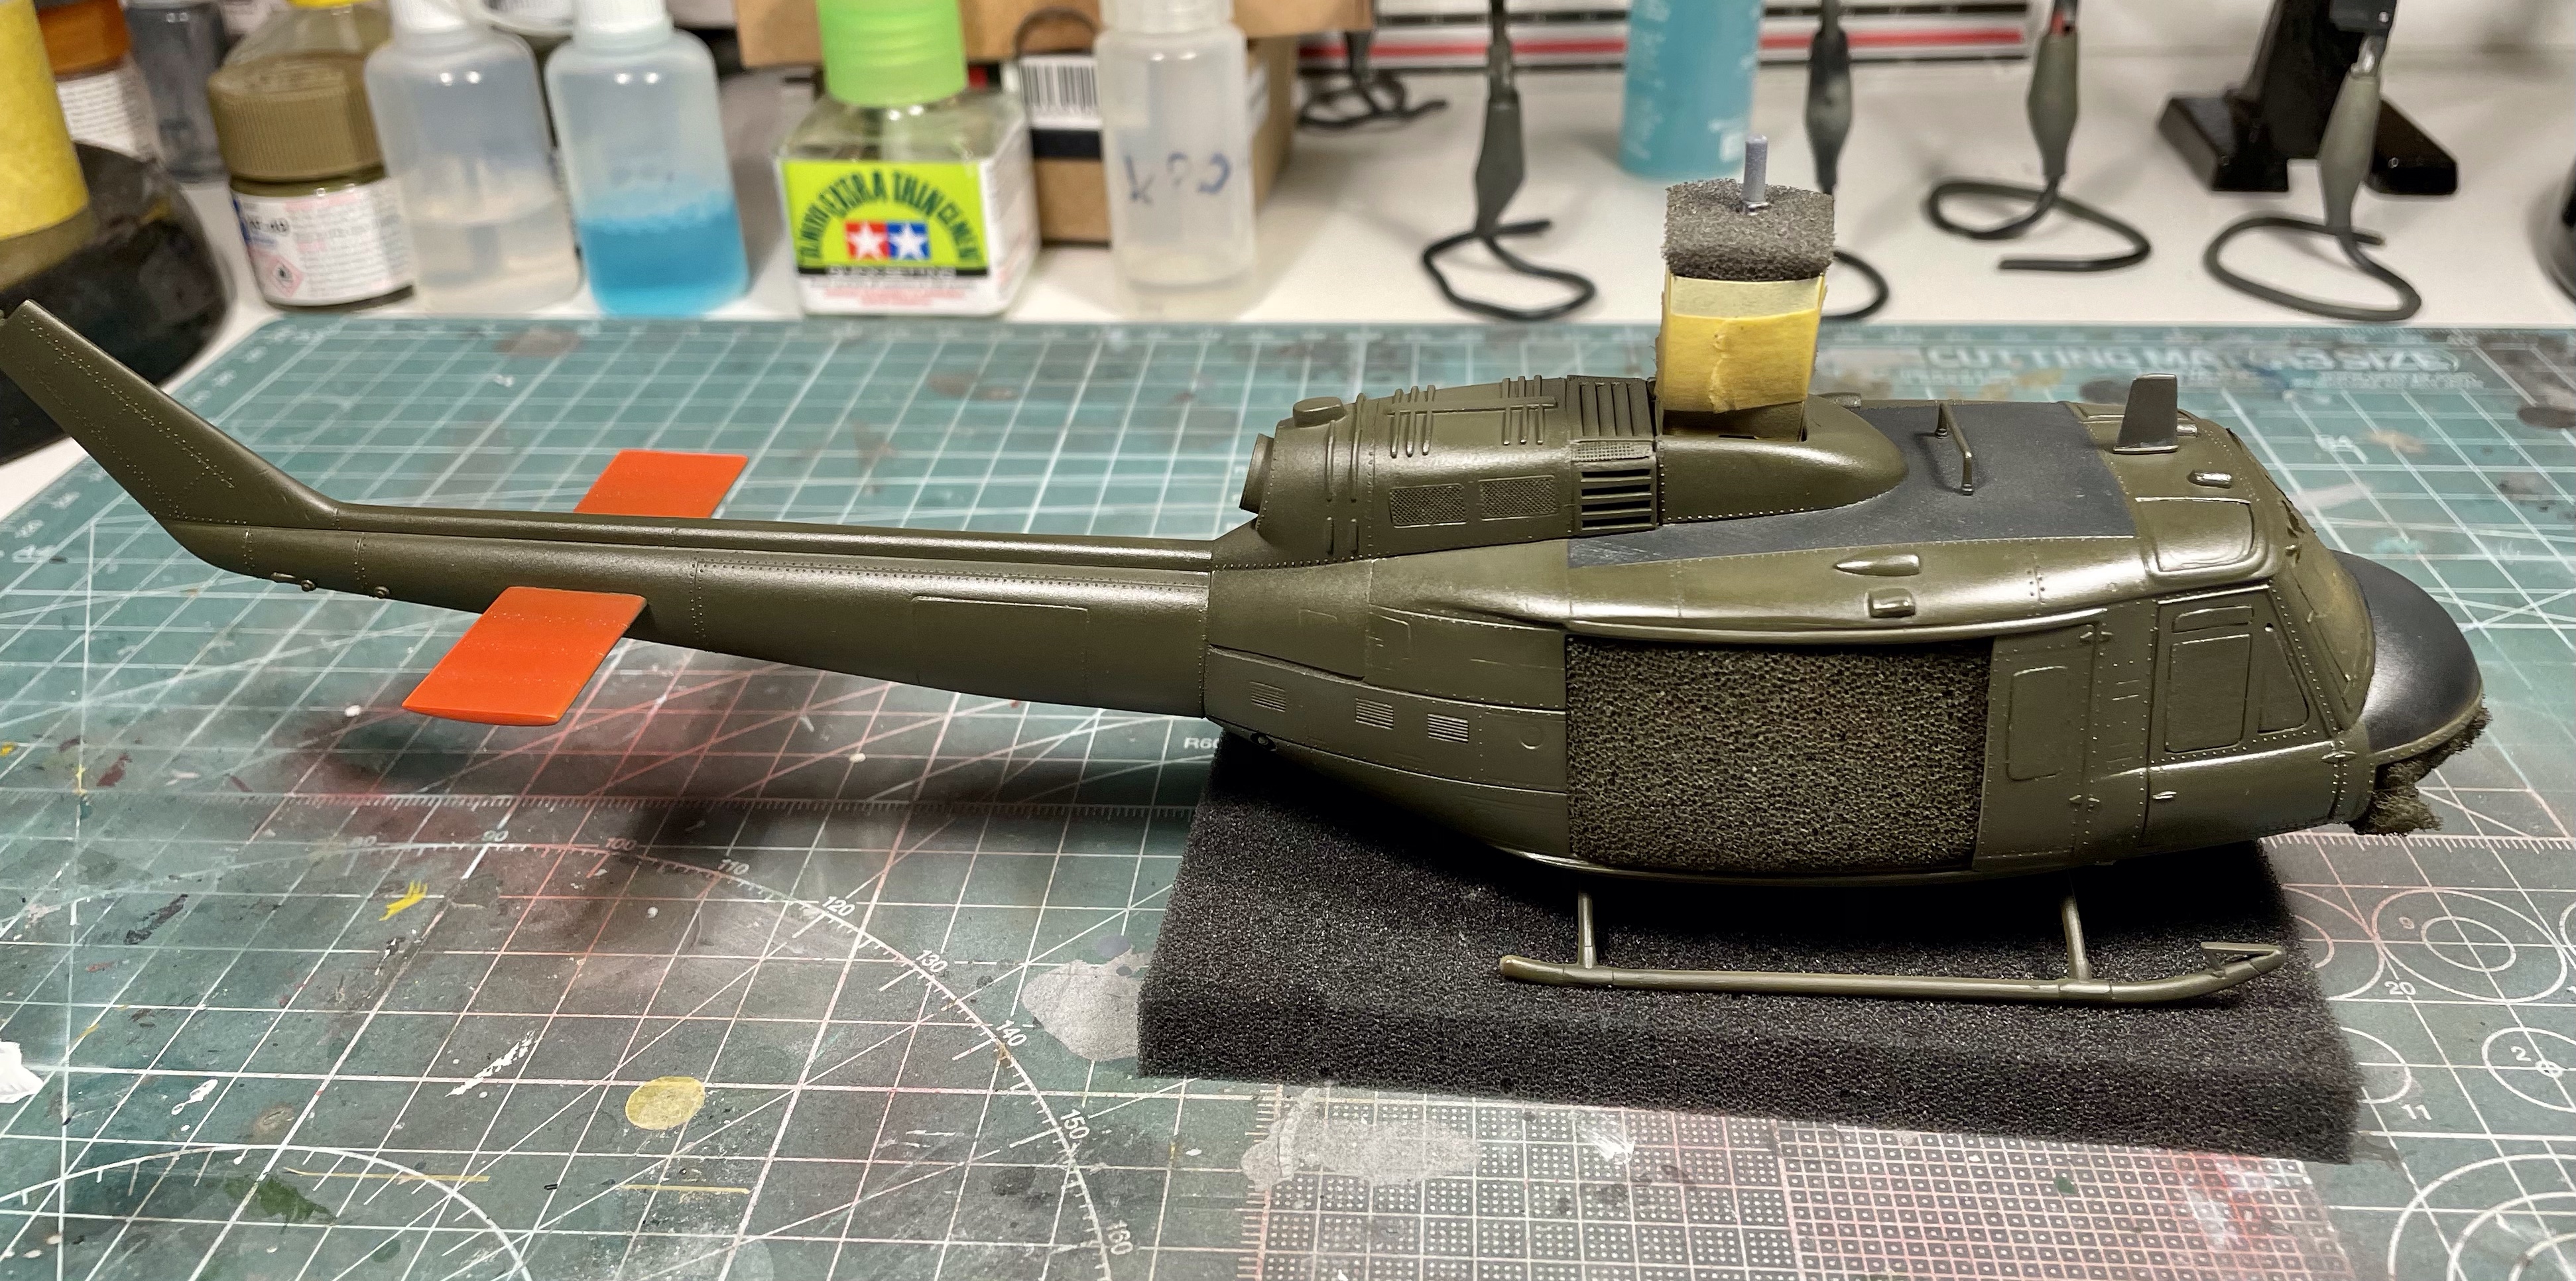
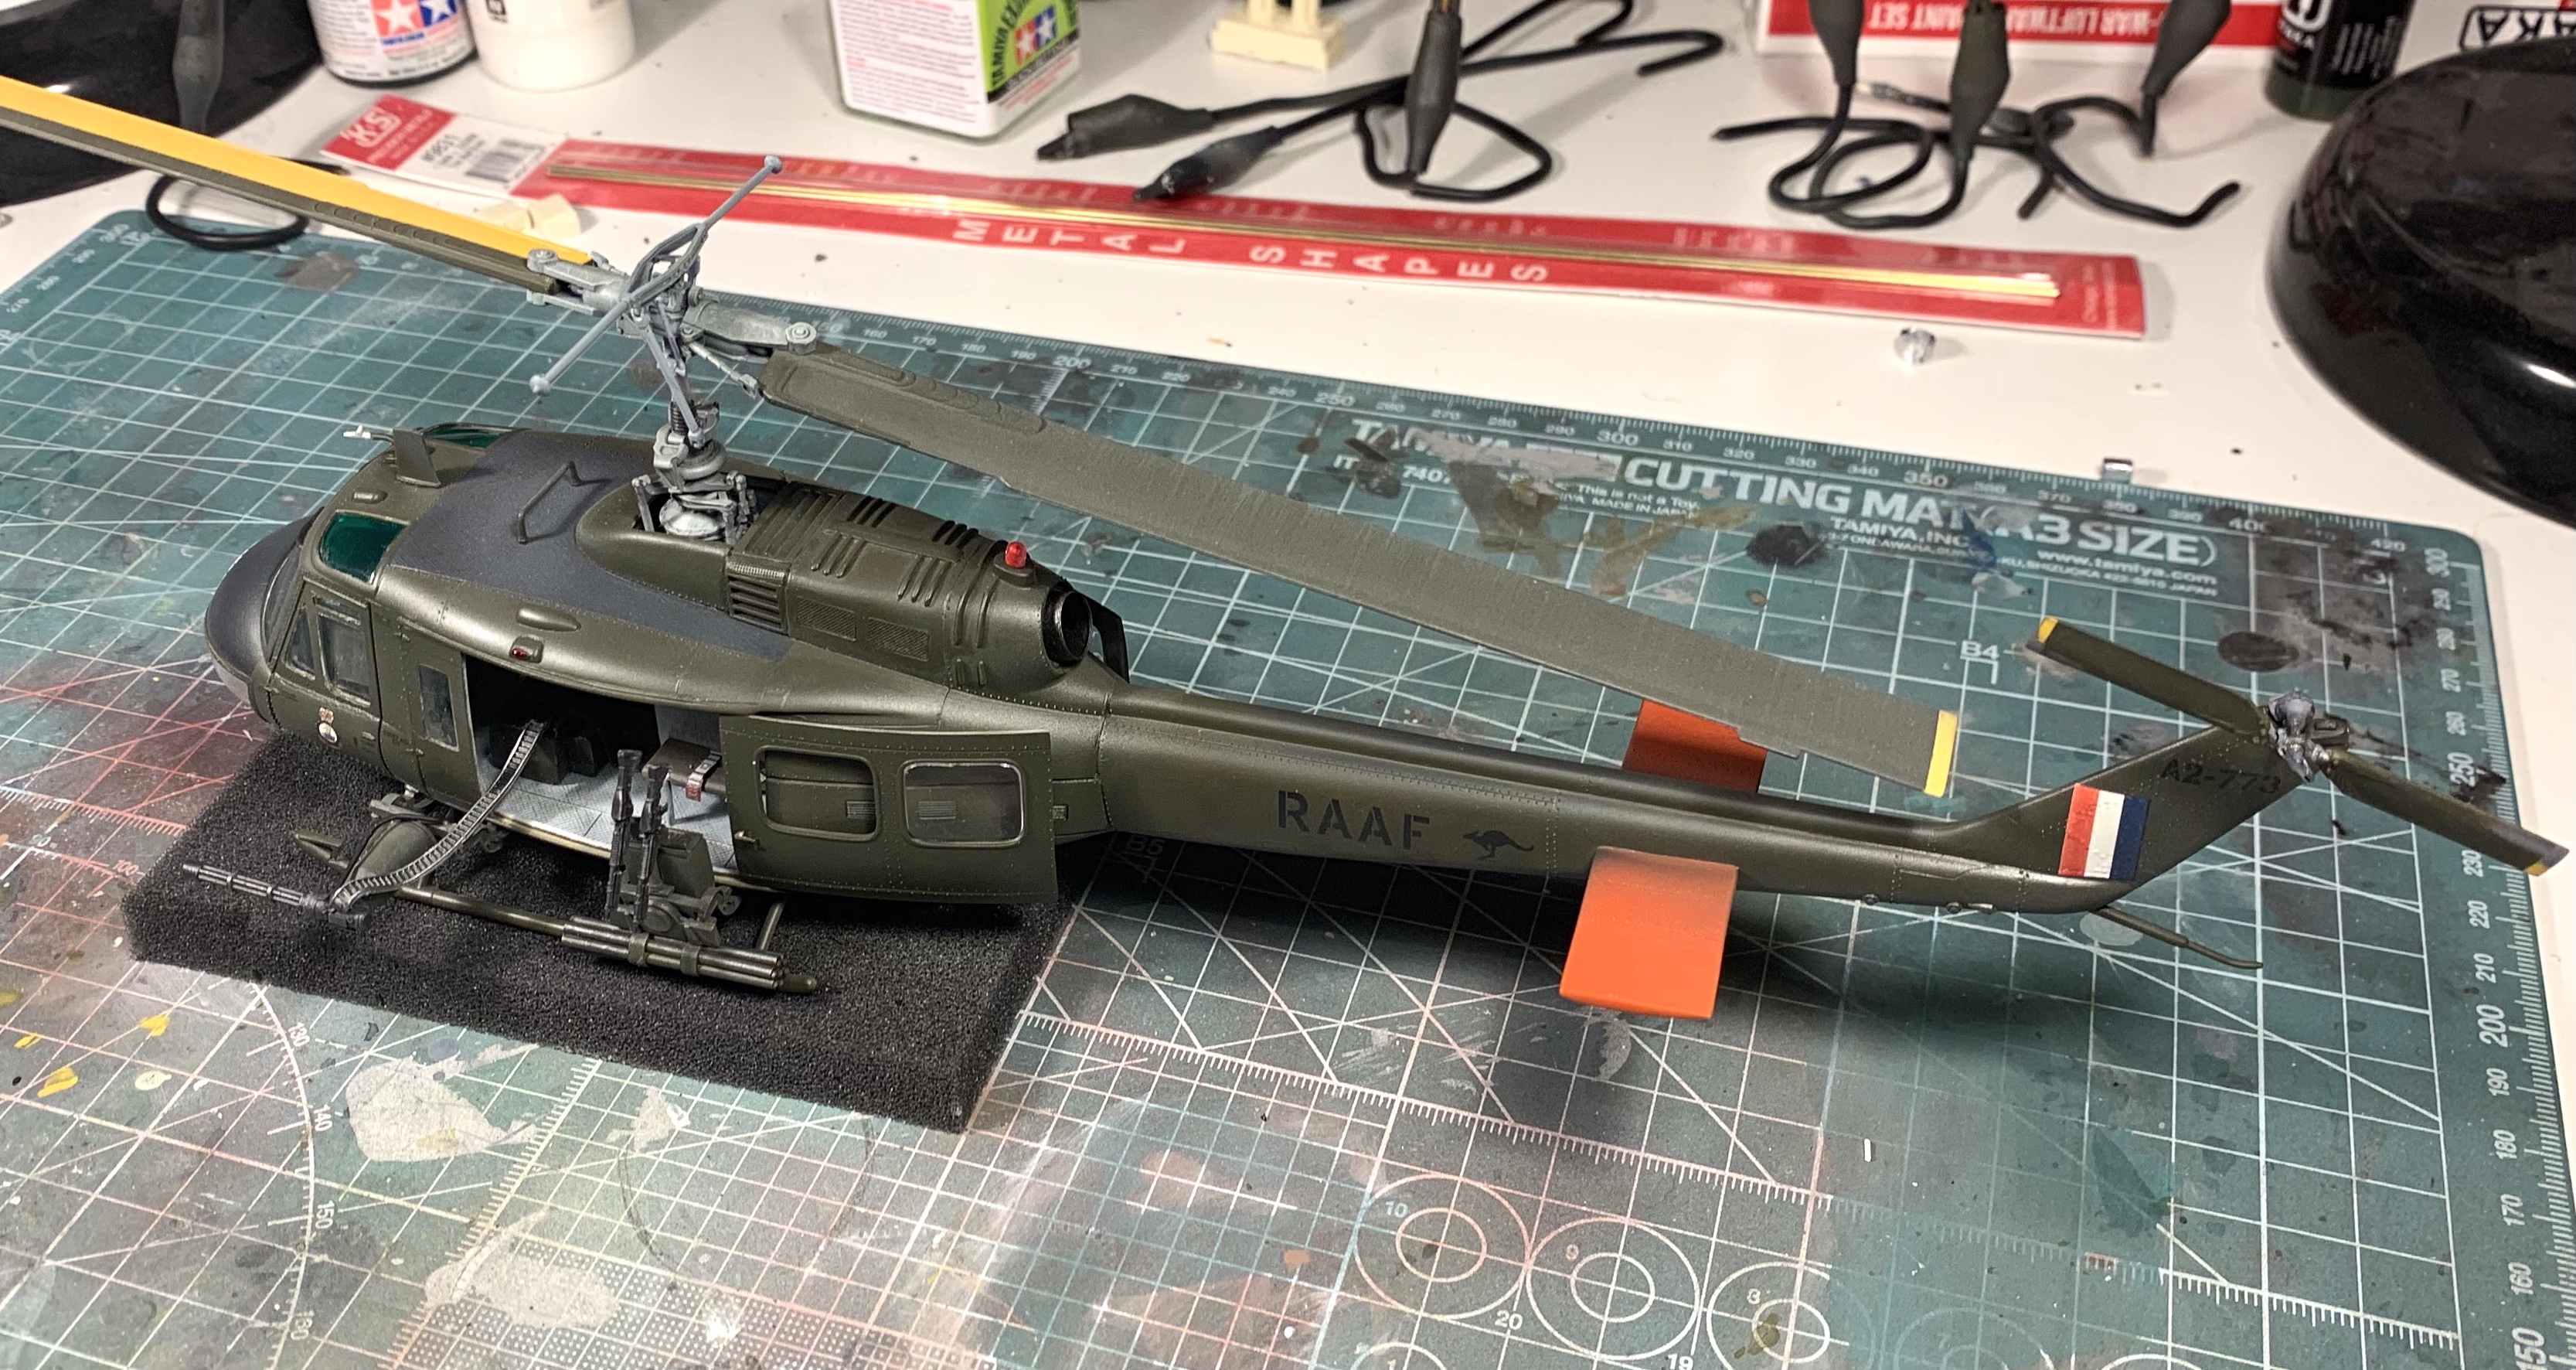
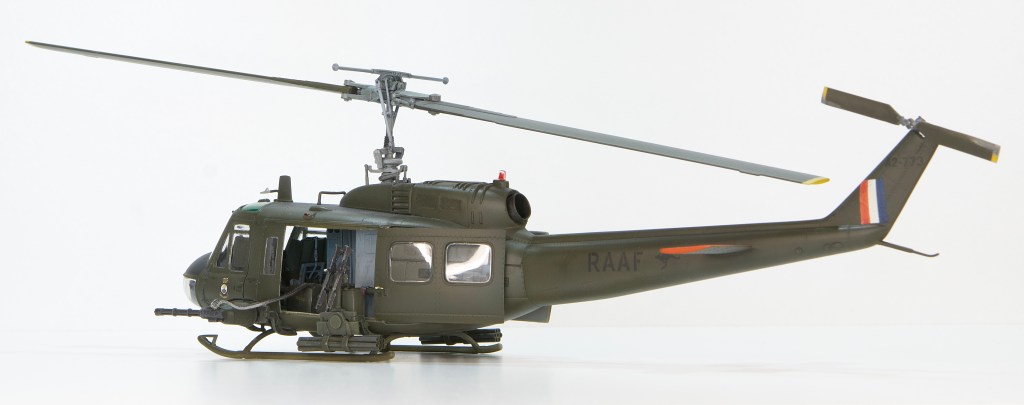
The initial paint work was straightforward with Tamiya Olive Drab subsequently modulated with darker and lighter shades. I deliberately emphasised the panel lines as experience with greens (at least) shows that the later treatments tend to subdue the effect. As it turns out, that happened on this one too.
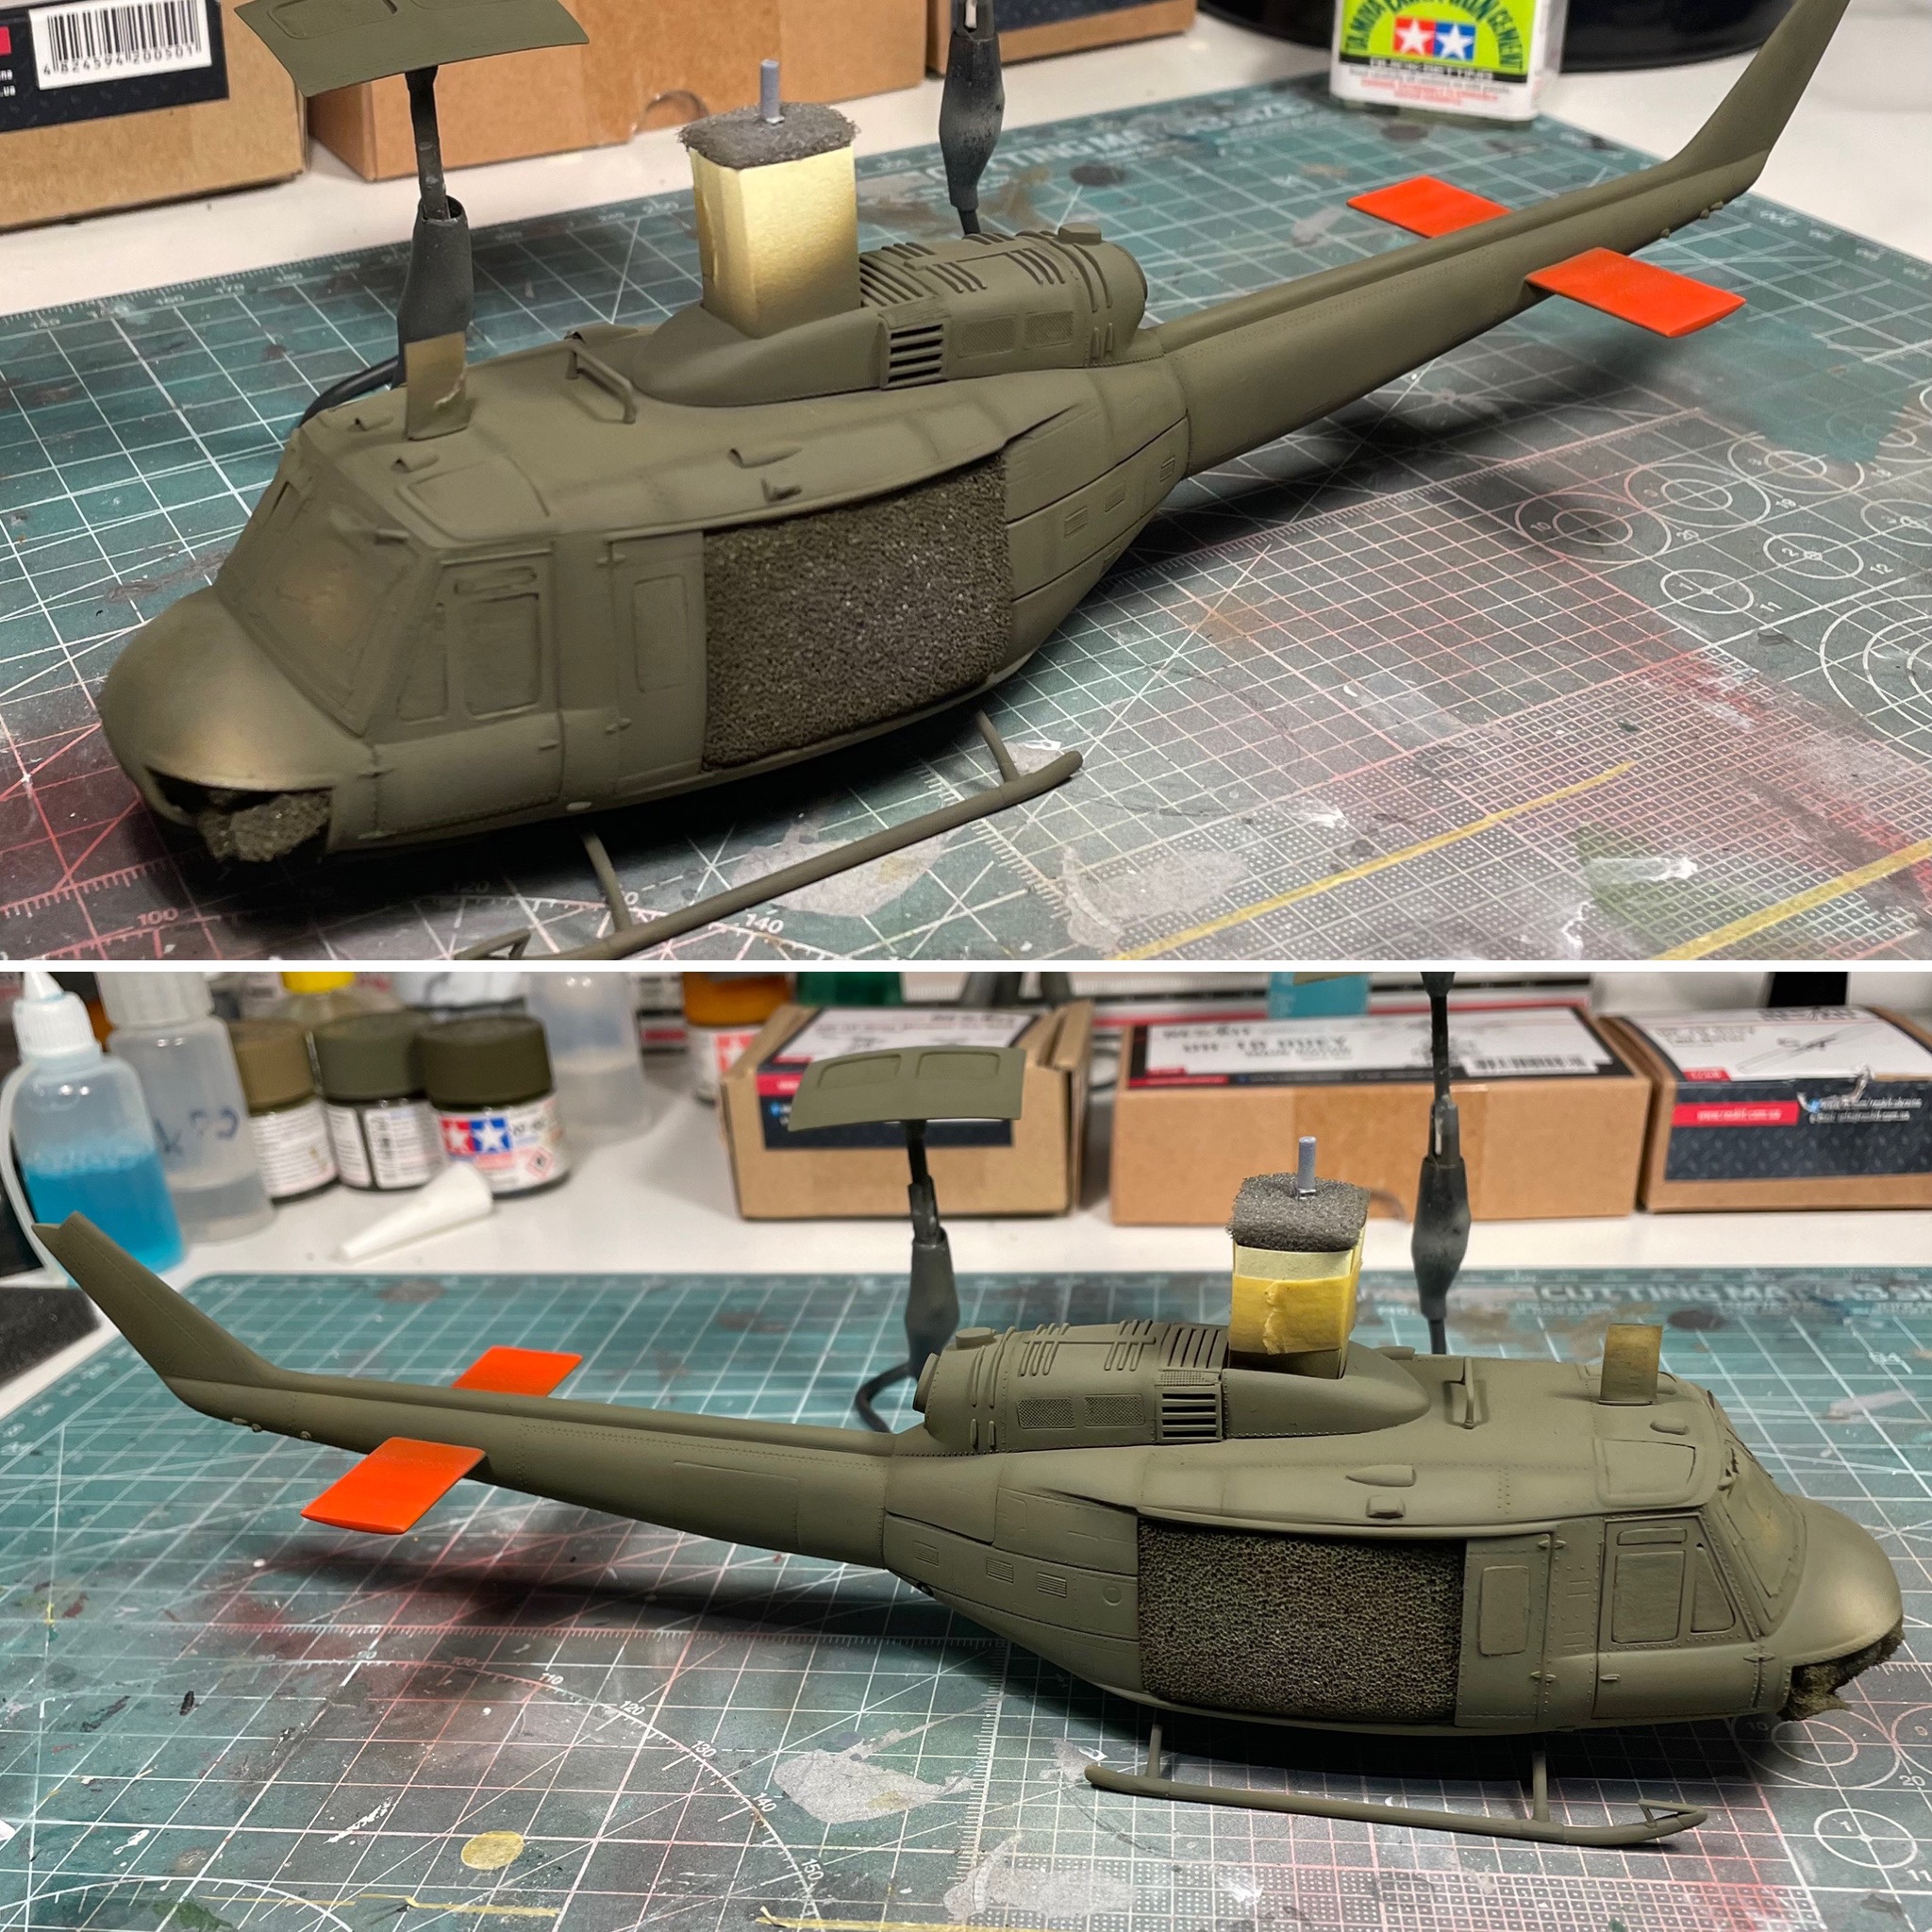
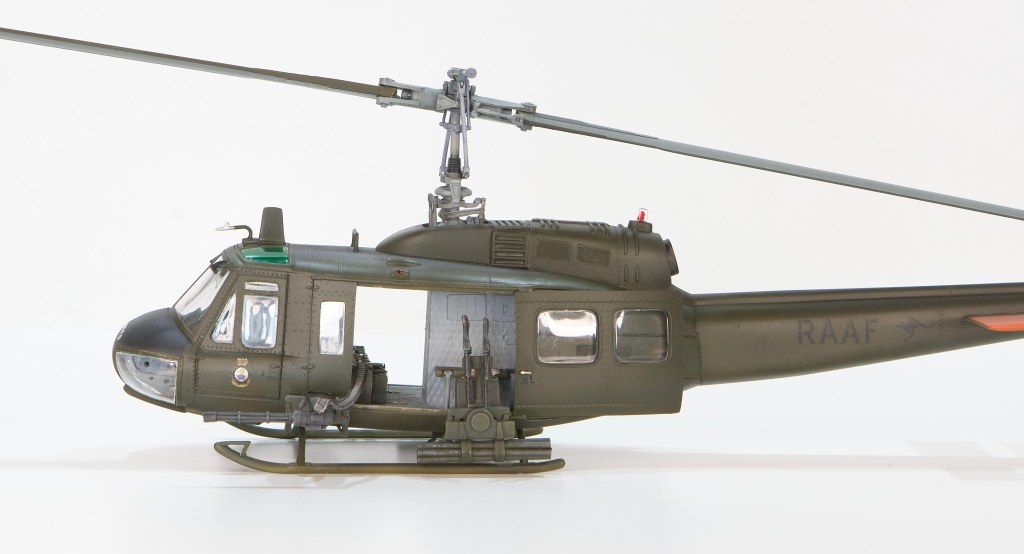
I painted the upper surfaces of the tail stabilisers a mixed bright hi-vis orange; this was applied as a friendly fire deterrent as the only threat the Bushrangers faced from above was from US aircraft.
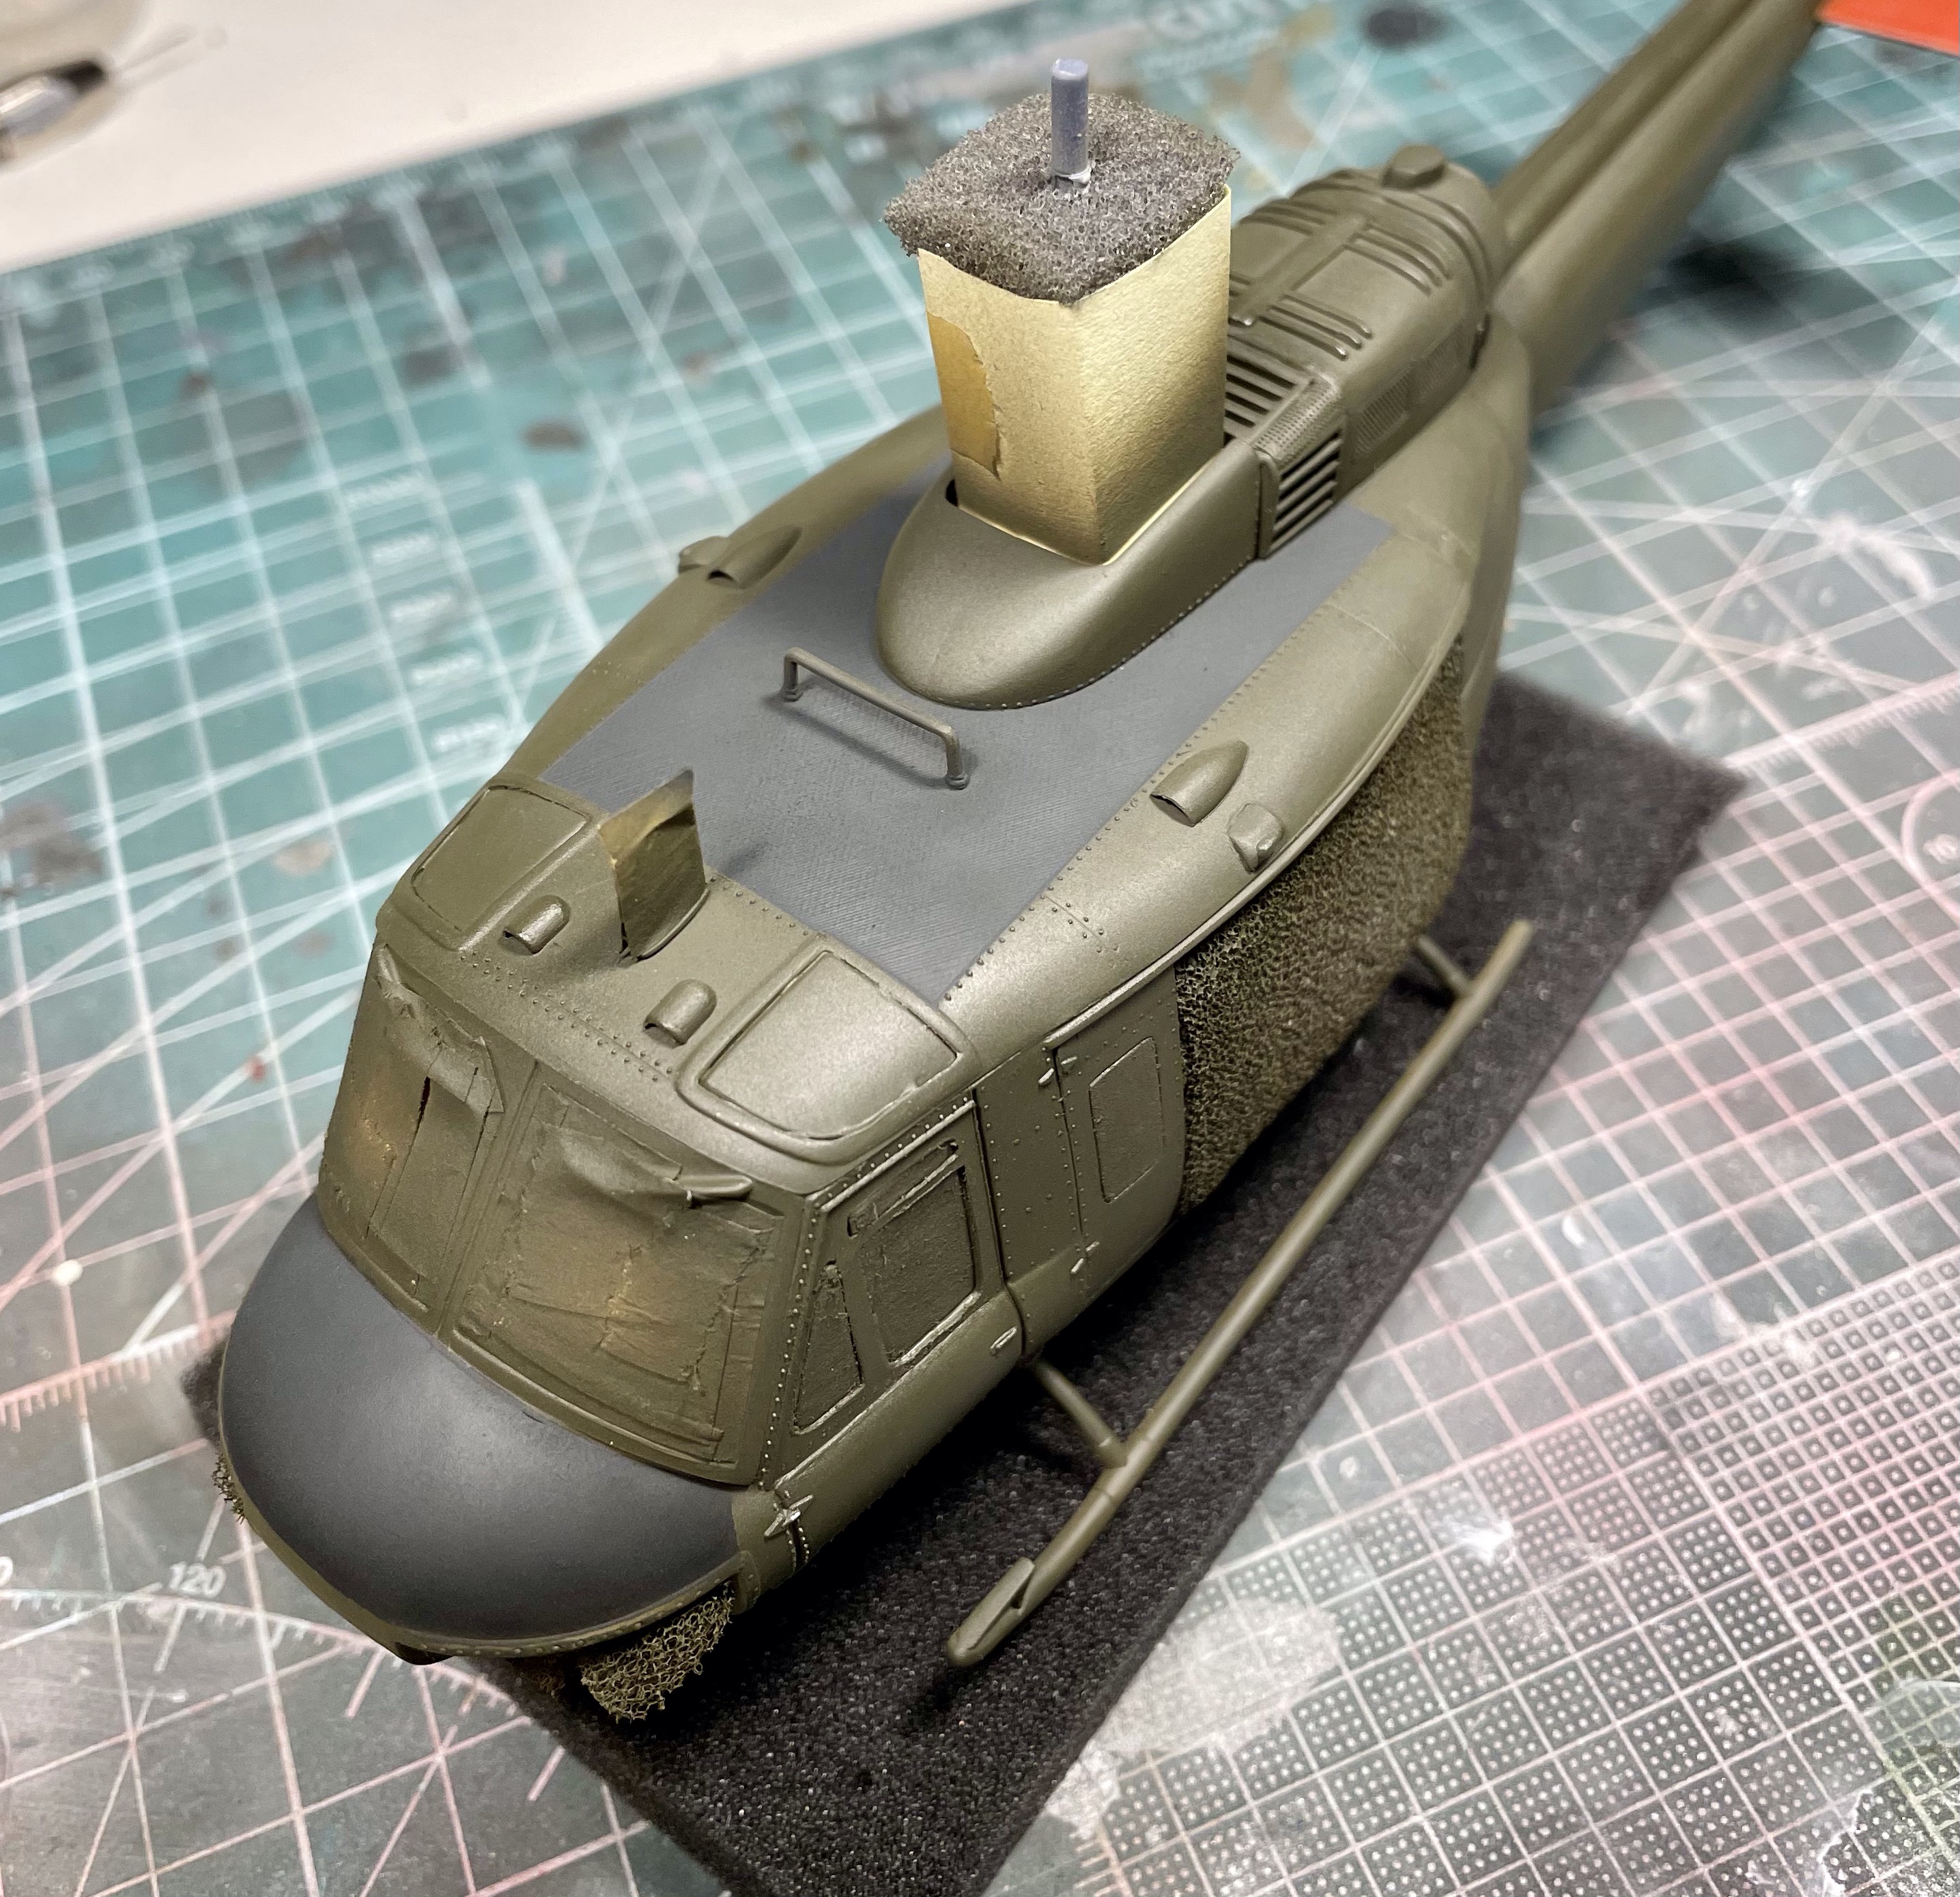
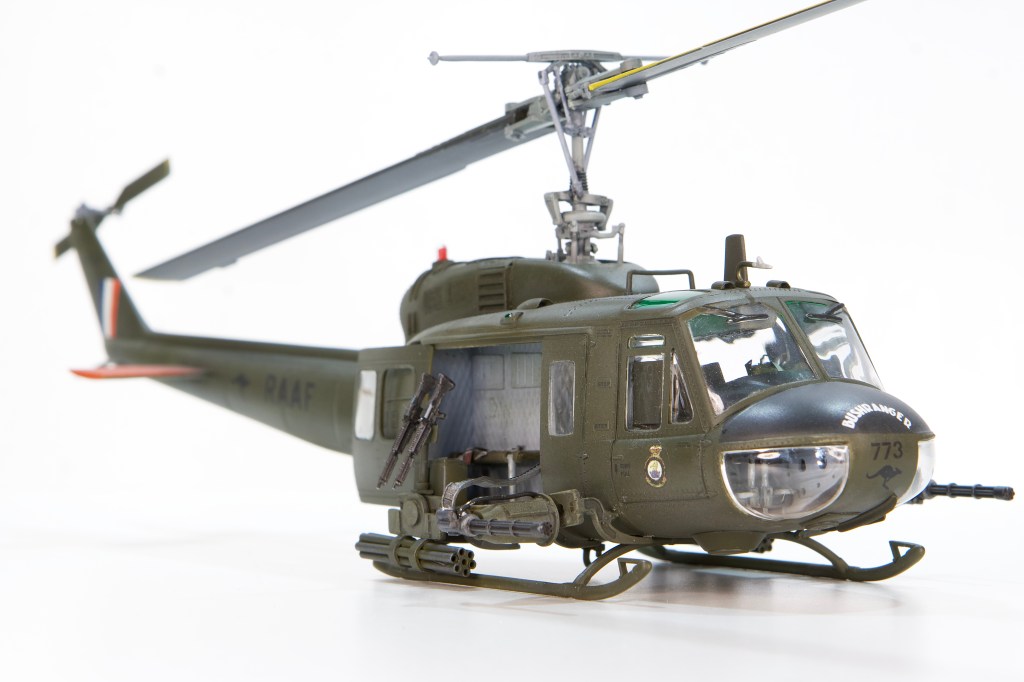
The only other colour applied was the black on the roof and the anti-glare on the nose. I used Nato Black for the roof to represent the fading. In the nose I used regular black at the lower edges and faded it to Nato Black at the top where it would have been exposed to the full sun.
After the paint had cured off nicely I glossed the airframe up for the decals. At this point it was starting to look very nice and I was pretty pleased with it to be honest.
Markings
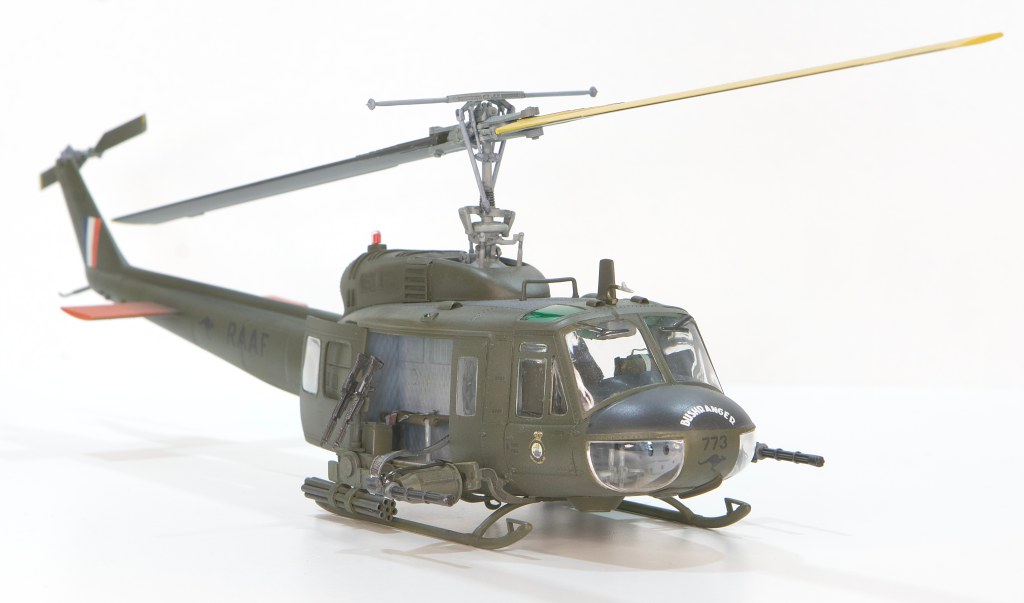
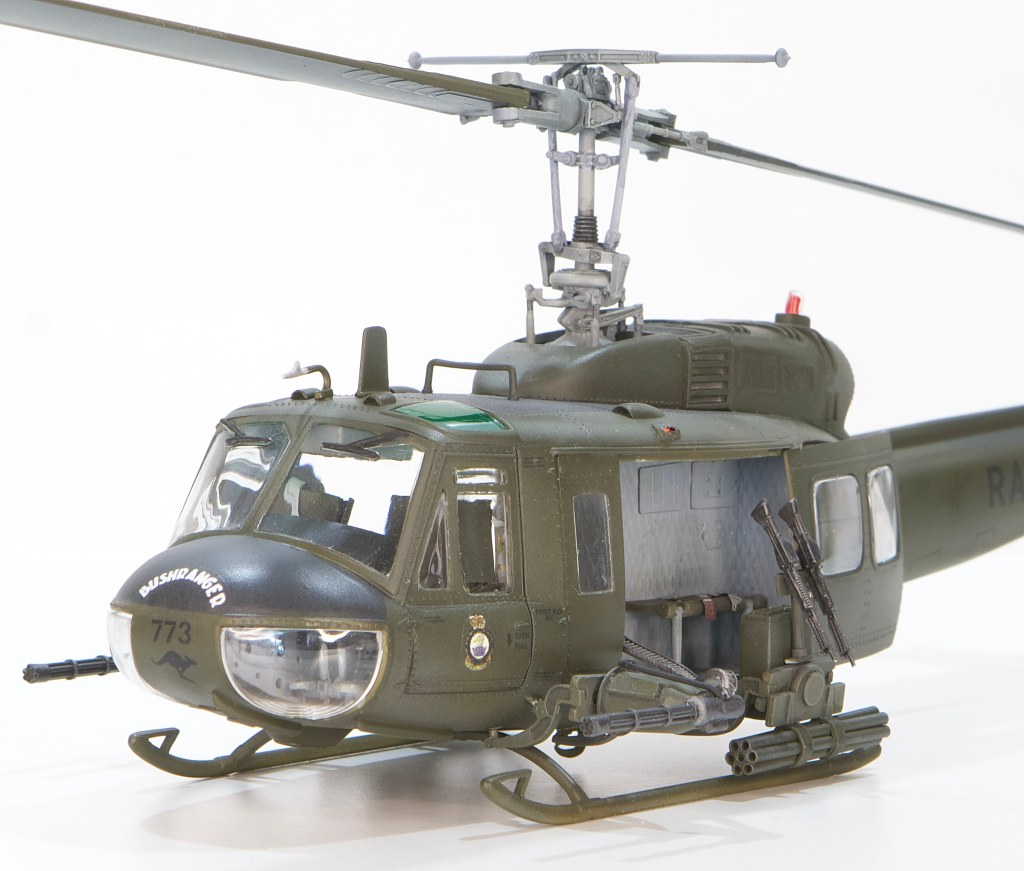
The markings came from a Hawkeye decals set. They were extremely thin and quite tricky to apply. Infairness, this is acknowledged in the instructions and there’s a very handy text explaining the best way to apply them. Nonetheless, great care needs to be taken lest they curl up or stick fast before reaching their final position. Example; the RAAF decal on the port side should be in line with the tail boom’s angle but it stuck where it was and I couldn’t move it.


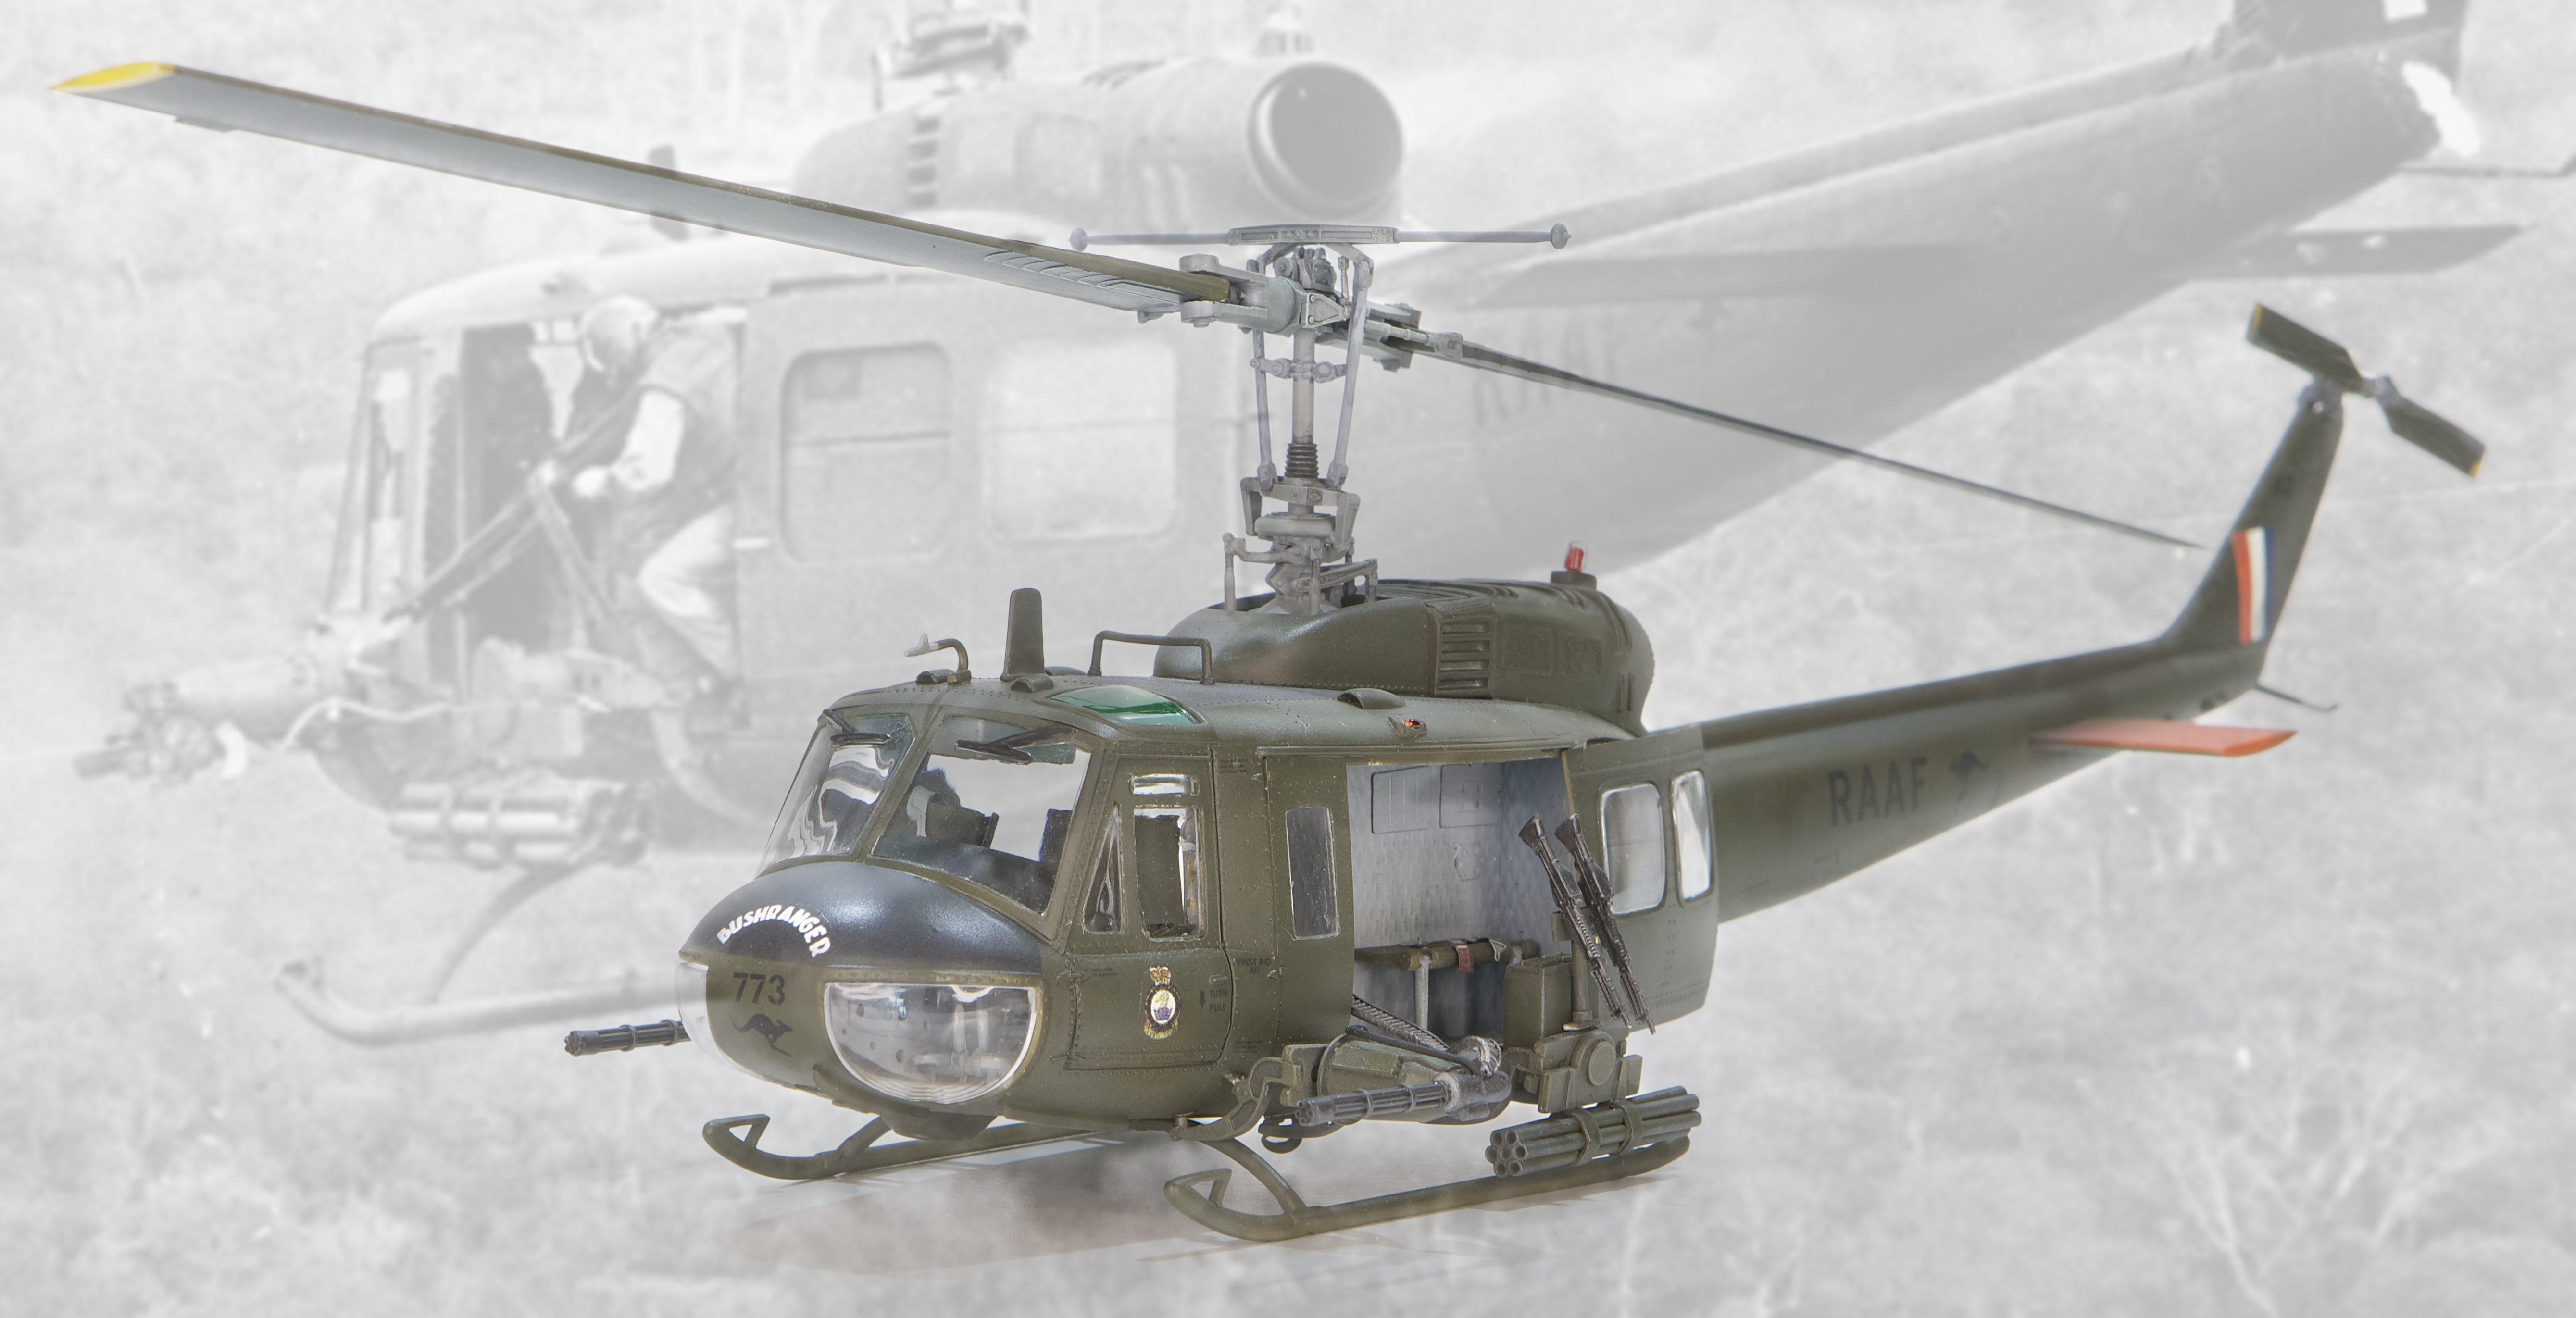
The starboard RAAF is in the right spot… I didn’t use the Hawkeye decals for the stencils opting instead for the kit stencils matched to where the the Hawkeye instructions pointed them. The finishing touch is “BUSHRANGER” in the nose, along with 773.
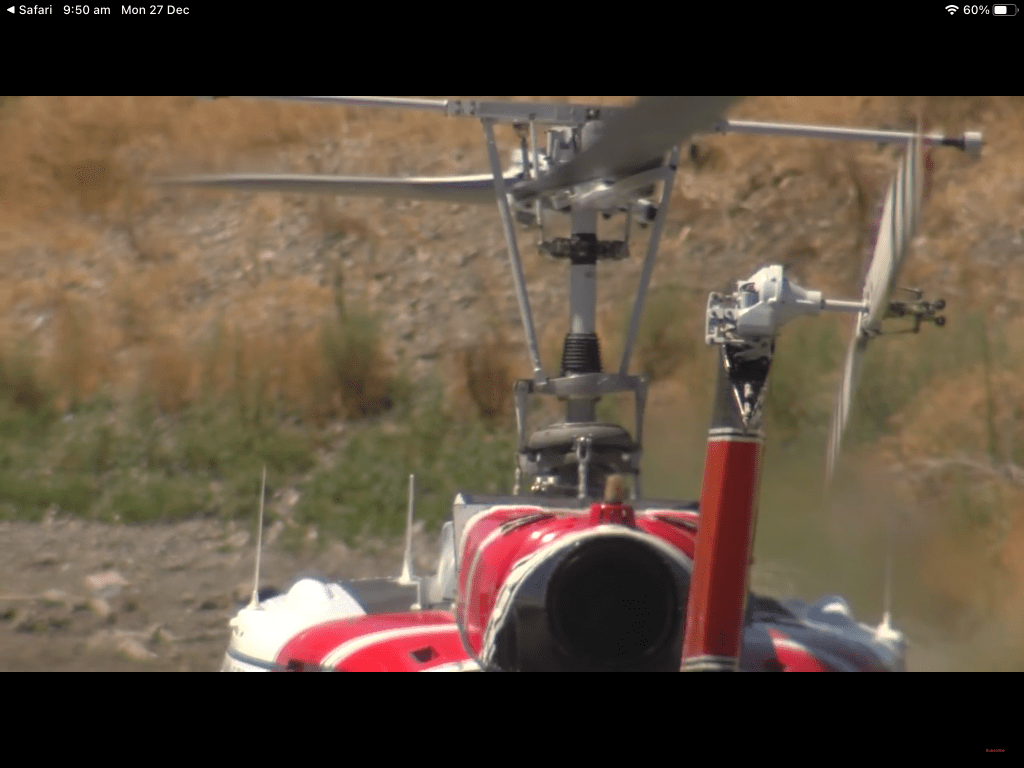
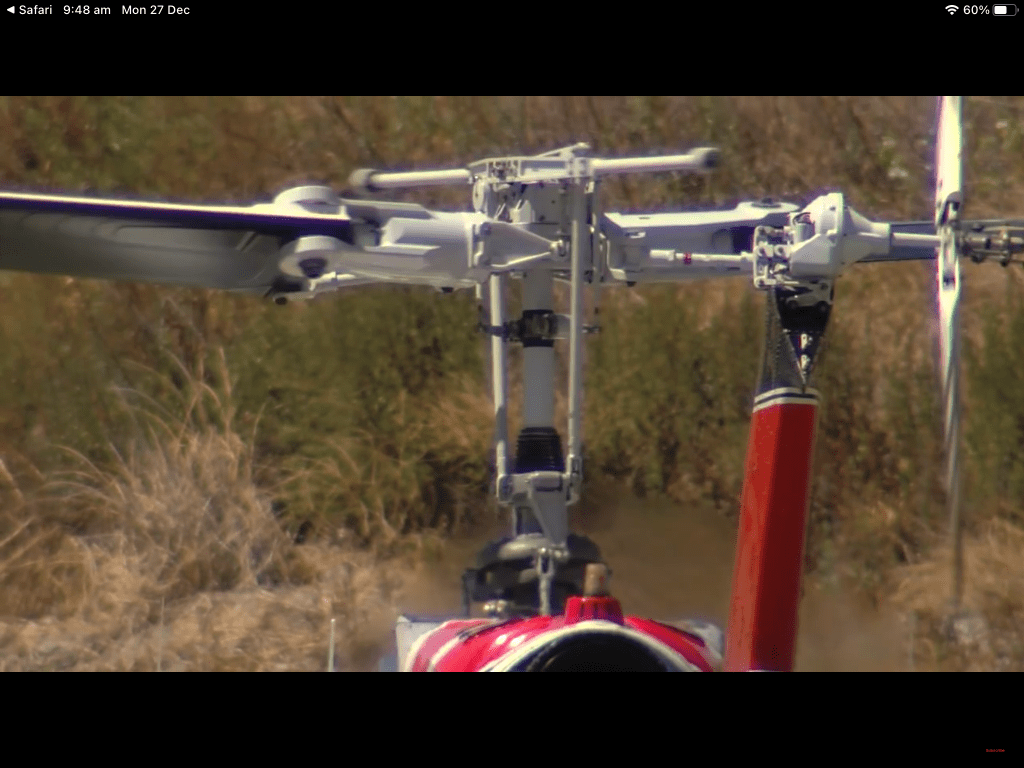
Back to the Main Rotor Head
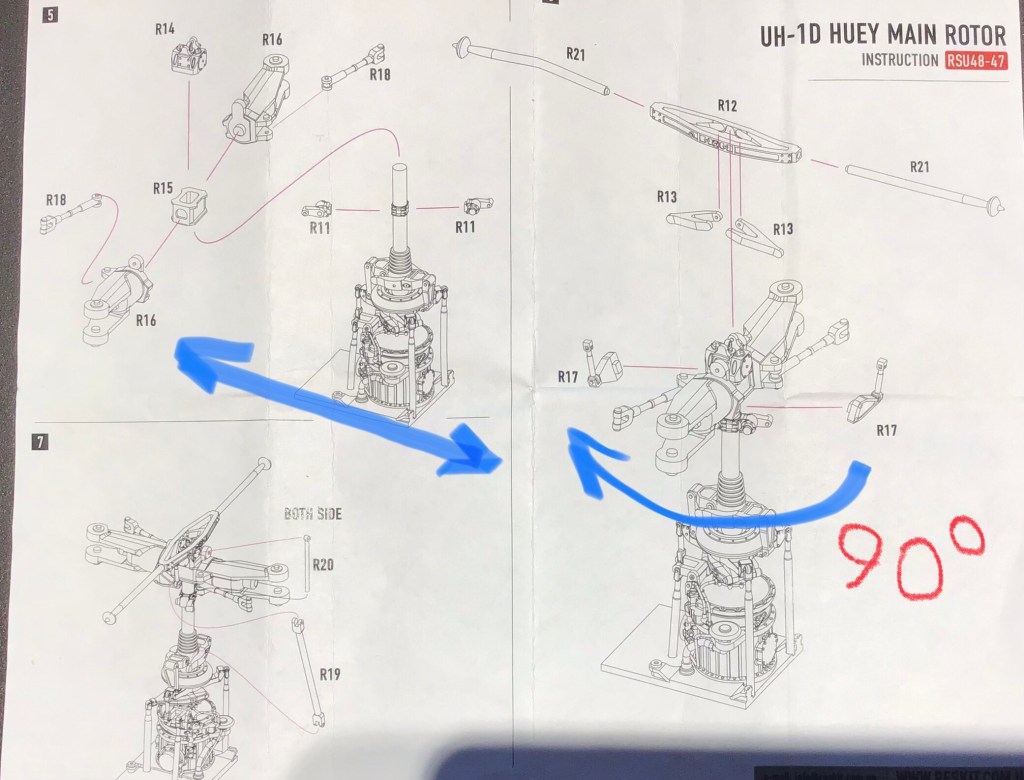
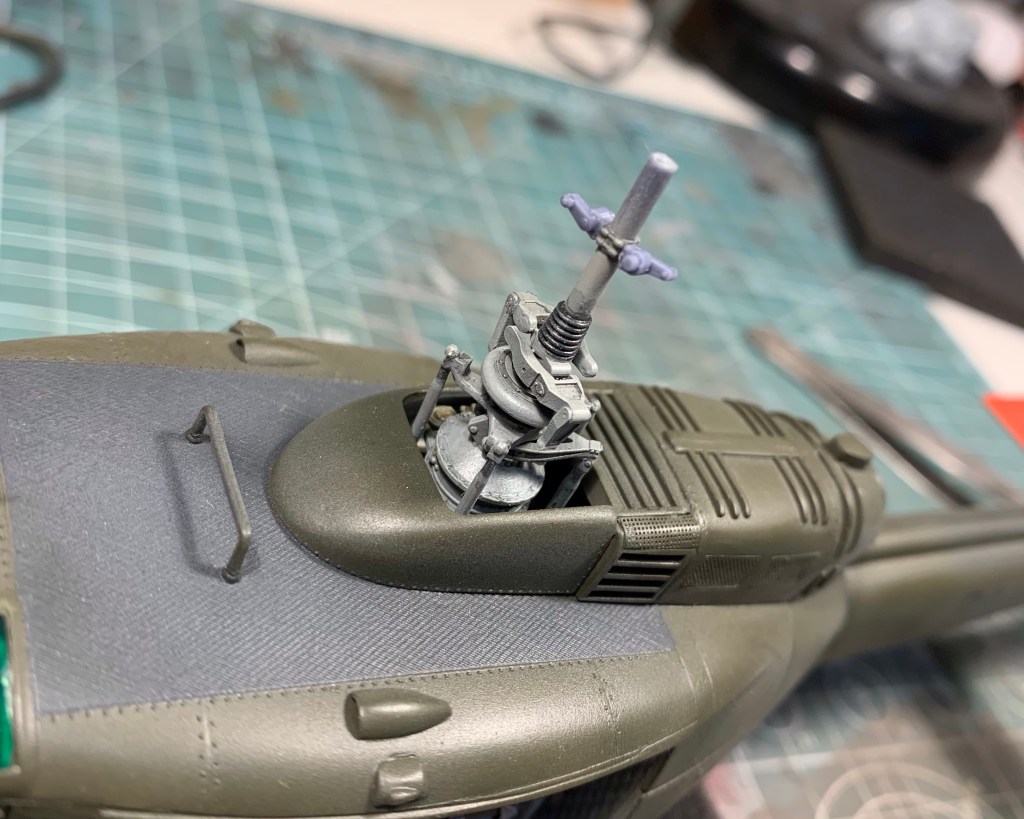
It was at around this point that I discovered a problem with the MRH assembly. Having built the top section I dry-fitted it to the lower section and found that it was 90deg form where I needed it to be in order to display the model with the bladed fore/aft as they were normal stowed. In checking the instructions I’d assembed the lower part correctly but the instructions were wrong. I checked my findings by cutting a couple of frames out of the Huey video and sure enough found that my MRH needed to be fixed.
It turned out to be easier than I expected; I removed the shaft form the swash plate quite easily by naming a blade into the join and gently twisting. Once it was removed, all I needed to do was regale it 90deg rotated from where it had been and all was good.
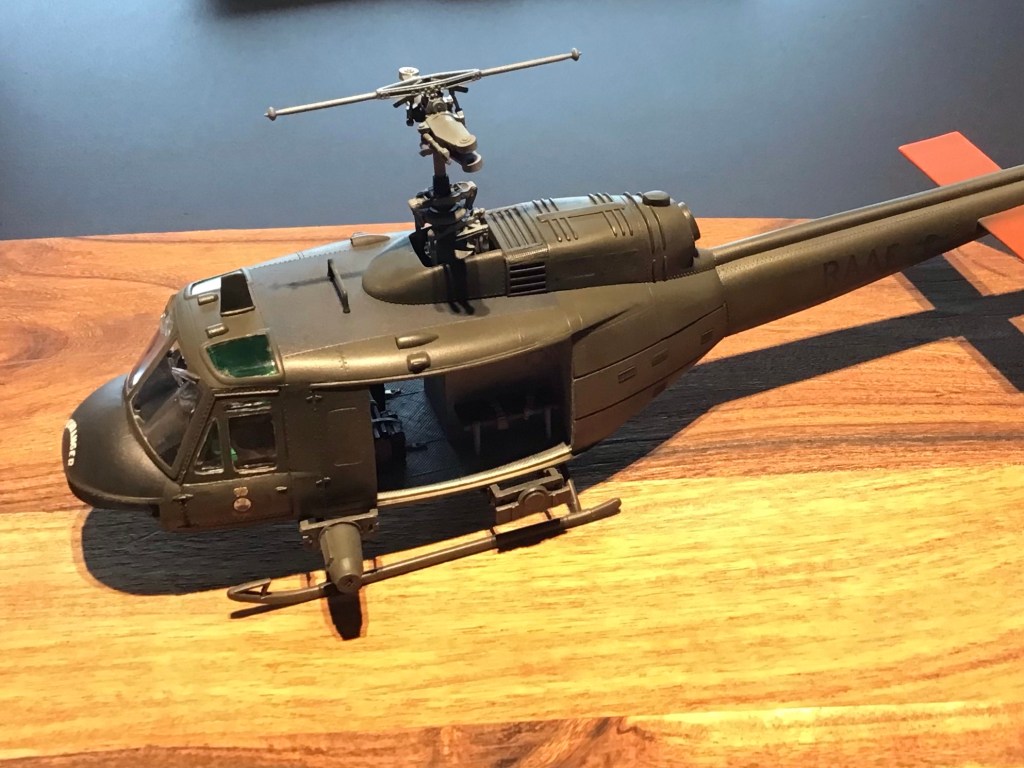

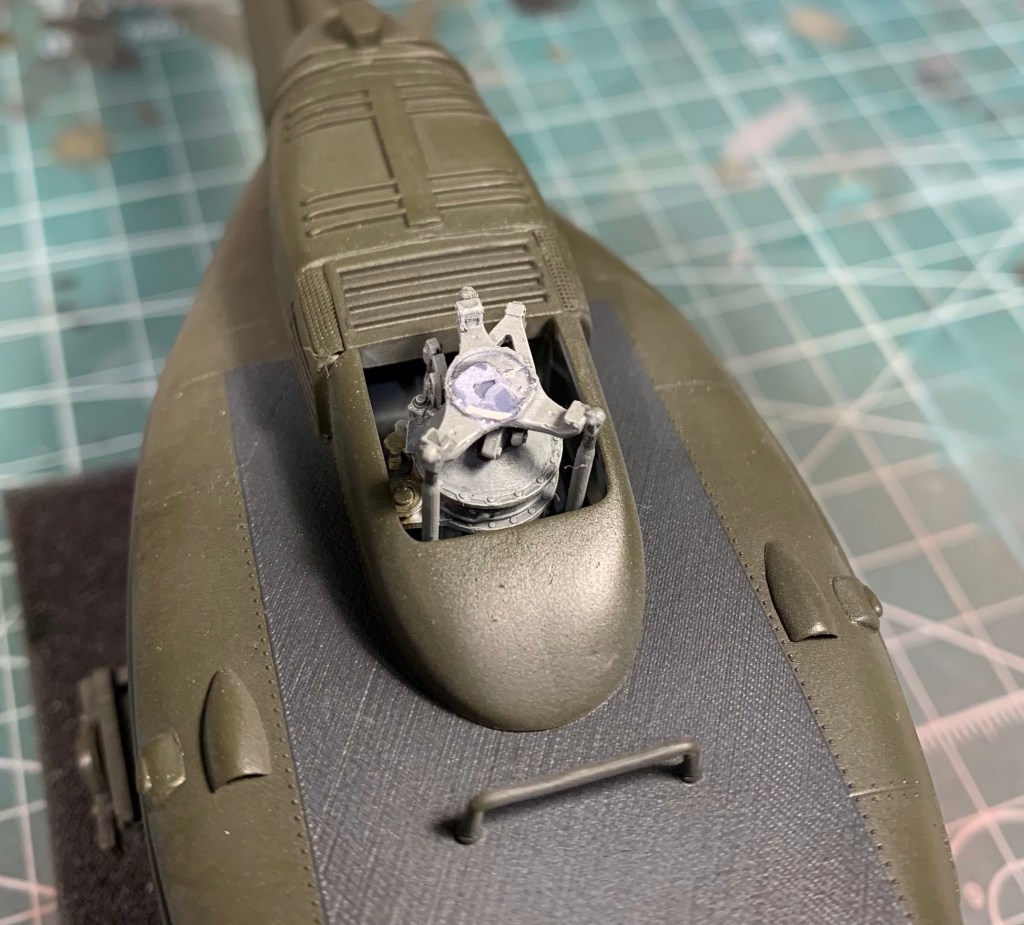


A quick test fit of the blades showed all was in the correct place now.
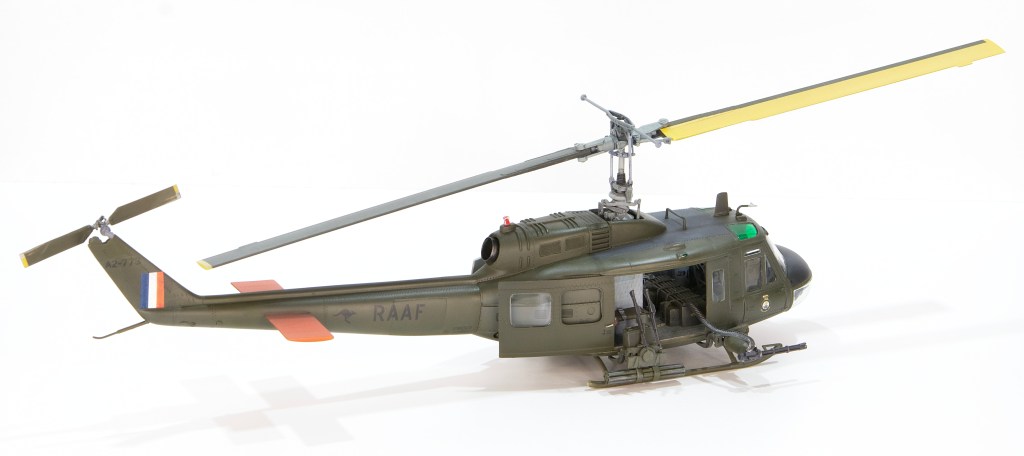
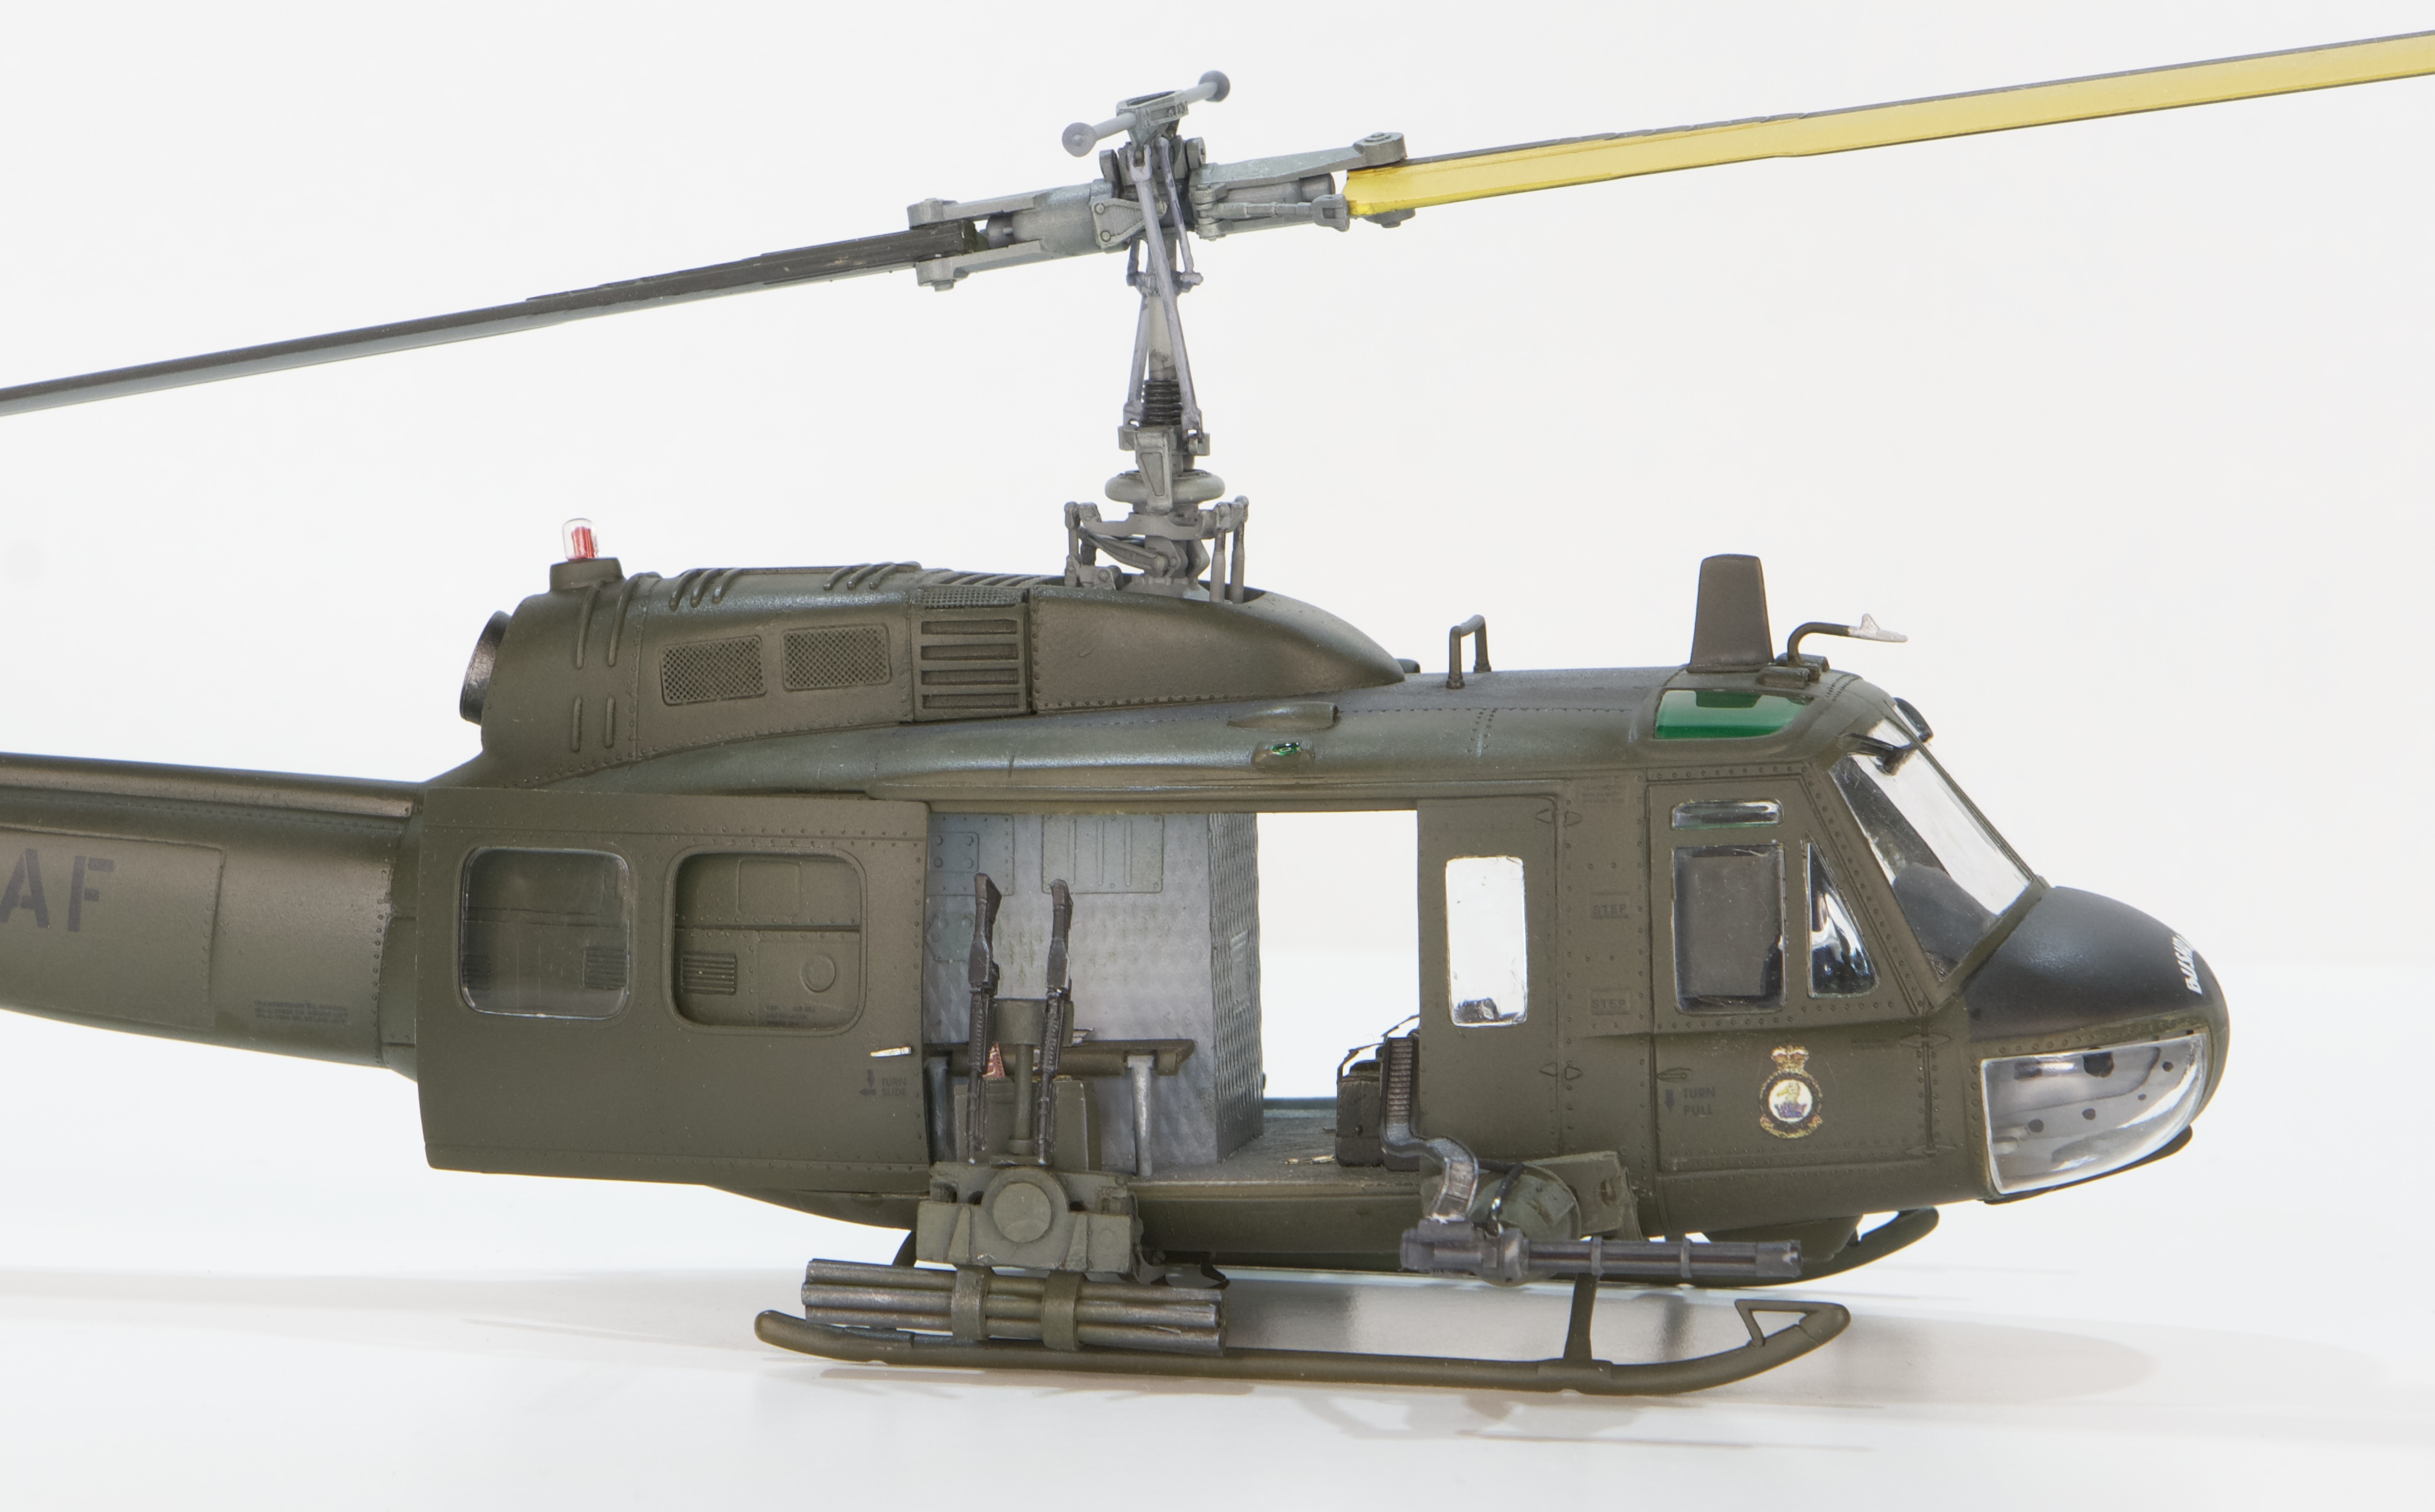
The blades themselves were from the kit, though adapted to connect to the Reskit rotor head. Interestingly, the RAAF painted one blade’s upper surface yellow, I assume also for recognition purposes.

I replicated the yellow on one blade and weathered them lightly. The photo below actually doesn’t do them justice but there’s a subtle streaking on both blades to represent the wear and tear.

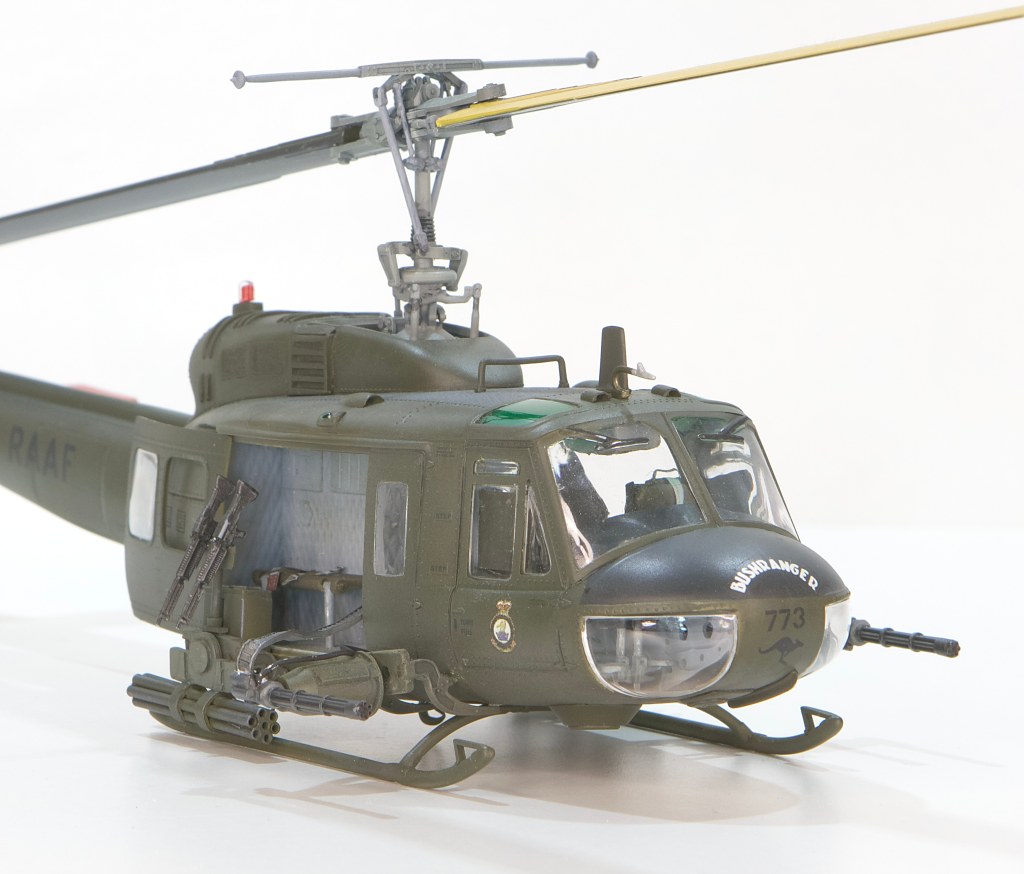
Weapons Systems
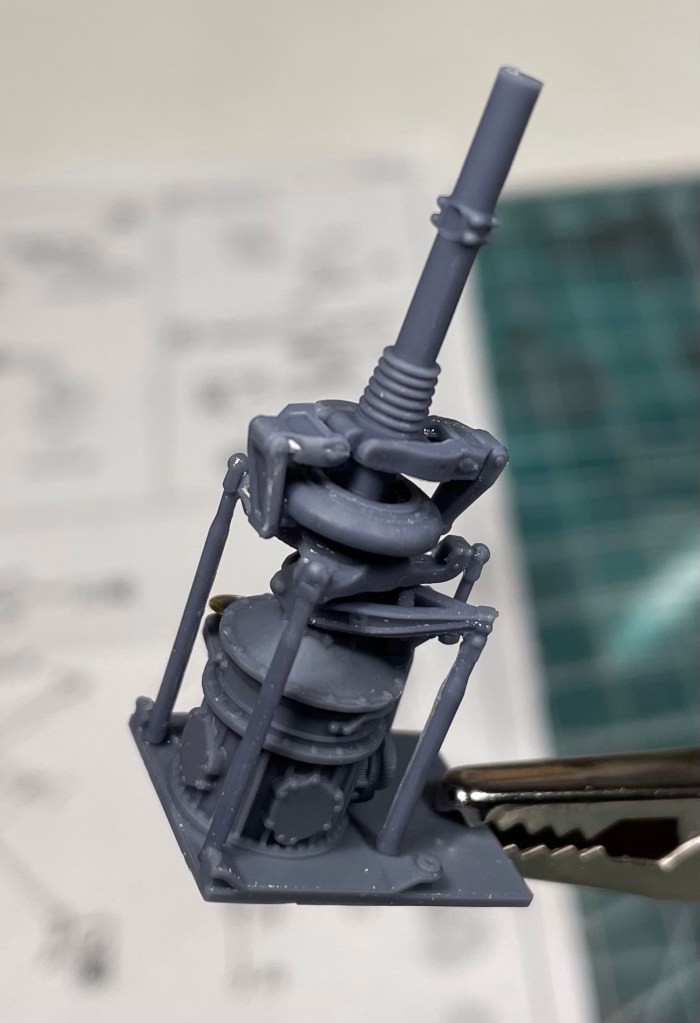
The weapons systems were the Bushranger’s raison d’être and I wanted to do them justice. Unfortunately the resin I’d bought was simply unusable. The picture below shows a sample of the issues with it, from the poorly mastered ammo boxes to the bubbles and other imperfections in the rockets and mini-guns.
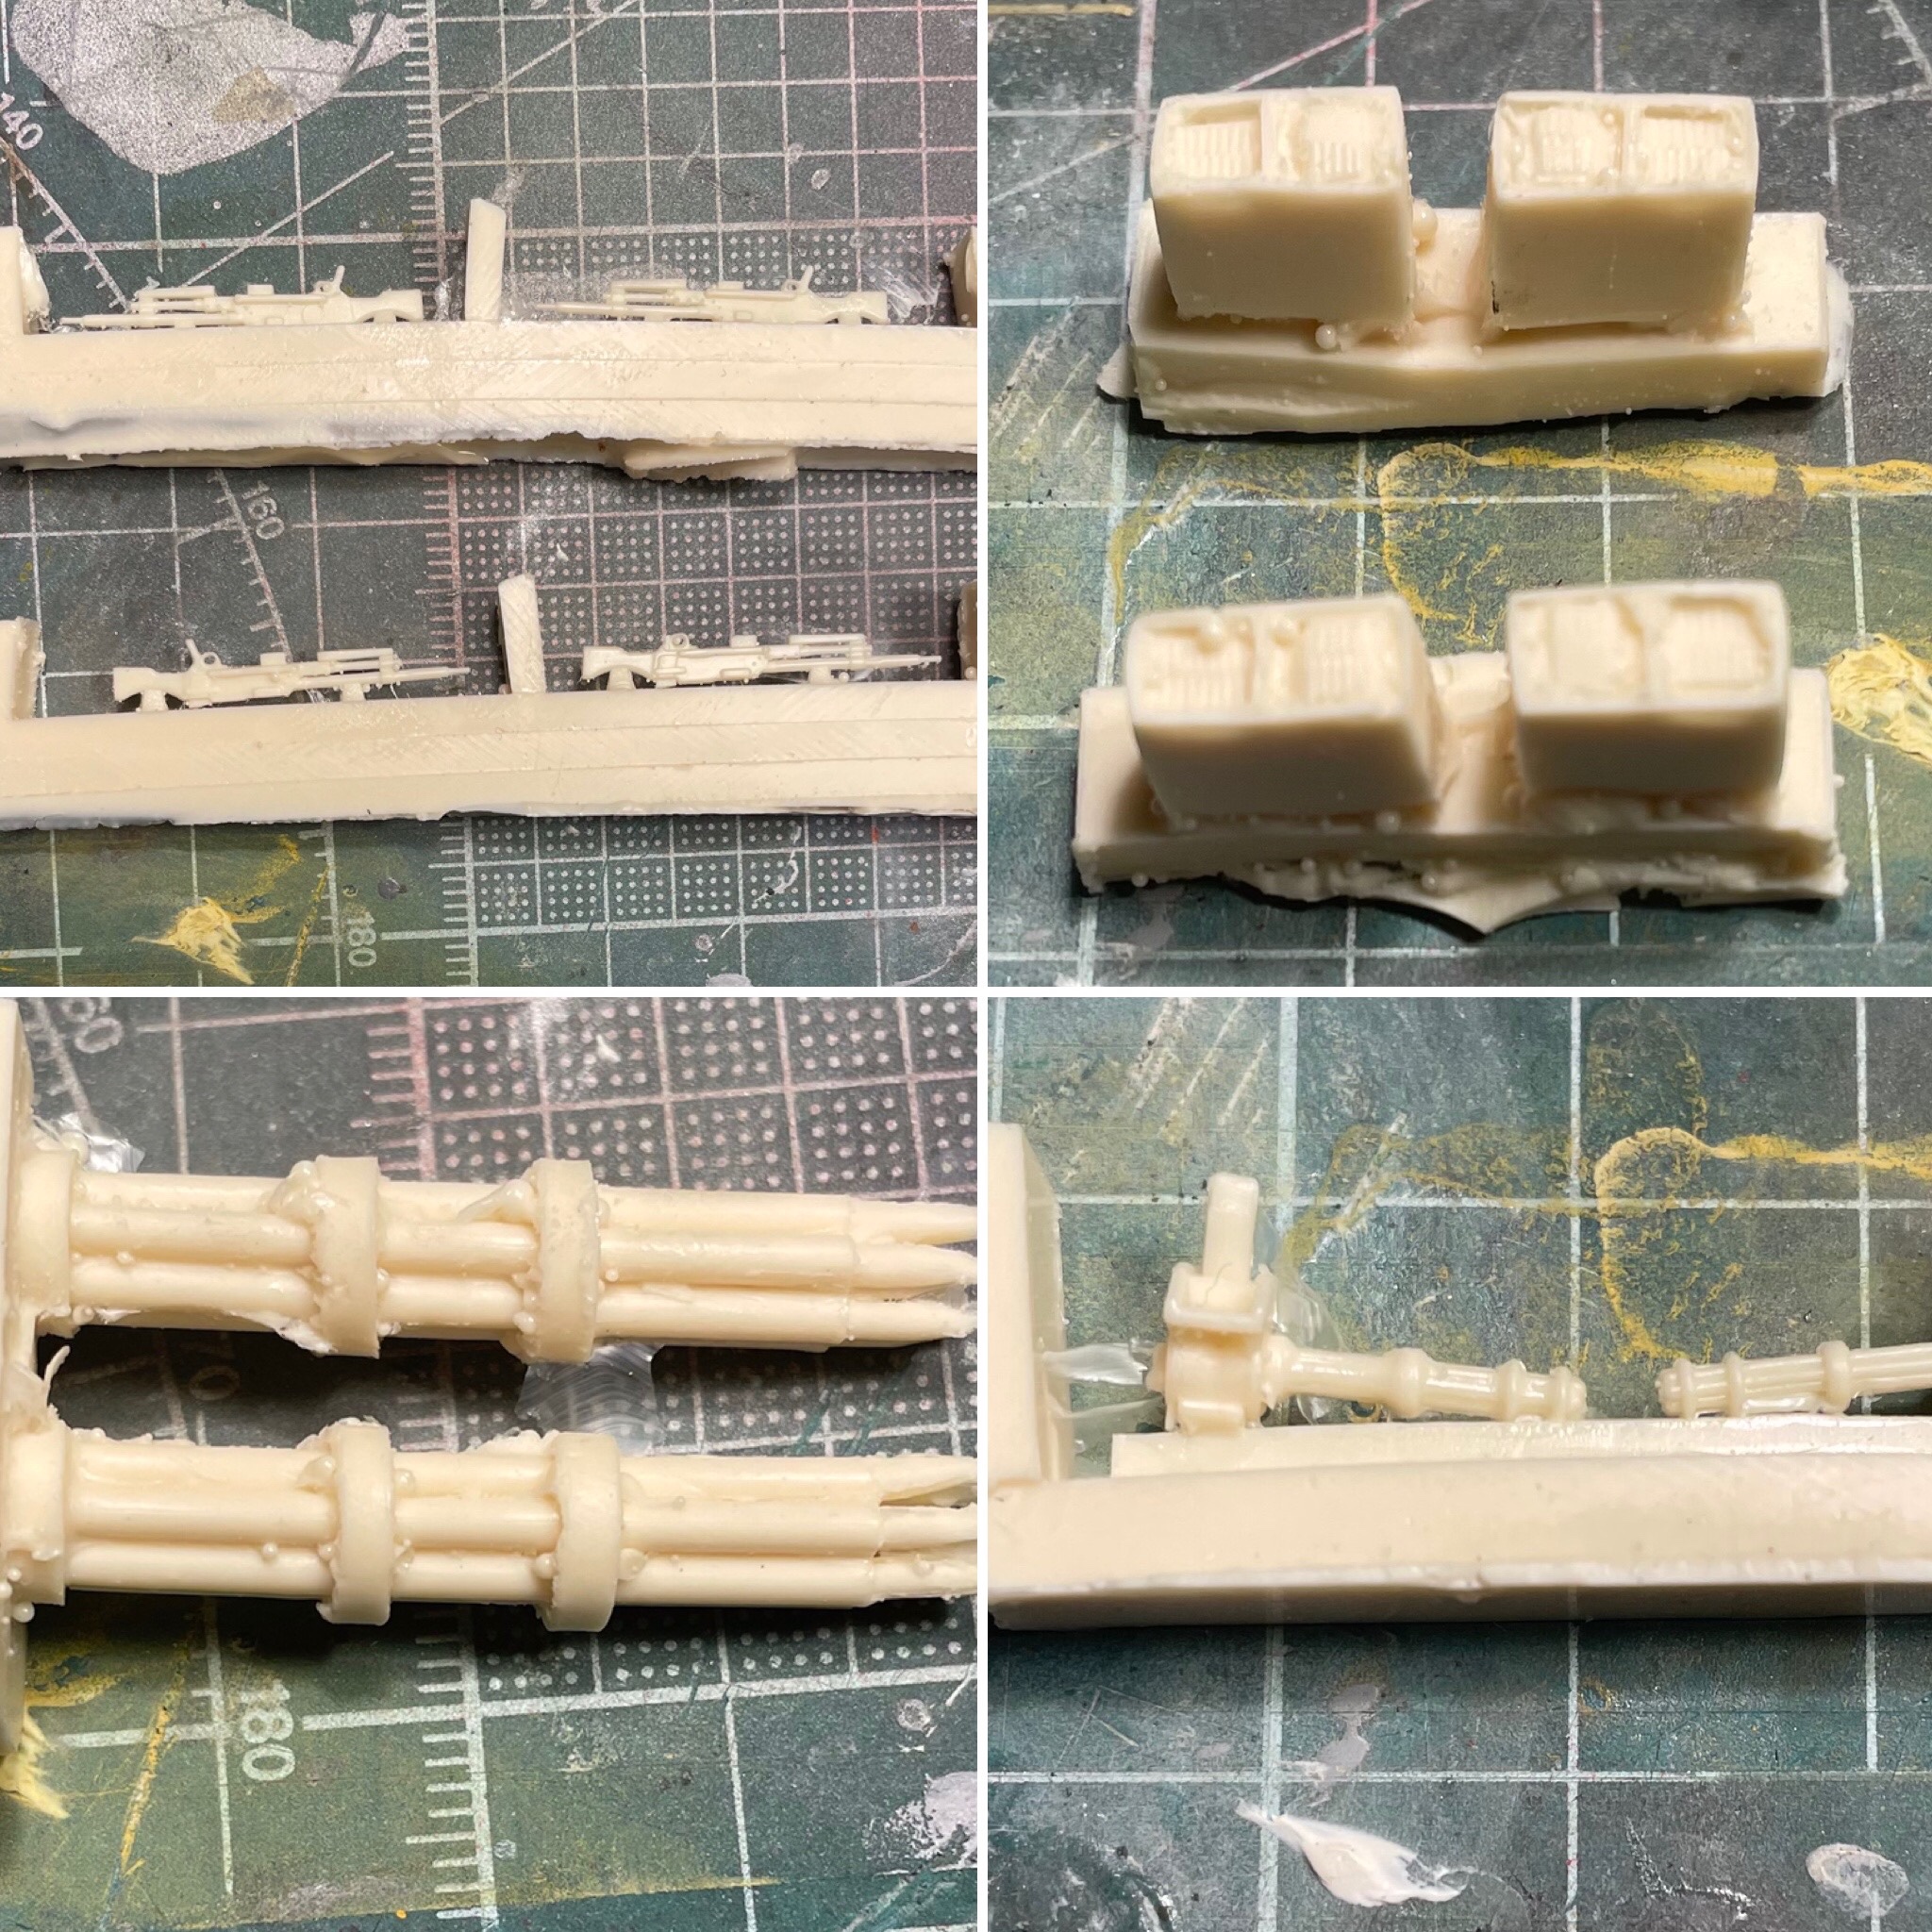
The only usable parts from the resin set were the mounts, luckily the only parts I wasn’t sure I could scratch-build. They weren’t perfect mind you, but they were usable so I quickly assembled and painted them.
Attaching the mounts to the airframe was a little tricky, but with patience I got all but the starboard mini-gun frame mounted square and true; try as I might I could not get that one mounted as well as I’d like but it is what it is.

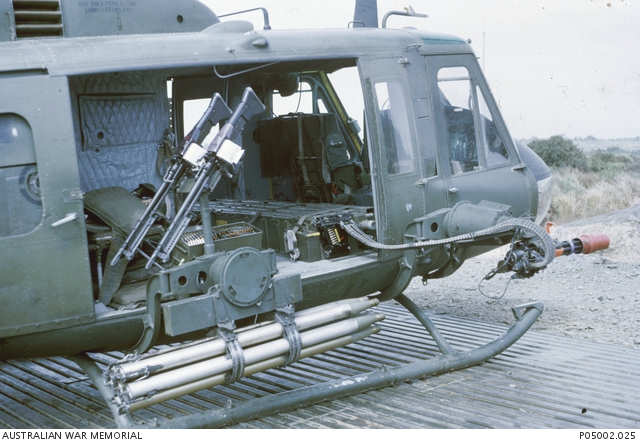
In lieu of resin, I went back to the online marketplace and ordered CMK mini-guns as well as M-60s and ammo feed lines. I decided to scratch-build the various mounting hardware and ammo boxes and began with the rockets. What I was aiming at is in the image below of 377.
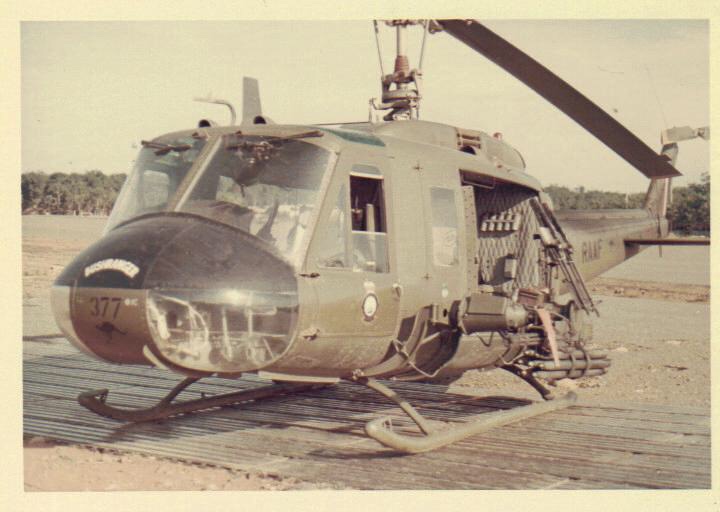
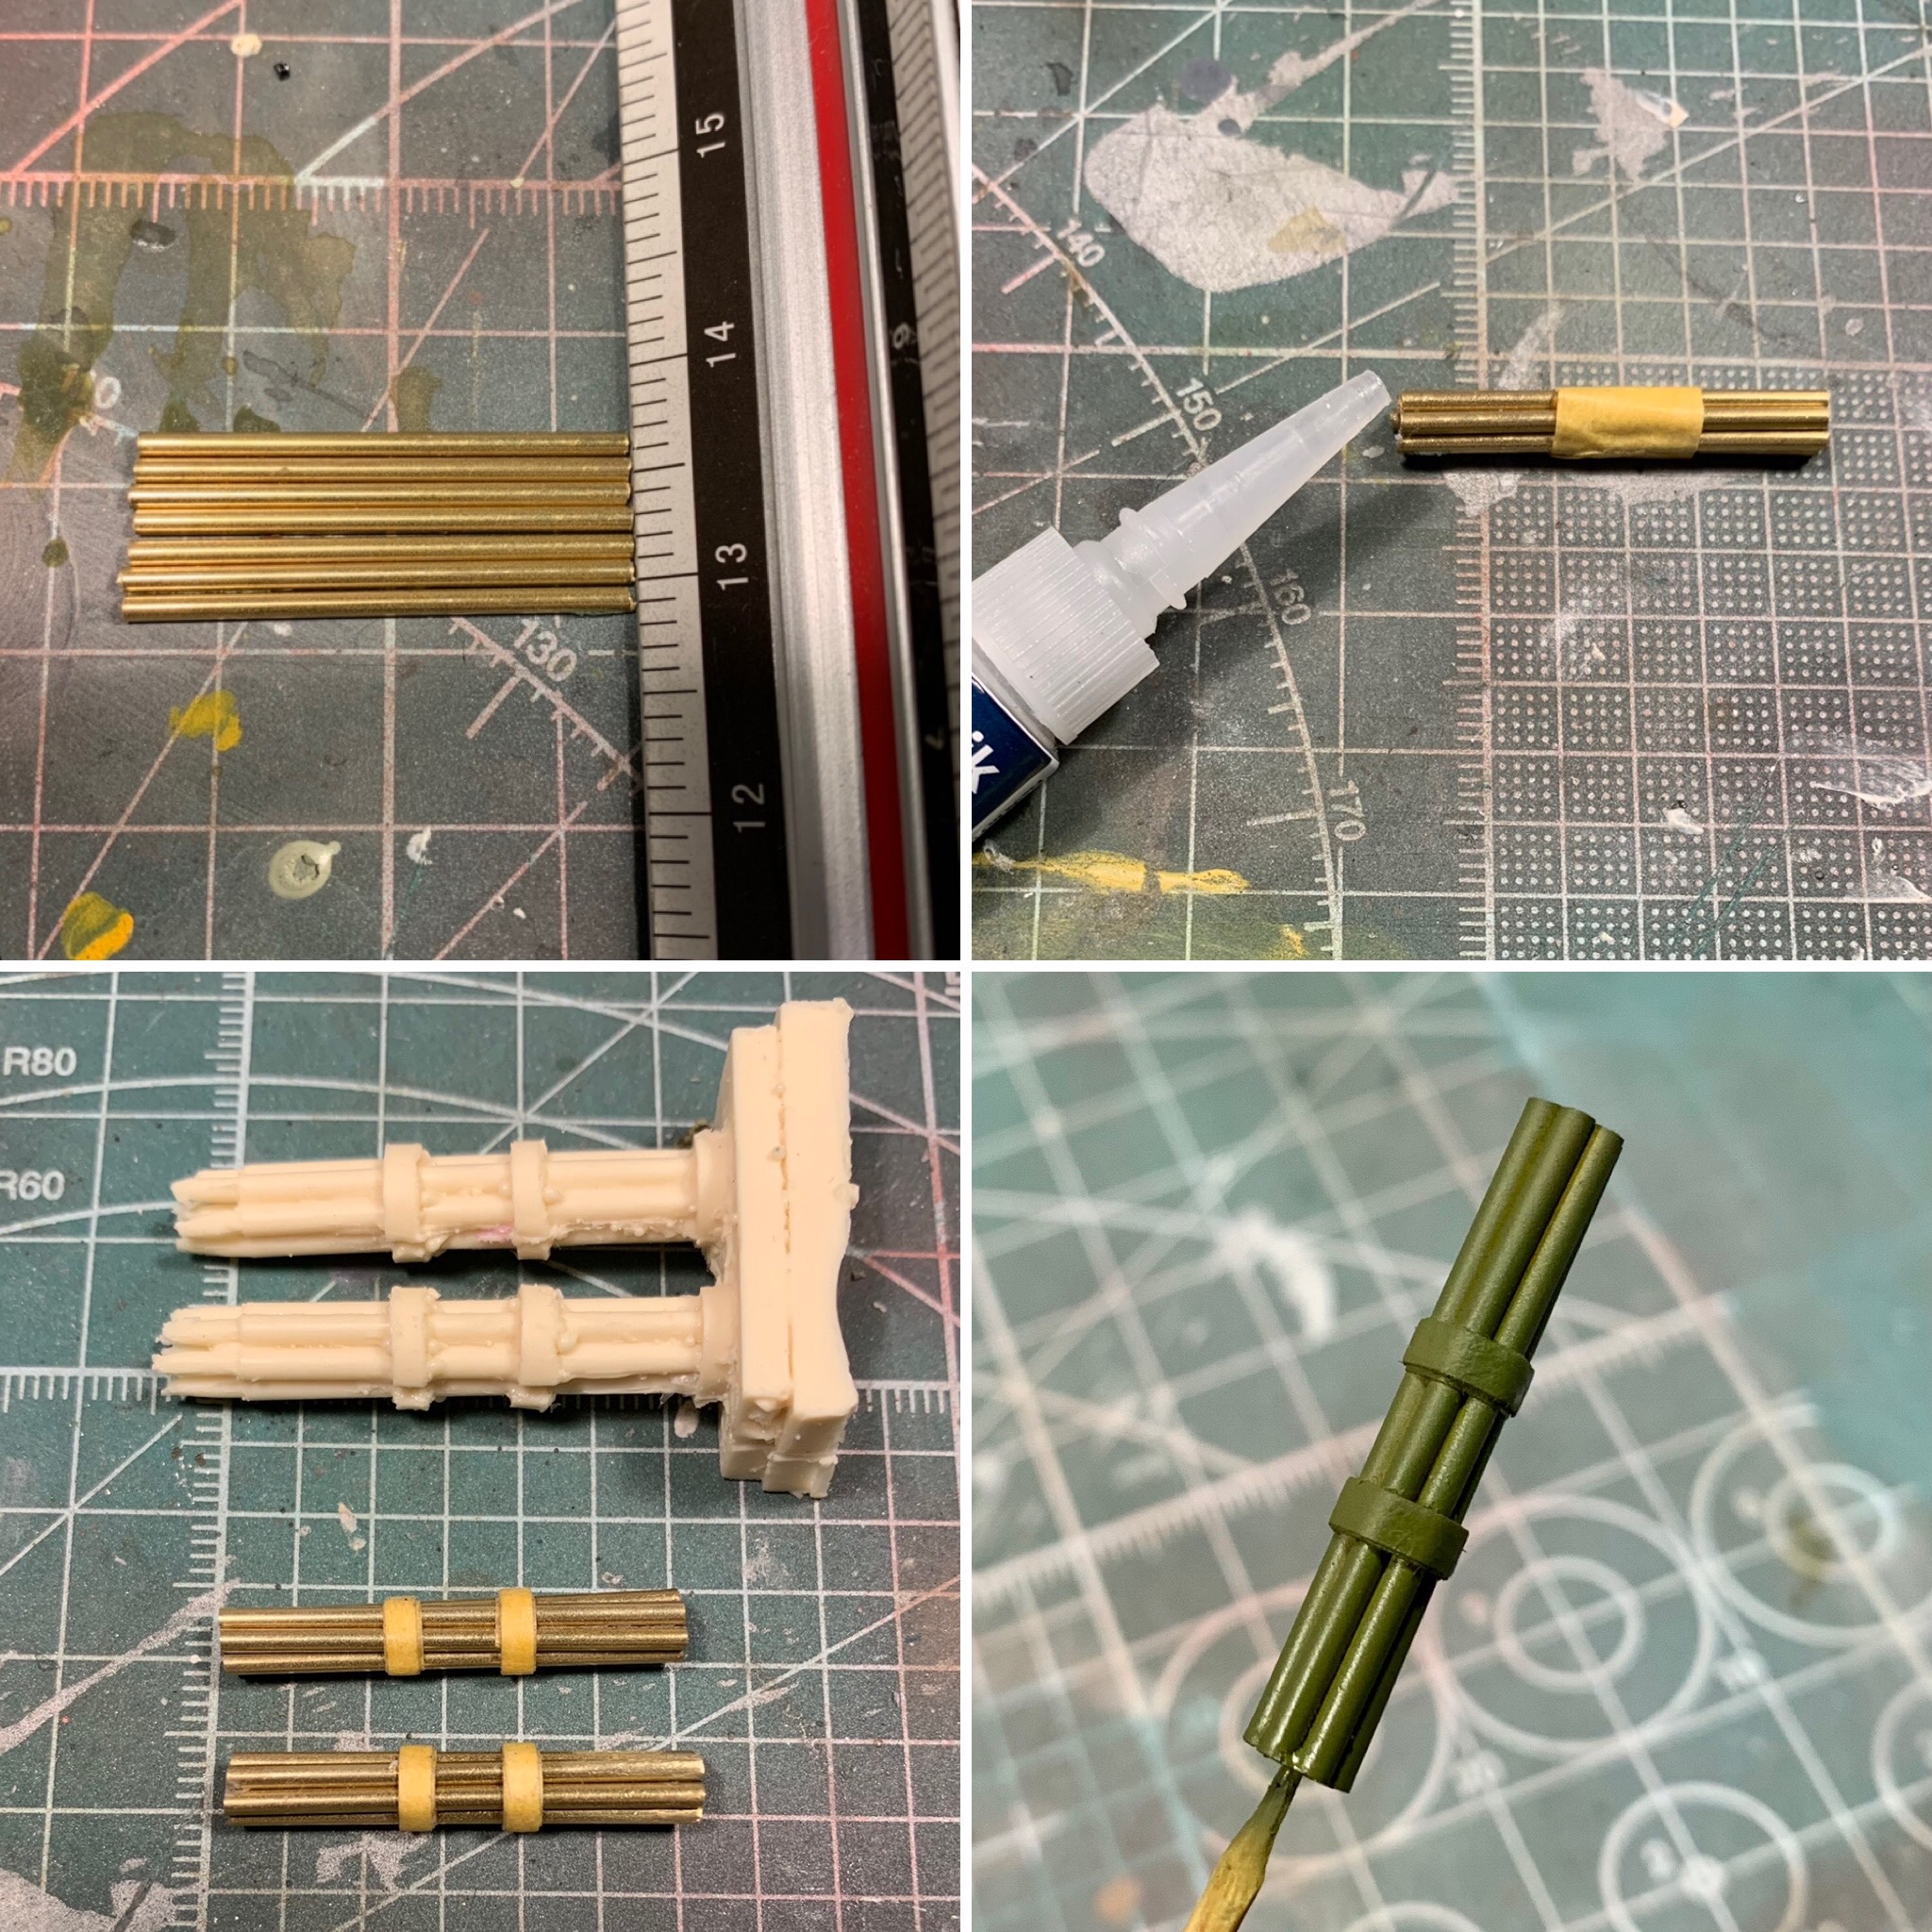
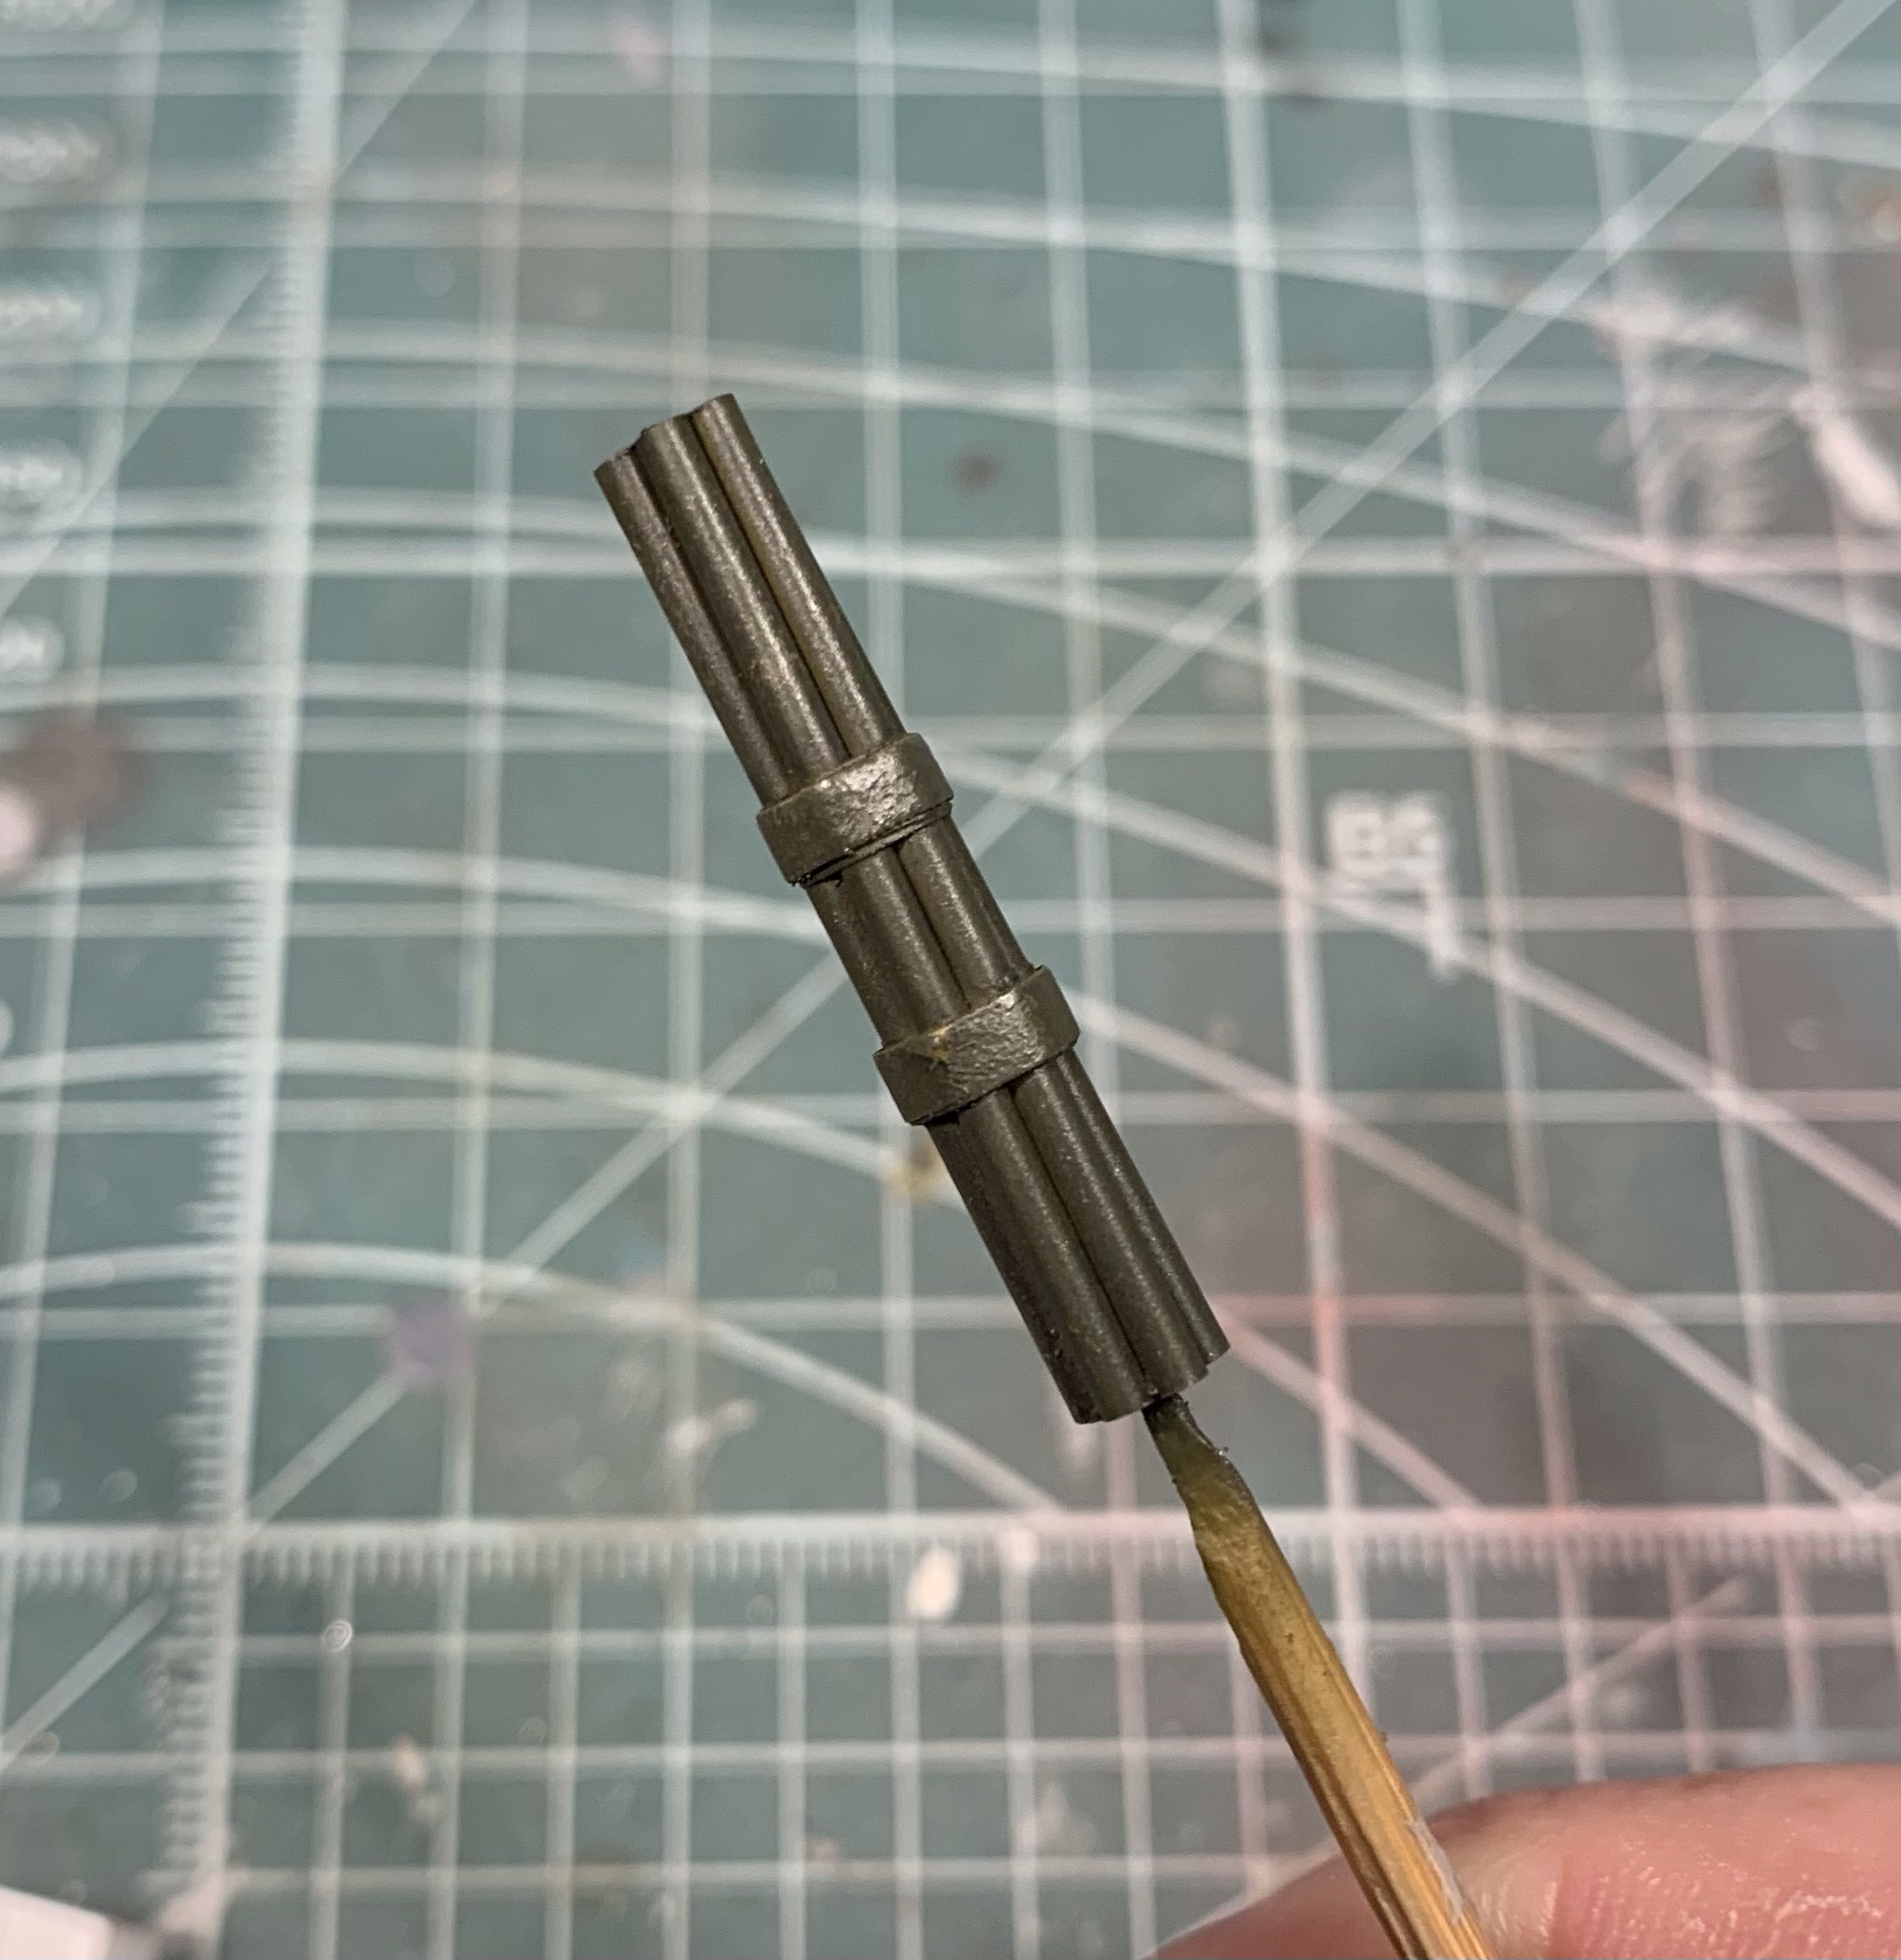
I began by cutting brass tube to length, then bundled the tubes and held them with a piece of Tamiya tape. I then worked some CA glue in each end between the tubes to glue them together before using measured and cut Tamiya tape the represent the banding used on the real thing. After a bit of paint and weathering, I think they came out very well.
Next was the ammo boxes and mount for the M-60s.
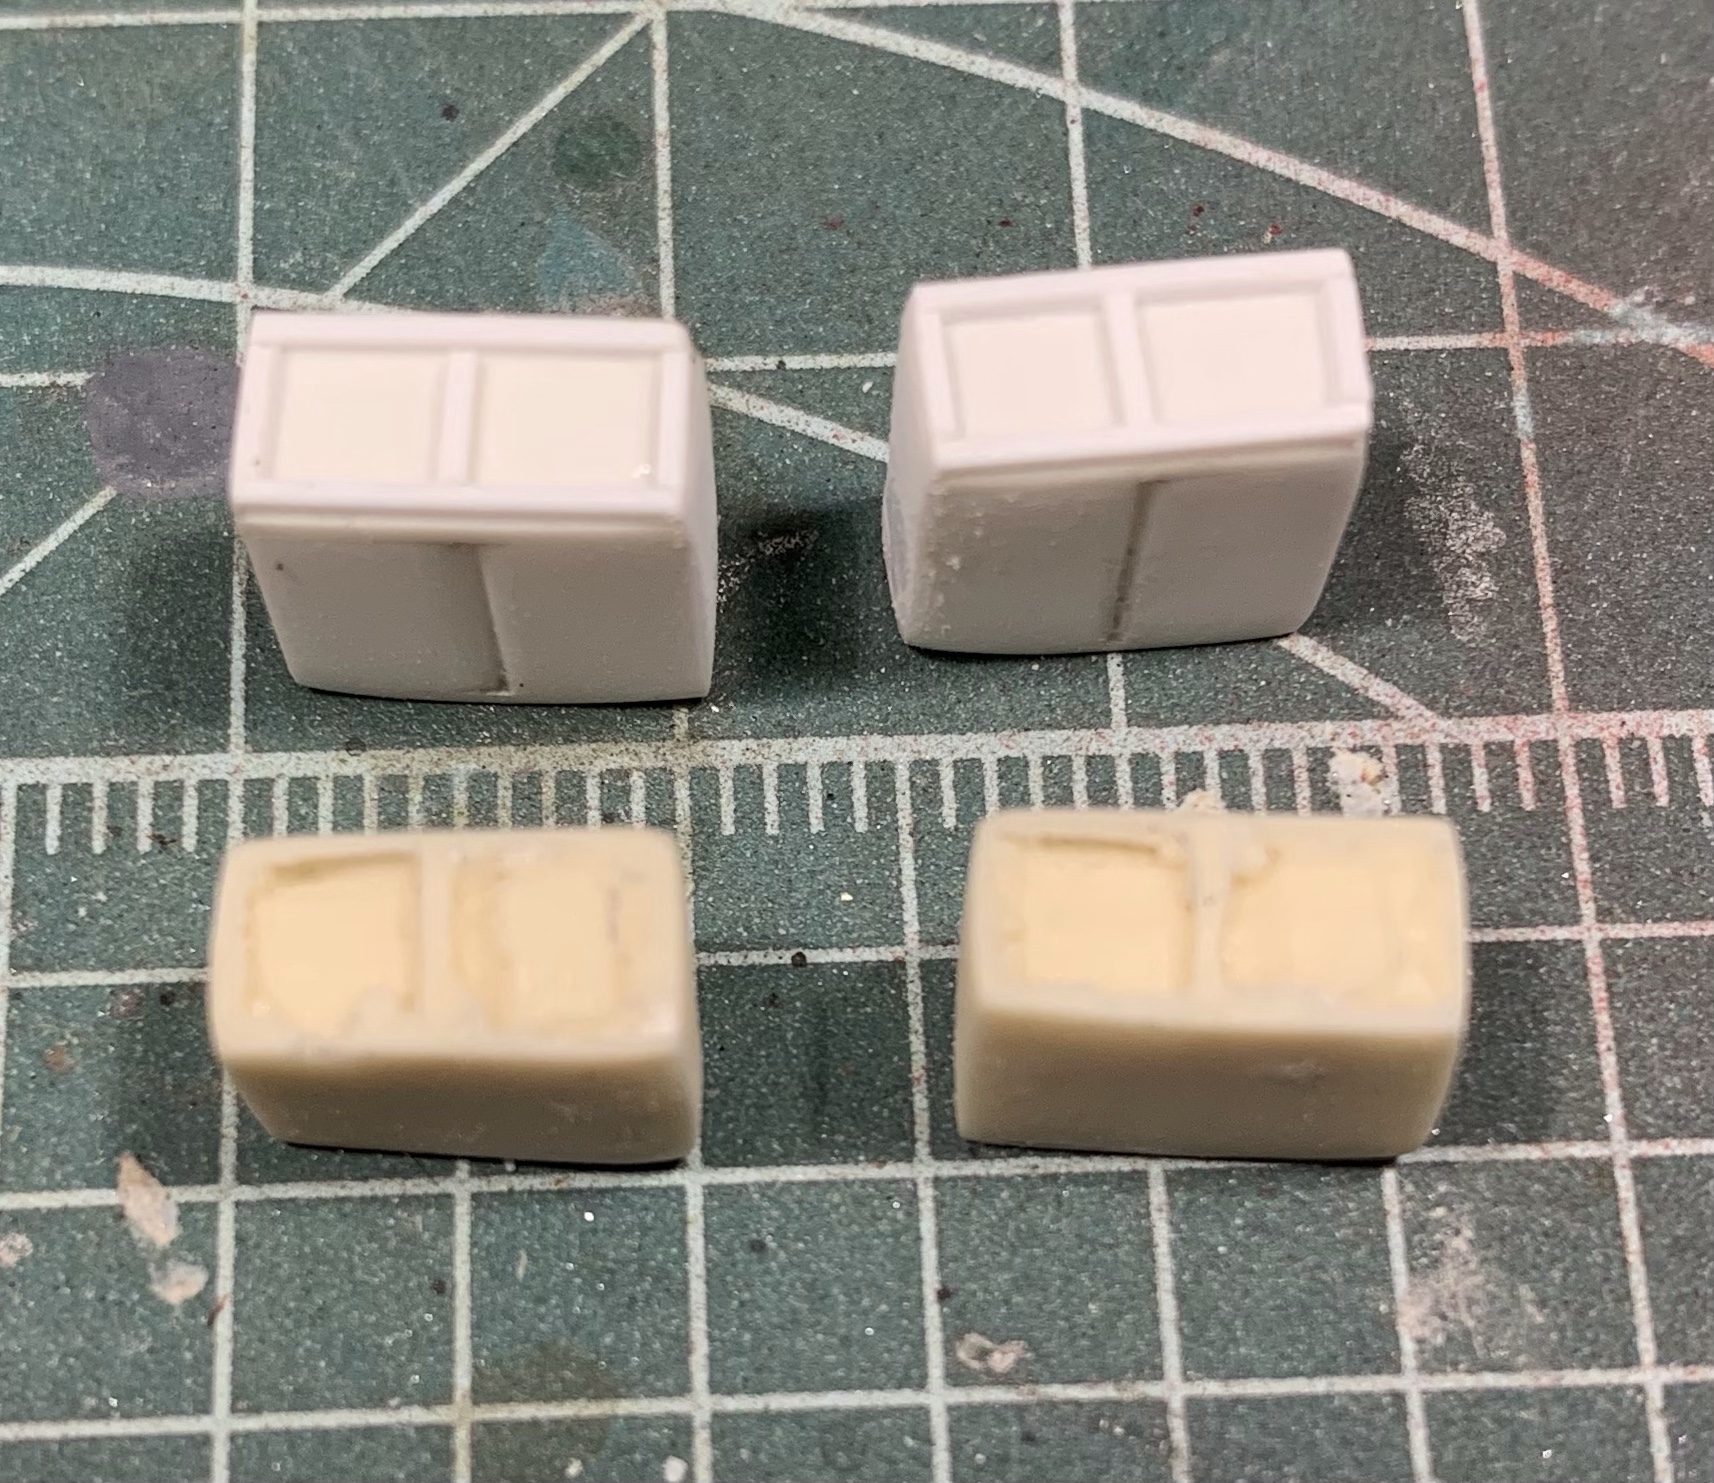
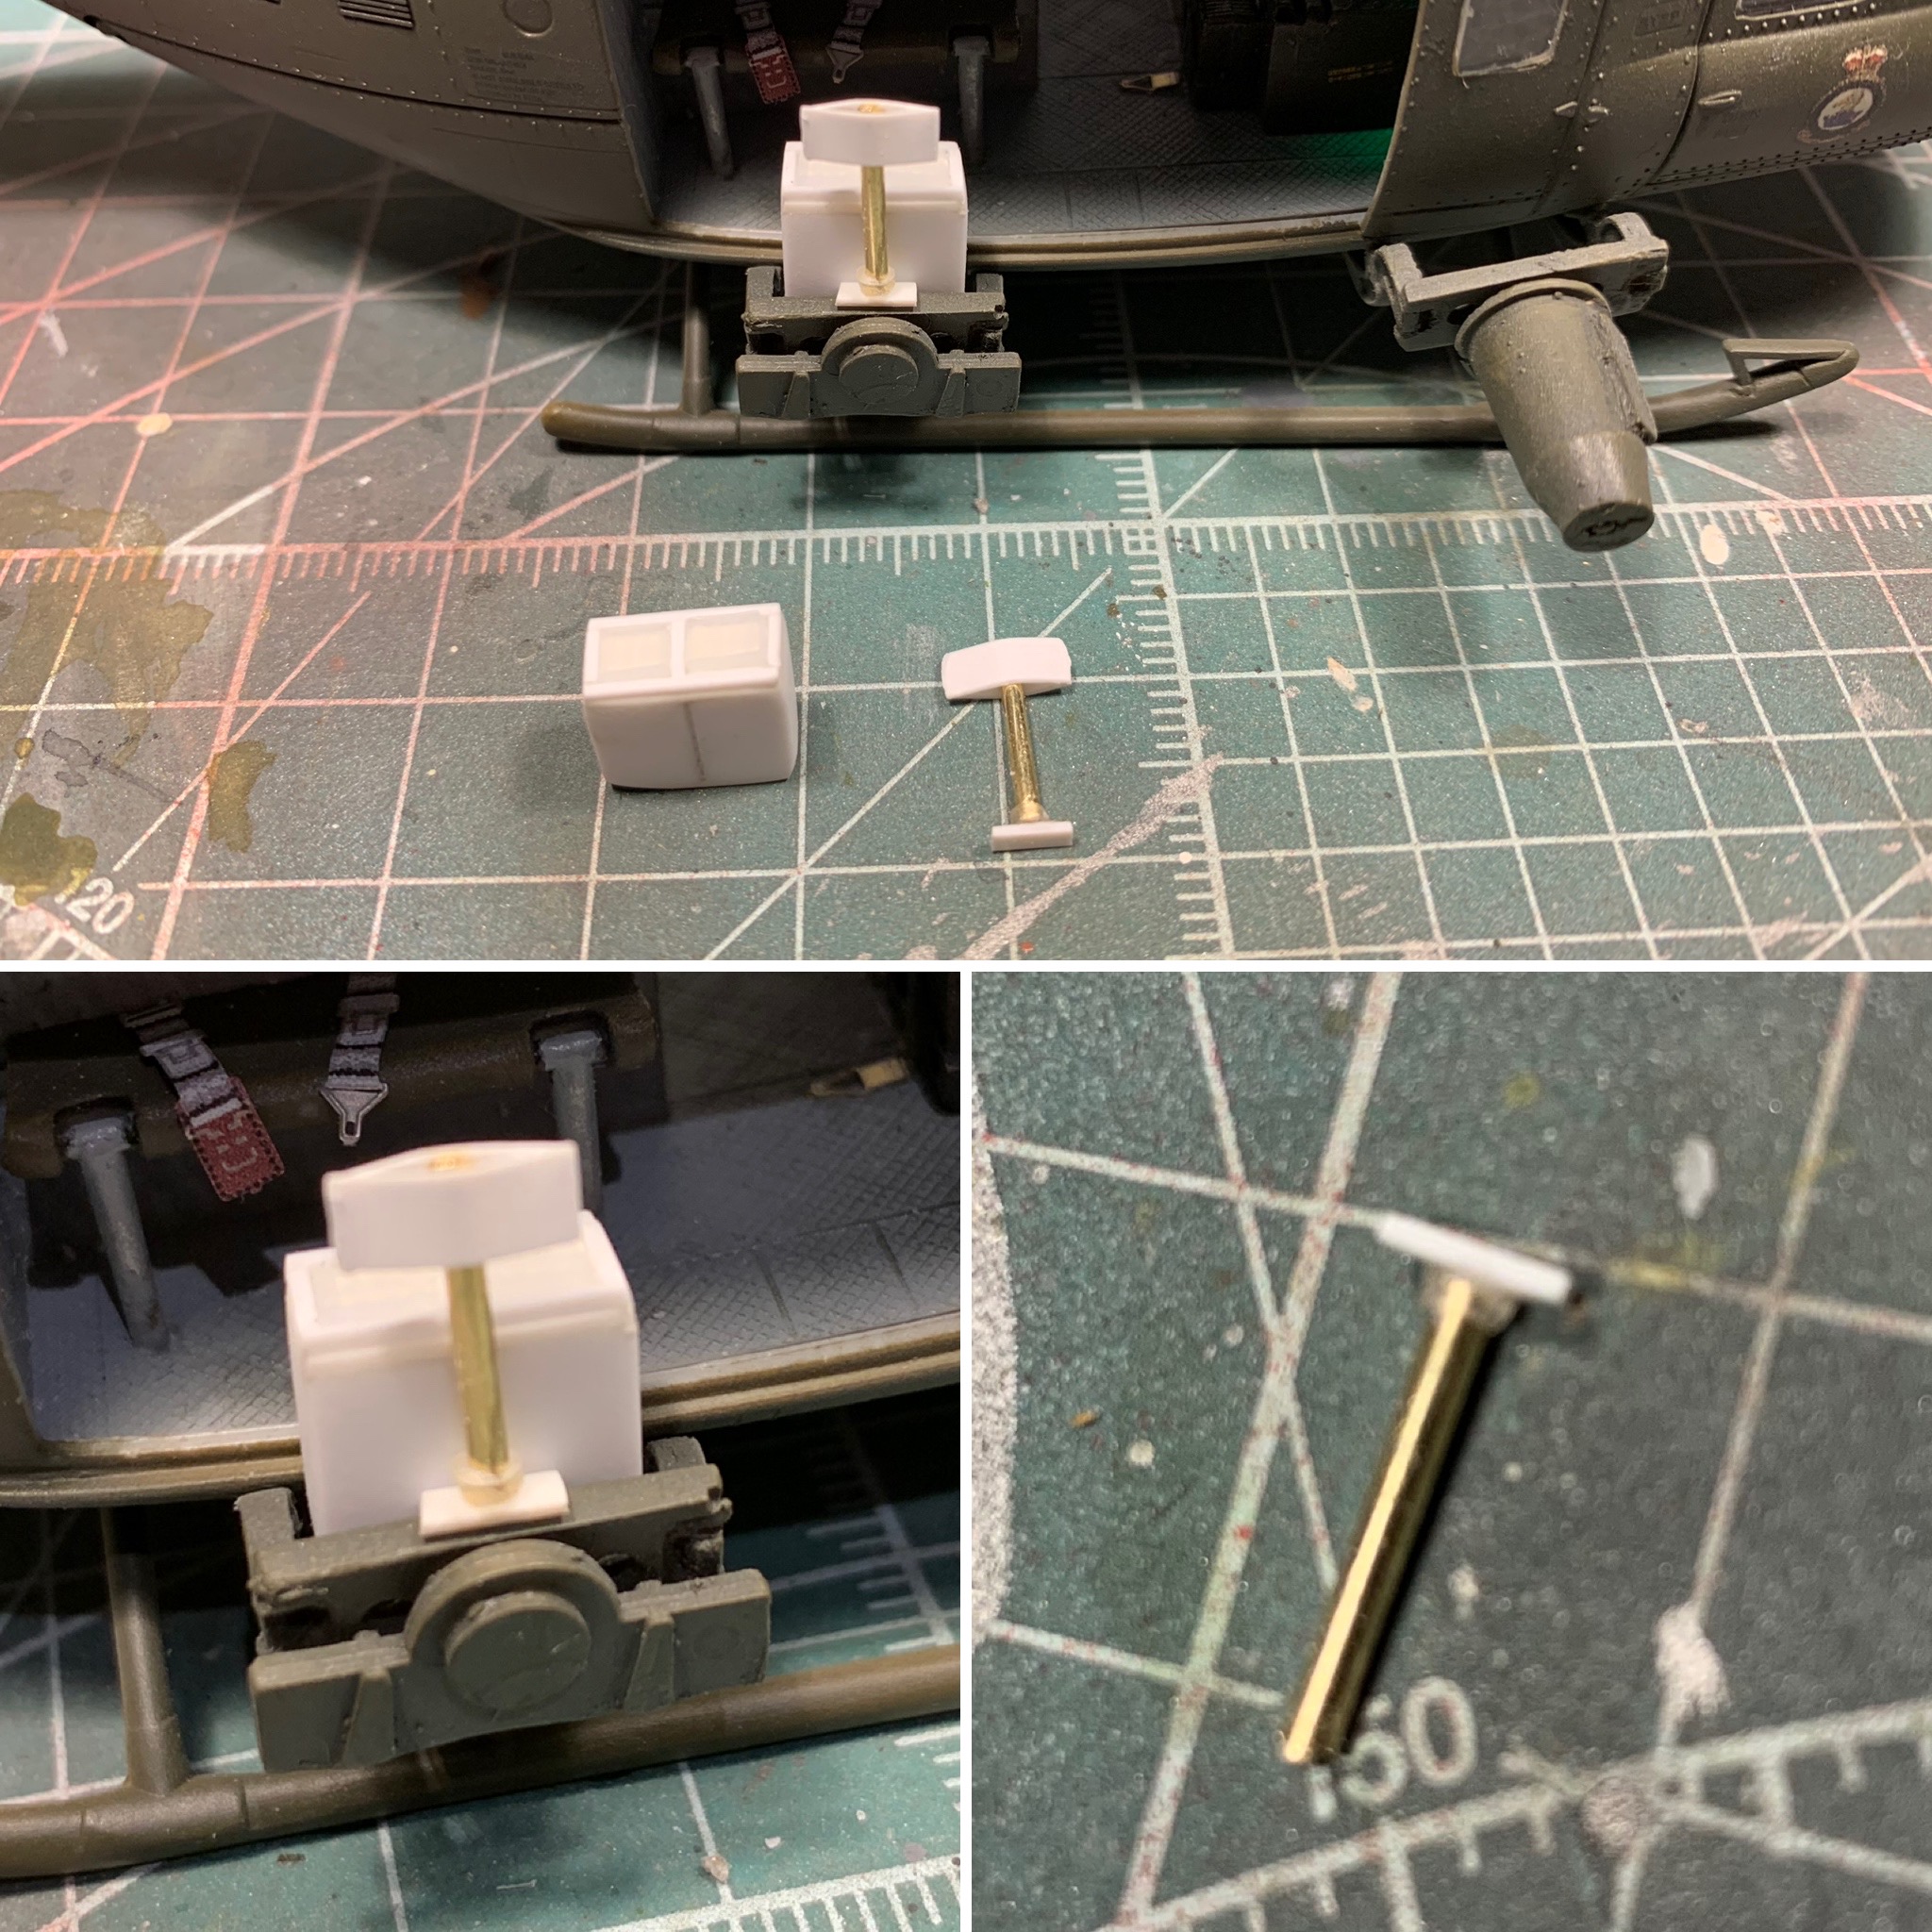
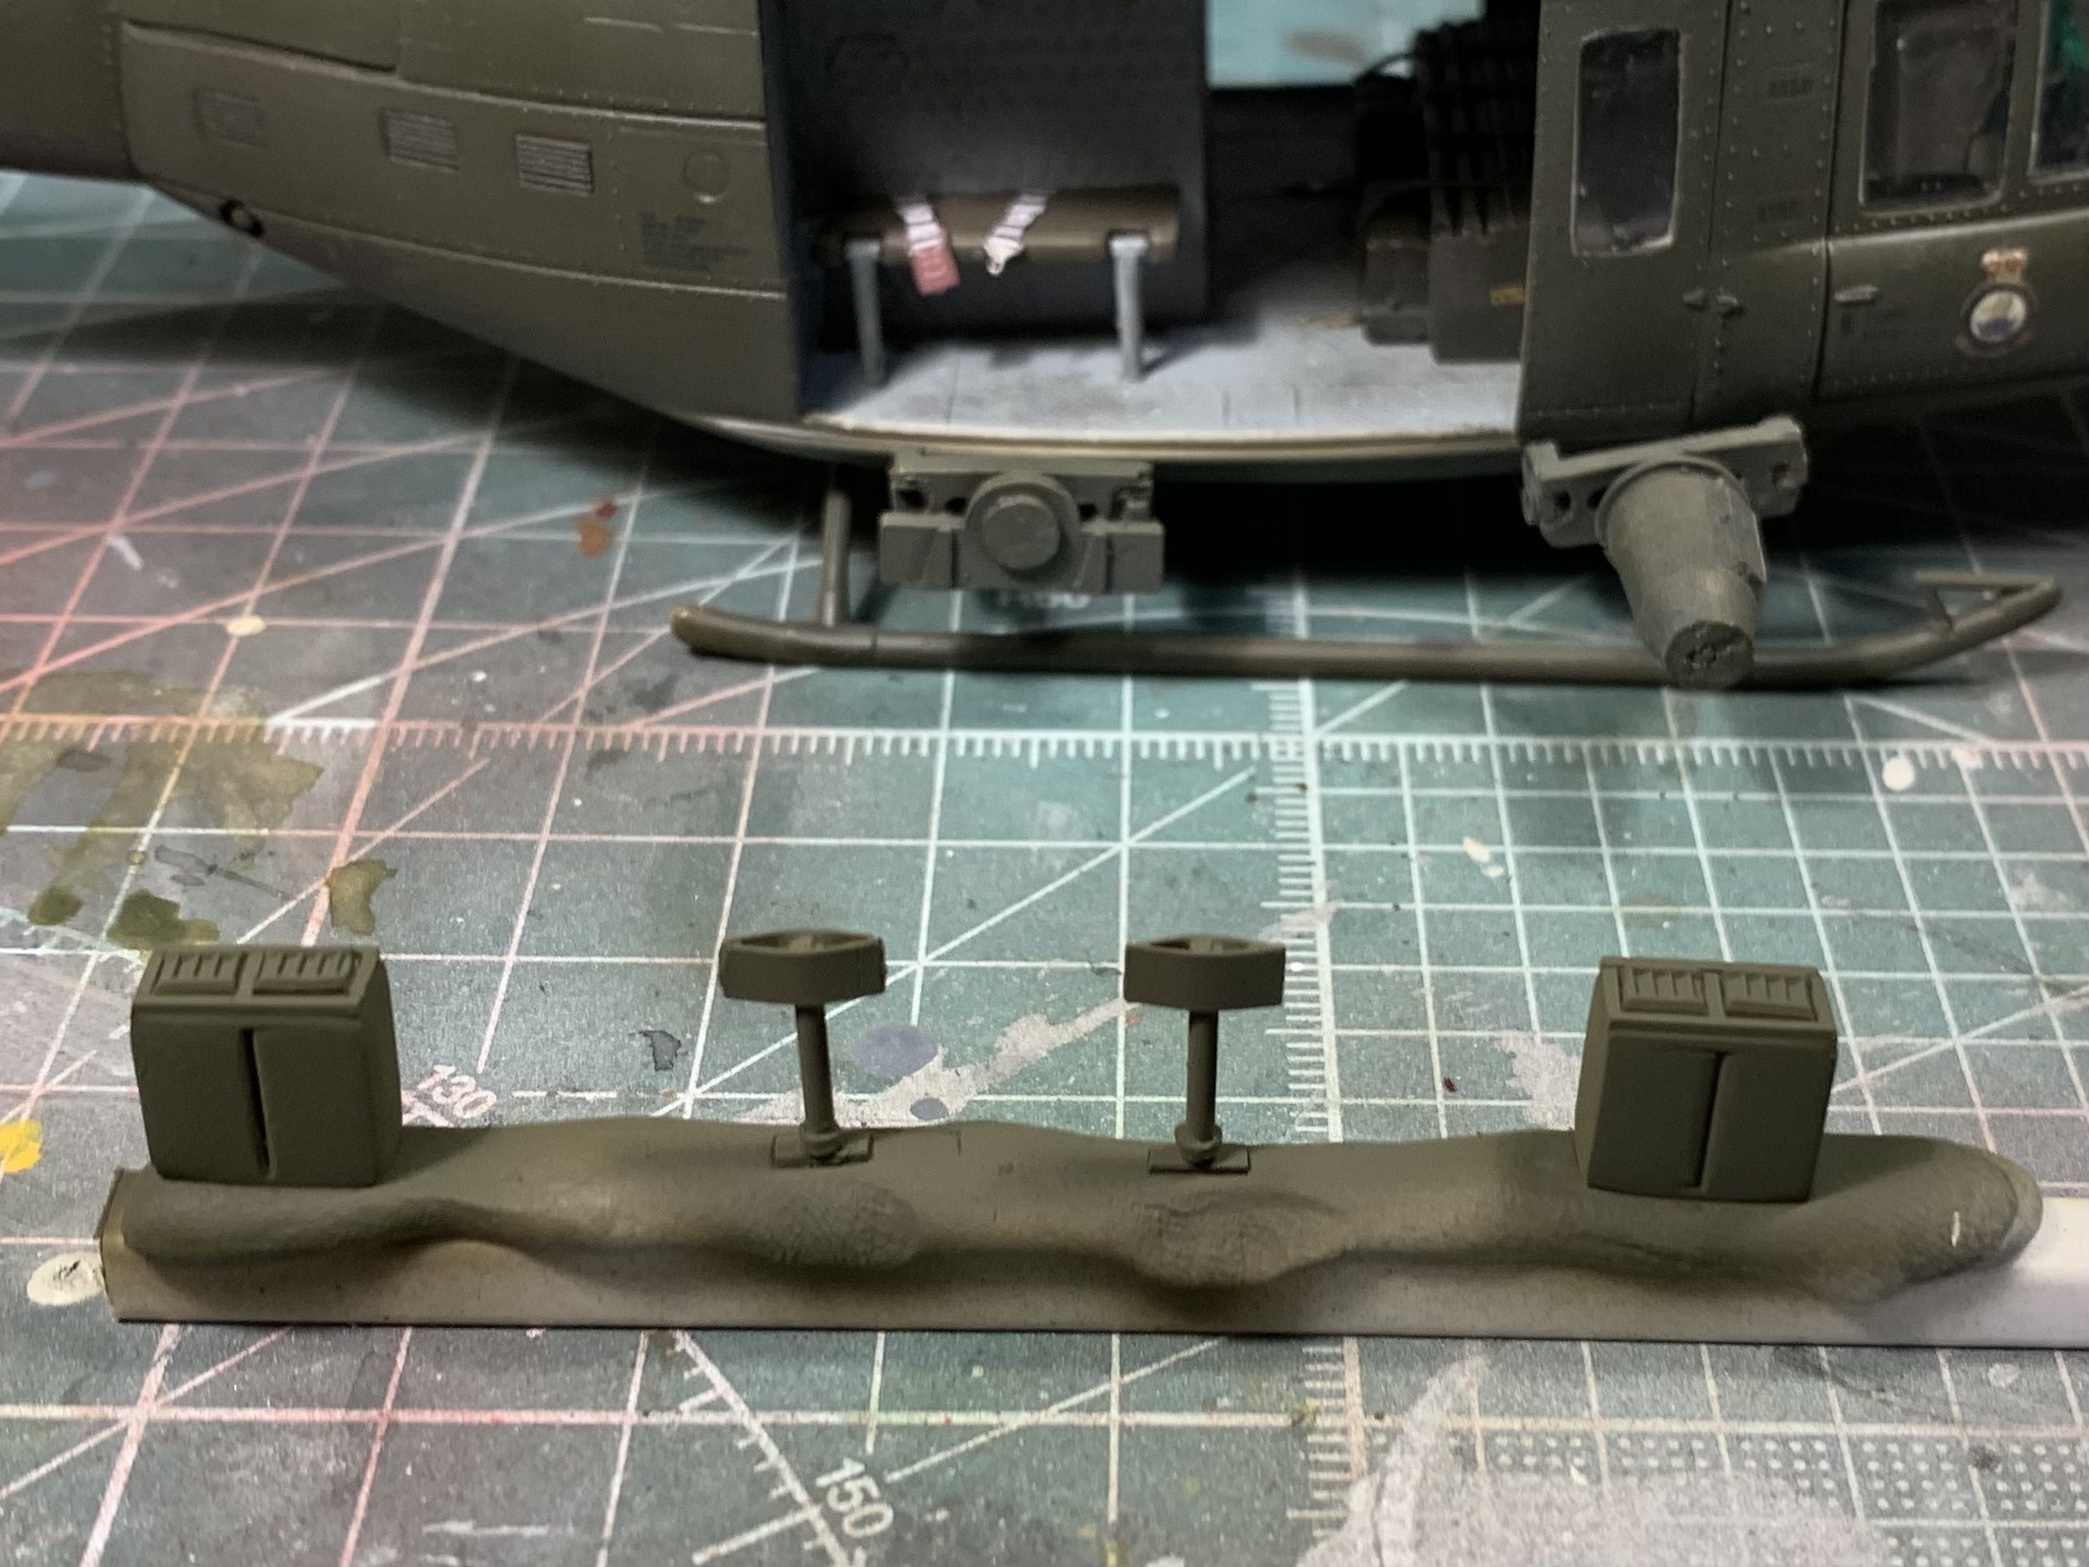
I scratch built the ammo boxes from plastic square tube and 1mm strip, and used a little piece of cable tie to represent the ammo itself. For the M-60 mounts I used some brass rod and plastic sheet as well as a tiny piece of ball-point pen ink tube to make the collar at the base of the post. When it was painted and weathered it looks good enough and I installed on the mounting bracket.

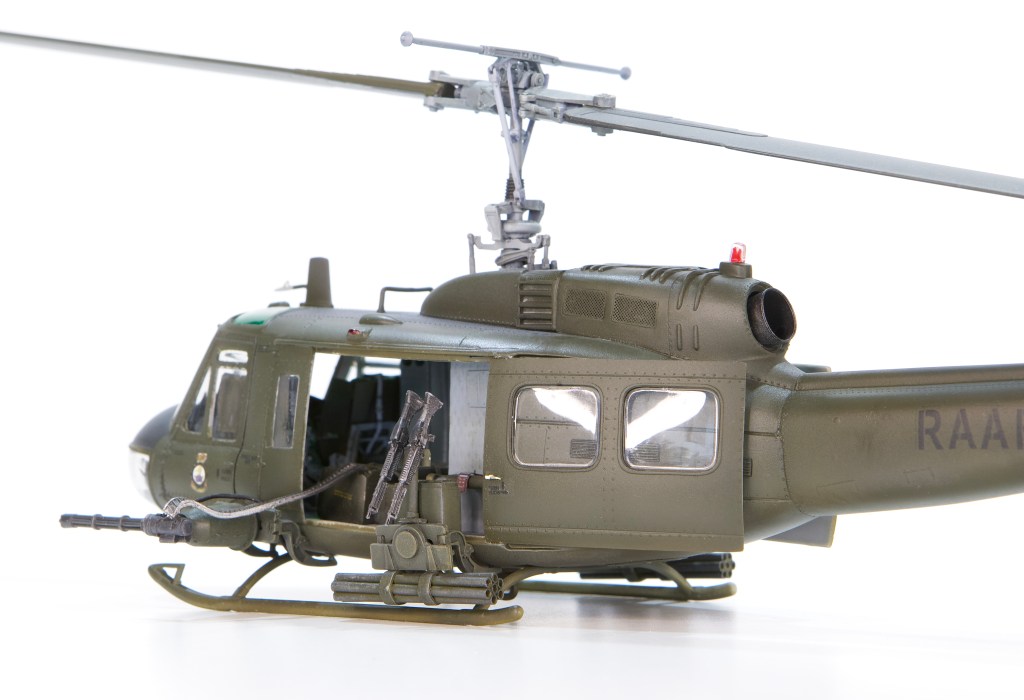
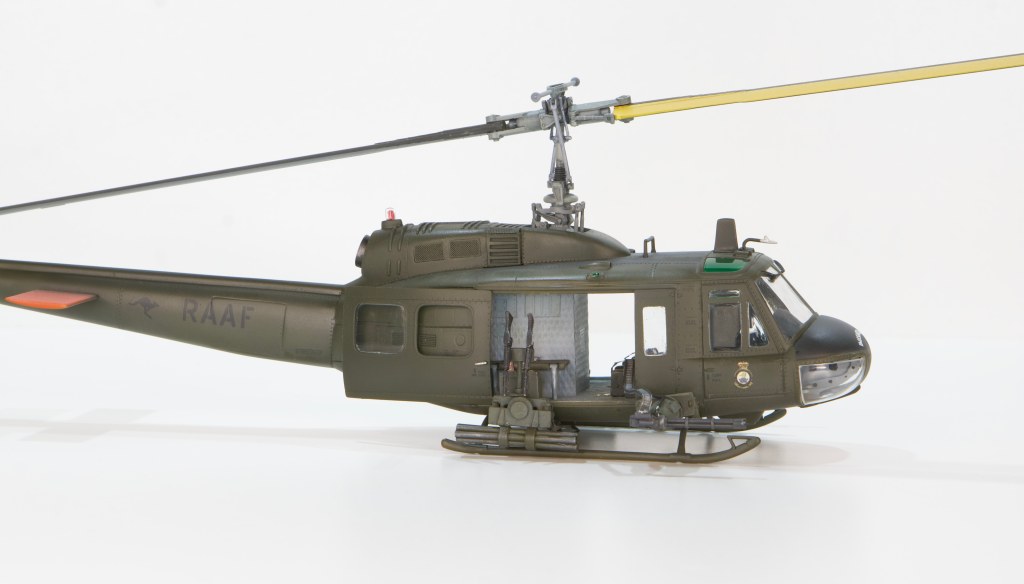
The final touches were the M-60s themselves which mounted on the bracket at the top of the post. I decided against running ammo feeds to the guns as most photos show the ammo belts not fed into the guns while the aircraft was on the ground.
Lastly, I worked on the mini-guns. The guns themselves were easy enough as I bought them :-). The ammo feeds though, that was a challenge. After trying a couple of options I settled on using cable tie again, this time heat-moulded into shape and painted/weathered to represent the real thing. I used some painted wire to represent the power and control feeds for the guns.
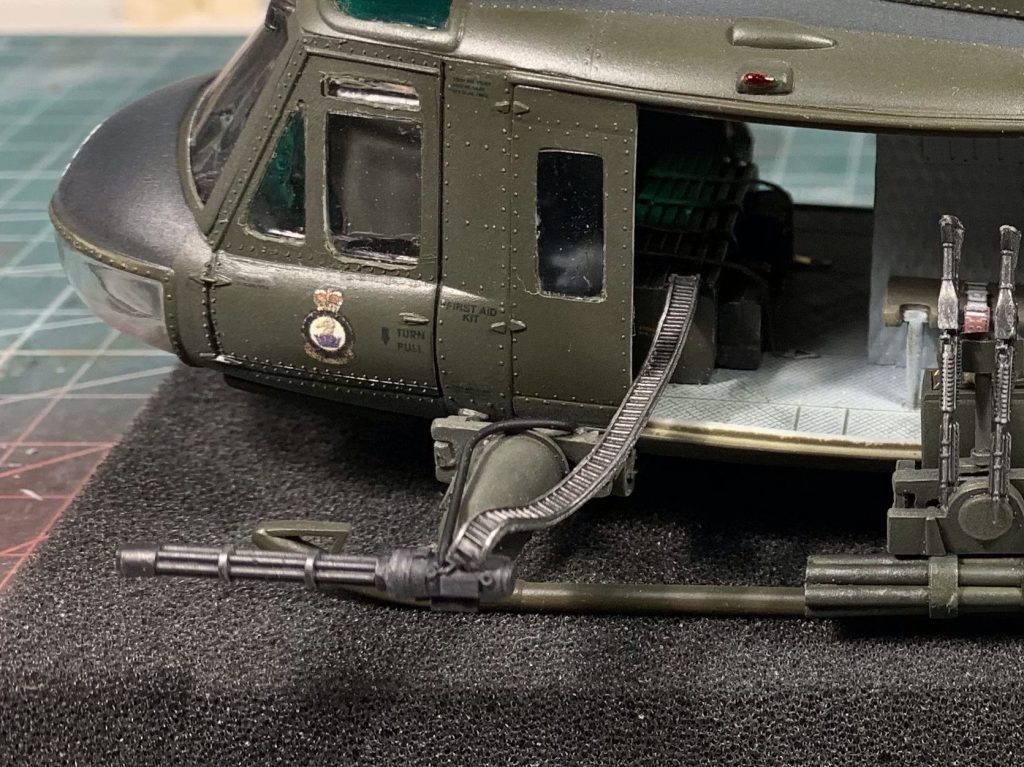
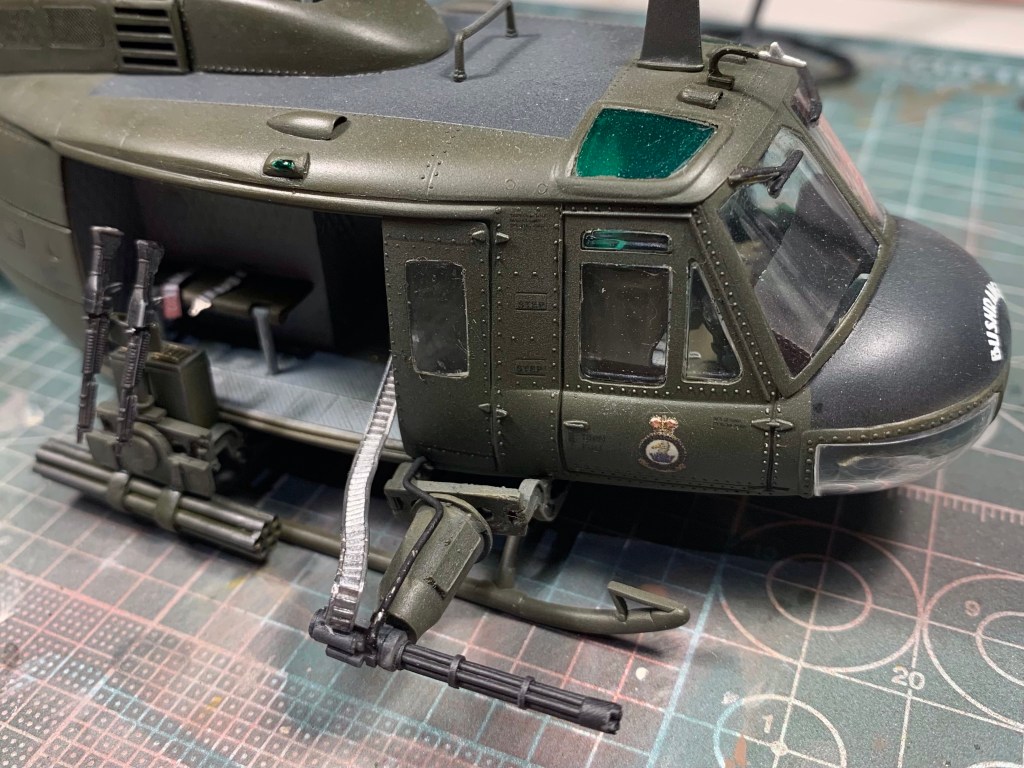
The cable tie worked out quite well I think. Not perfect, but not bad. I also think the mini-guns aren’t correct for the Bushrangers, the barrels are too long but they’re what I had to work with and the time I didn’t think to simply cut the barrels down.
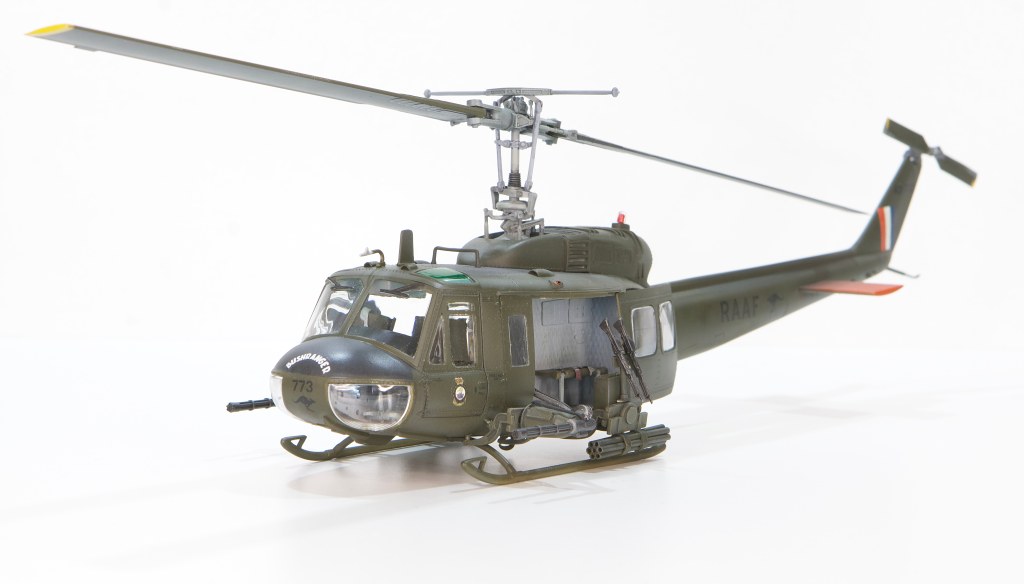
With the weapons systems competed and attached, all that remains was the doors and it was done. There’s a moment of satisfied contemplation when I lean back and look at the newly competed model as it sits on the work bench that I really enjoy. This was that moment.

Conclusion
I quite liked the Italeri kit. It has a reputation as an ill-fitting kit but I didn’t really run into much issue with that. I was tempted to use the newer Kitty Hawk kit but the Italeri was less than half its price. The Italeri kit’s weakest element are its clear parts, the windows are horrifically thick and lens-like. My only regret on this model is that I didn’t do something about them.
Post Script
There’s another regret, actually; the two pics just above of the finished model above show the forward window in both doors absent, something that was done in the field to facilitate “hot” refuelling. When I posted those two images on a modelling discussion board someone who ought to know pointed out that only the starboard door had its window removed. So, I thanked him and re-installed the port side window. Later, when writing this piece I looked at the very first image(s) of the real Bushranger 773, those posted at the very top of this article. Always refer to references…
Gallary


References
My primary reference for the historical portion of this piece is the excellent and thoroughly comprehensive monograph on the development and history of the Bushrangers written by the RAAF’s Wing Commander Brian Dirou DFC entitled “The Bushranger Story; …and so, a gunship was born.” Wing Commander Dirou led the Bushranger development program in Vietnam and his account is as primary as one can find as a primary reference.
There are a couple of versions of this priceless piece available on line, the most comprehensive being the version linked HERE, as well as linked separately below. I used it as the source for my brief description of the Bushranger gunship development program as well as for the description of the action of 16th May 1969.
However, my précis barely touches the depth of detail and flowing narrative of W/C Dirou’s superb original and I urge any reader with an interest in the Bushranger story to put aside 30min before clicking on one of the links above or below to learn the history of the RAAF’s 9SQN Bushrangers from the source itself.
Thanks also to Keith Beaty who contacted me in August 2022 with corrected and additional information on 773’s post-Vietnam operational service.
- https://www.radschool.org.au/Books/TBS%20FirstEdition%20Rev2021.pdf
- https://www.5rar.asn.au/gallery/iroquois-A2-773.htm
- http://www.diggerhistory.info/pages-air-support/vietnam/gunships.htm
- The Australian War Memorial website search function
I really hope you enjoyed this article!
Making-History is a labour of love for me, but it’s becoming more expensive and time consuming. I’m loath to put advertising on it, so if you feel inclined please consider making a donation to help cover site hosting costs as well as the time it takes to produce its content. All donations get a receipt with my thanks.
Mark.
Make a one-time donation
Make a monthly donation
Make a yearly donation
Choose an amount
Or enter a custom amount
Your contribution is very much appreciated and 100% of it will be recycled back into Making-History.
Your contribution is appreciated.
Your contribution is appreciated.
Copyright ©2022
This article, its text, and photos of the model(s) is my original work and is protected by copyright in its entirety, except where noted. All research sources are listed in the References and Credits section above, including photos from official sources. All other images were sourced from the internet and are used here under protection of fair-use. Any copyrighted images will be removed or credited forthwith upon request by its rightful owner.


Leave a comment