
I was a few days away from my 16th birthday on 8th June 1982 and was mightily upset, in the way only a naïve 16 year old boy can be, that I was “missing” the Falklands Conflict (I was at the time working hard on my O Levels with plans, ultimately unfulfilled, of joining the Royal Navy as an Artificer).
Just a few weeks before in early April I’d cycled the 10 miles or so from Fareham to Gosport on the west side of Portsmouth Harbour to see the task force off alongside thousands of others. I followed the daily updates delivered by Ian McDonald, the M.O.D. spokesman who became a minor celebrity in his own right. By the 8th June the conflict was approaching its climax at Port Stanley, and it was clear – it always was really – the British would complete the retaking of the Islands within days.
Up until that point we at home had been spared the details of [the] war; we listened as Brian Hanrahan counted them out and counting them back in from the deck of HMS Invincible, and the Battle of Britain style dogfight win/loss ratios; we learned about the endurance of the RAF’s Avro Vulcan crews who flew literally from one end of the planet to other to bomb the Port Stanley runway; we knew Goose Green had been a major battle and while 2 Parra had taken causalities they’d prevailed decisively; we’d seen Royal Marines yomping across the desolate Falklands landscape carrying loads on their backs as incredible as their stamina and ultimately prevailing at Two Sisters and Mount Harriet; we’d witnessed the devastation one missile could wreak on a warship like HMS Sheffield, and then – incredibly – the losses of Coventry, Ardent, Antelope, and the Atlantic Conveyor, all of which shook us into a new understanding of the costs of the operation (and, ominously, the ability, courage and determination of the Argentine pilots); we knew the the General Belgrano had been sunk with great loss of life but they were theirs, not ours.
But, we hadn’t actually seen any of it happen, only its aftermath. The losses had been remote, the victories more or less unbroken, the eventual outcome never really in doubt.
Then on 8th June, only days away from victory reports came in of a disaster at Bluff Cove (actually it was at Port Pleasant, Bluff Cove was the destination).
Port Pleasant, 8th June
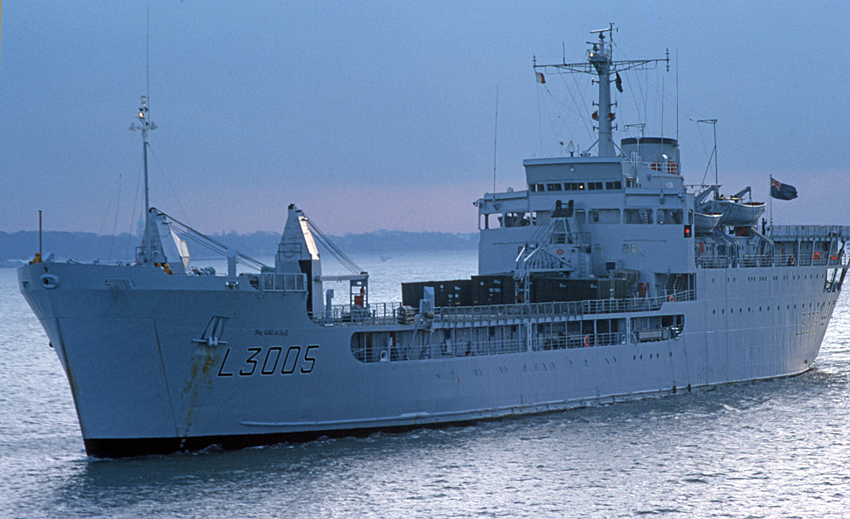
The RFA’s Sir Galahad and Sir Tristram had been found at anchor in Port Pleasant by the Argentine Air Force and attacked. Both ships had been in the secluded and quiet lagoon for some hours and had begun unloading their cargos in preparation for the upcoming assault on Port Stanley. However due to several factors the unloading was at an agonisingly slow snail’s pace while in the mean time both ships were terribly exposed. Ground based Argentinian observers spotted them and reported their positions. Sir Tristram was mostly loaded with materiel, the Galahad was mostly loaded with men.
Upon receiving reports of the two exposed LSLs in Port Pleasant the Argentine air forces launched an attack and in keeping with the breathtaking bravery and skill exhibited by their pilots throughout the campaign, their attack was pressed home with full effect. Although three of their number were subsequently shot down by Harriers, the attack was a devastating success.
In place of what would likely be a wholly inadequate attempt at describing the aftermath of the attack, I’ll pass the narrative over to the BBC…
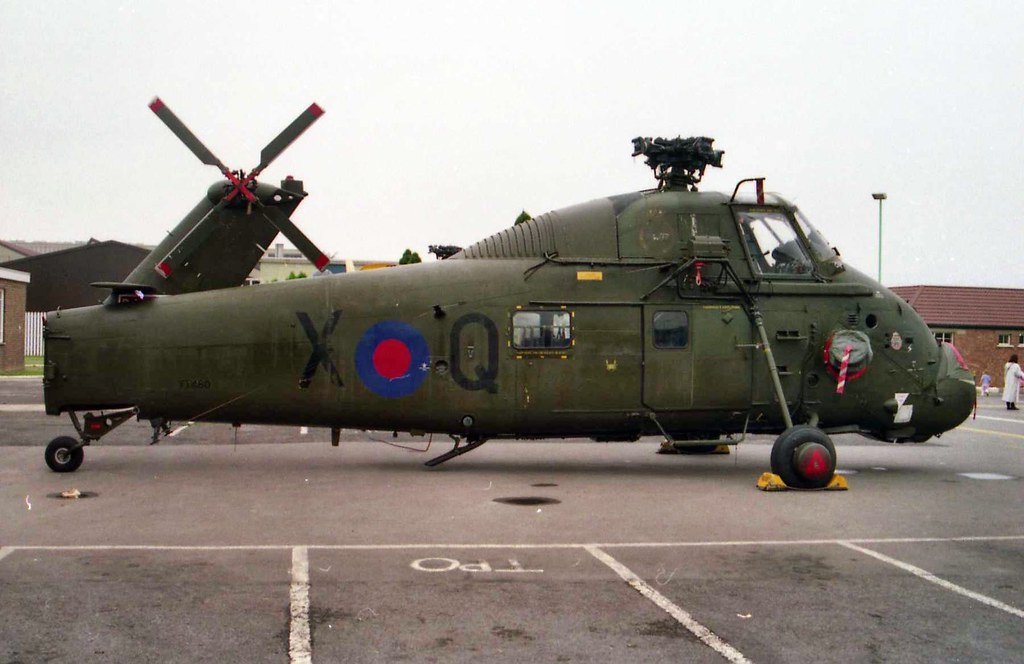
Units of the Scots and Welsh Guards were still on board the Sir Galahad and were now trapped in the fierce fires aboard. Helicopters, in terribly short supply due to the loss of the Atlantic Conveyer two weeks earlier, came to aid the rescue. A Royal Navy Sea King and Westland Wessex both provided assistance that included using their rotor downwash to push life rafts away from the burning ships. The Wessex was “XQ” of 847 Naval Air Squadron. Upon arrival at the scene it quickly became short of fuel but rather than leave the area Lieutenant Hughes landed his helicopter on the burning Sir Tristram and refuelled there, allowing it to return to its rescue mission without delay.
48 crew and soldiers lost their lives aboard the Sir Galahad, two crew were killed on the Sir Tristram. Chiu Yiu-Nam, a seaman on Sir Galahad, was awarded the George Medal for rescuing ten men trapped by a fire in the bowels of the ship. The Sir Galahad’s captain, Philip Roberts, was awarded the DSO for his leadership and courage. Royal Marine Sergeant Brian Dolivera was mentioned in dispatches for his efforts during the evacuation.
The conflict ended six days later. Later in June the Sir Galahad was towed to sea and sunk with torpedoes from HMS Onyx, it is now designated as a War Grave. The Sir Tristram however was salvaged and eventually returned to service, finally retiring in 2005 but still used as a training vessel.
A Catalogue of Mistakes…
Why did it happen? I’m not qualified to make a determination as to why; I’ve never been in a war and I have little [real] understanding of the pressures of operating in such a high-stakes environment. However, it is interesting to log the series of decisions, events and circumstances that created the opportunity for tragedy in Port Pleasant on June 8th 1982. My start point is the Argentine invasion in March;
- The Atlantic Conveyor, a container ship requisitioned for use in the conflict was not designated “a high-value unit” and was therefore not fitted with either an active or a passive defence system.
- The Atlantic Conveyor carried the helicopters required for moving troops from the planned landing beaches to the assault on Port Stanley
- 5 Brigade gave up two Battalions of Para troops to 3 Commando which were replaced by Guards Brigades directly from public duties (guarding Buckingham Palace, etc.) and consequently under-trained and, as events were to prove, not in the physical same condition as the Royal Marines and Paras
- The Atlantic Conveyor was sunk by Argentine aircraft on 25th May leaving the Task Force with a critical shortage of Helicopters
- 2 Para, one of the five Battalions of the reconstituted 5th Brigade unilaterally requisitioned the only remaining Chinook helicopter for an unauthorised – the land forces commander Major General Jeremy Moore only learned of their advance by accident – and unsupported movement forward to occupy Fitzroy and Bluff Cove
- 2 Parra’s movement forward left them exposed and unsupported 50km in advance of the Task Force units and Moore was forced to send ground troops forward by land along a southern route to support them (a withdrawal by the Paras, although more likely the proper military decision, was politically unacceptable)
- Because ground troops were now routed along a southerly march, other units of 5th Brigade were required for the north route and 5 Brigade’s Welsh and Scottish Guards were designated for the “yomp” along the northern route to Stanley
- The Guards Brigades were unable to complete the 25km march due to weather and the loads they were required to carry and were returned to their first point of disembarkation at San Carlos Water
- Despite the risk to the vessels concerned, the only way to move the Guards Battalions and their equipment was by ship and landing craft (competing demands for the few remaining helicopters precluded that option) and as part of that manoeuvre elements subsequently boarded RFA Sir Galahad and Sir Tristram for transport to Bluff Cove on June 7th.
While the foregoing list is an oversimplification the chain of events is significant in its human nature. Simple errors of judgement, enthusiasm and ego, improvisation and assumption all played a part in the losses of 8th June at Port Pleasant. A quote from Winston Churchill comes to mind;
War is a catalogue of rough mistakes
Winston Churchill
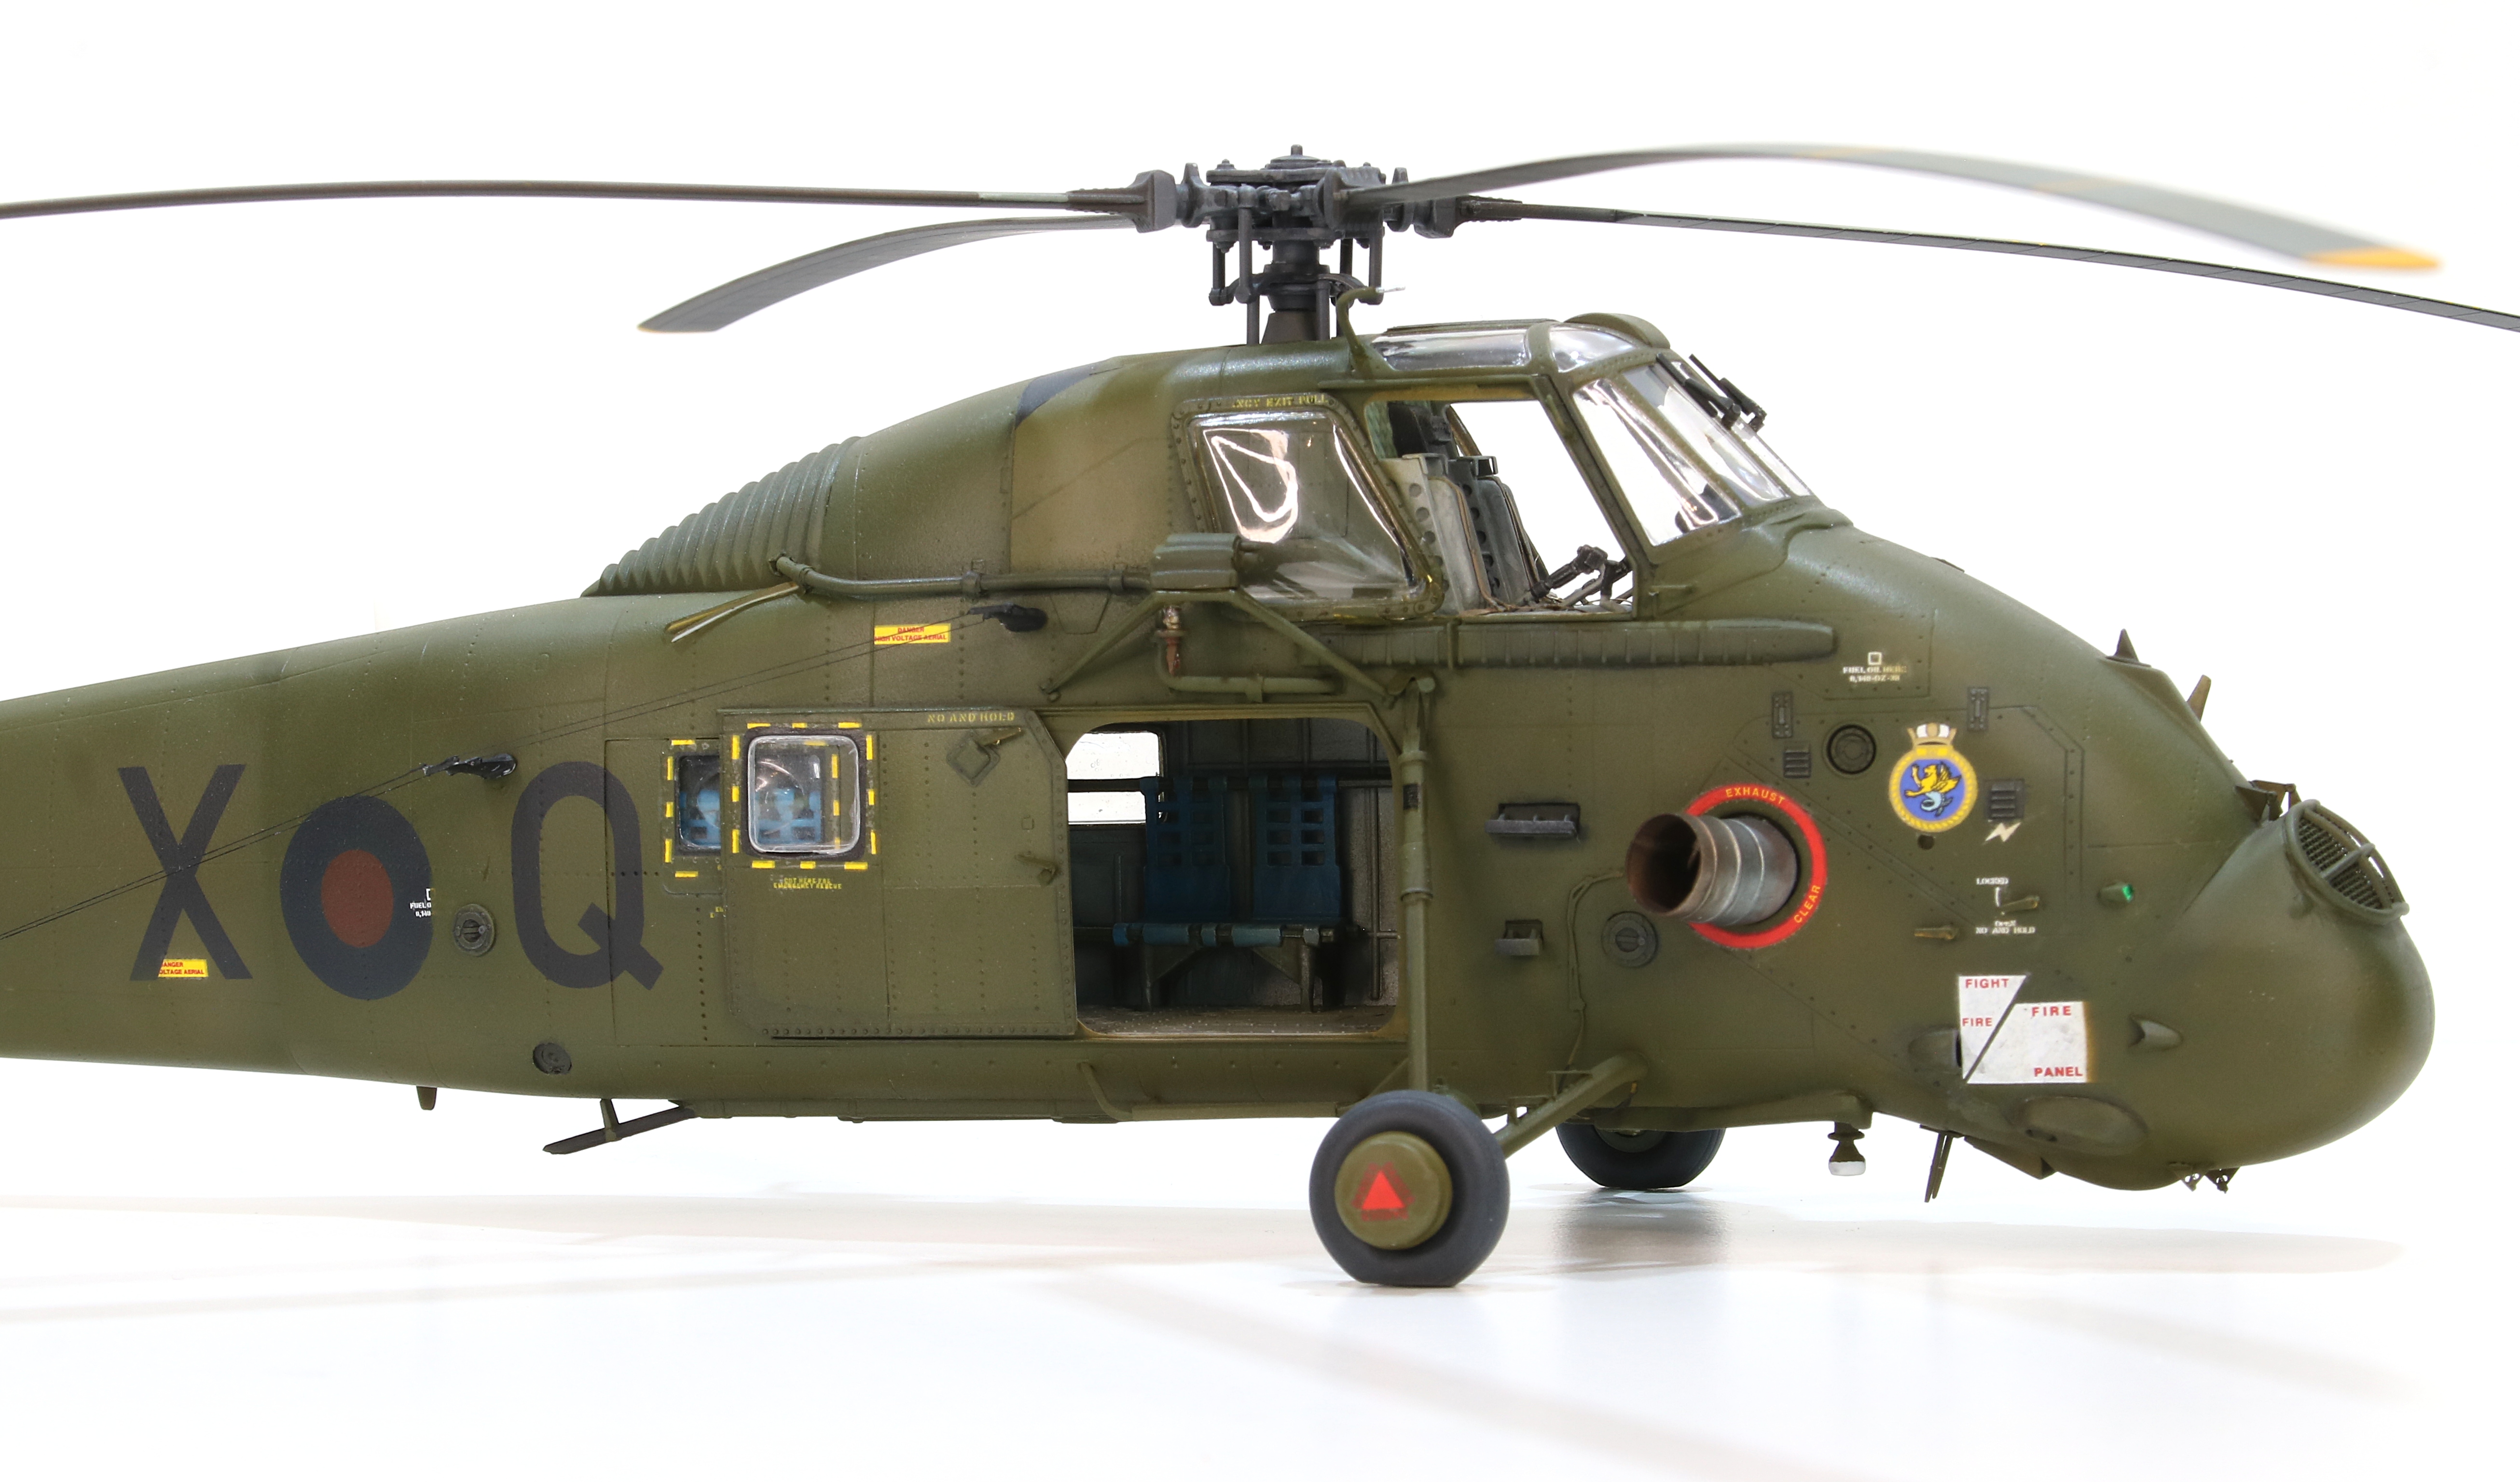
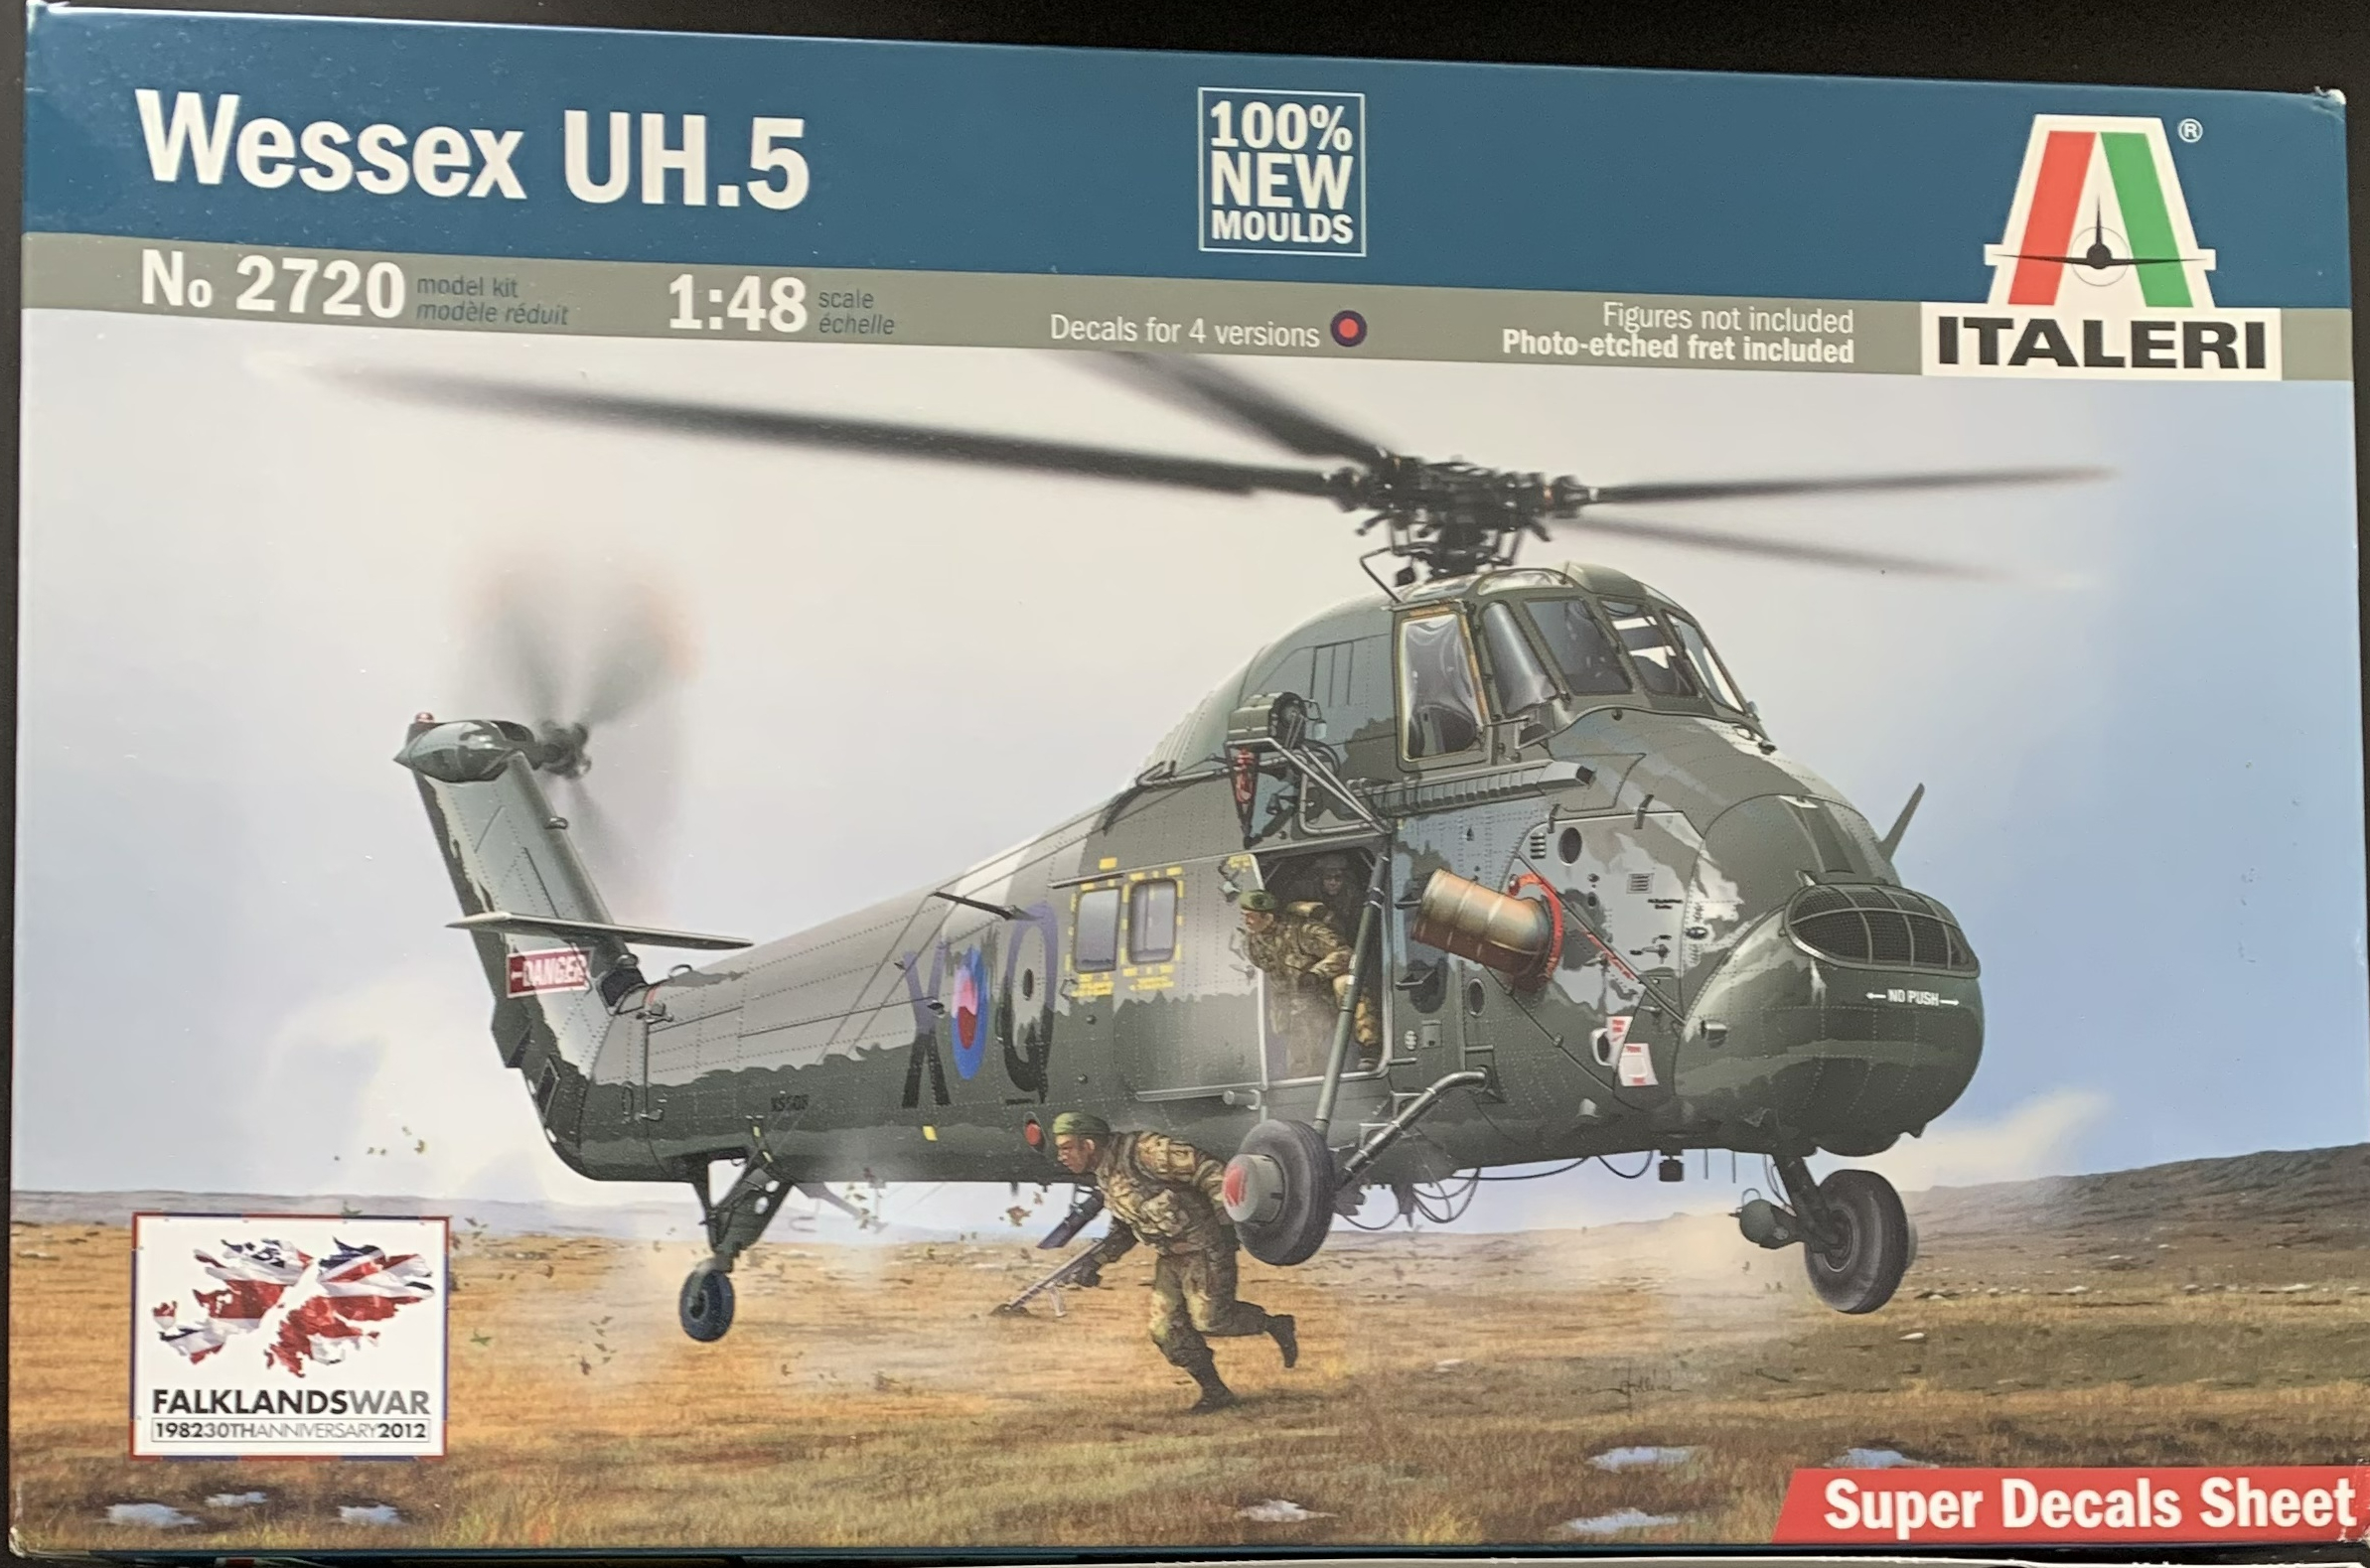
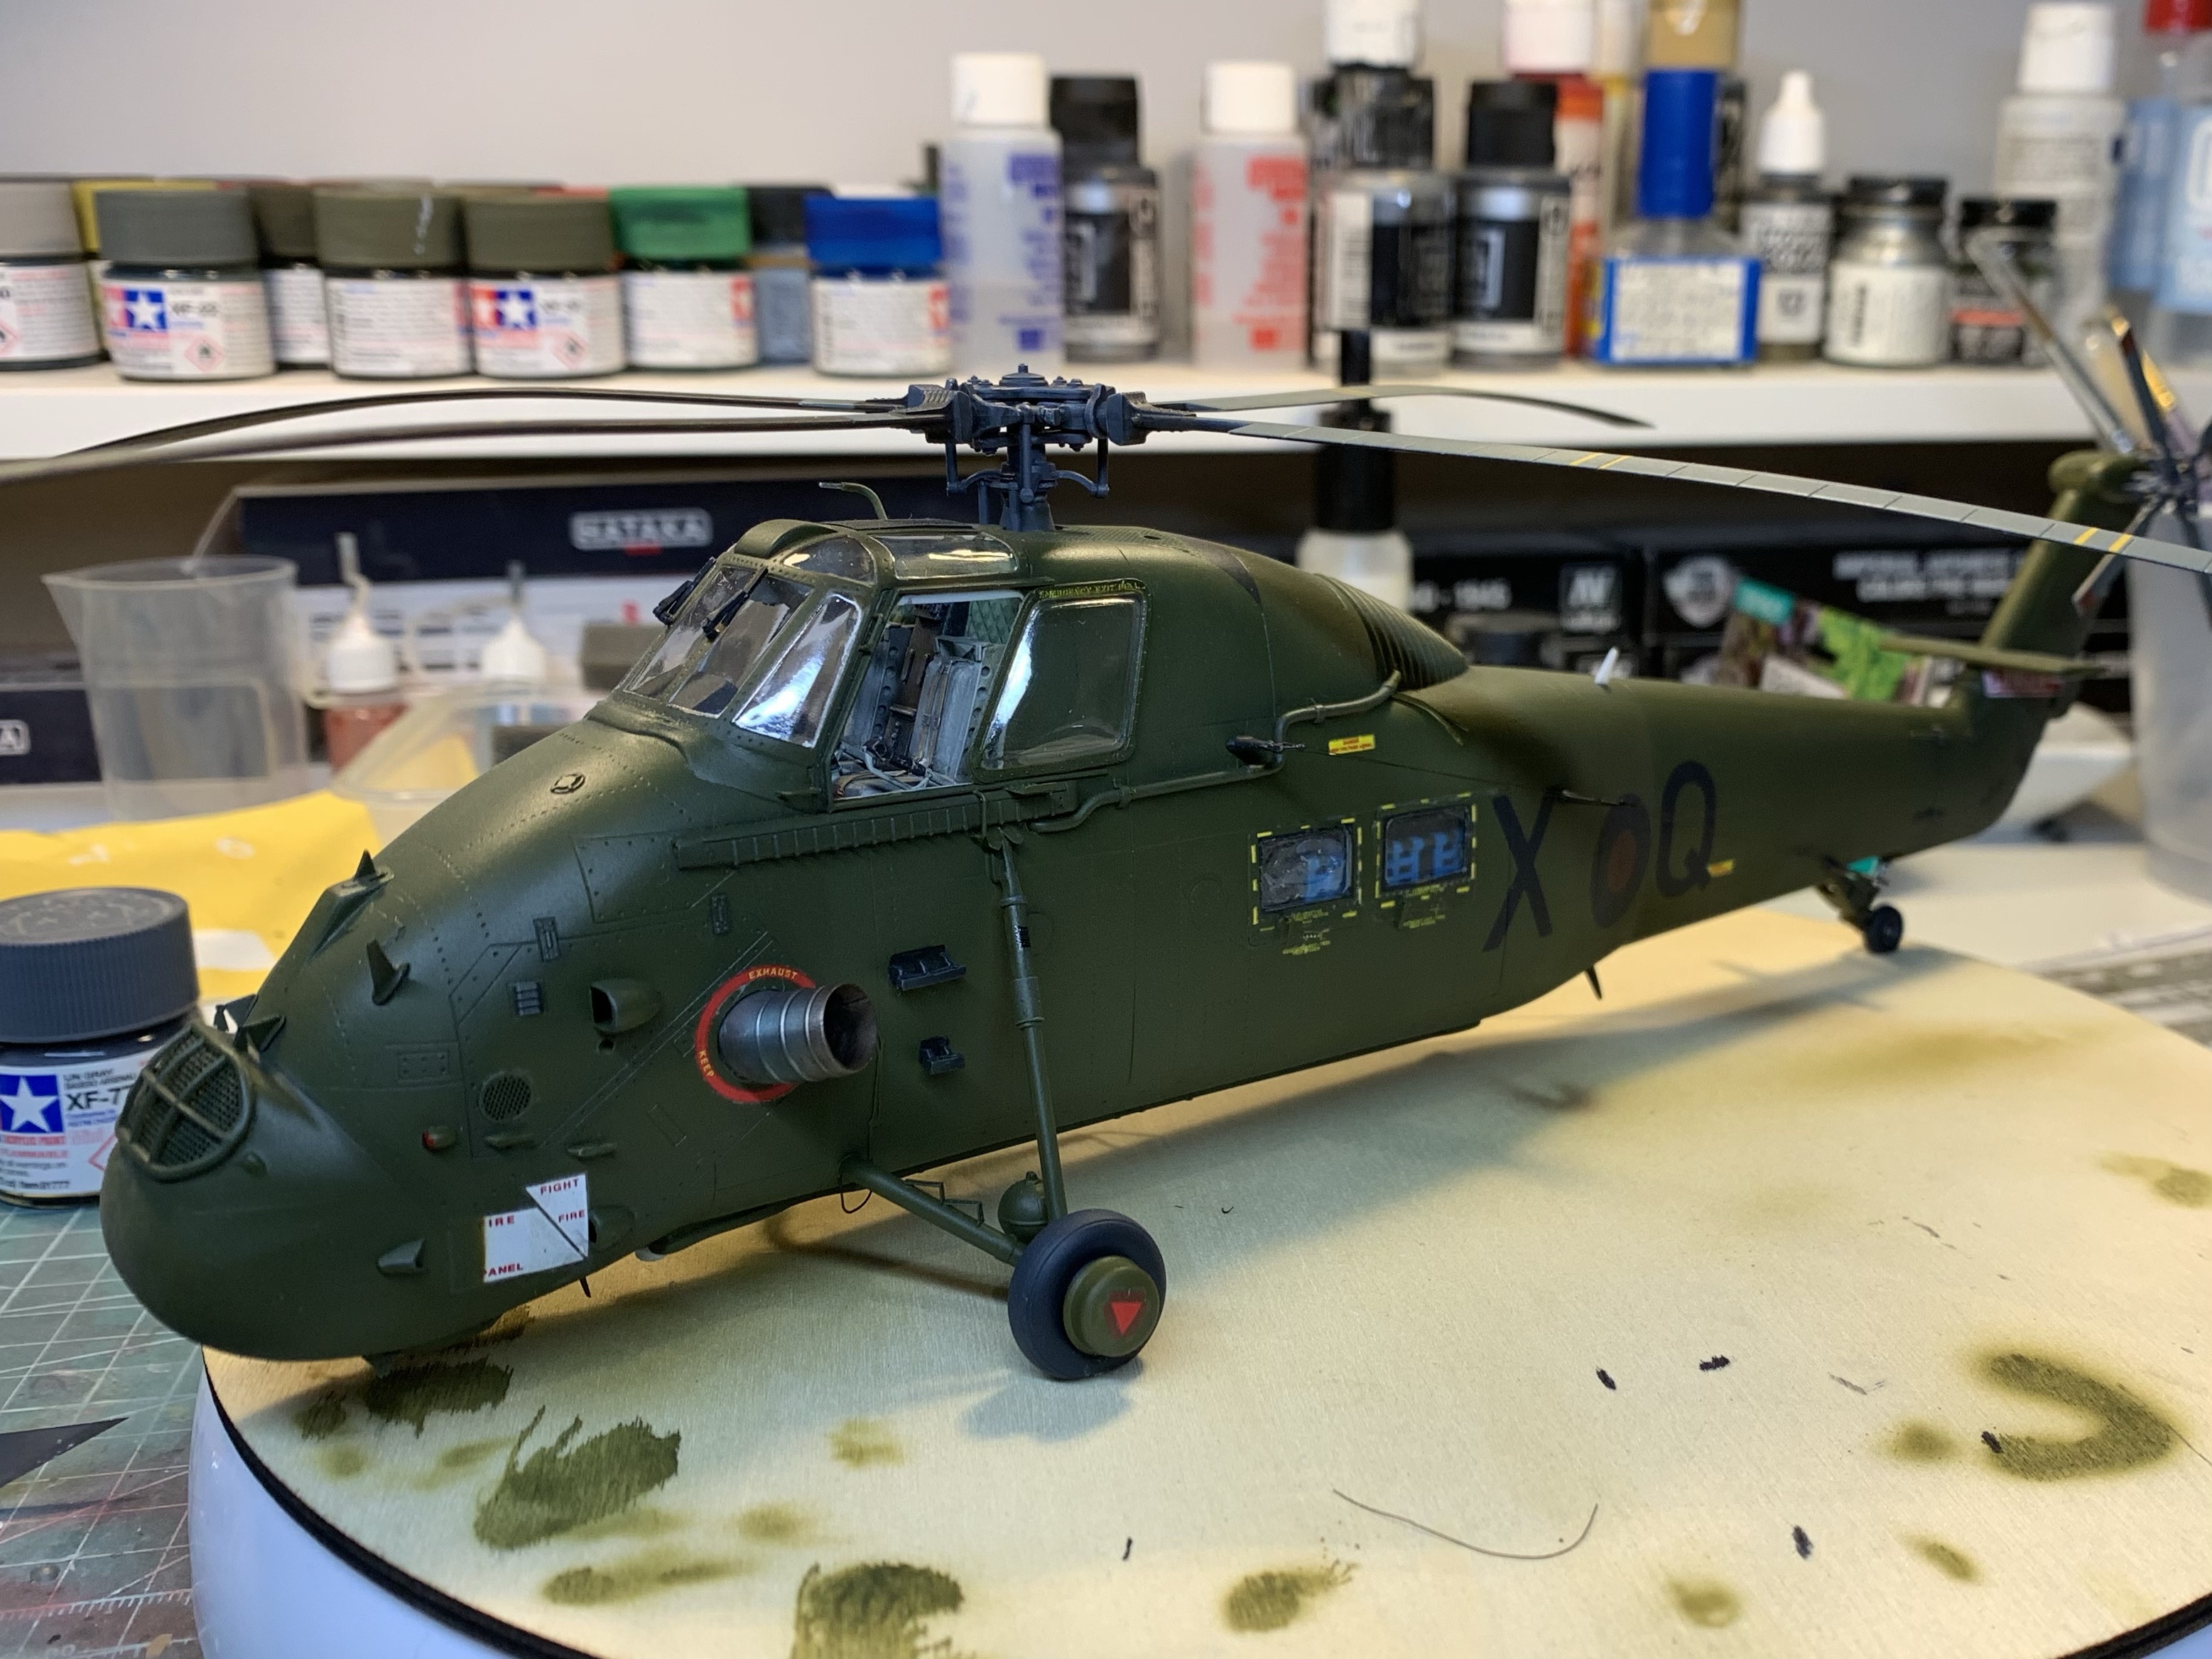
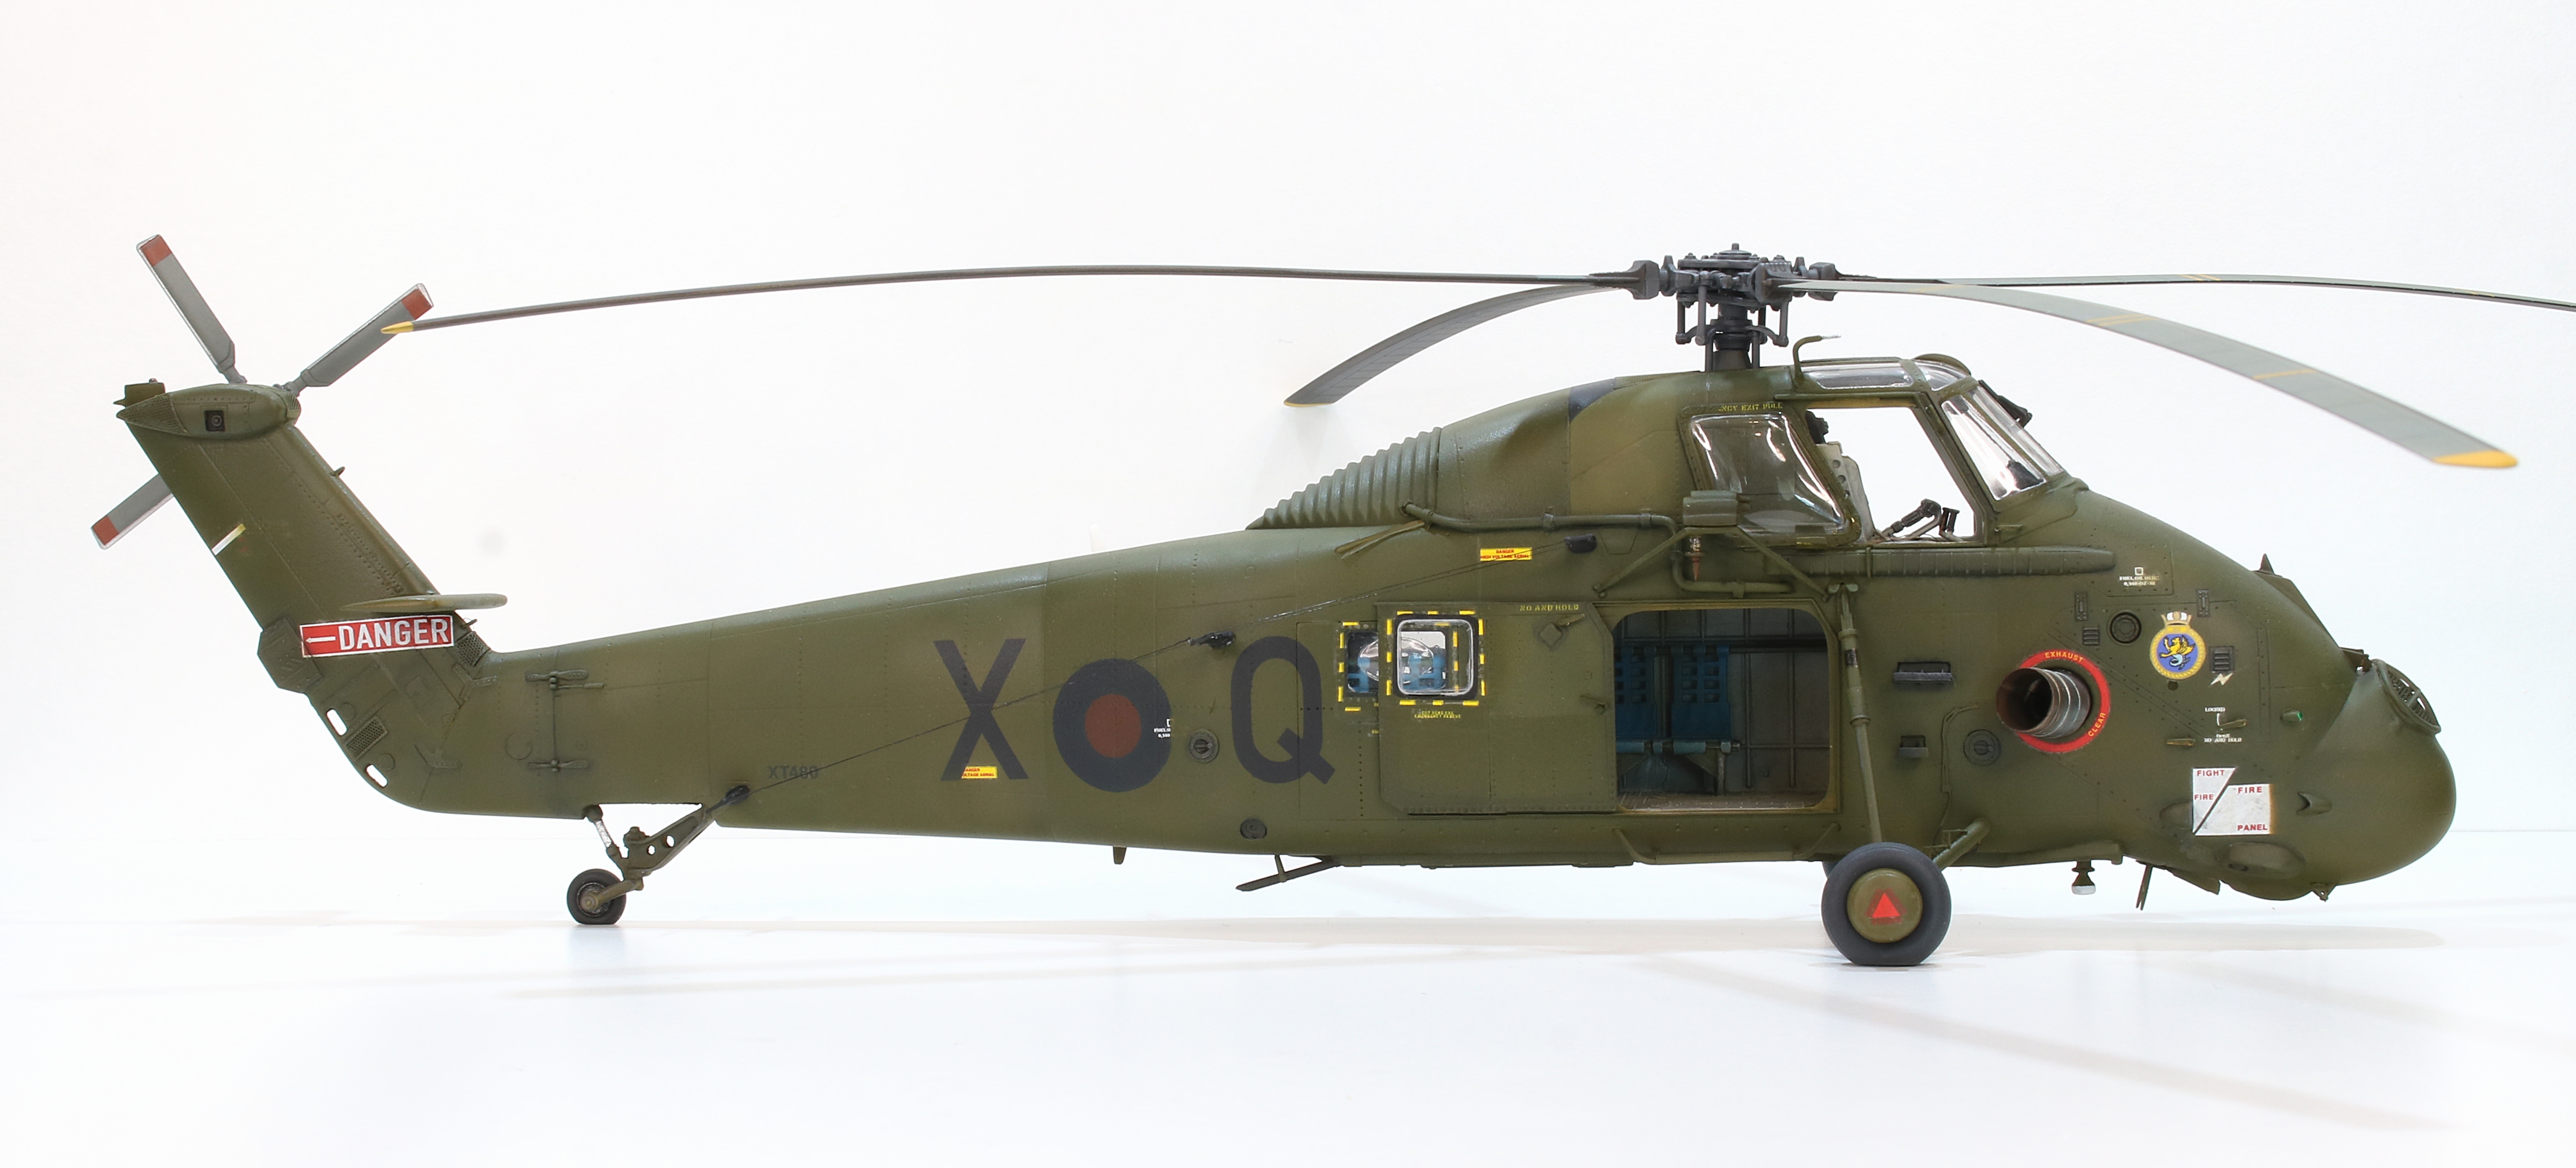
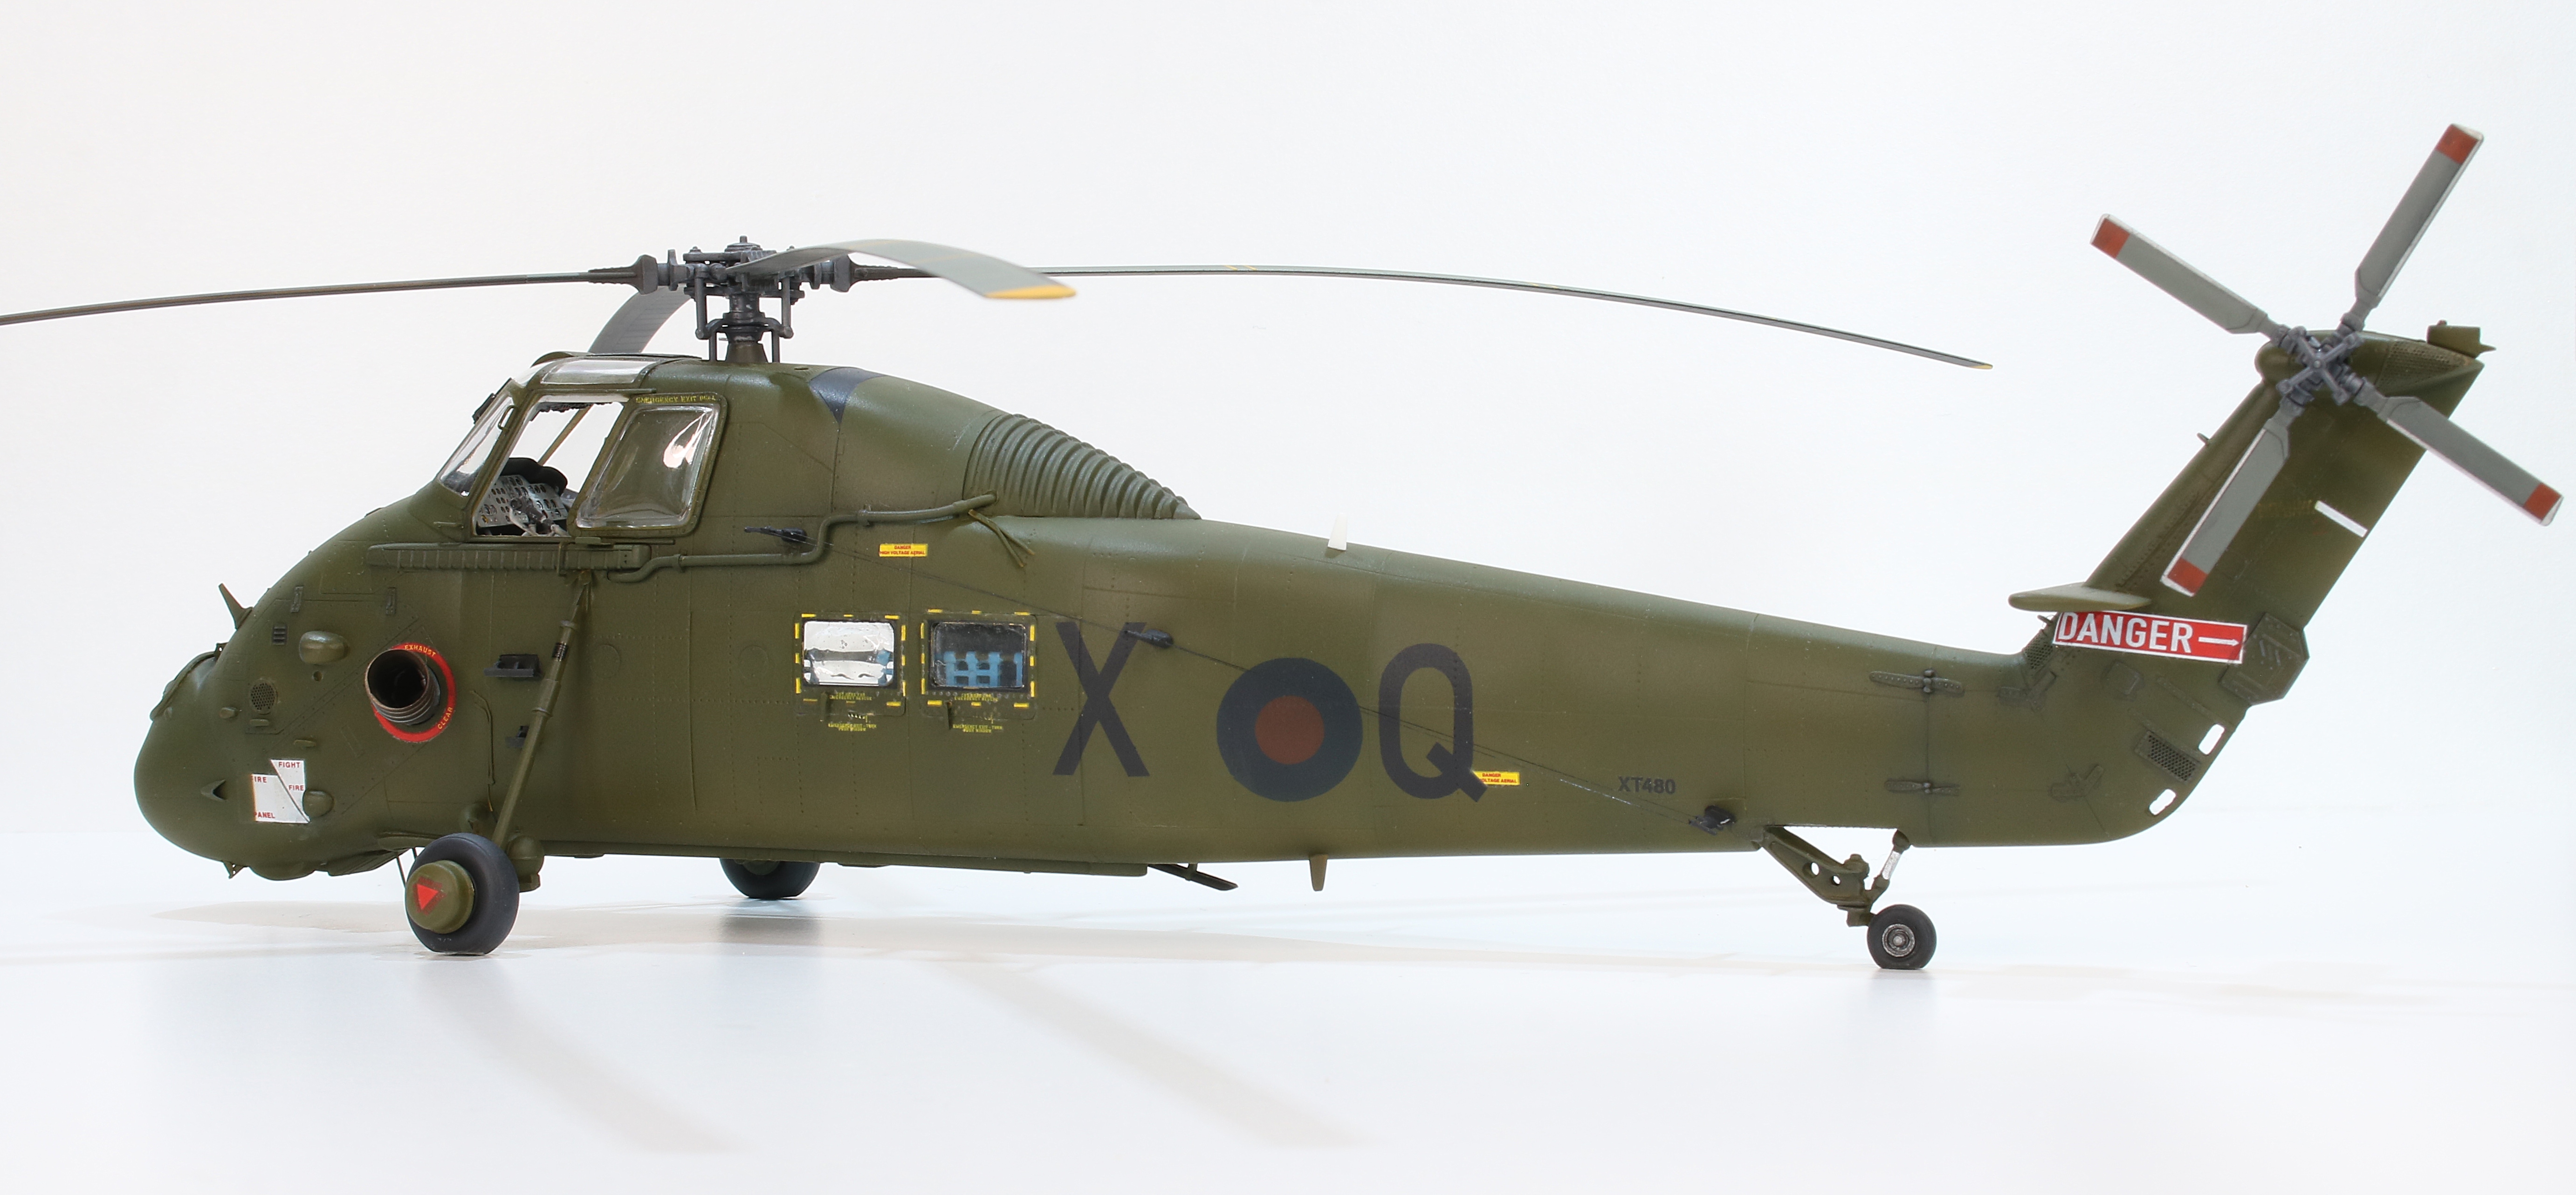
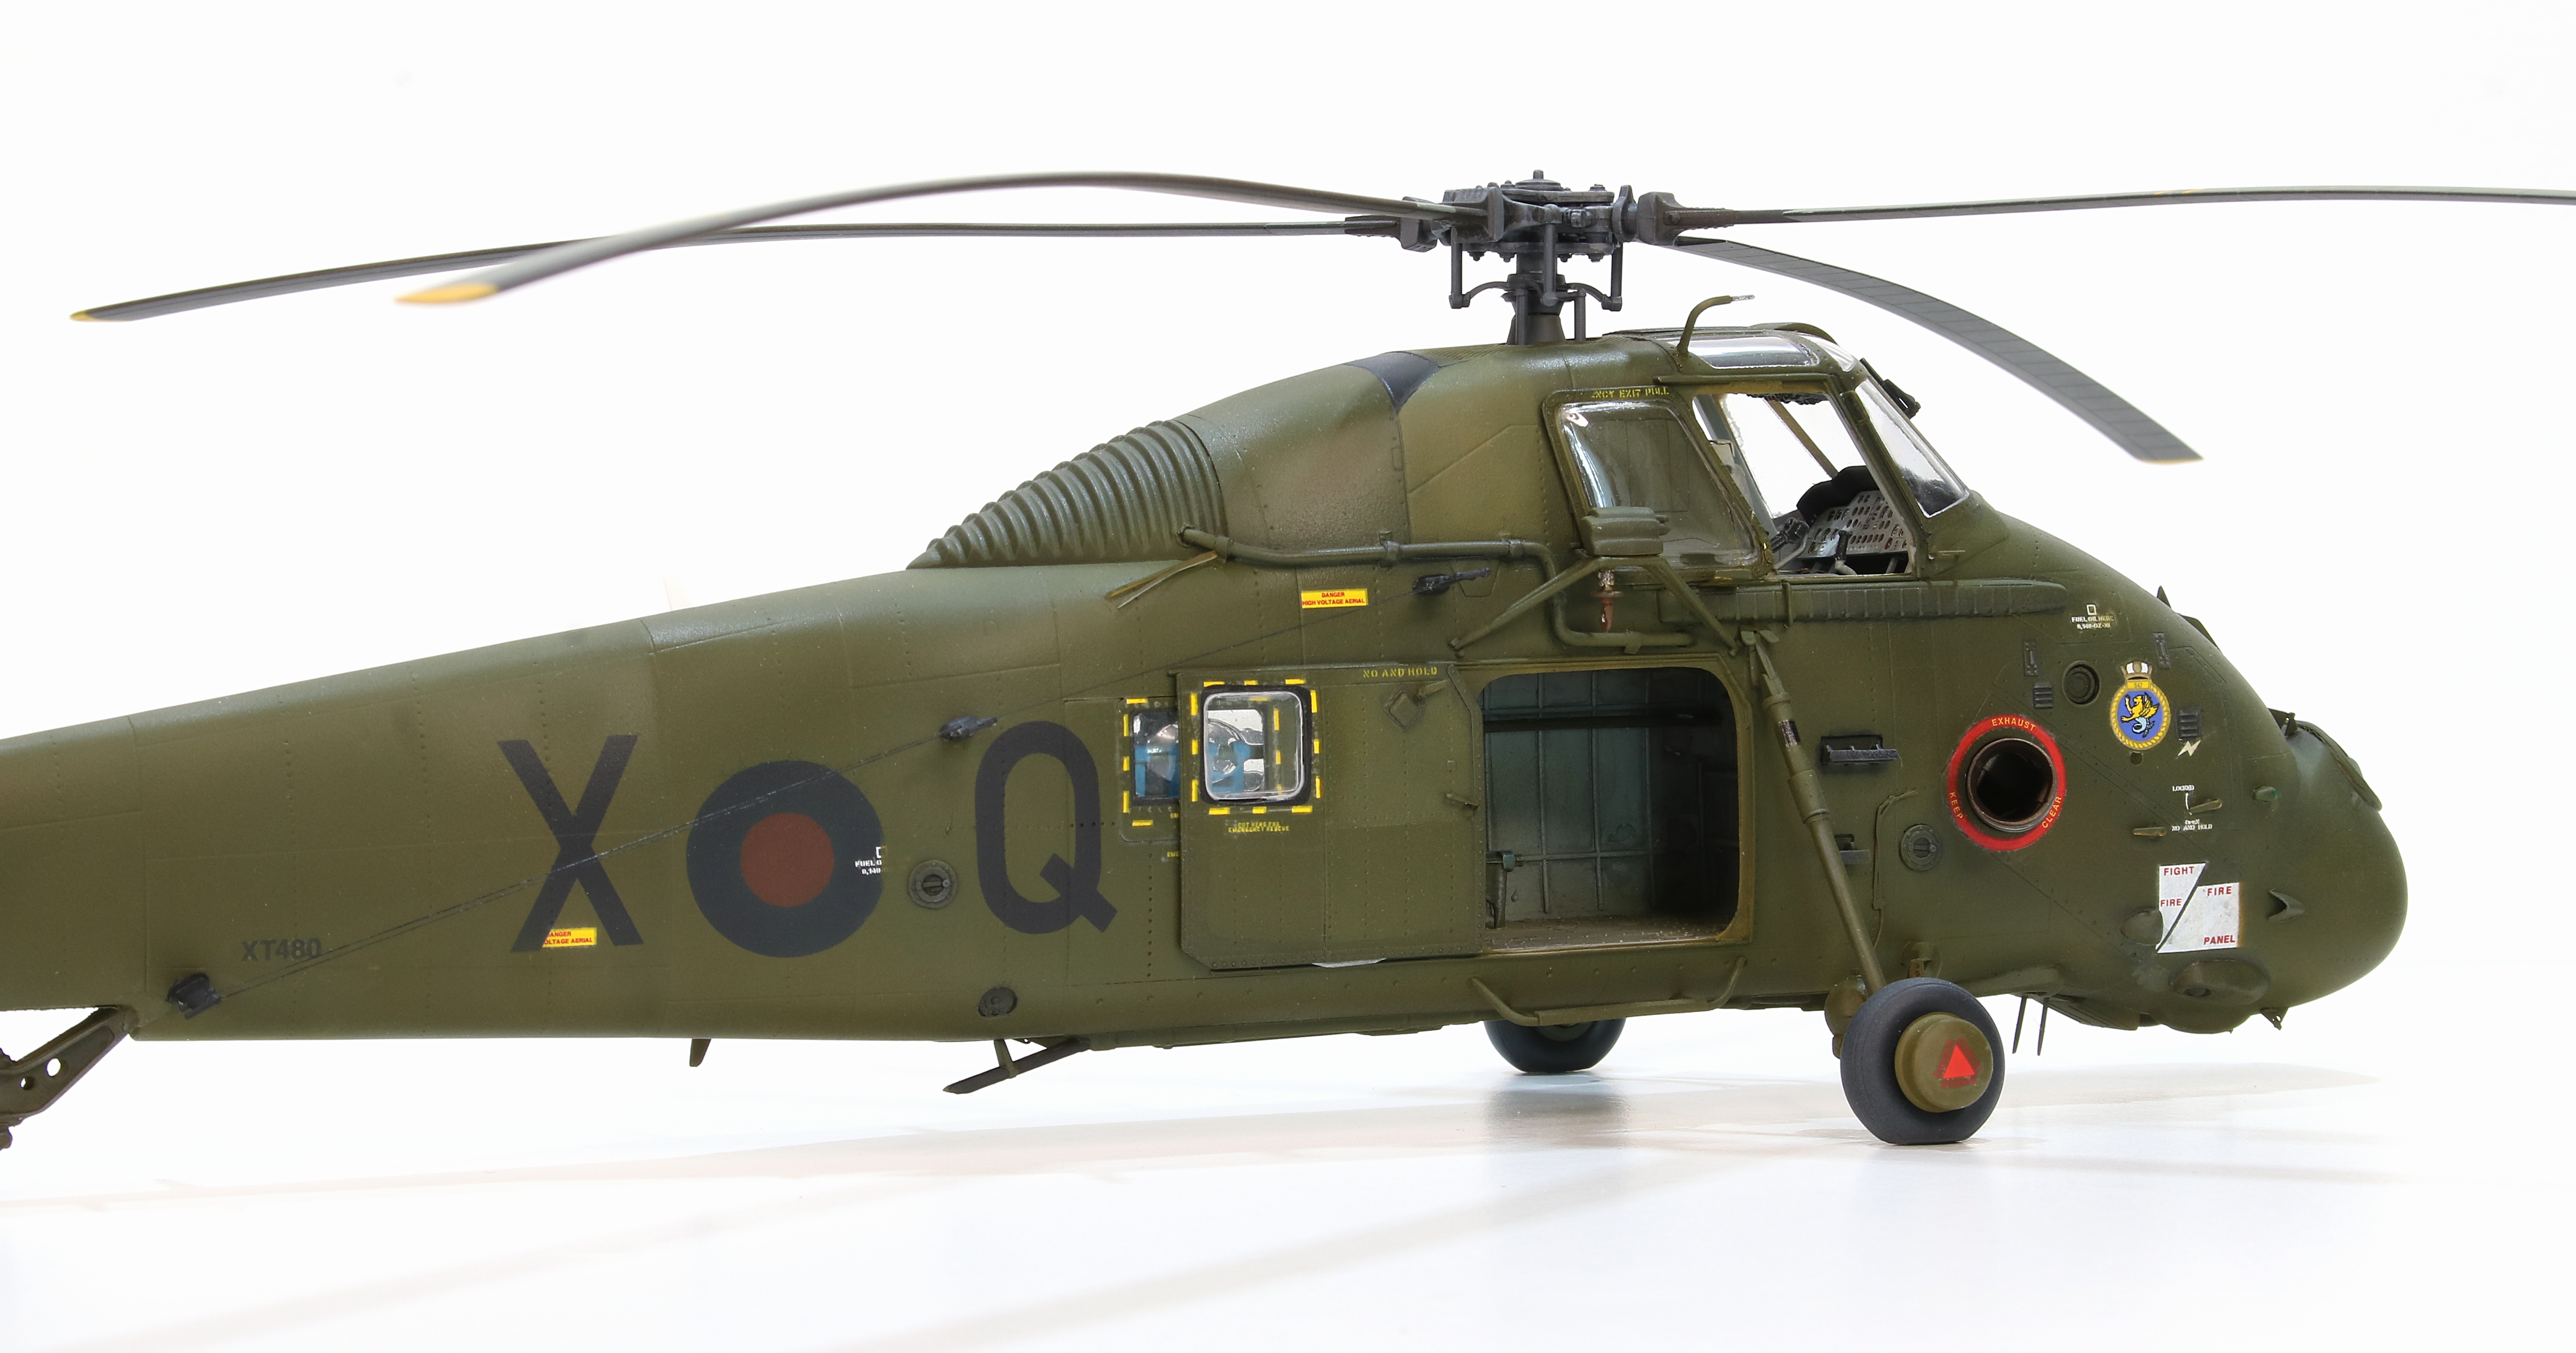
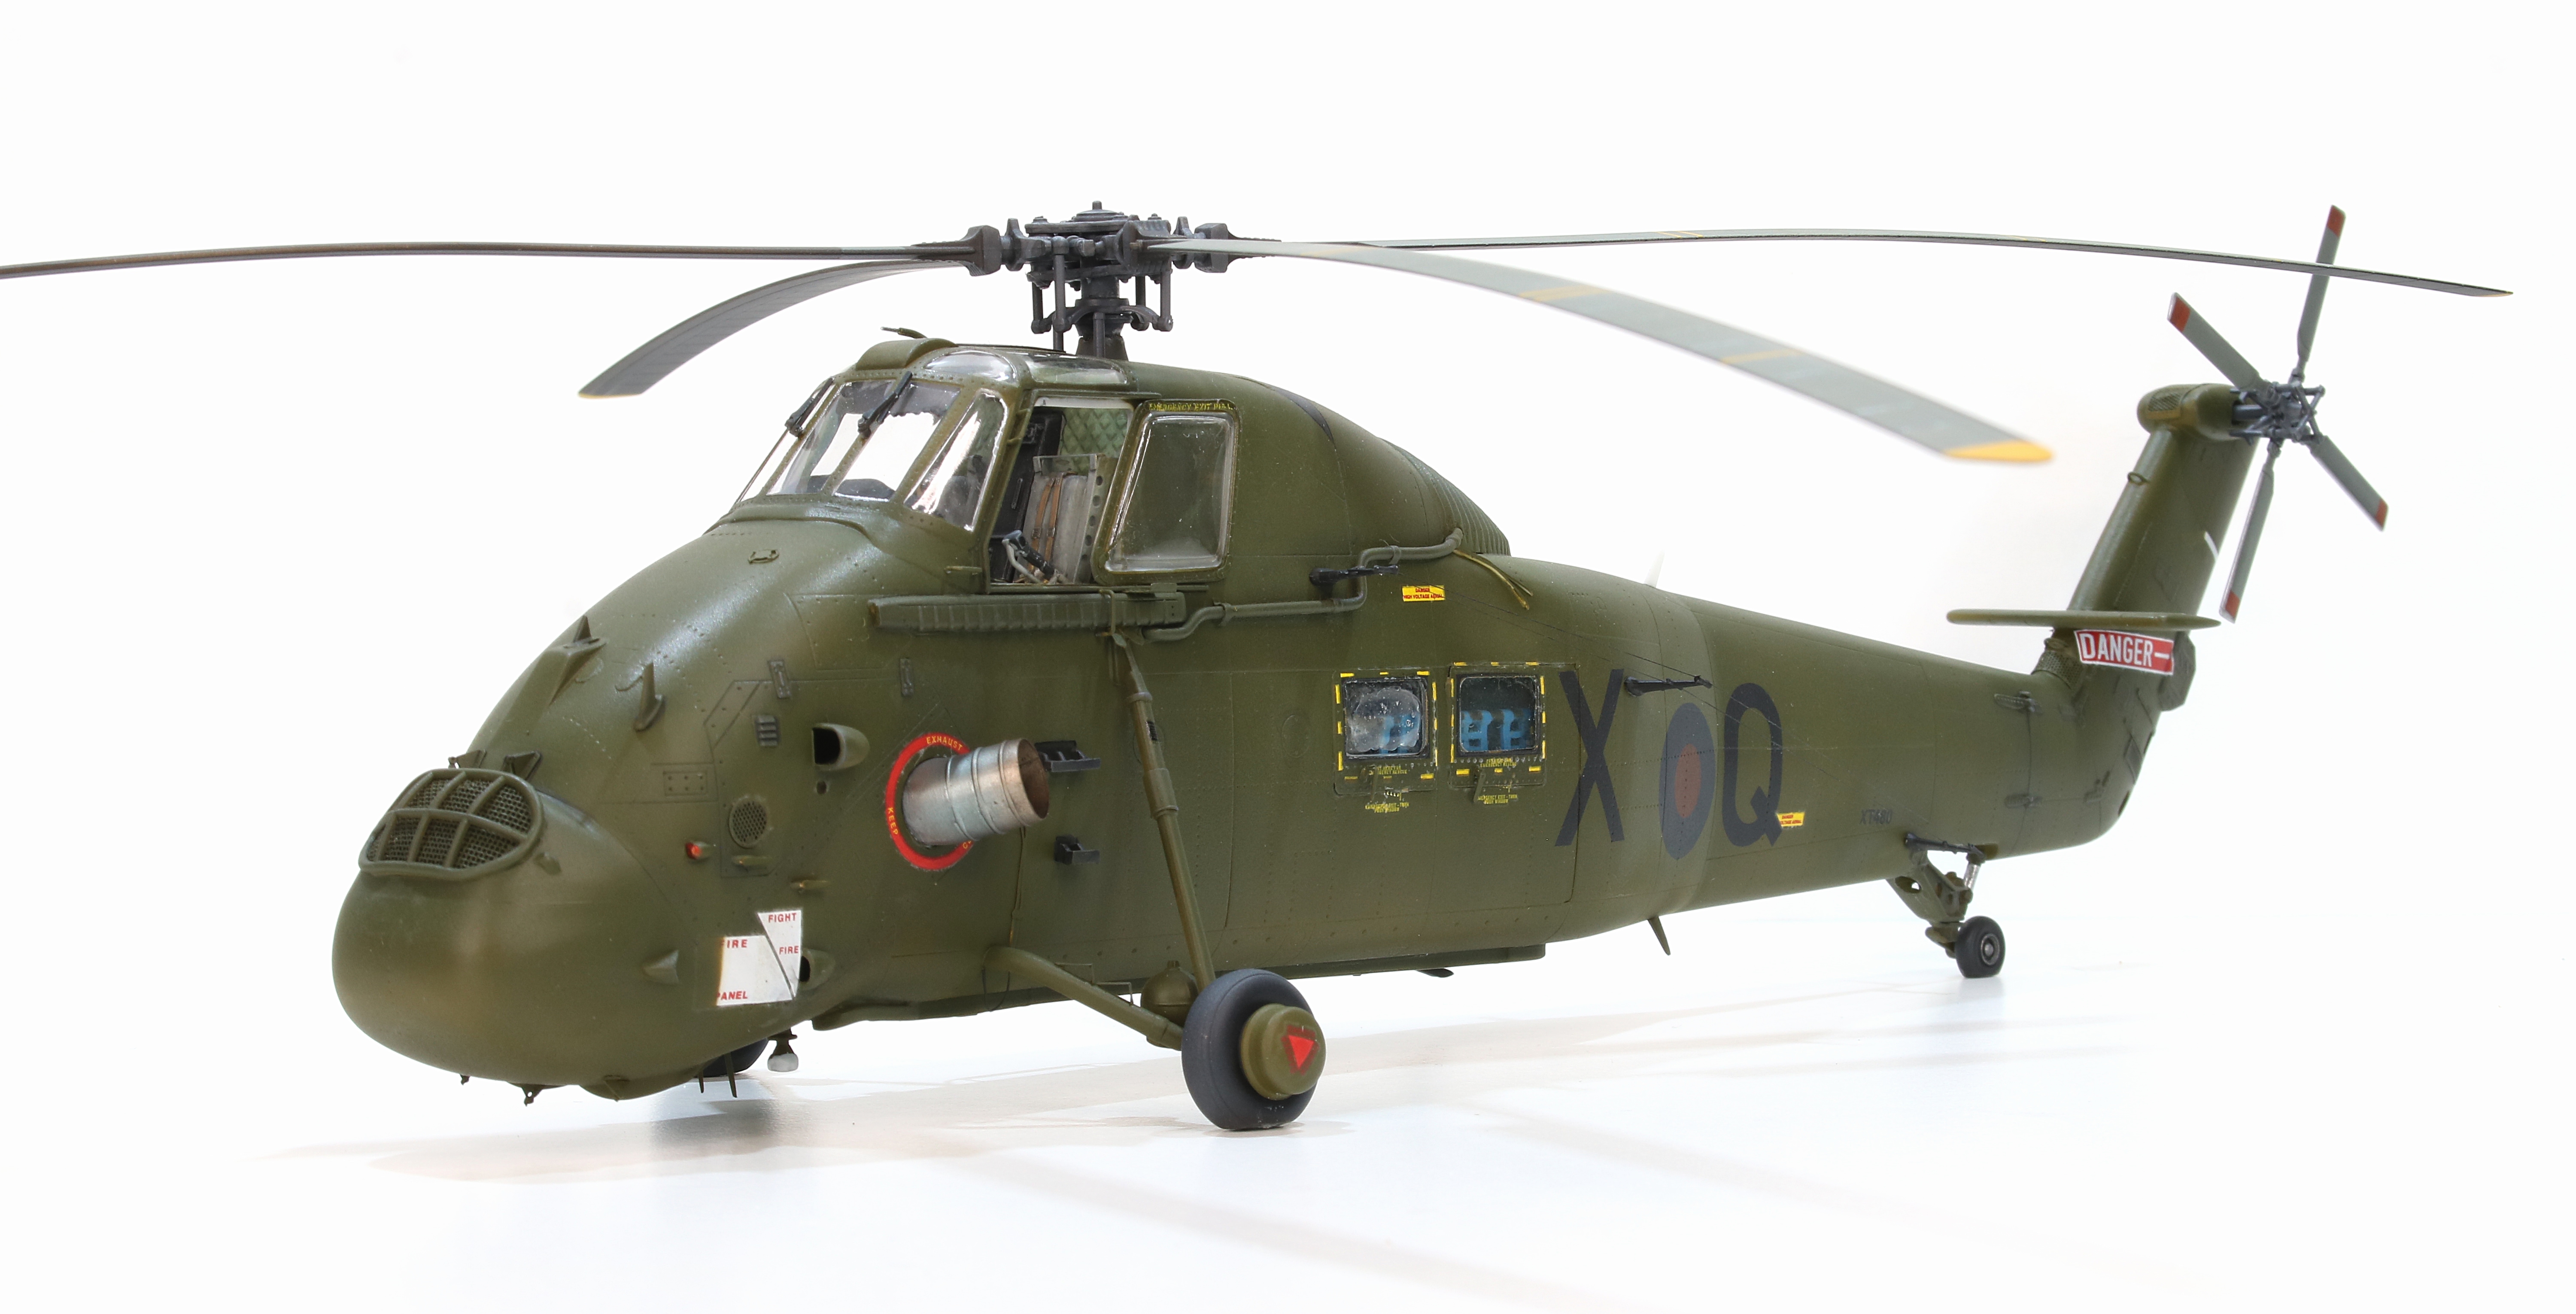
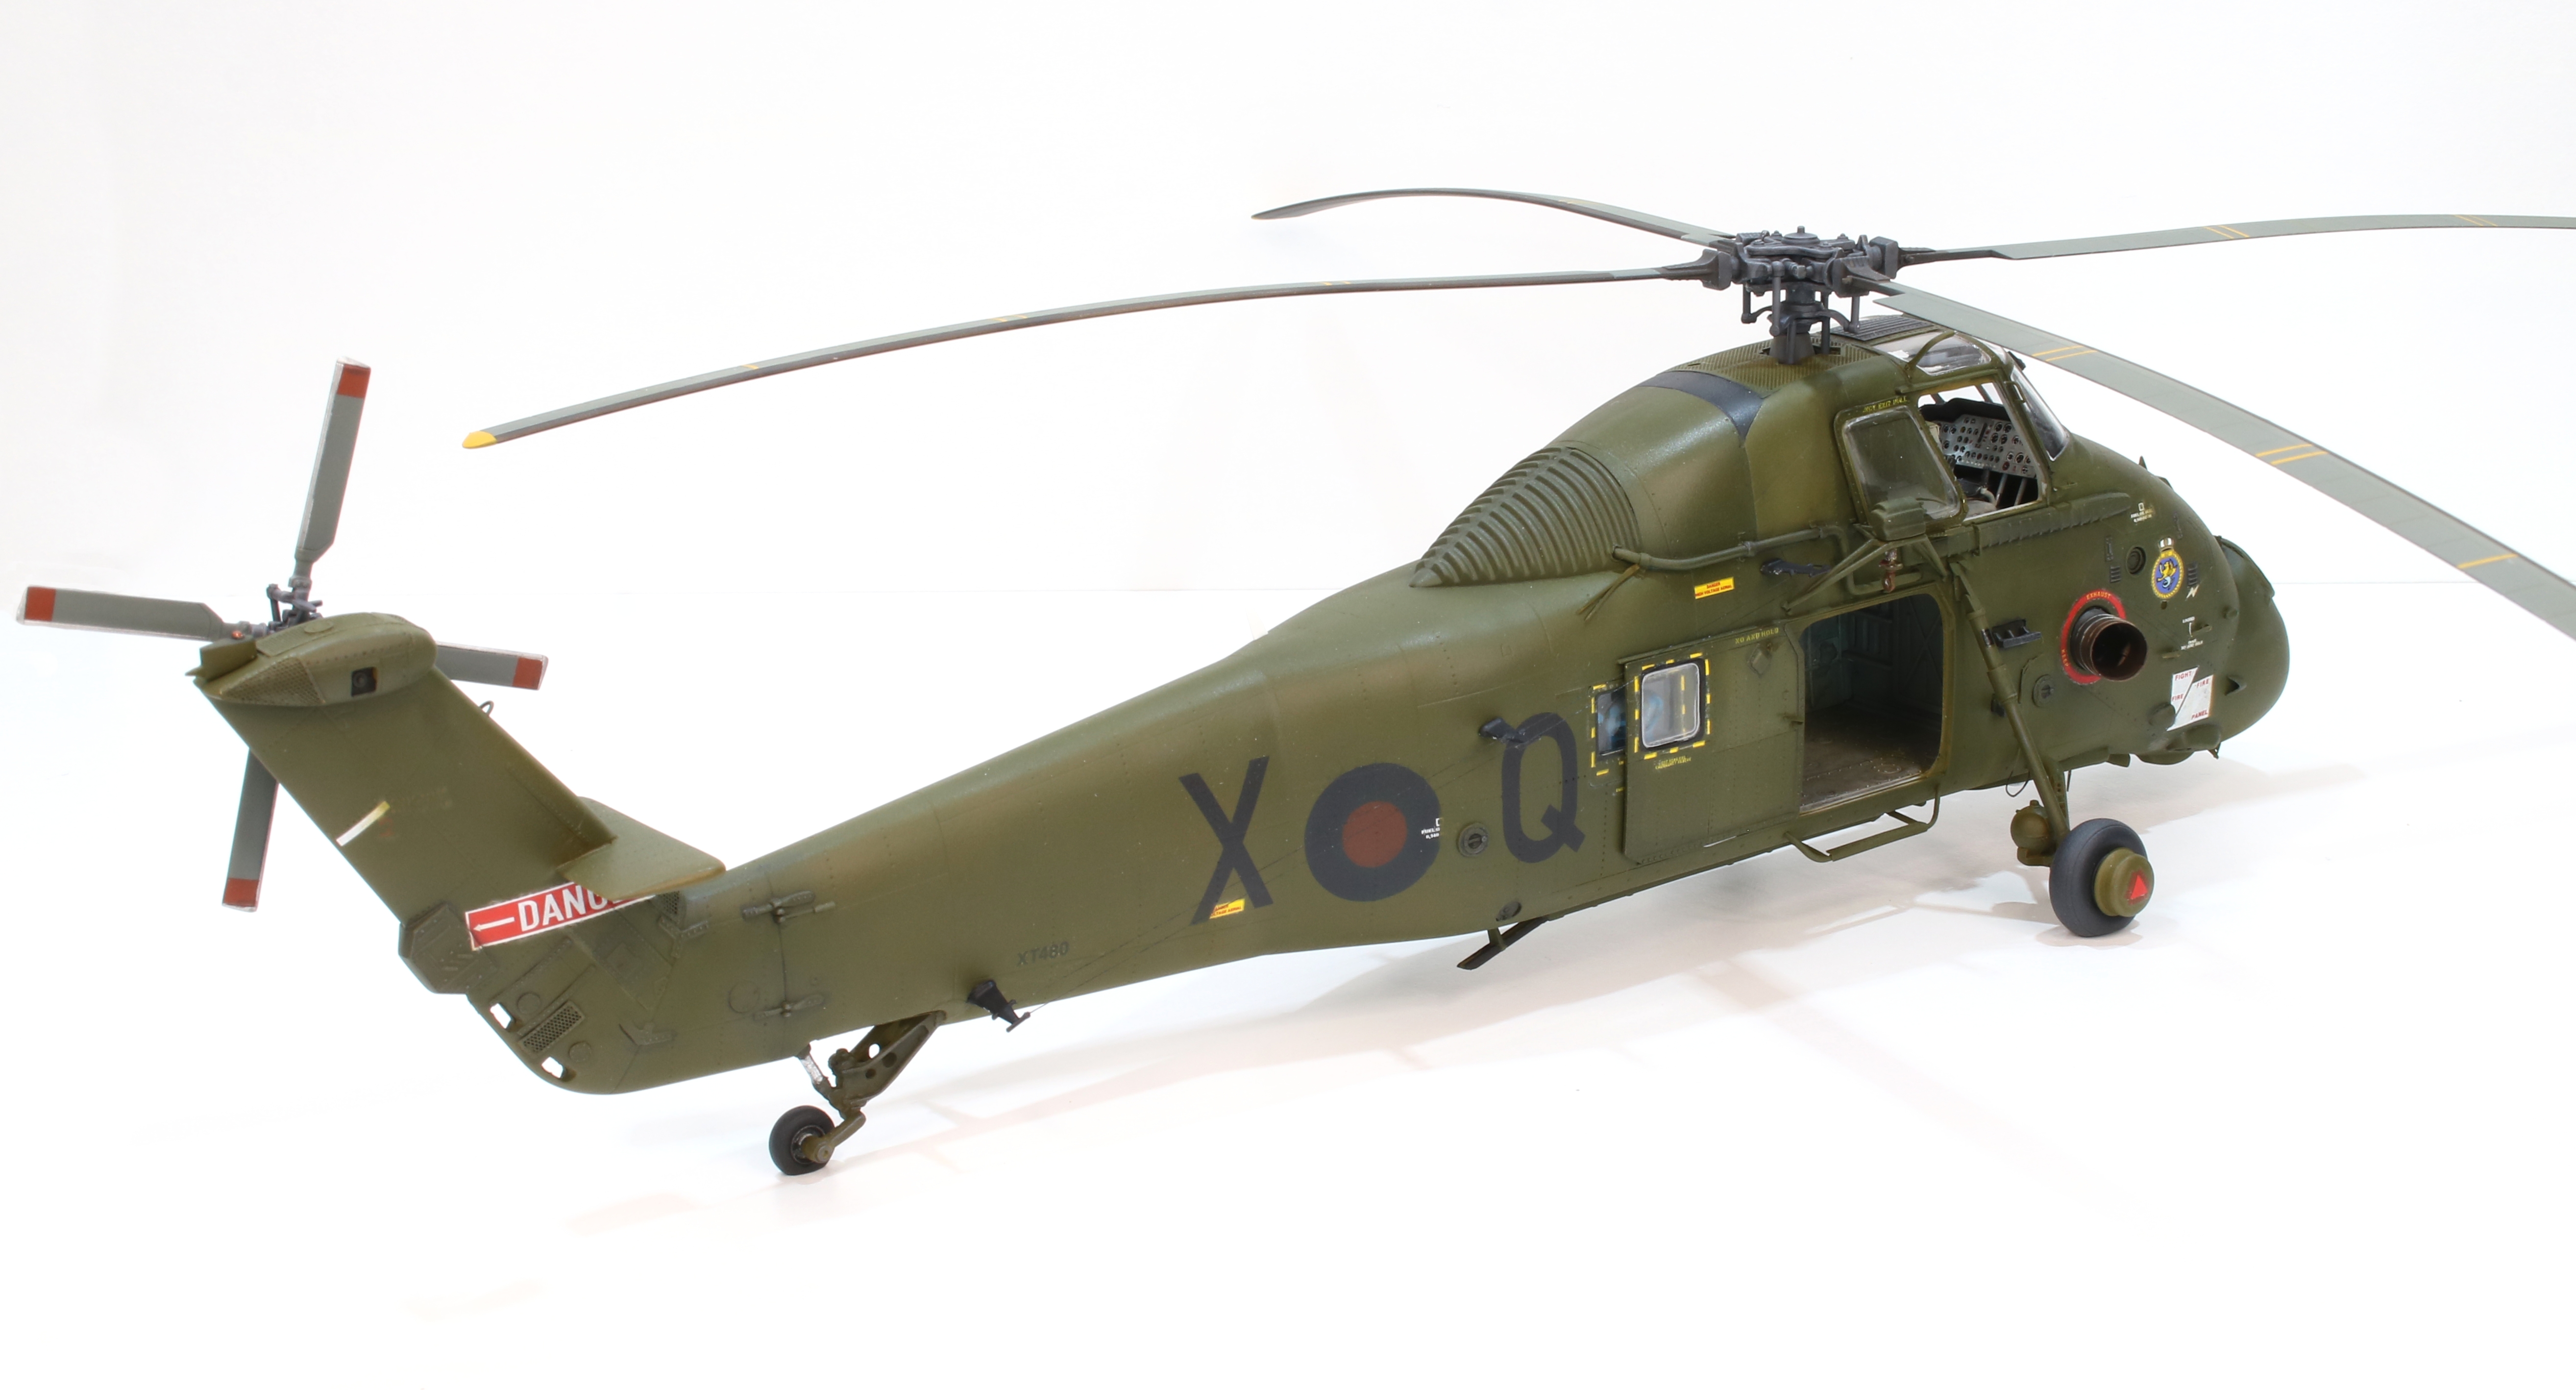
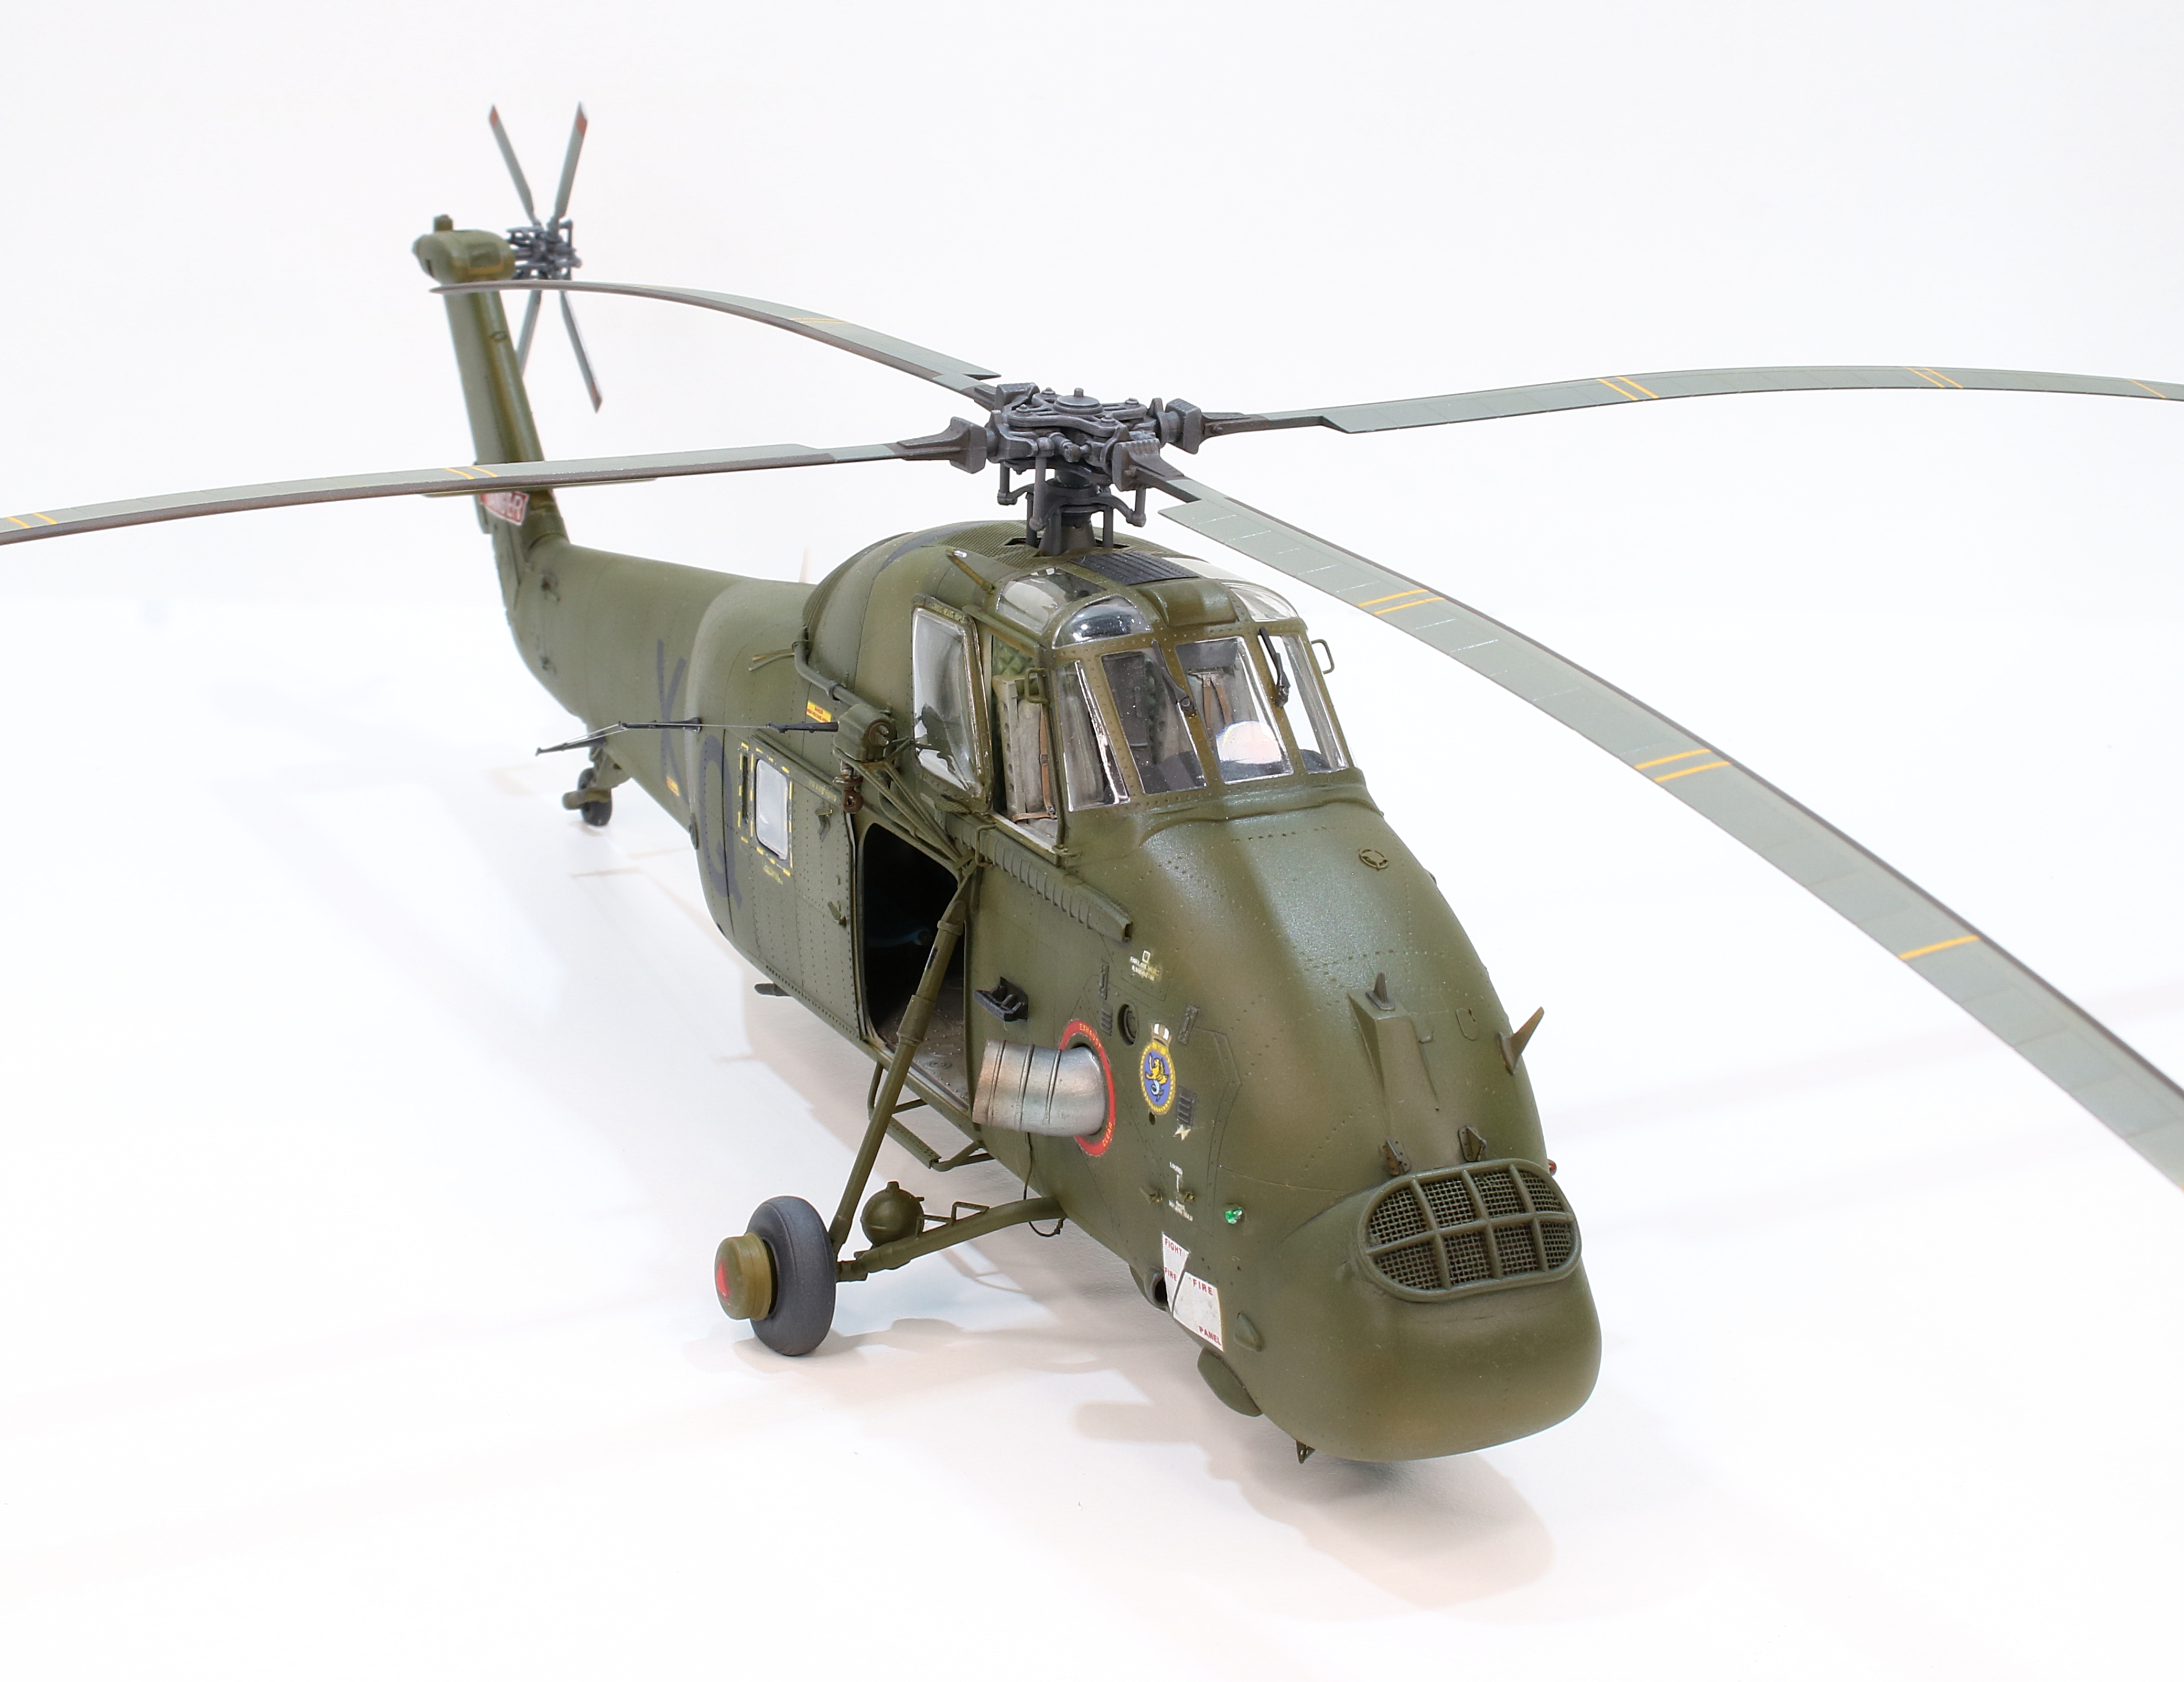
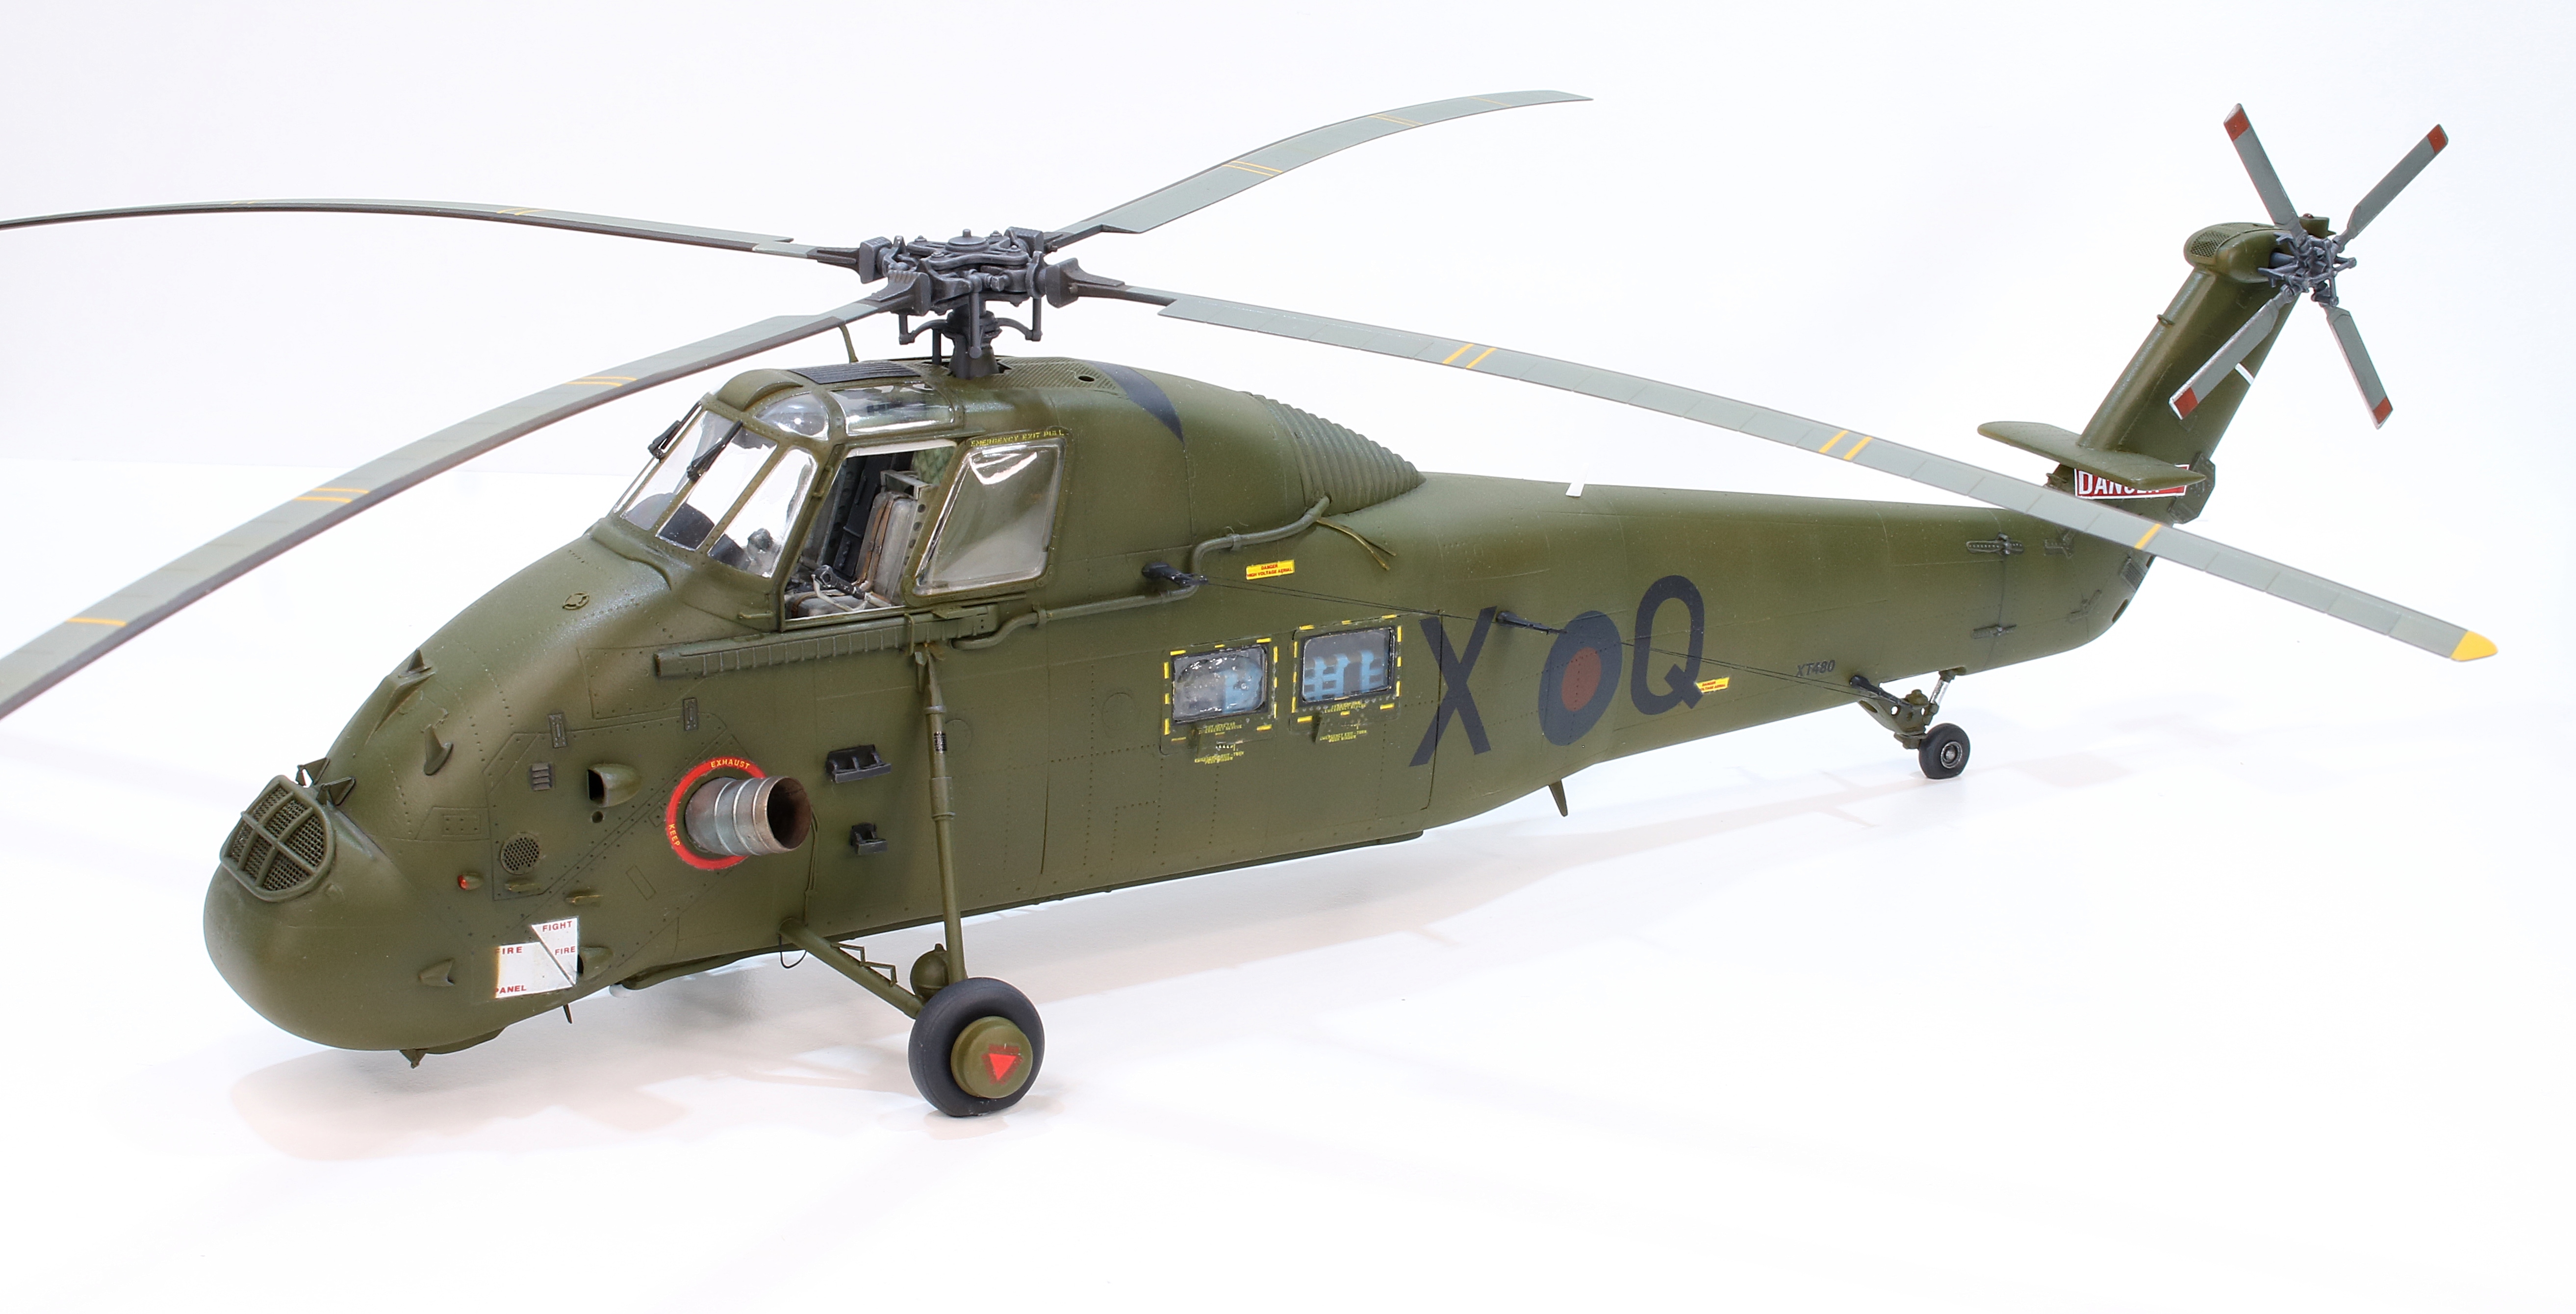
Italeri 1/48 Scale Westland Wessex HU5
Build
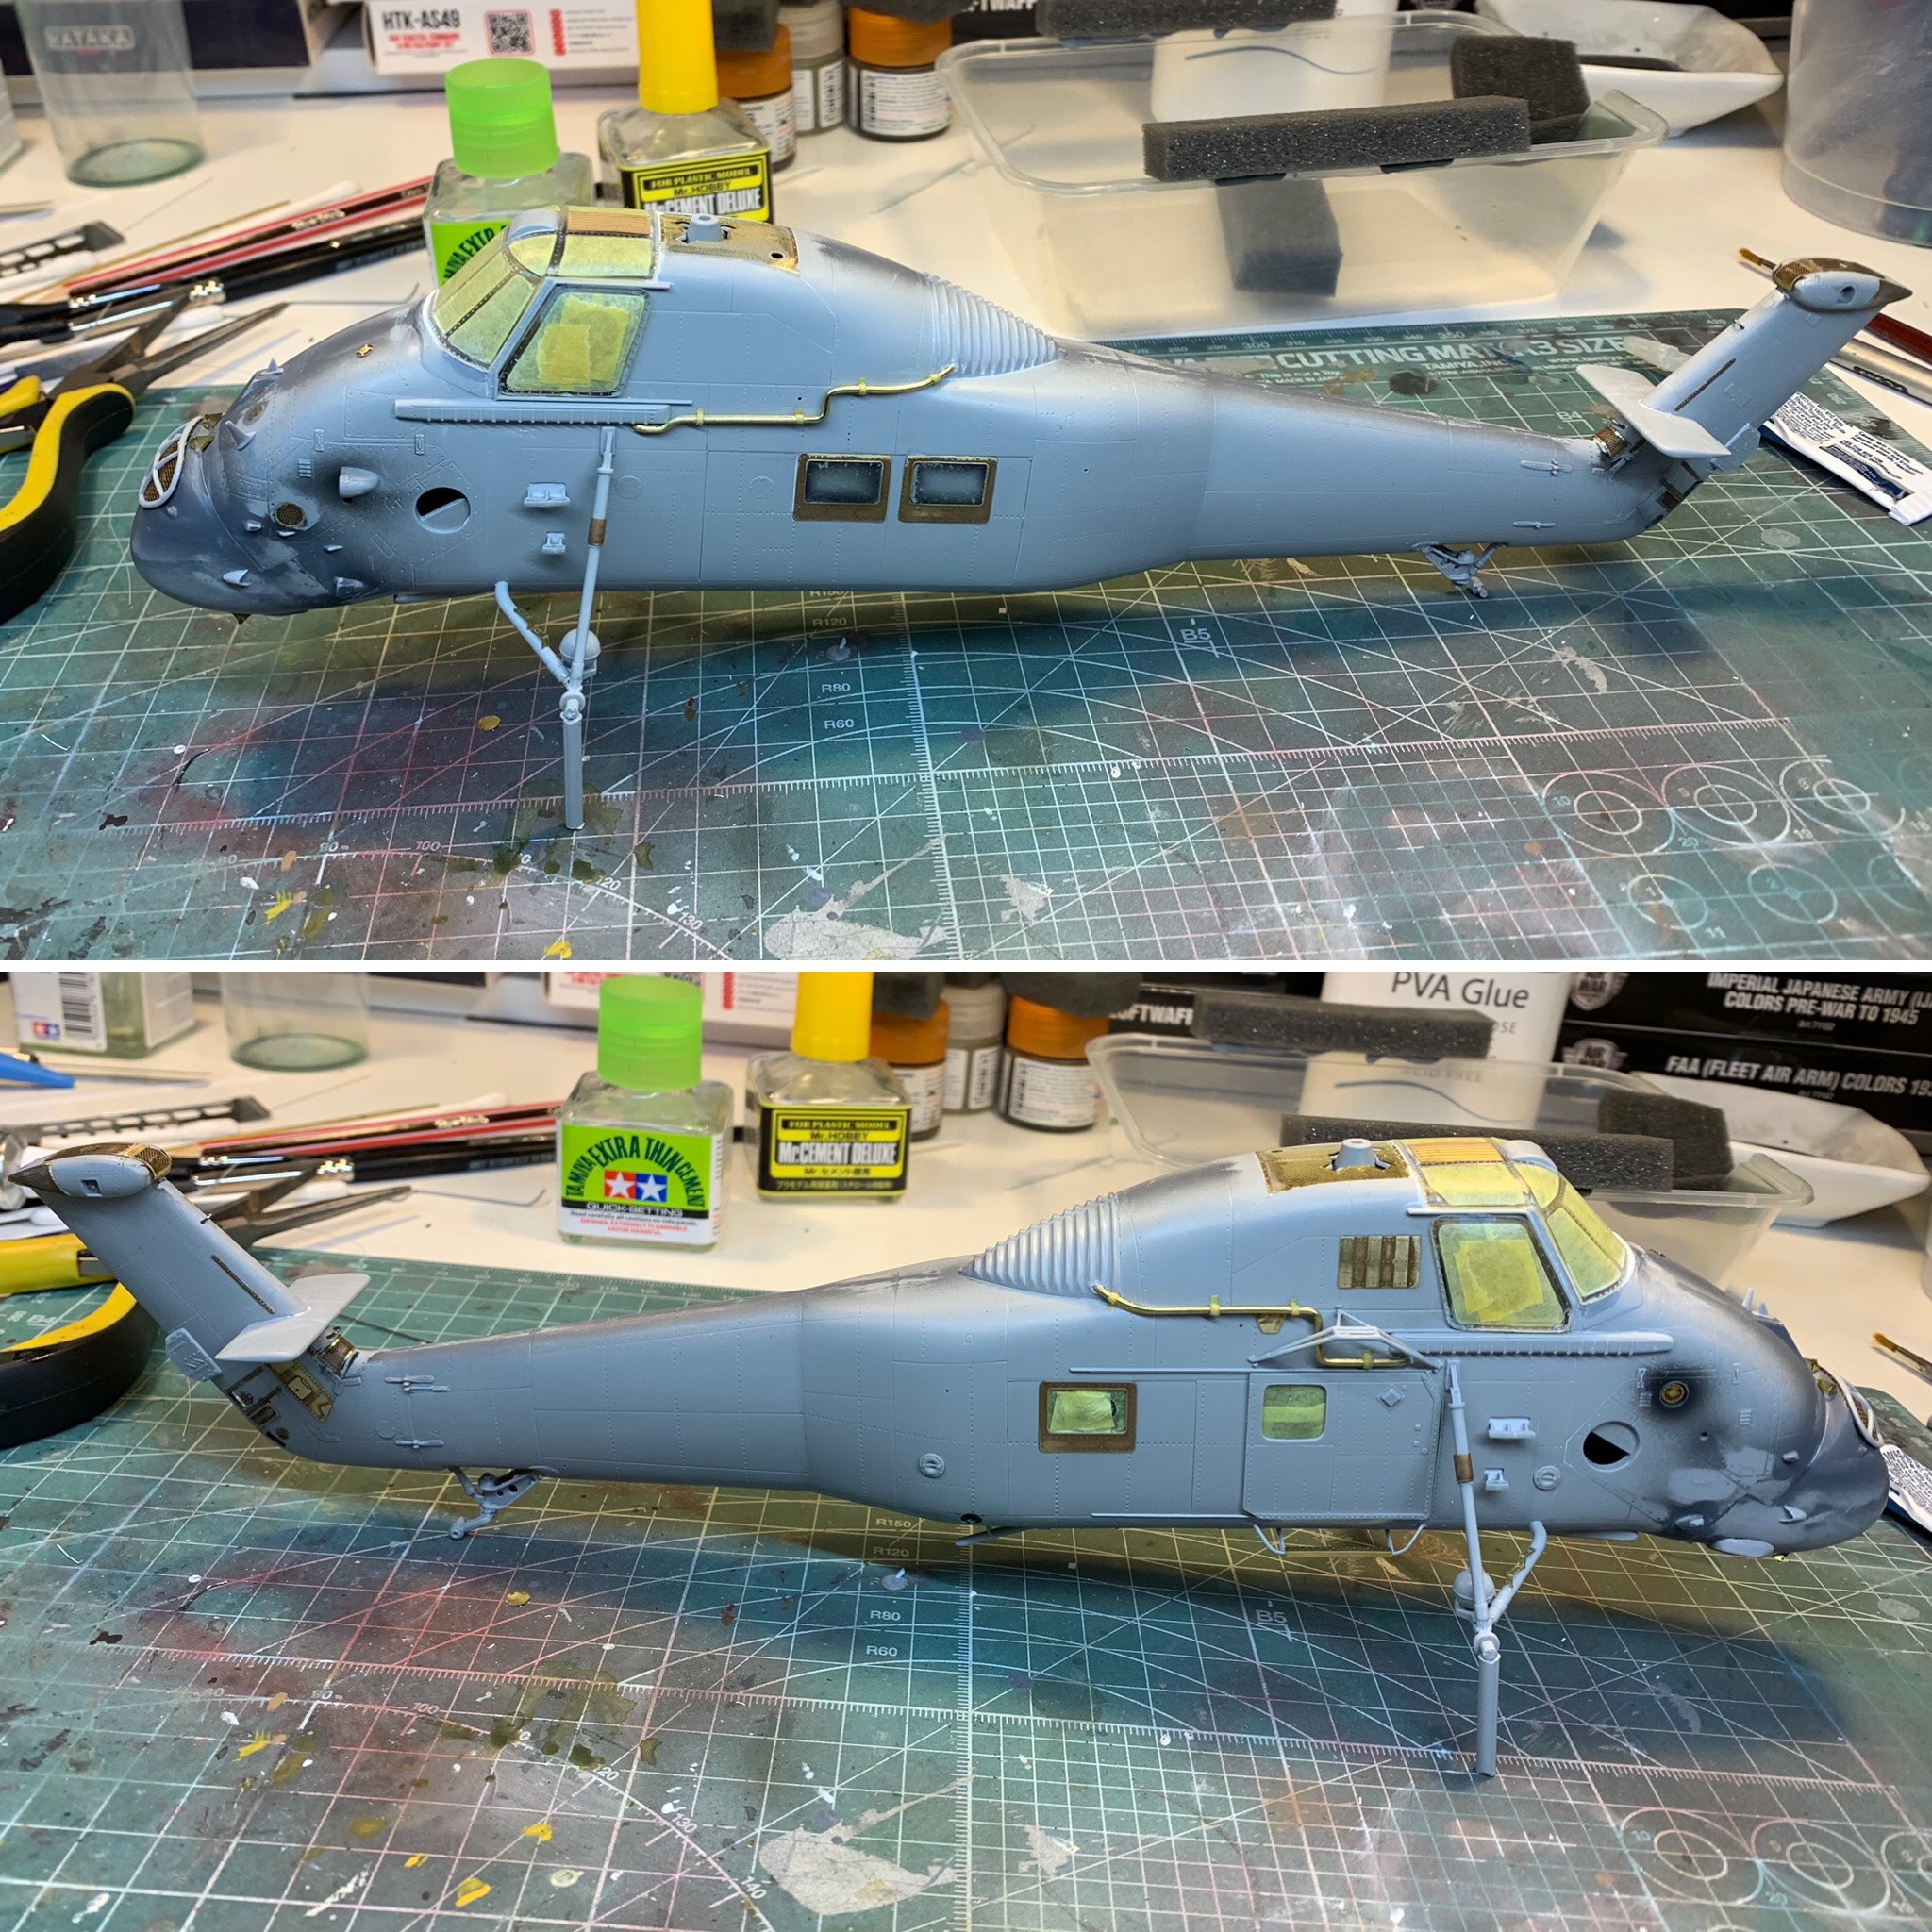
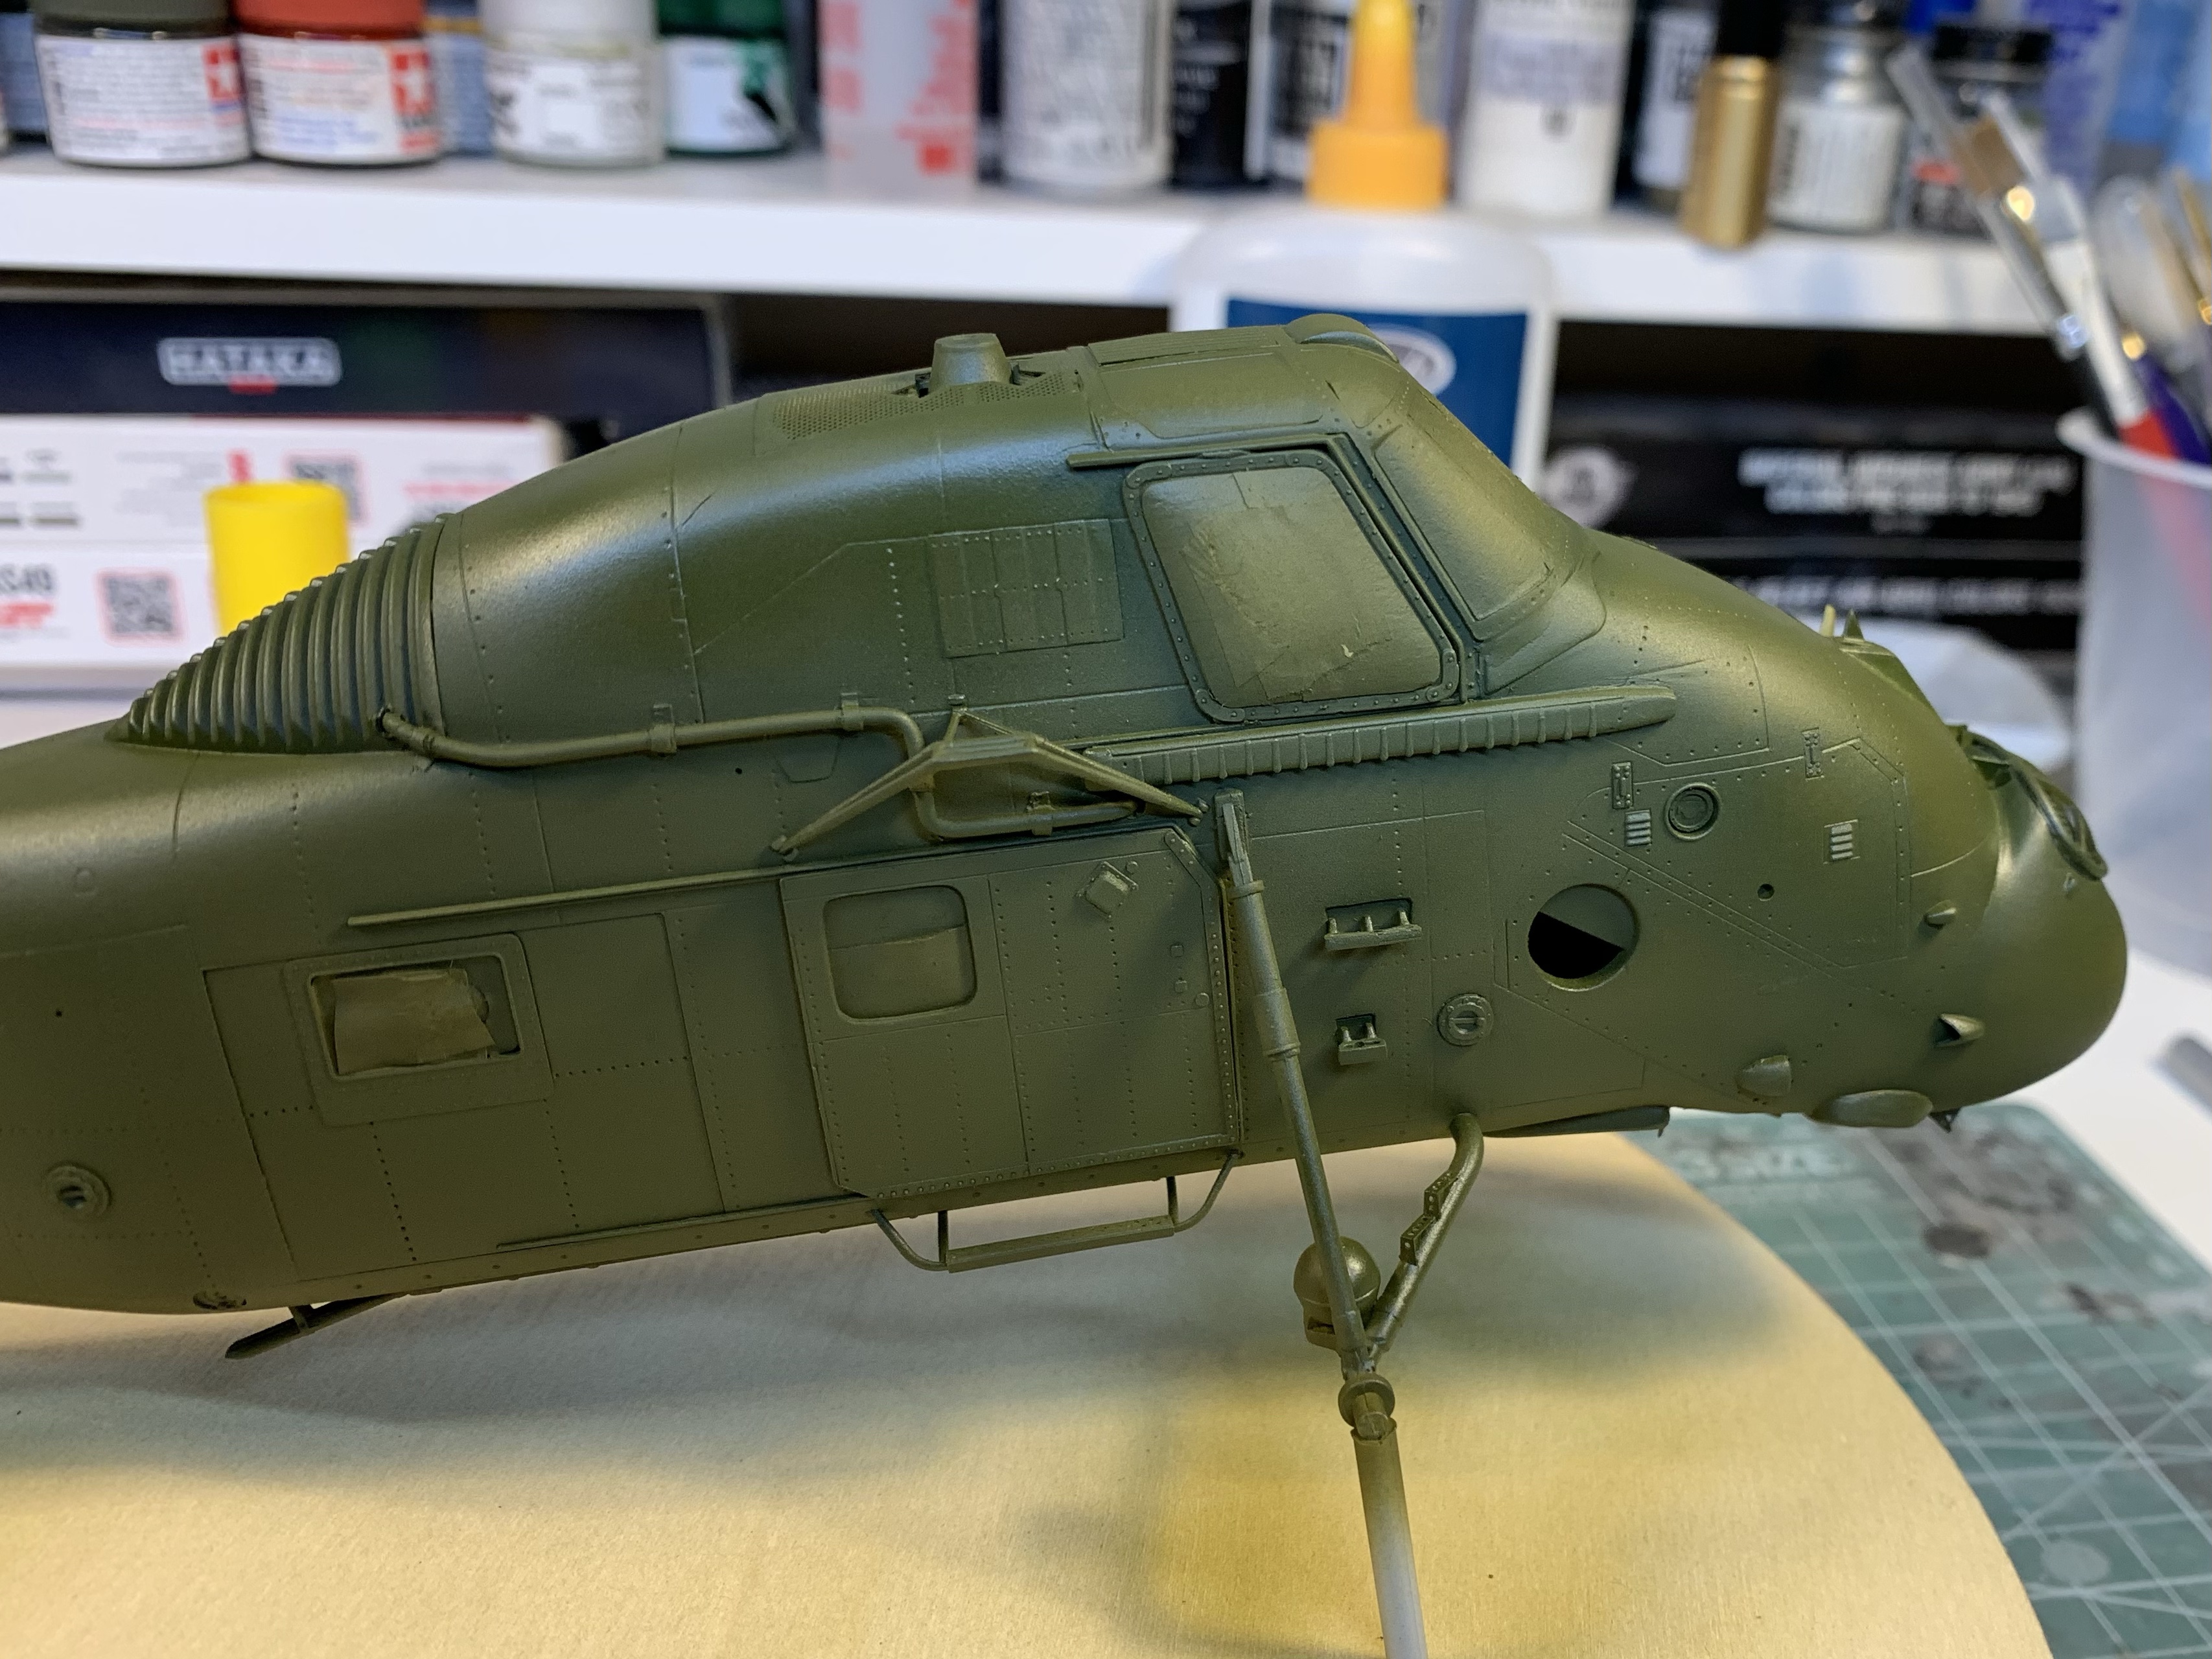
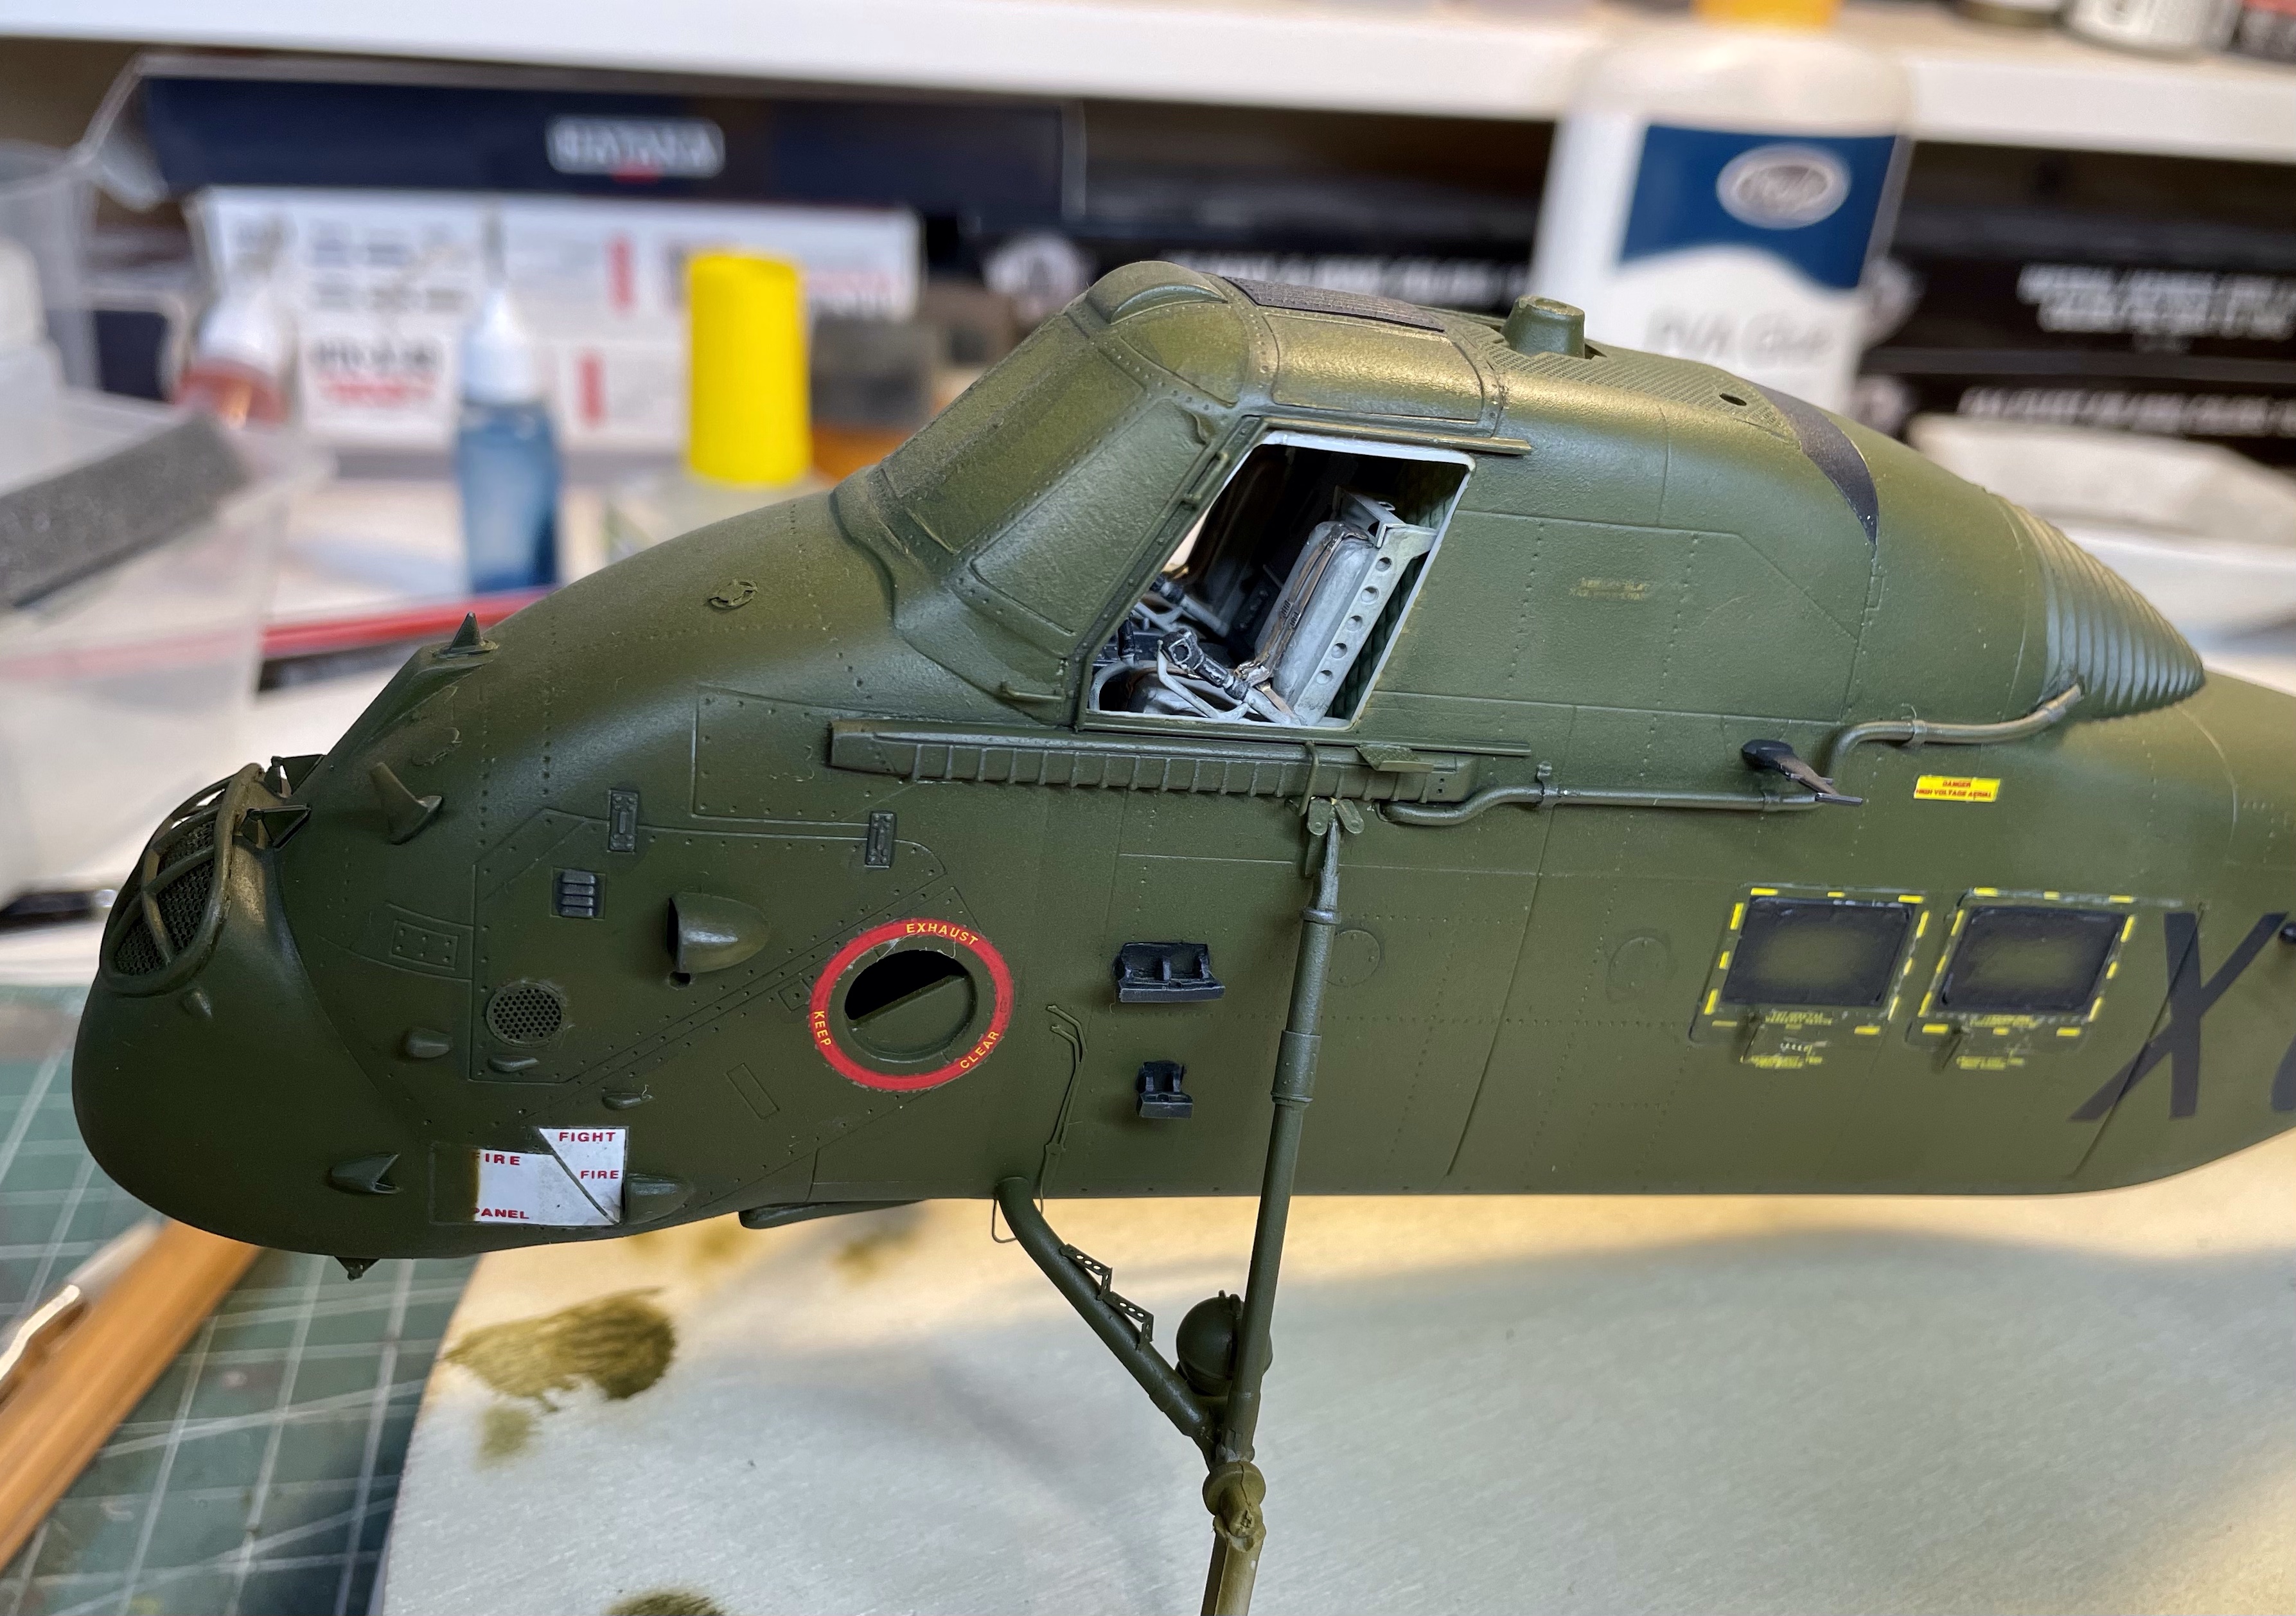
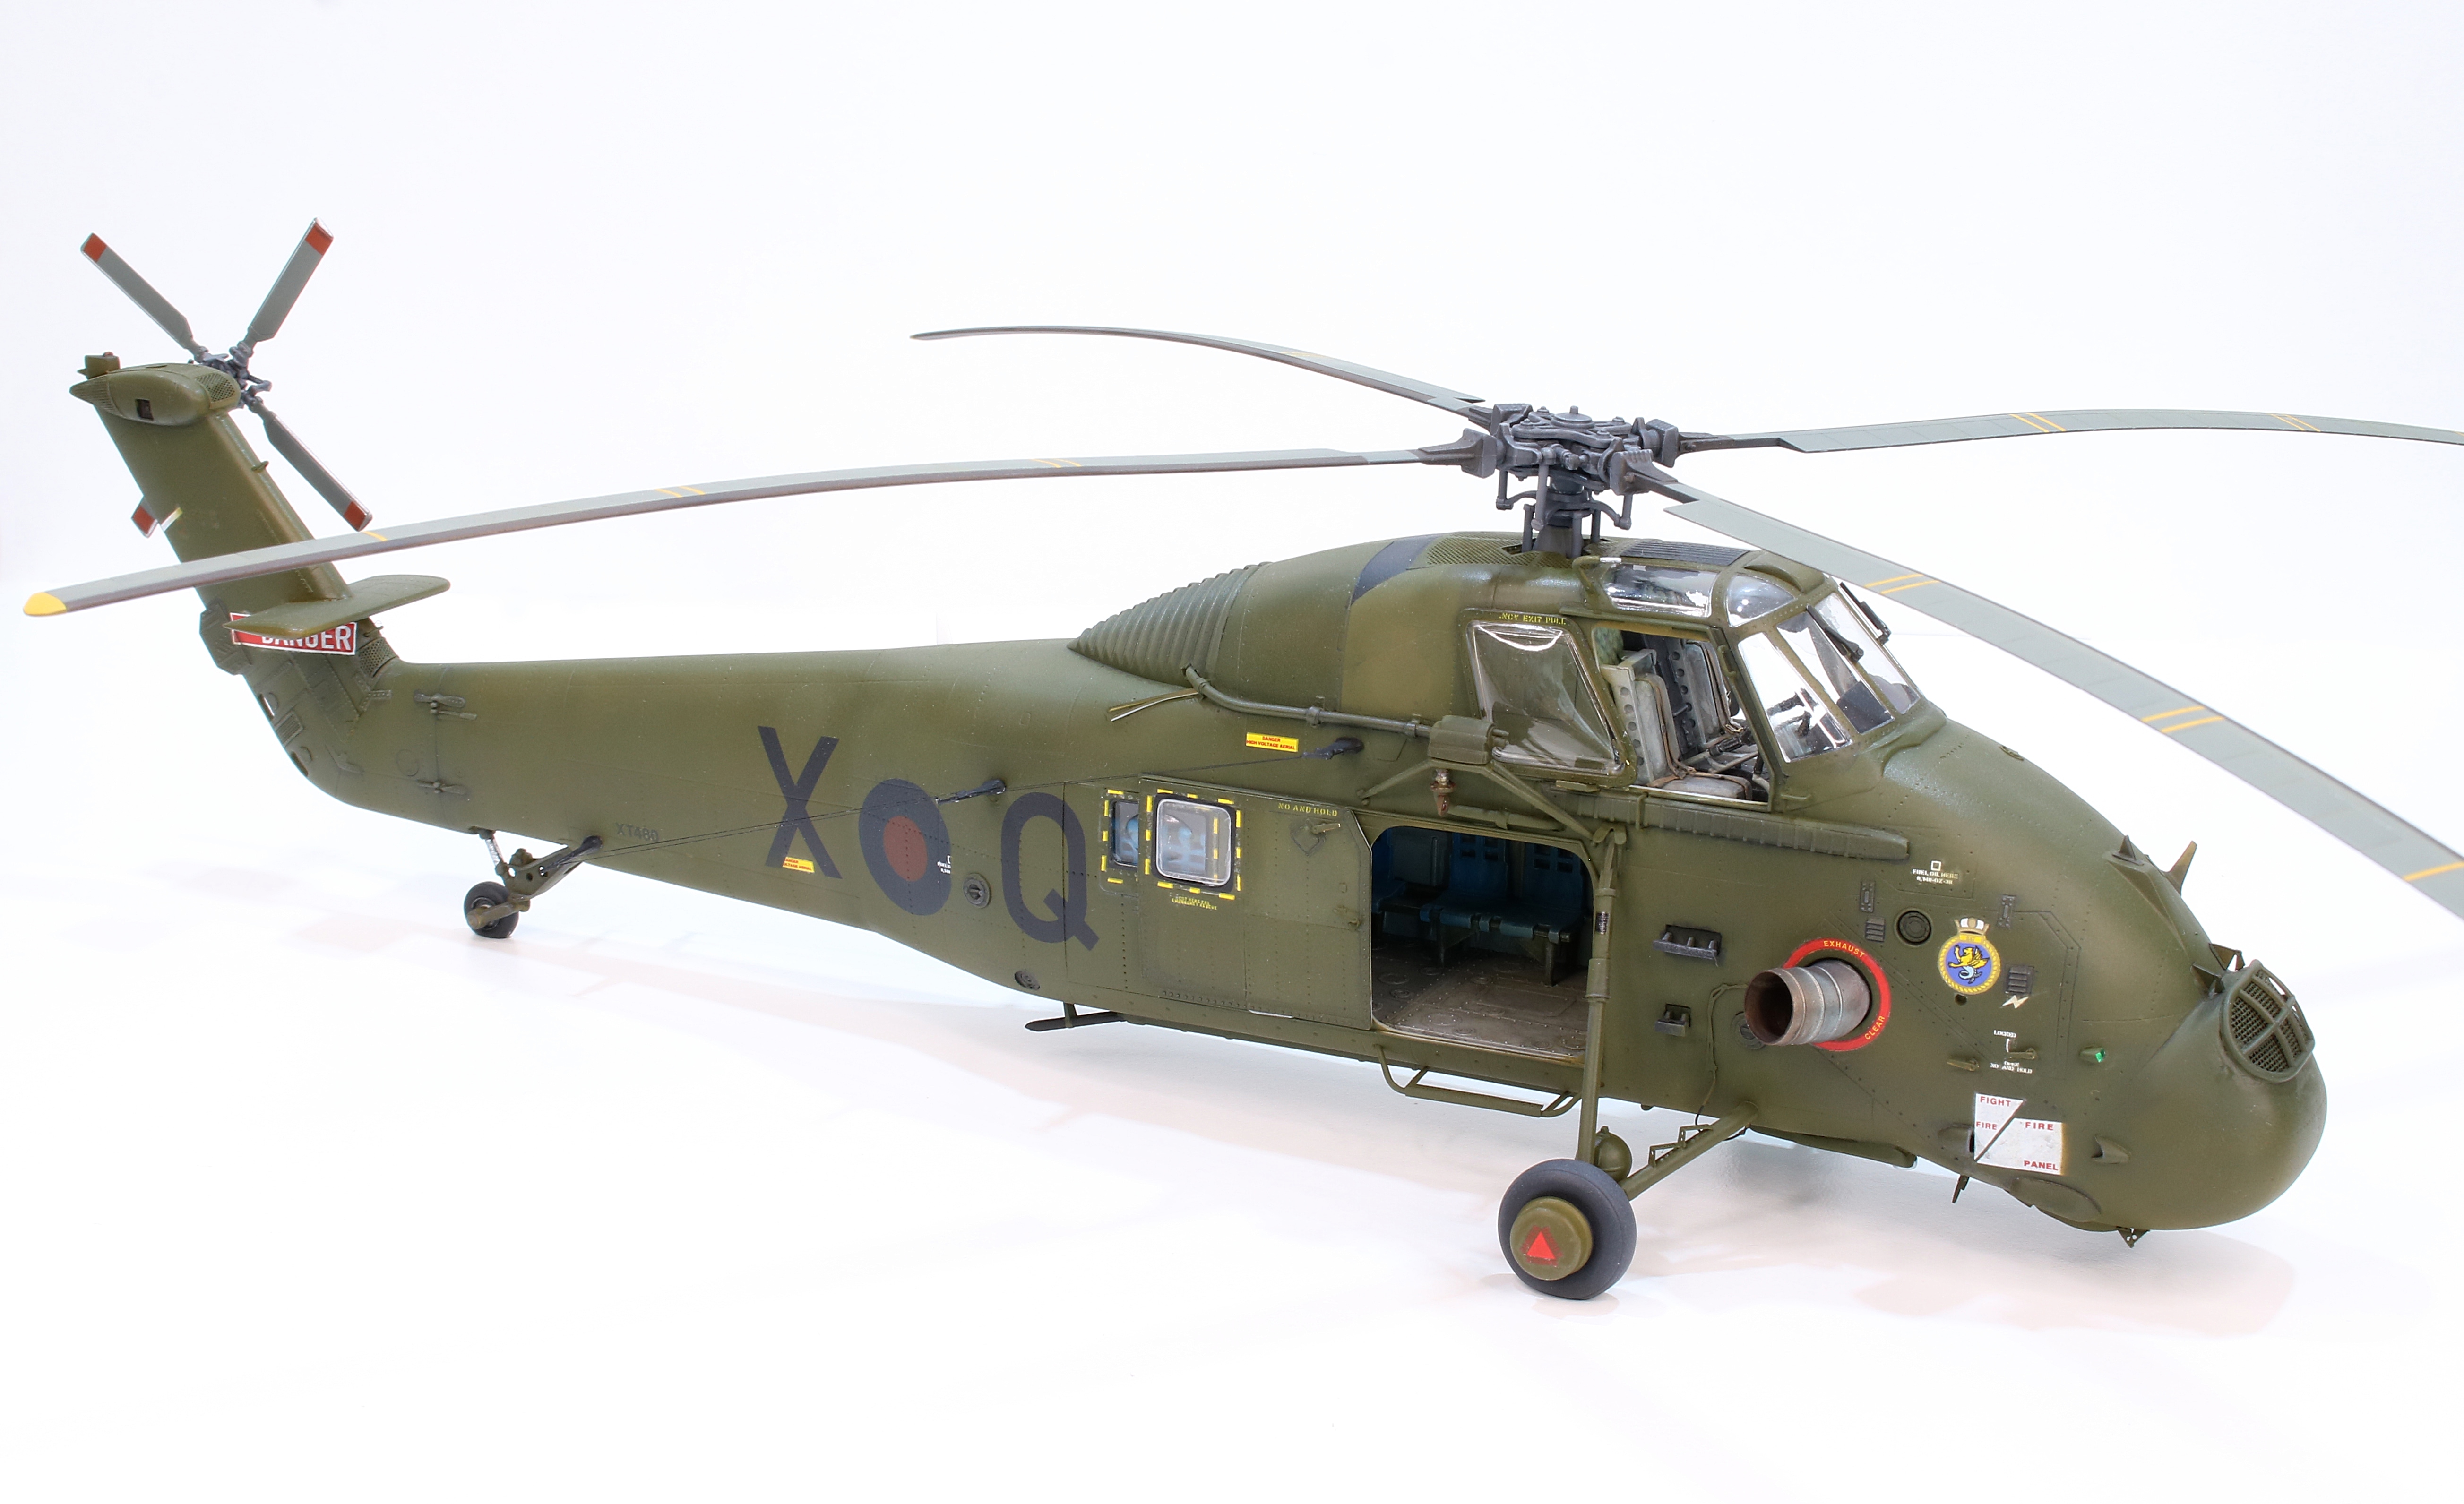
I’ll try and keep it brief… In building this one up I focused on a couple of areas, one specific and one as a consequence of using the Eduard Exterior Detail PE Set.
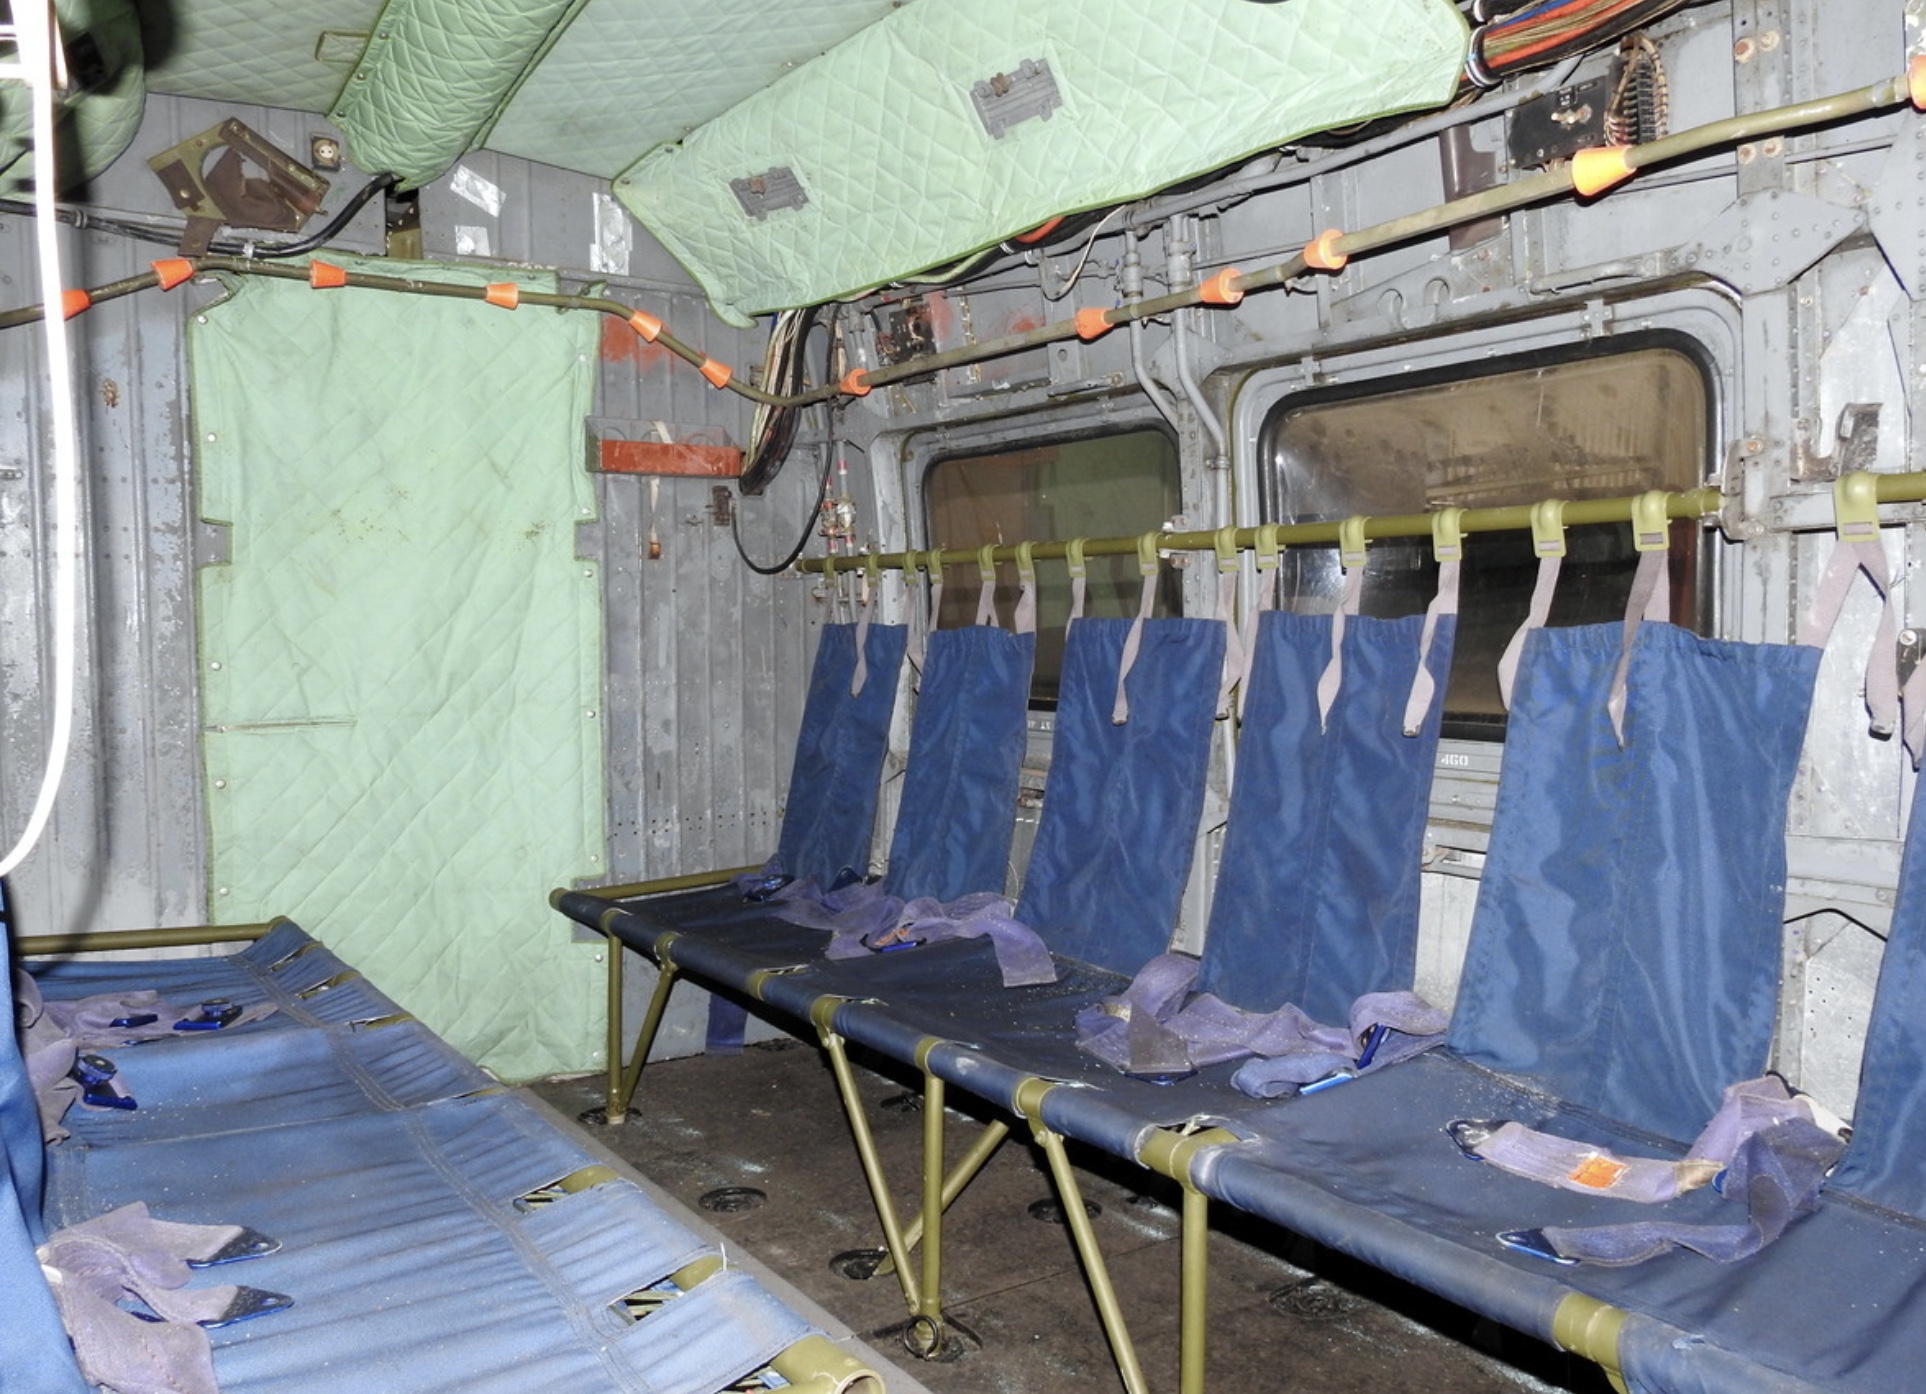
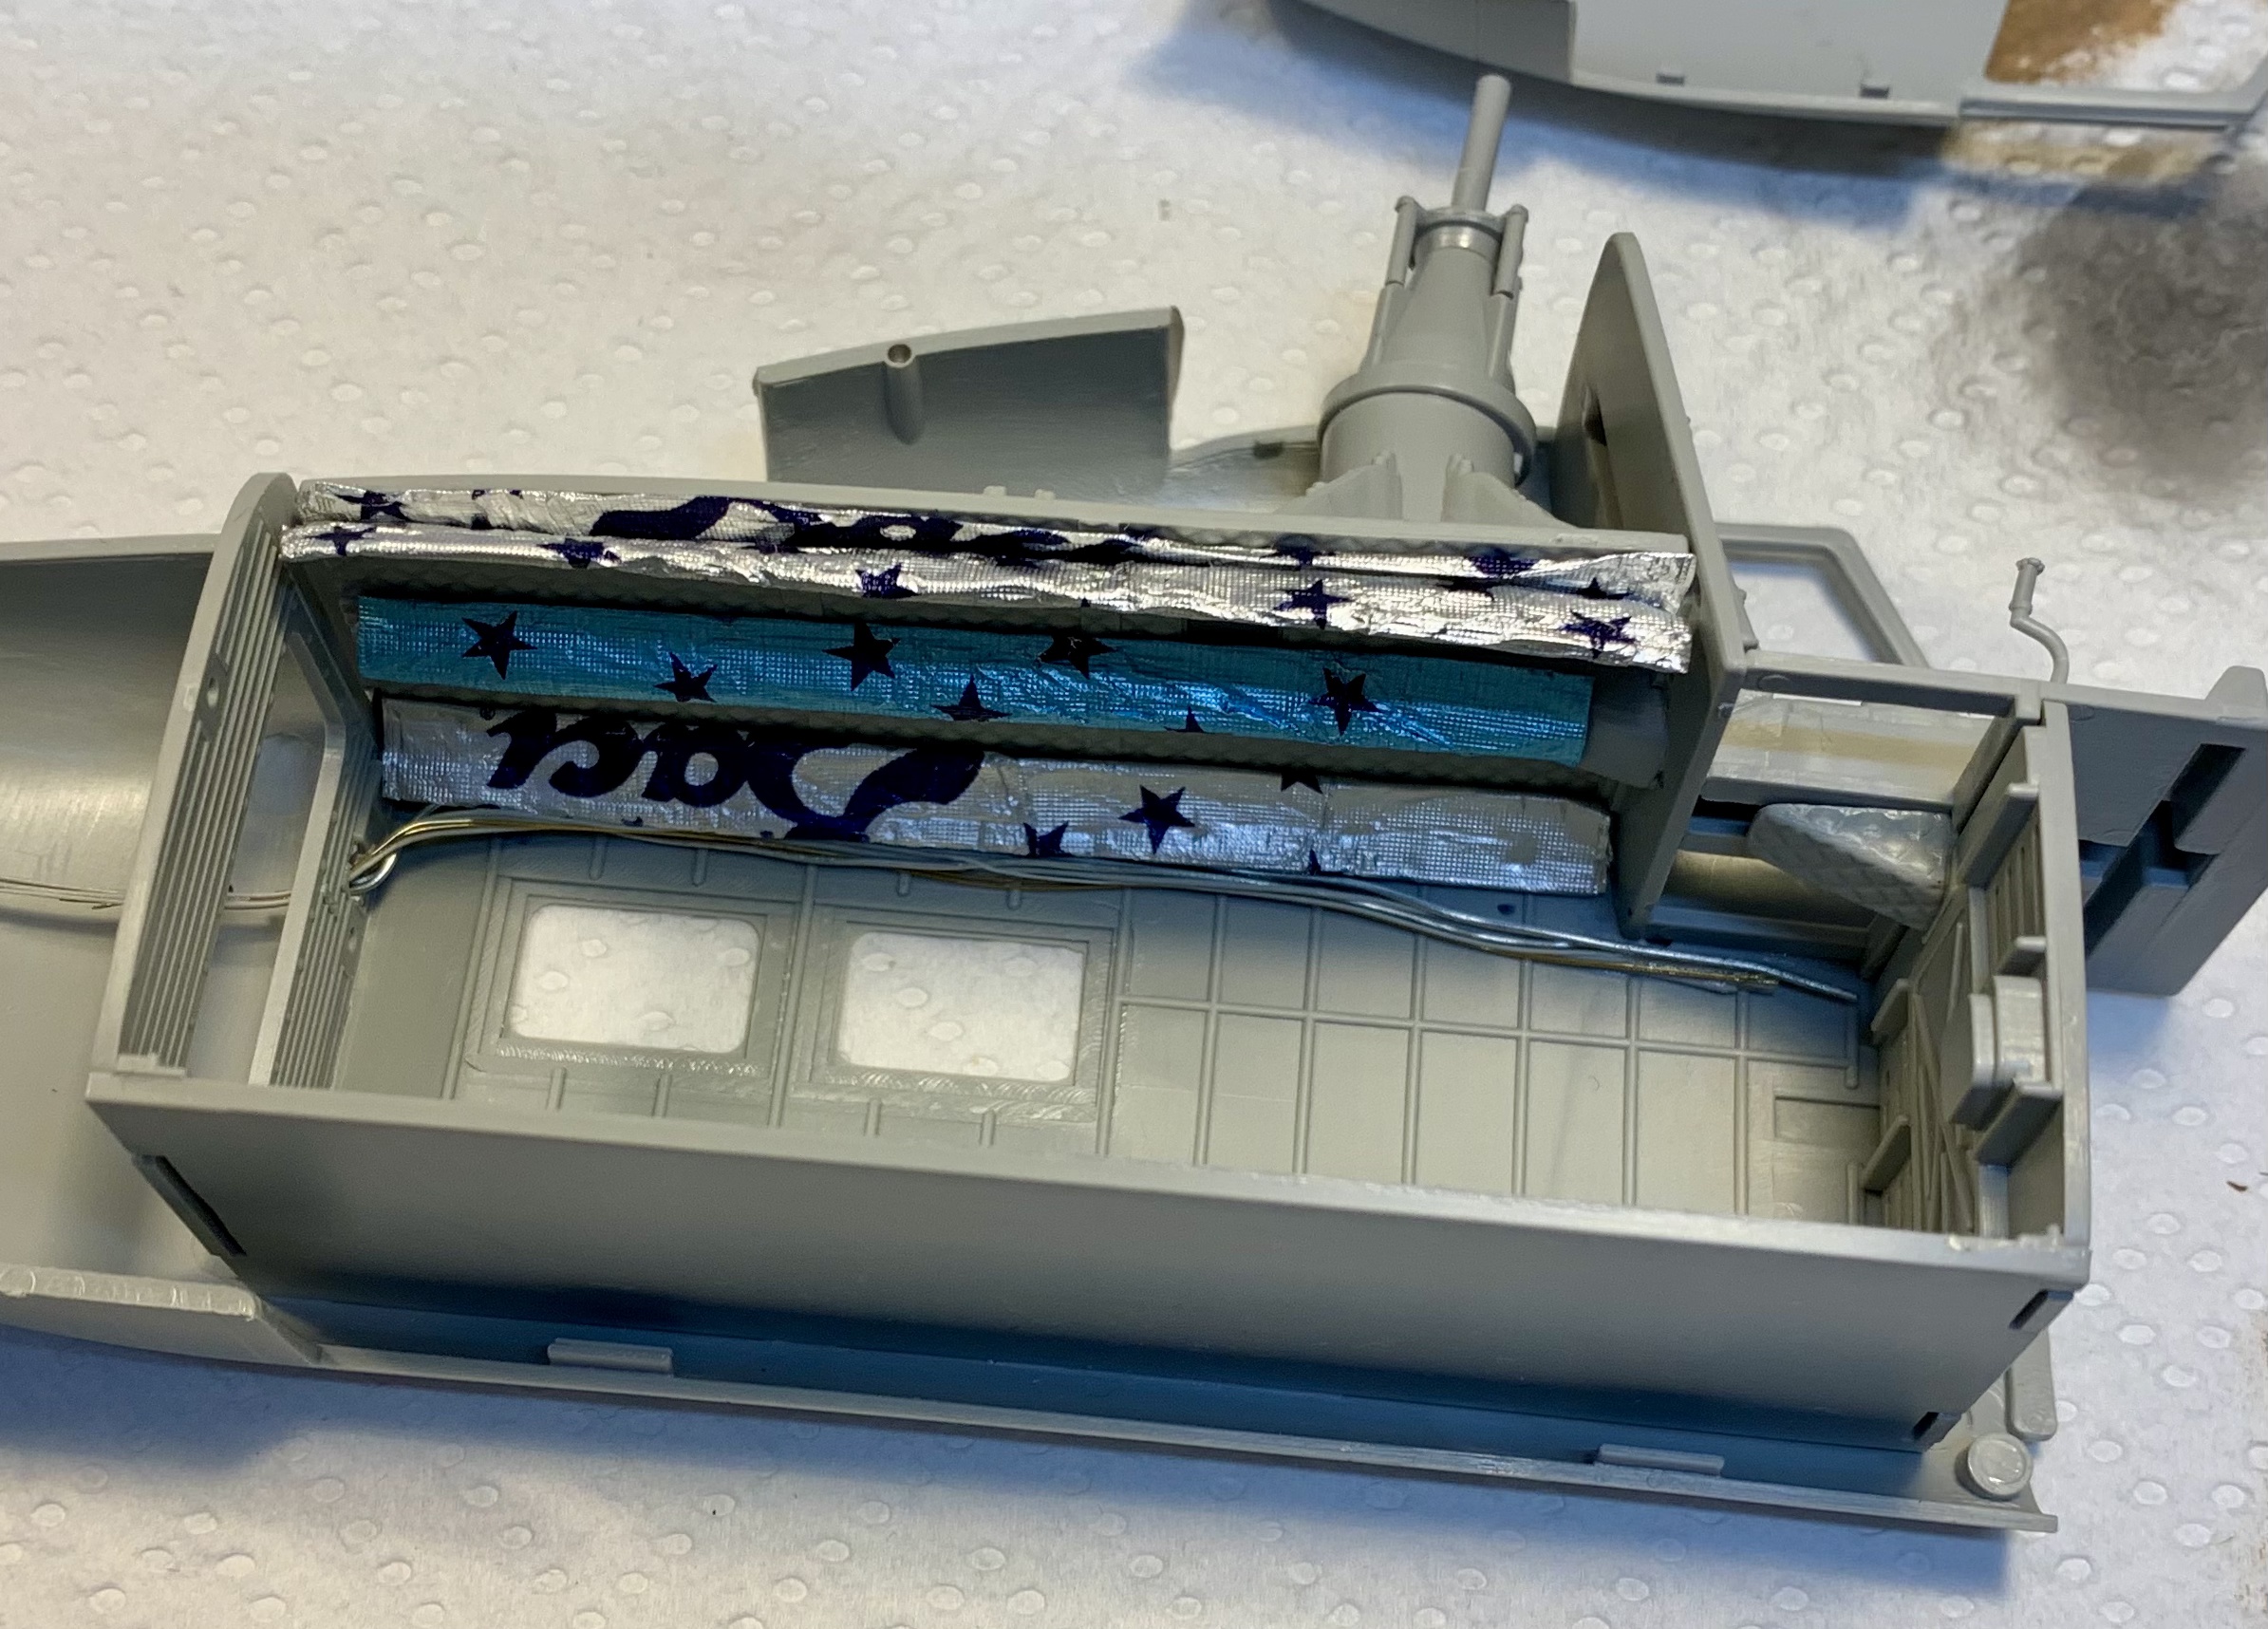
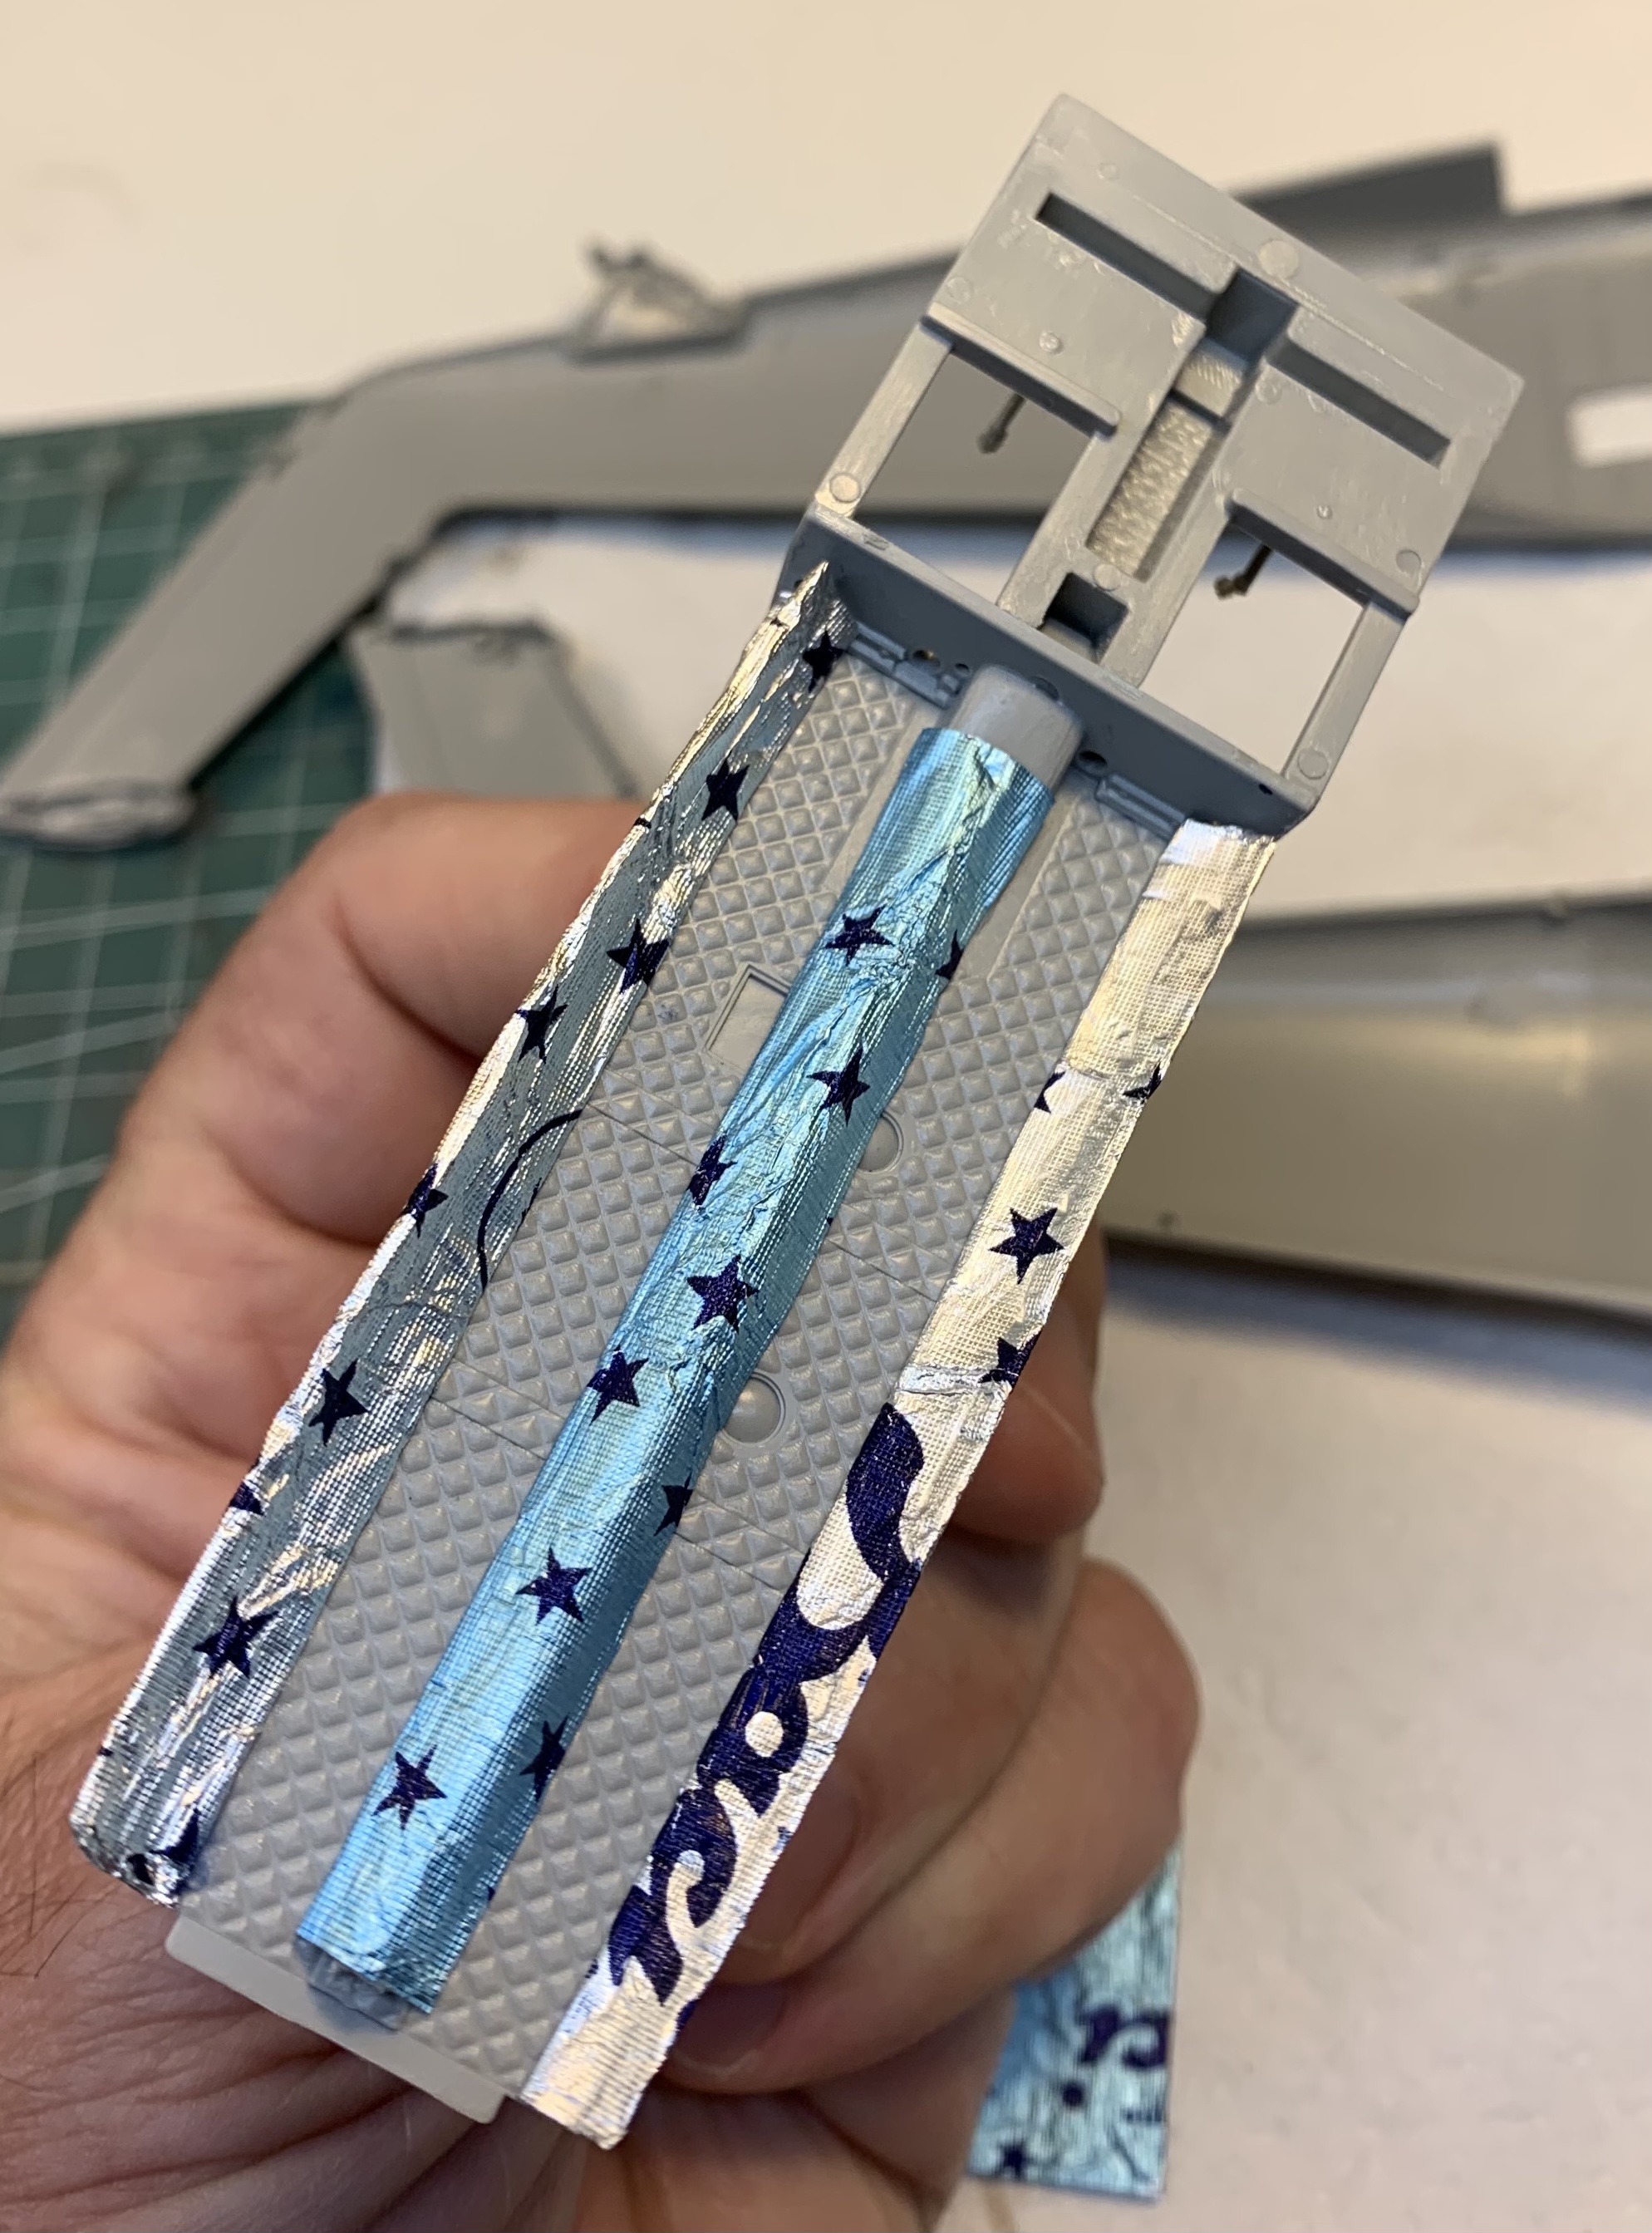
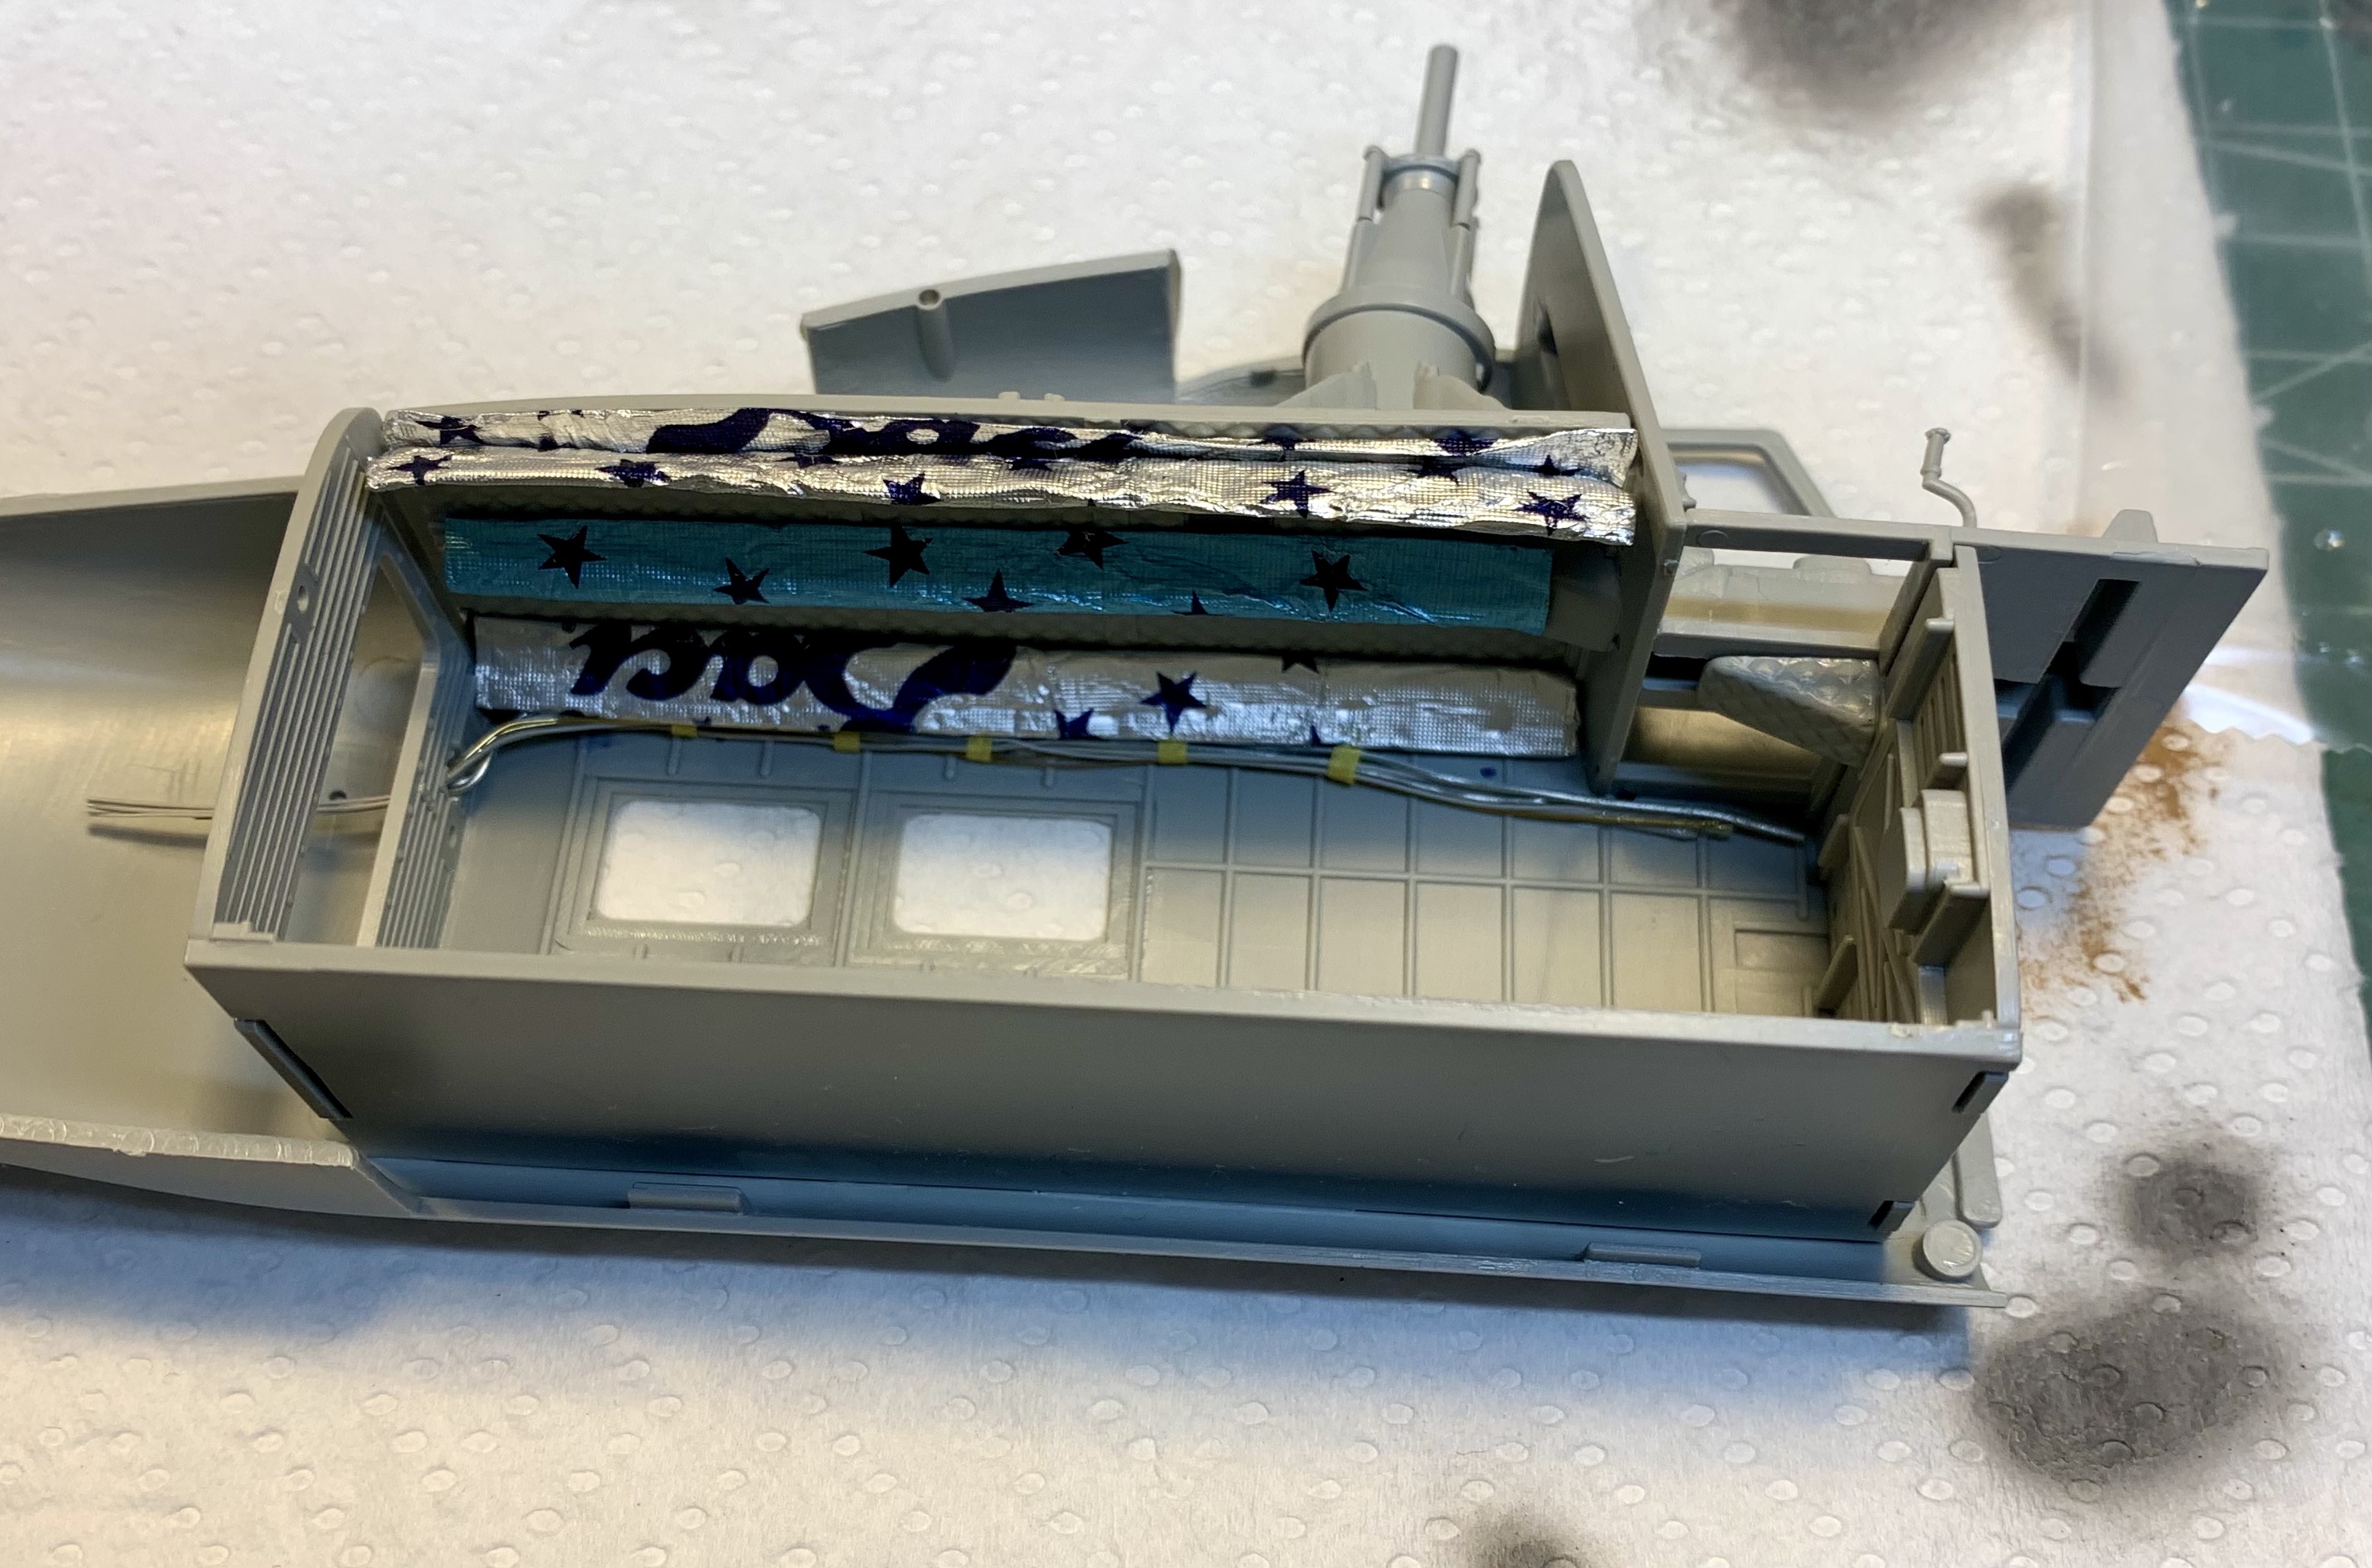
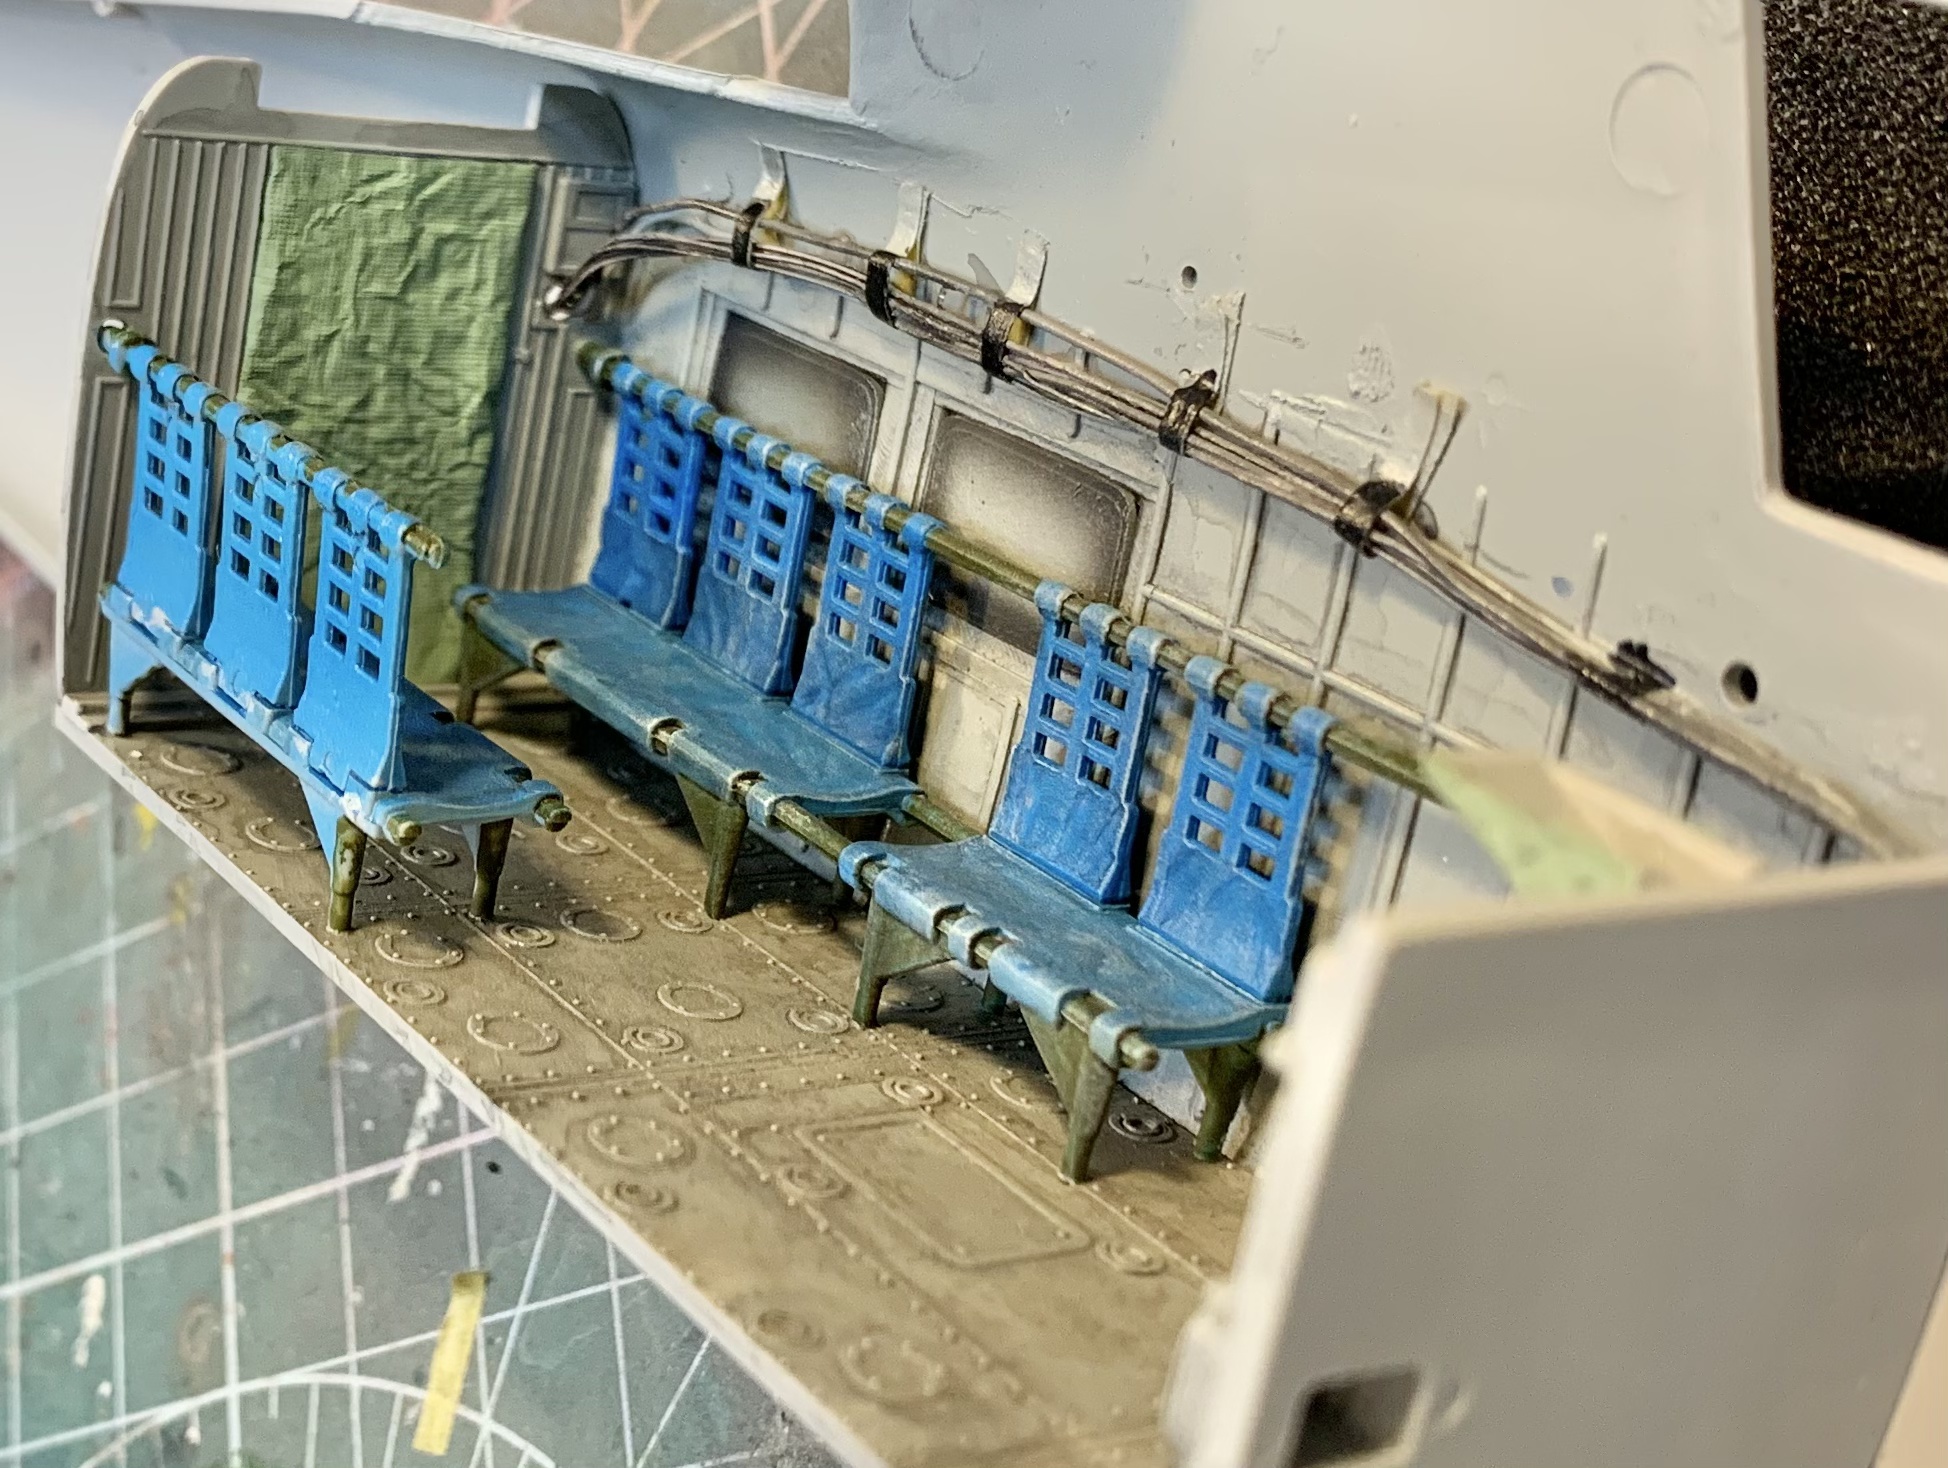
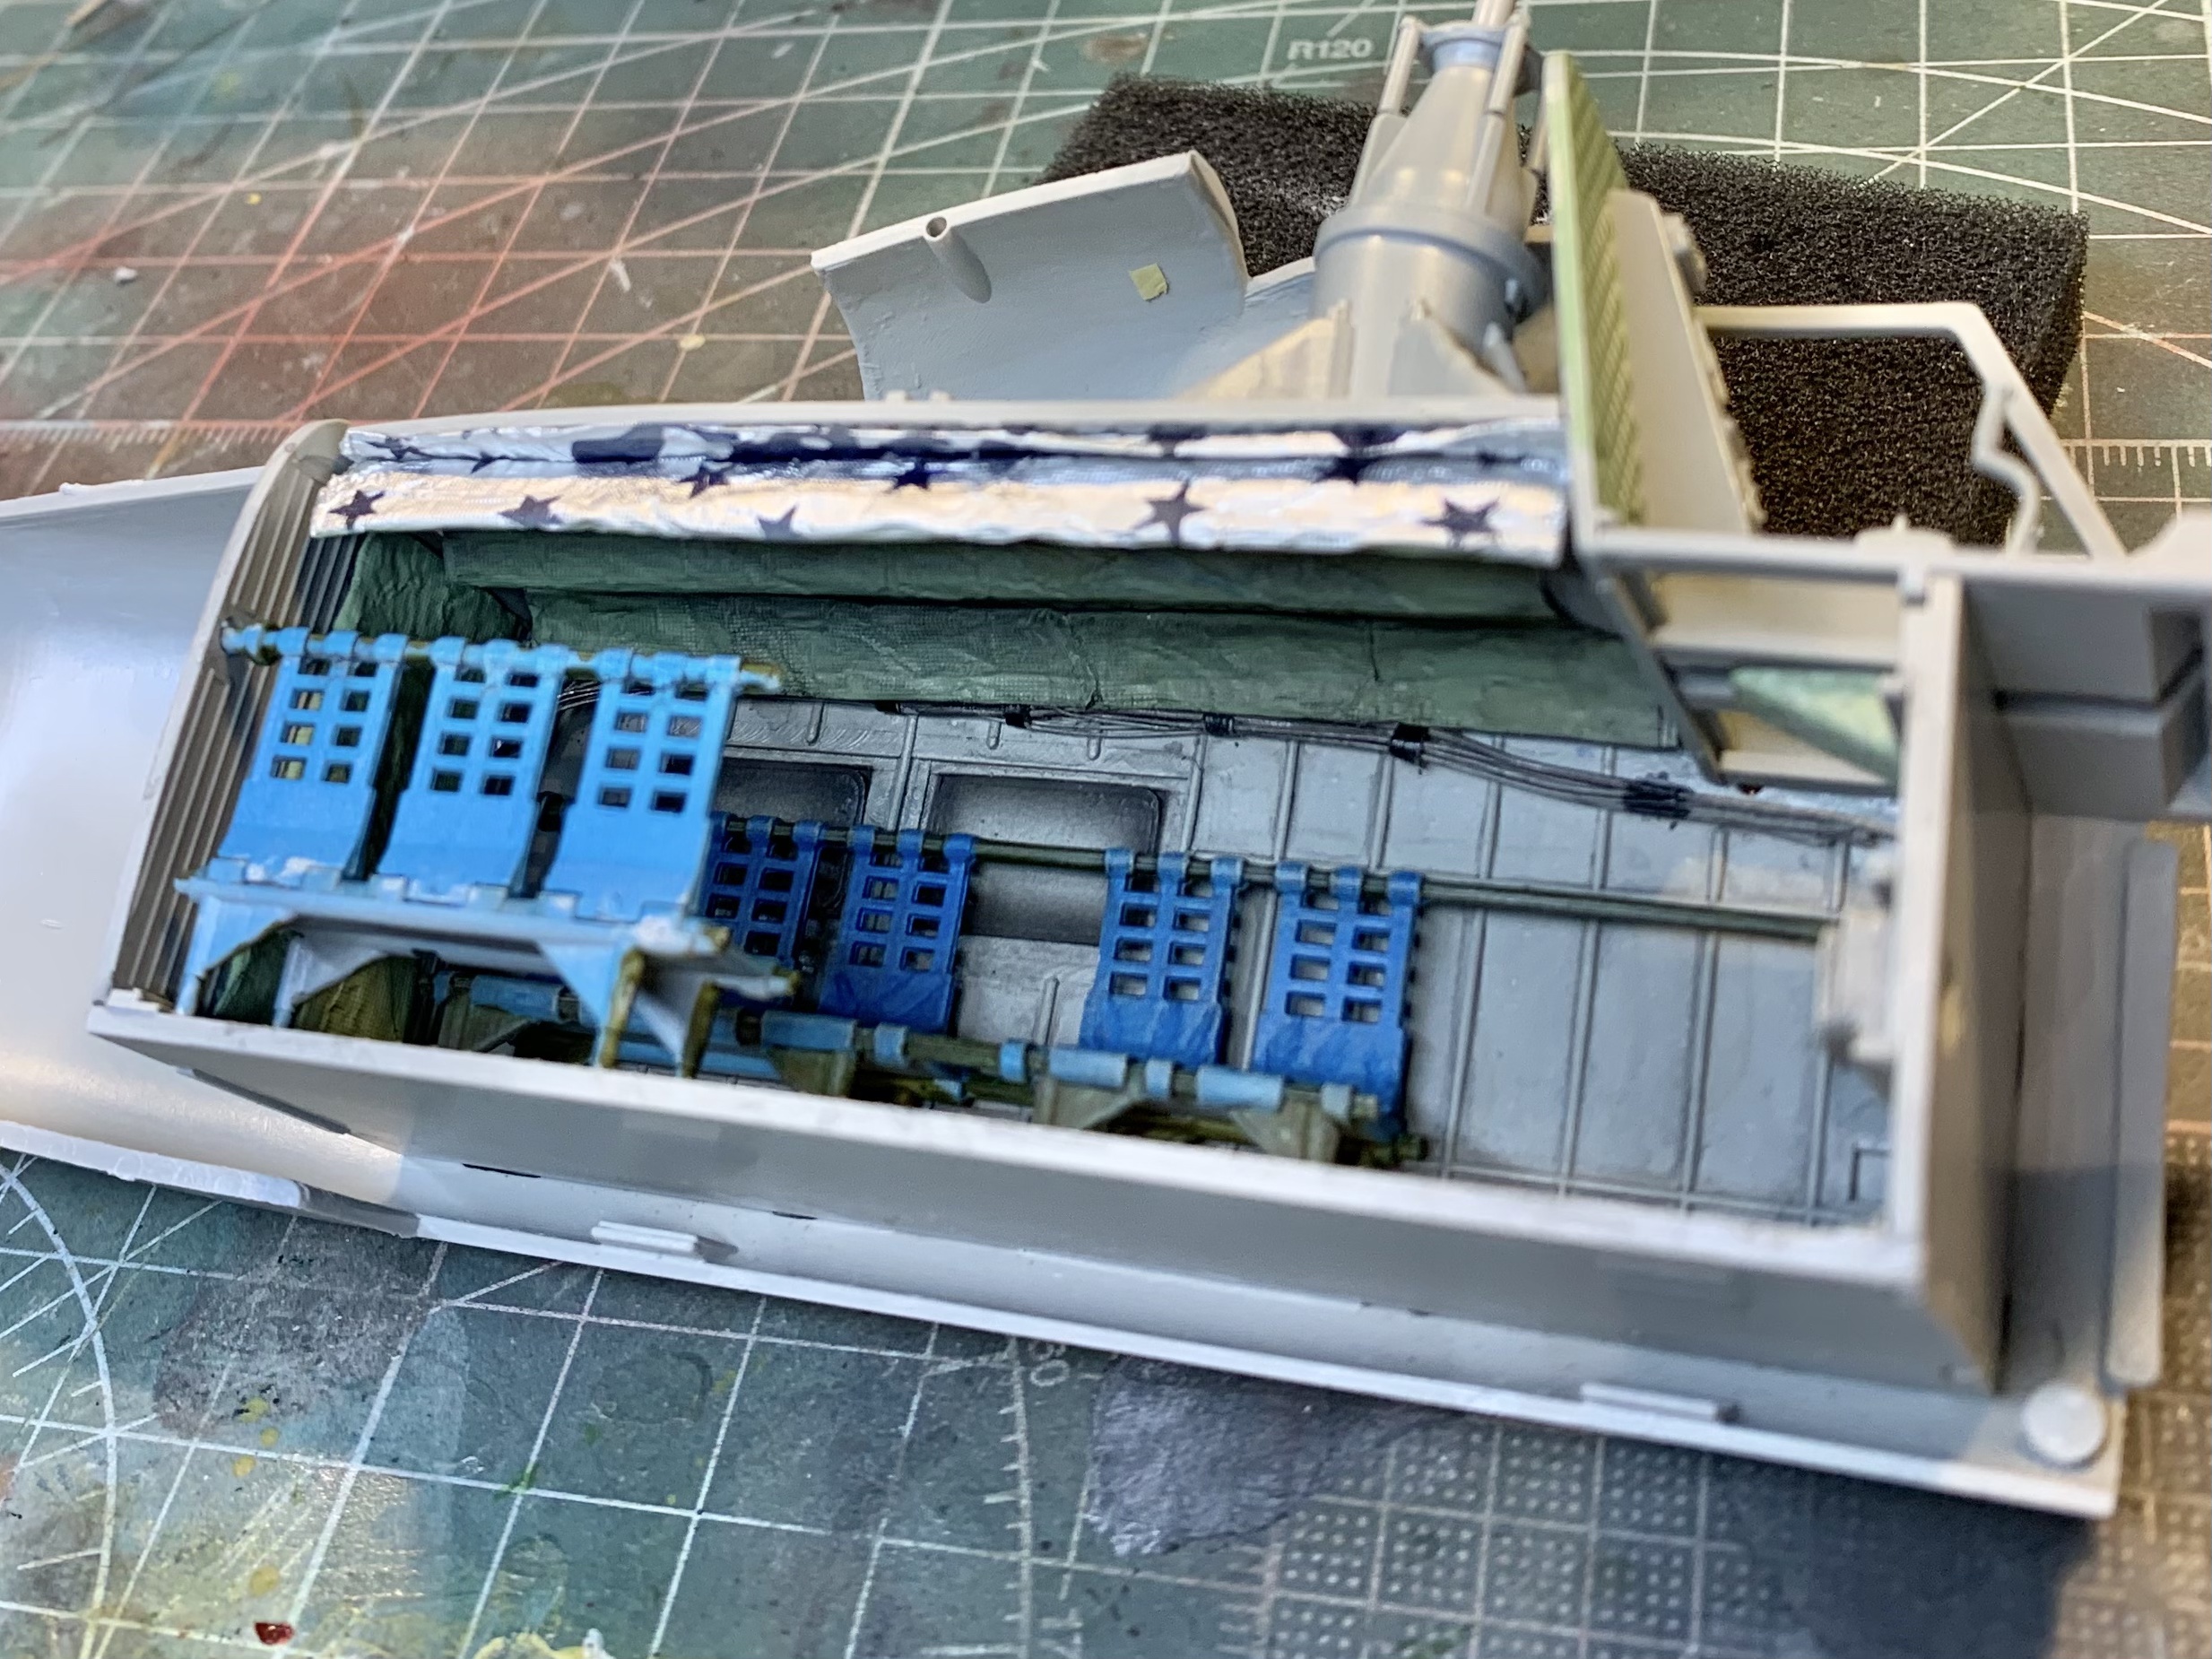
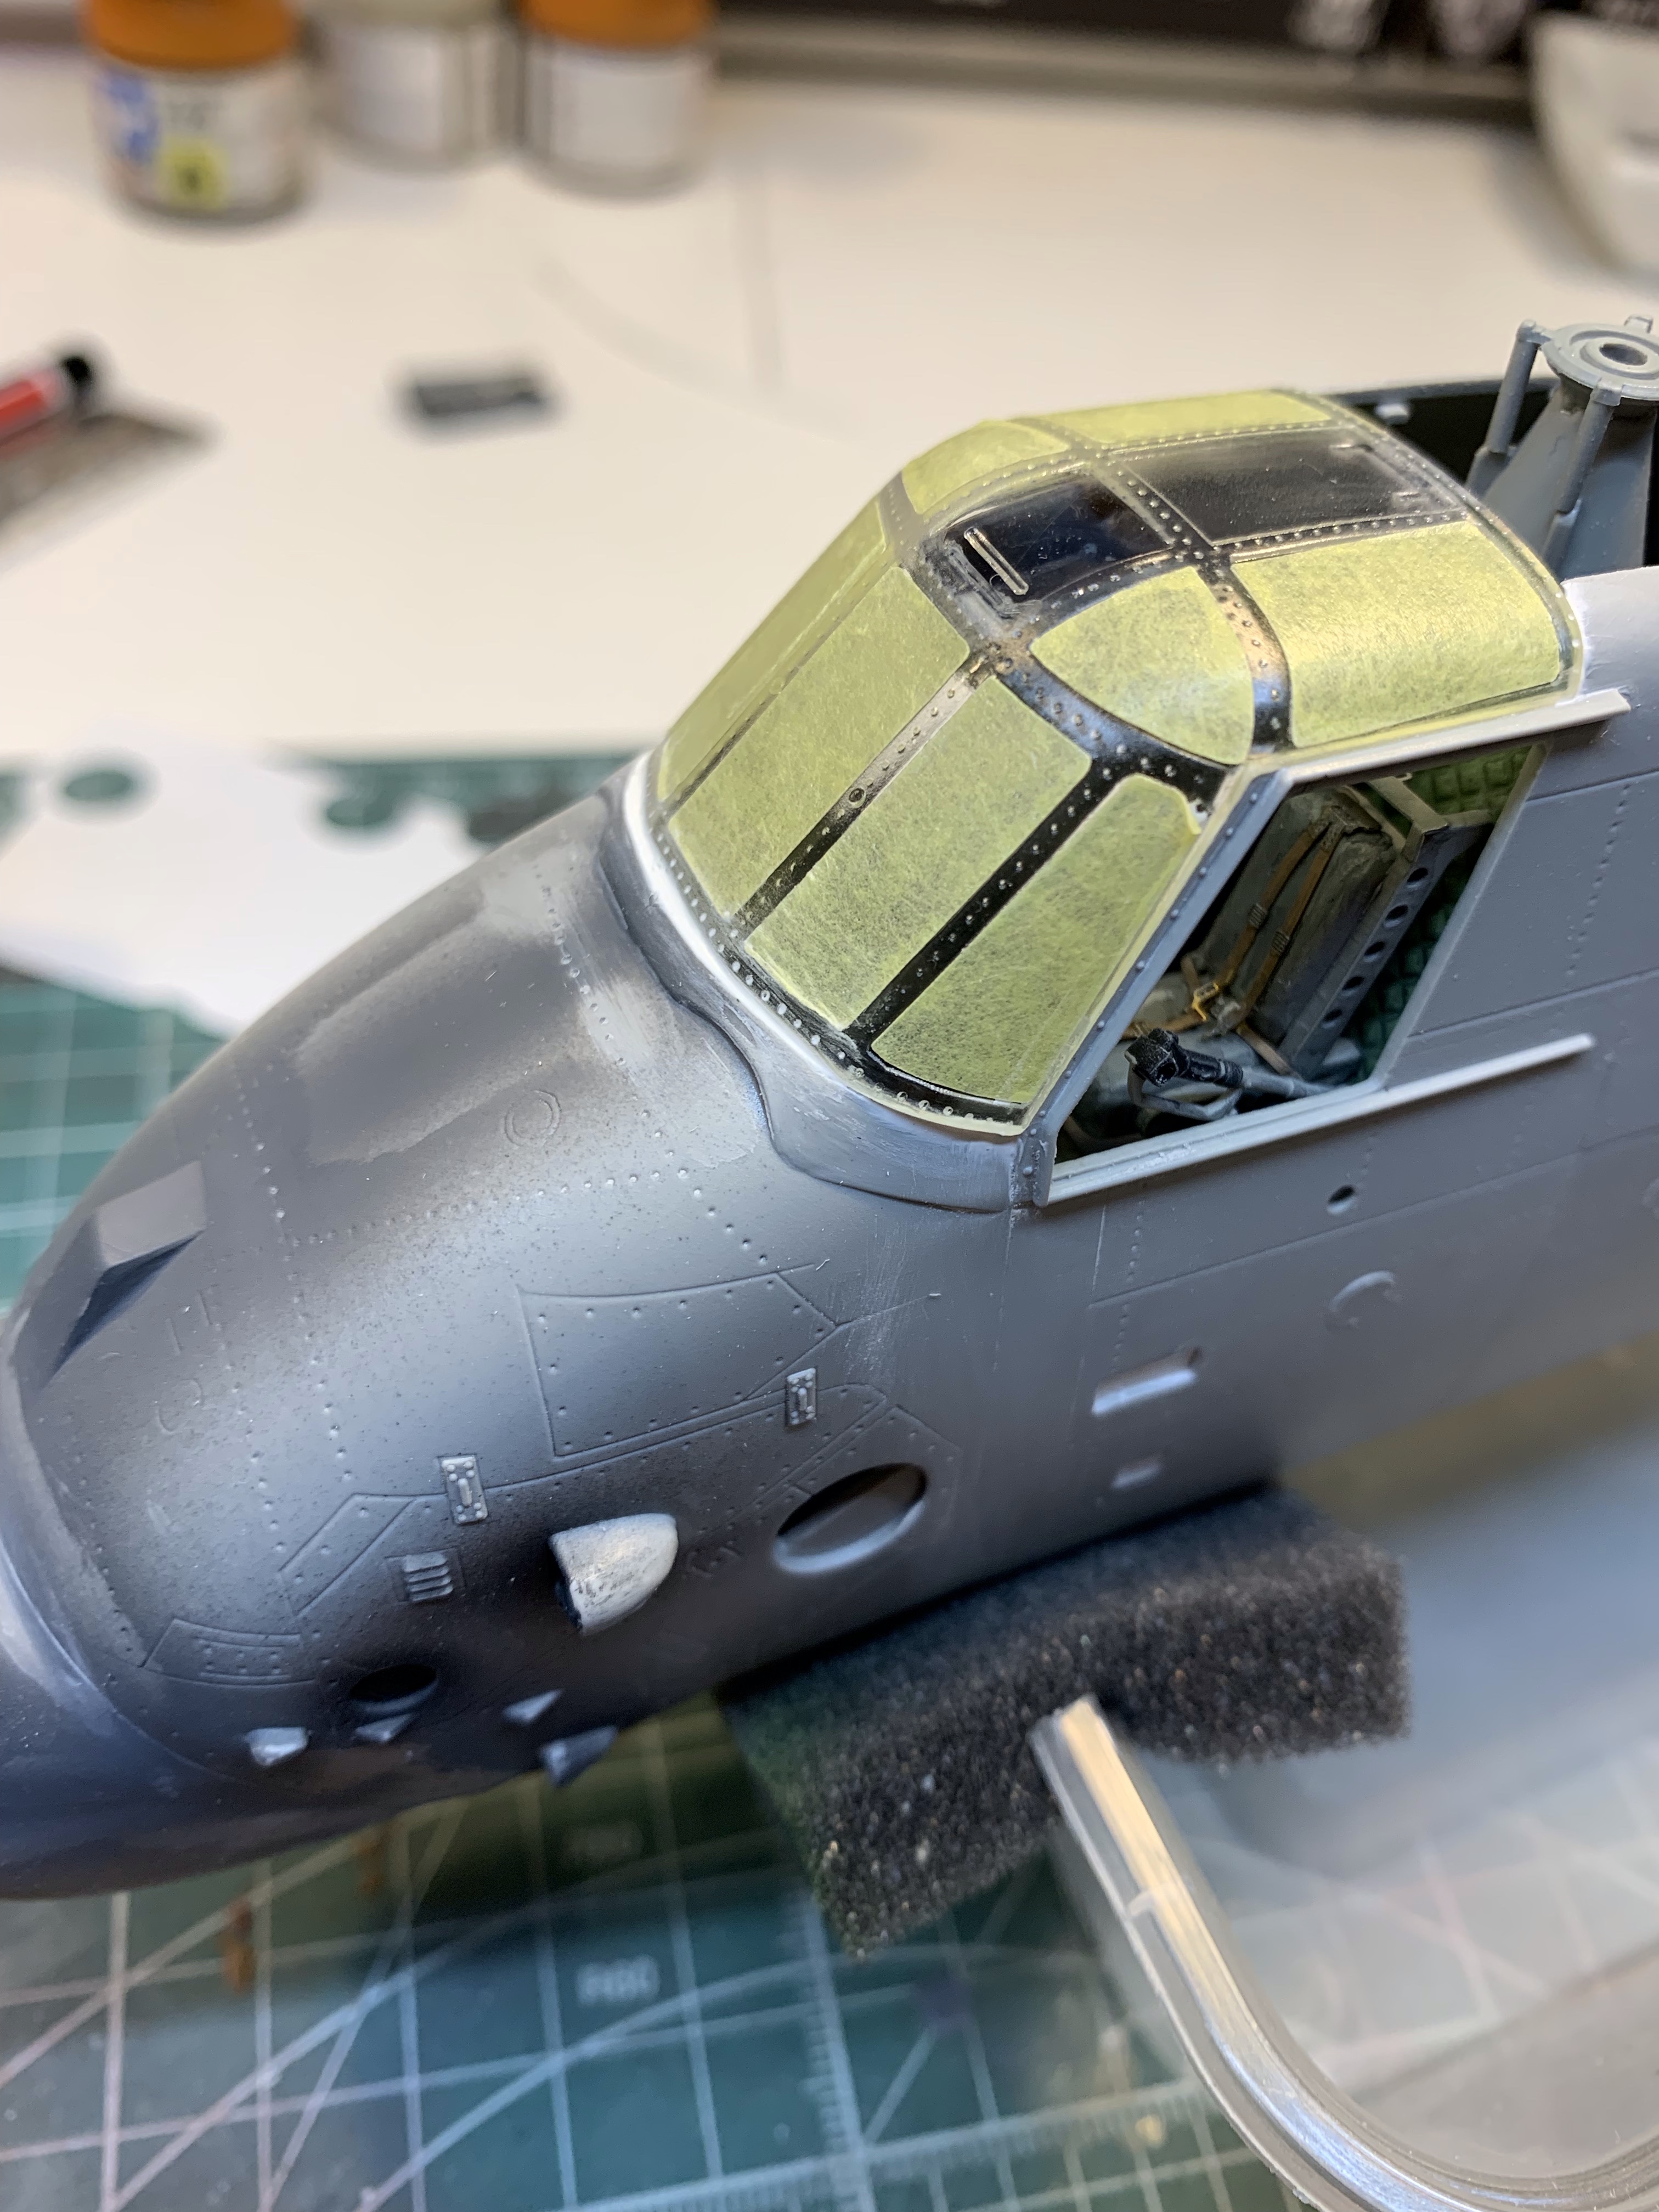
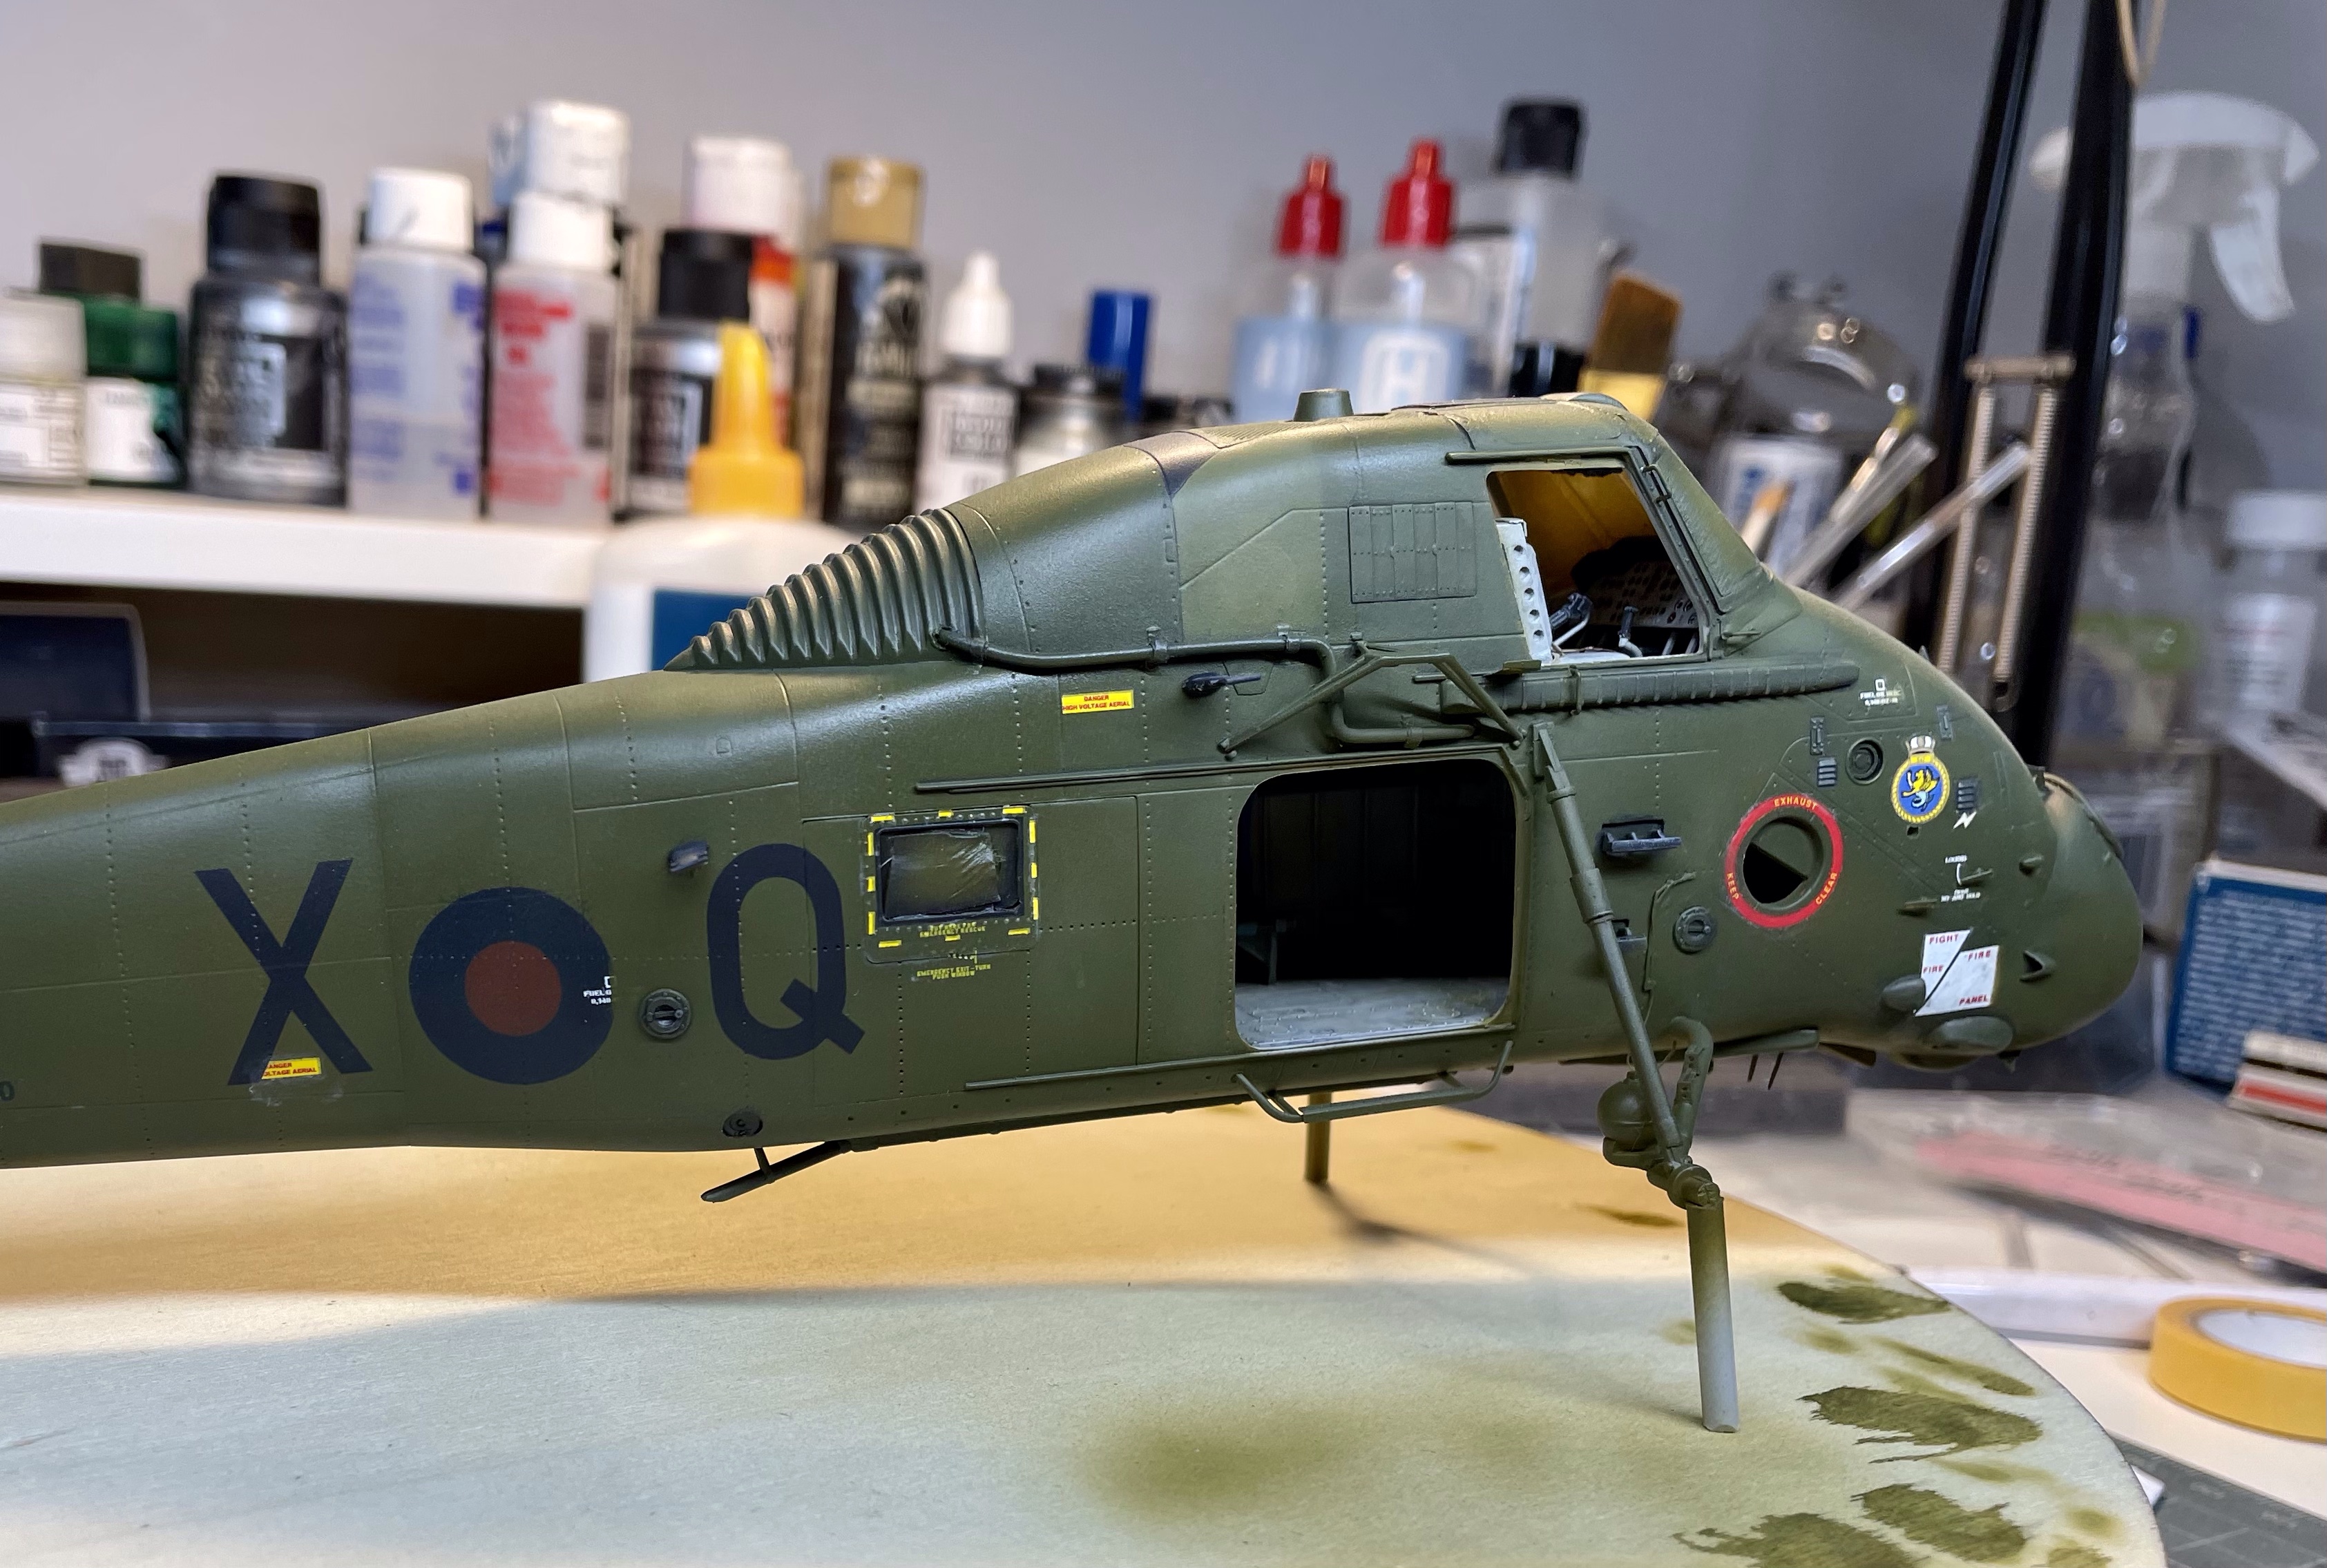
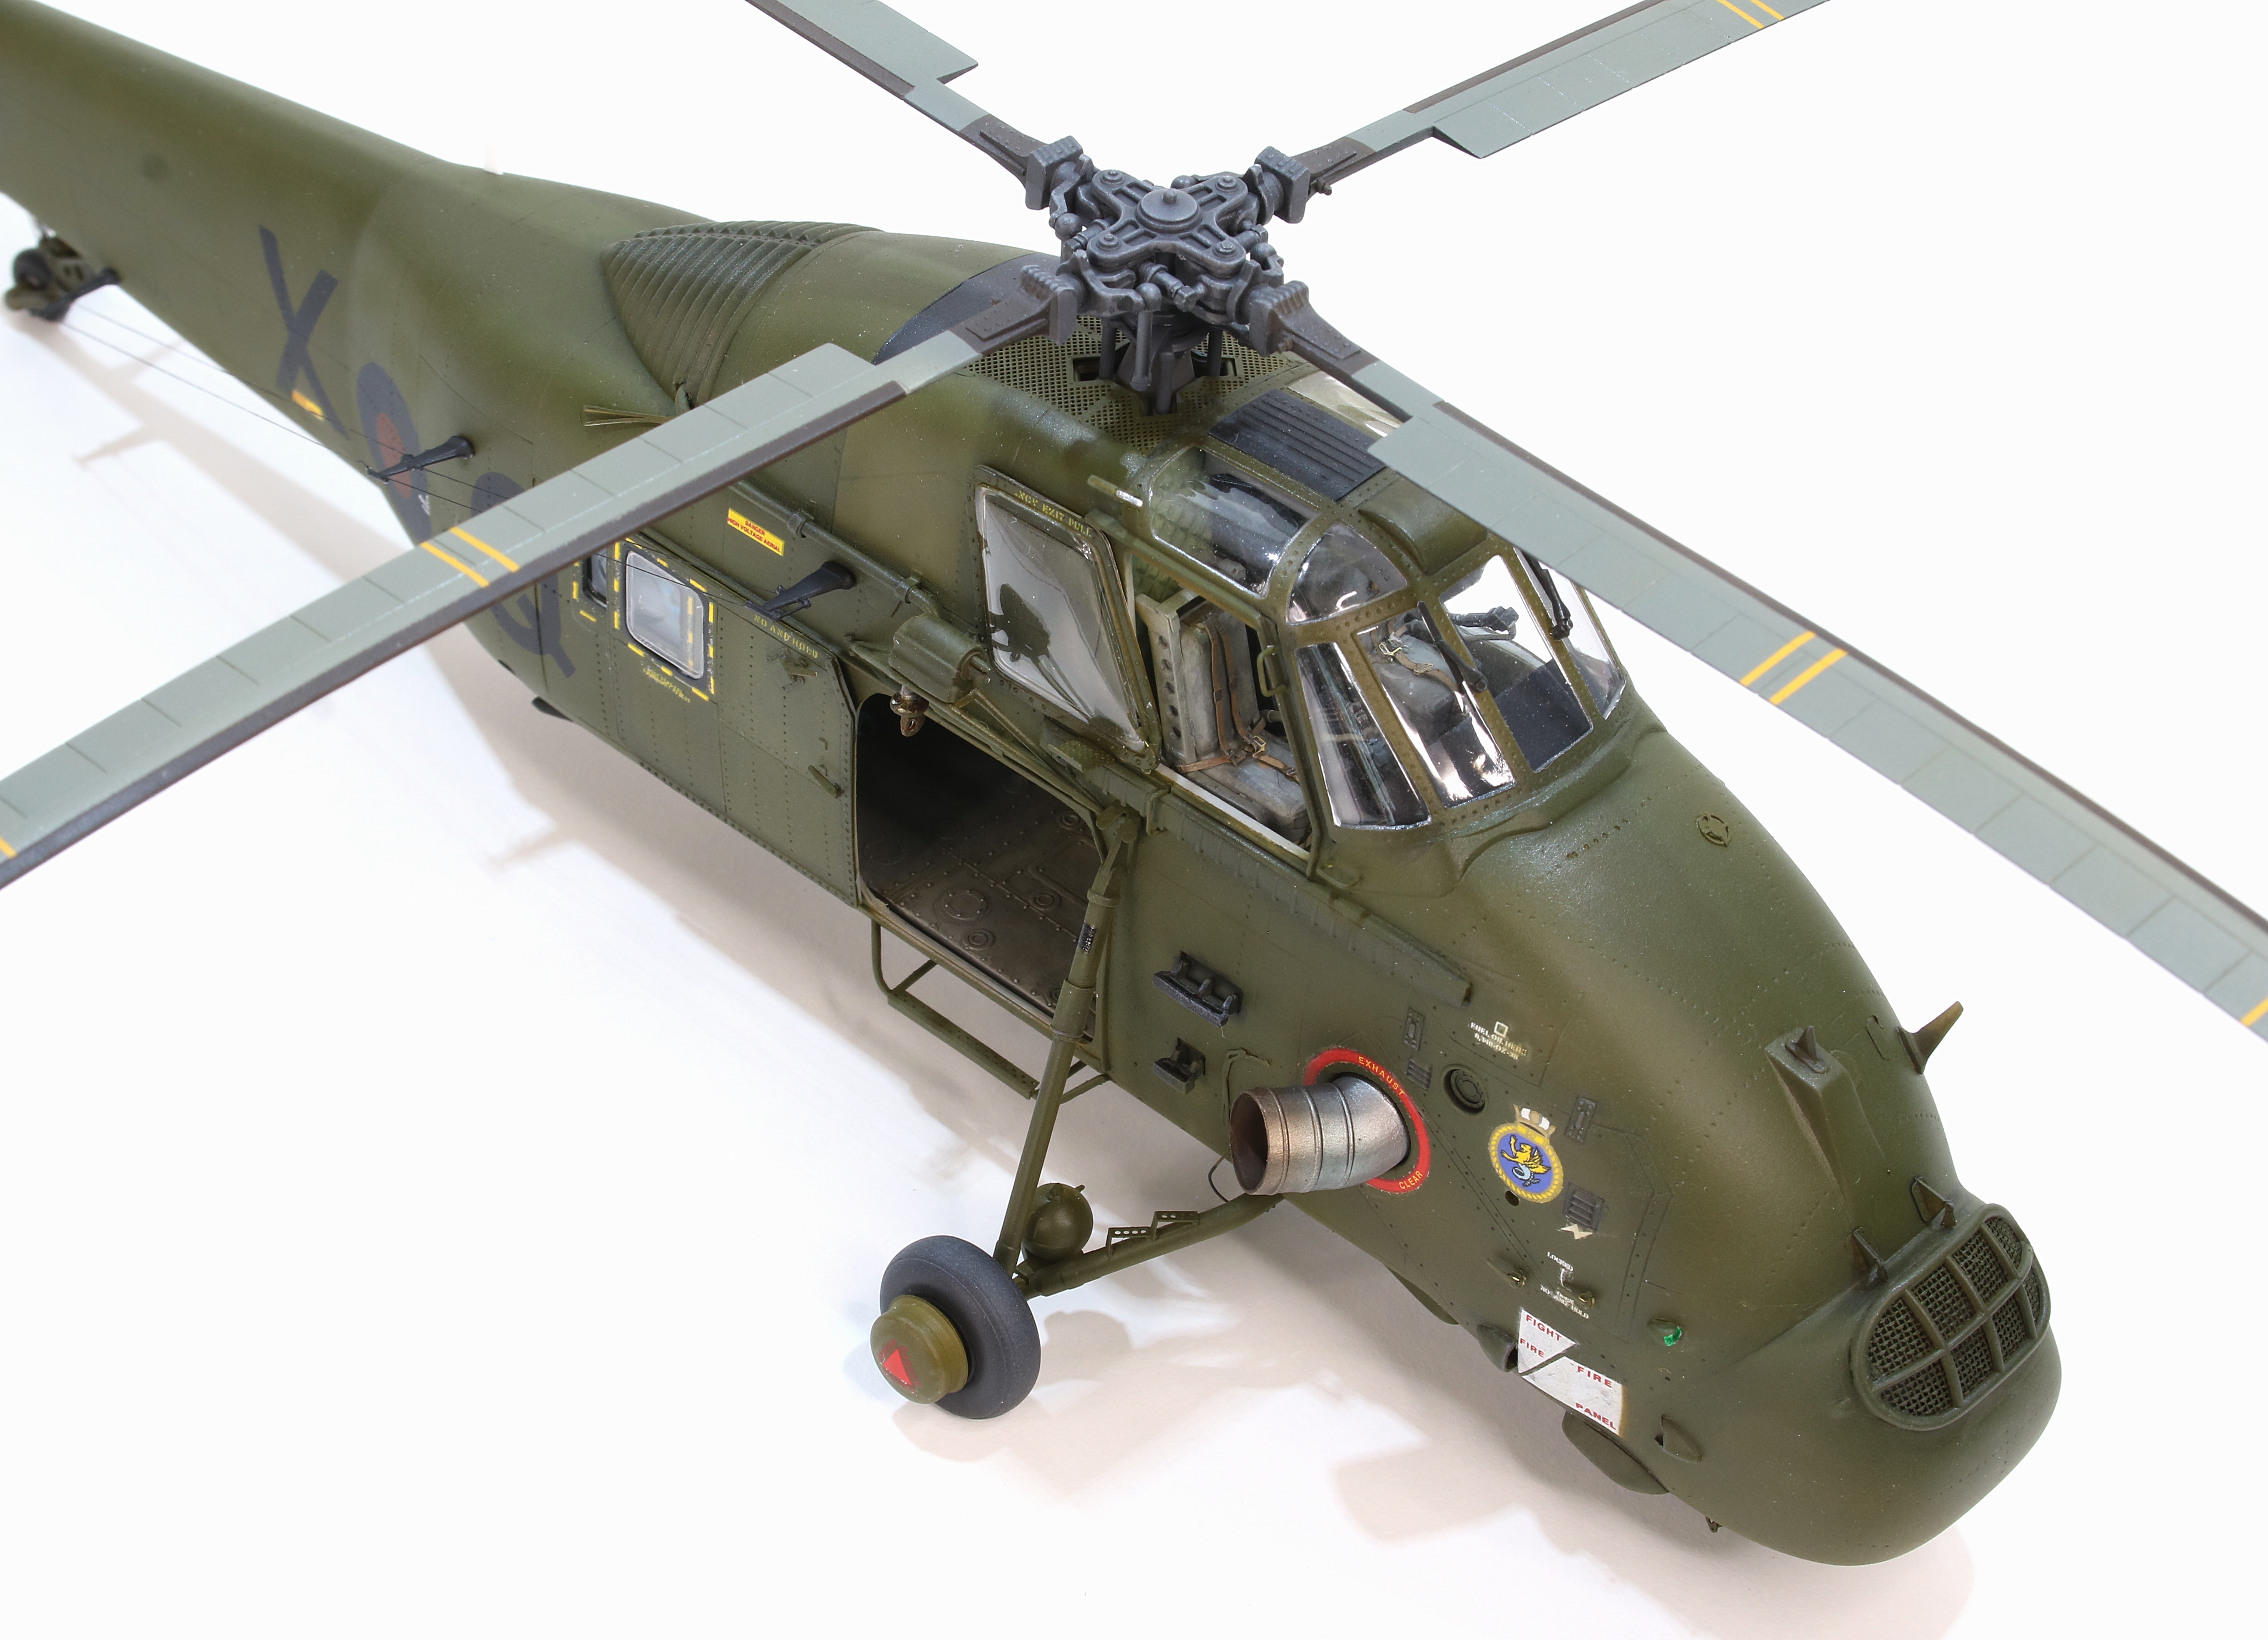
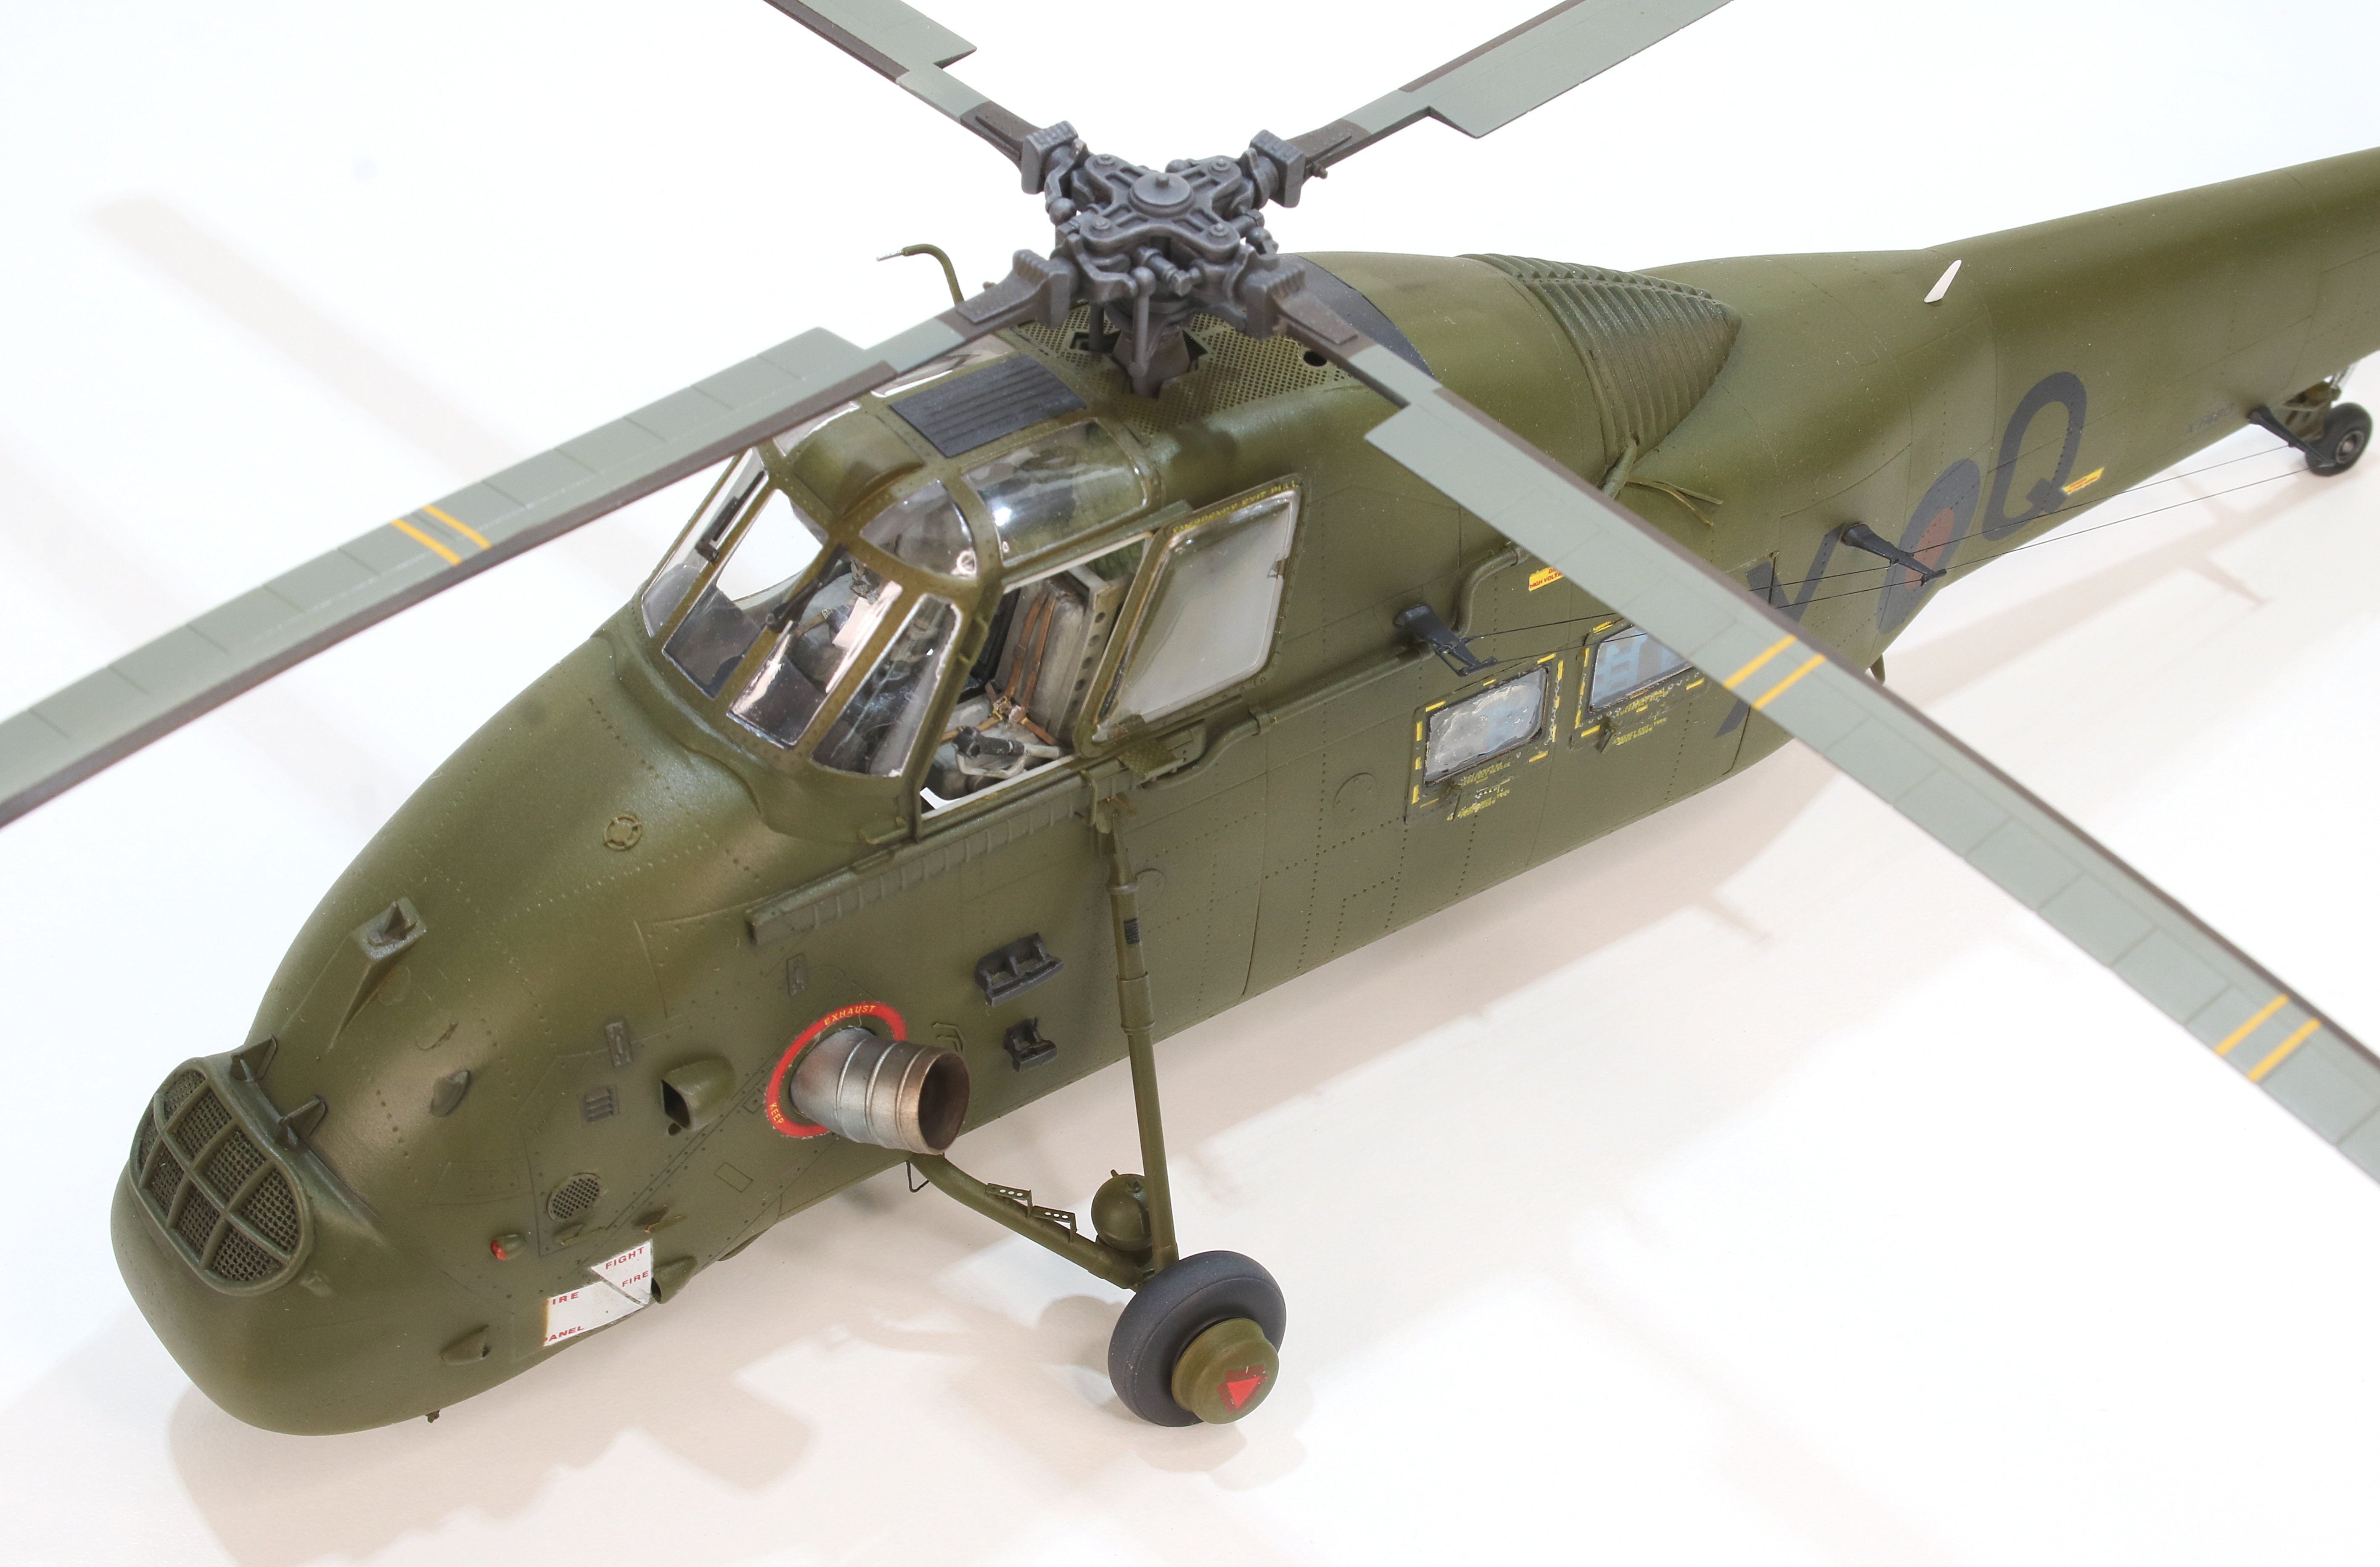
The specific area was the cabin interior. I used some chocolate wrapper foil to fashion the sound damping on the cabin roof and sides. I also added a wiring loom along the port side as it’s quite conspicuous in photos.

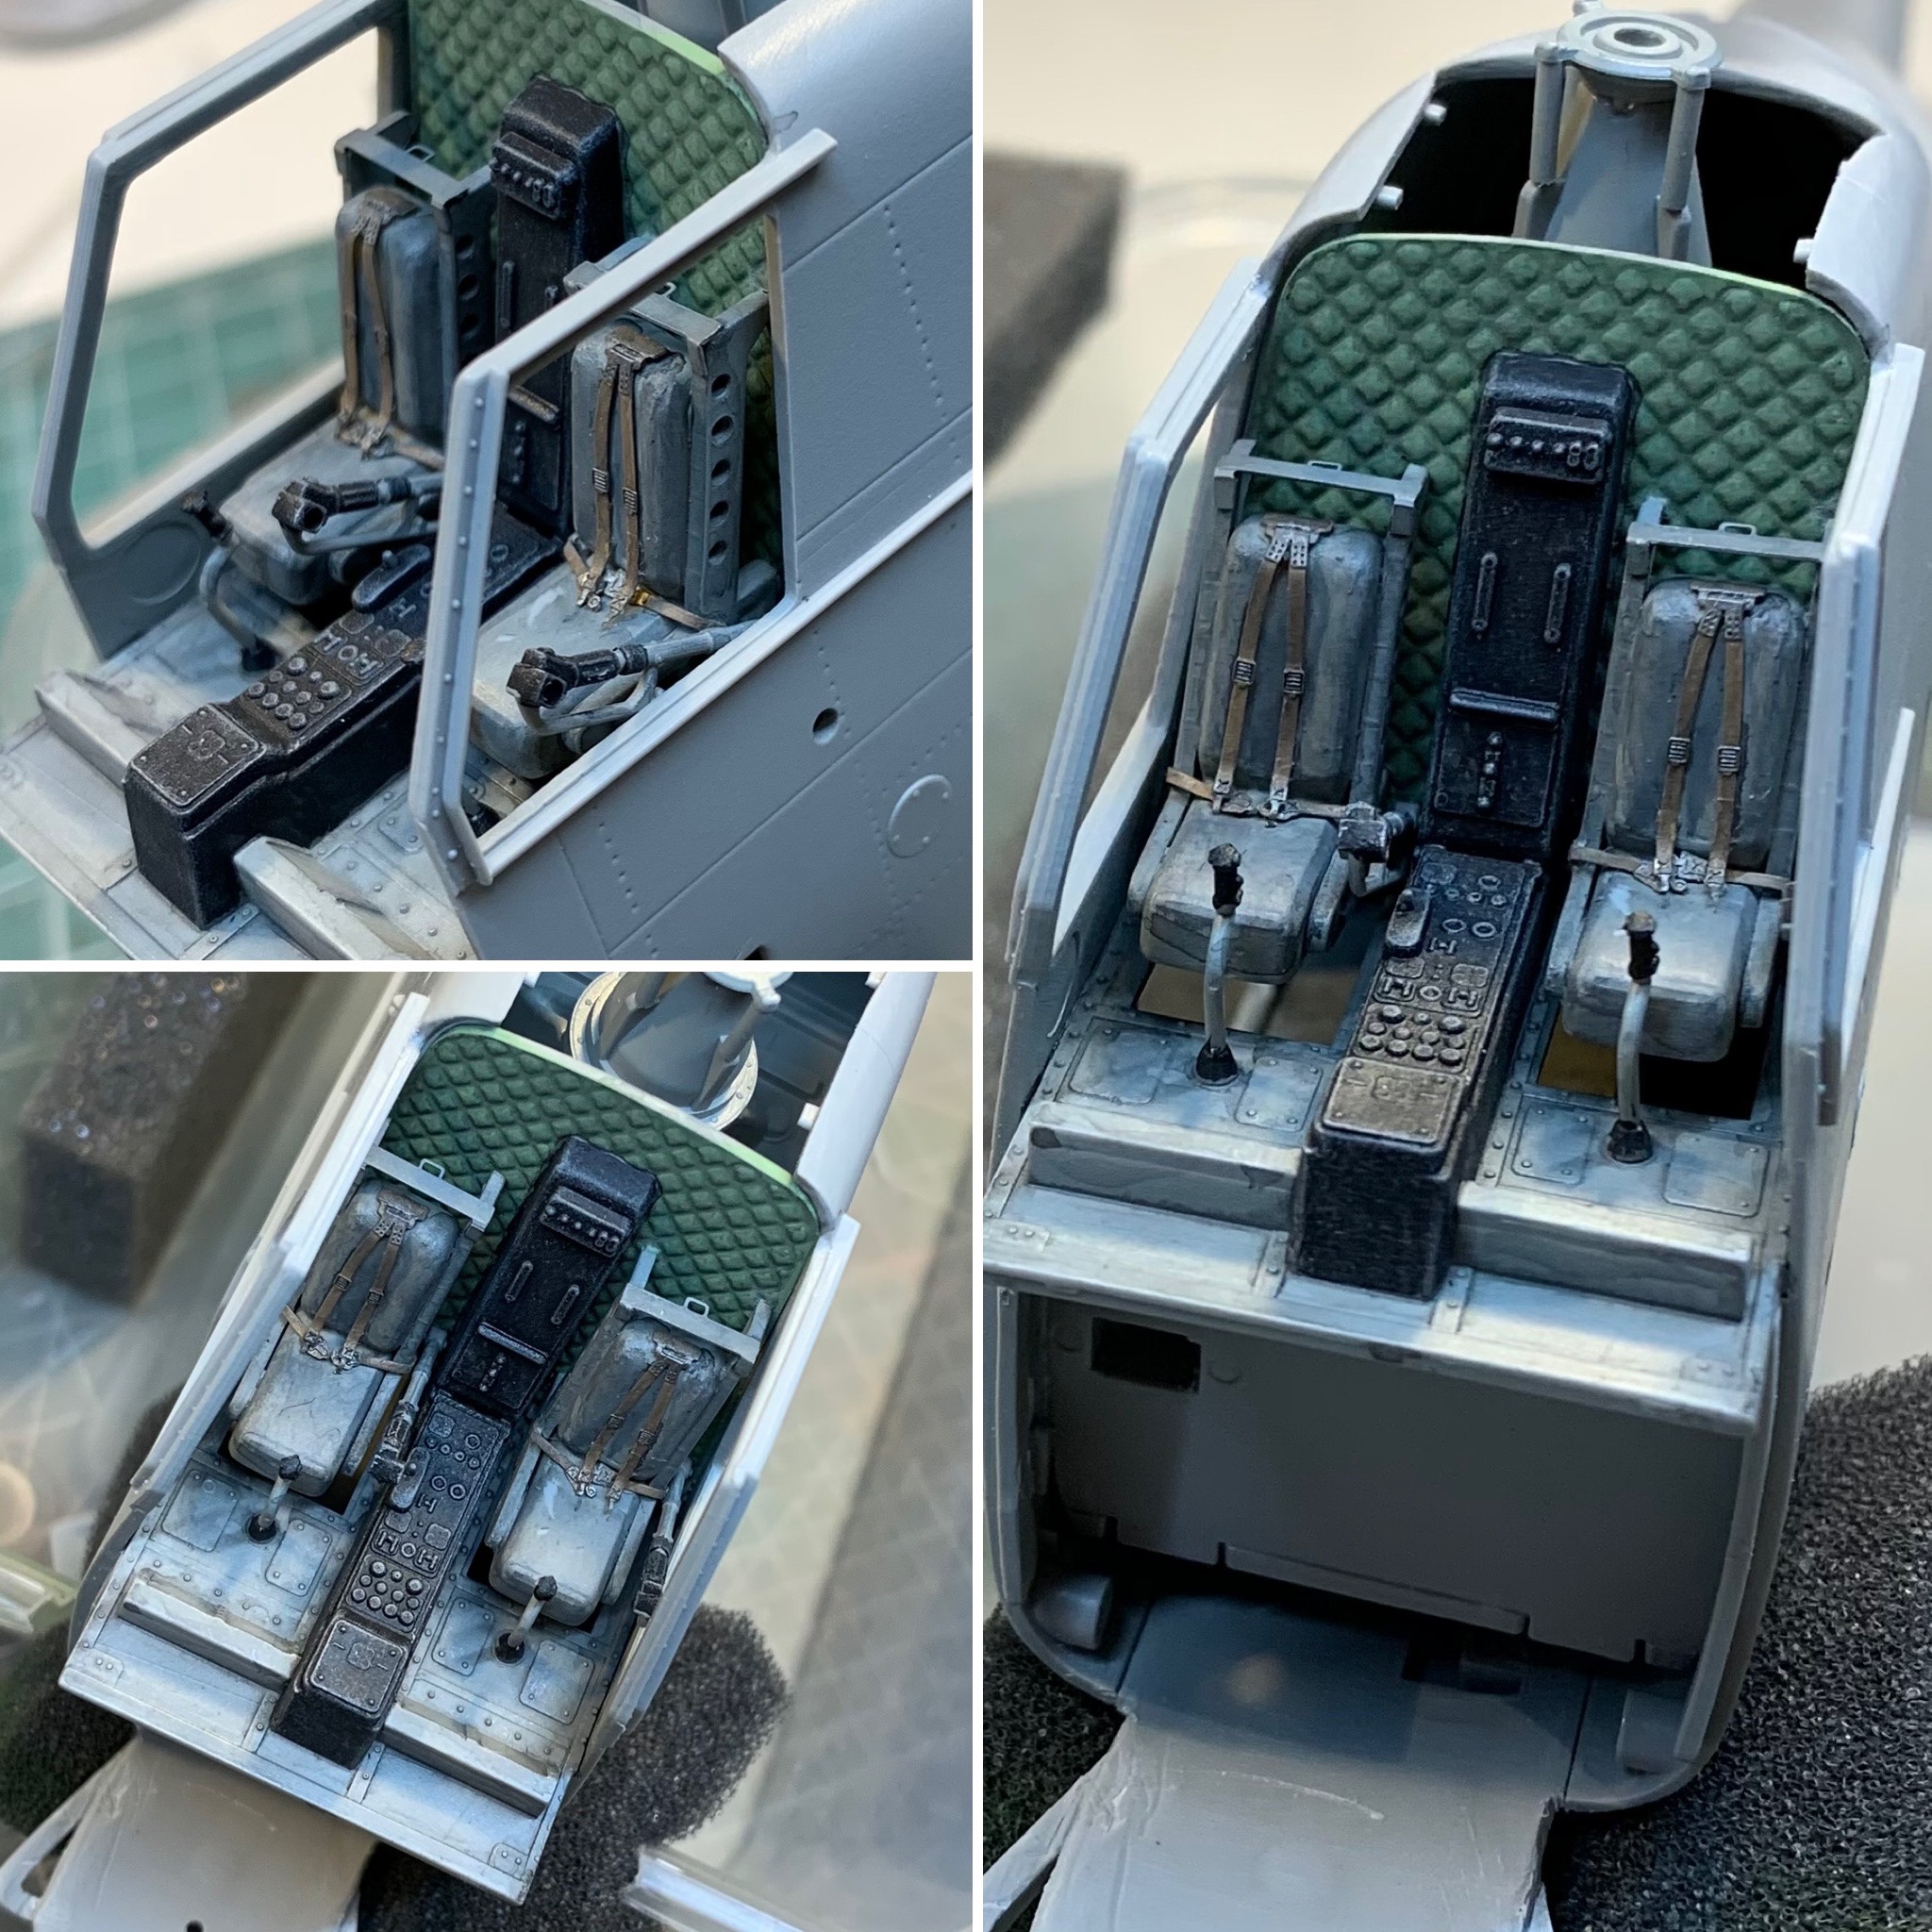
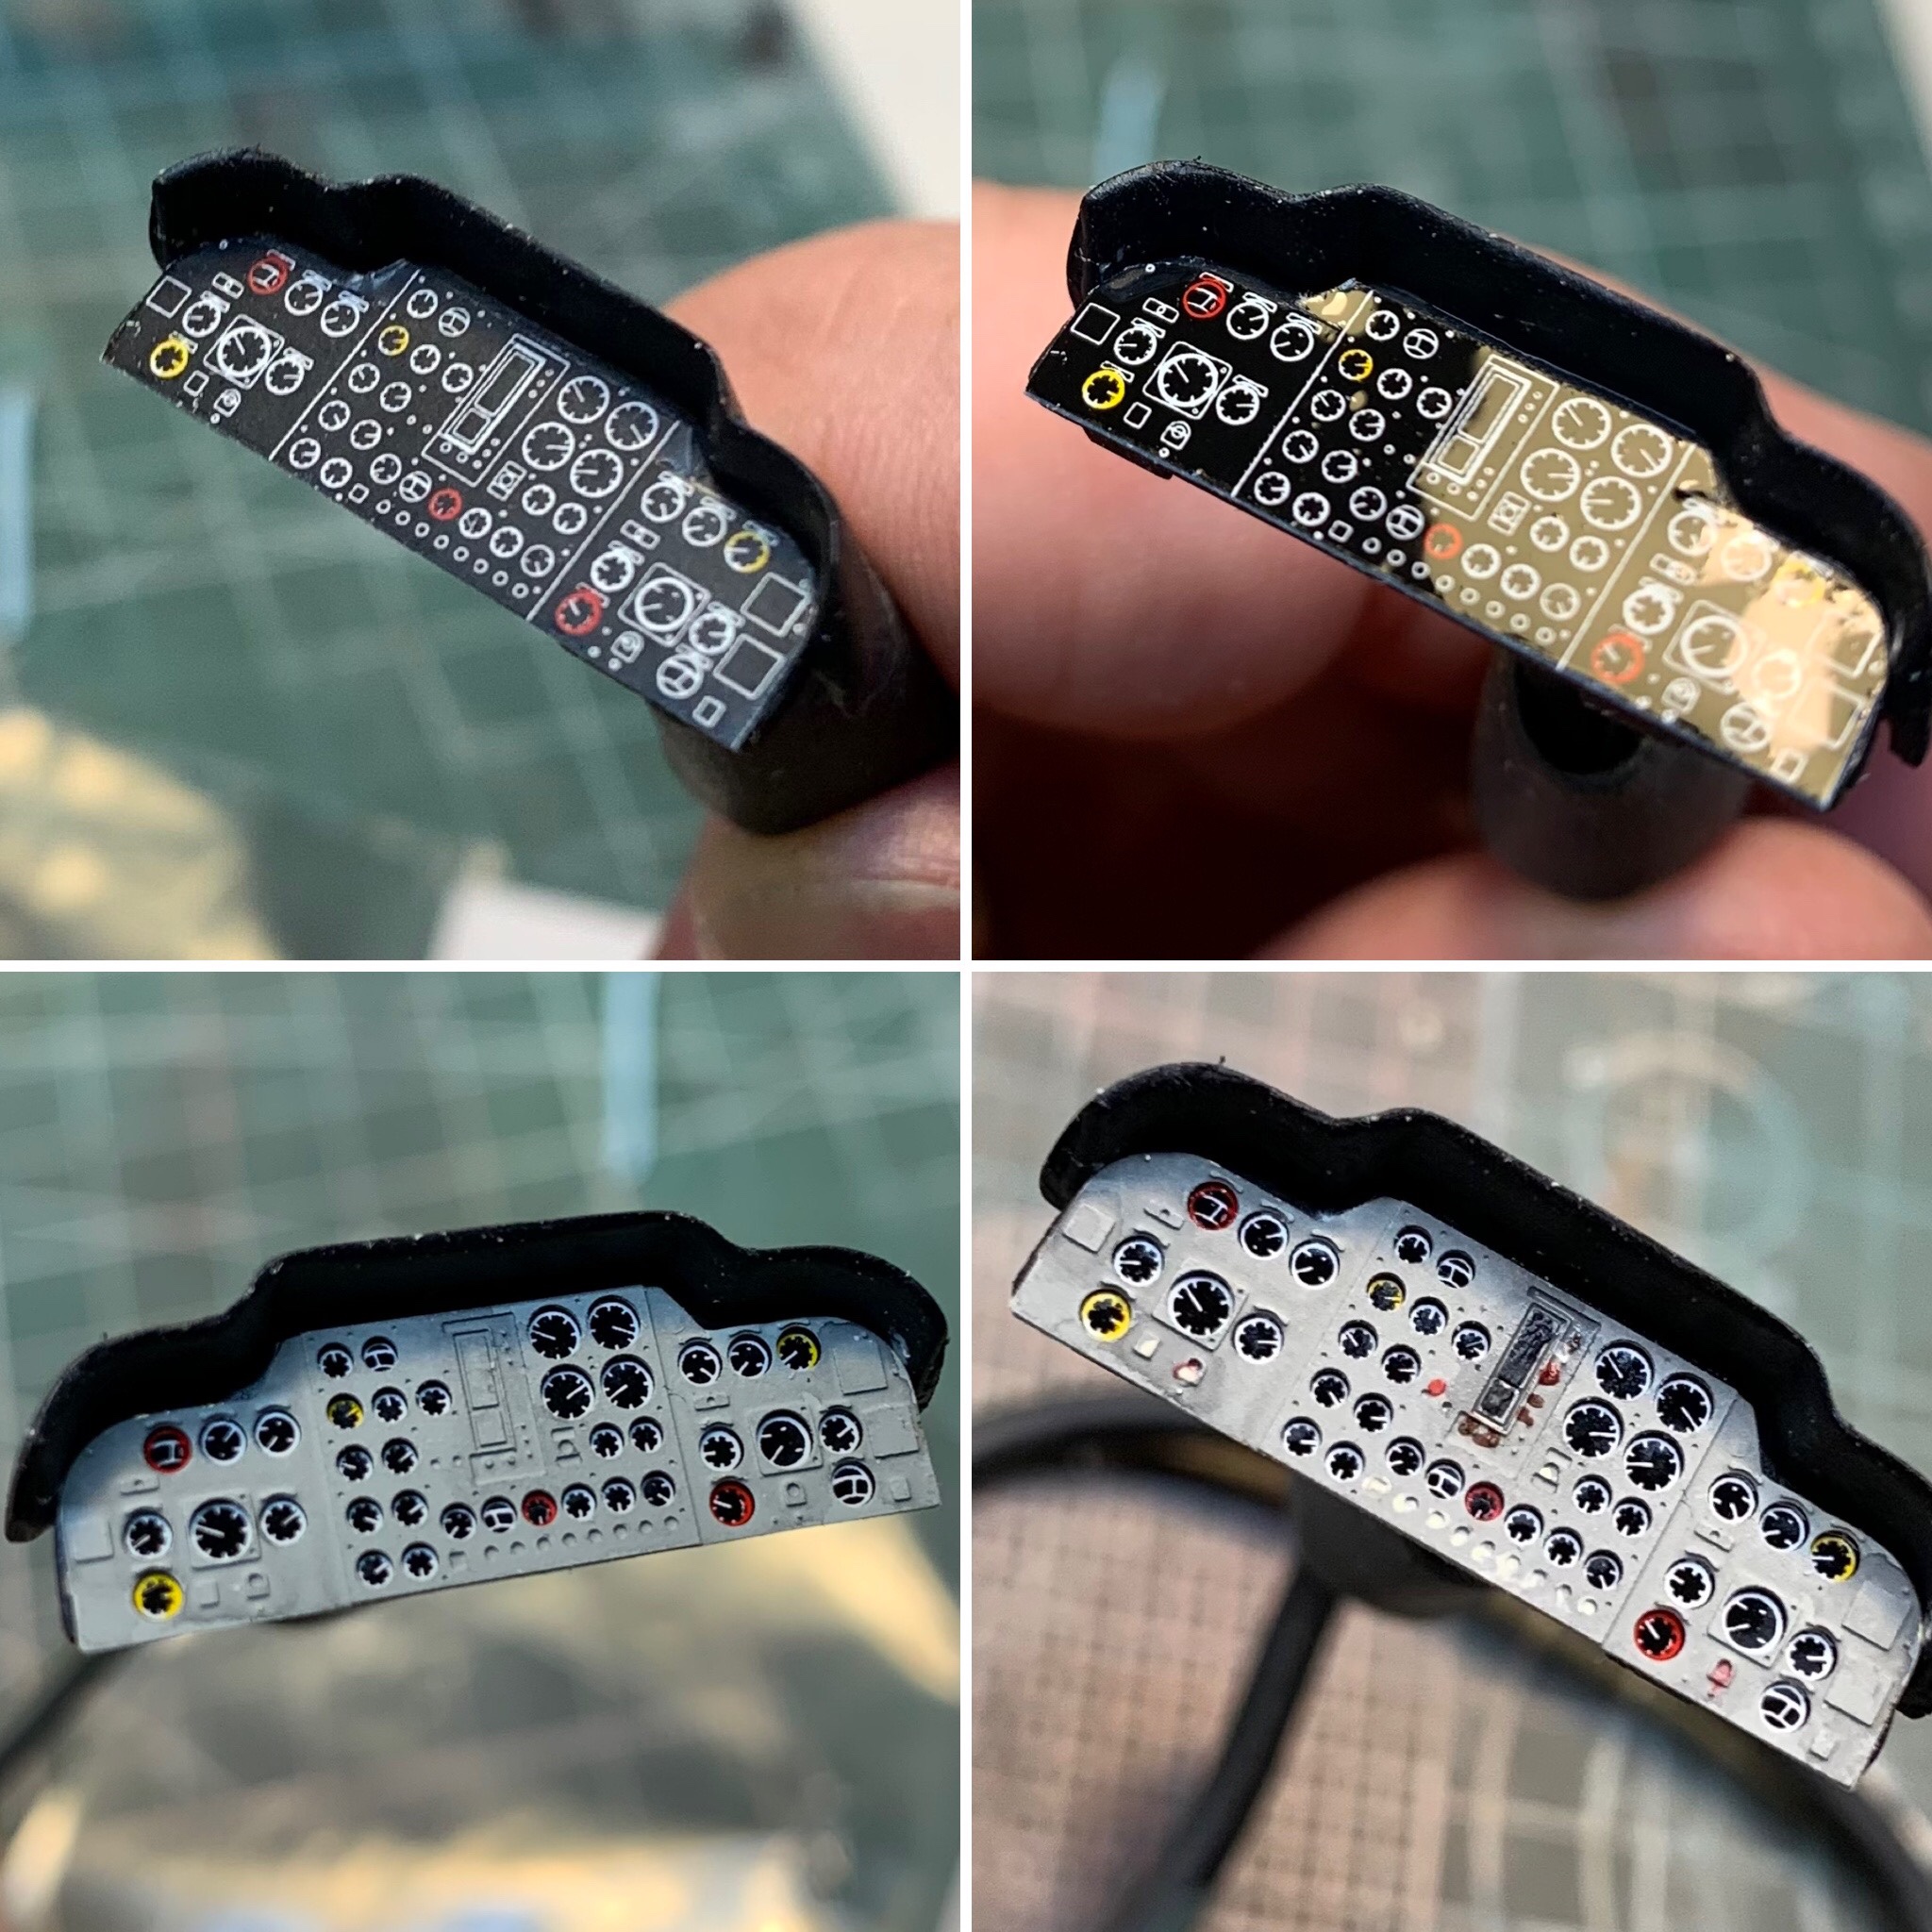
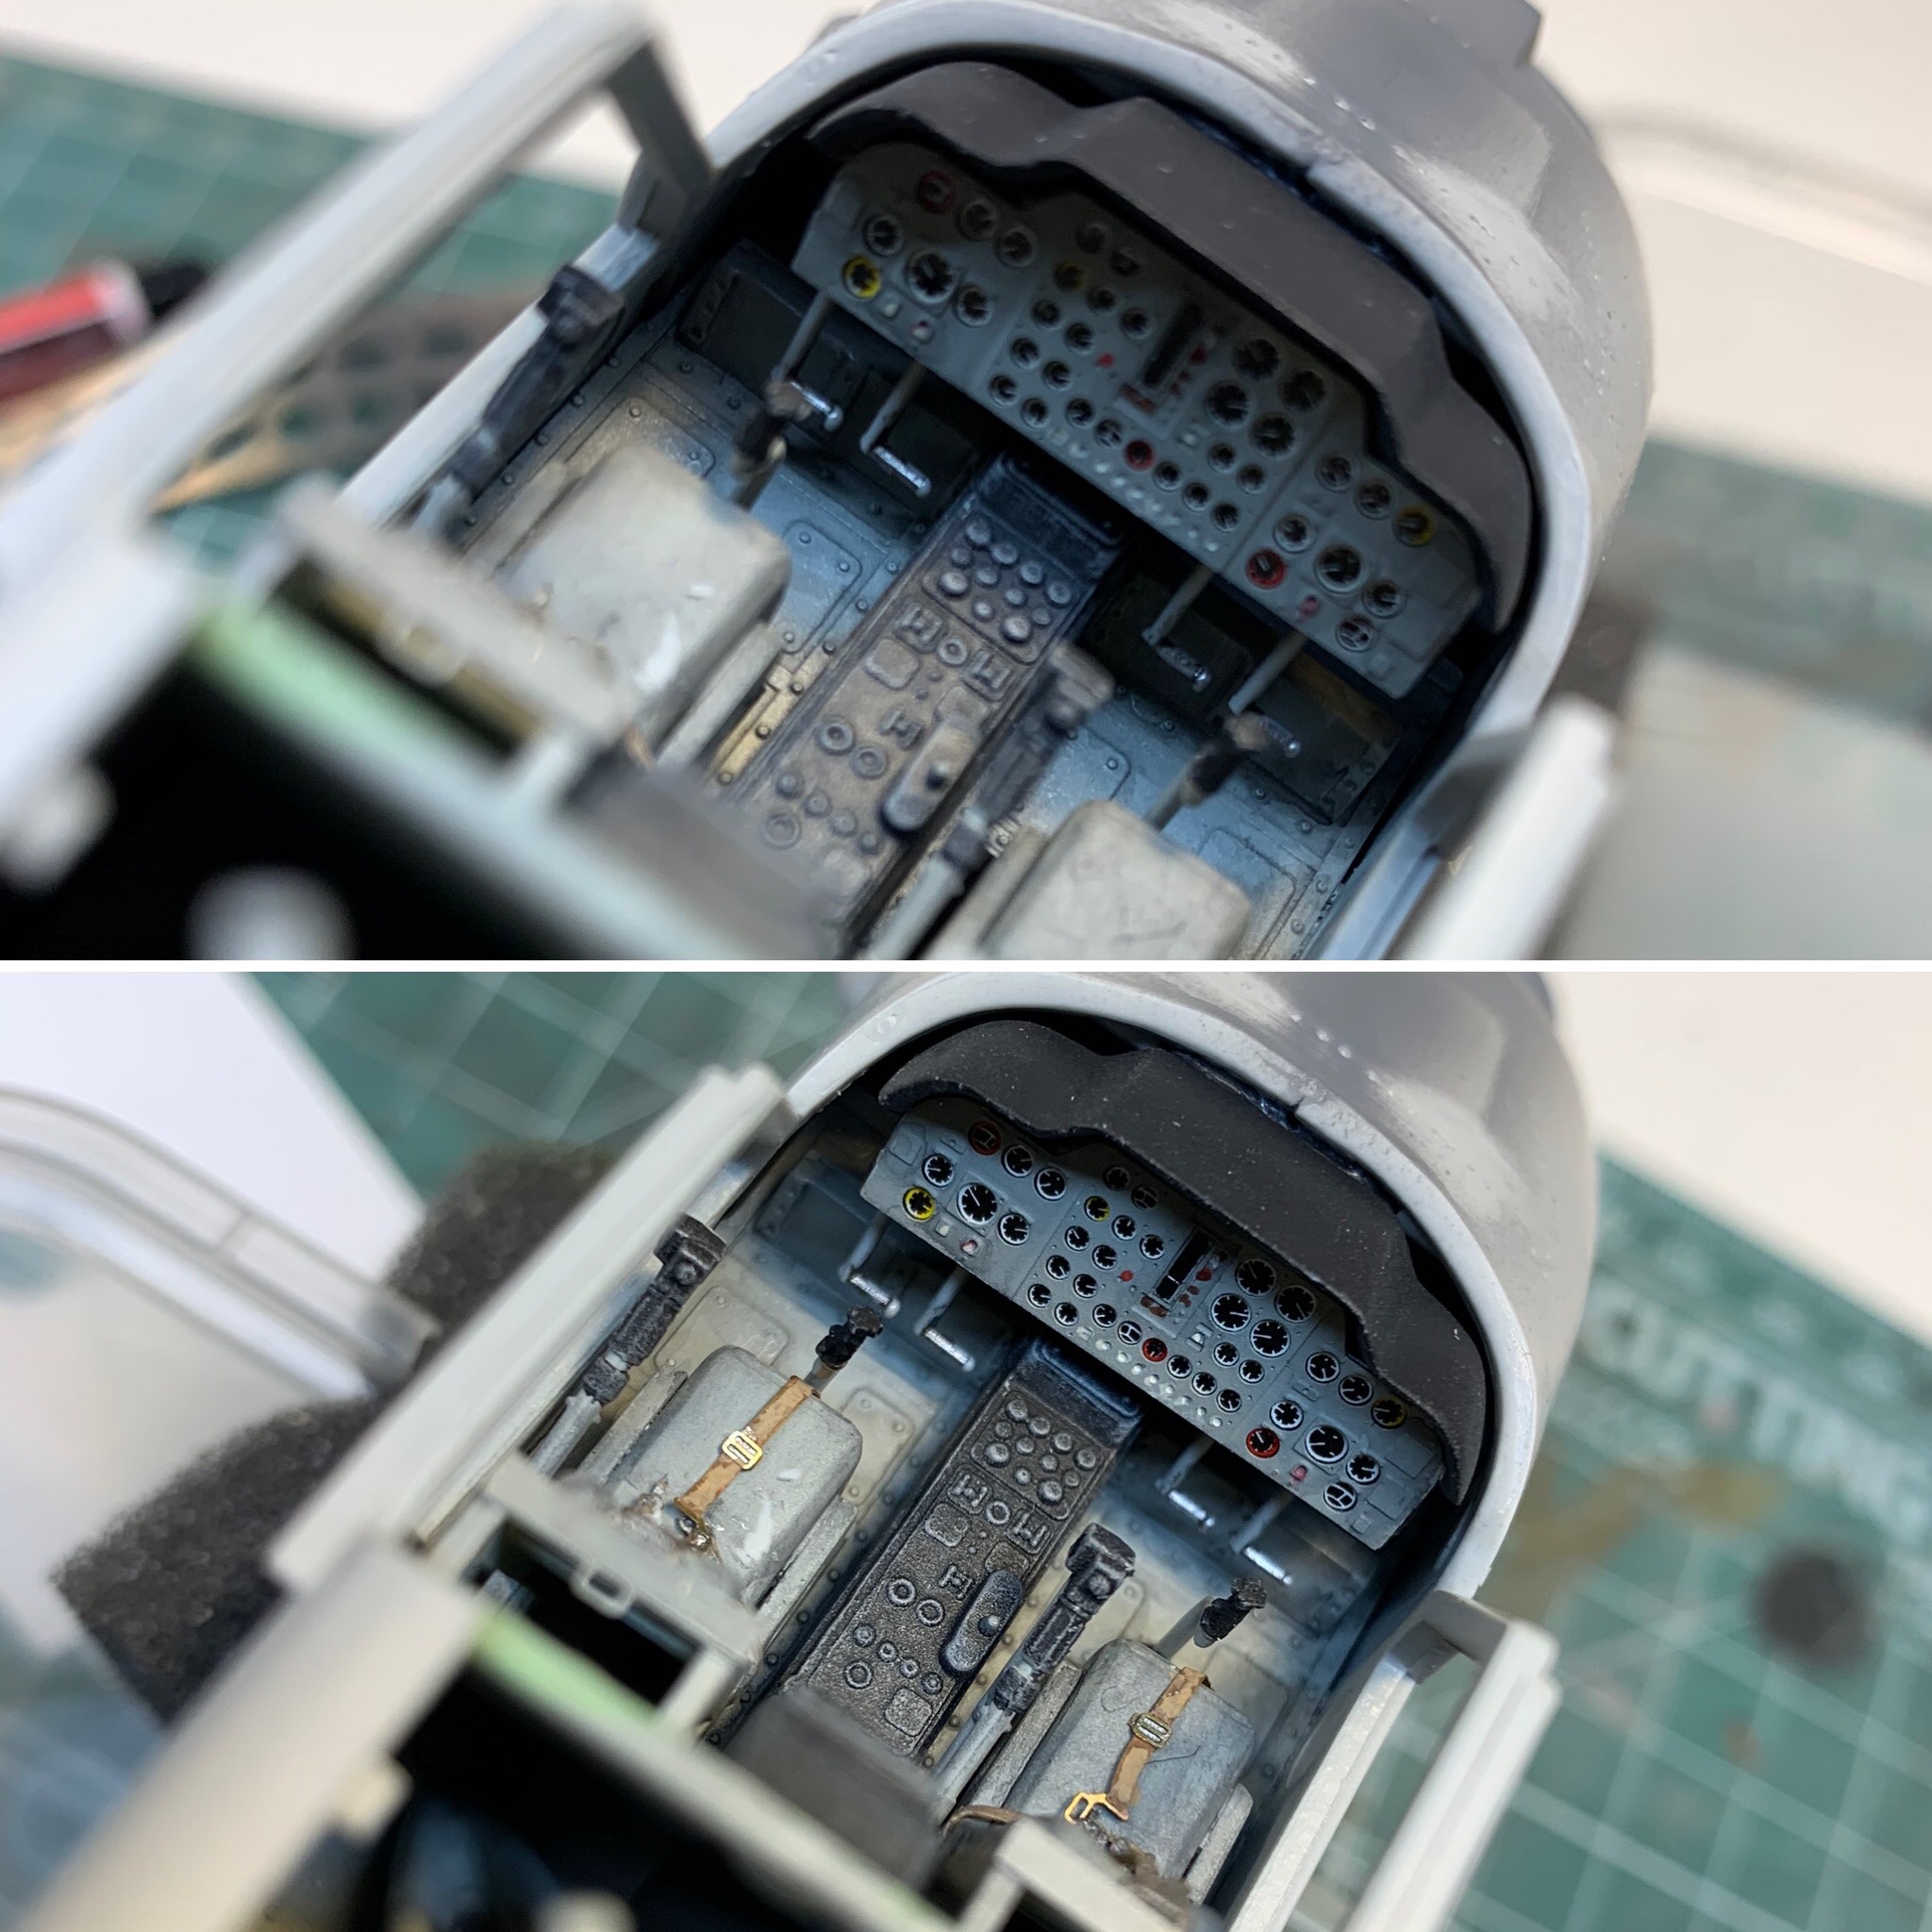
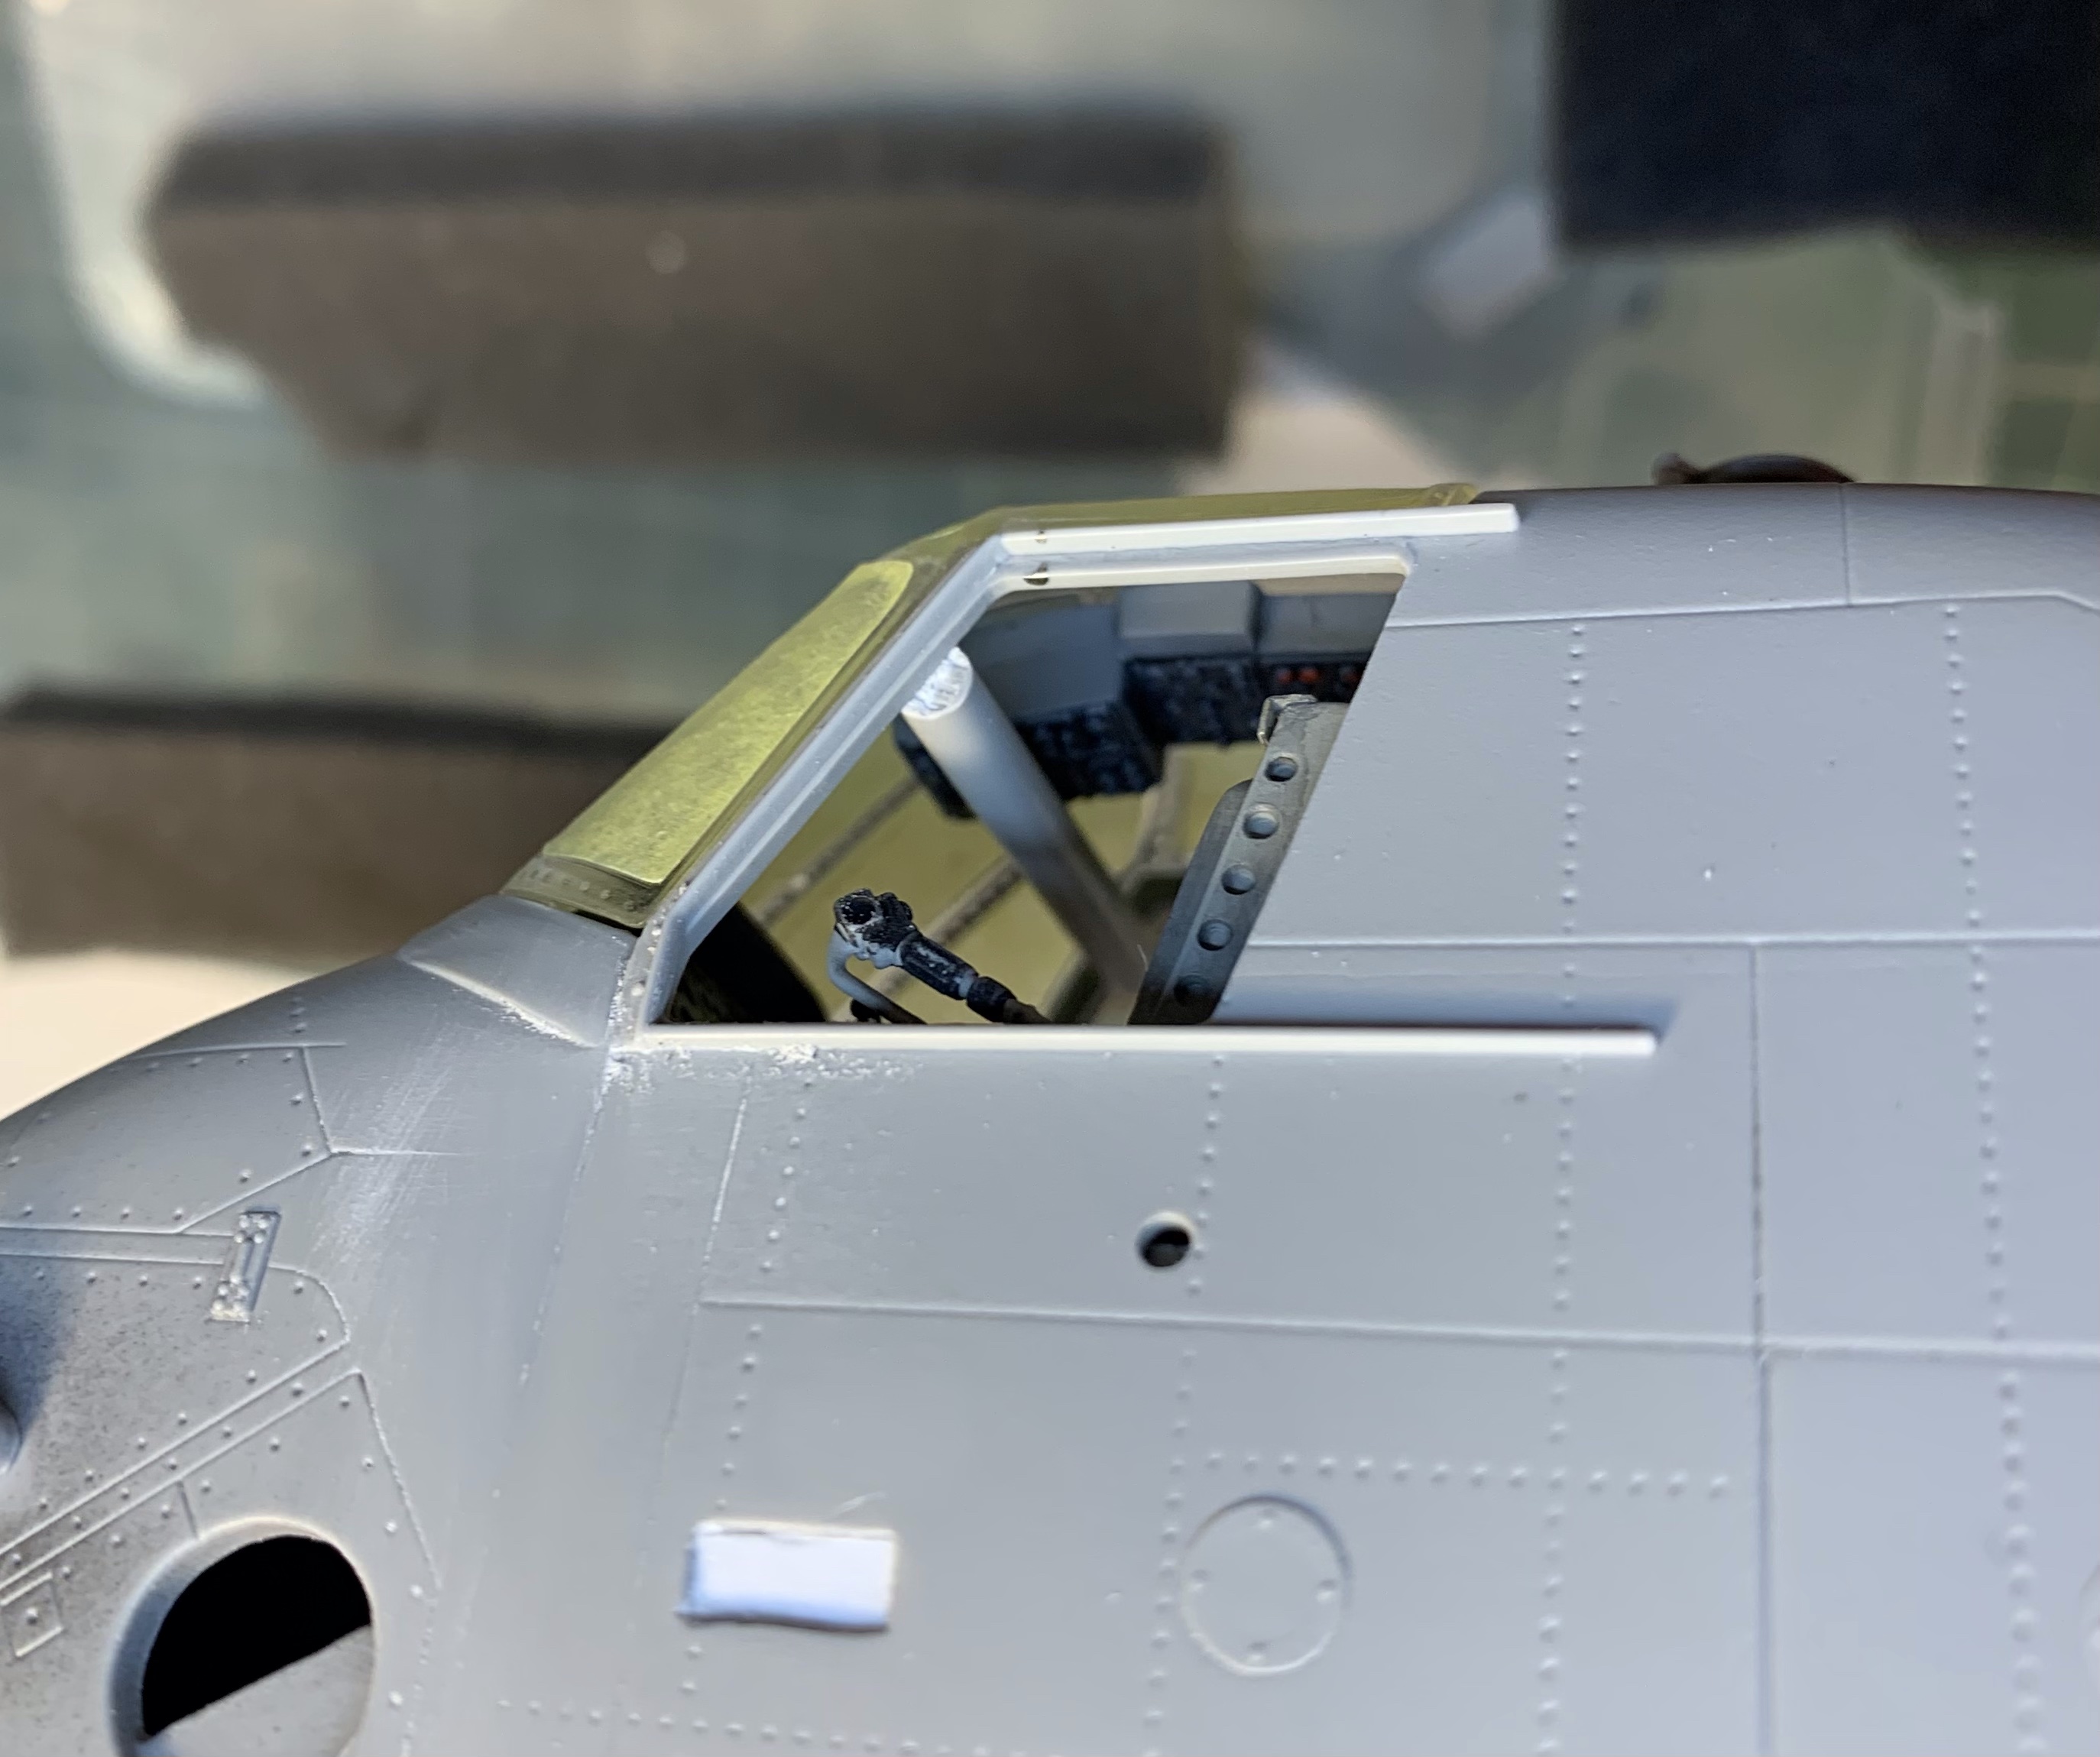
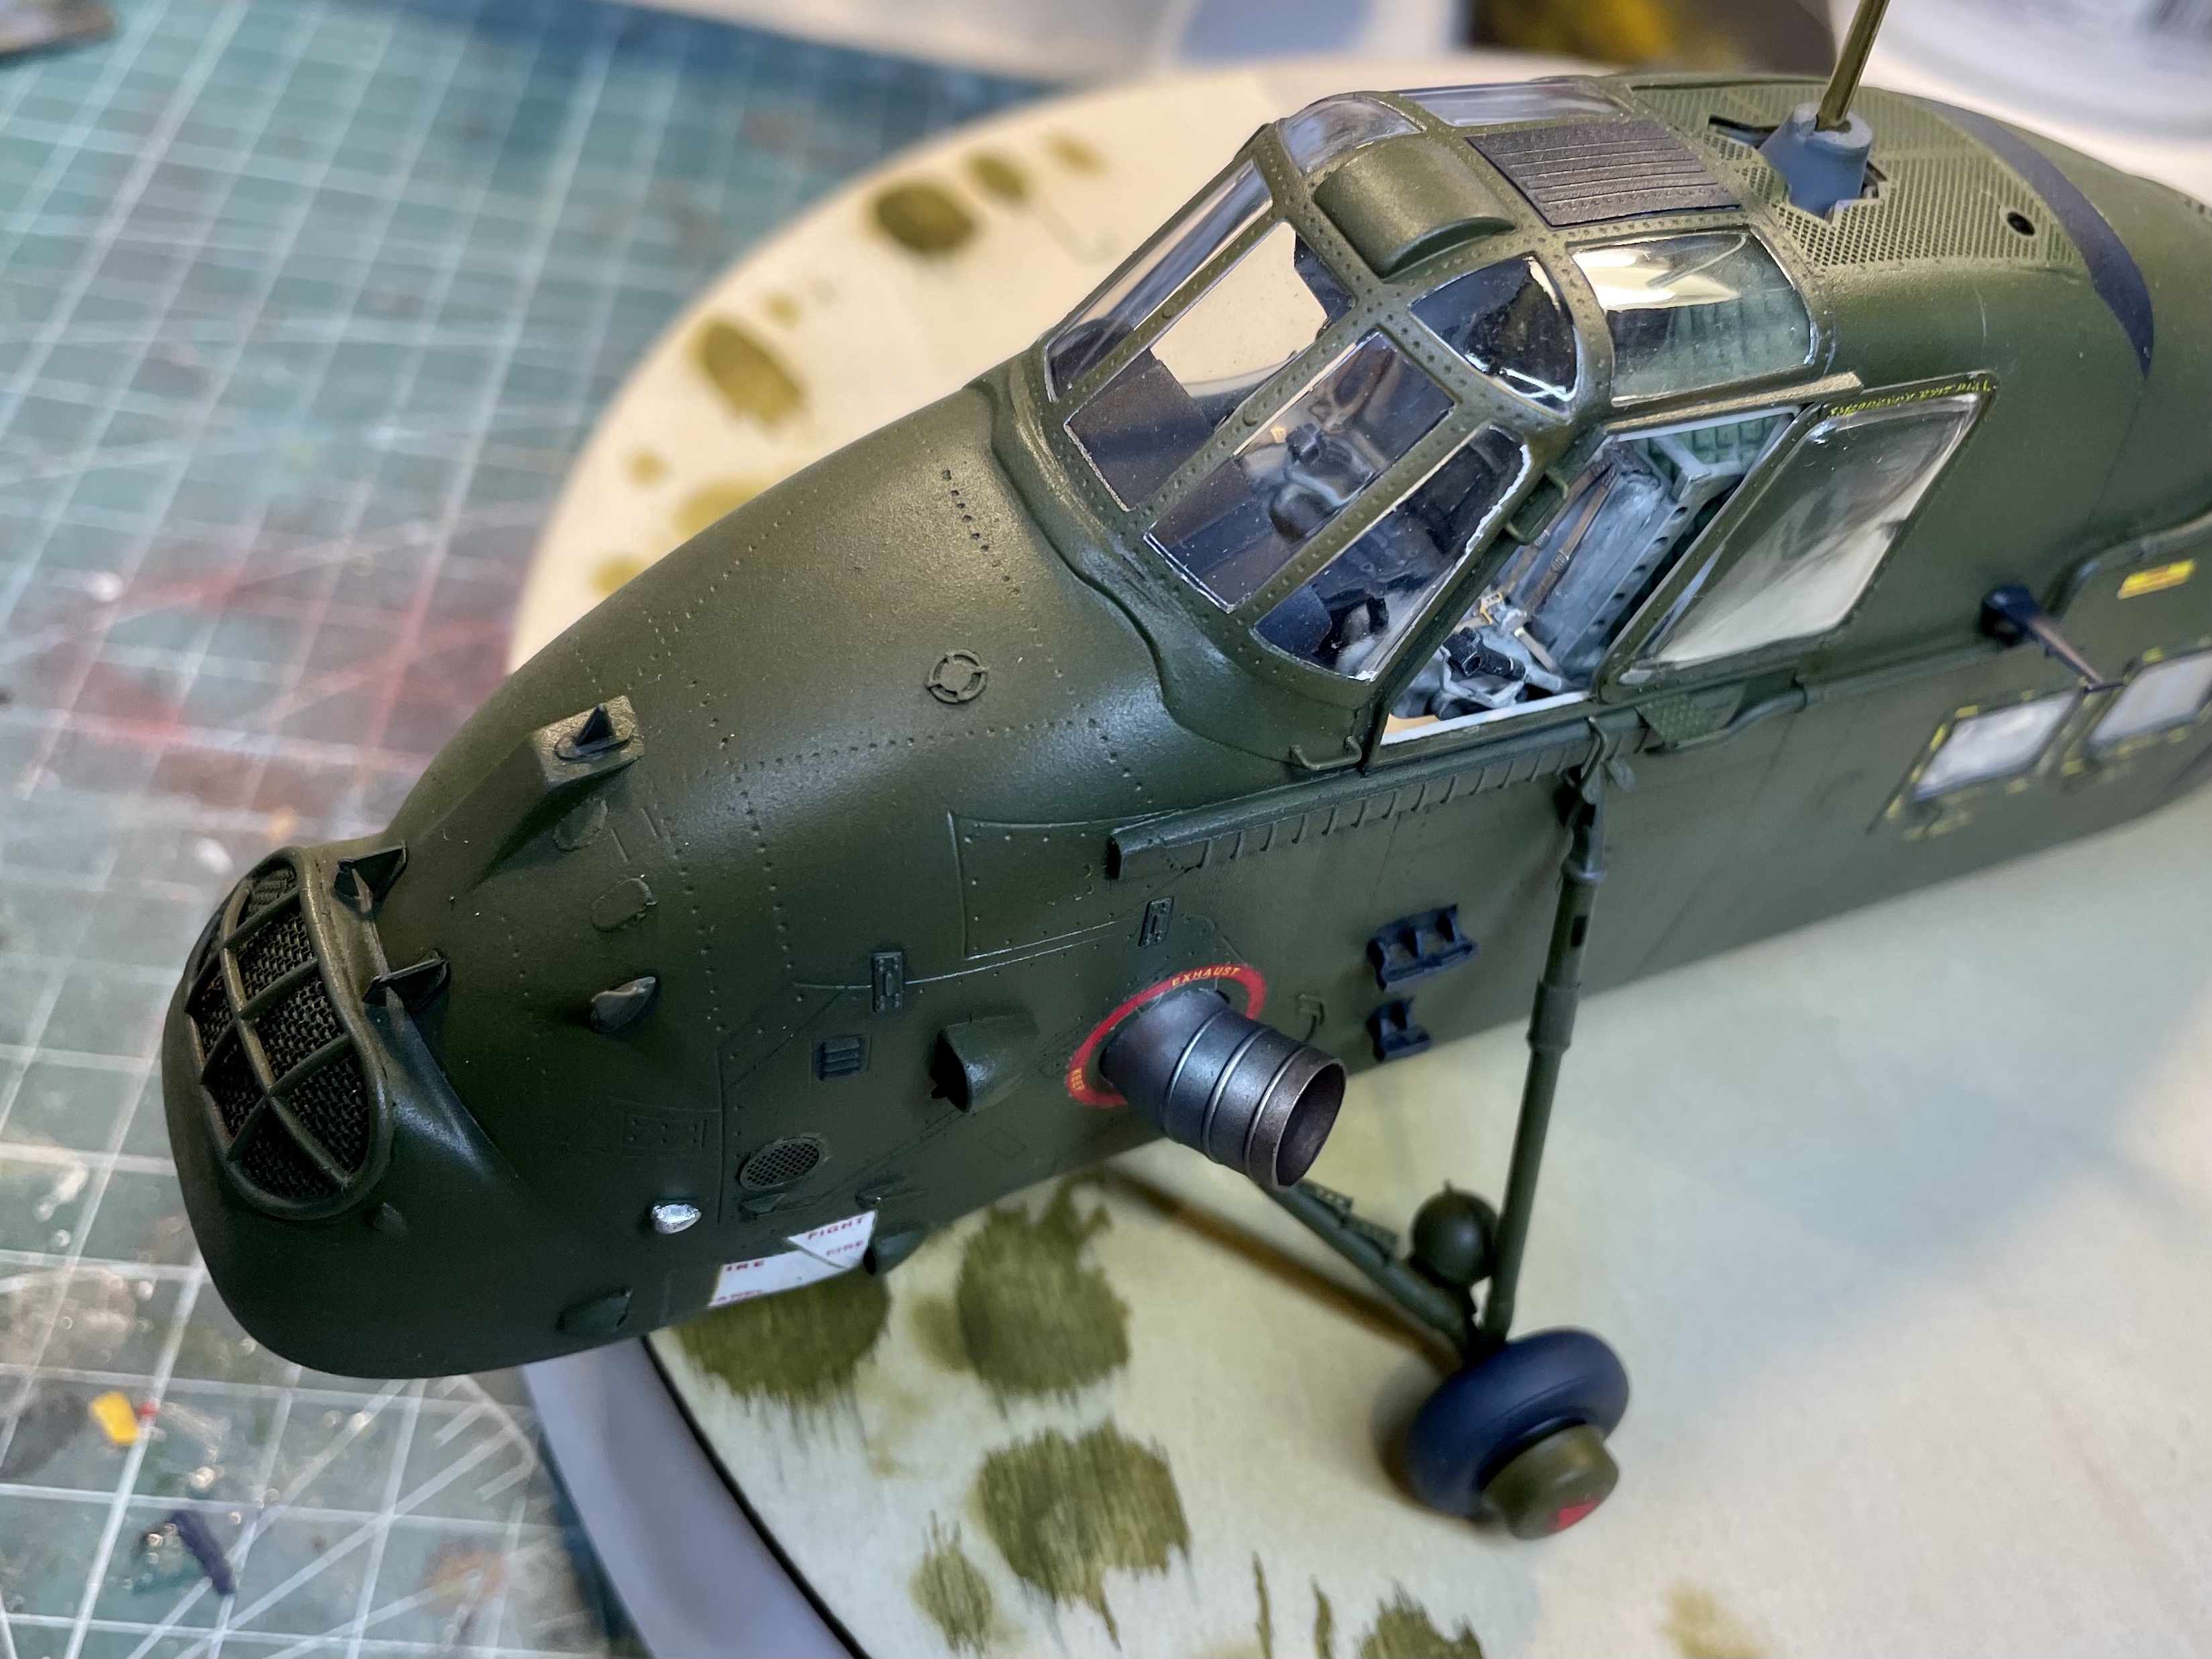
The cockpit was also treated to a little extra effort as I intended to leave the side windows open. I followed my usual process here with the exception of the instrument panel which I “glued” the decal to the backing with Future and then “glued” the PE front panel to the instrument in the same way. This left the instruments with a very nice gloss glass-effect which now no-one can see.
The remainder of construction was fairly simple; the only obstacle I encountered was the fit of the windscreen for which I had to install a temporary spreader in the framing to match it to the windscreen. Once glued, the spreader was removed. Most of the effort though was the PE set which was tedious but cumulatively rewarding. In total it added a level of detail and accuracy (albeit some of it not as accurate as it could have been, according to what I learned along the way) which creates the impression of the whole.
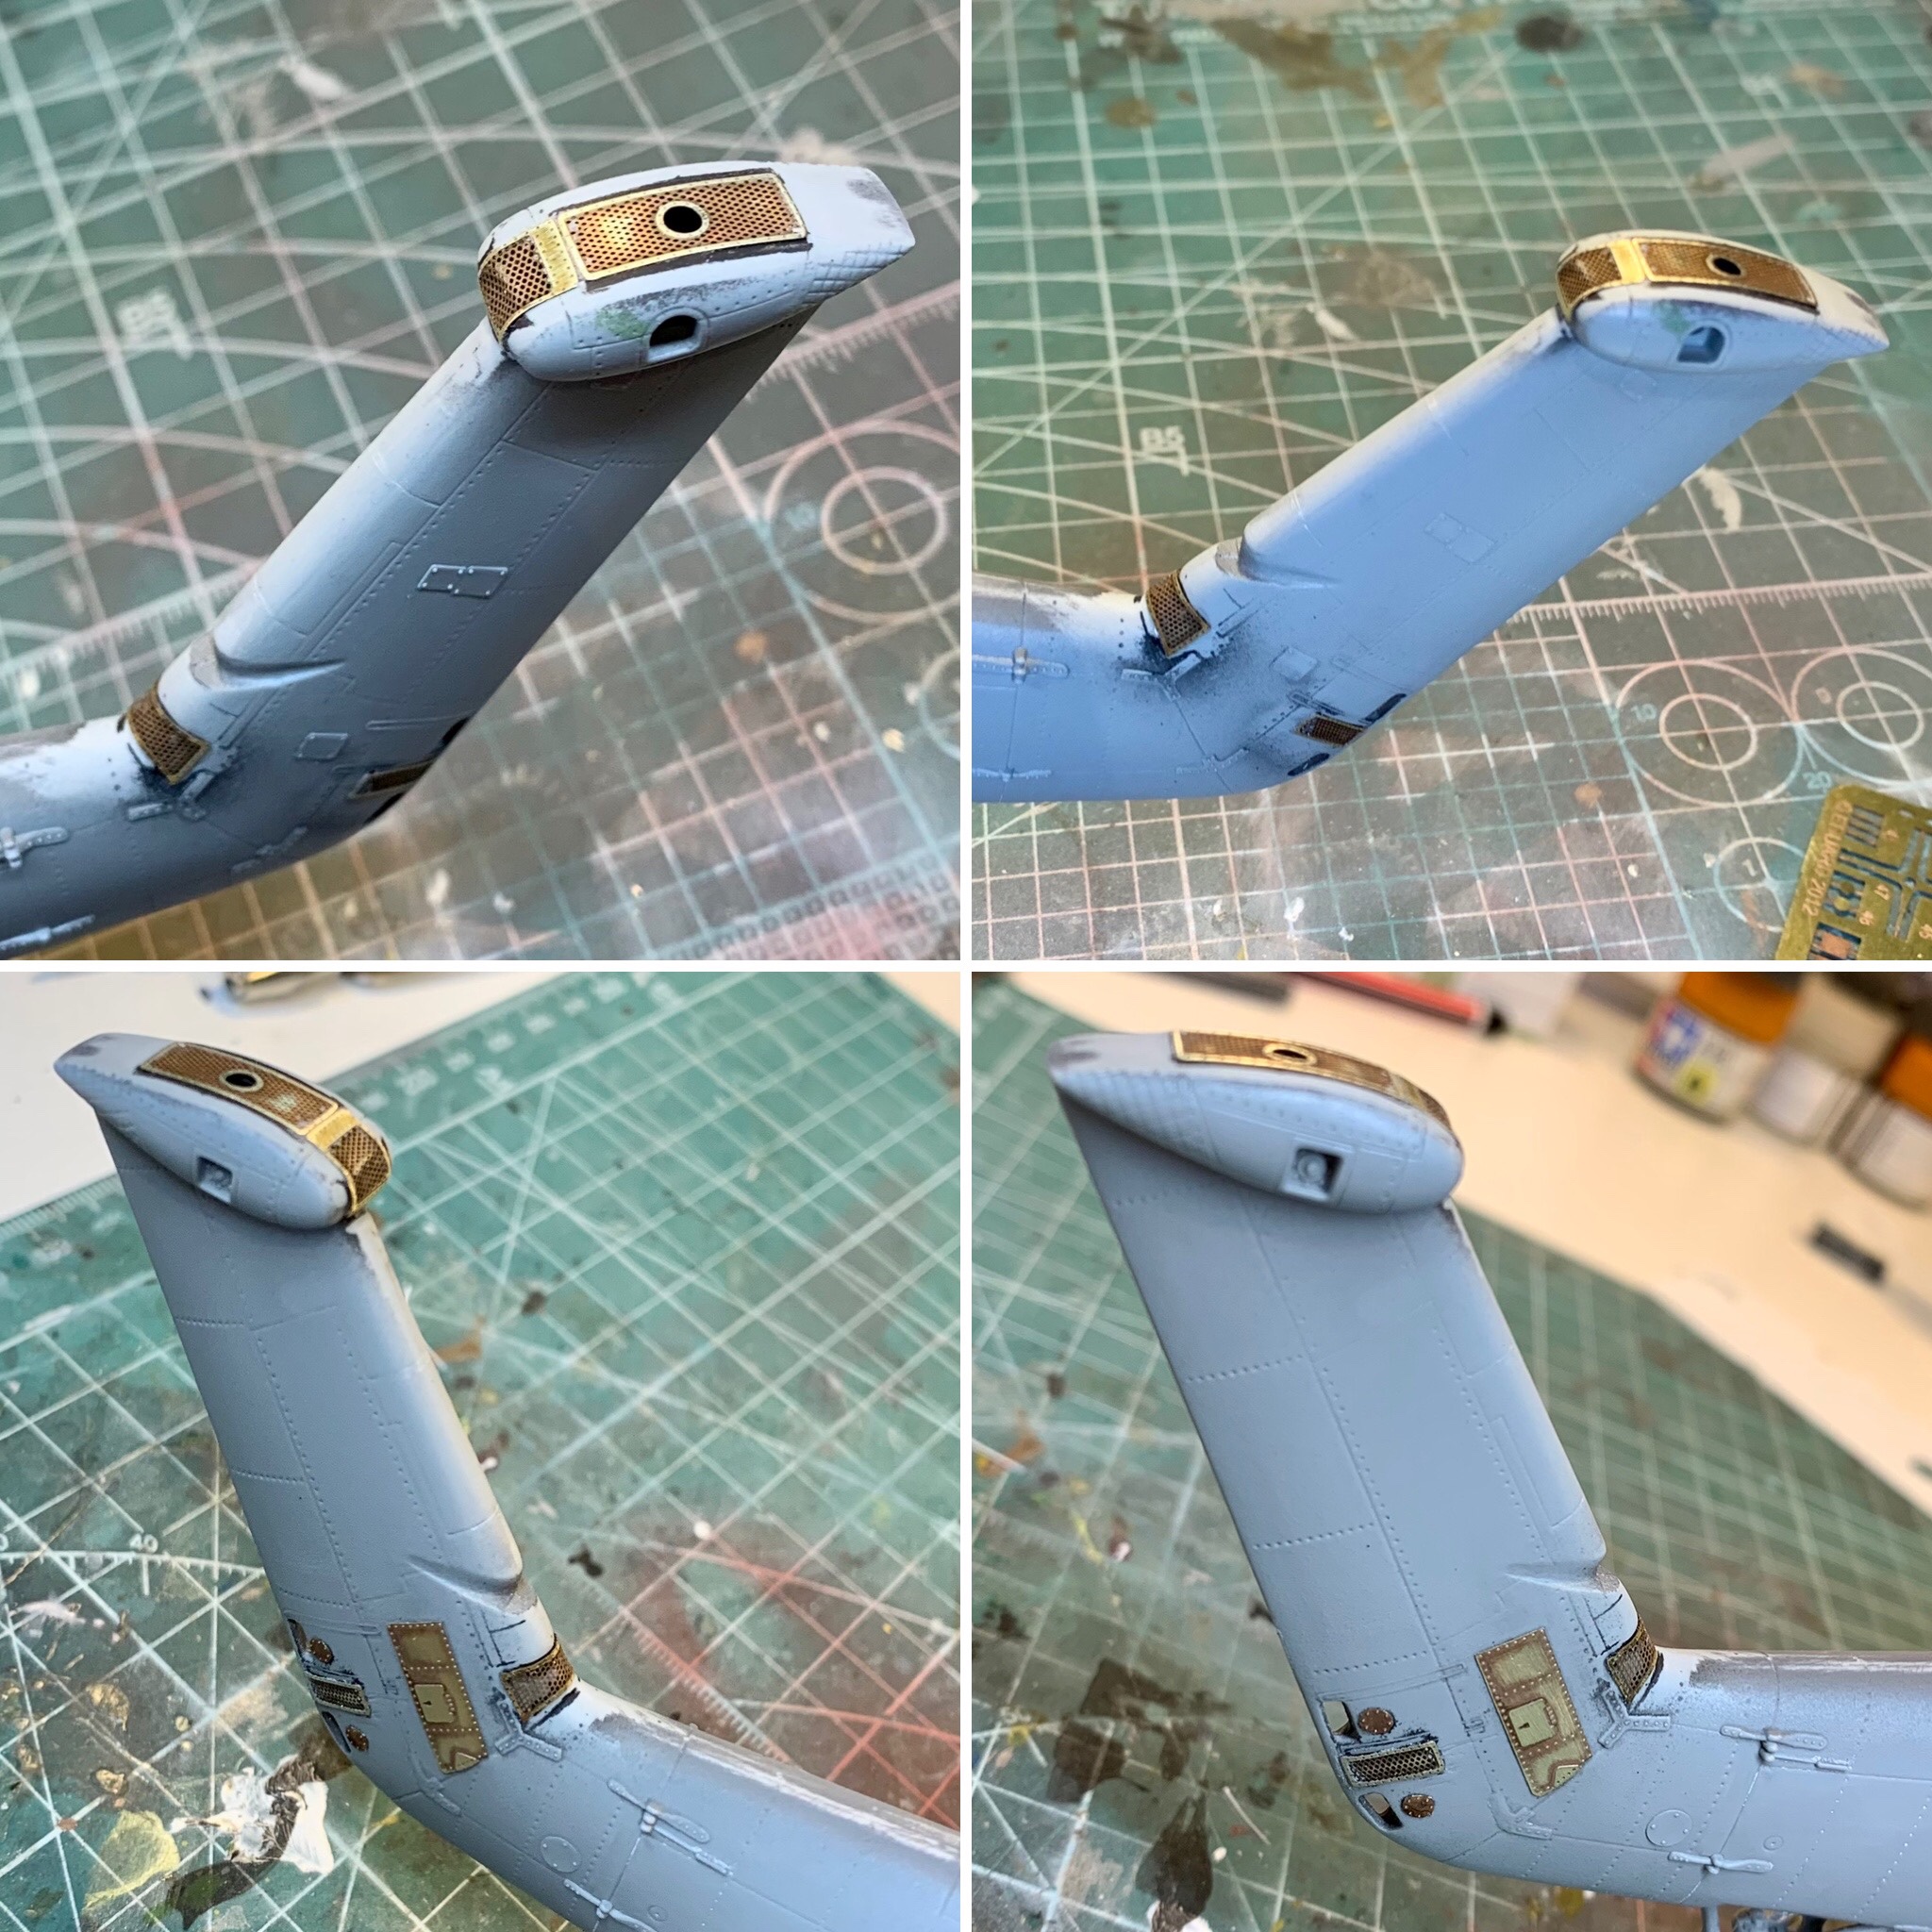
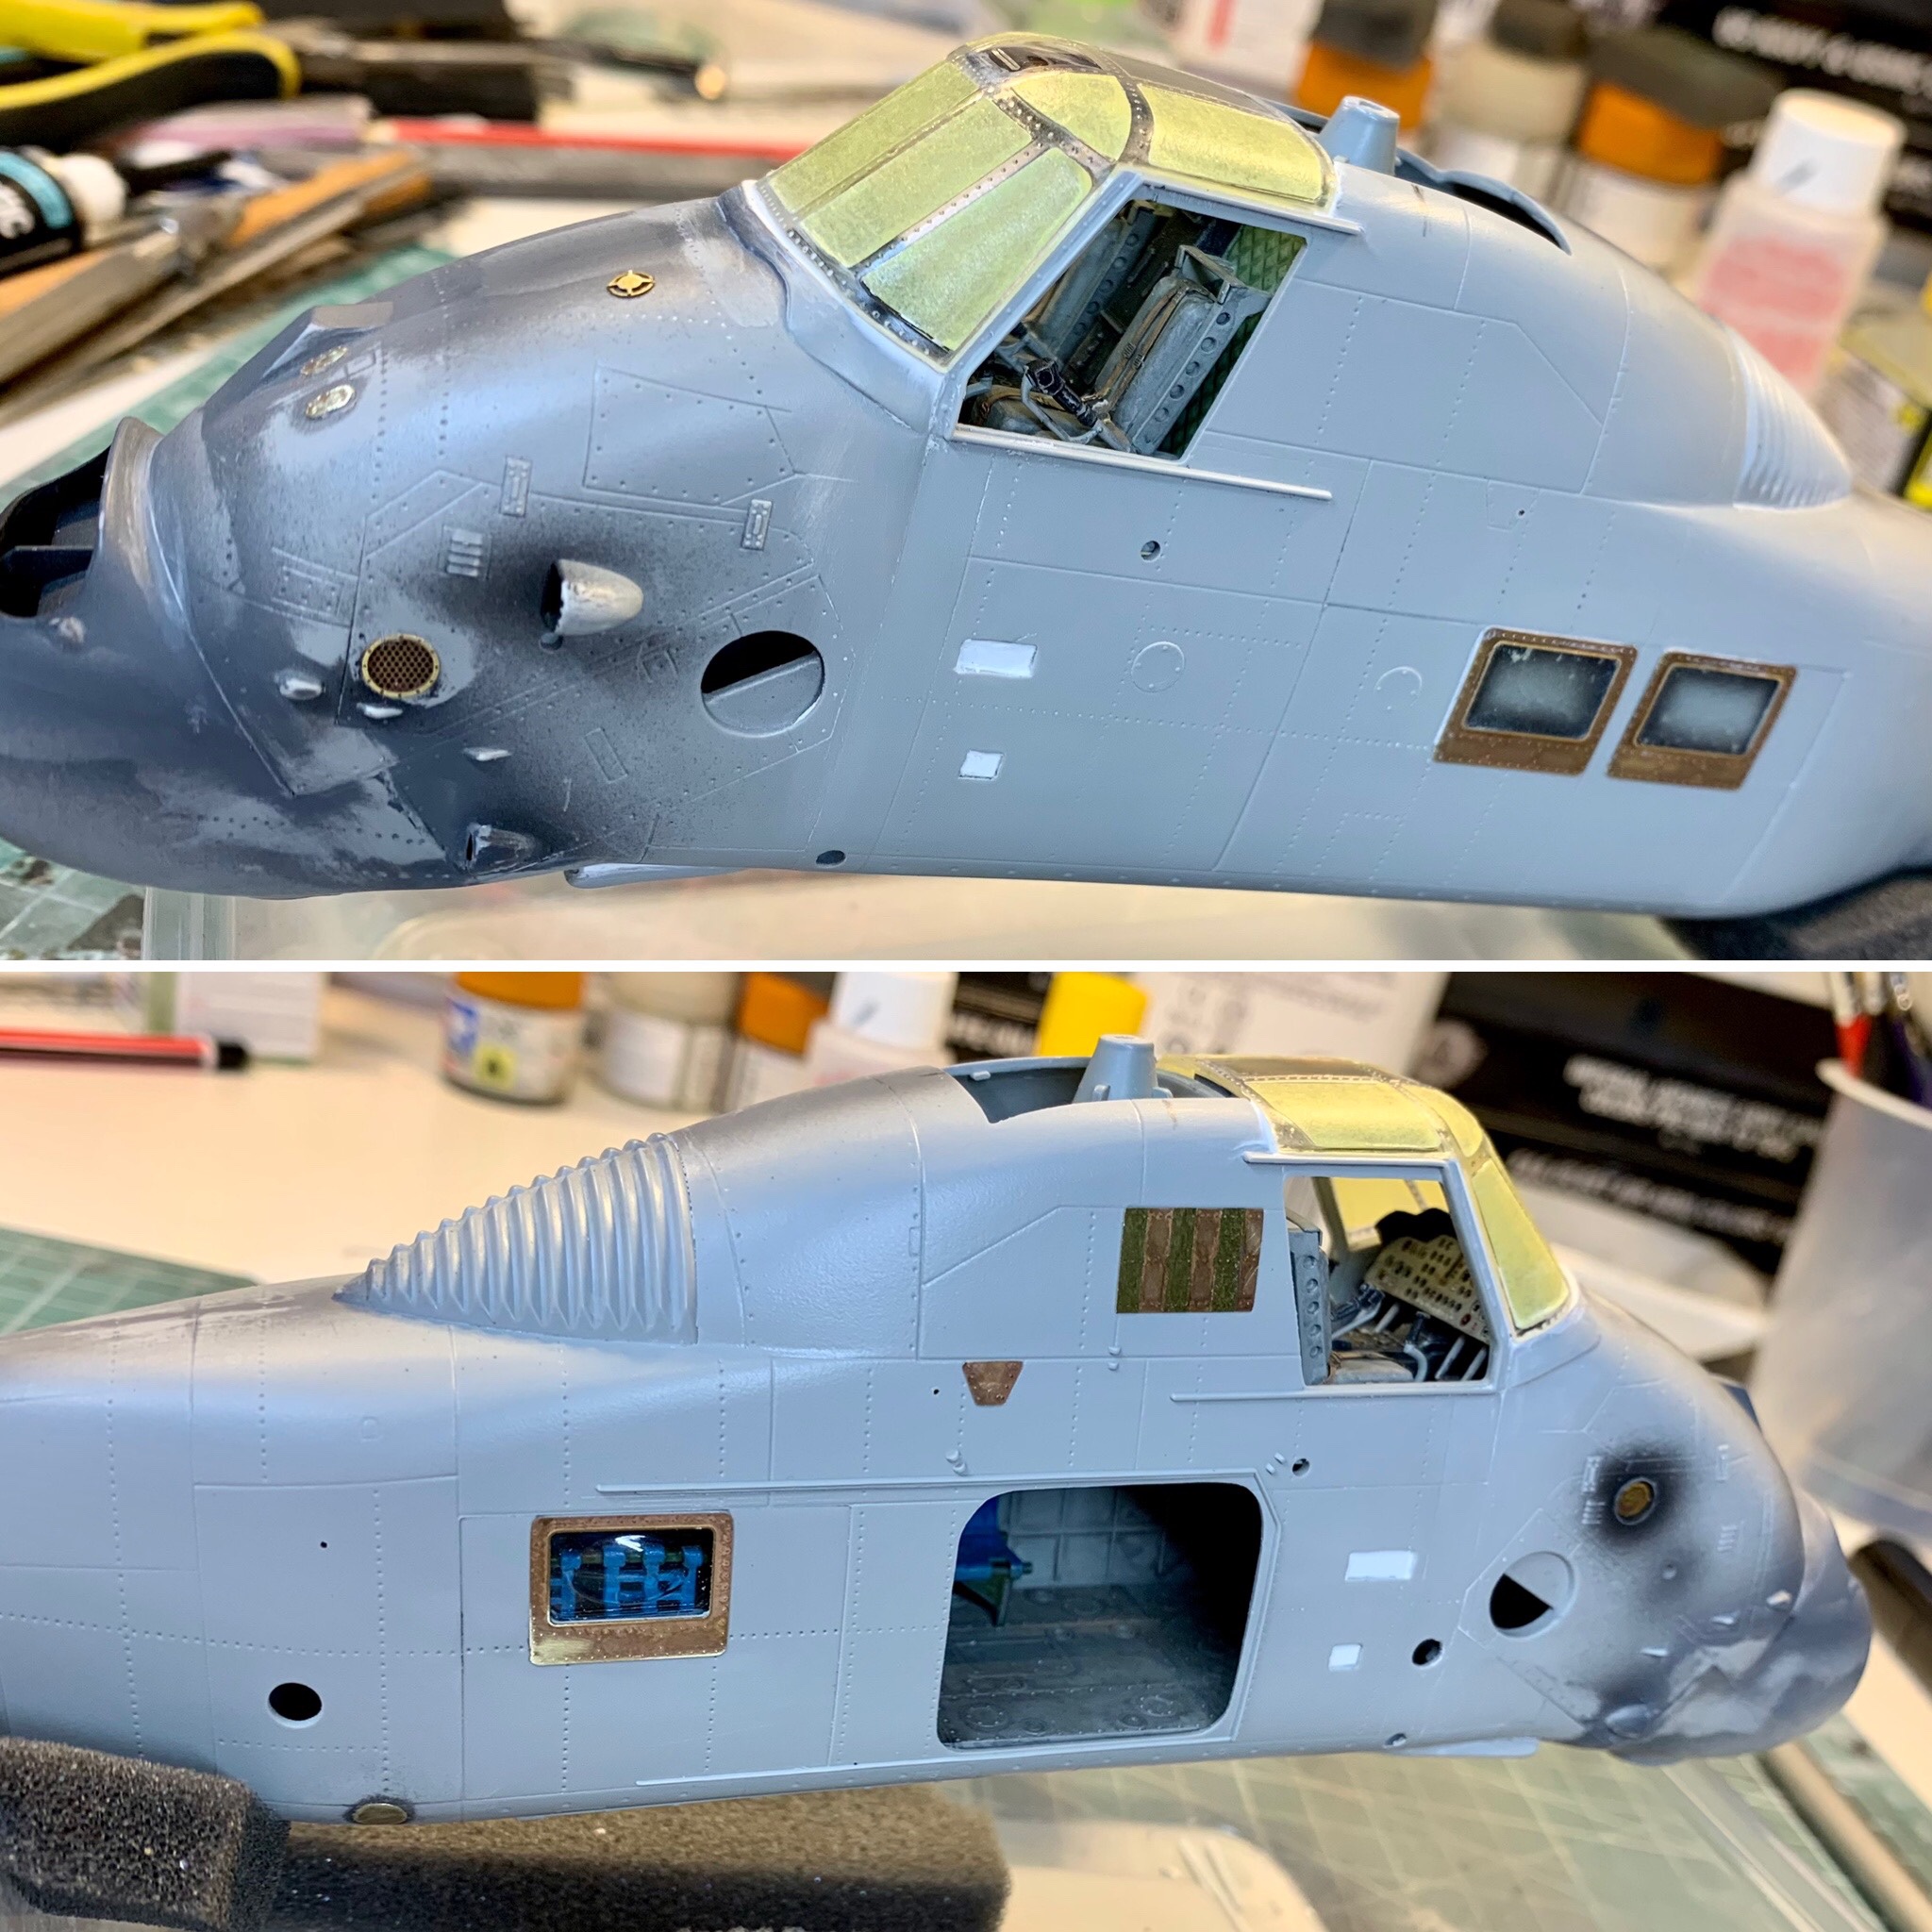
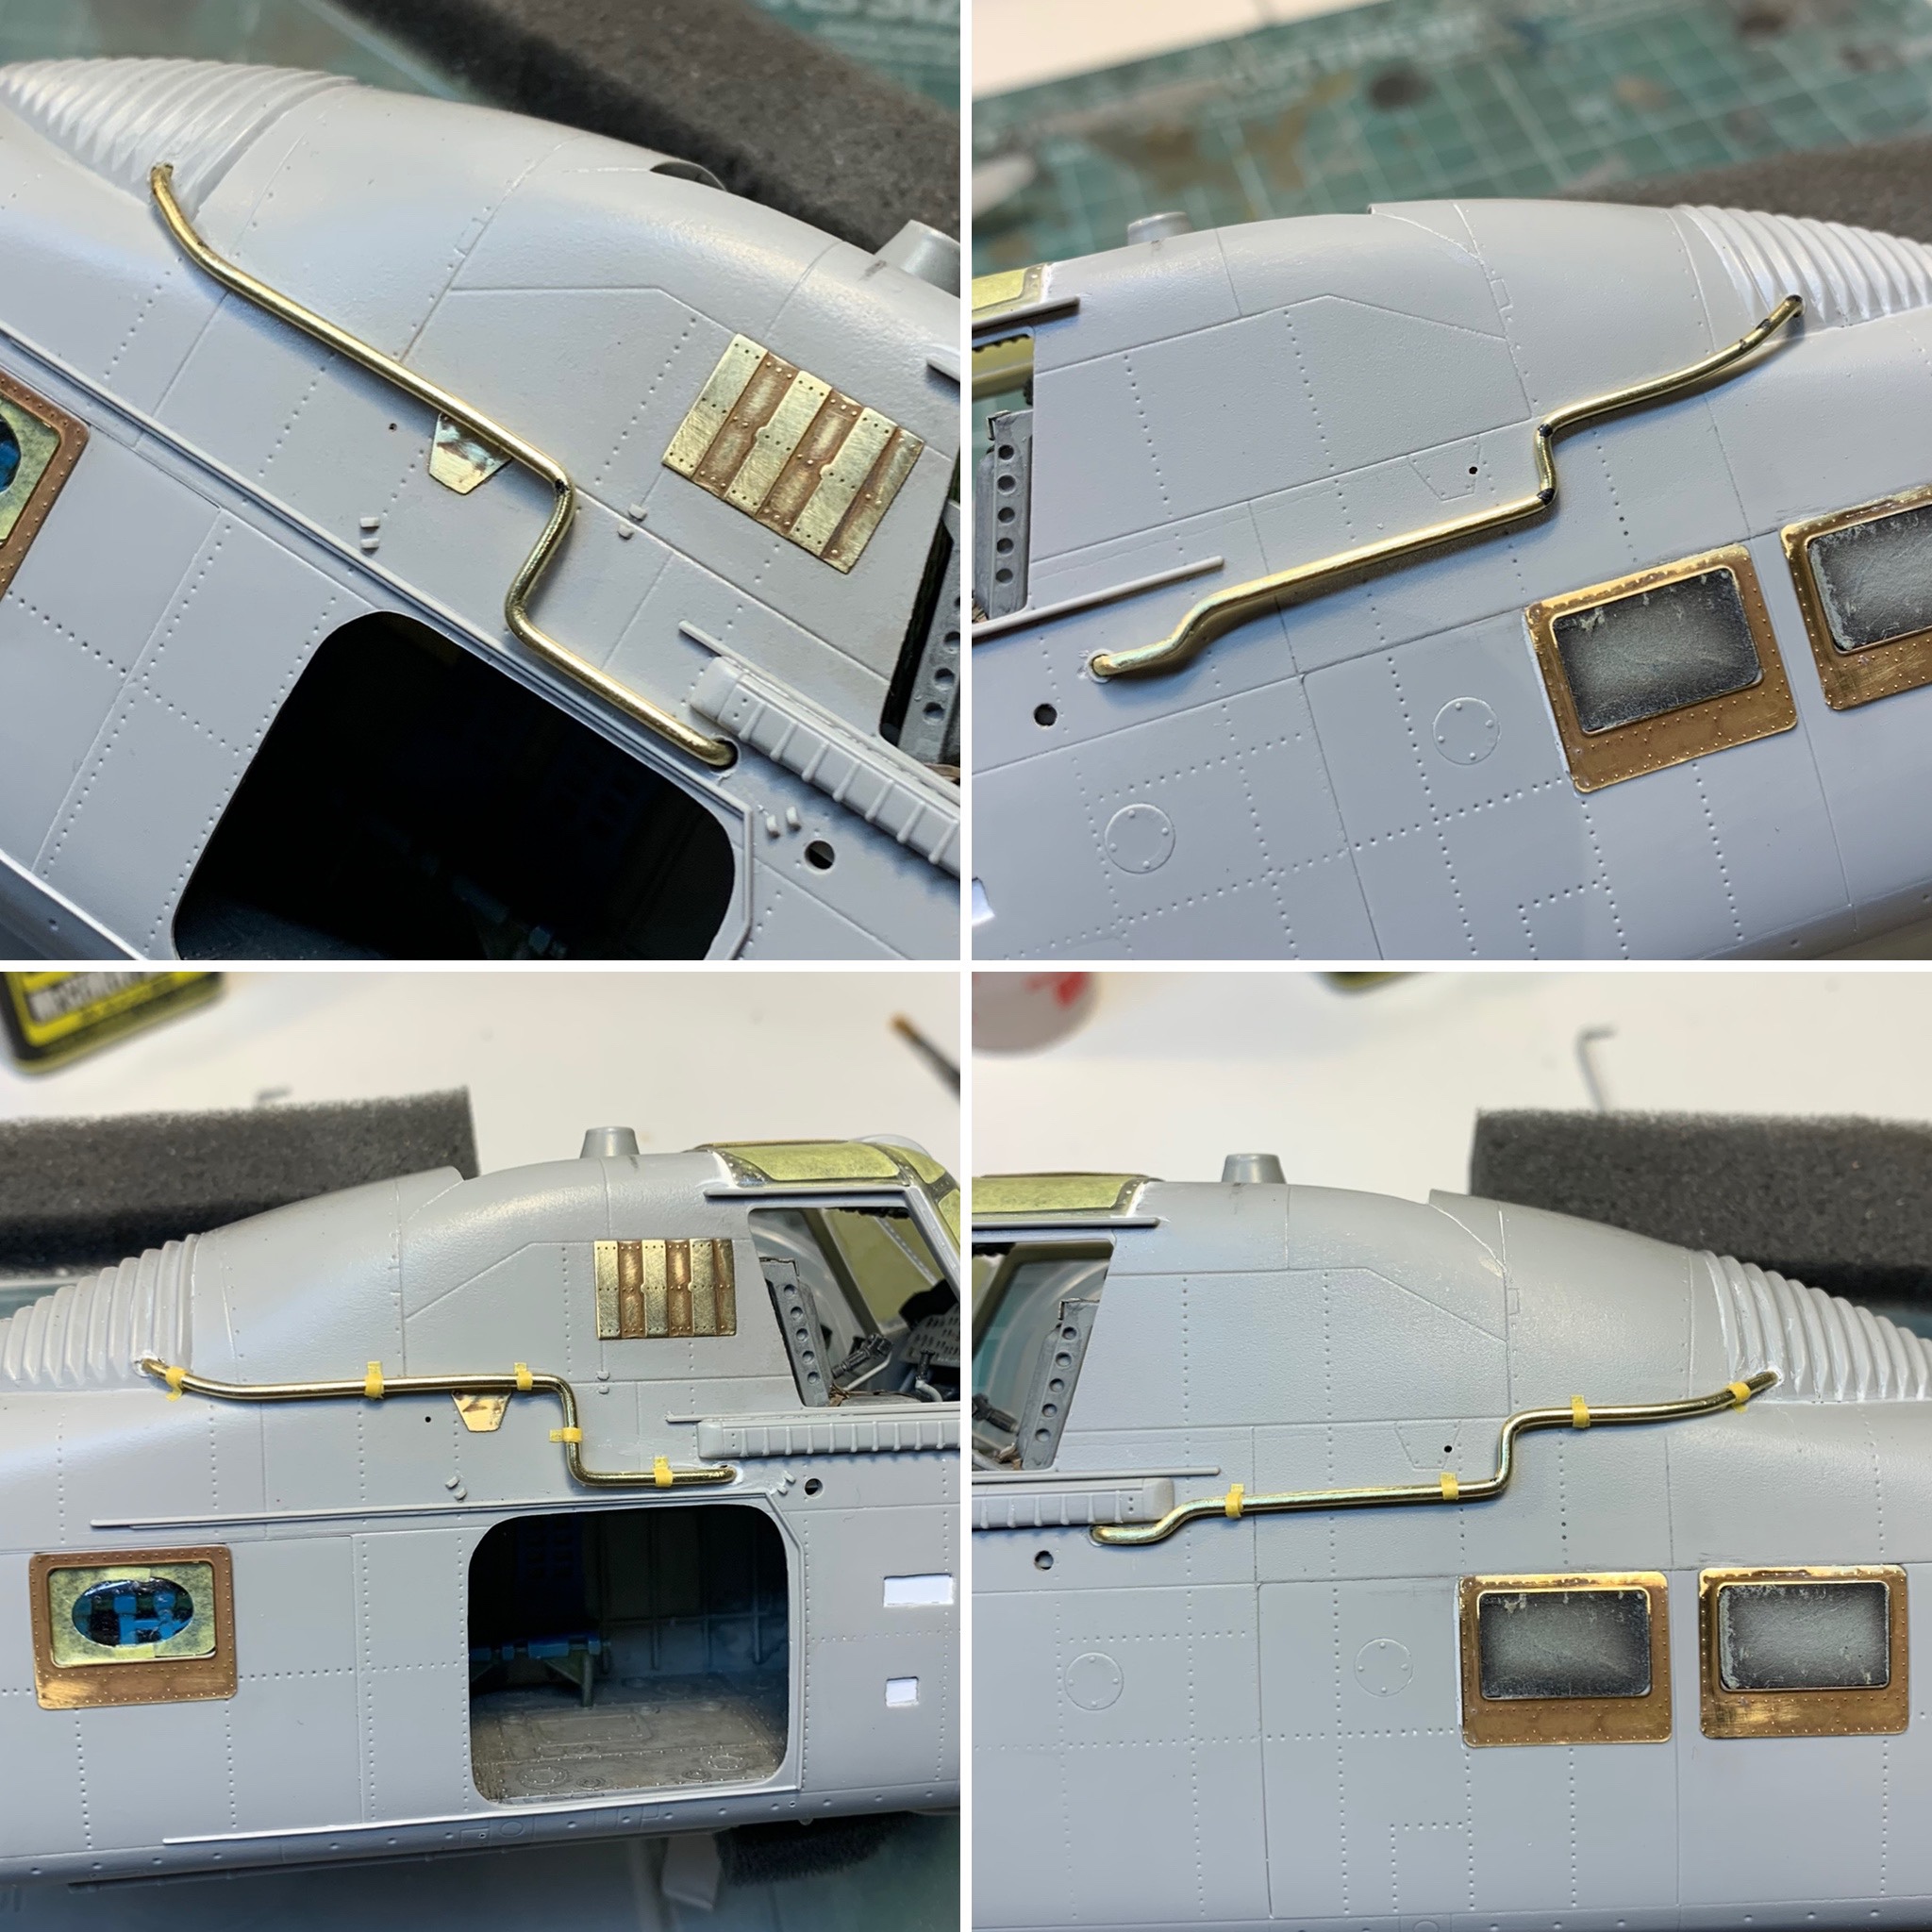
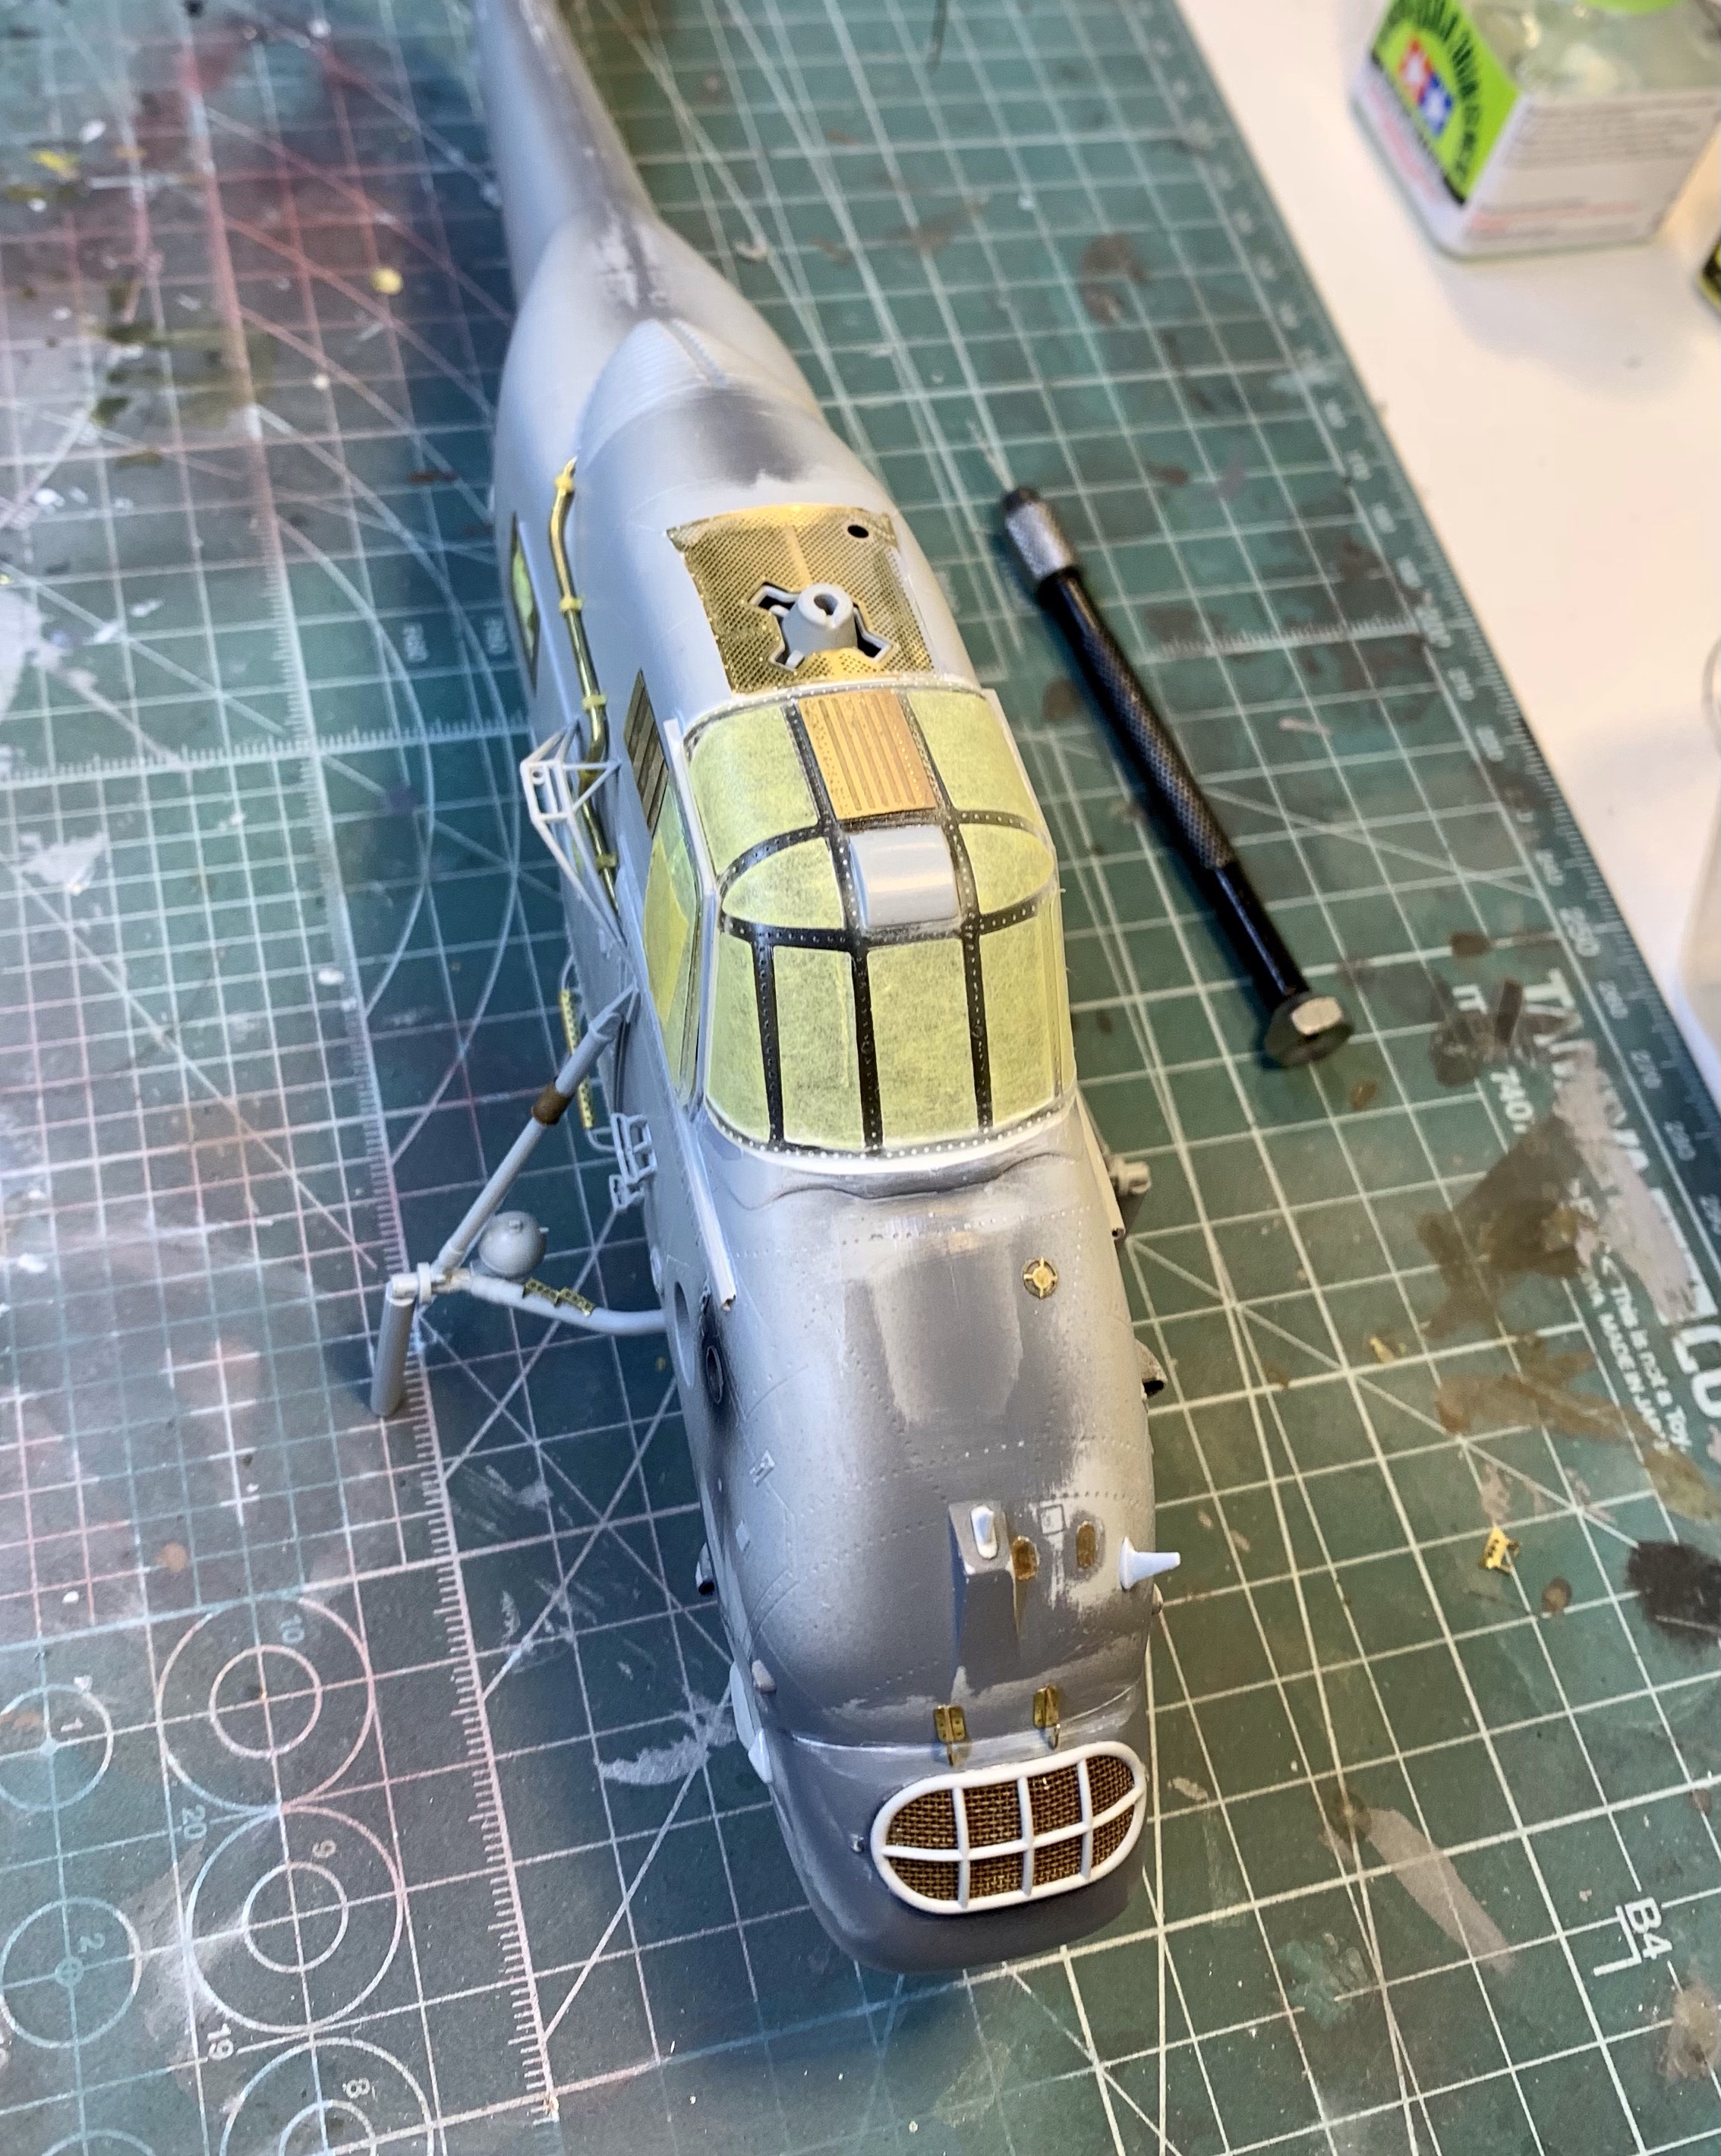
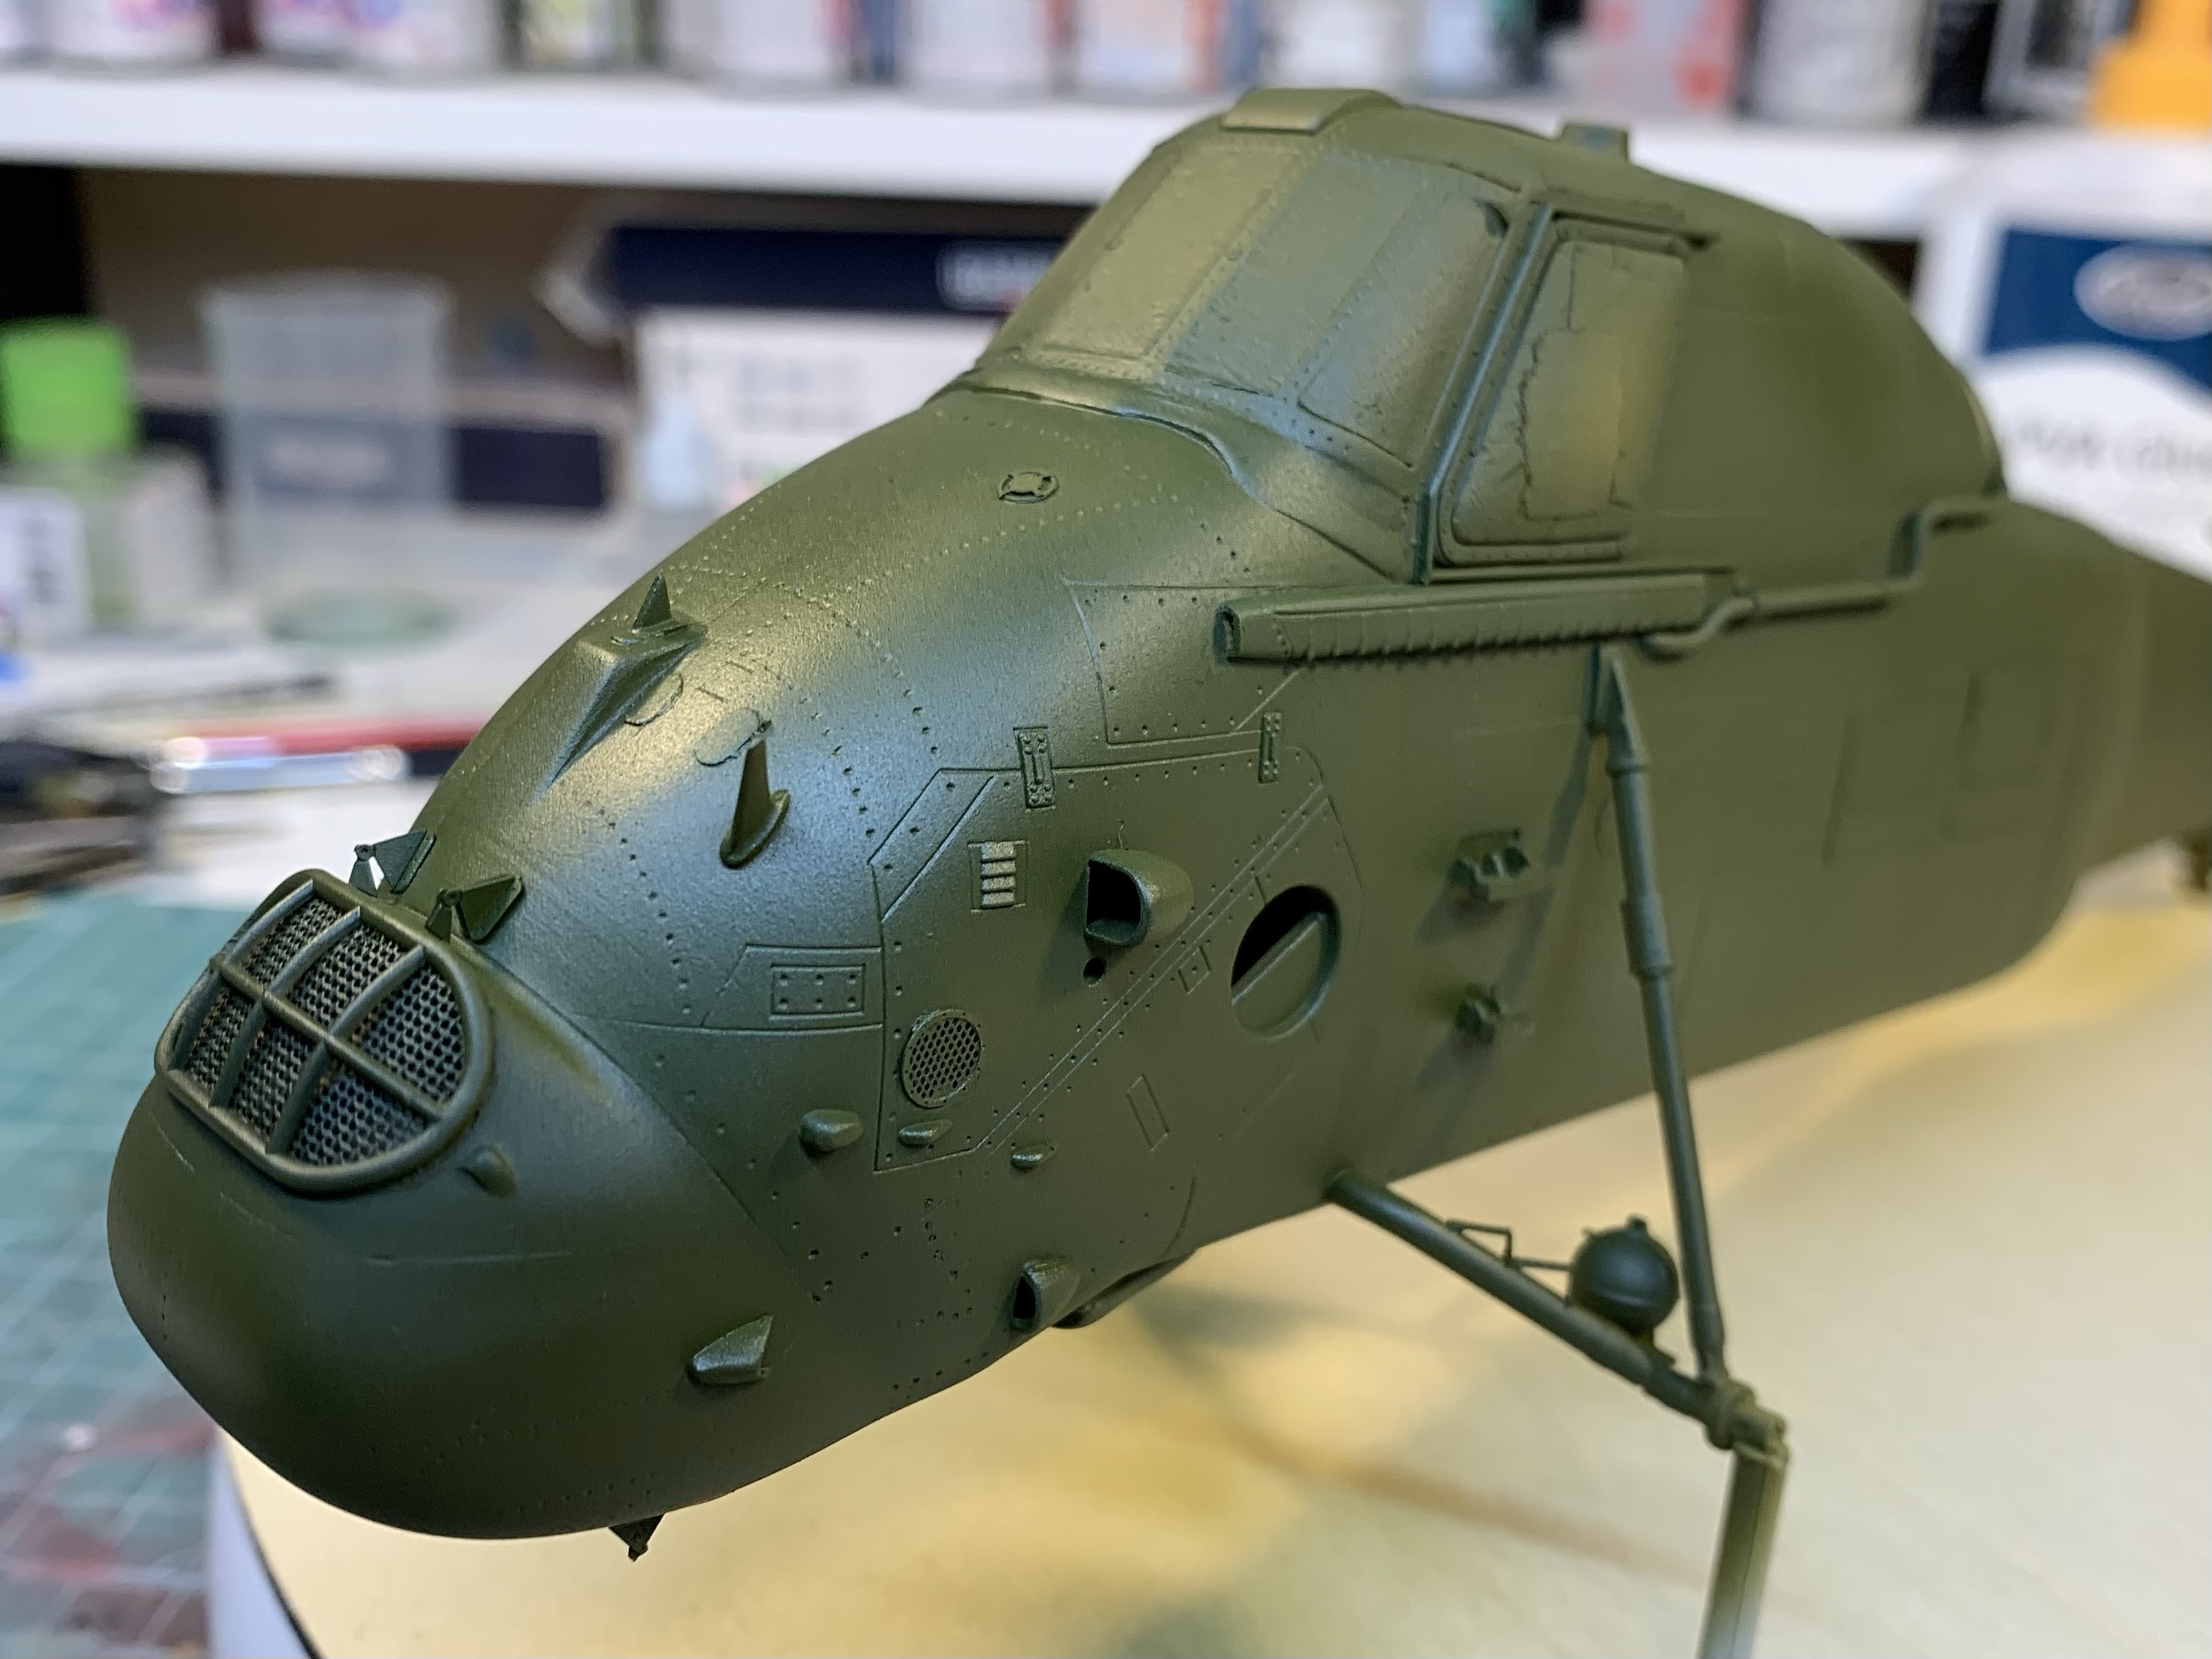
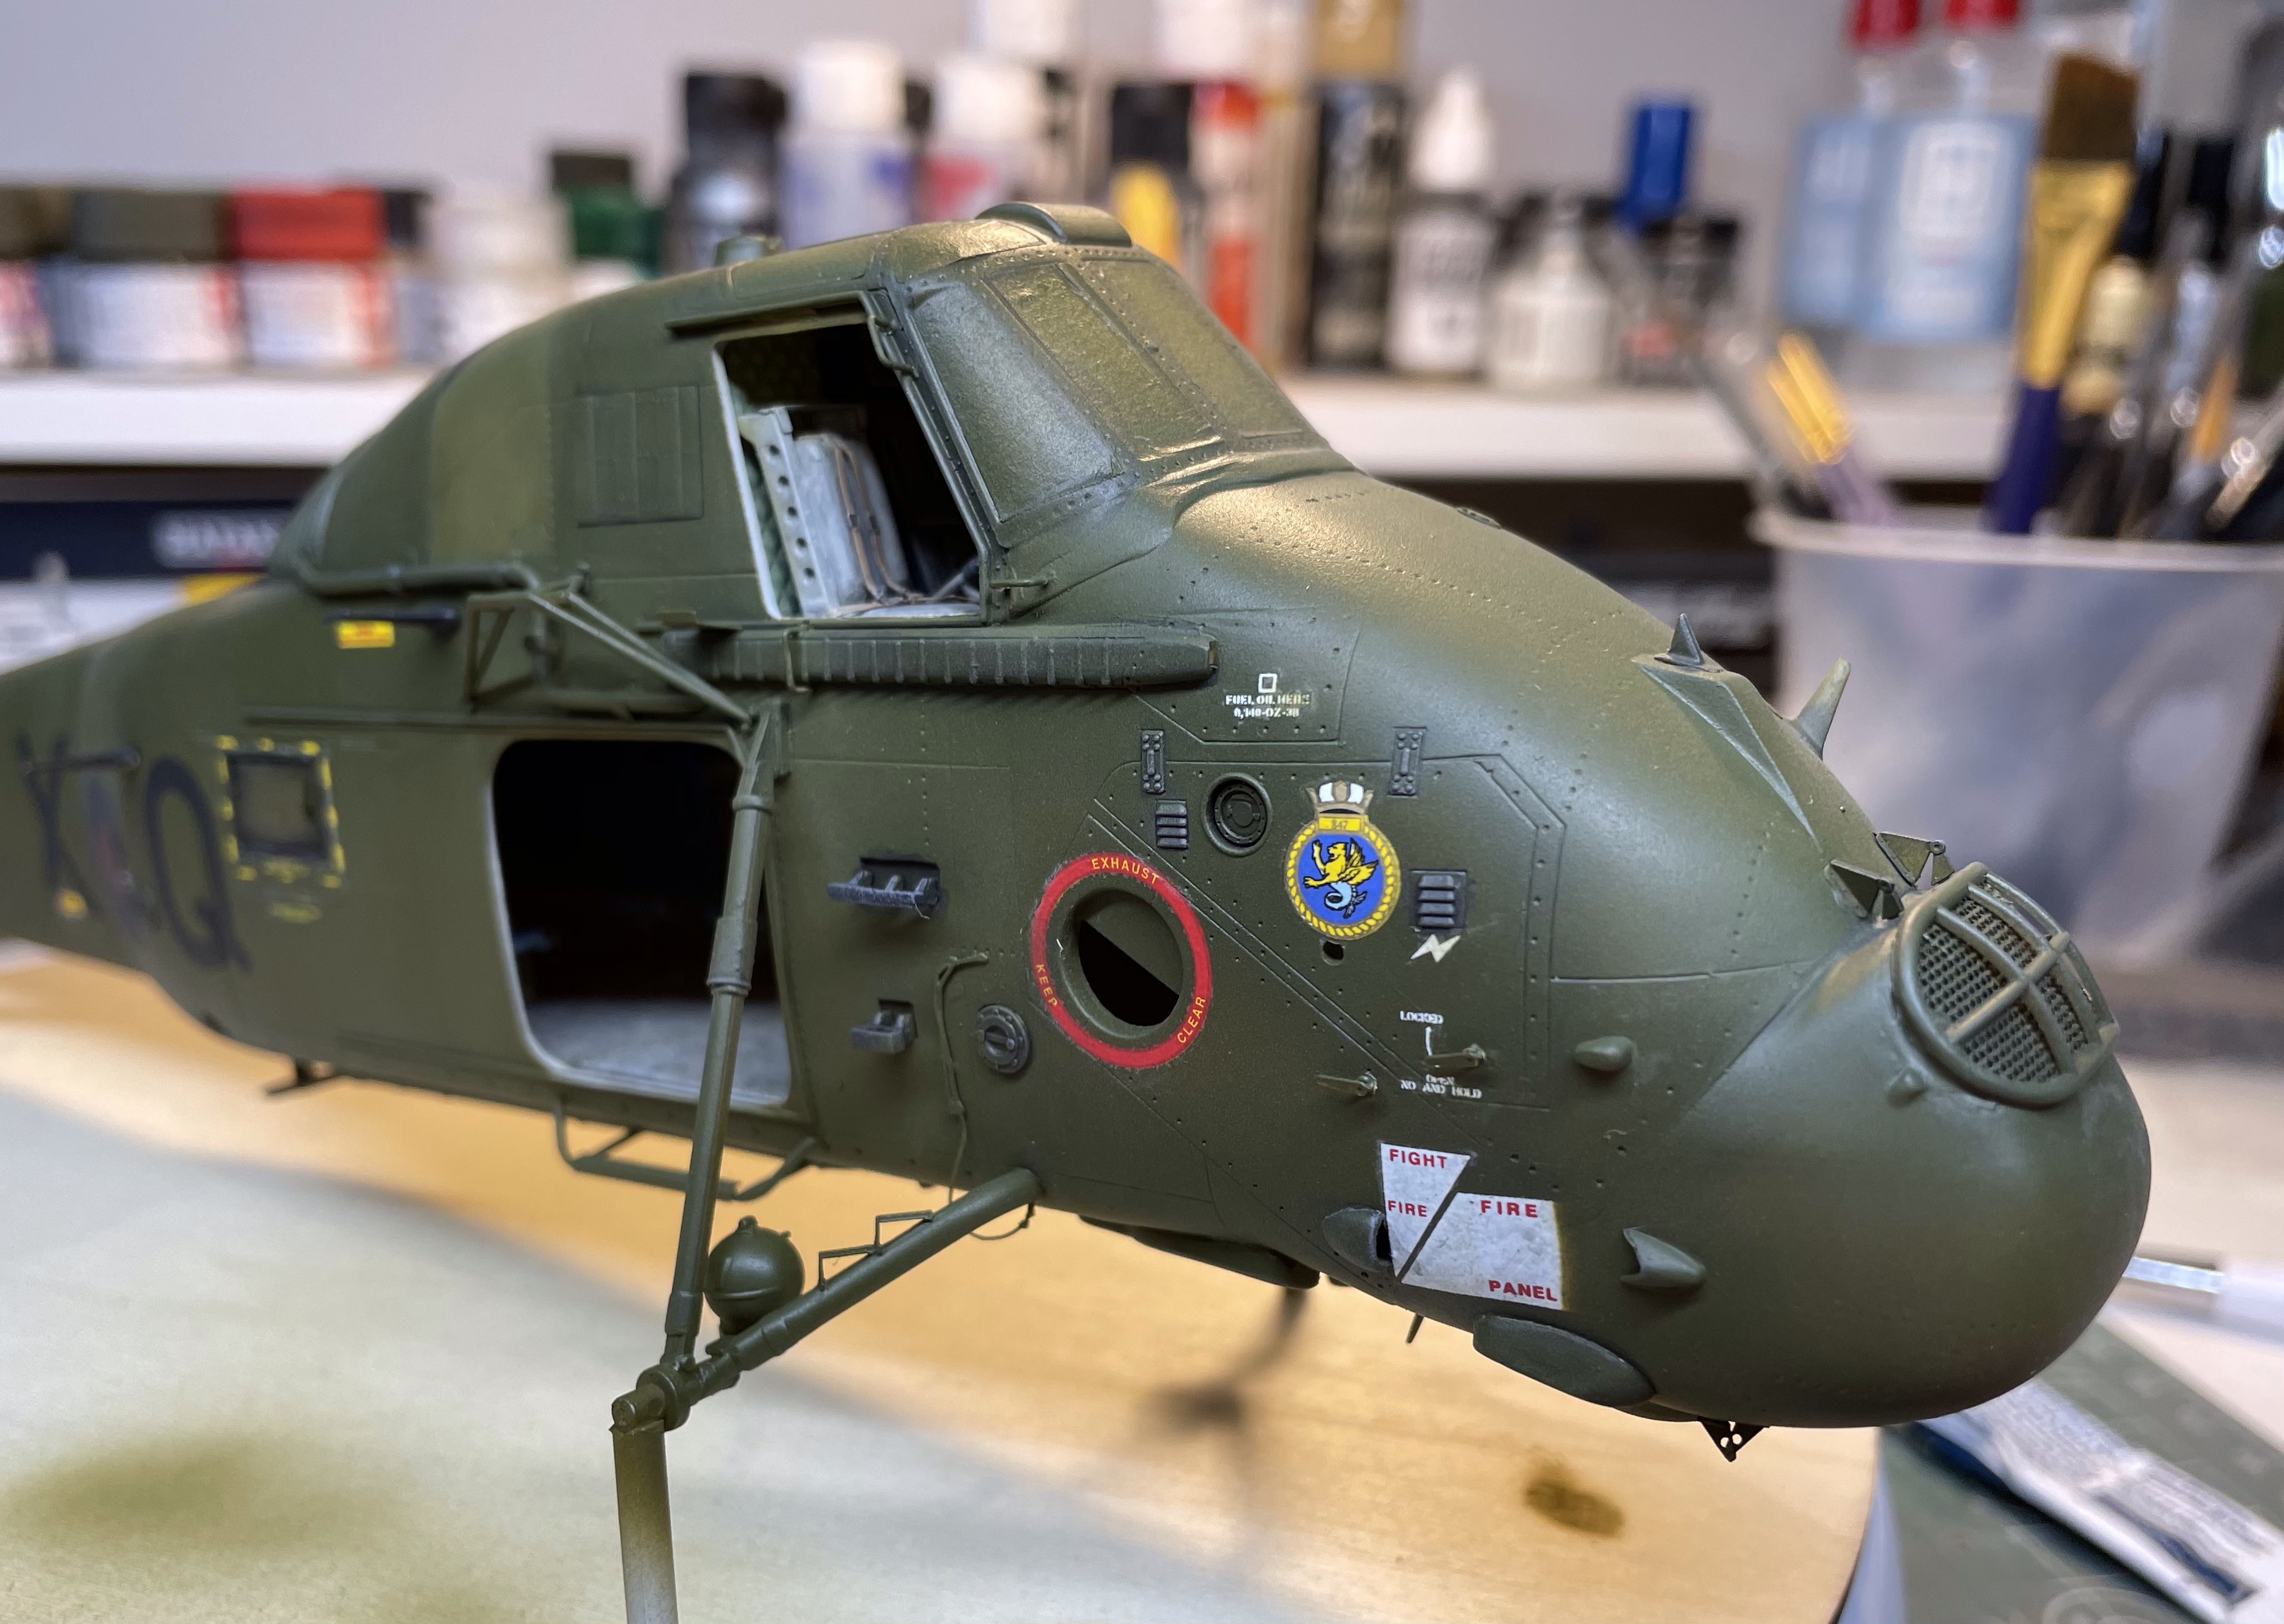
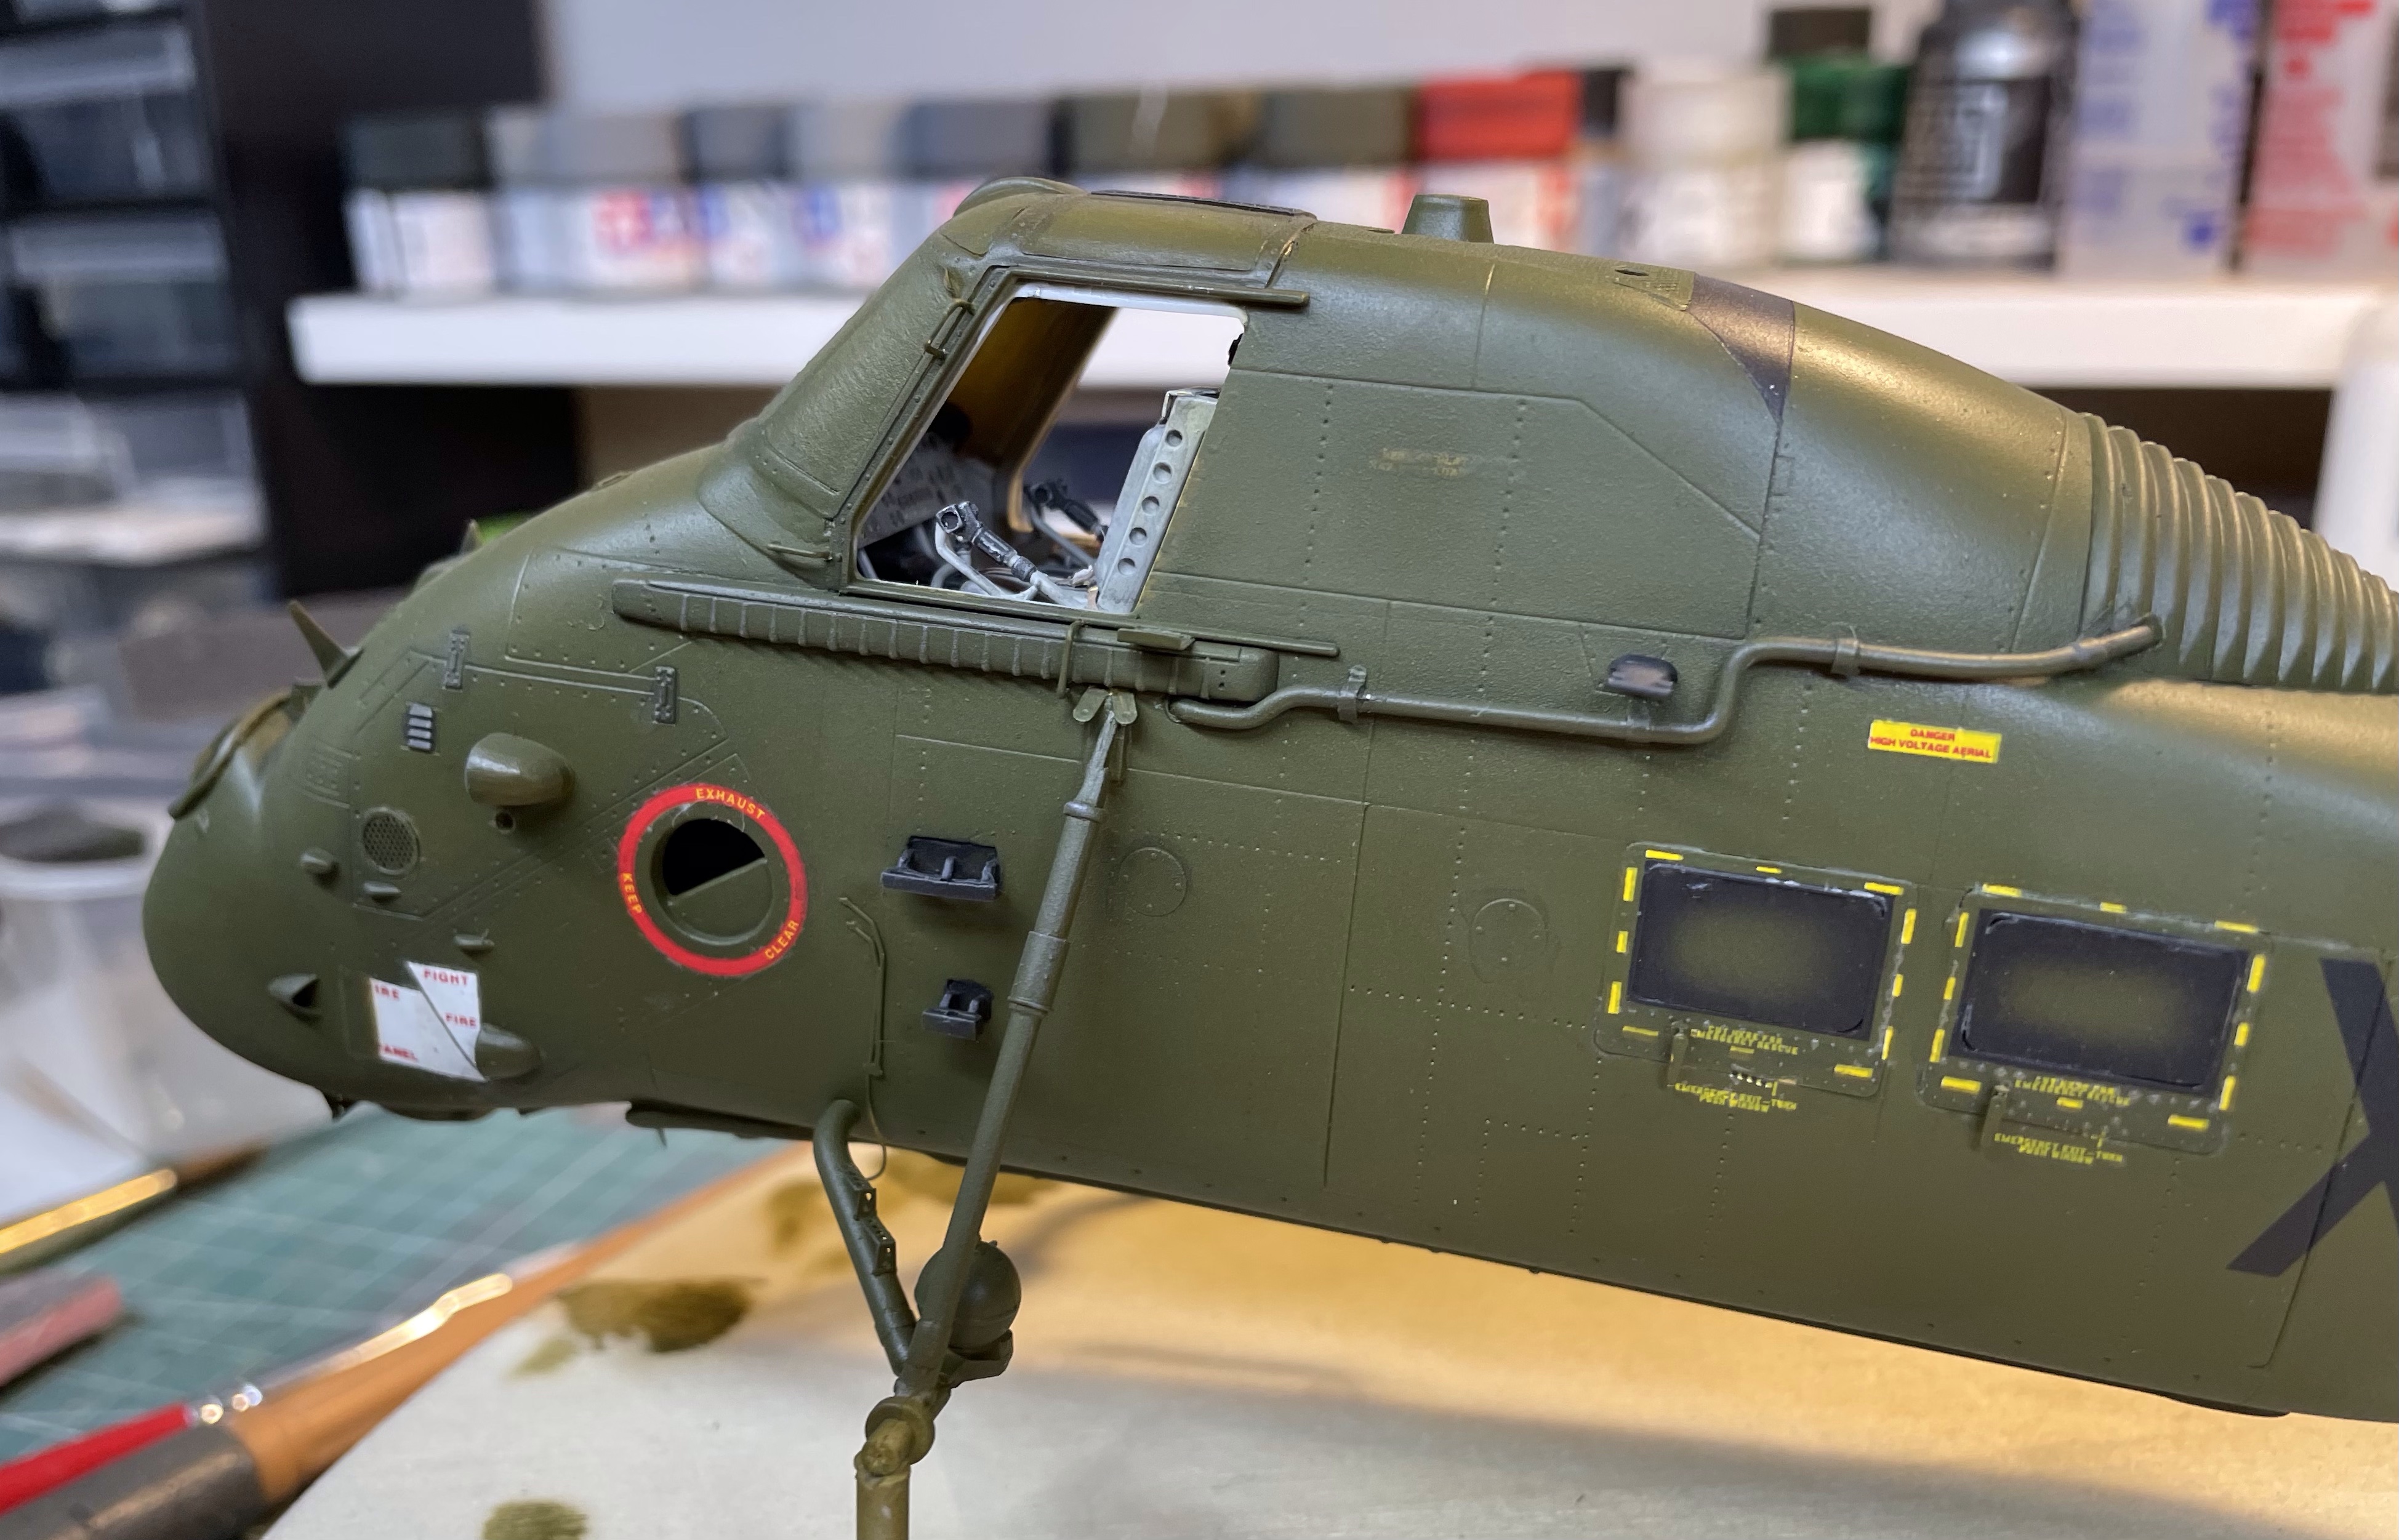
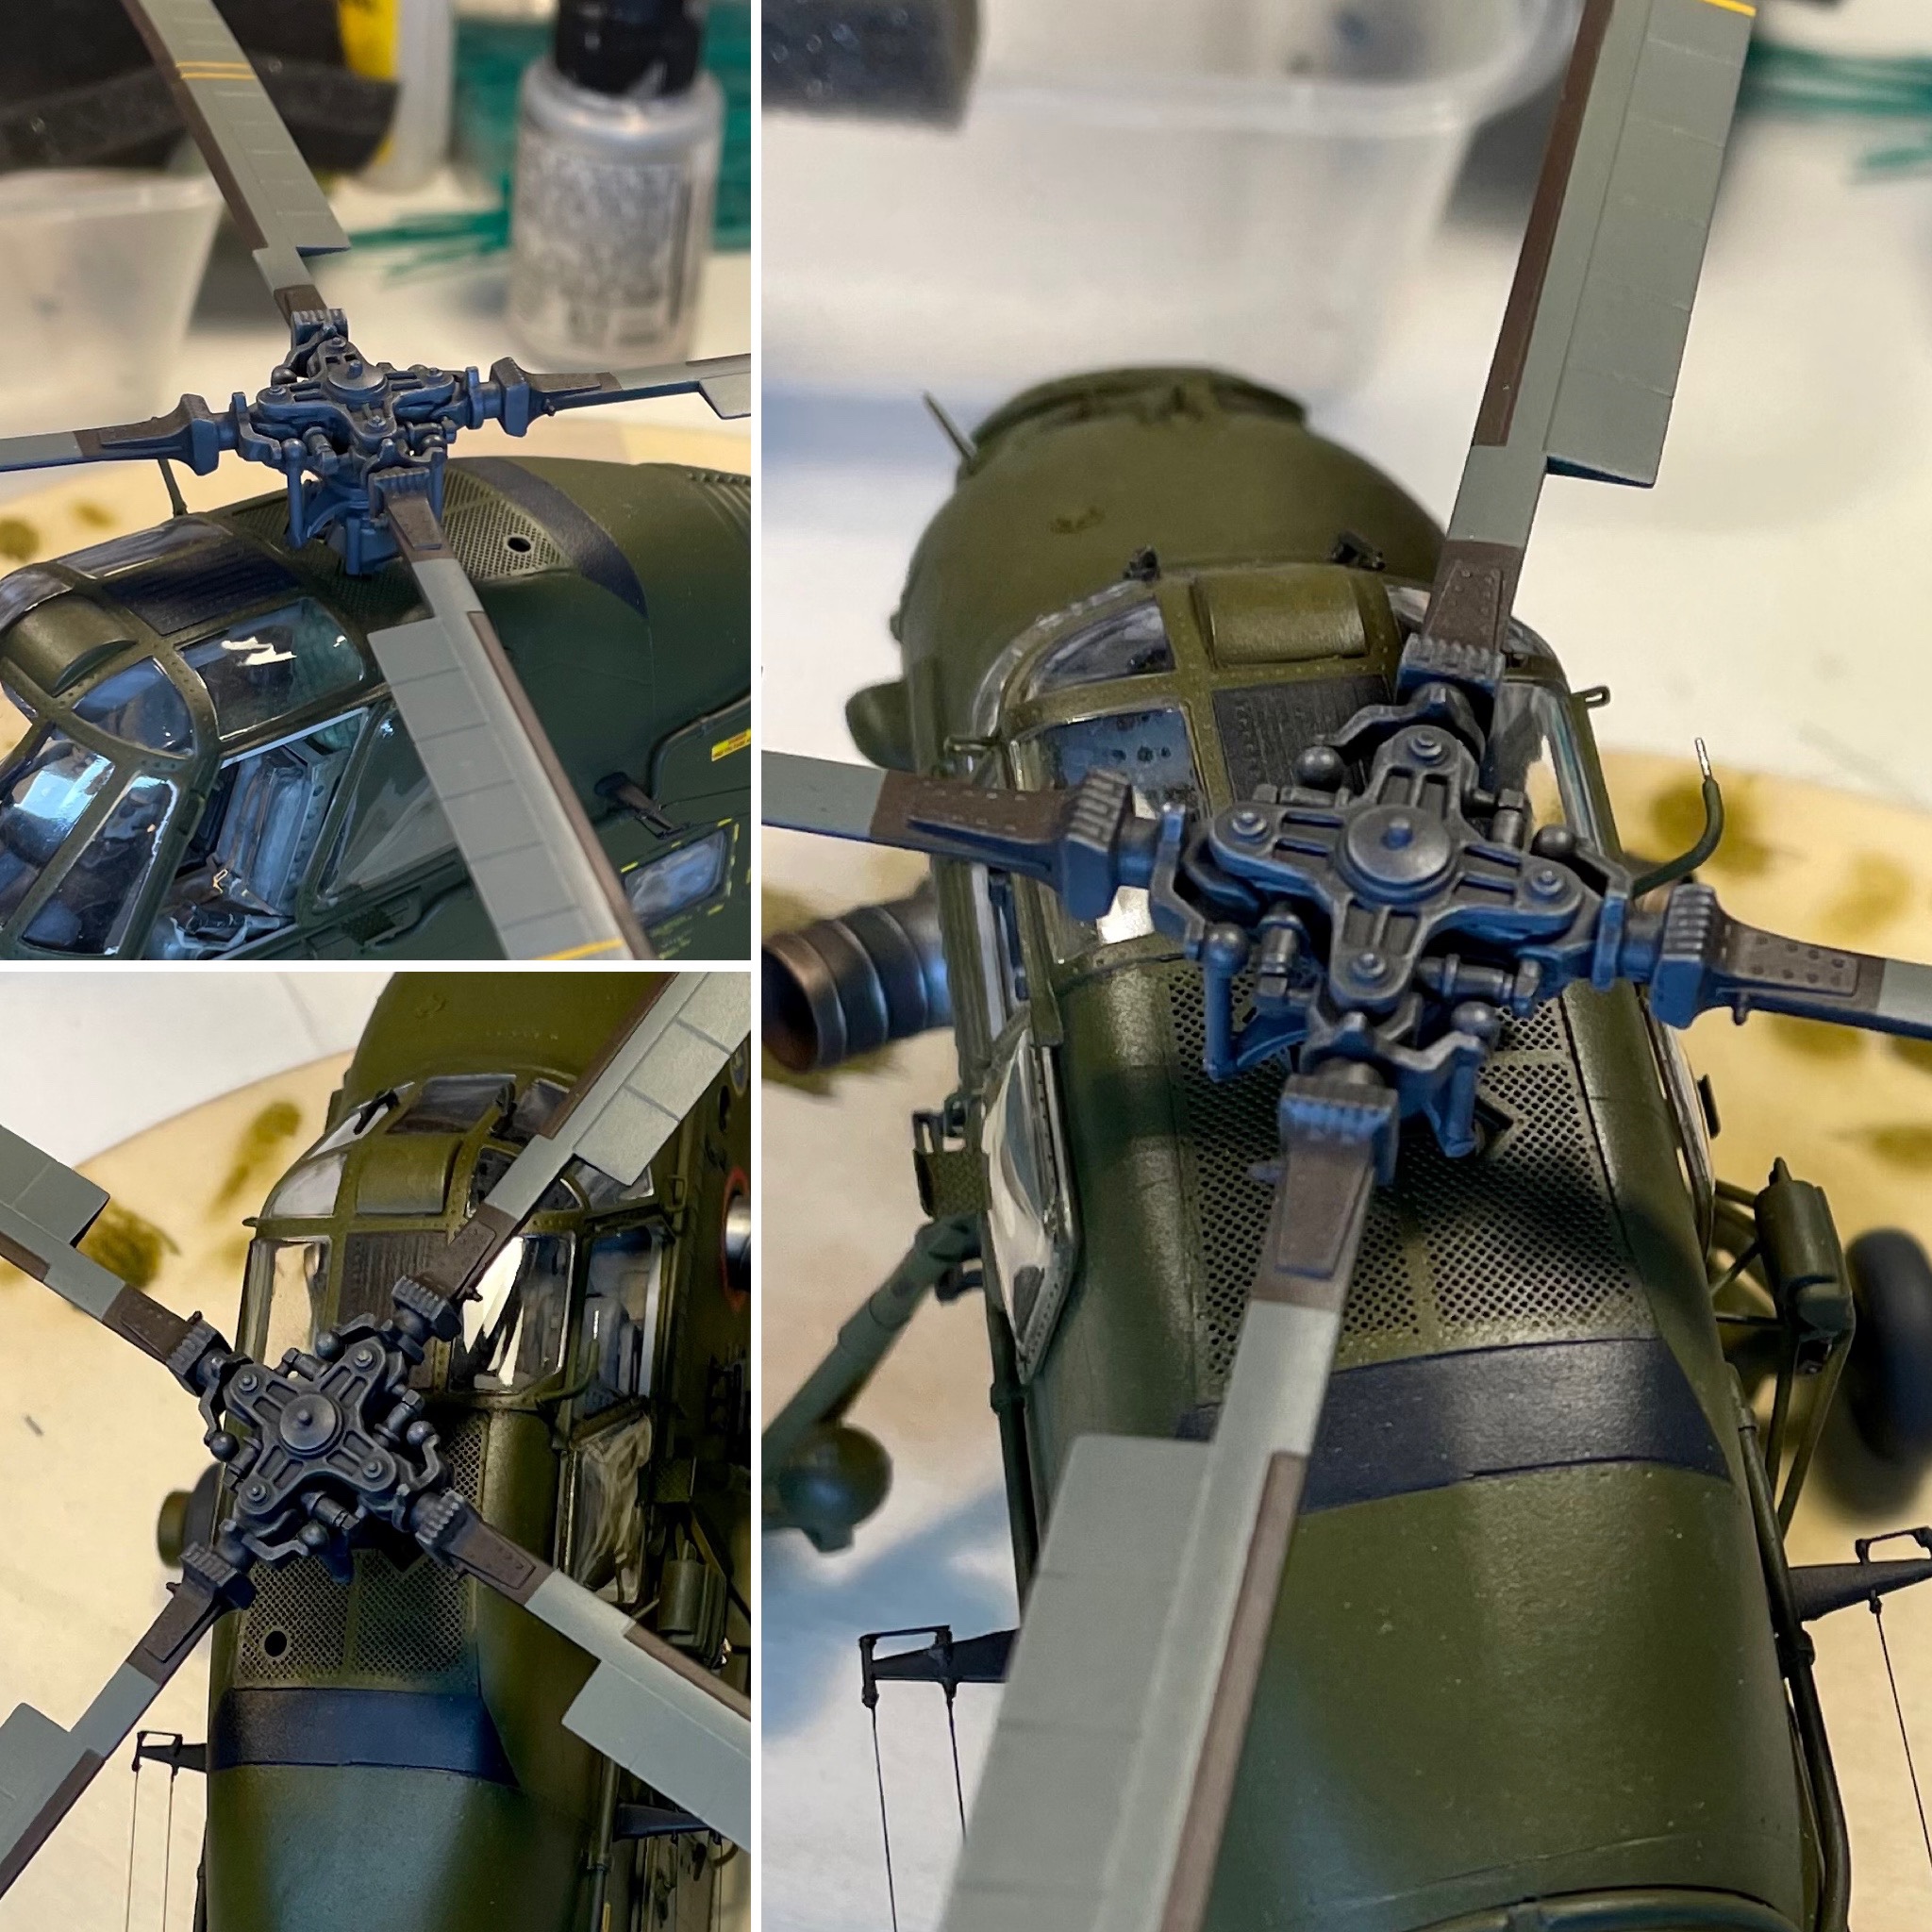
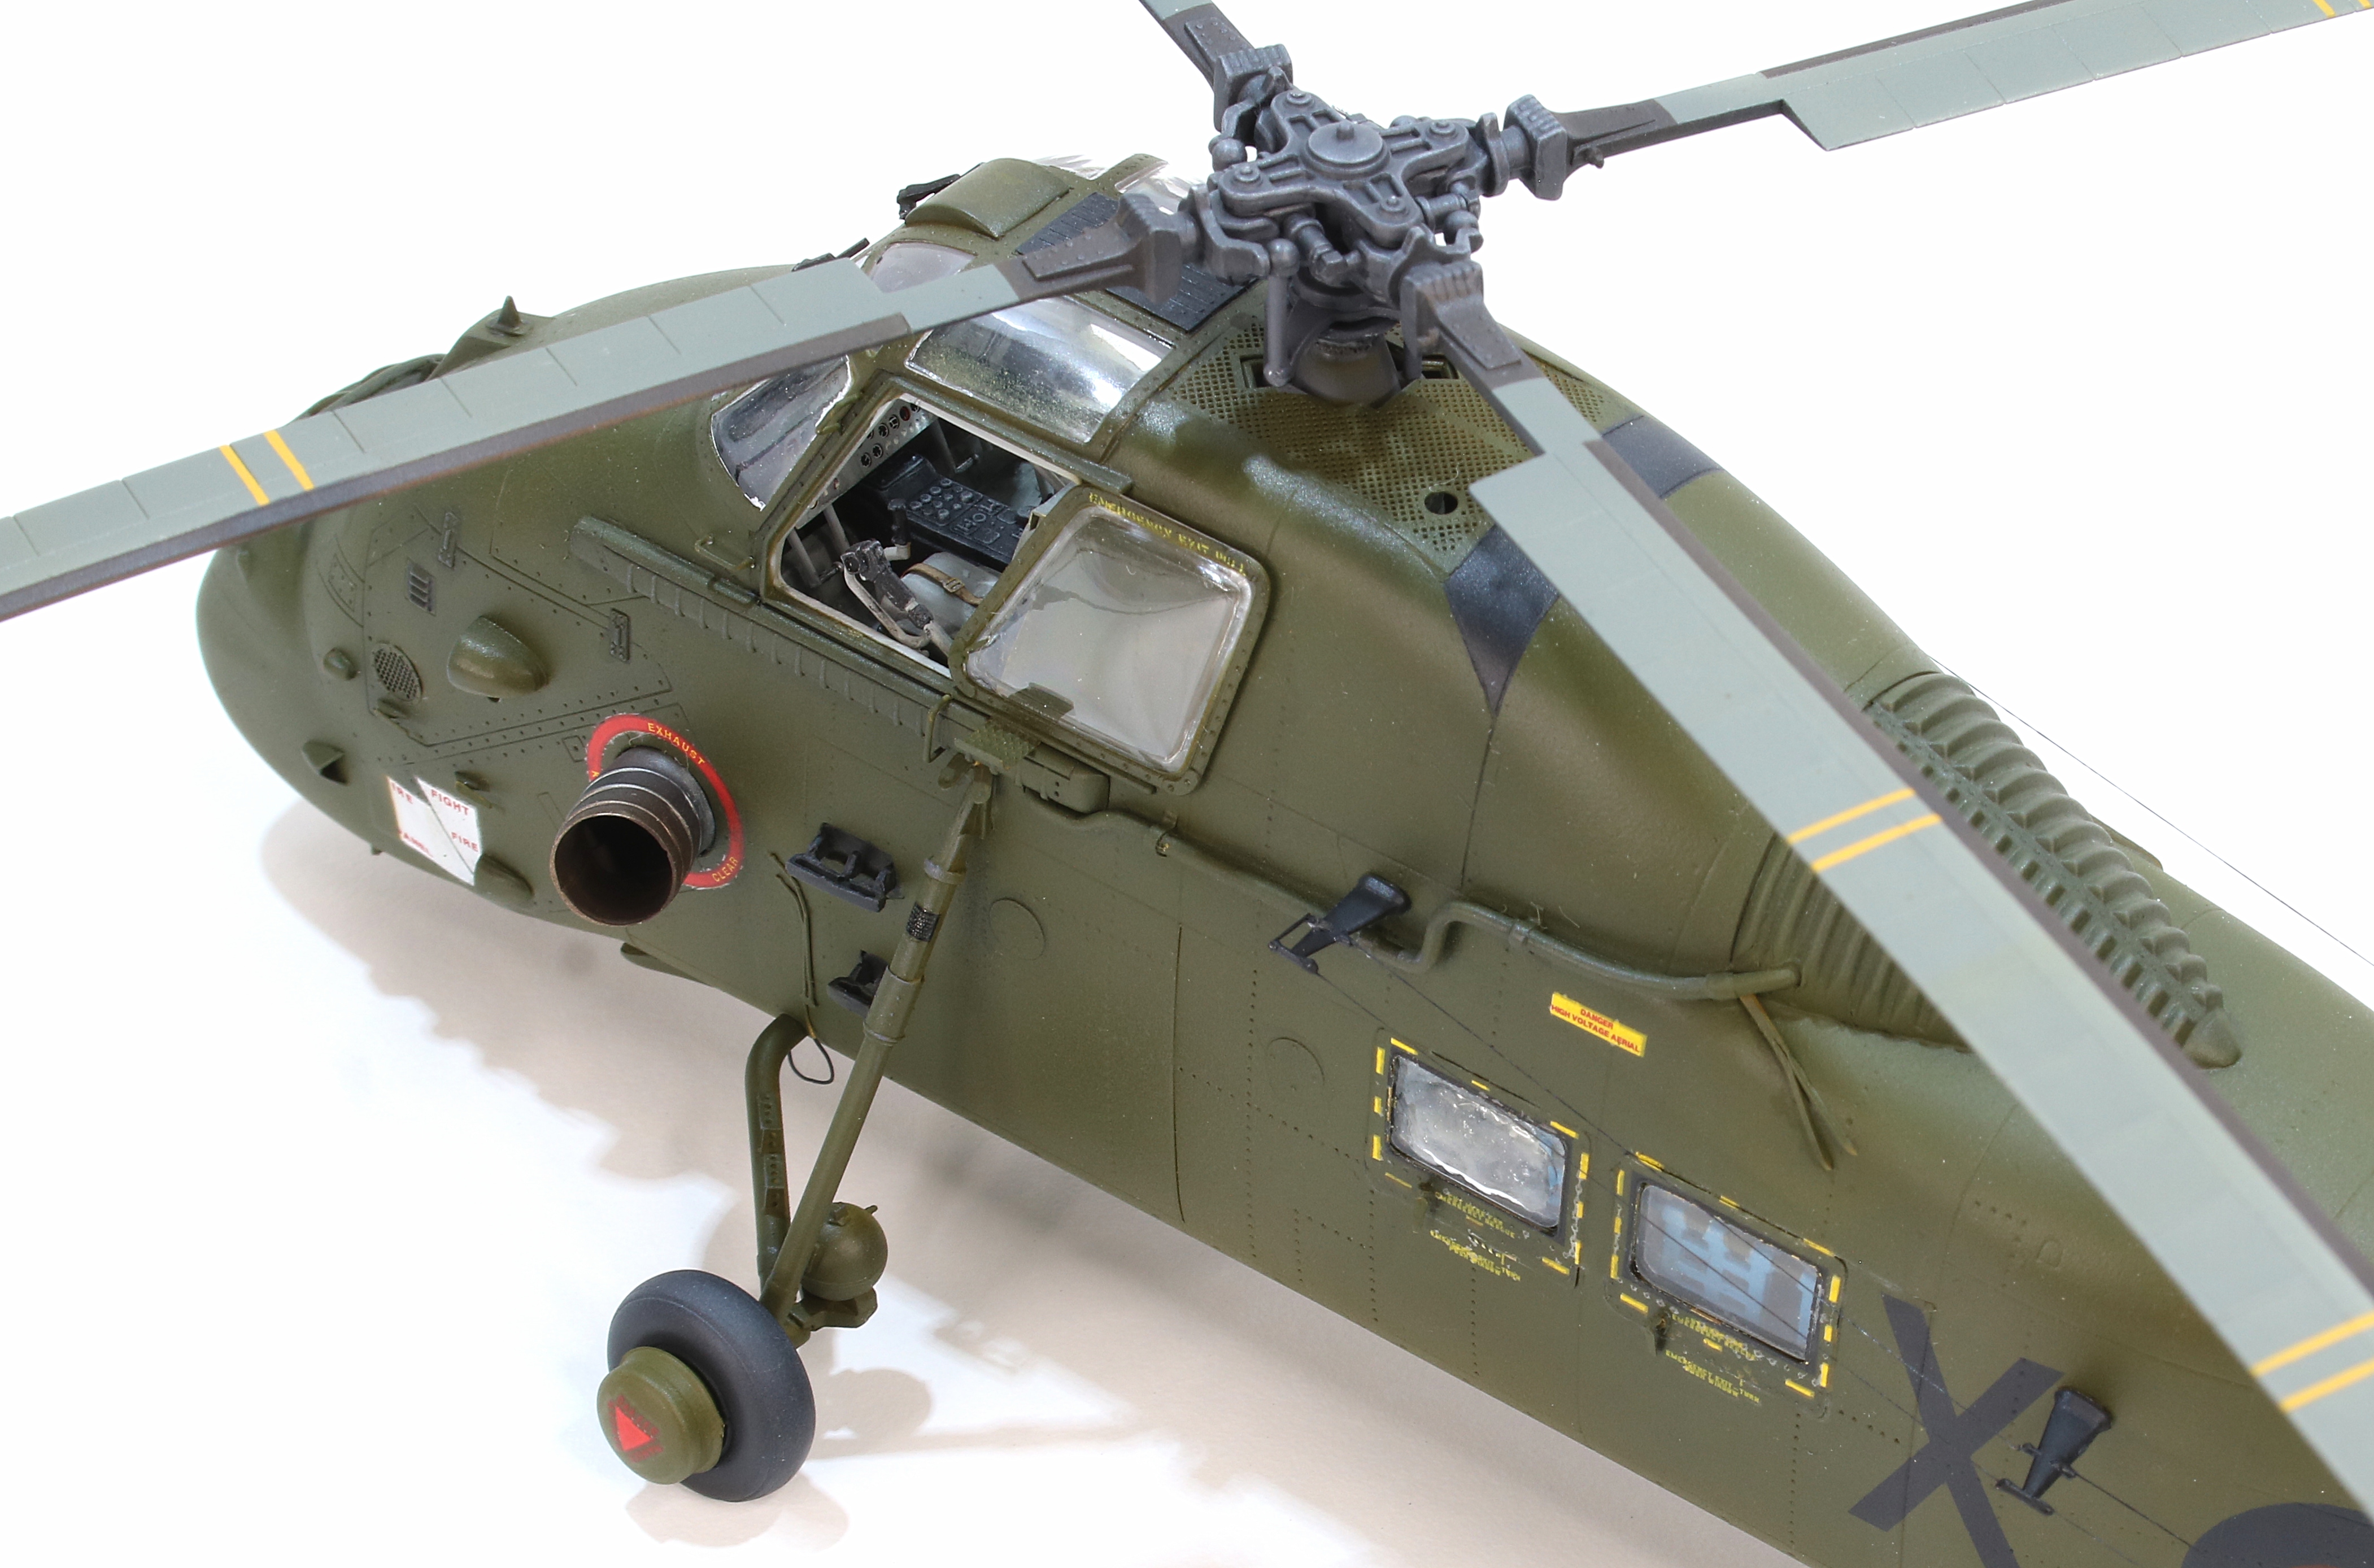
In addition to Eduard’s PE, I scratched up the conduit that runs from just behind the cockpit to the lobster deck out of brass wire. Some of the notable inaccuracies I learned along the way are the winch panel (too far forward), the fuel fillers (not recessed, as they should be), and the PE grill around the main rotor gearbox should not have that hole in it on the rear port side.
I would also be remiss if I didn’t mention the one glaring error I made which I couldn’t subsequently fix; I carelessly installed the part for the bulged forward port window on the starboard side instead.
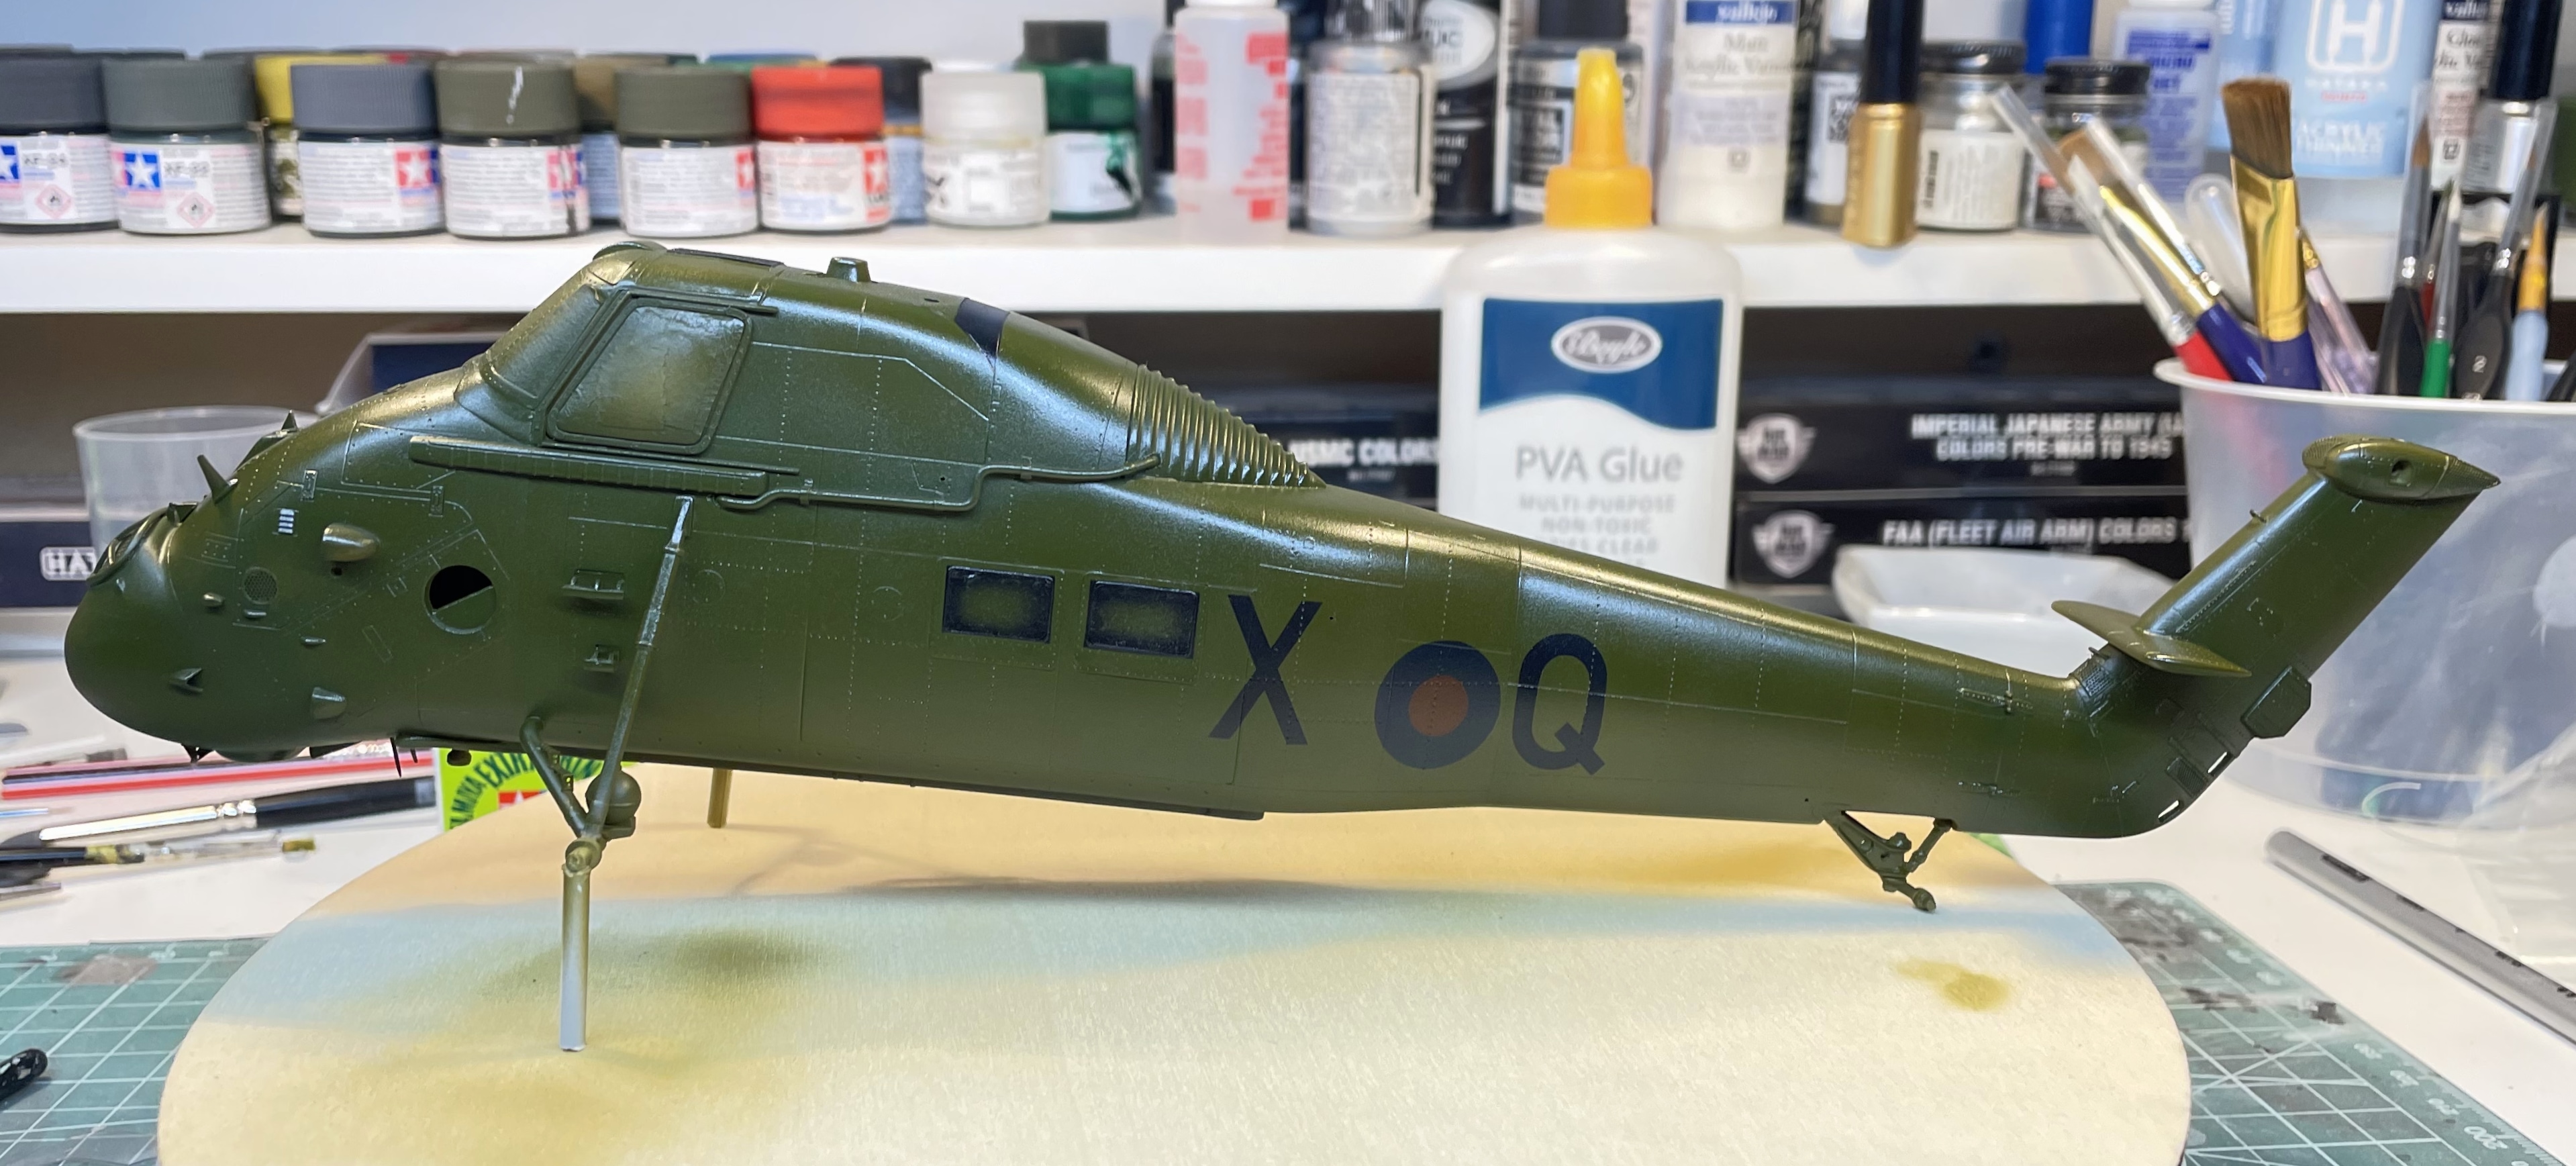
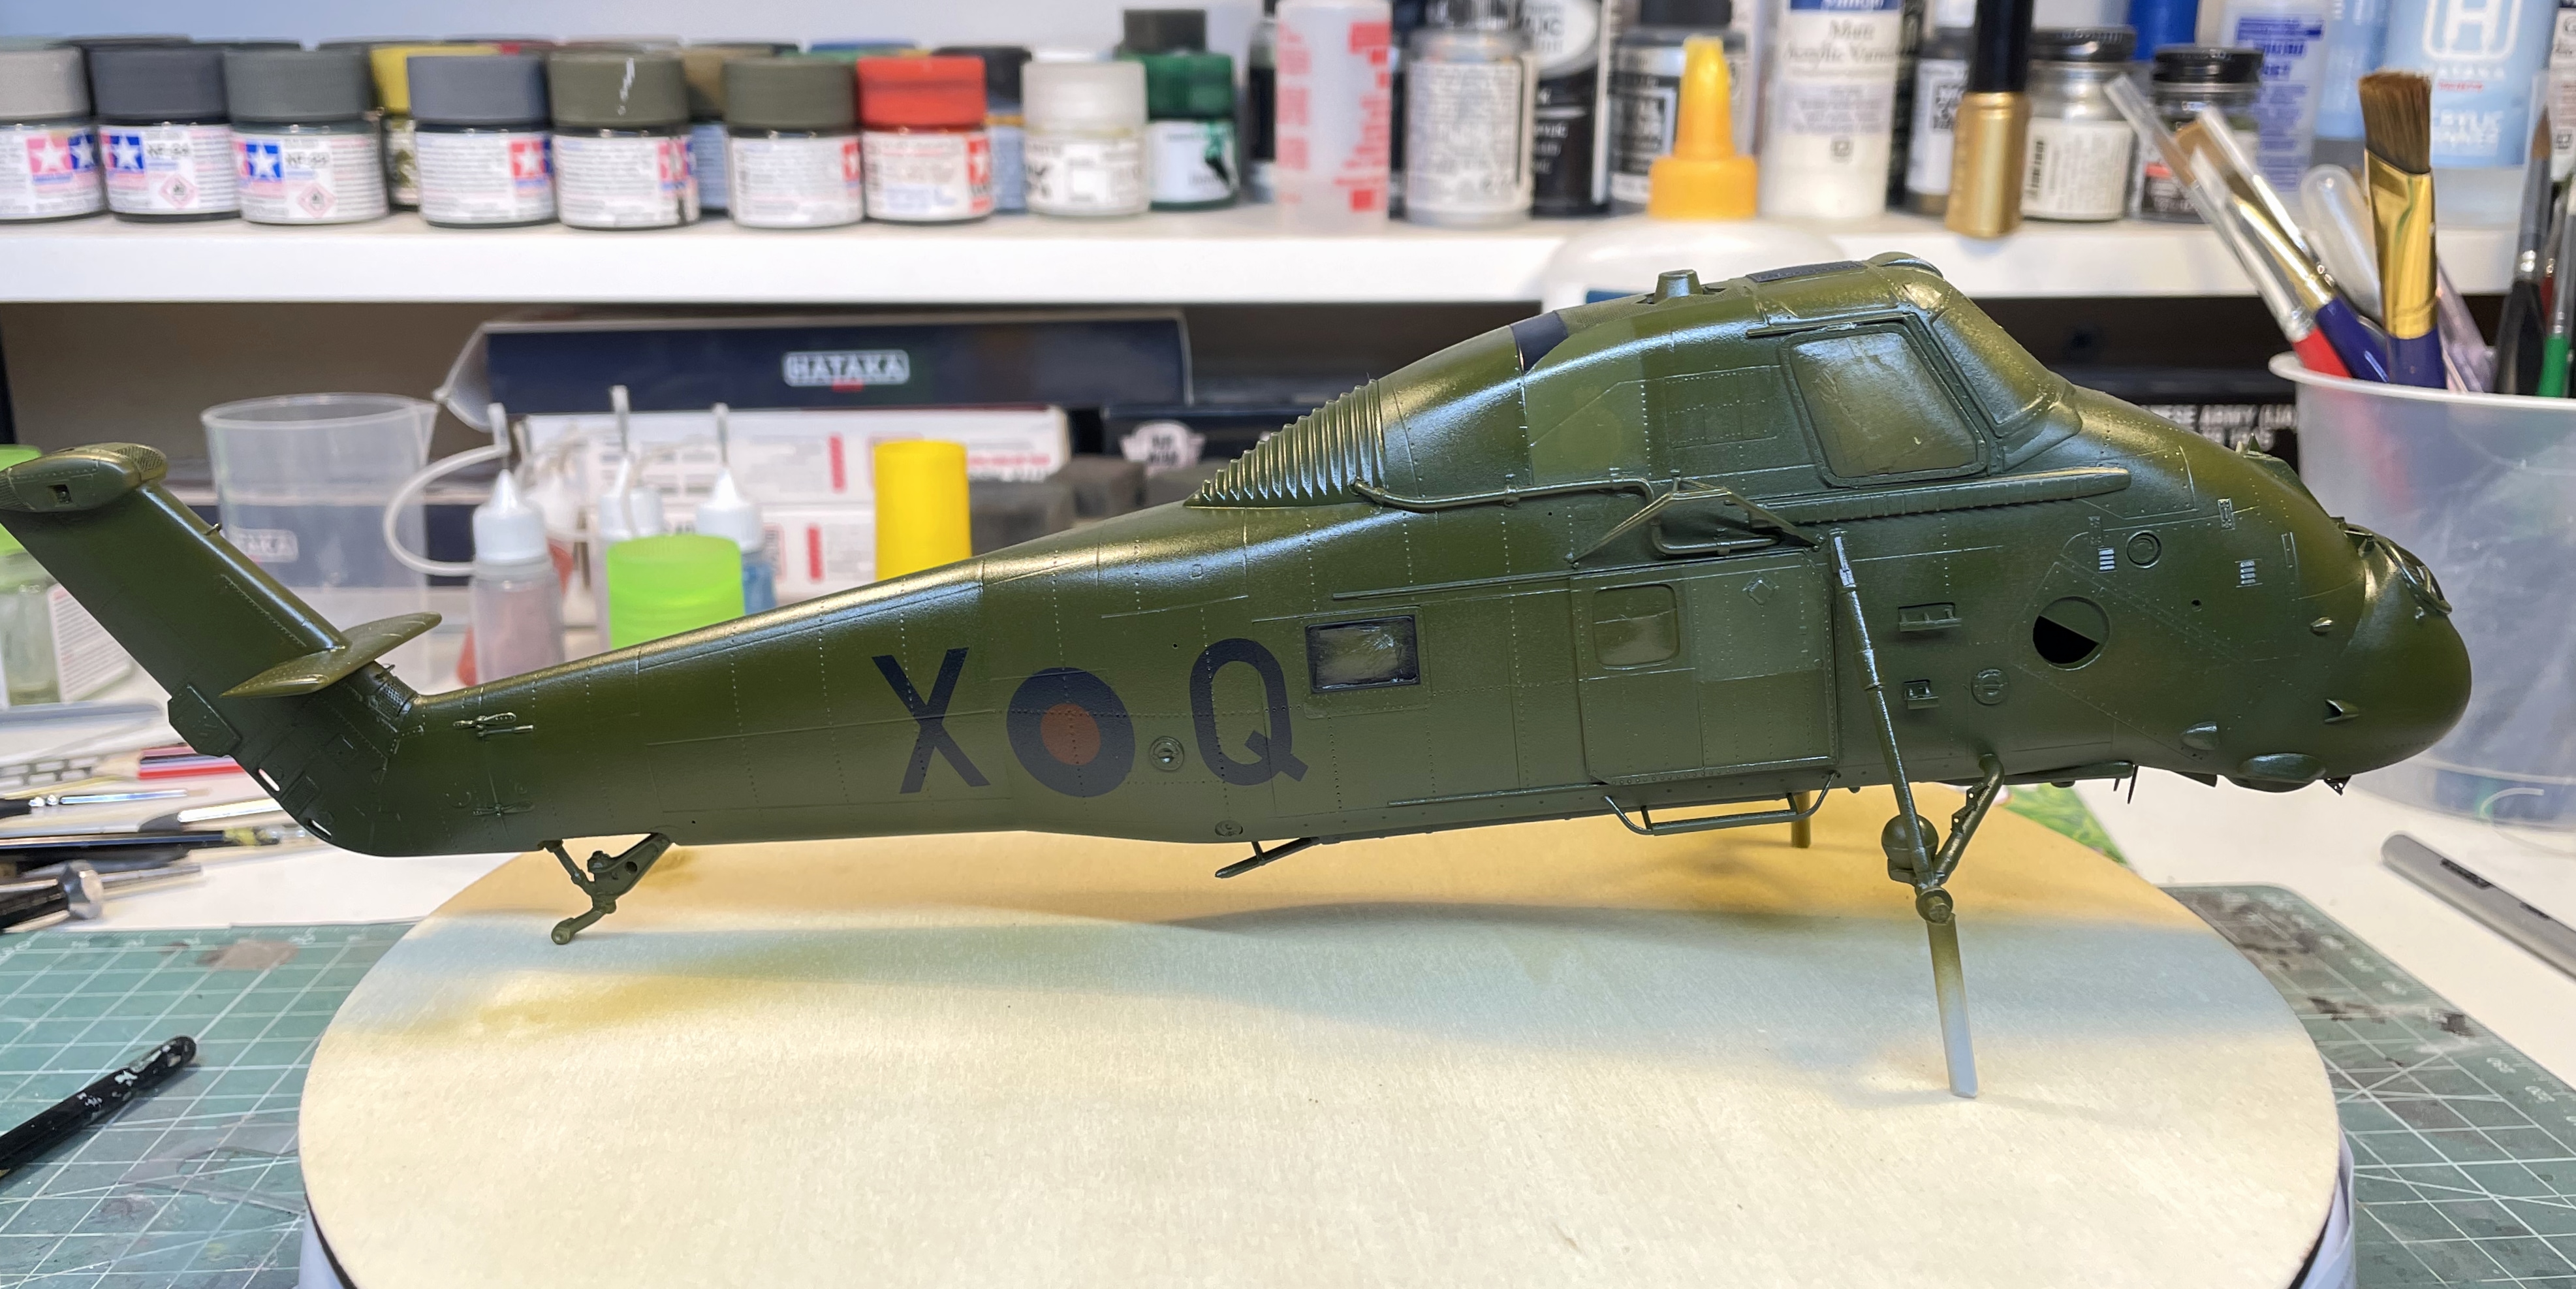
Paint

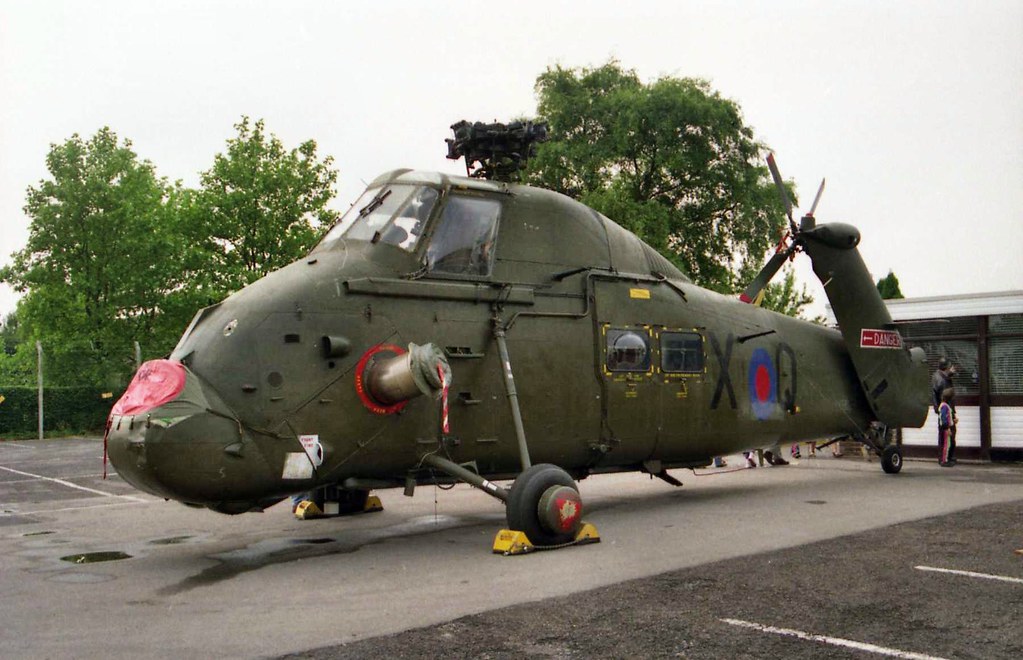
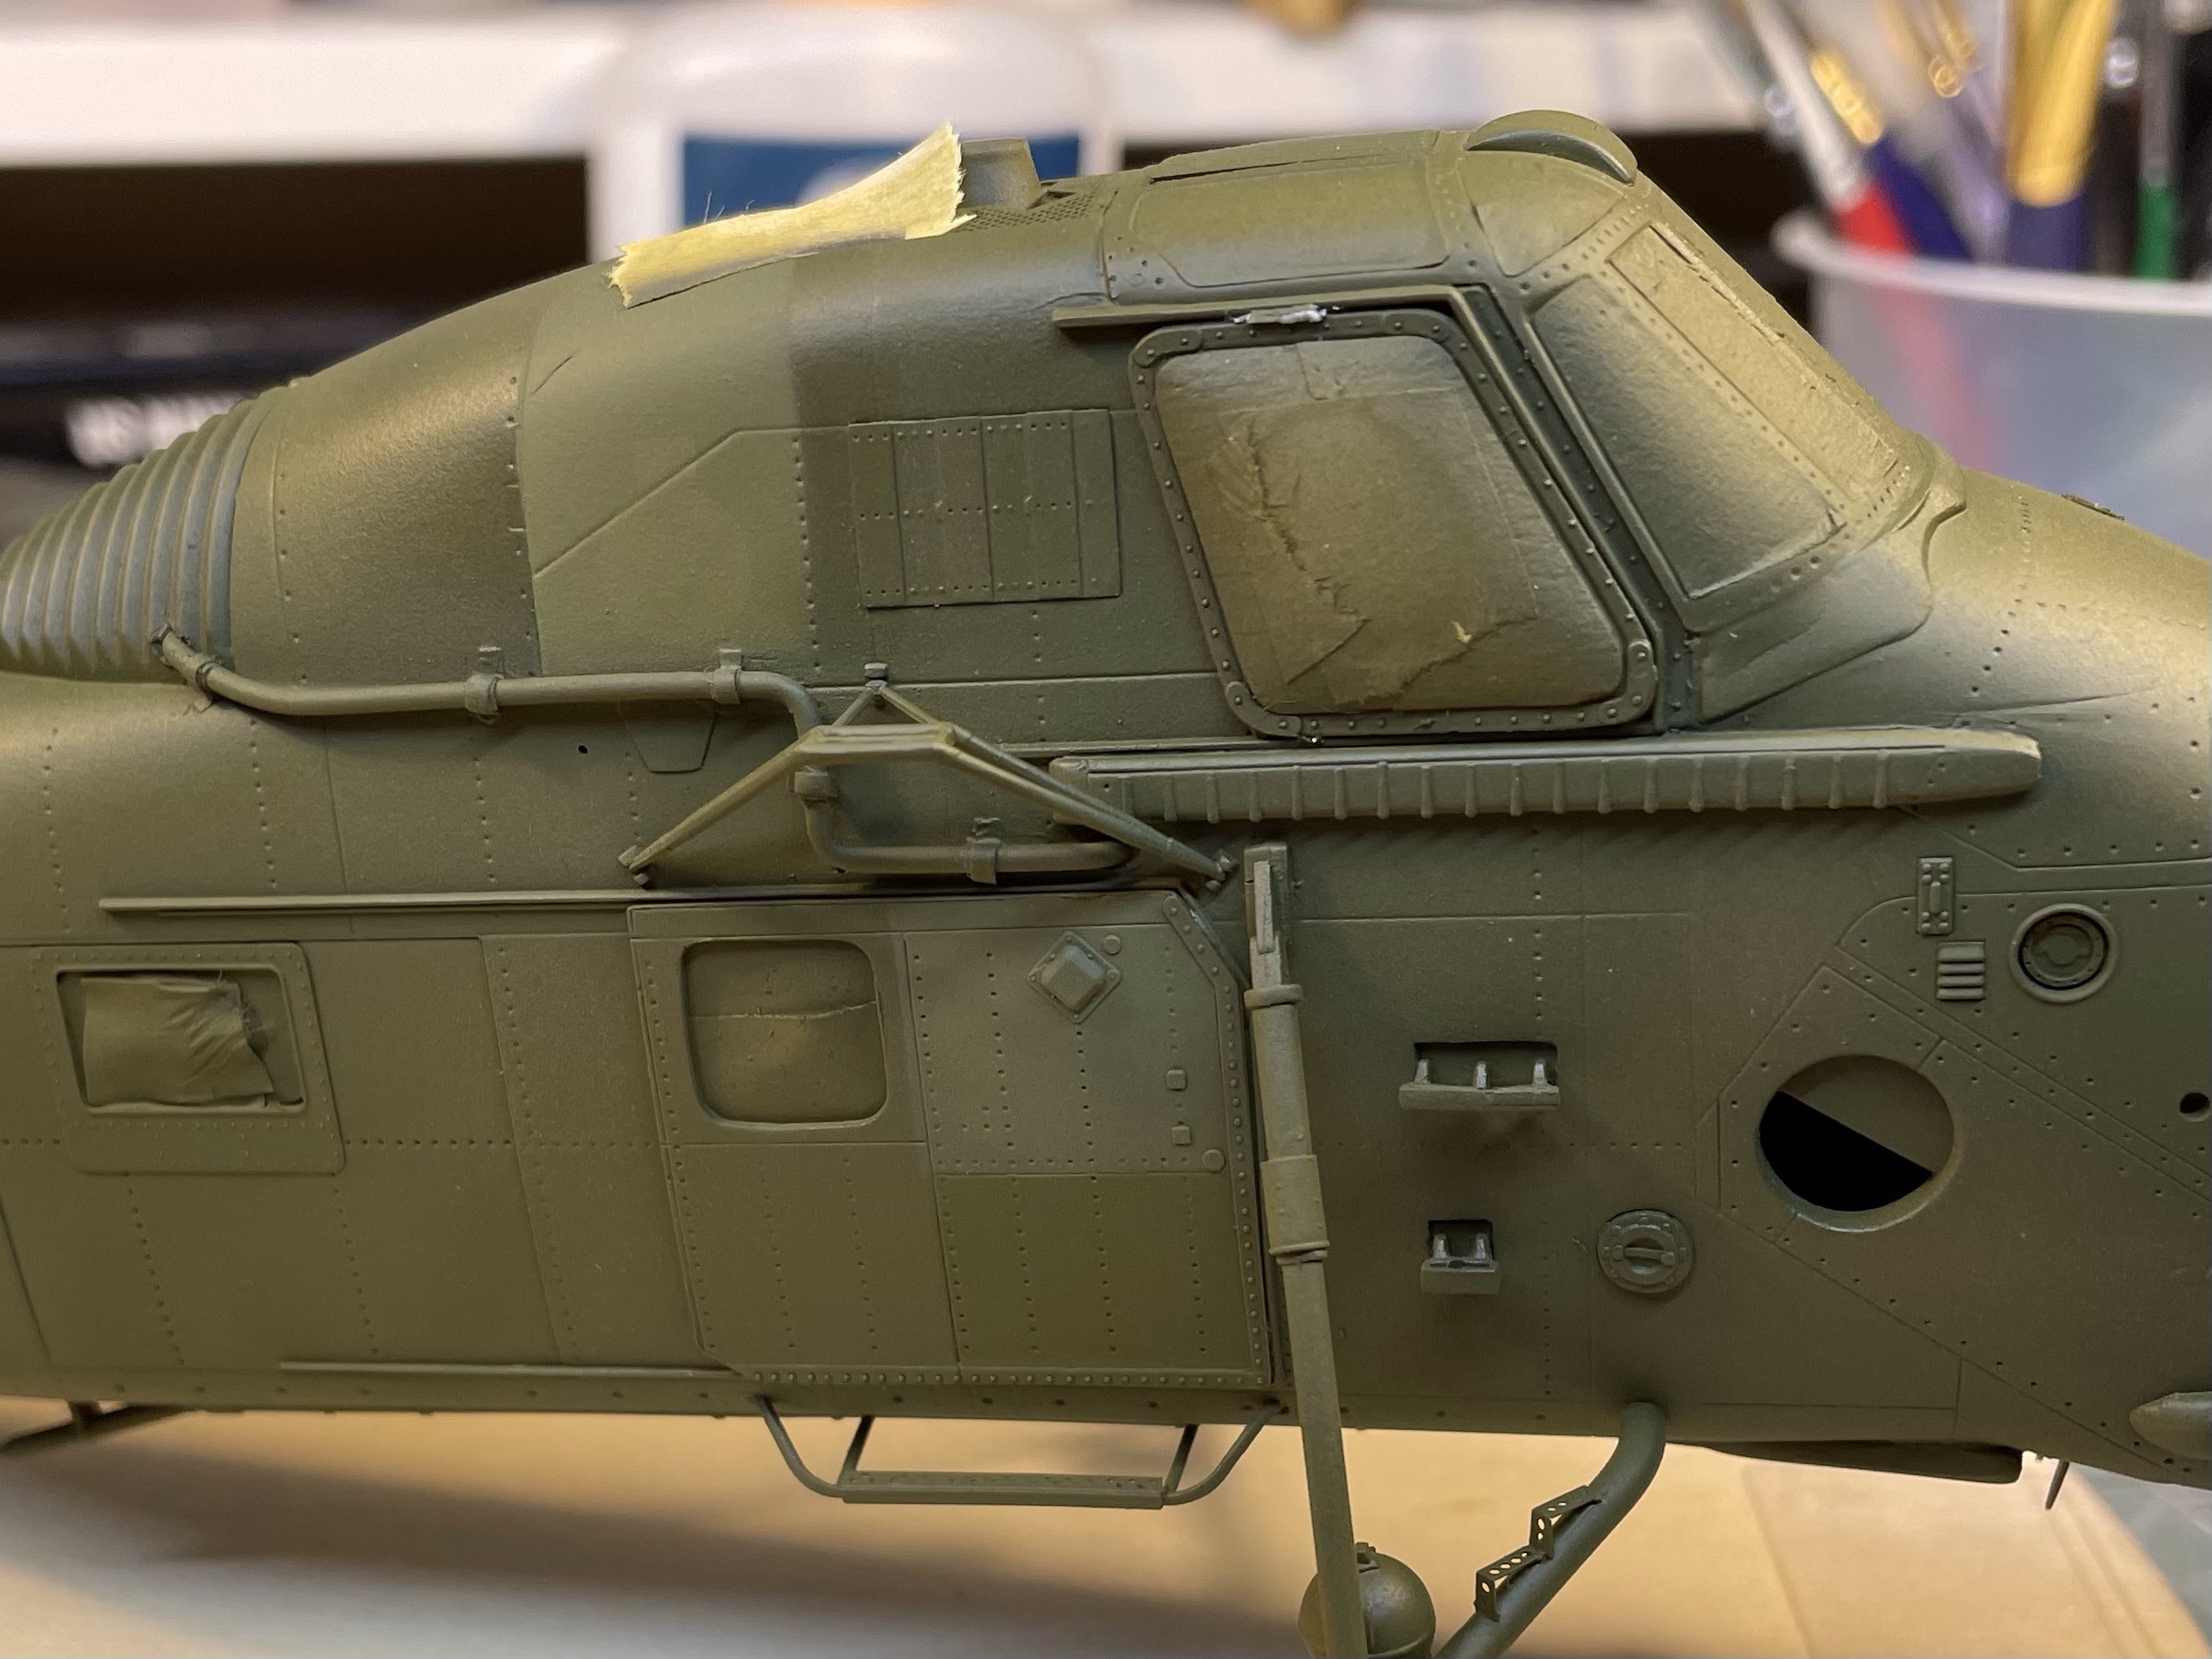
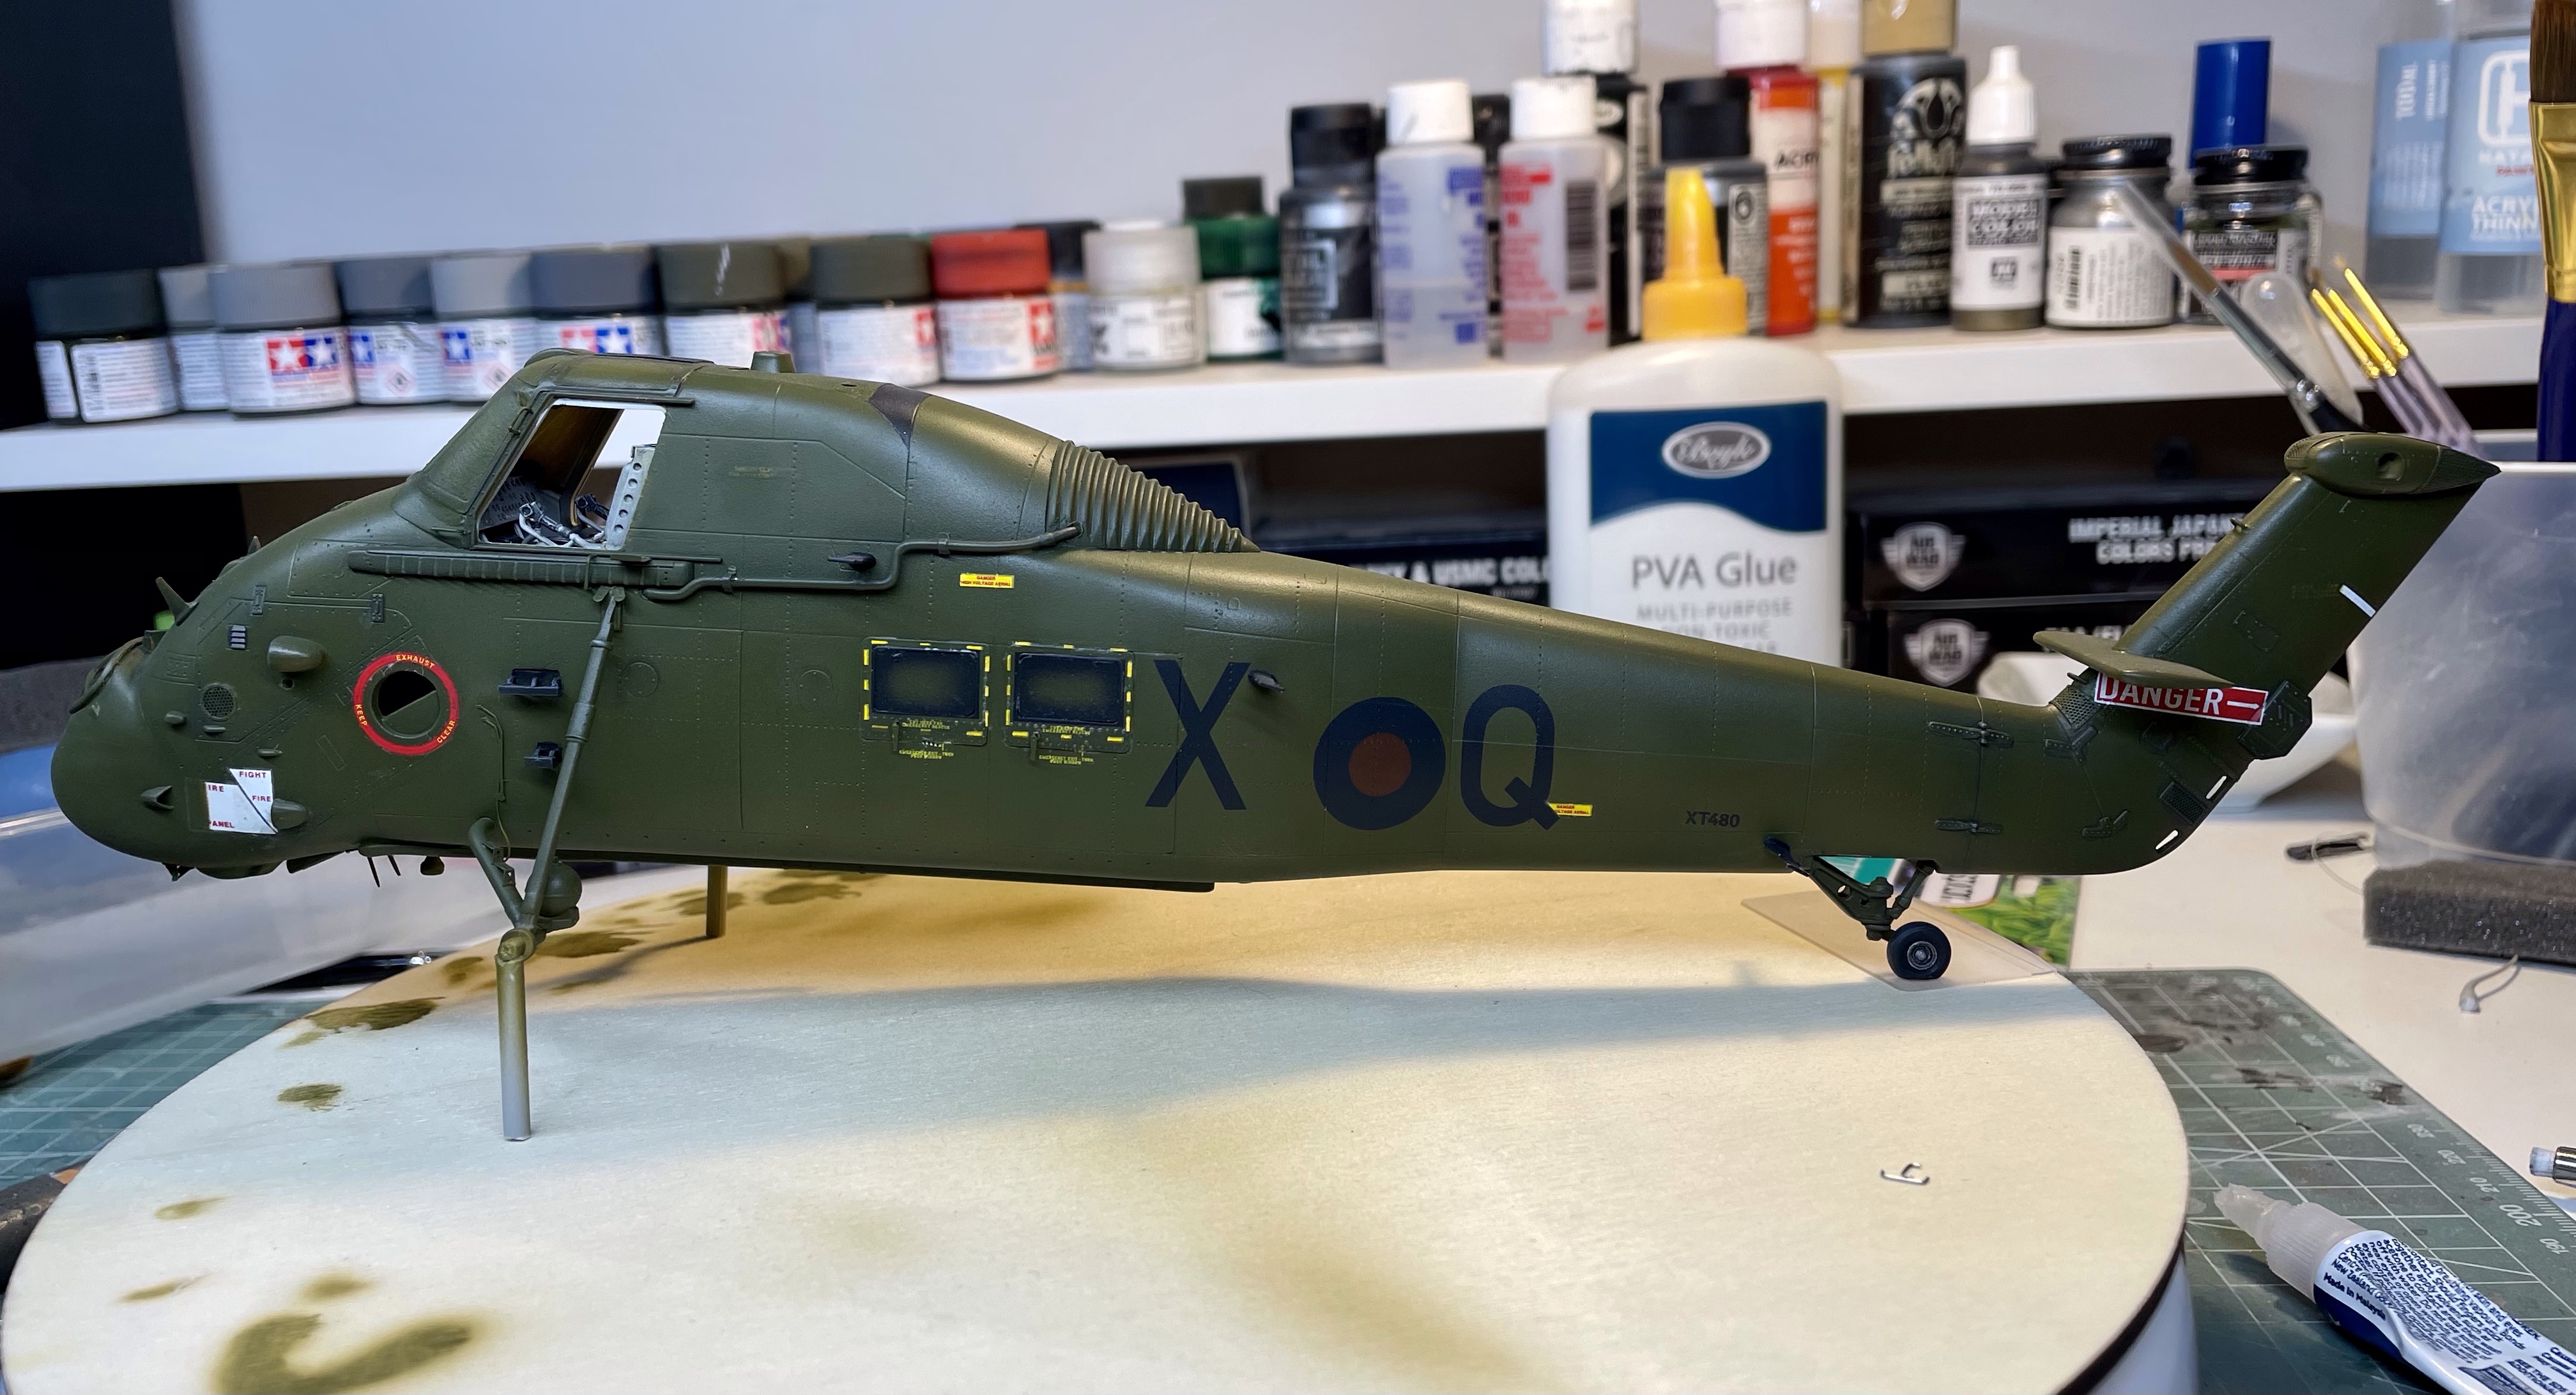
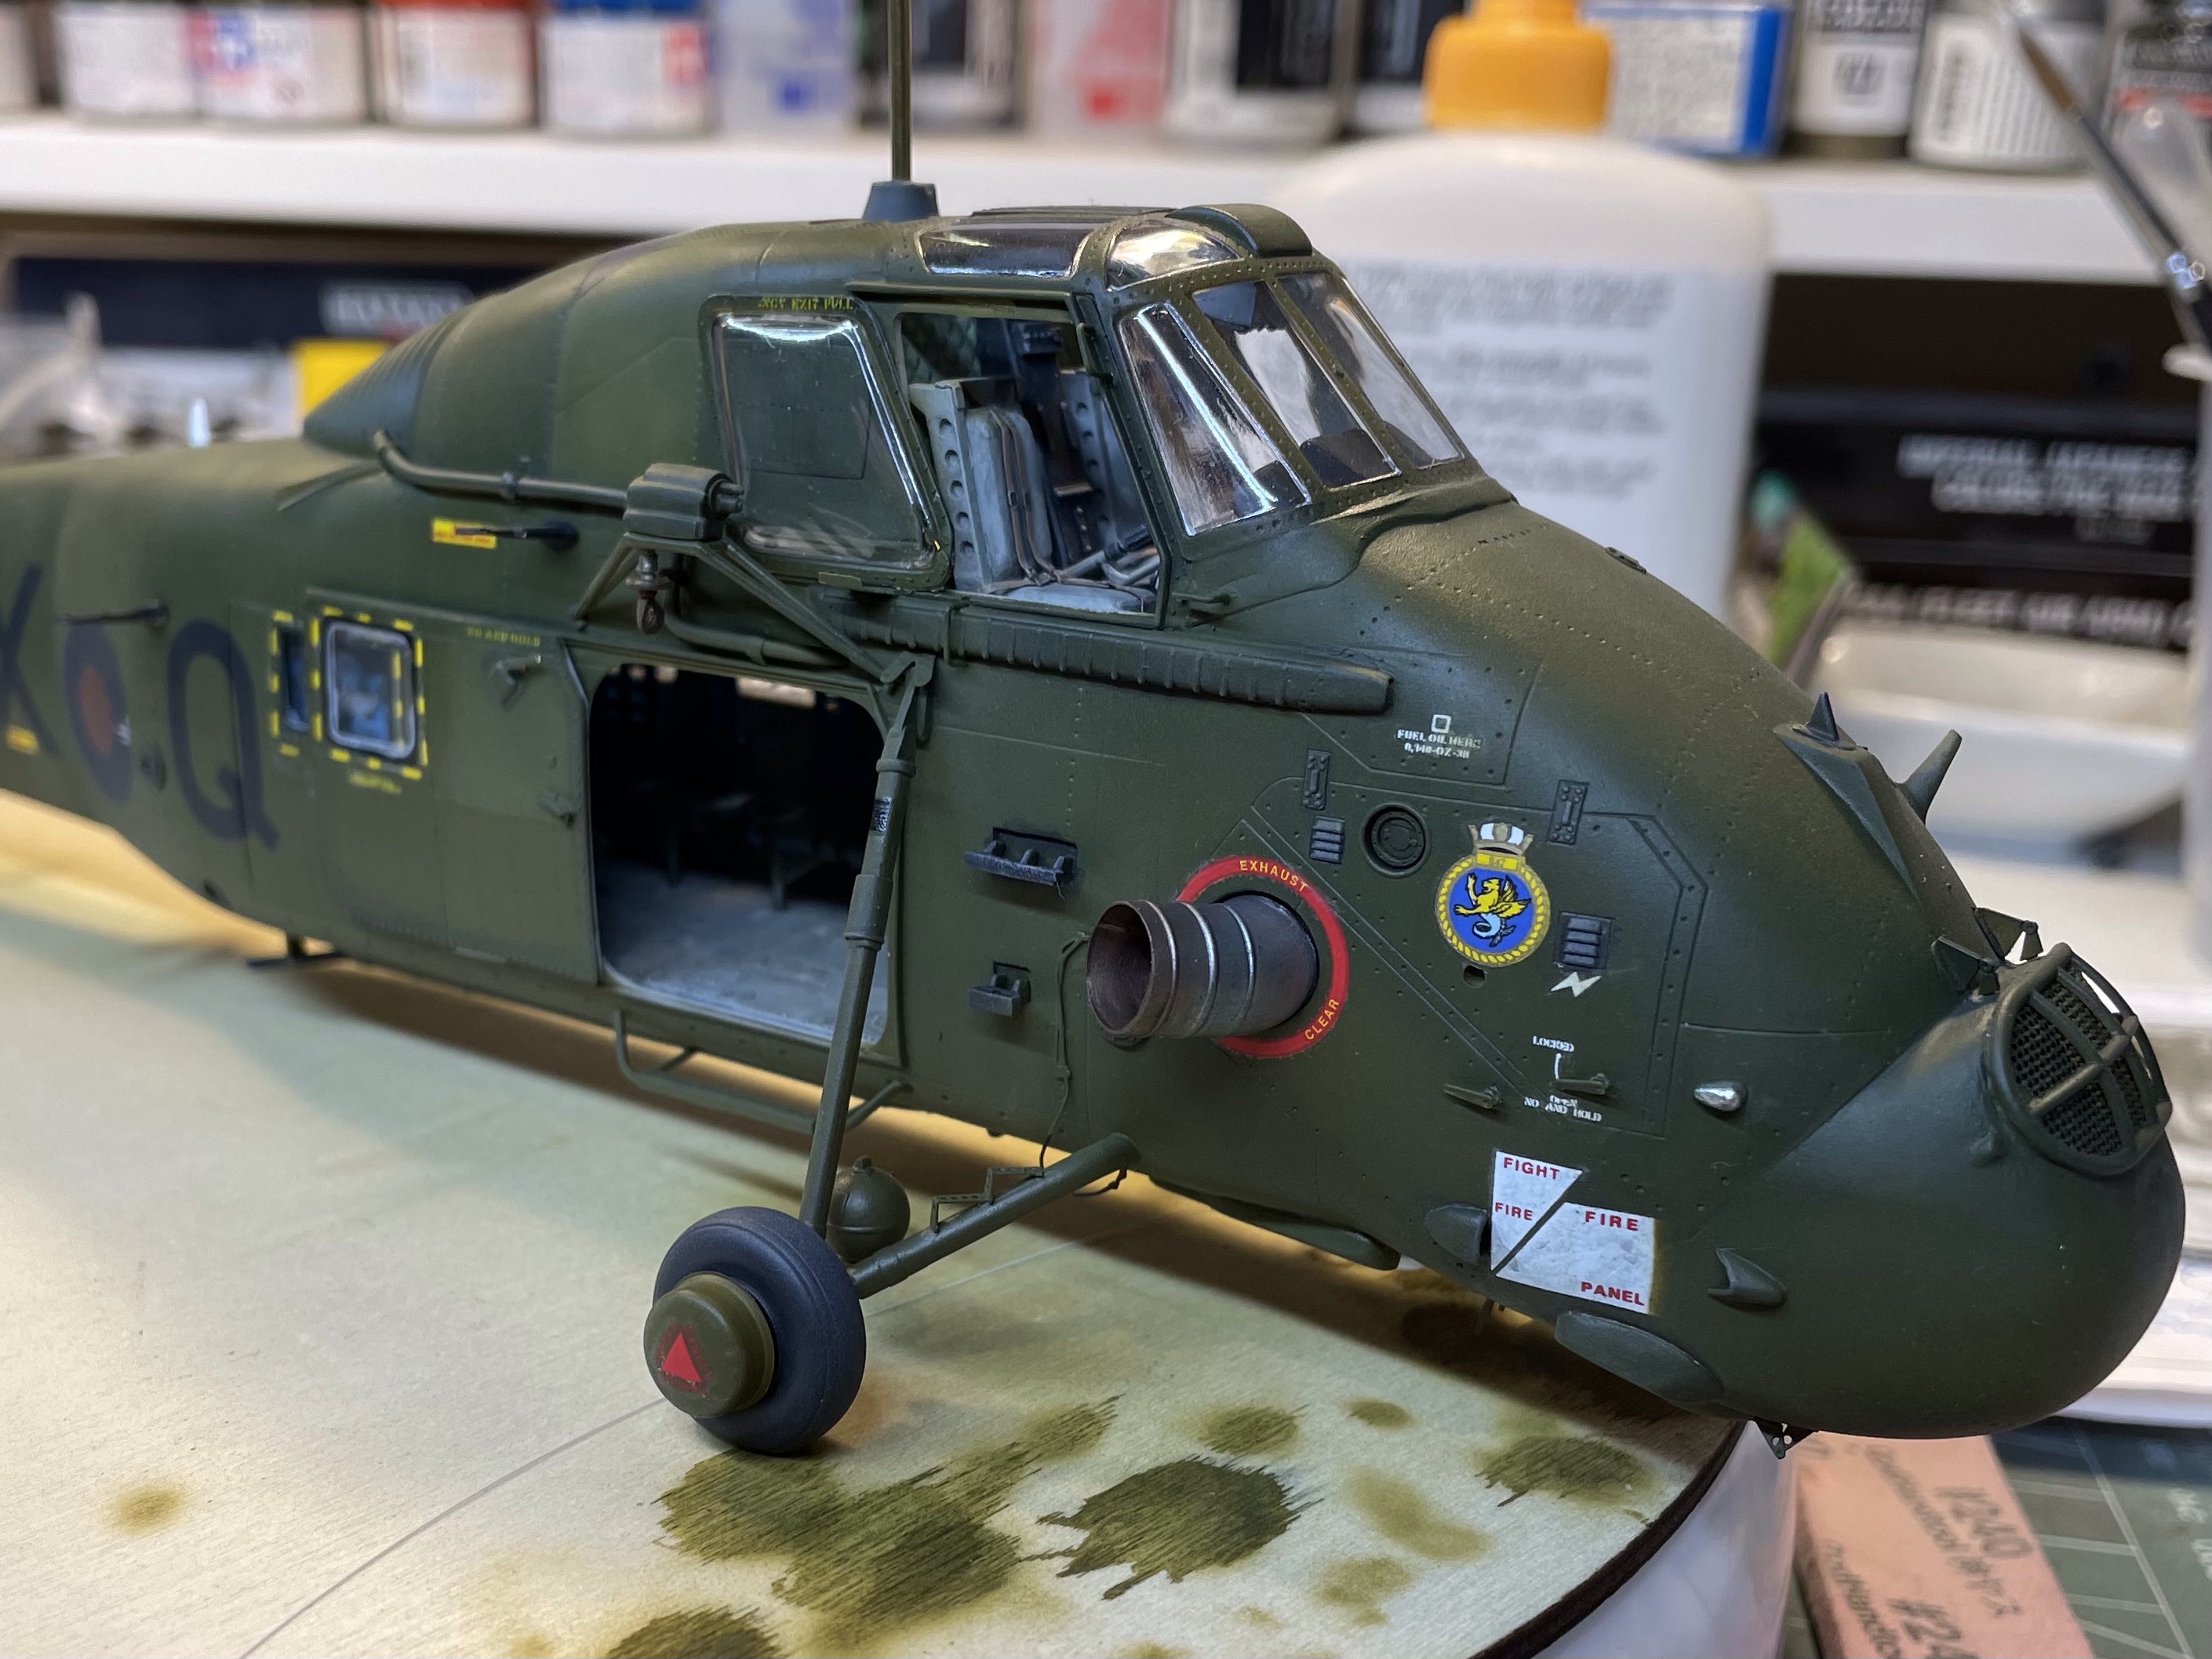
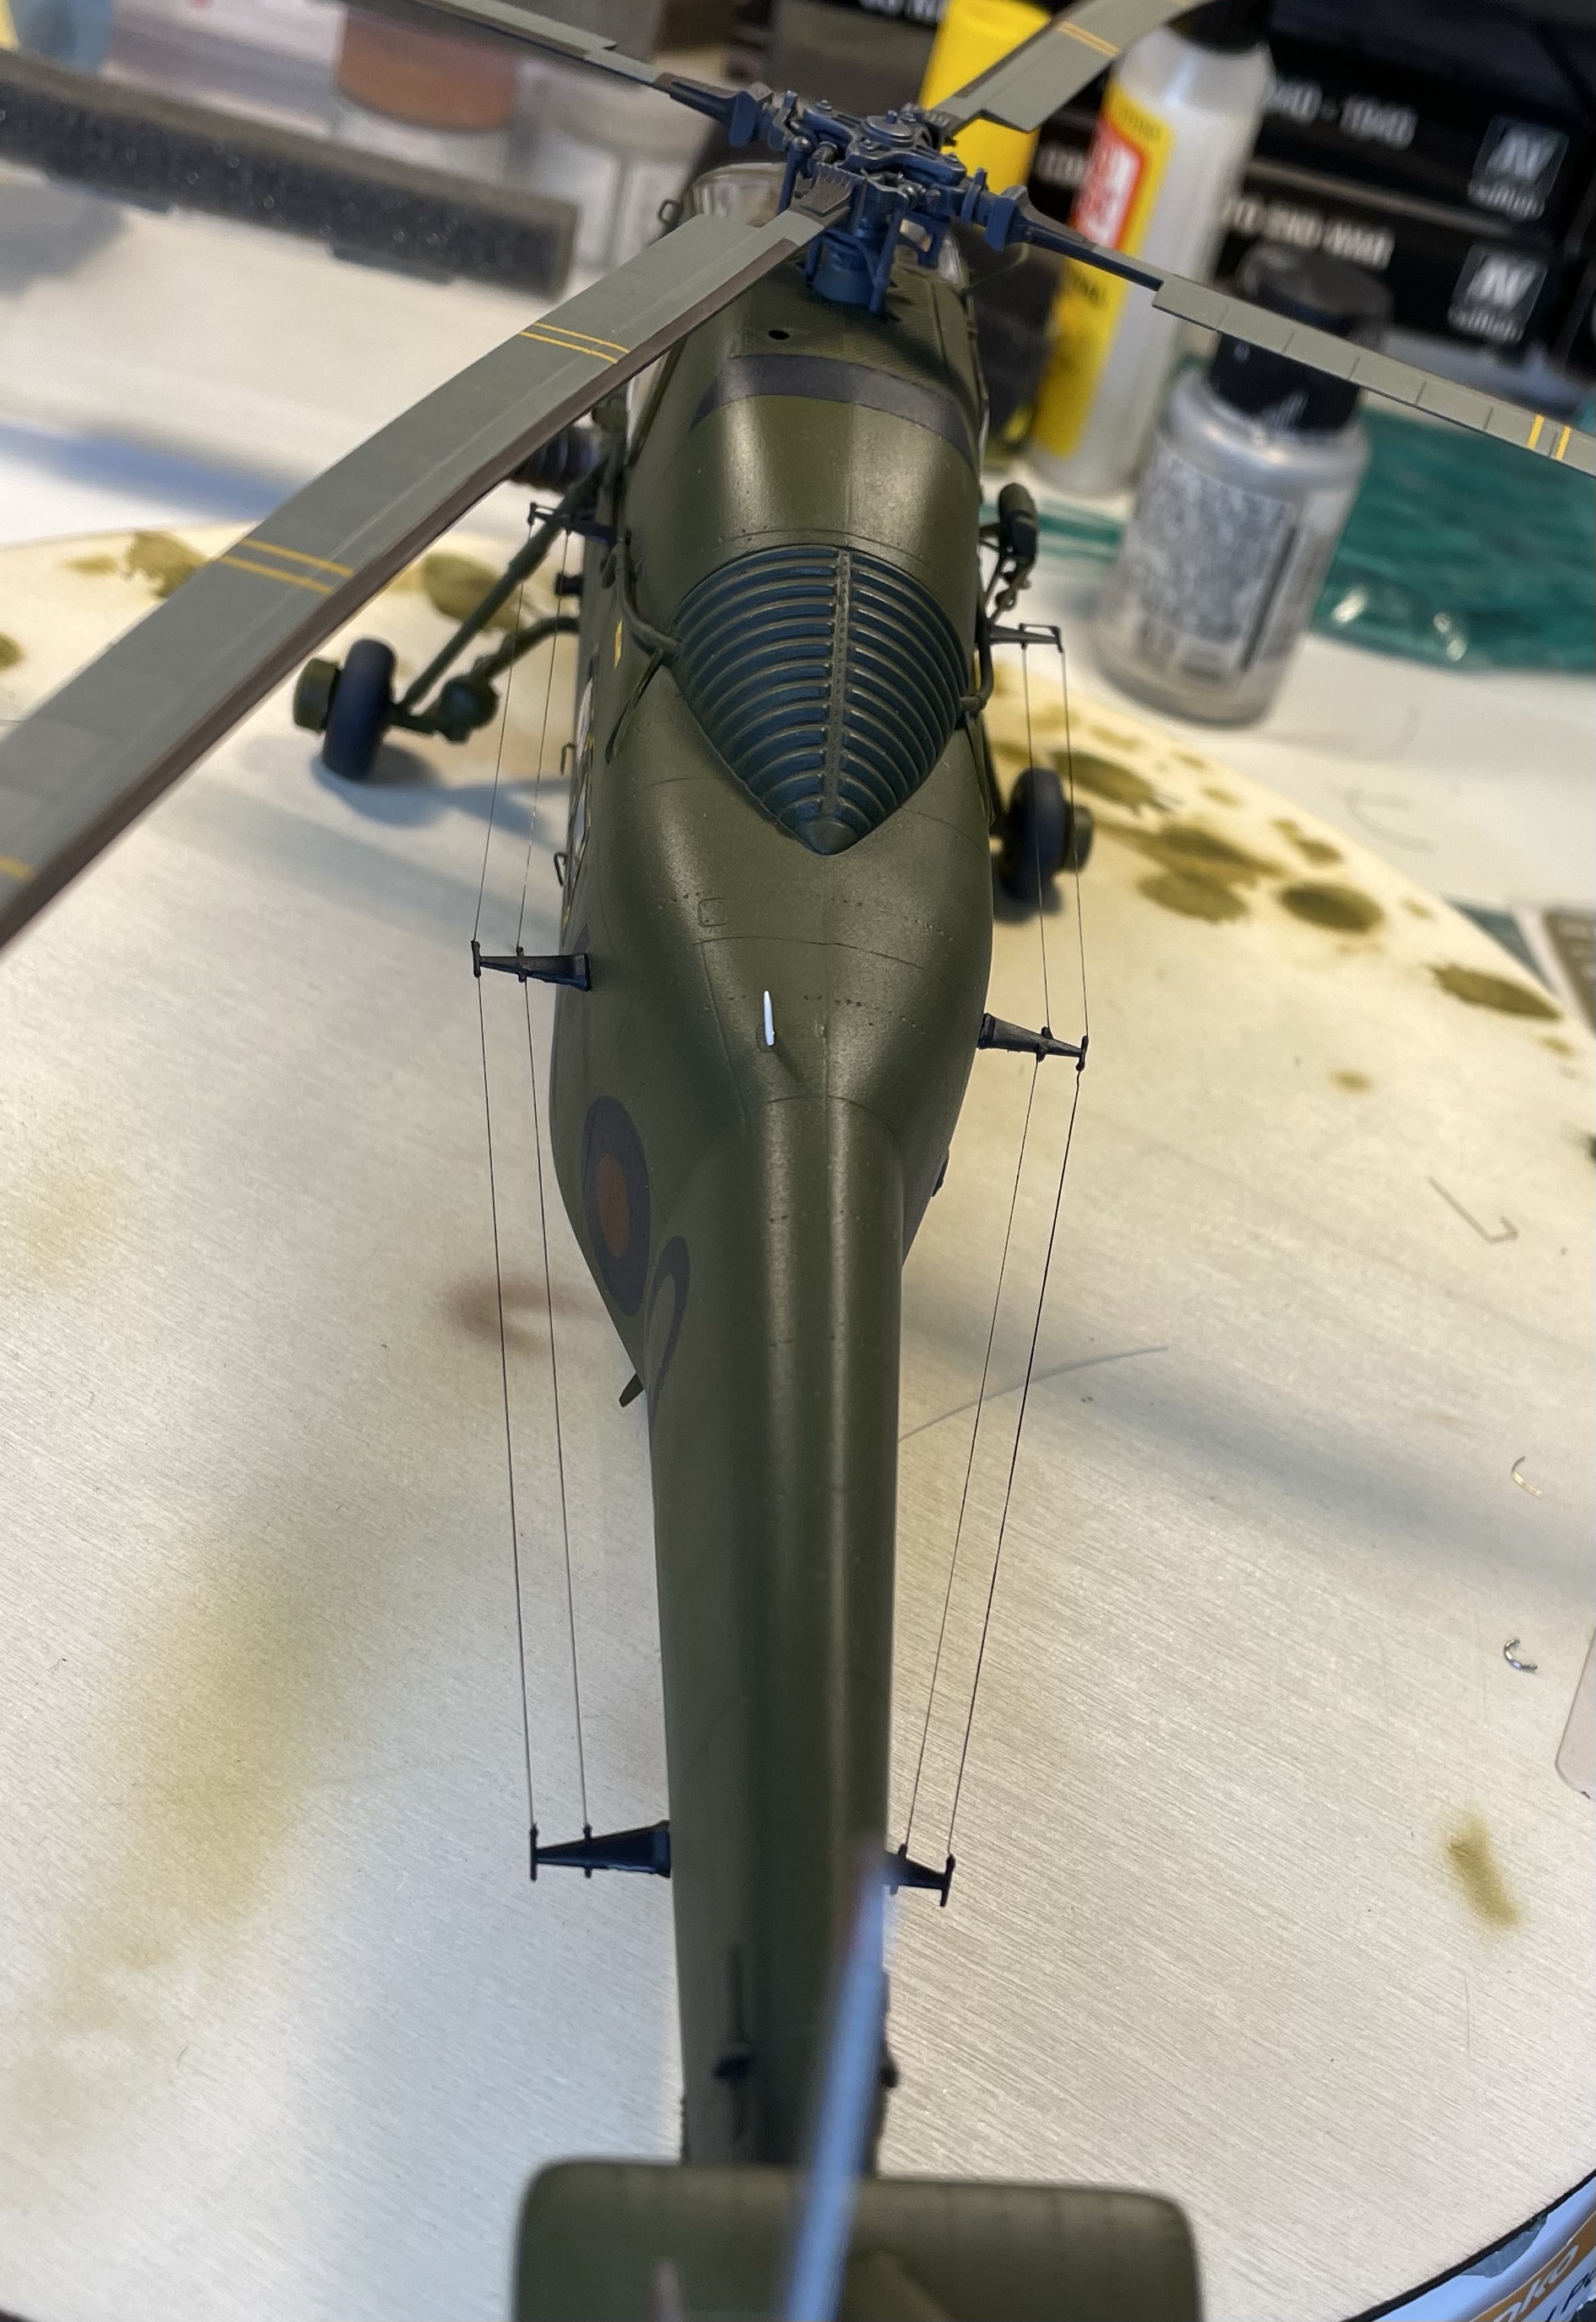
The photos above show what I was aiming at. The two on the right are from some time after the Falklands Conflict and some additional wear and weathering can be seen in them. But as far as painting goes, it’s a very simple scheme – all over Olive Green. I applied a pre-shade around key areas such as access panels, the steps and windows, the conduits and hinges and most of the other surface features. The key to a monochromatic finish is the make sure there’s some tonal variation to create the realism. Looking at the photos above, the airframe is clearly all the same colour but no two parts are exactly the same tone.

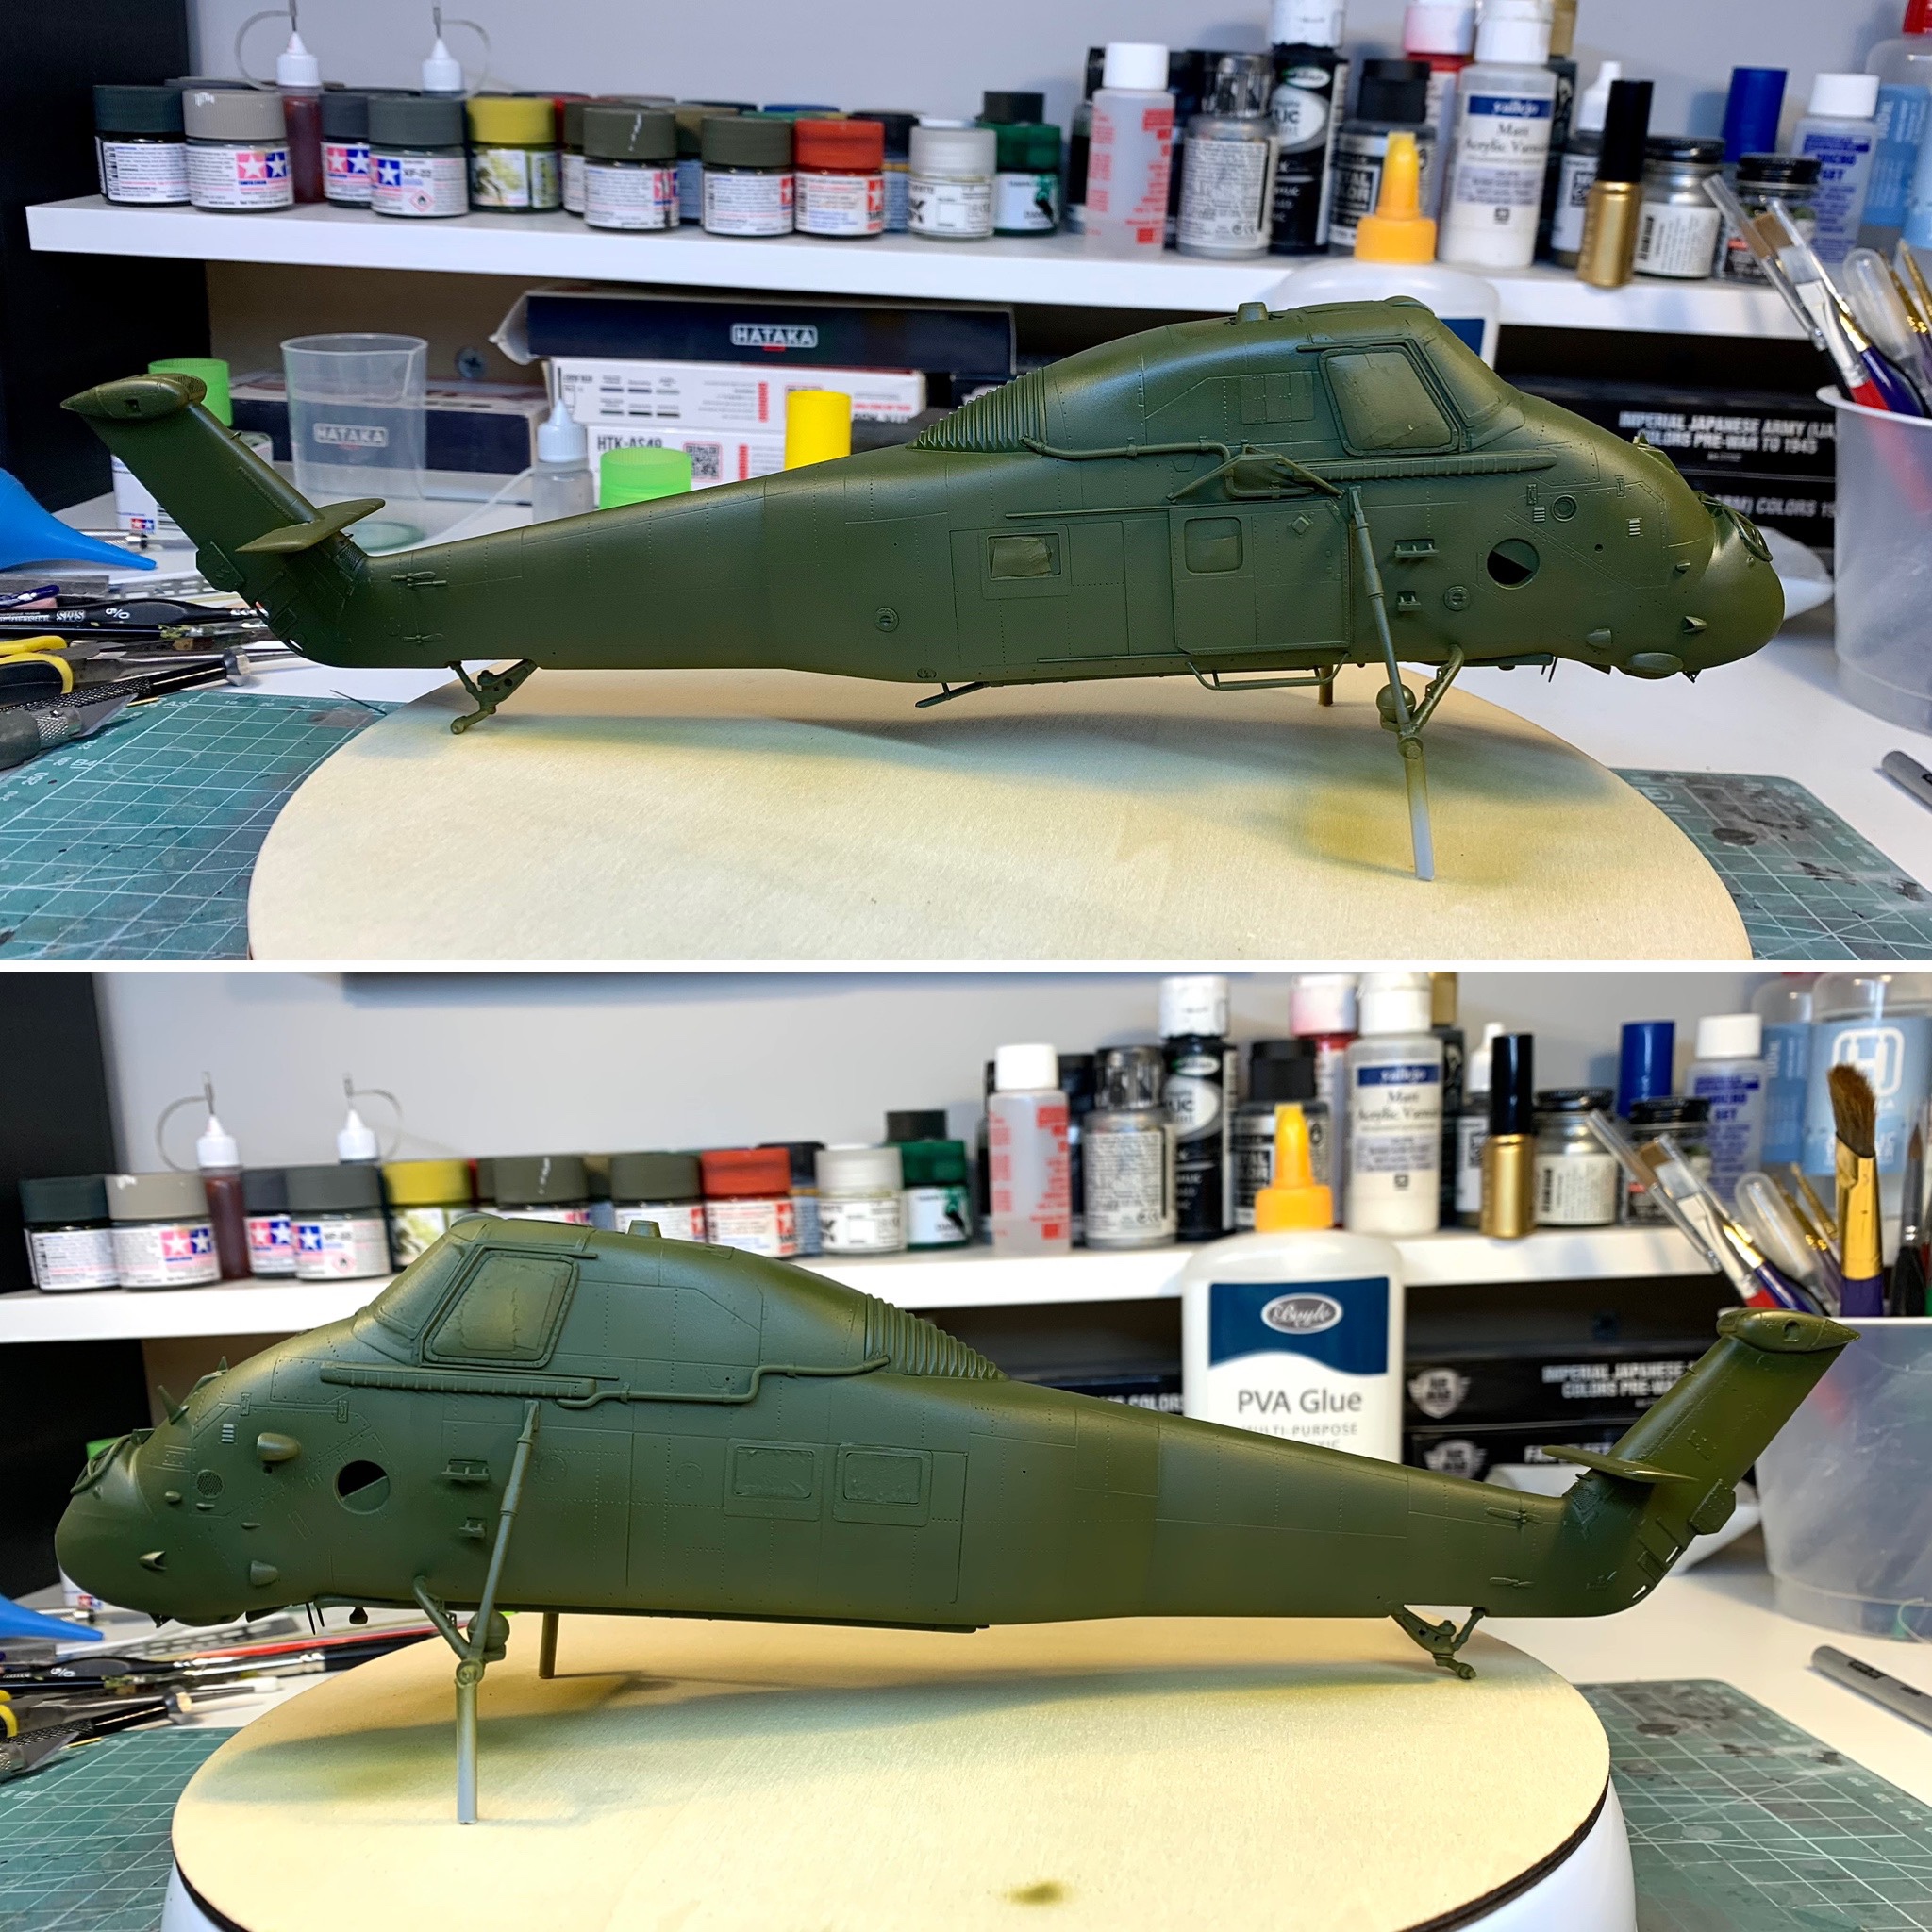
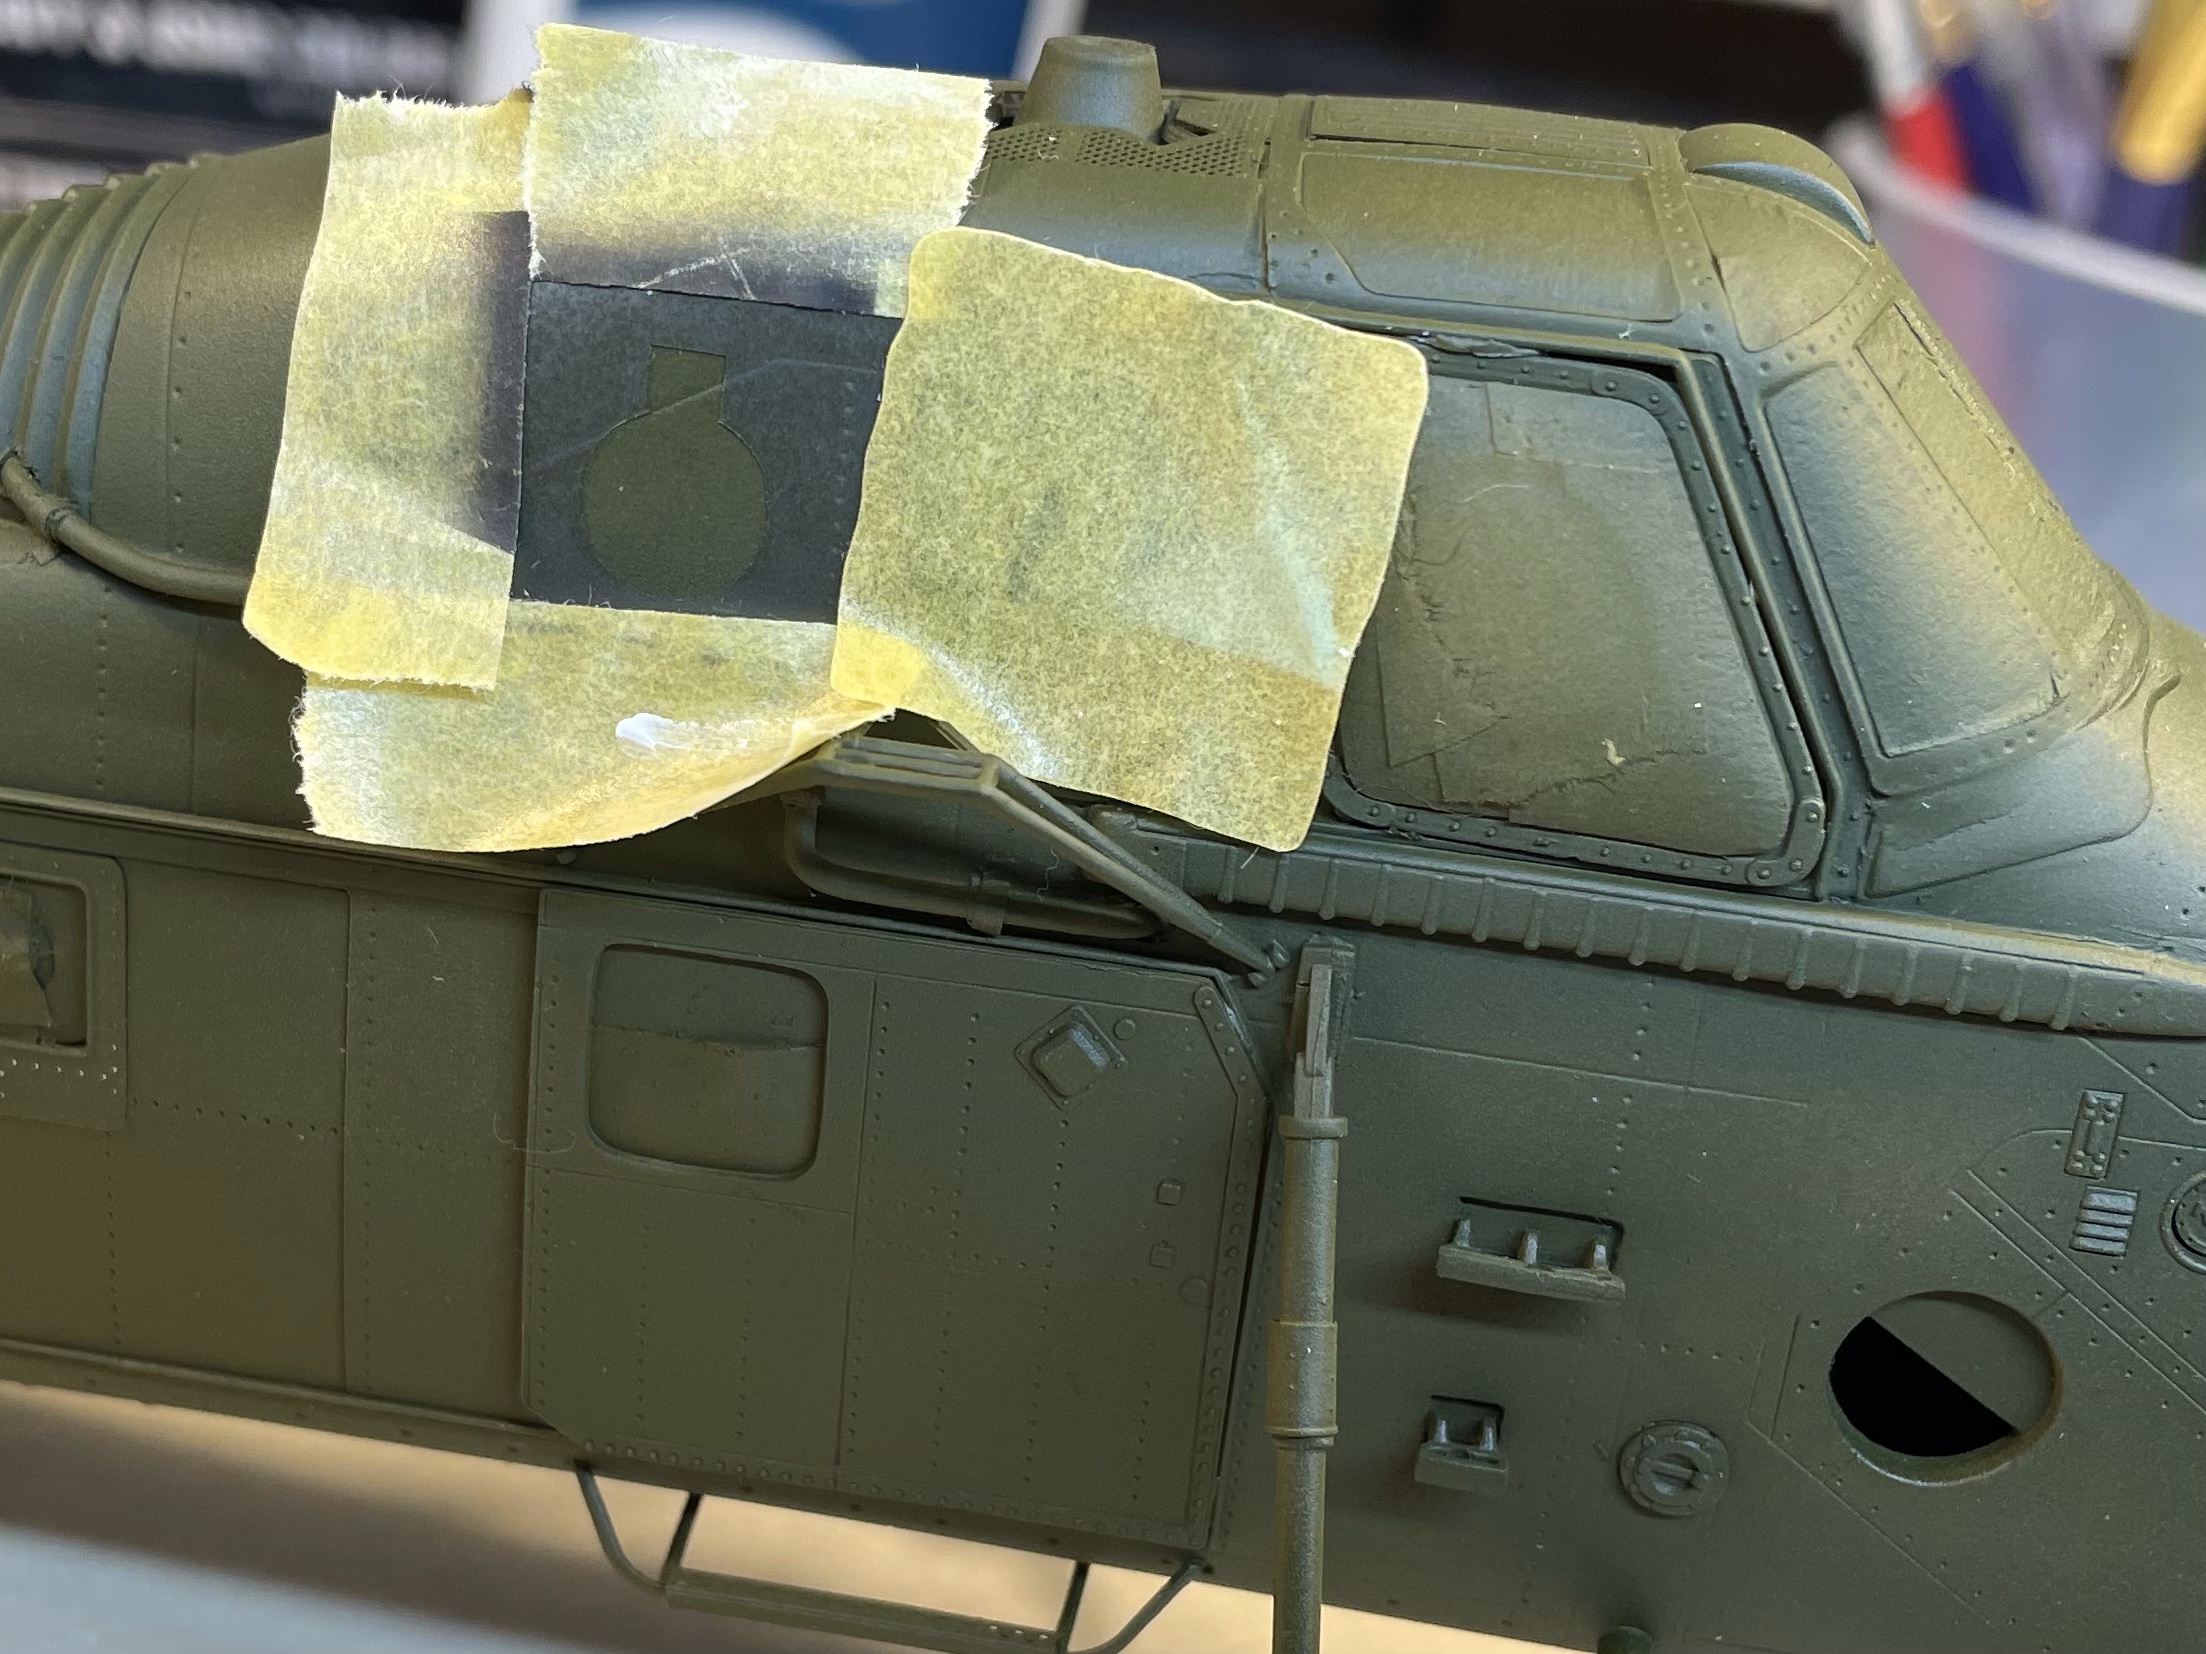
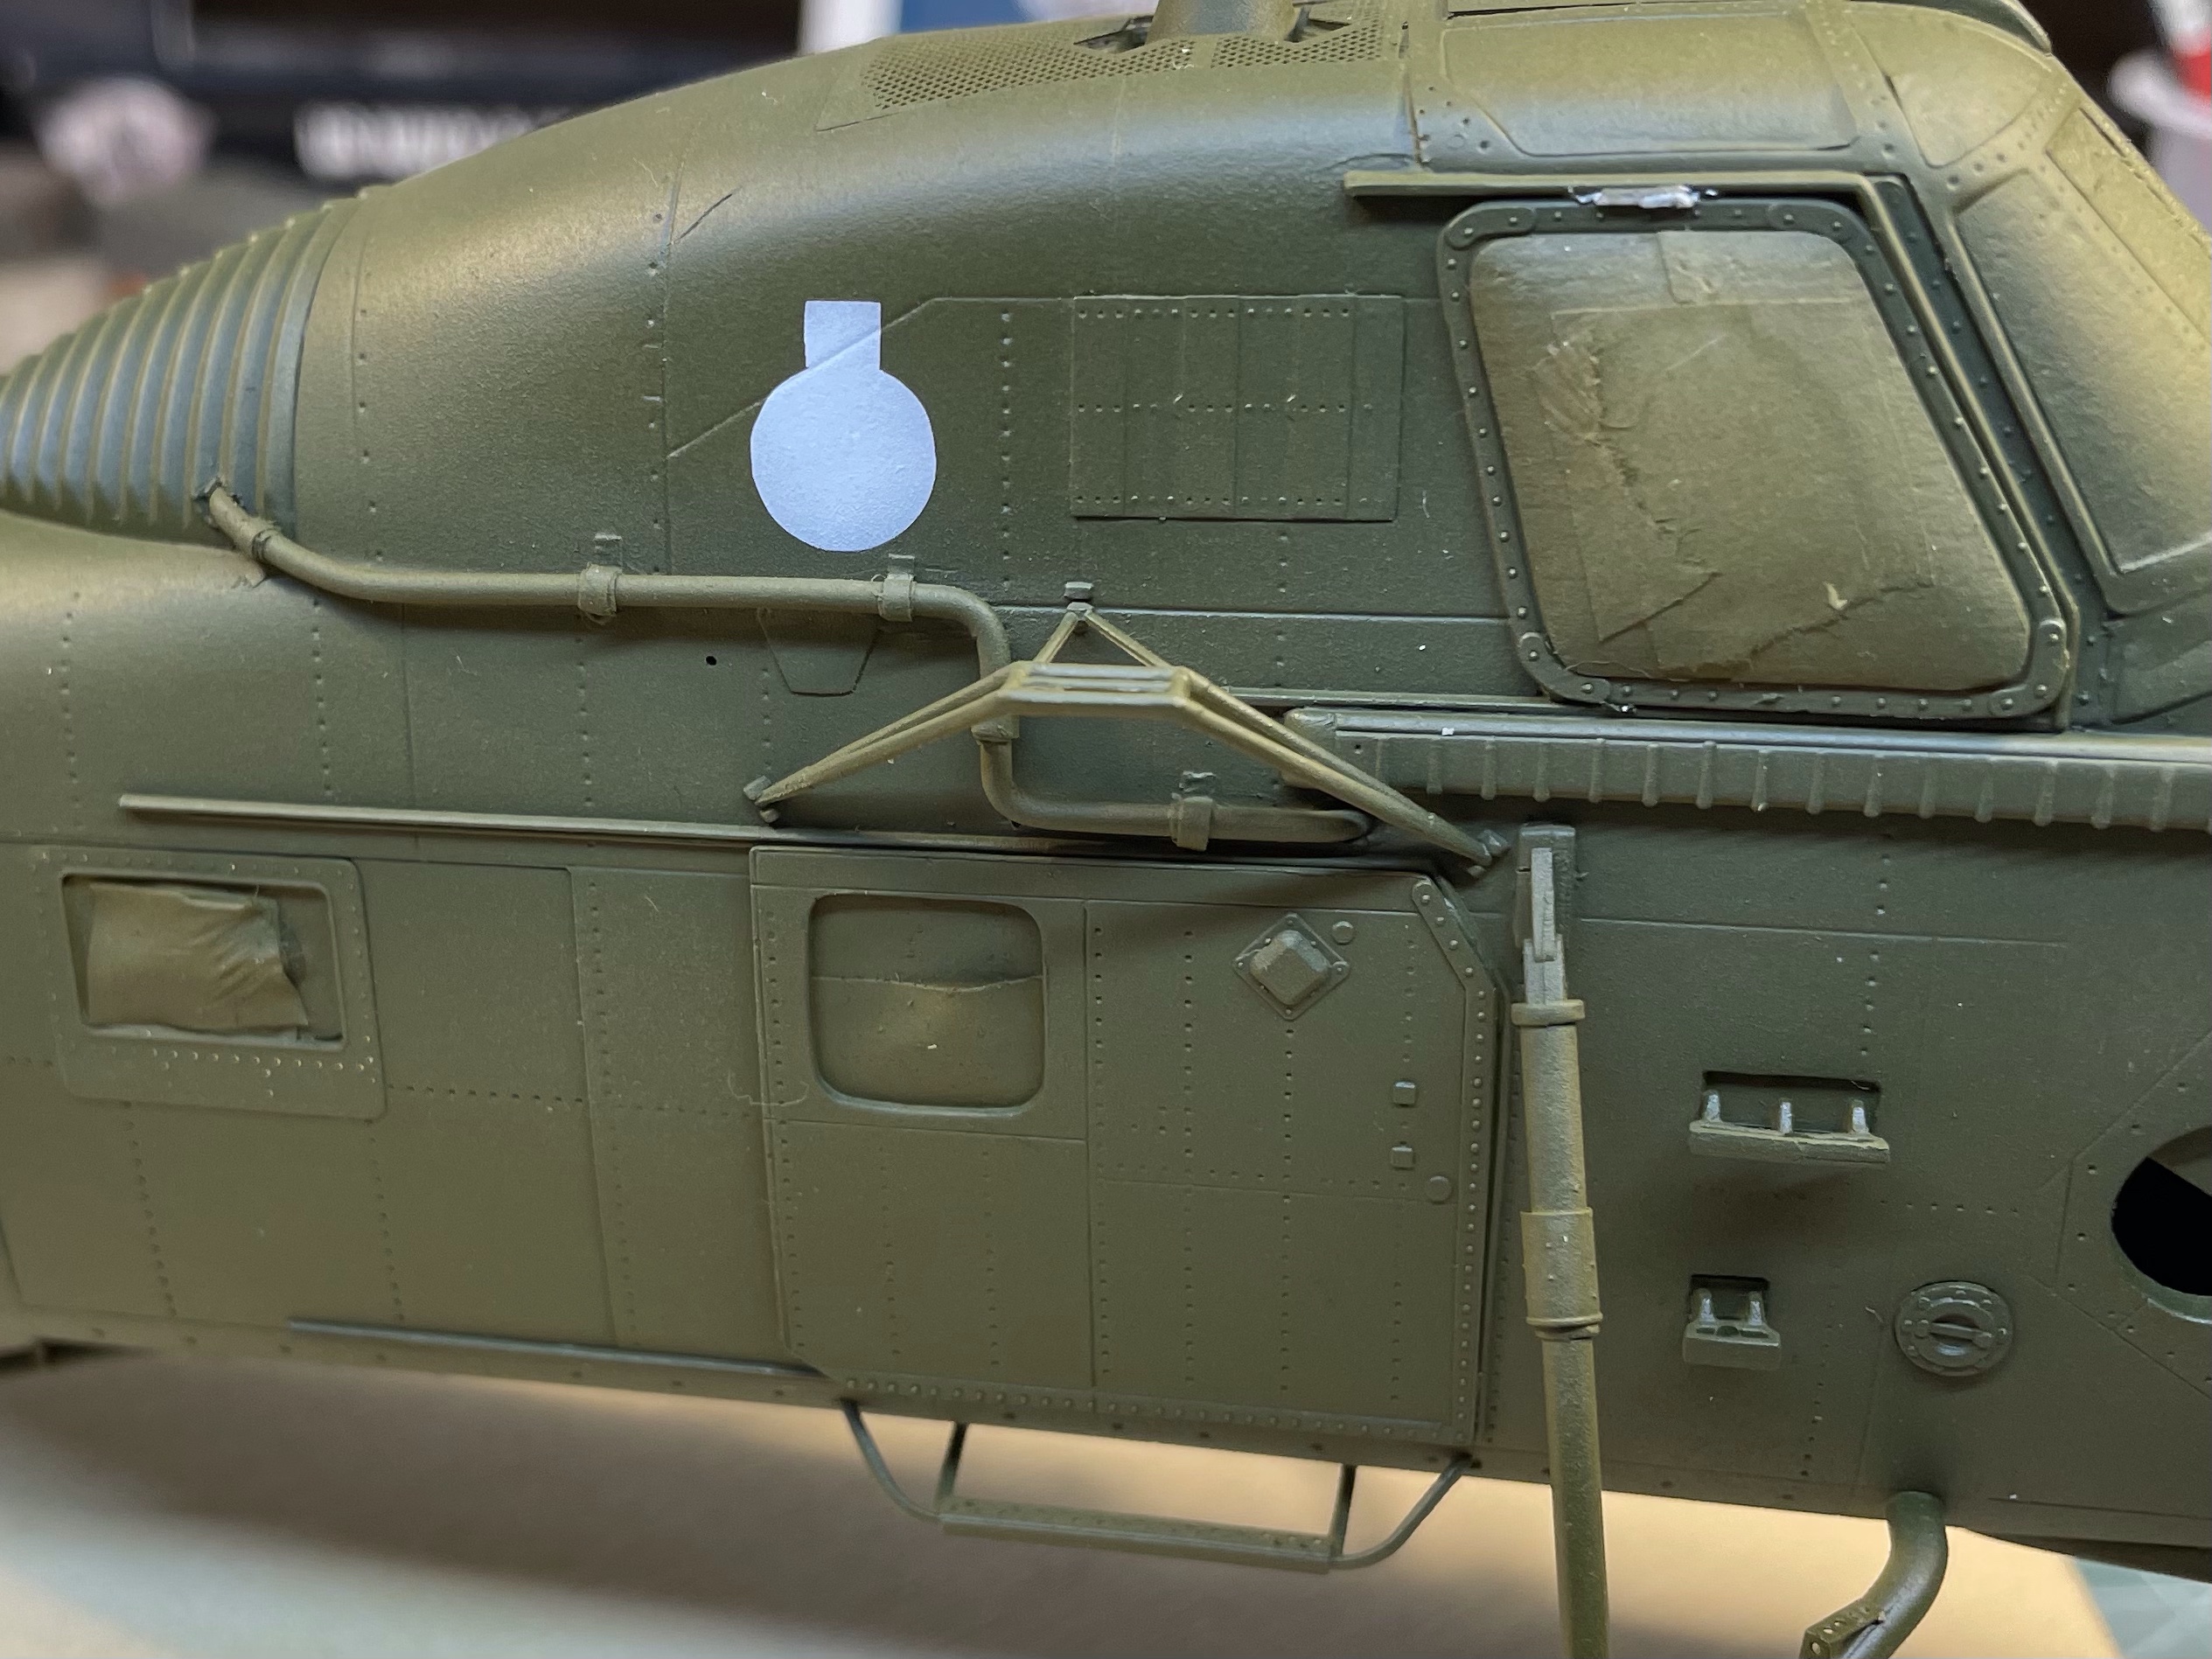
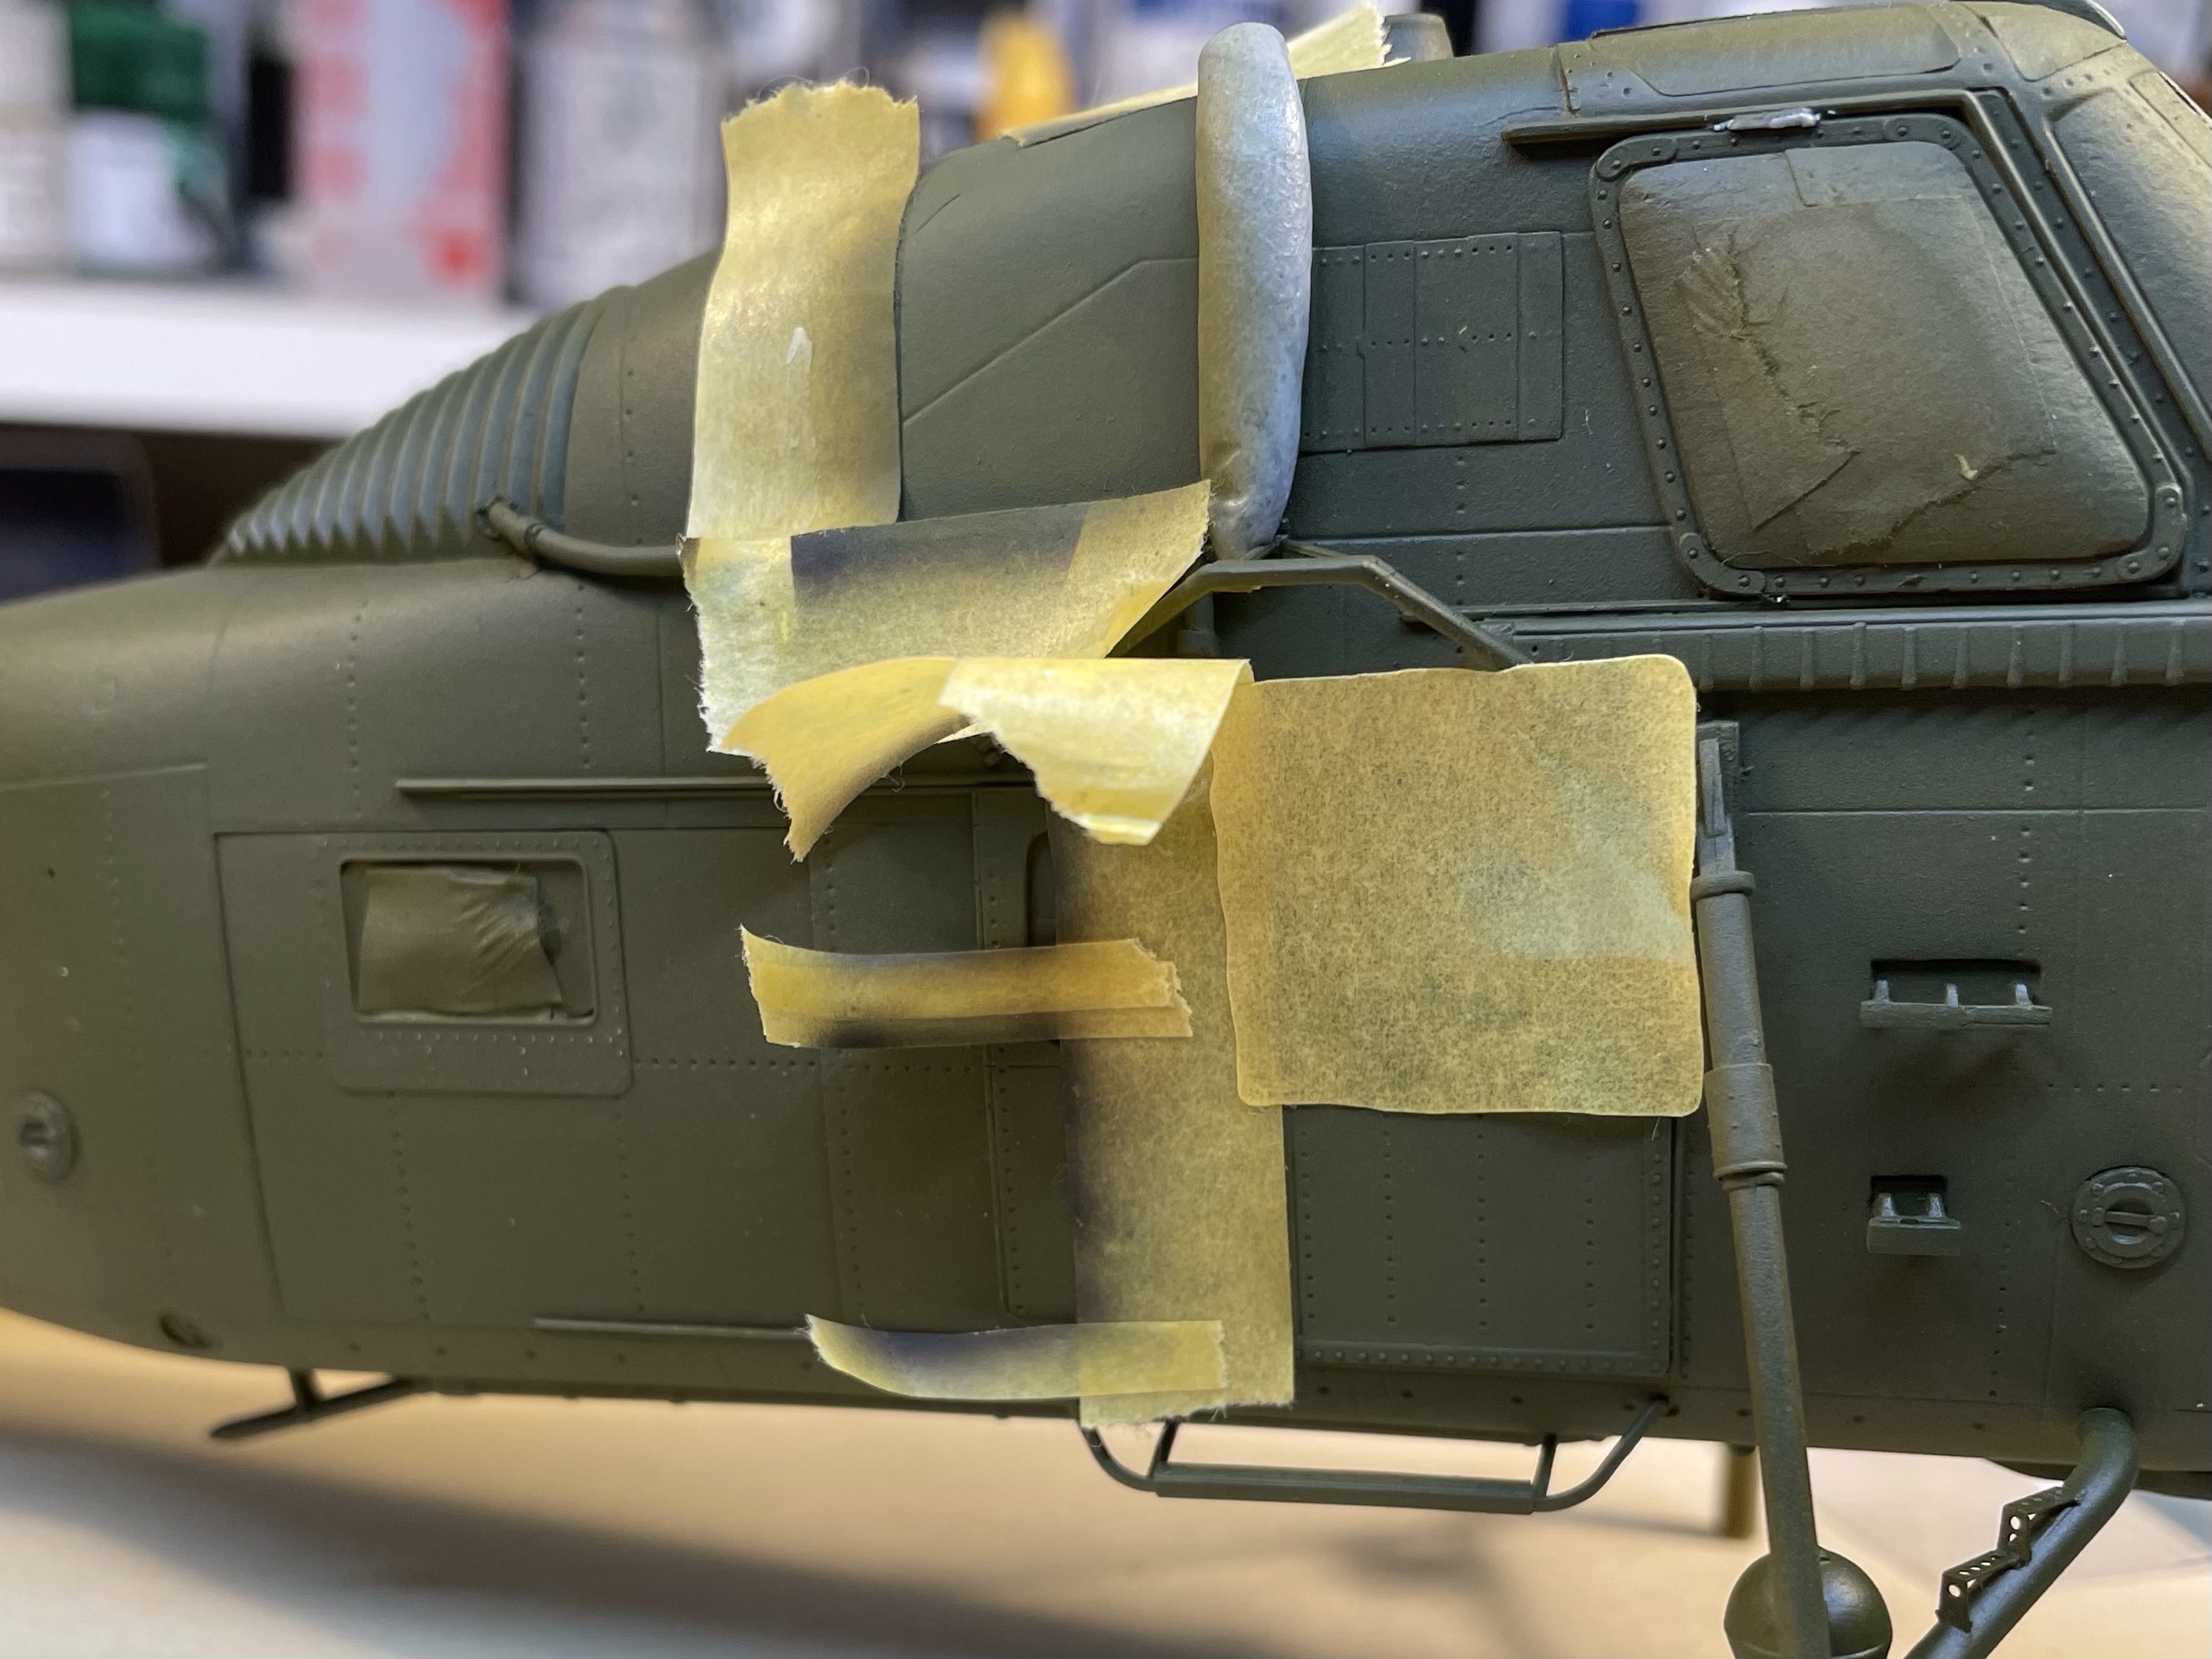
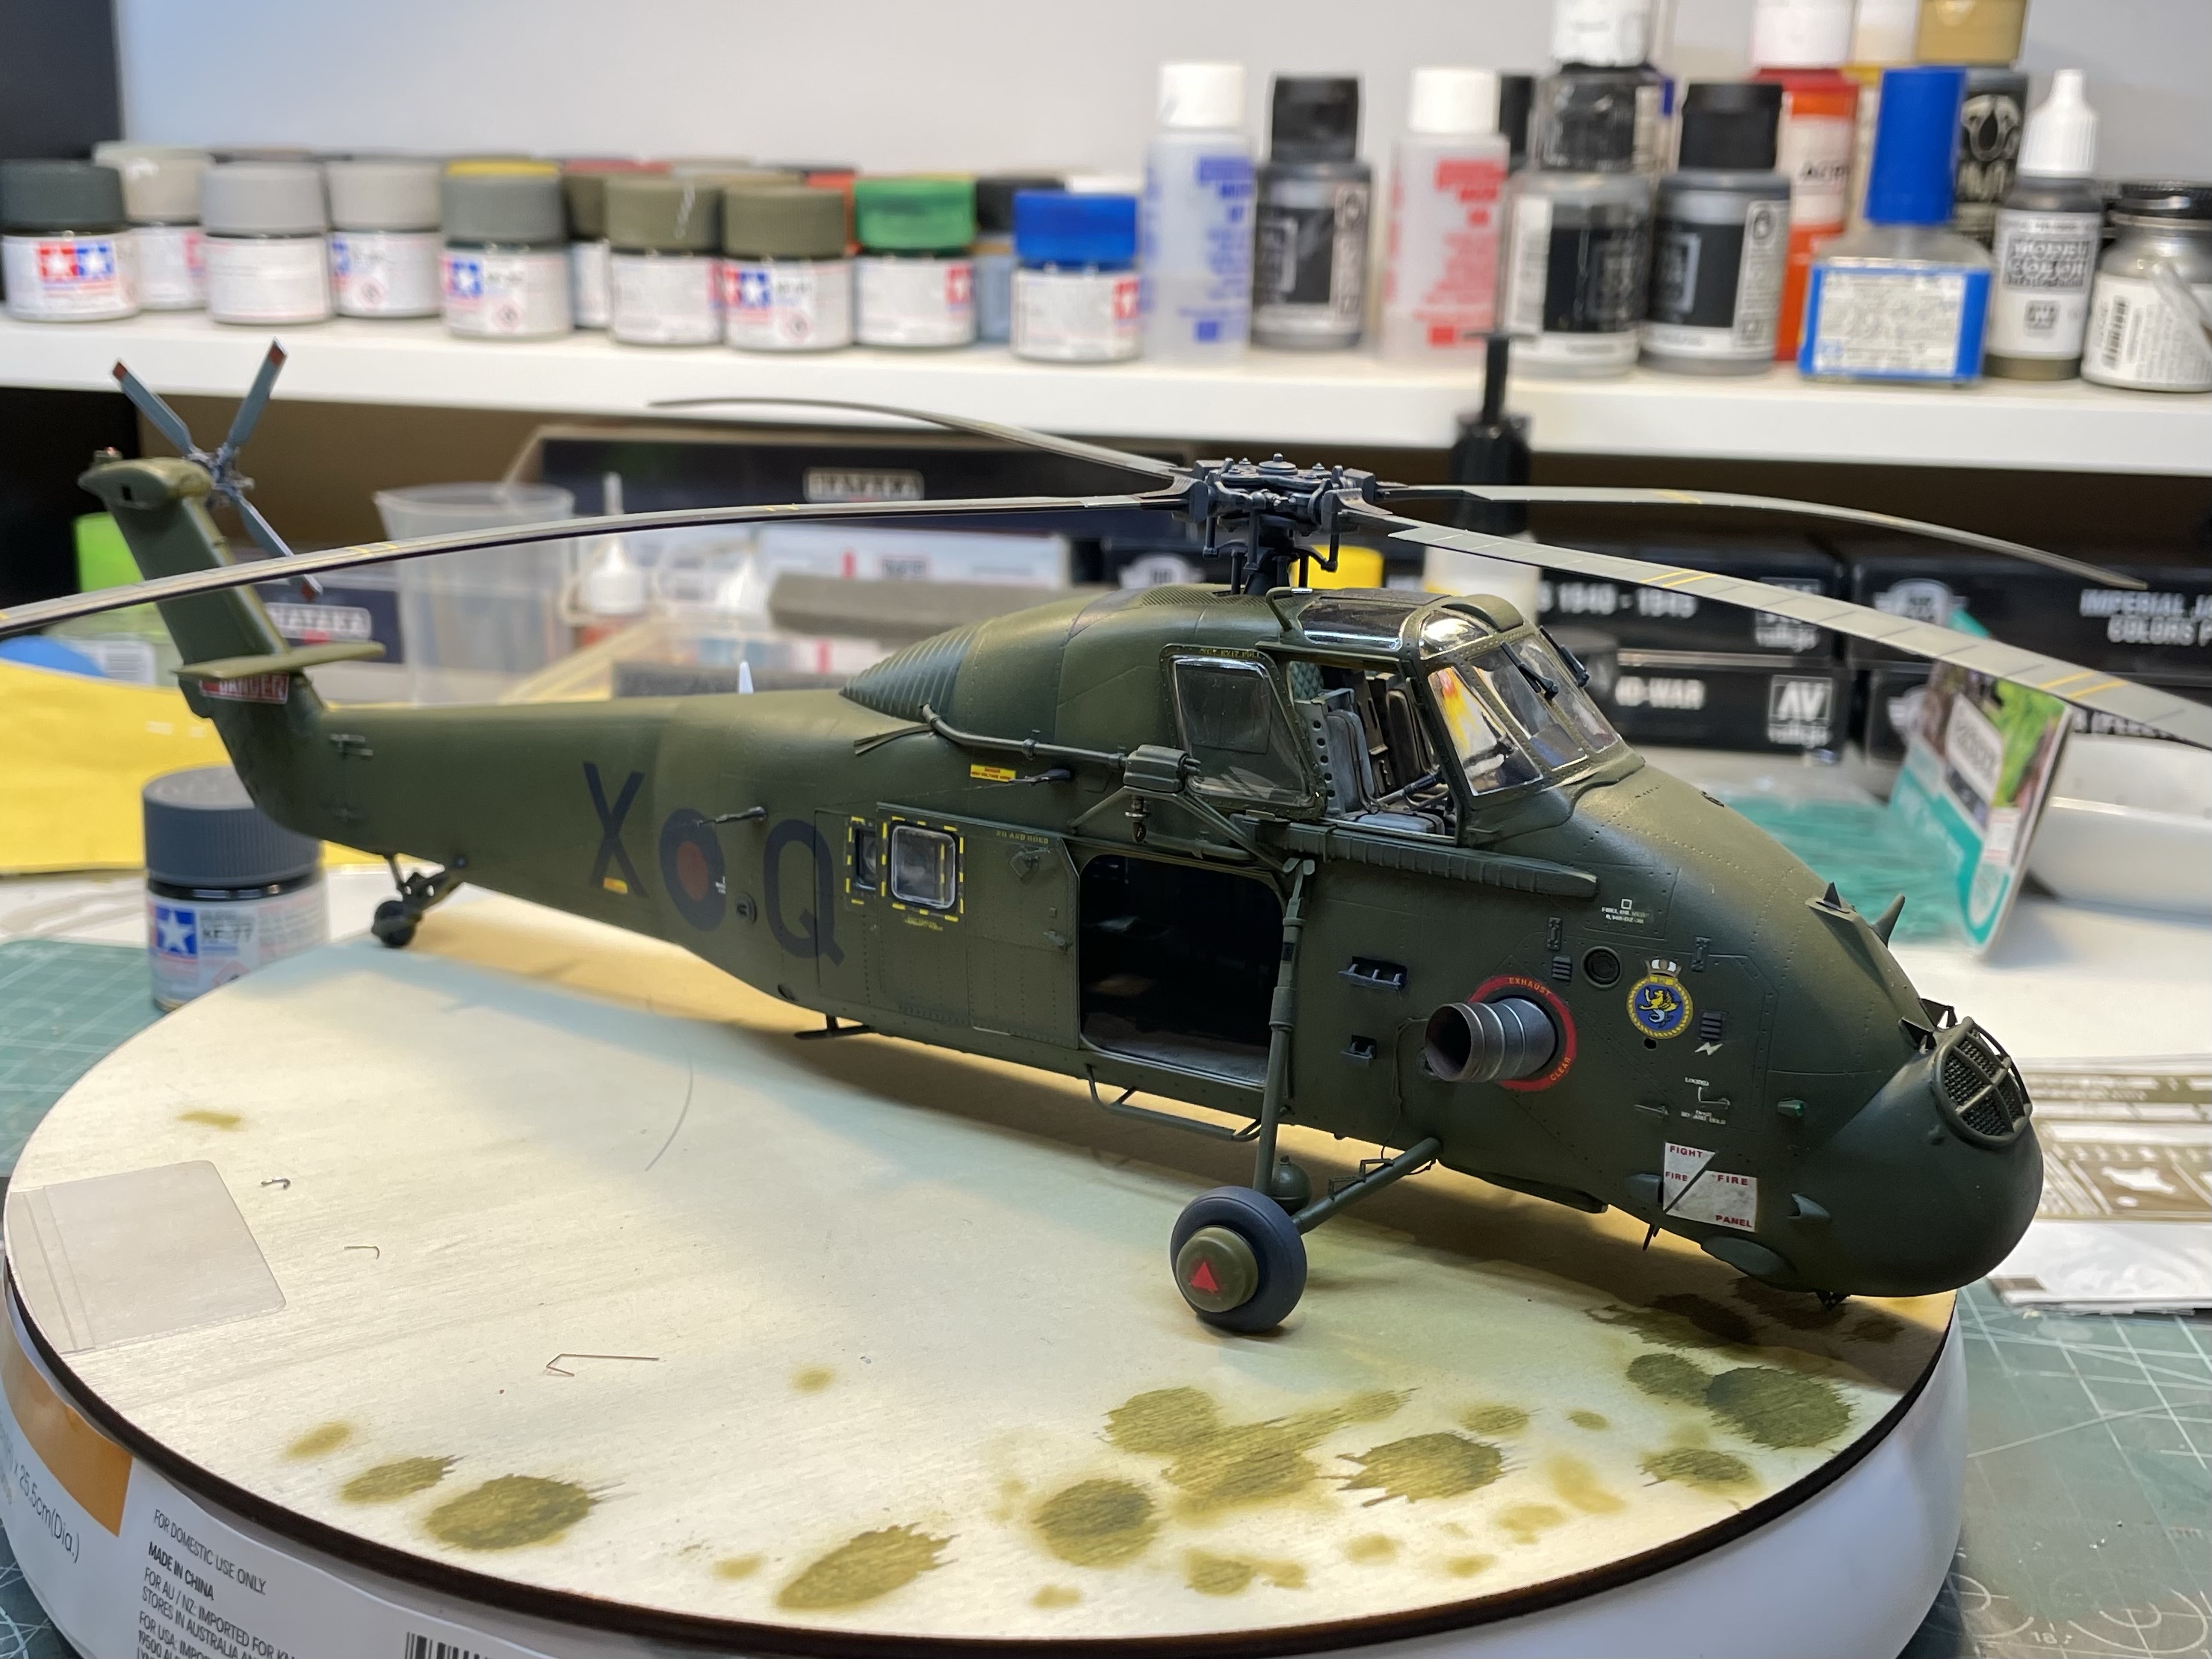
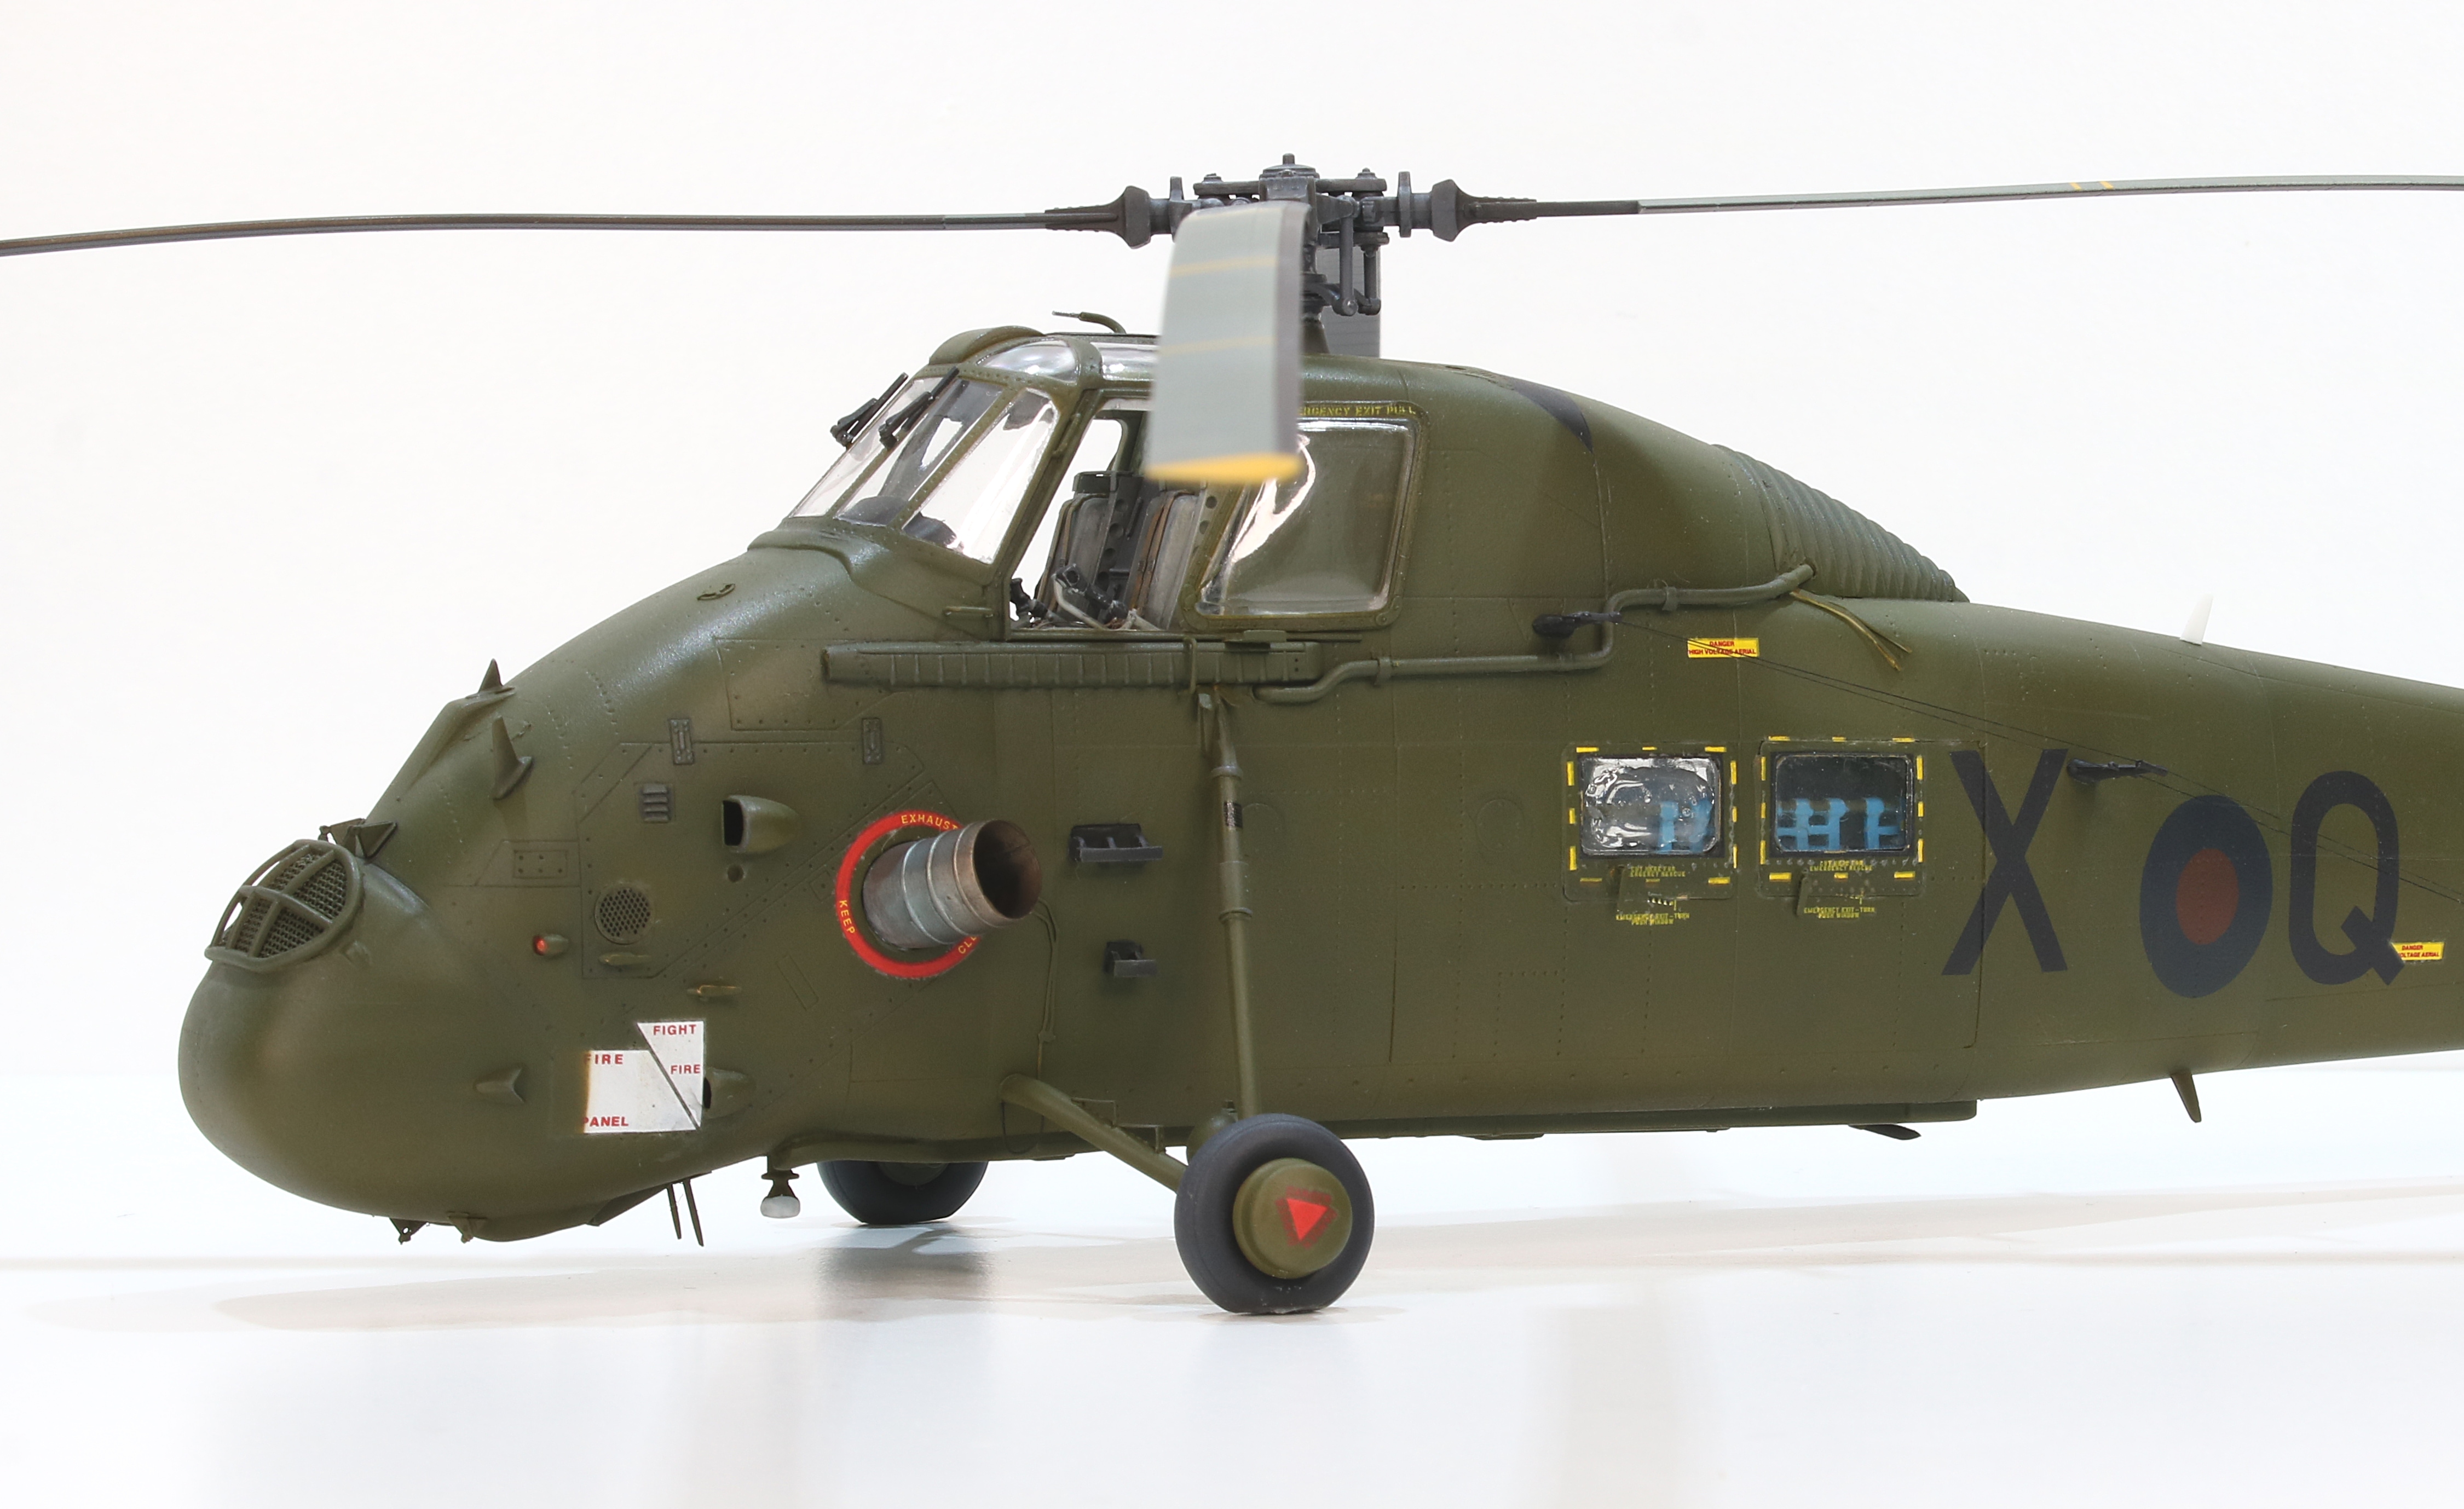
In studying the photos more closely it became apparent that the squadron crest on the starboard engine cover to the rear of the cockpit had been painted over, and the green used was slightly lighter than the original. There was also an area of the cabin door which also appeared to be repainted. I made a simple representation of this by cutting a mask, using it to paint a white crest shape and then overspray that with a lighter green. I exaggerated the contrast as later treatments would tone down the difference.
I used artists acrylics for the paintwork. I experimented with the addition of some Future/Pledge clear gloss to the thinned mix and felt this gave a smoother and more resilient finish.
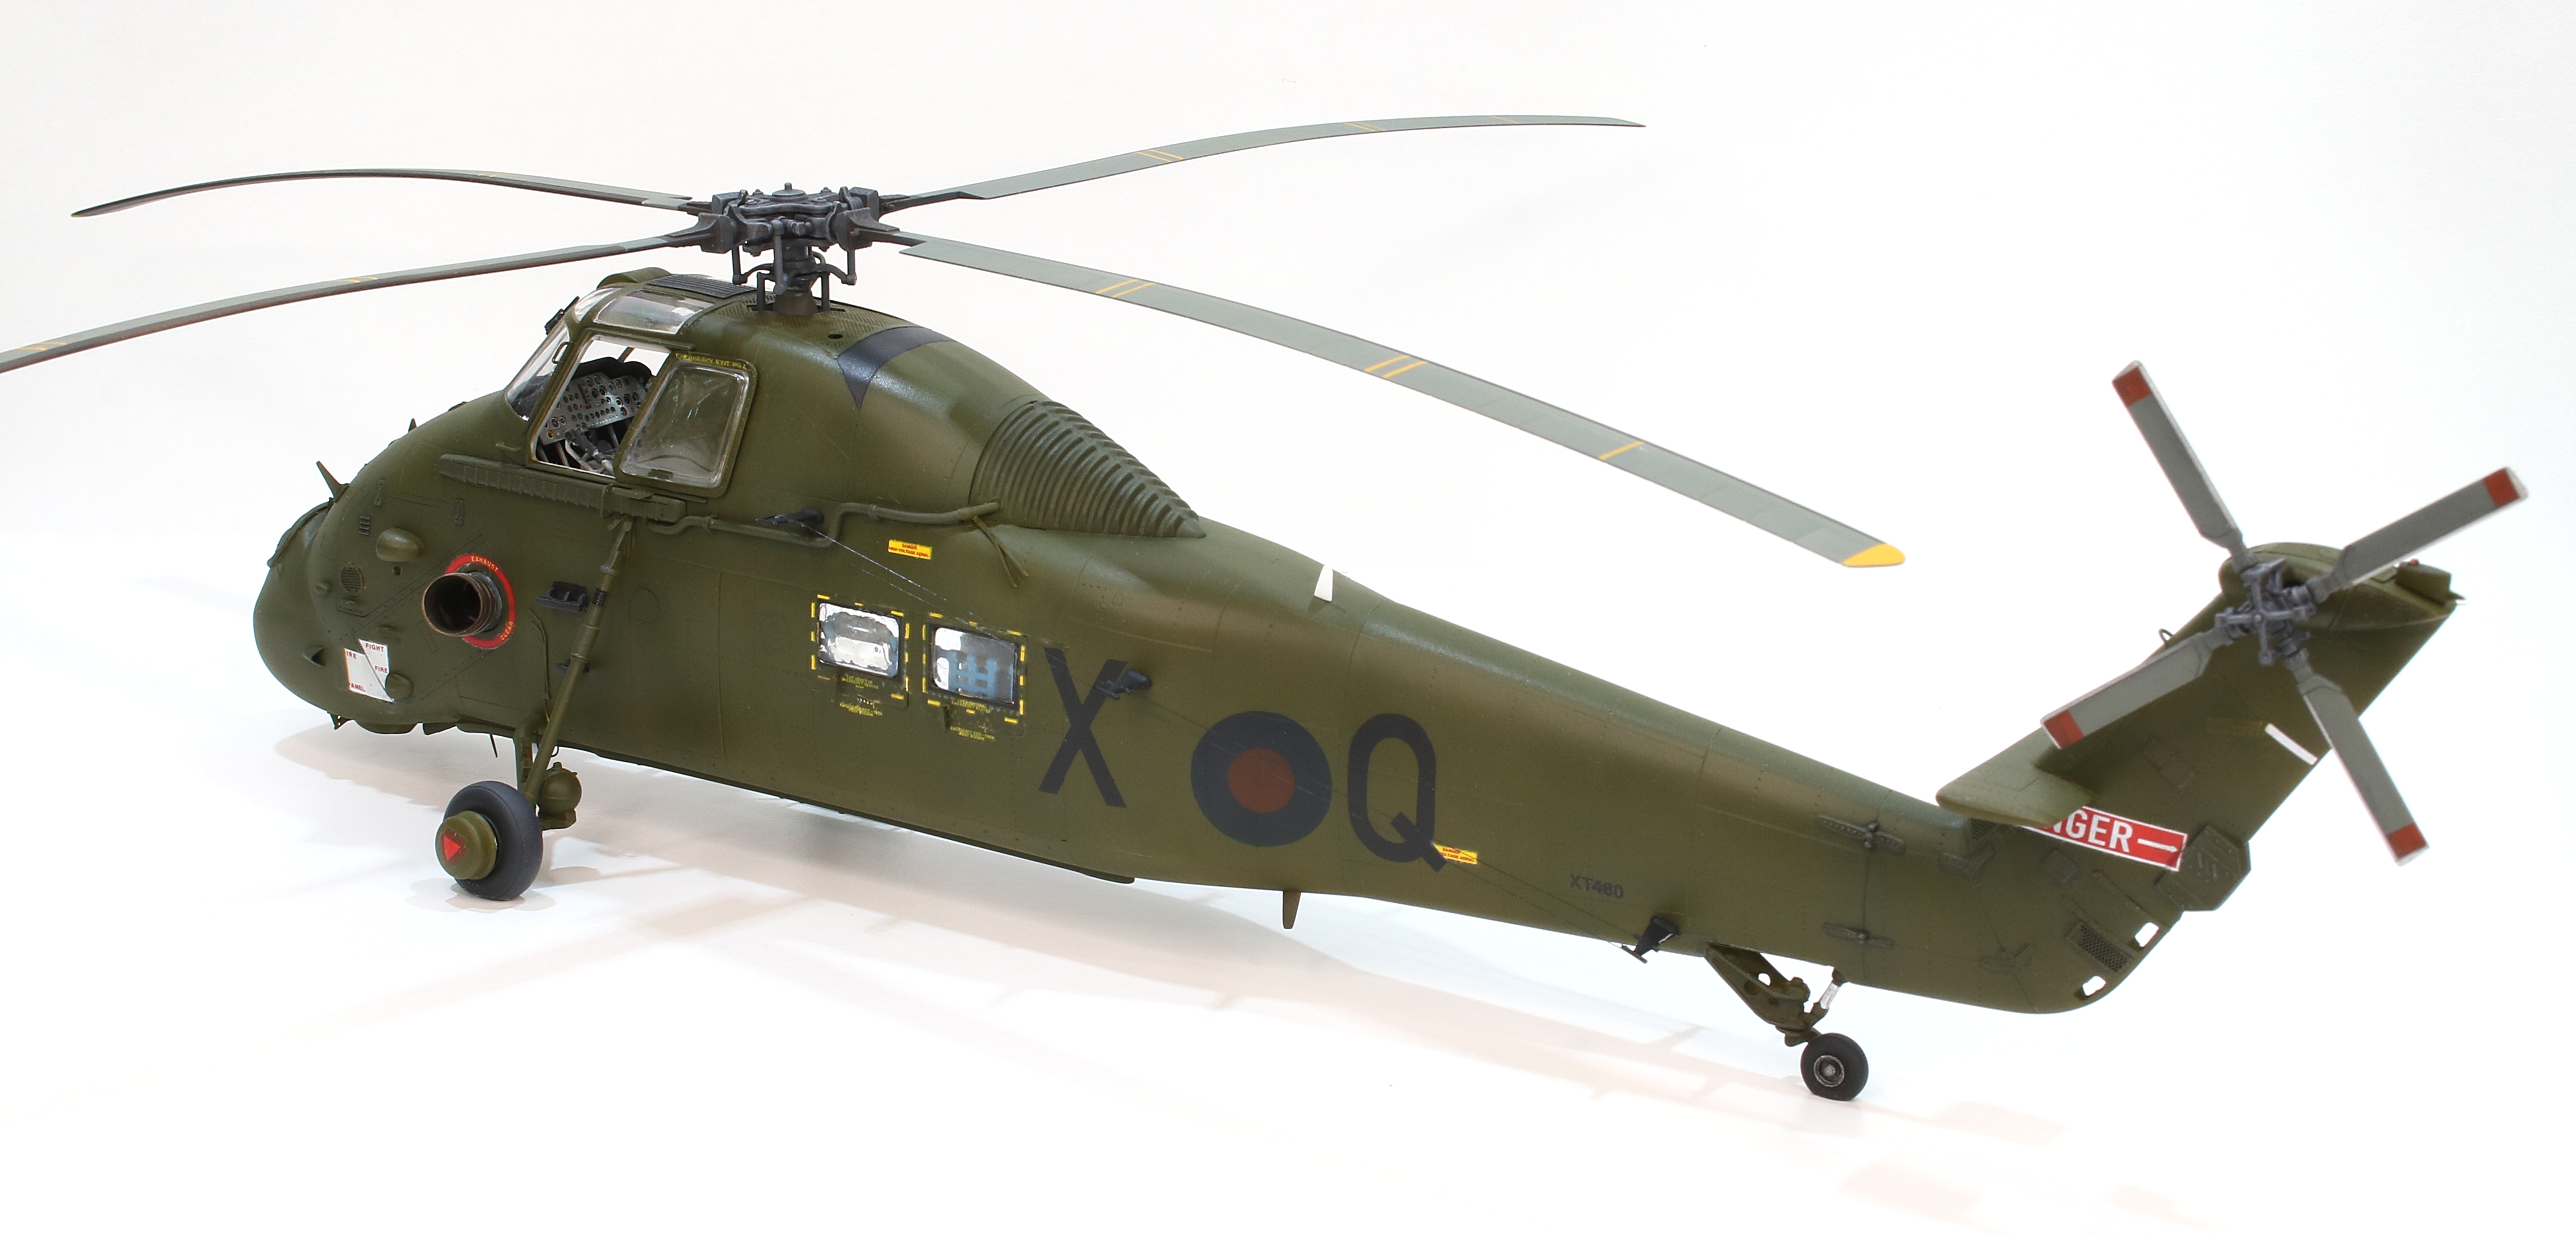
Markings

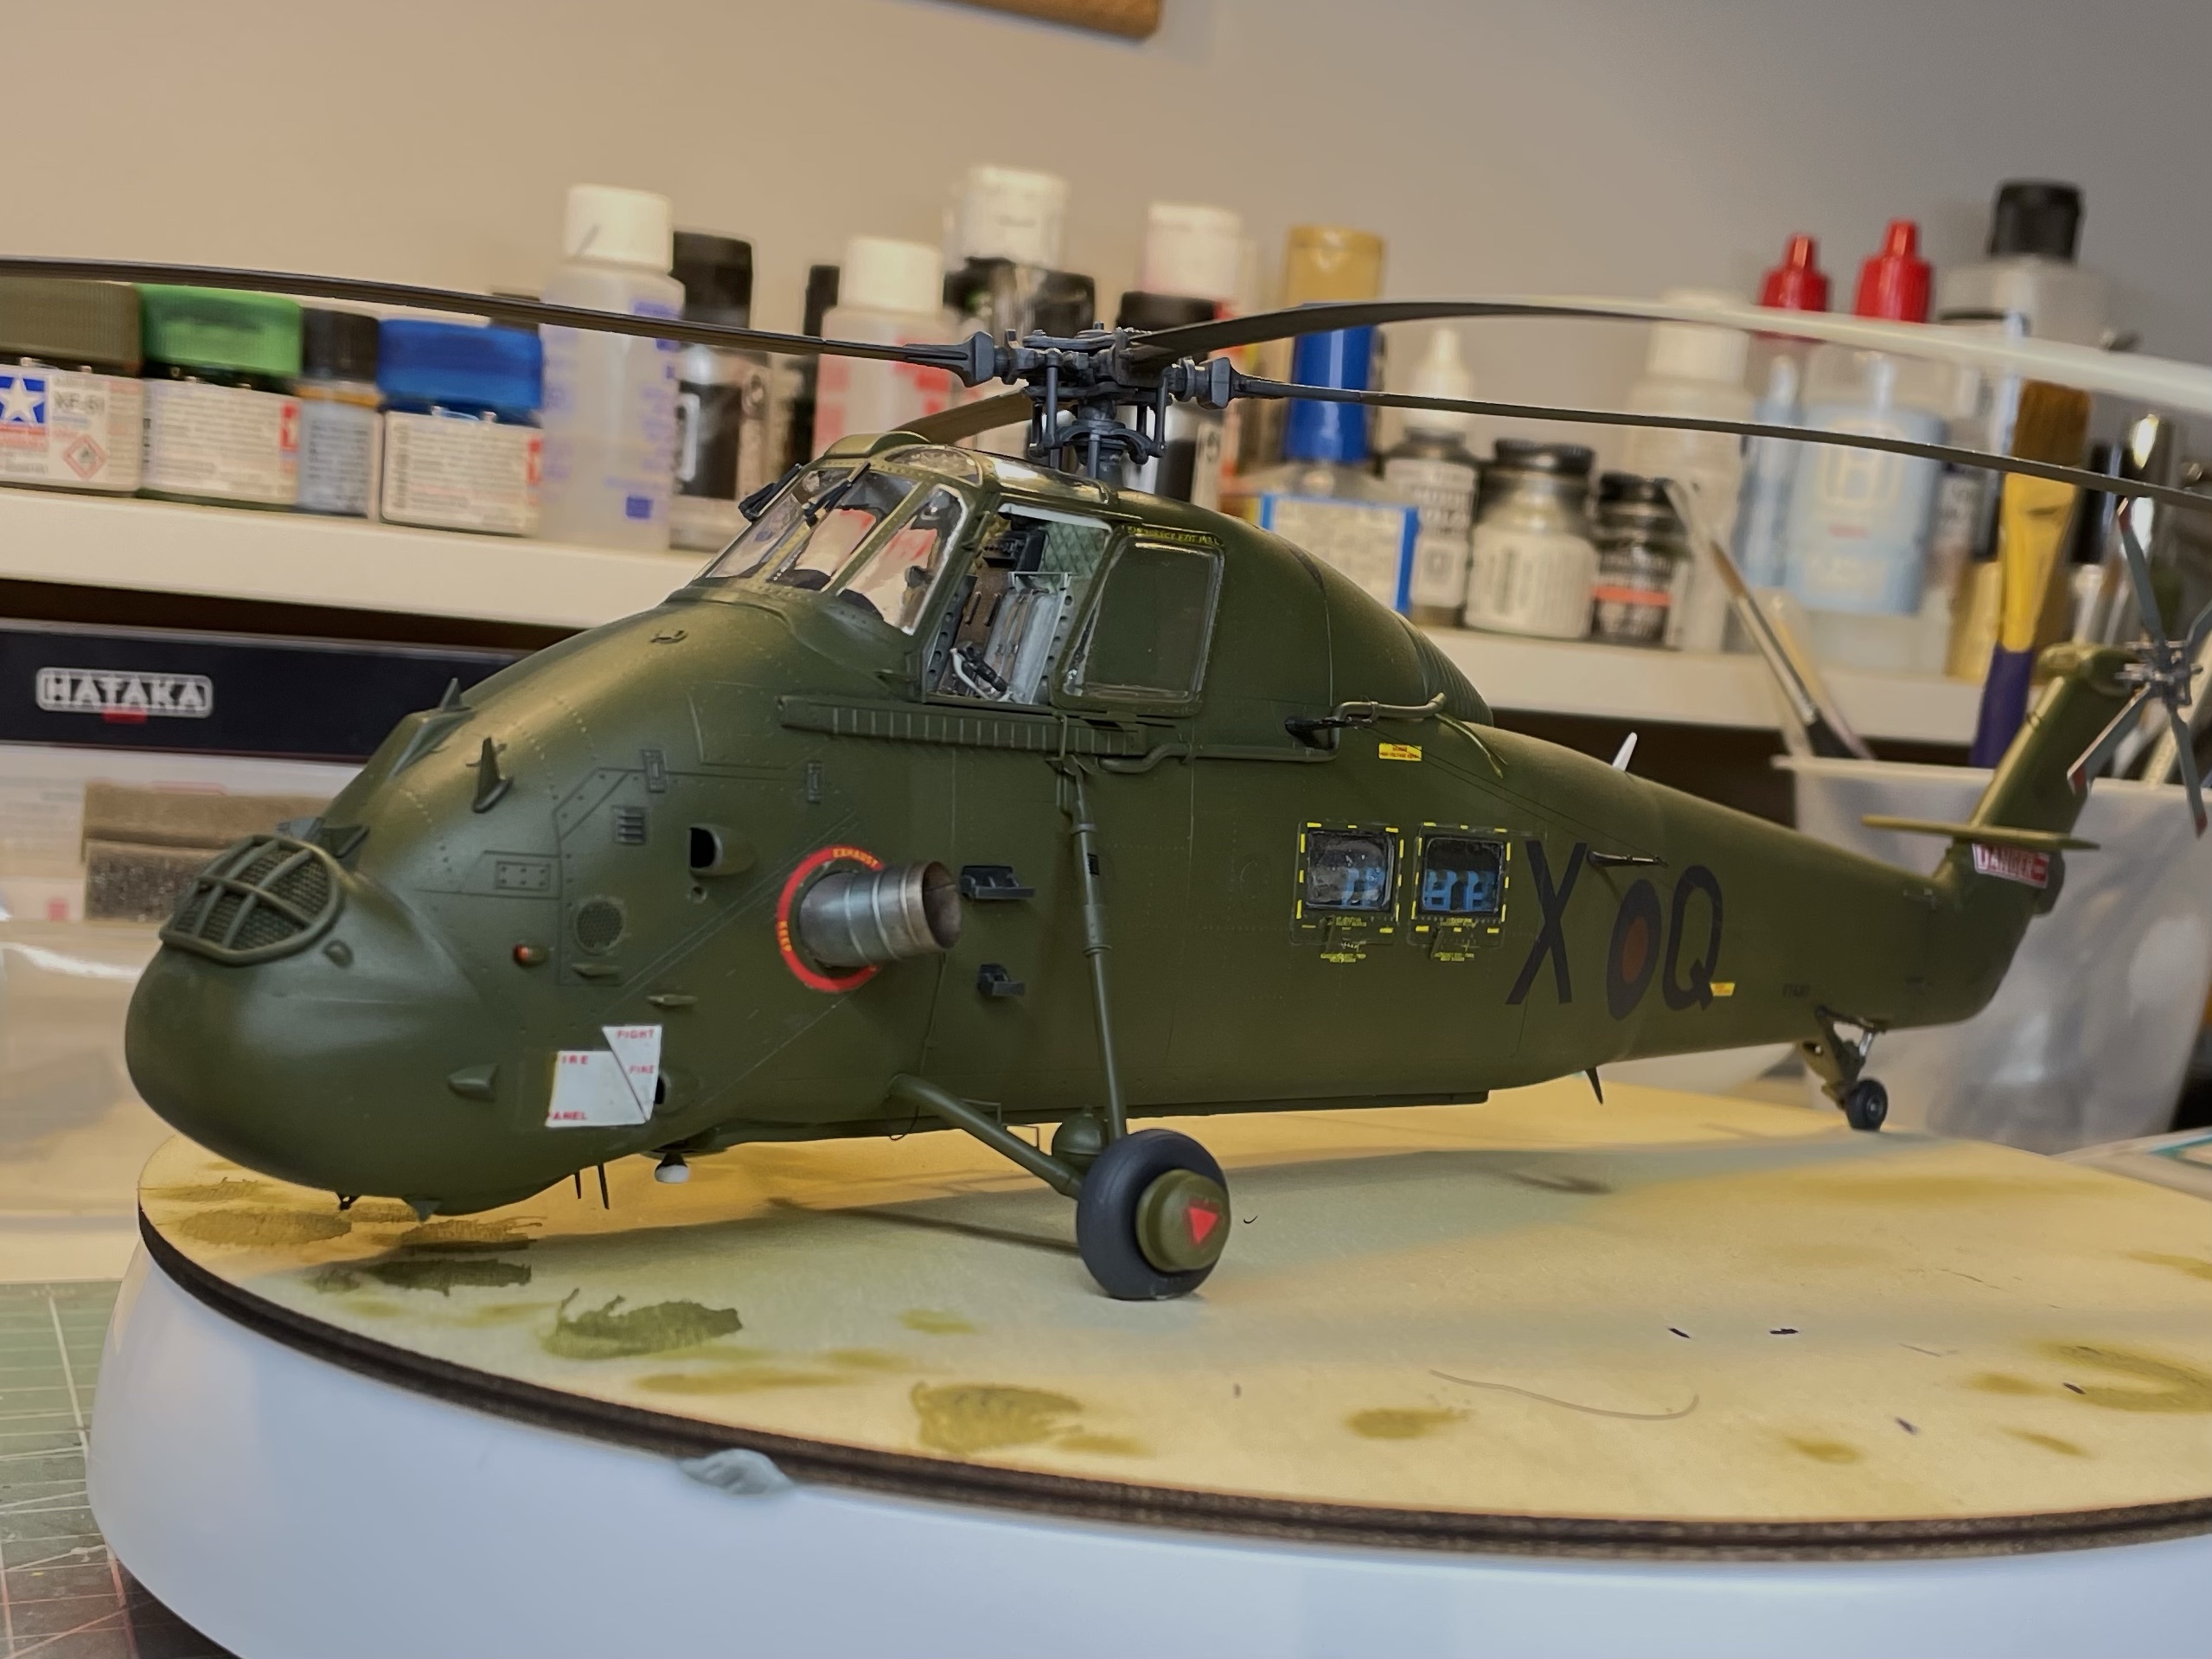
Initially, I thought the markings were going to be a problem as Italeri had only included white stencil decals while at first glance at the photos it seems they were supposed to be black. However, when I started to properly look, it became apparent that there weren’t very many stencils on the airframe after all. I learned later that the all-green paint scheme was a base-level change from the original two-colour camouflage finish and most bases would not have had the stencils with which to repaint them after the green was applied. The marked up photo above shows where there is evidence of the original stencils having been painted over, sometimes not very well.
I created some masks for the main markings, those being the roundel and the code letters and after painting them I glossed up the airframe for the few decals I did apply.


Once the decals were applied I painted over them 🙂
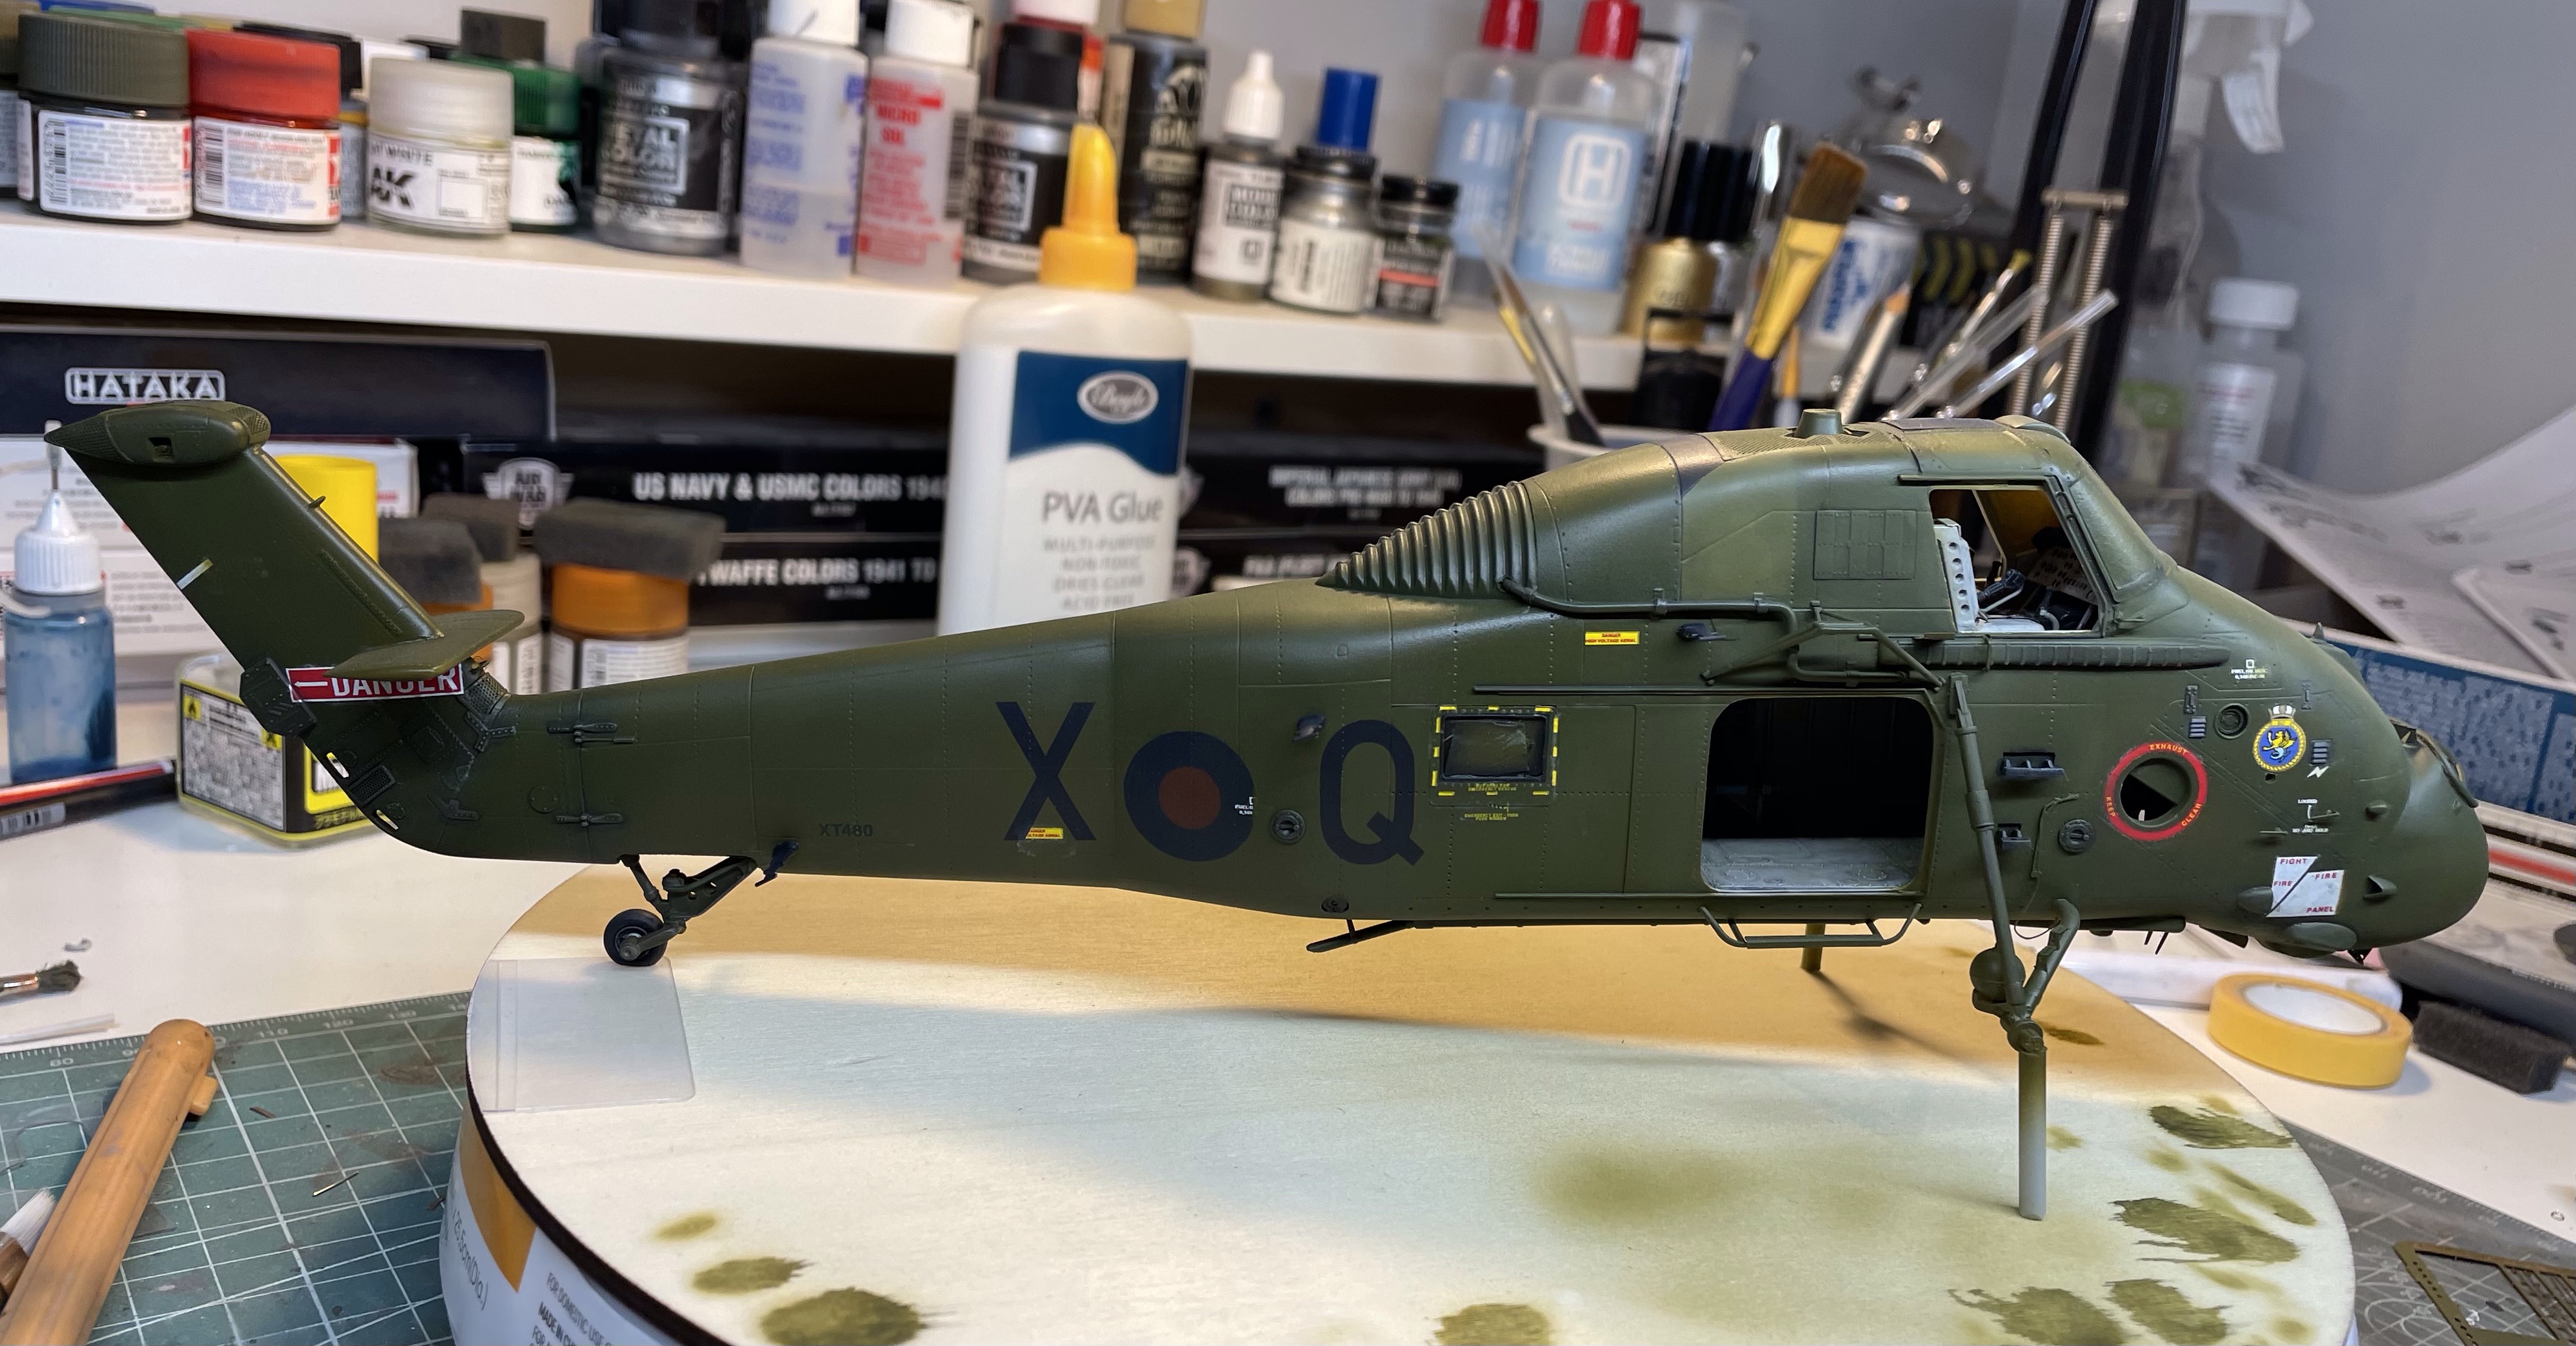
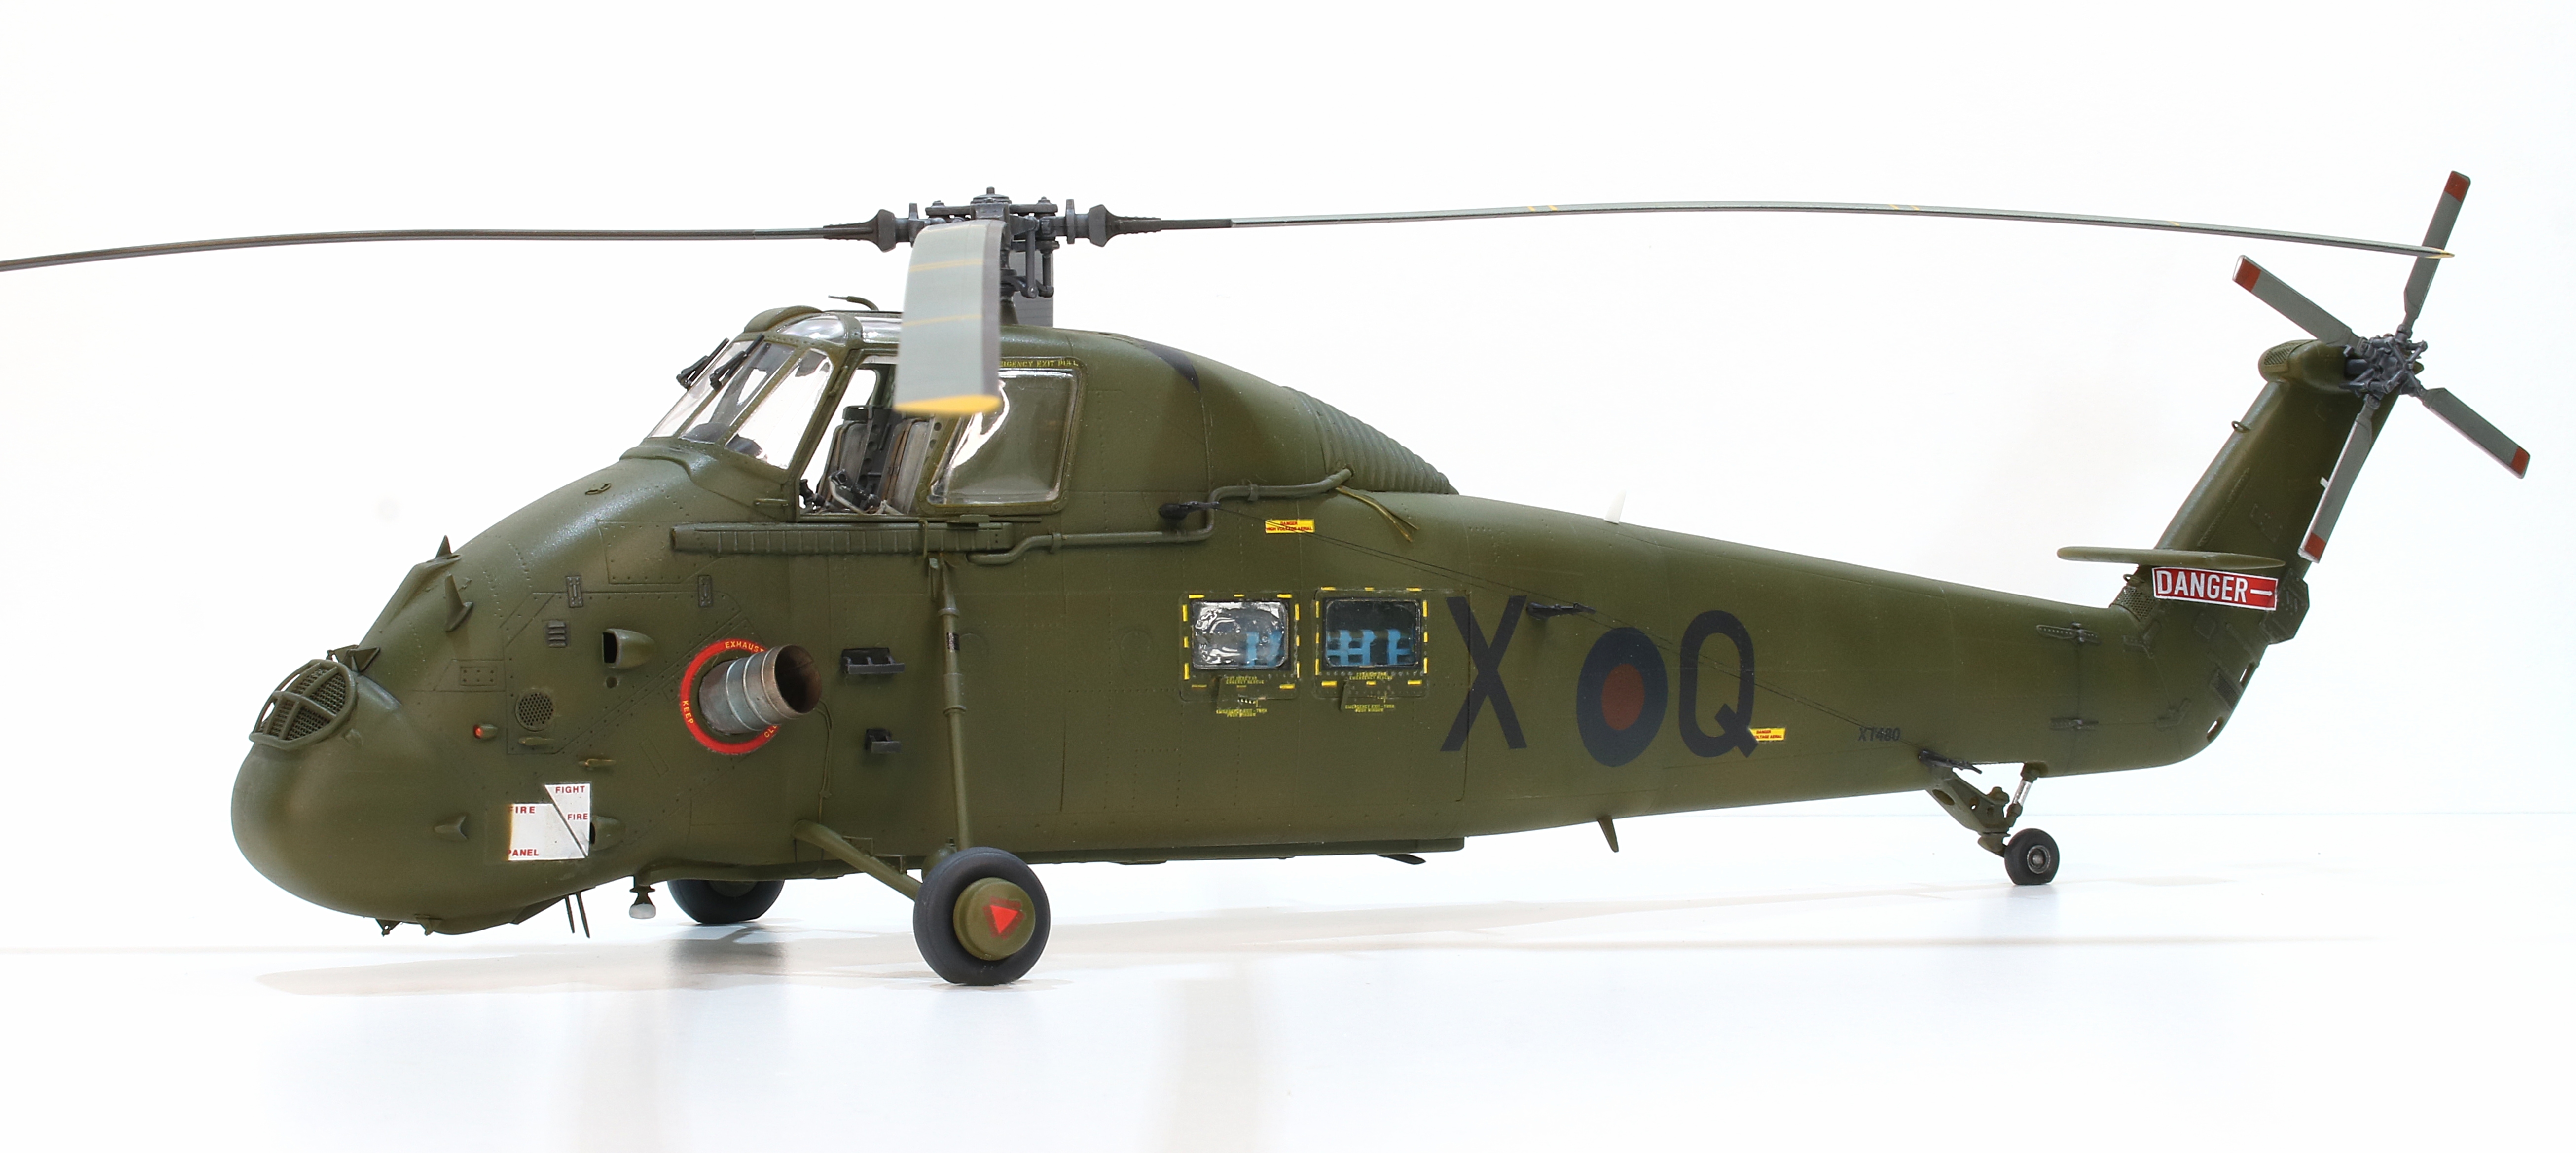
Of note; the yellow dashed lines around the windows were hideously over-thick and needed fixing. I painstakingly masked half their thickness and painted over them to create something far more palatable.
Finishing
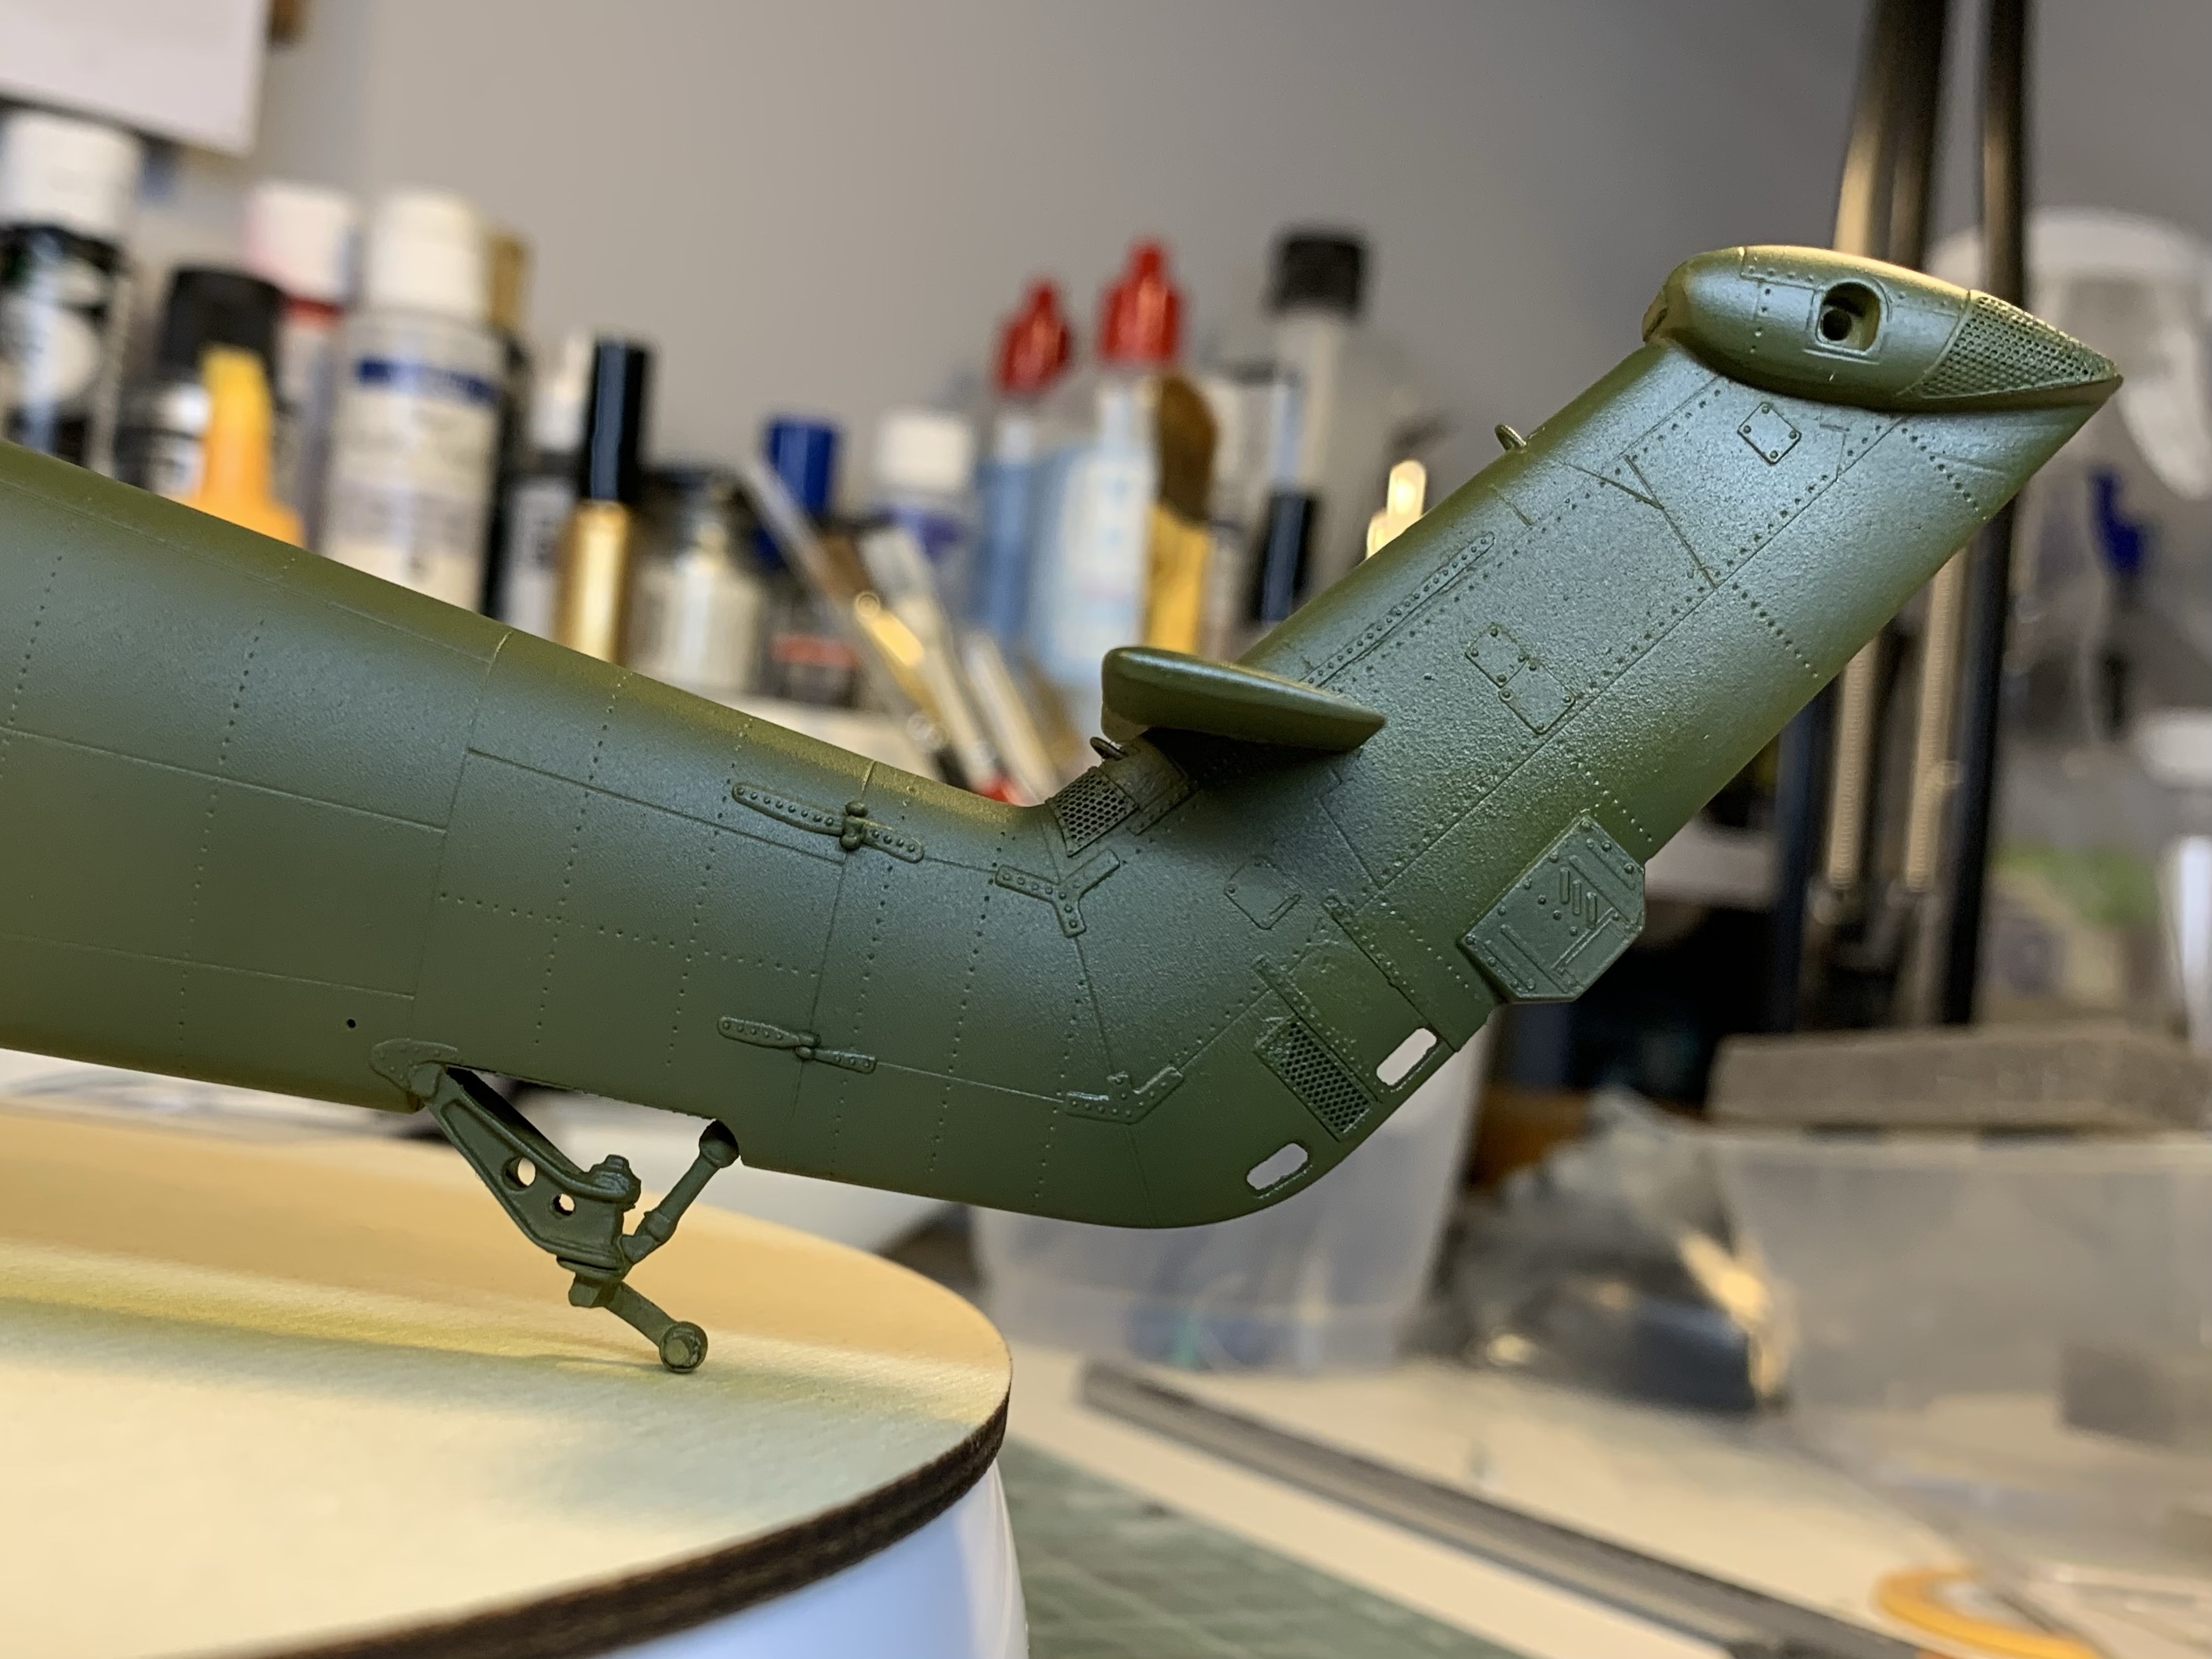
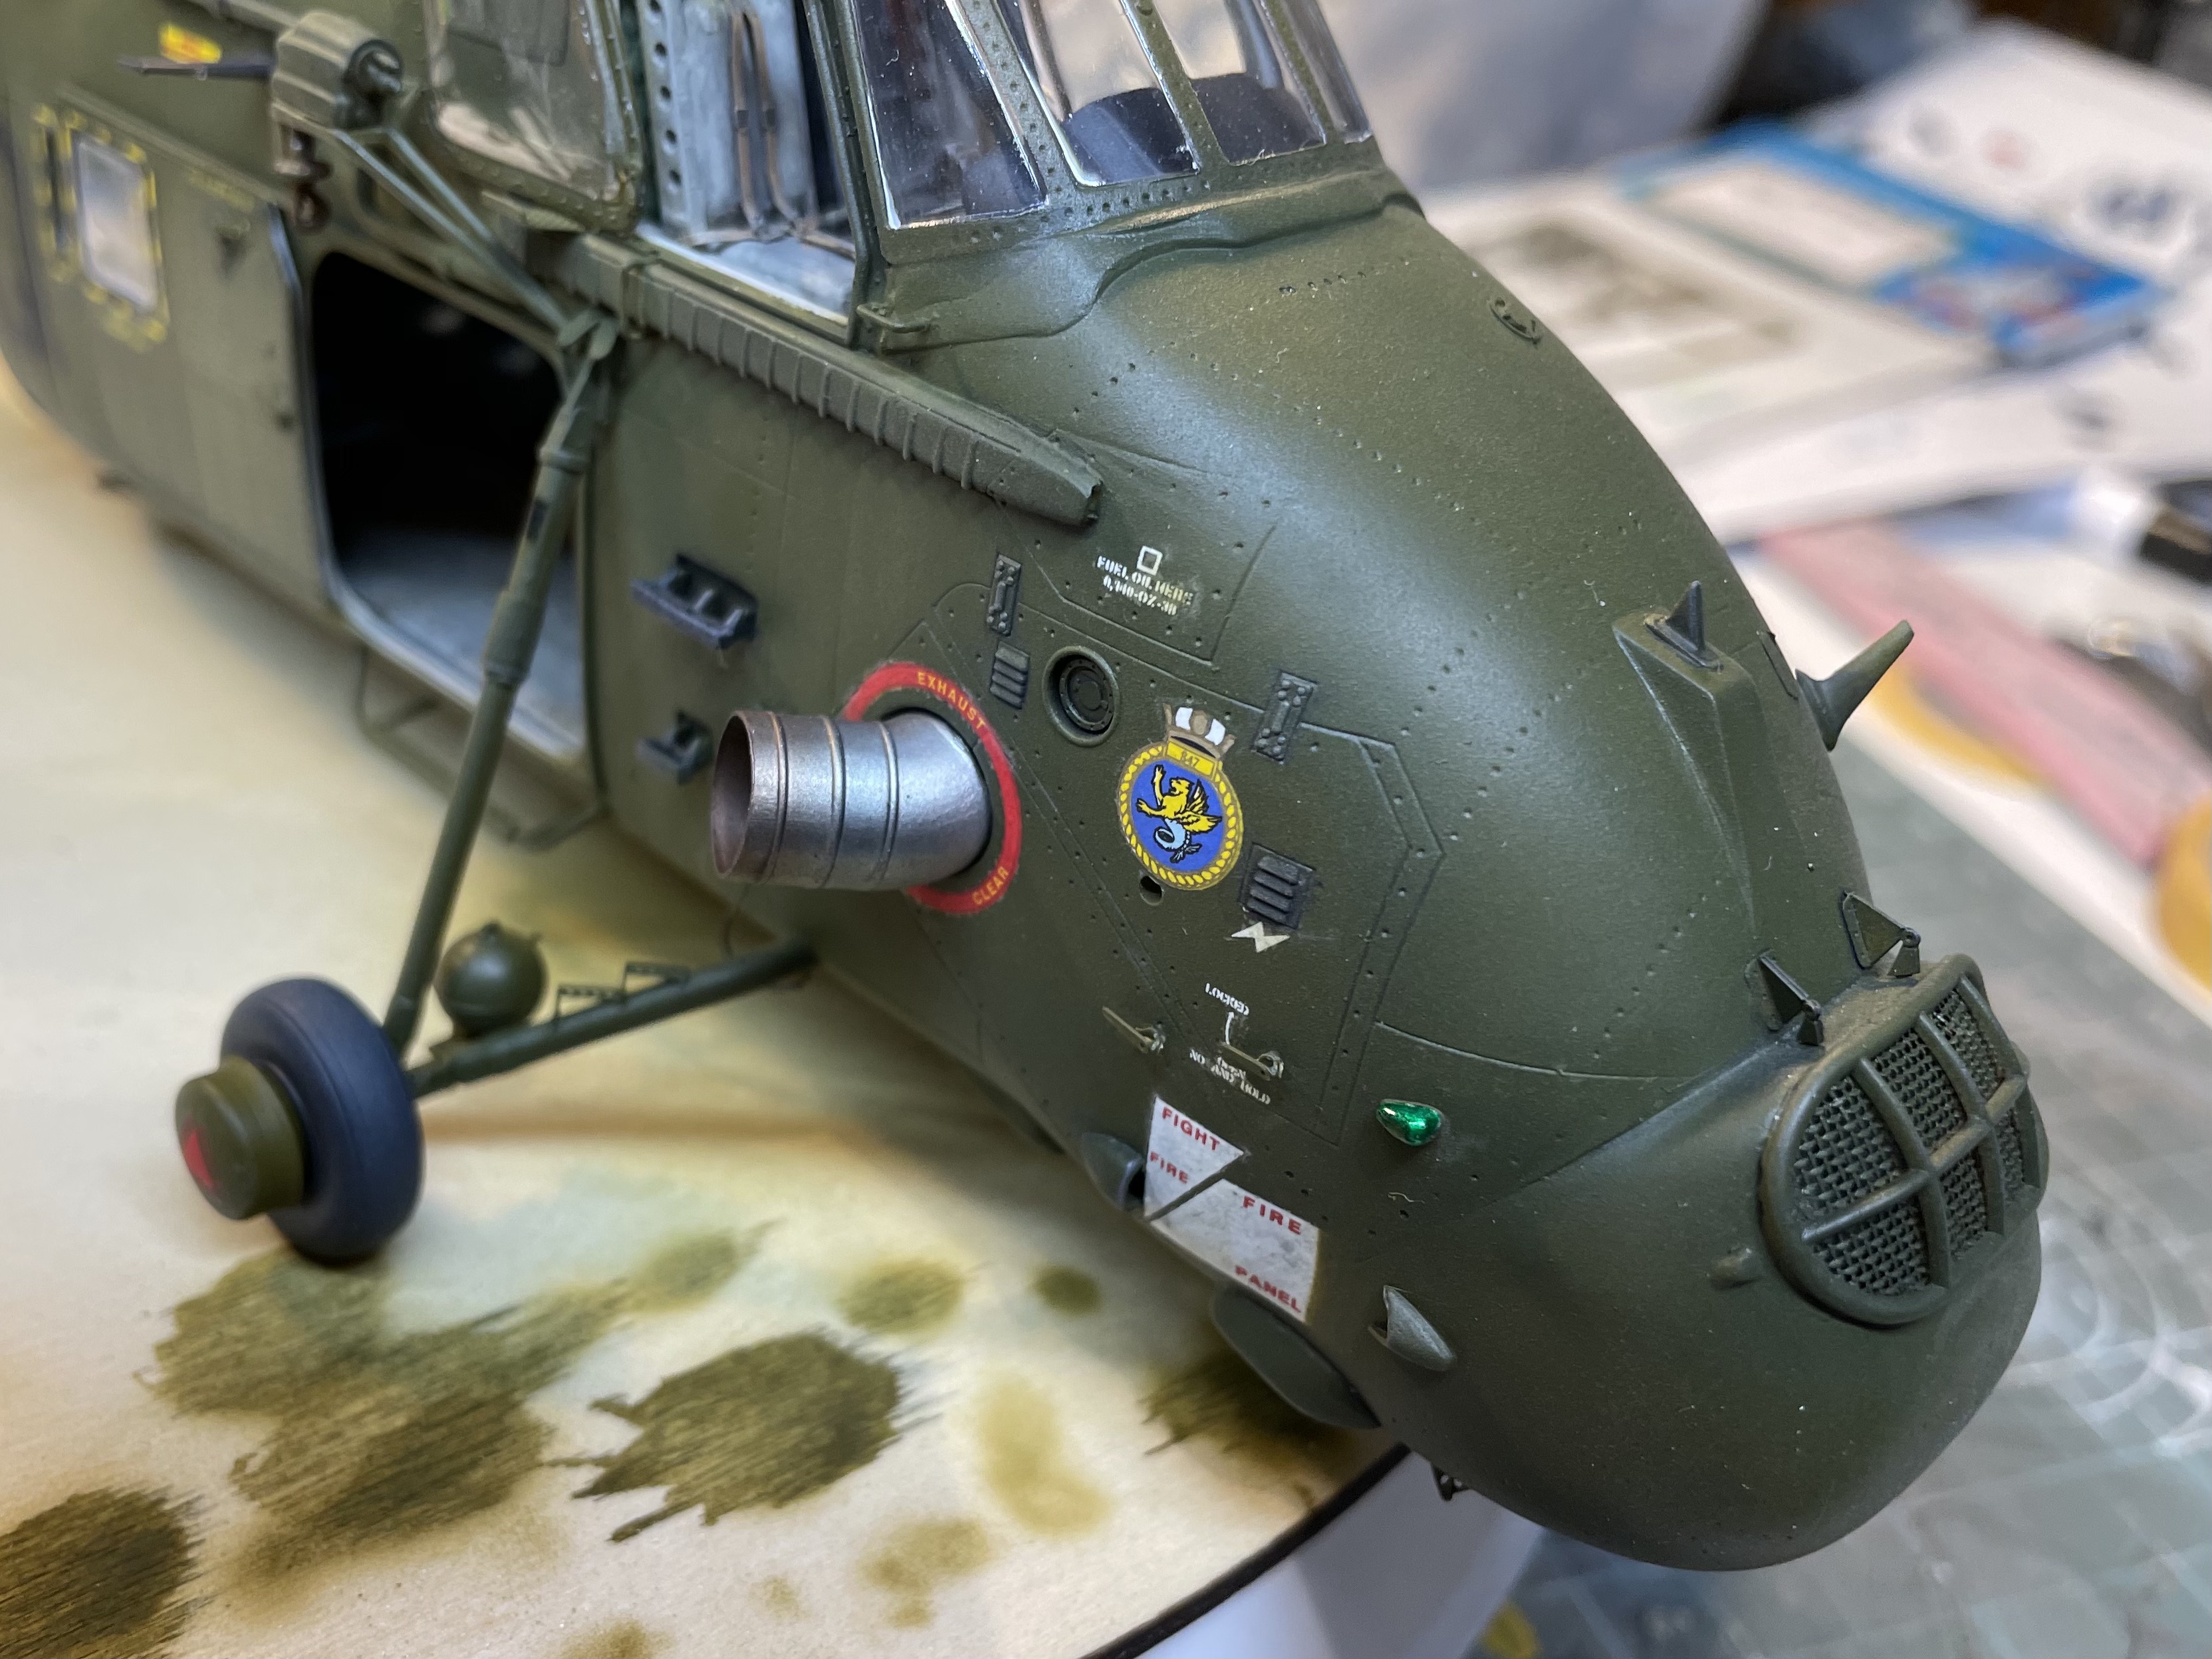
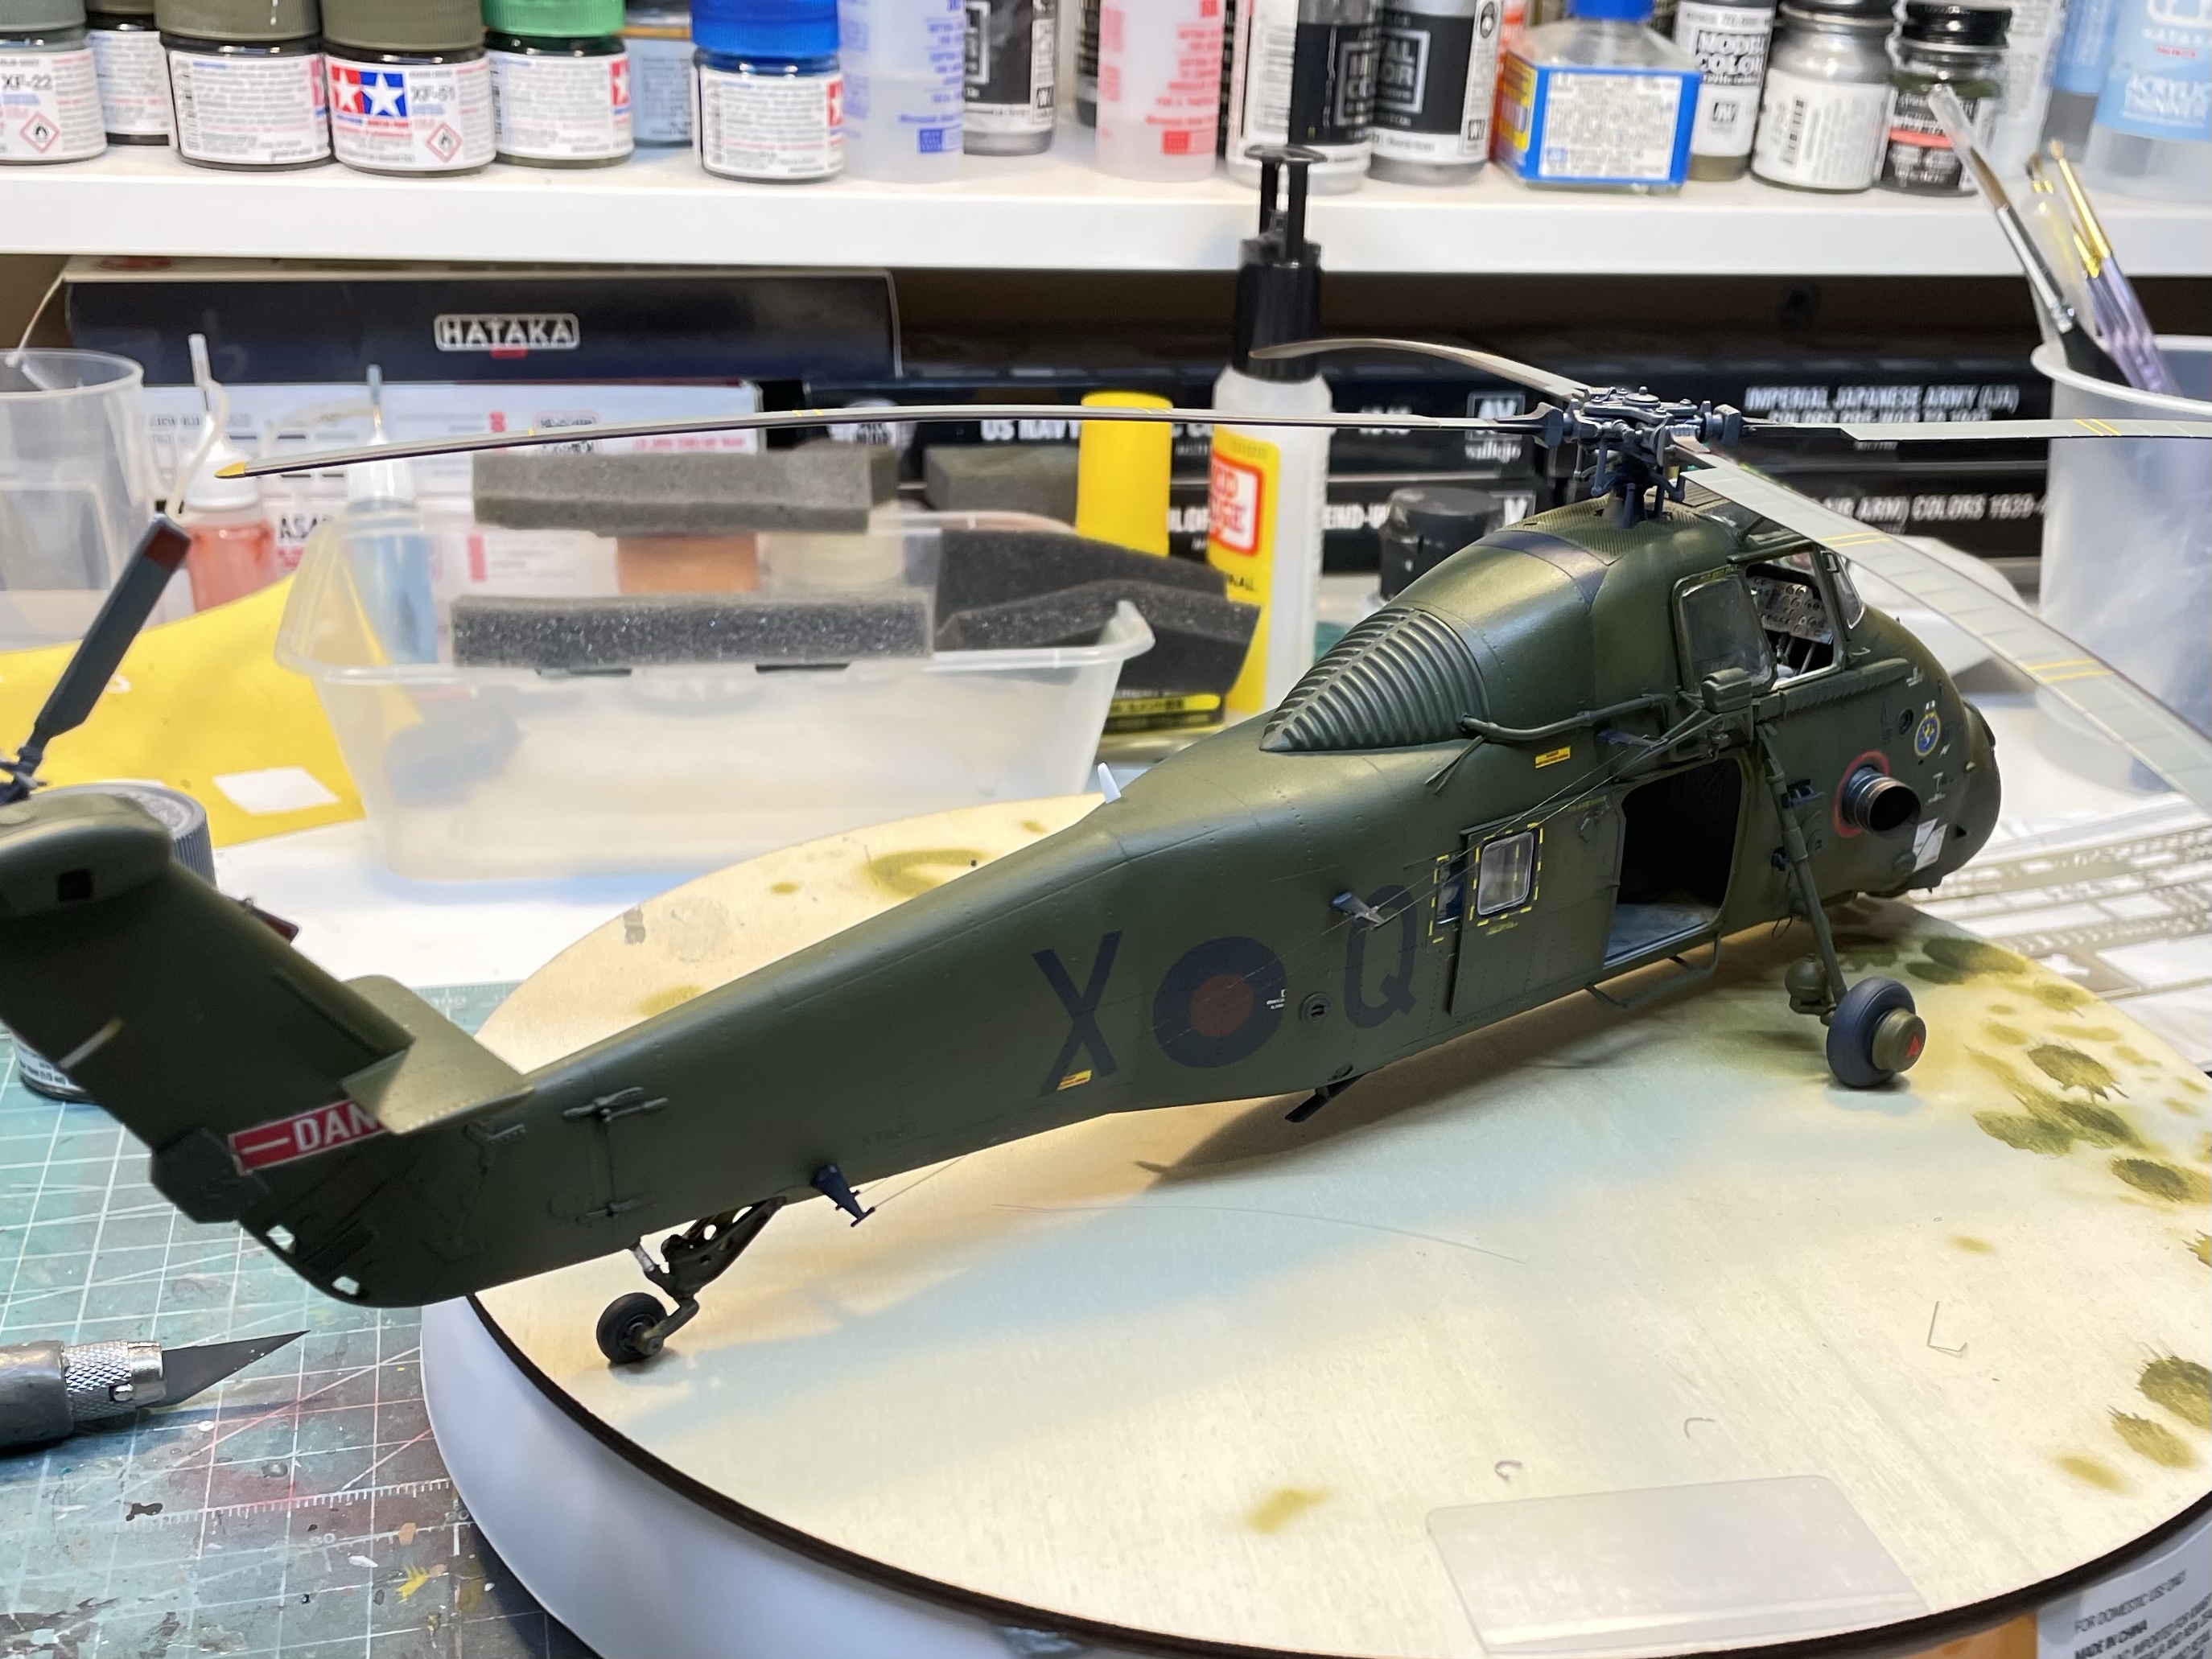
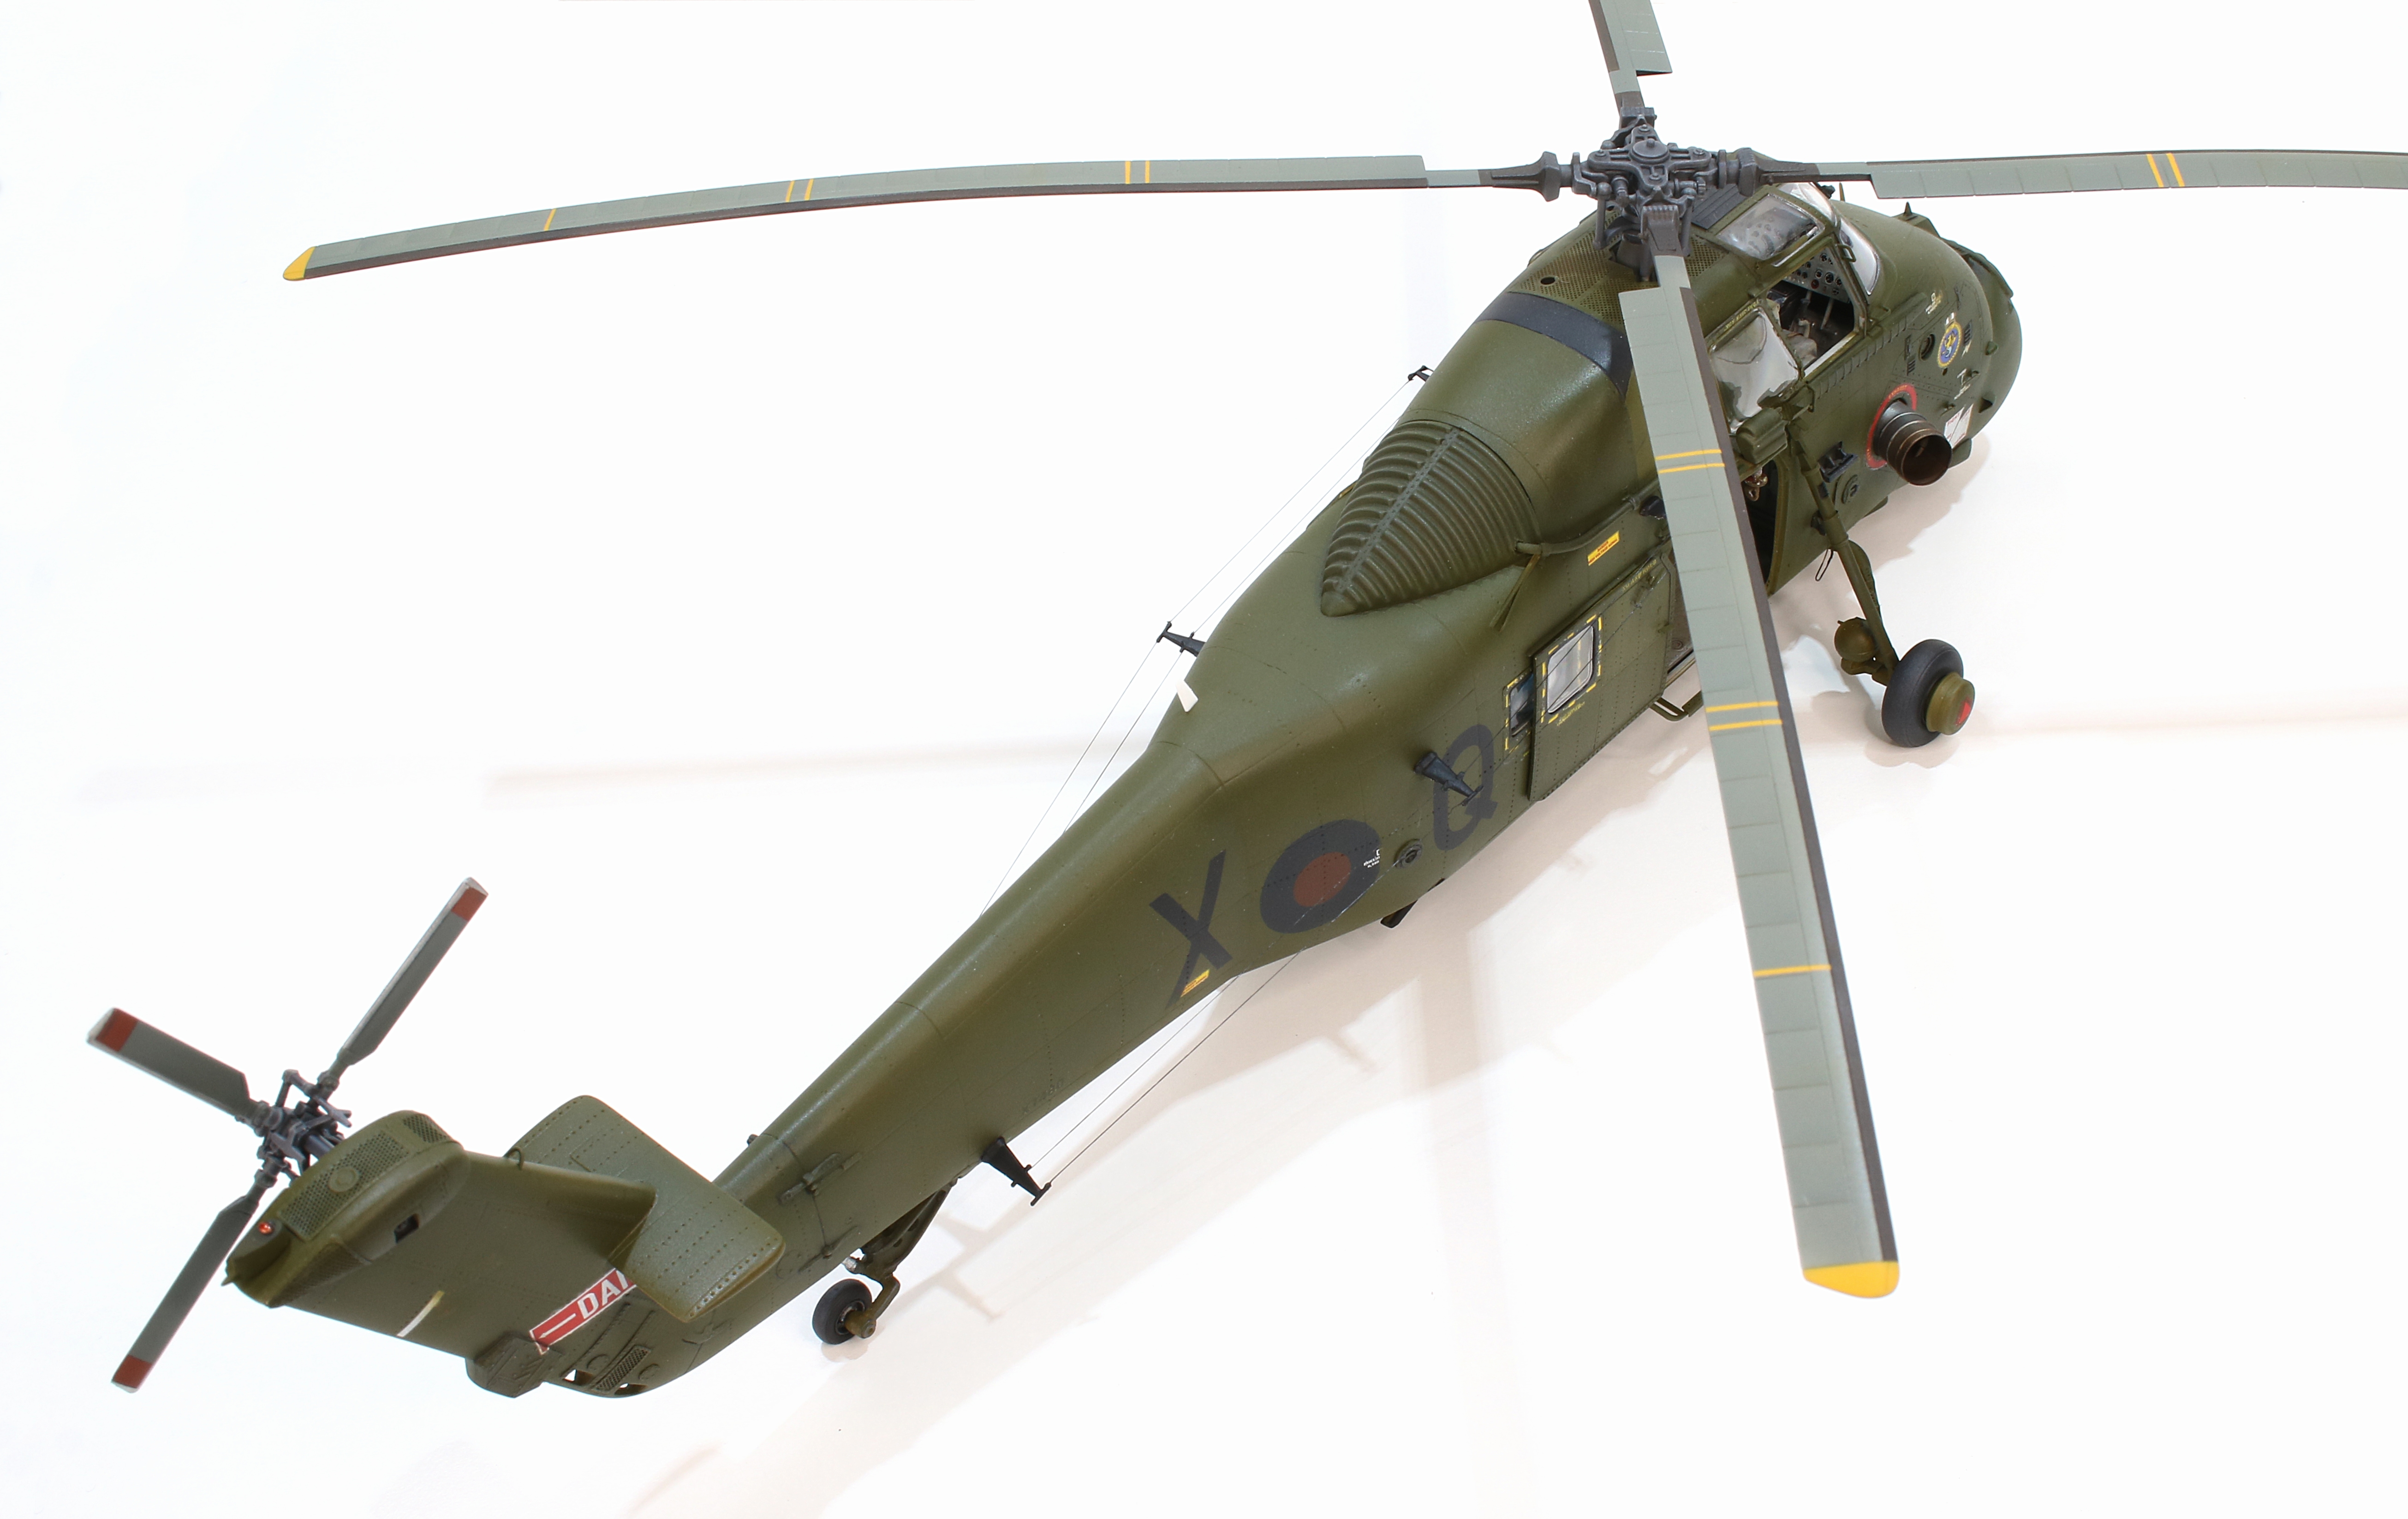
The finishing touches included the exhausts, the rotors and wheels.
As my first attempt at a heated metal finish I was quite pleased with how the exhausts turned out. I based them with Vallejo Aluminium mixed with a little flat base and Future/Pledge to get a smooth finish. I then sprayed multiple thin Tamiya Clear Red and Clear Blue coats, even mixing them to get a purple colour. After going back and forth for a few minutes I was happy with where they were and stopped. Lastly, I spayed a light Burnt Umber around the outer edge and into the exhaust itself.
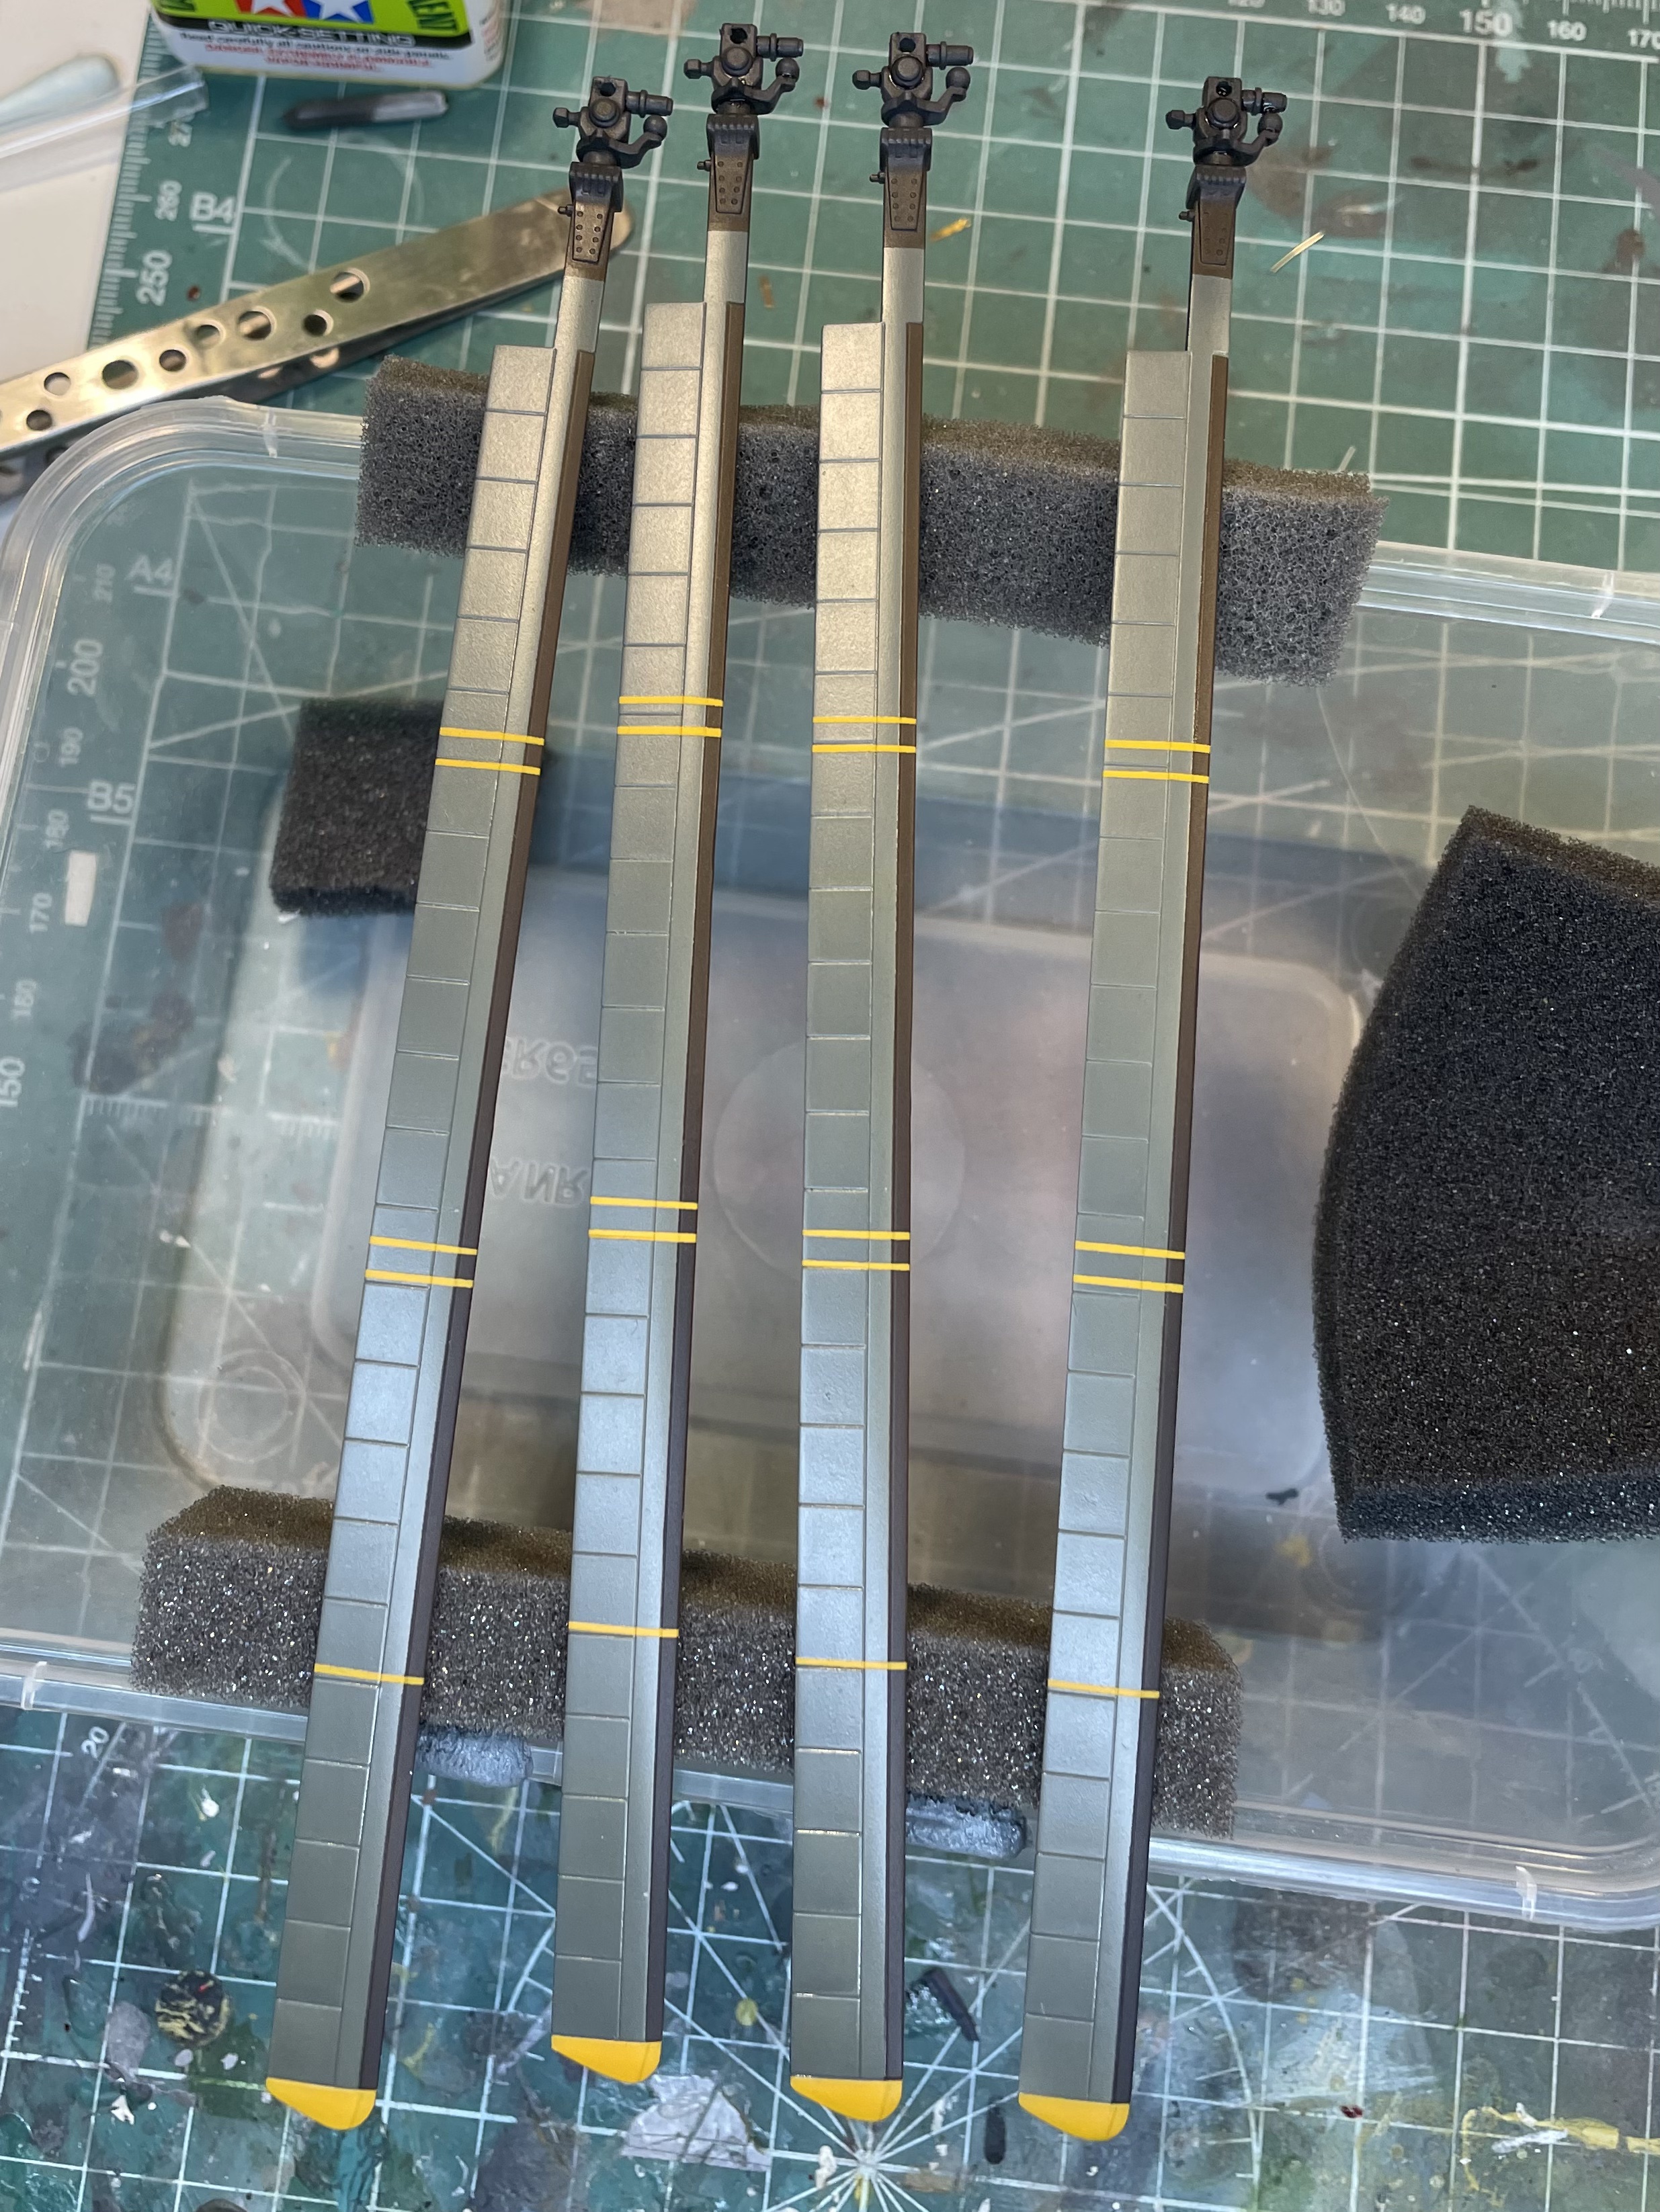
The rotors were a simple matter of painting and assembling. I used a solid application of Burnt Umber for the main rotor leading edge anti-corrosion application as I was told it was a dark brown colour rather than the more commonly applied black. You may notice that I incorrectly painted the yellow lines over the anti-corrosion, when this error was pointed out it was a simple task to fix them.

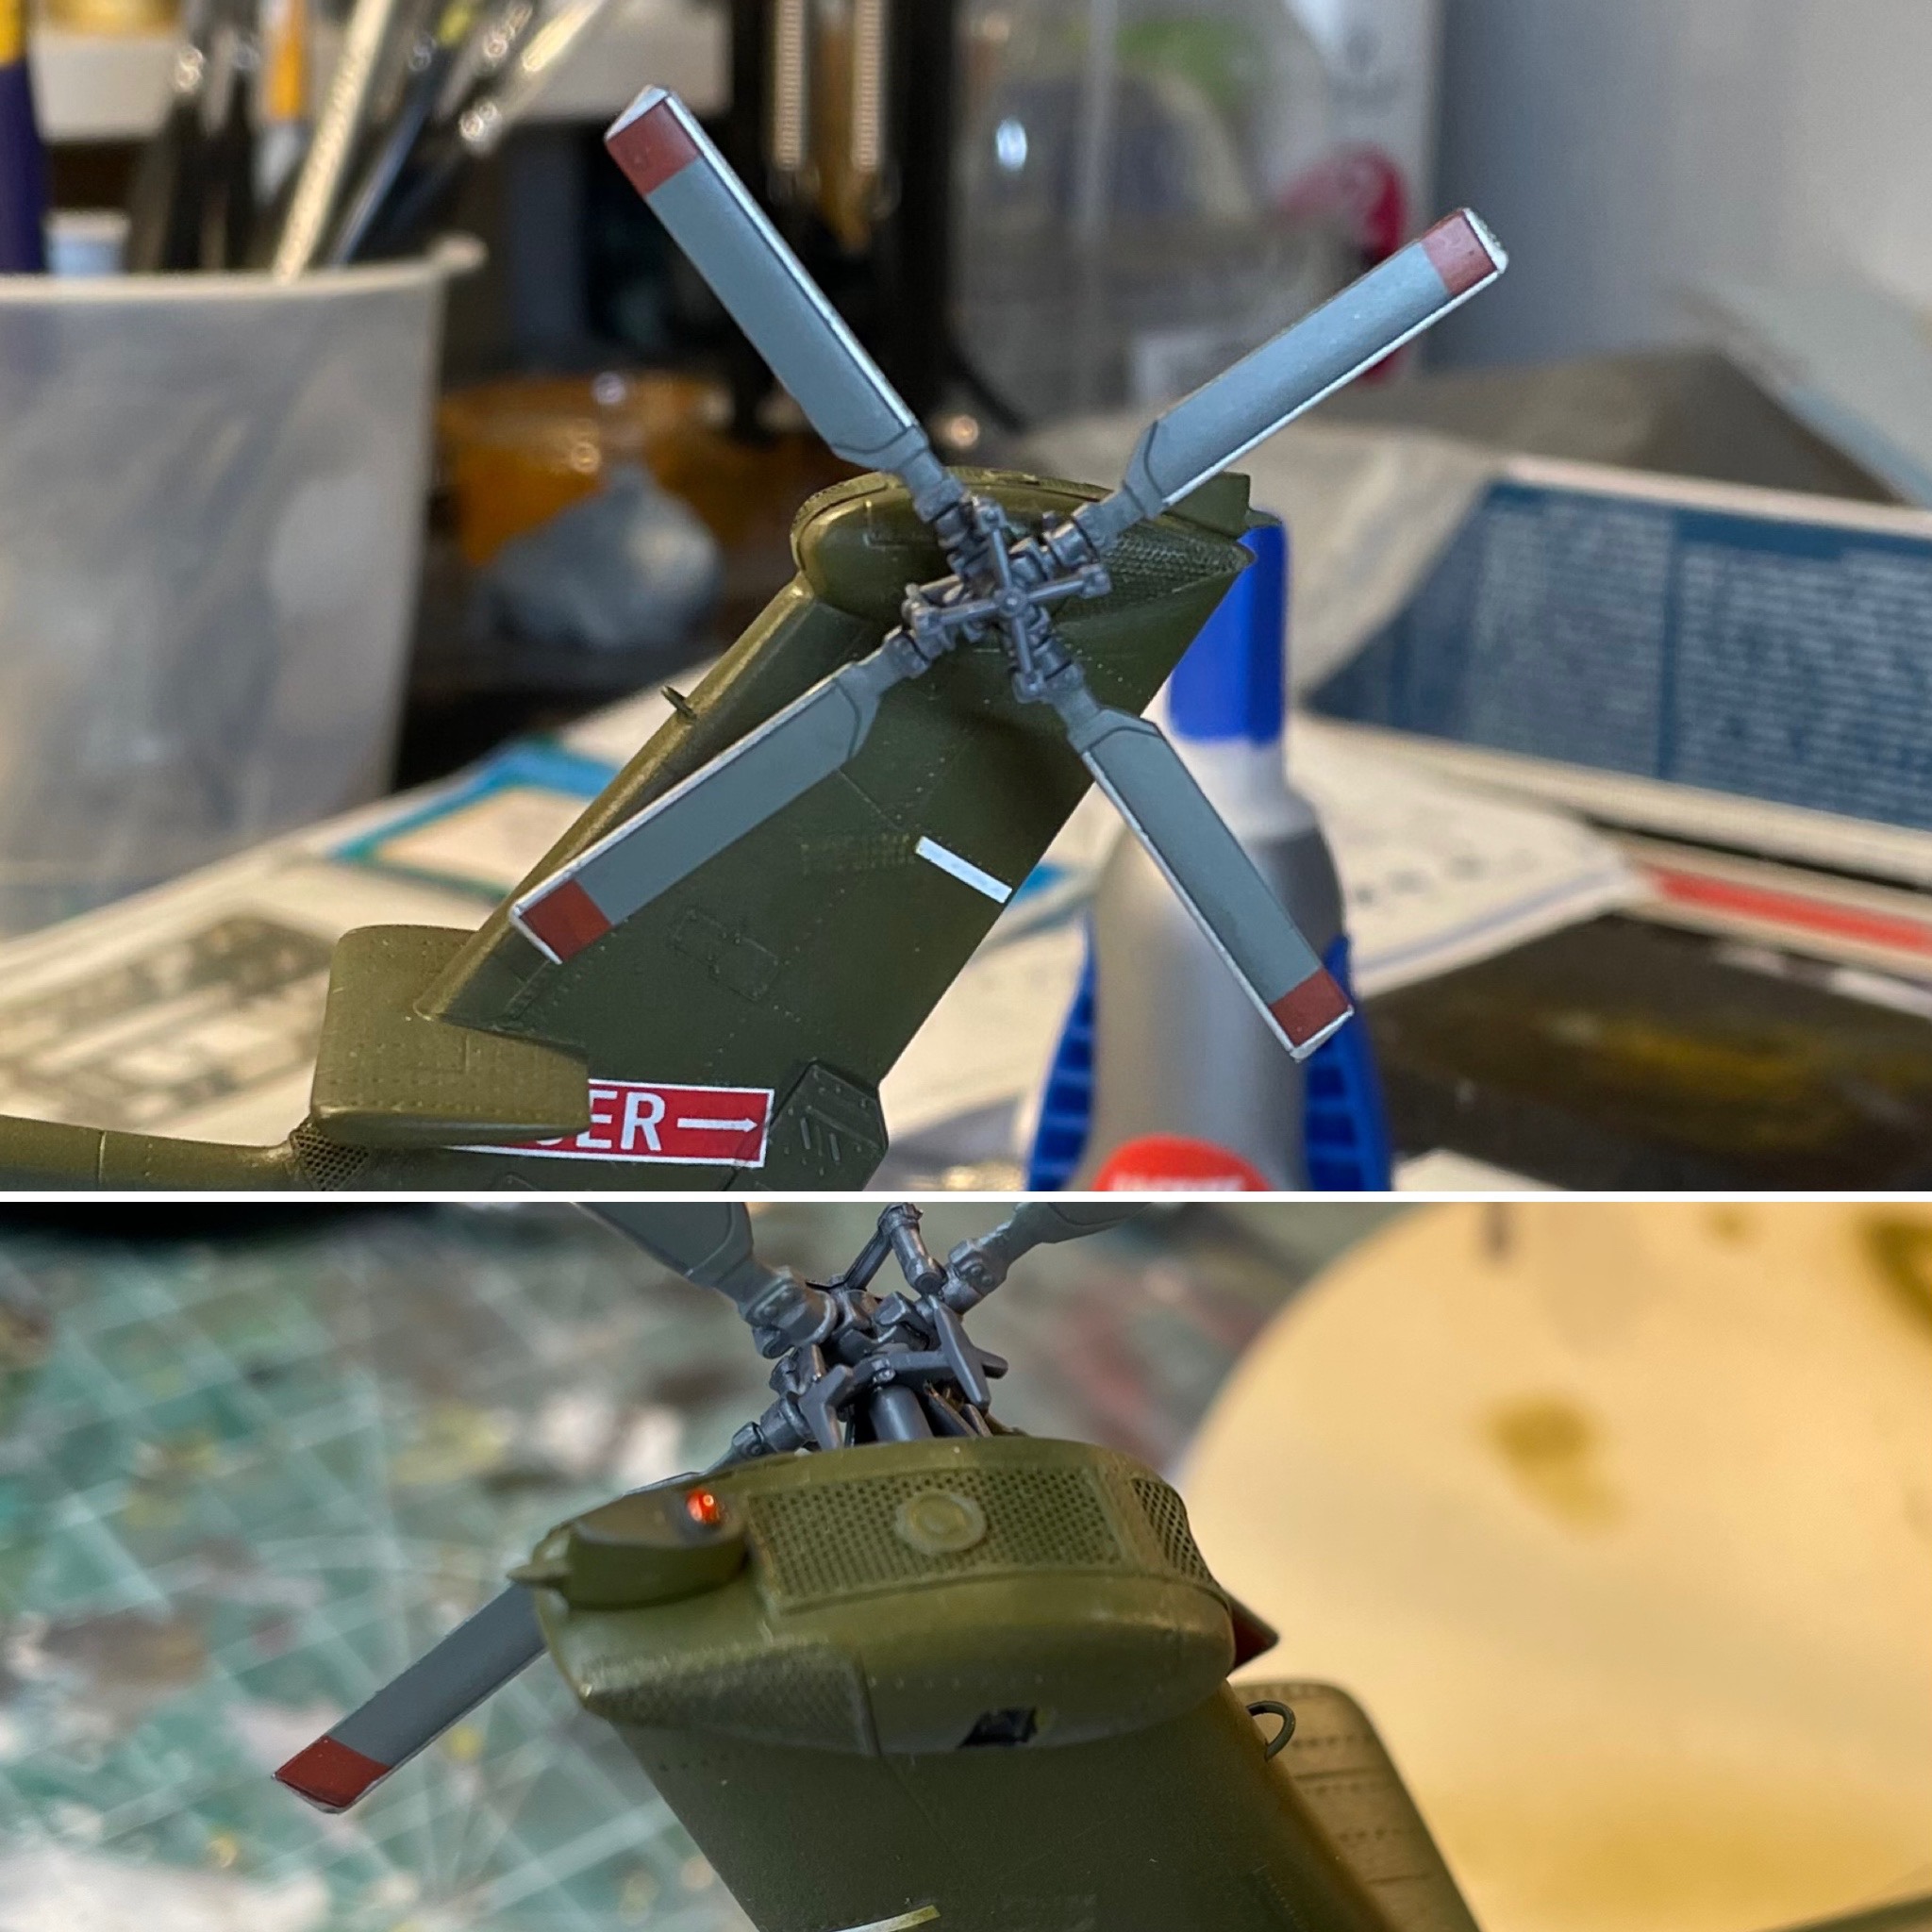

Next, I tackled the navigation lights and antenna wires, as well as attaching the wheels and the two blade antennas mounted on the fuselage just rear of the lobster deck; the upper one being painted white and the lower painted green. Italeri showed those blade antennas in their drawings but didn’t actually include them in the parts they provided in the kit.
The antenna wires gave me fits to begin with. After trying stretched sprue and brass wire I went to AK’s elasticated thread and knocked off the entire job in fifteen minutes.

And, as they say, just like that it was finished.
There was a moment in this build where I nearly abandoned it. The more I learned about the details in the Wessex airframe, the longer the list became of things to fix to make it “accurate”. After a mojo reset however, I remembered why I was building this one – for me – and decided I could live with those things I couldn’t fix because it was too late (the fuel fillers and winch hatch, for example) and those I simply didn’t care enough to worry about.
Looking at my Wessex now, a month or so removed form finishing it, I’m really pleased with it.
Gallery
References
My references on this piece were more or less the photos included. I did however gain some great advice and assistance from a few individuals on the forums at Britmodeller.com.
The final reference in this list is recommended reading for anyone seeking a full understanding of the entire campaign’s logistics challenges and ultimate triumphs.
- https://smallwarsjournal.com/documents/bolia1.pdf
- https://en.wikipedia.org/wiki/RFA_Sir_Galahad_%281966%29
- https://www.royalnavy.mod.uk/news-and-latest-activity/news/2021/june/08/20210608-sir-galahad
- https://en.wikipedia.org/wiki/5th_Infantry_Brigade_(United_Kingdom)
- https://en.wikipedia.org/wiki/SS_Atlantic_Conveyor
- https://www.scotsman.com/news/uk-news/falklands-war-was-nearly-disaster-2512877
- https://ftp.idu.ac.id/wp-content/uploads/ebook/ip/BUKU%20TENTANG%20LOGISTIK%20MILITER/LOGISTIK%20PERANG/Logistics%20in%20the%20Falklands%20War%20%28%20PDFDrive%20%29.pdf
- http://guardsmagazine.com/features/2022%20Summer/02%20FalklandsWelshGds.html
Copyright ©2022
This article, its text, and photos of the model is my original work and is protected by copyright in its entirety, except where noted. All research sources are listed in the References and Credits section above, including photos from official sources. All other images were sourced from the internet and are used here under protection of fair-use. Any copyrighted images will be removed or credited forthwith upon request by its rightful owner.


Leave a comment