“No housewife on a shopping spree could have crammed more into her string bag,”
Just over a year before the Japanese destroyed the United States Navy’s Pacific Battleship Fleet in its home port of Pearl Harbour, the Royal Navy attacked and crippled the Italian Navy in its home port at Taranto.
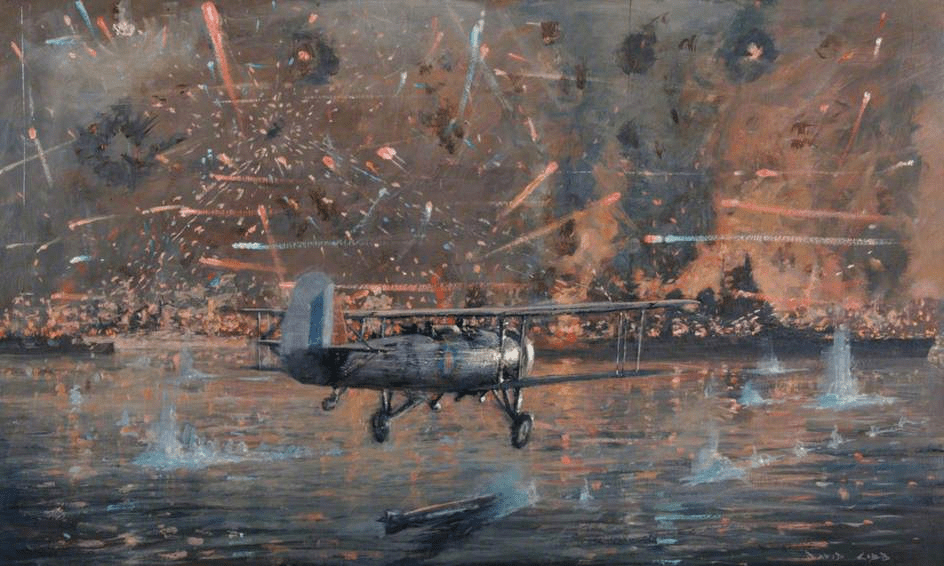
Charles David Cobb (1921–2014) National Museum of the Royal Navy, Portsmouth
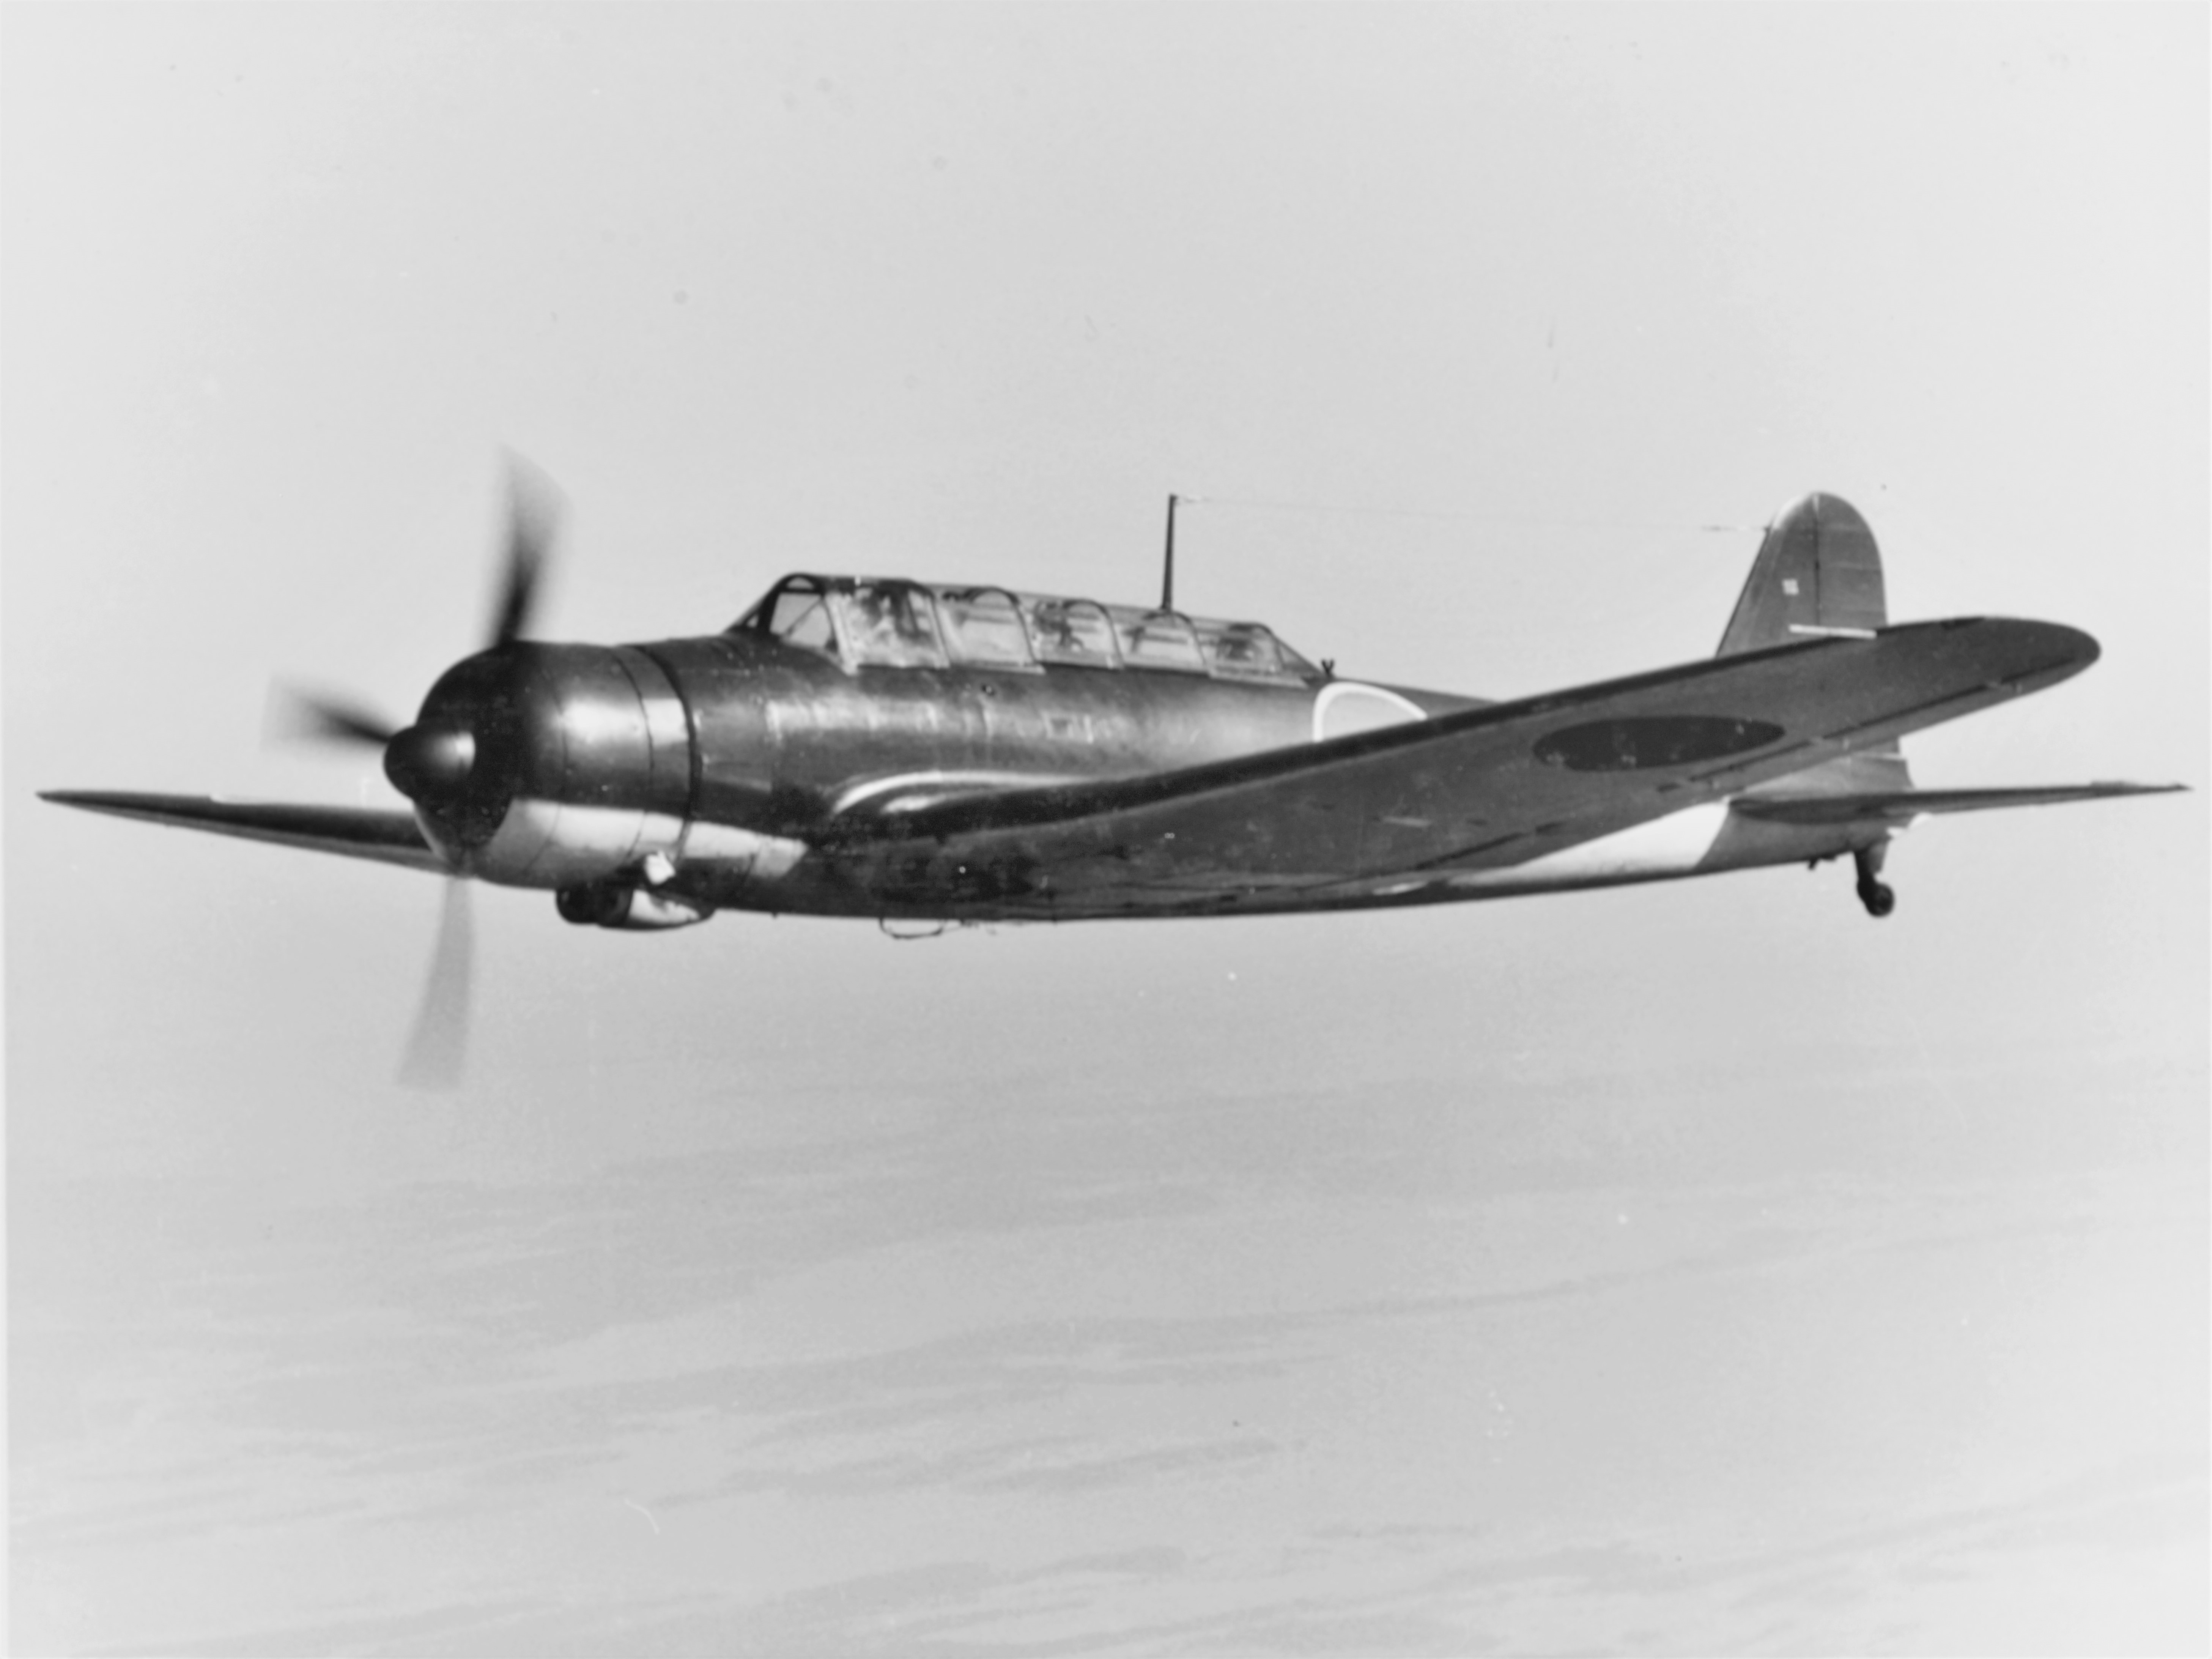
The Japanese delivered its attack using modern, all metal low-wing monoplane layout with retractable, wide-set conventional landing gear and enclosed cockpit, and each of the three types employed was designed for a specific role; the Nakajima B5N “Kate” as torpedo bomber, the Aichi D3A “Val” as dive bomber and the Mitsubishi A6M “Zero” (though officially “Zeke”) as fighter. All three were designed to take advantage of improved engine and airframe technologies during the late 1930’s,with their respective first flights being in 1937, 1937, and 1939. It’s fair to say that they represented some of the finest military aircraft design of the time.
The results the Japanese achieved at Pearl Harbour are well documented. Attacking with complete surprise with superior equipment they devastated the U.S.N. Battleships as well as installations and aircraft. If the USN aircraft carriers had been in port at the time they would likely have suffered the same level of damage. It was a brilliant operation, well executed – though not perfectly, that’s a topic for another day – and achieved much of its aims.
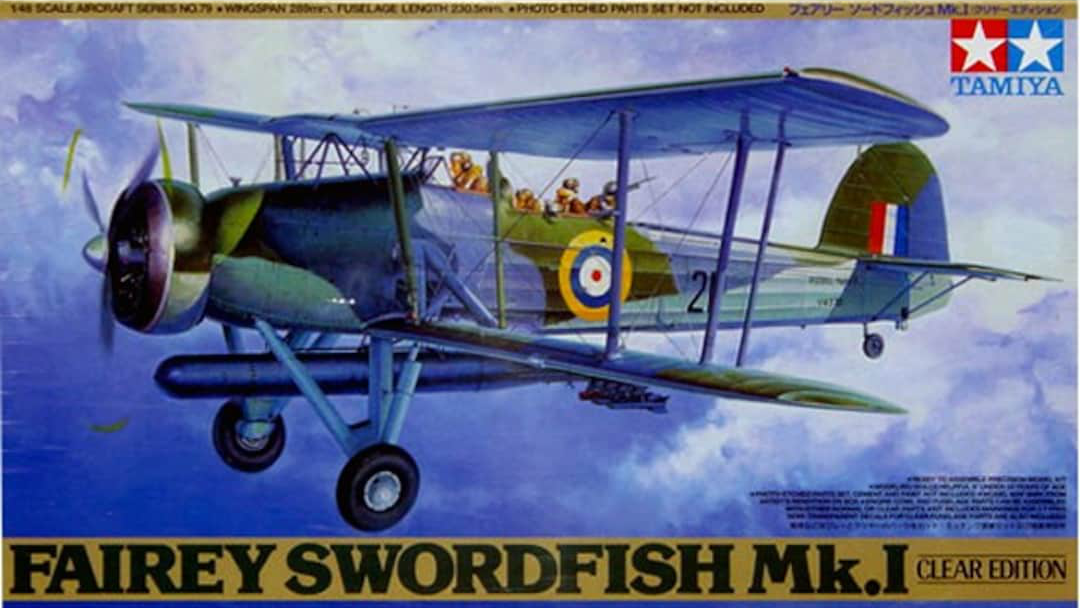
The Royal Navy achieved its earlier success at Taranto using an altogether different aircraft, a three-seat biplane of fabric-covered, metal-frame design; the Fairey Swordfish Mk.I. Designed as a multipurpose aircraft [eventually] capable of delivering both bomb and torpedo, the Swordfish’s prototype, the T.S.R.1 (Torpedo Spotter Reconnaissance 1) first flew in 1933 at least five years before the Japanese “Kate” and after further development – although by then already arguably obsolete – the Swordfish went into production in 1936.

Taranto
The arrival of the Royal Navy’s newest aircraft carrier HMS Illustrious in the Mediterranean in late August enabled Admiral Cunningham, who had taken command of the Mediterranean fleet in 1939 to put into effect long held plans to take the fight to the Italians.

Picture: Fleet Air Arm Museum CARS 1/171
One of the more remarkable parts of the Taranto Raid was in the preparation. At times involving three aircraft carriers, a battle squadron of four vessels led by HMS Warspite, a destroyer squadron of 12 destroyers, plus another 33 vessels of varying types, it used misdirection and bluff to prevent the Italians anticipating the real purpose of the manoeuvres.

The attack at Taranto was originally planned for the night of 24 October, 1940 but a hanger fire on HMS Illustrious in mid October damaged several aircraft and the operation was postponed to the night of 11th November.
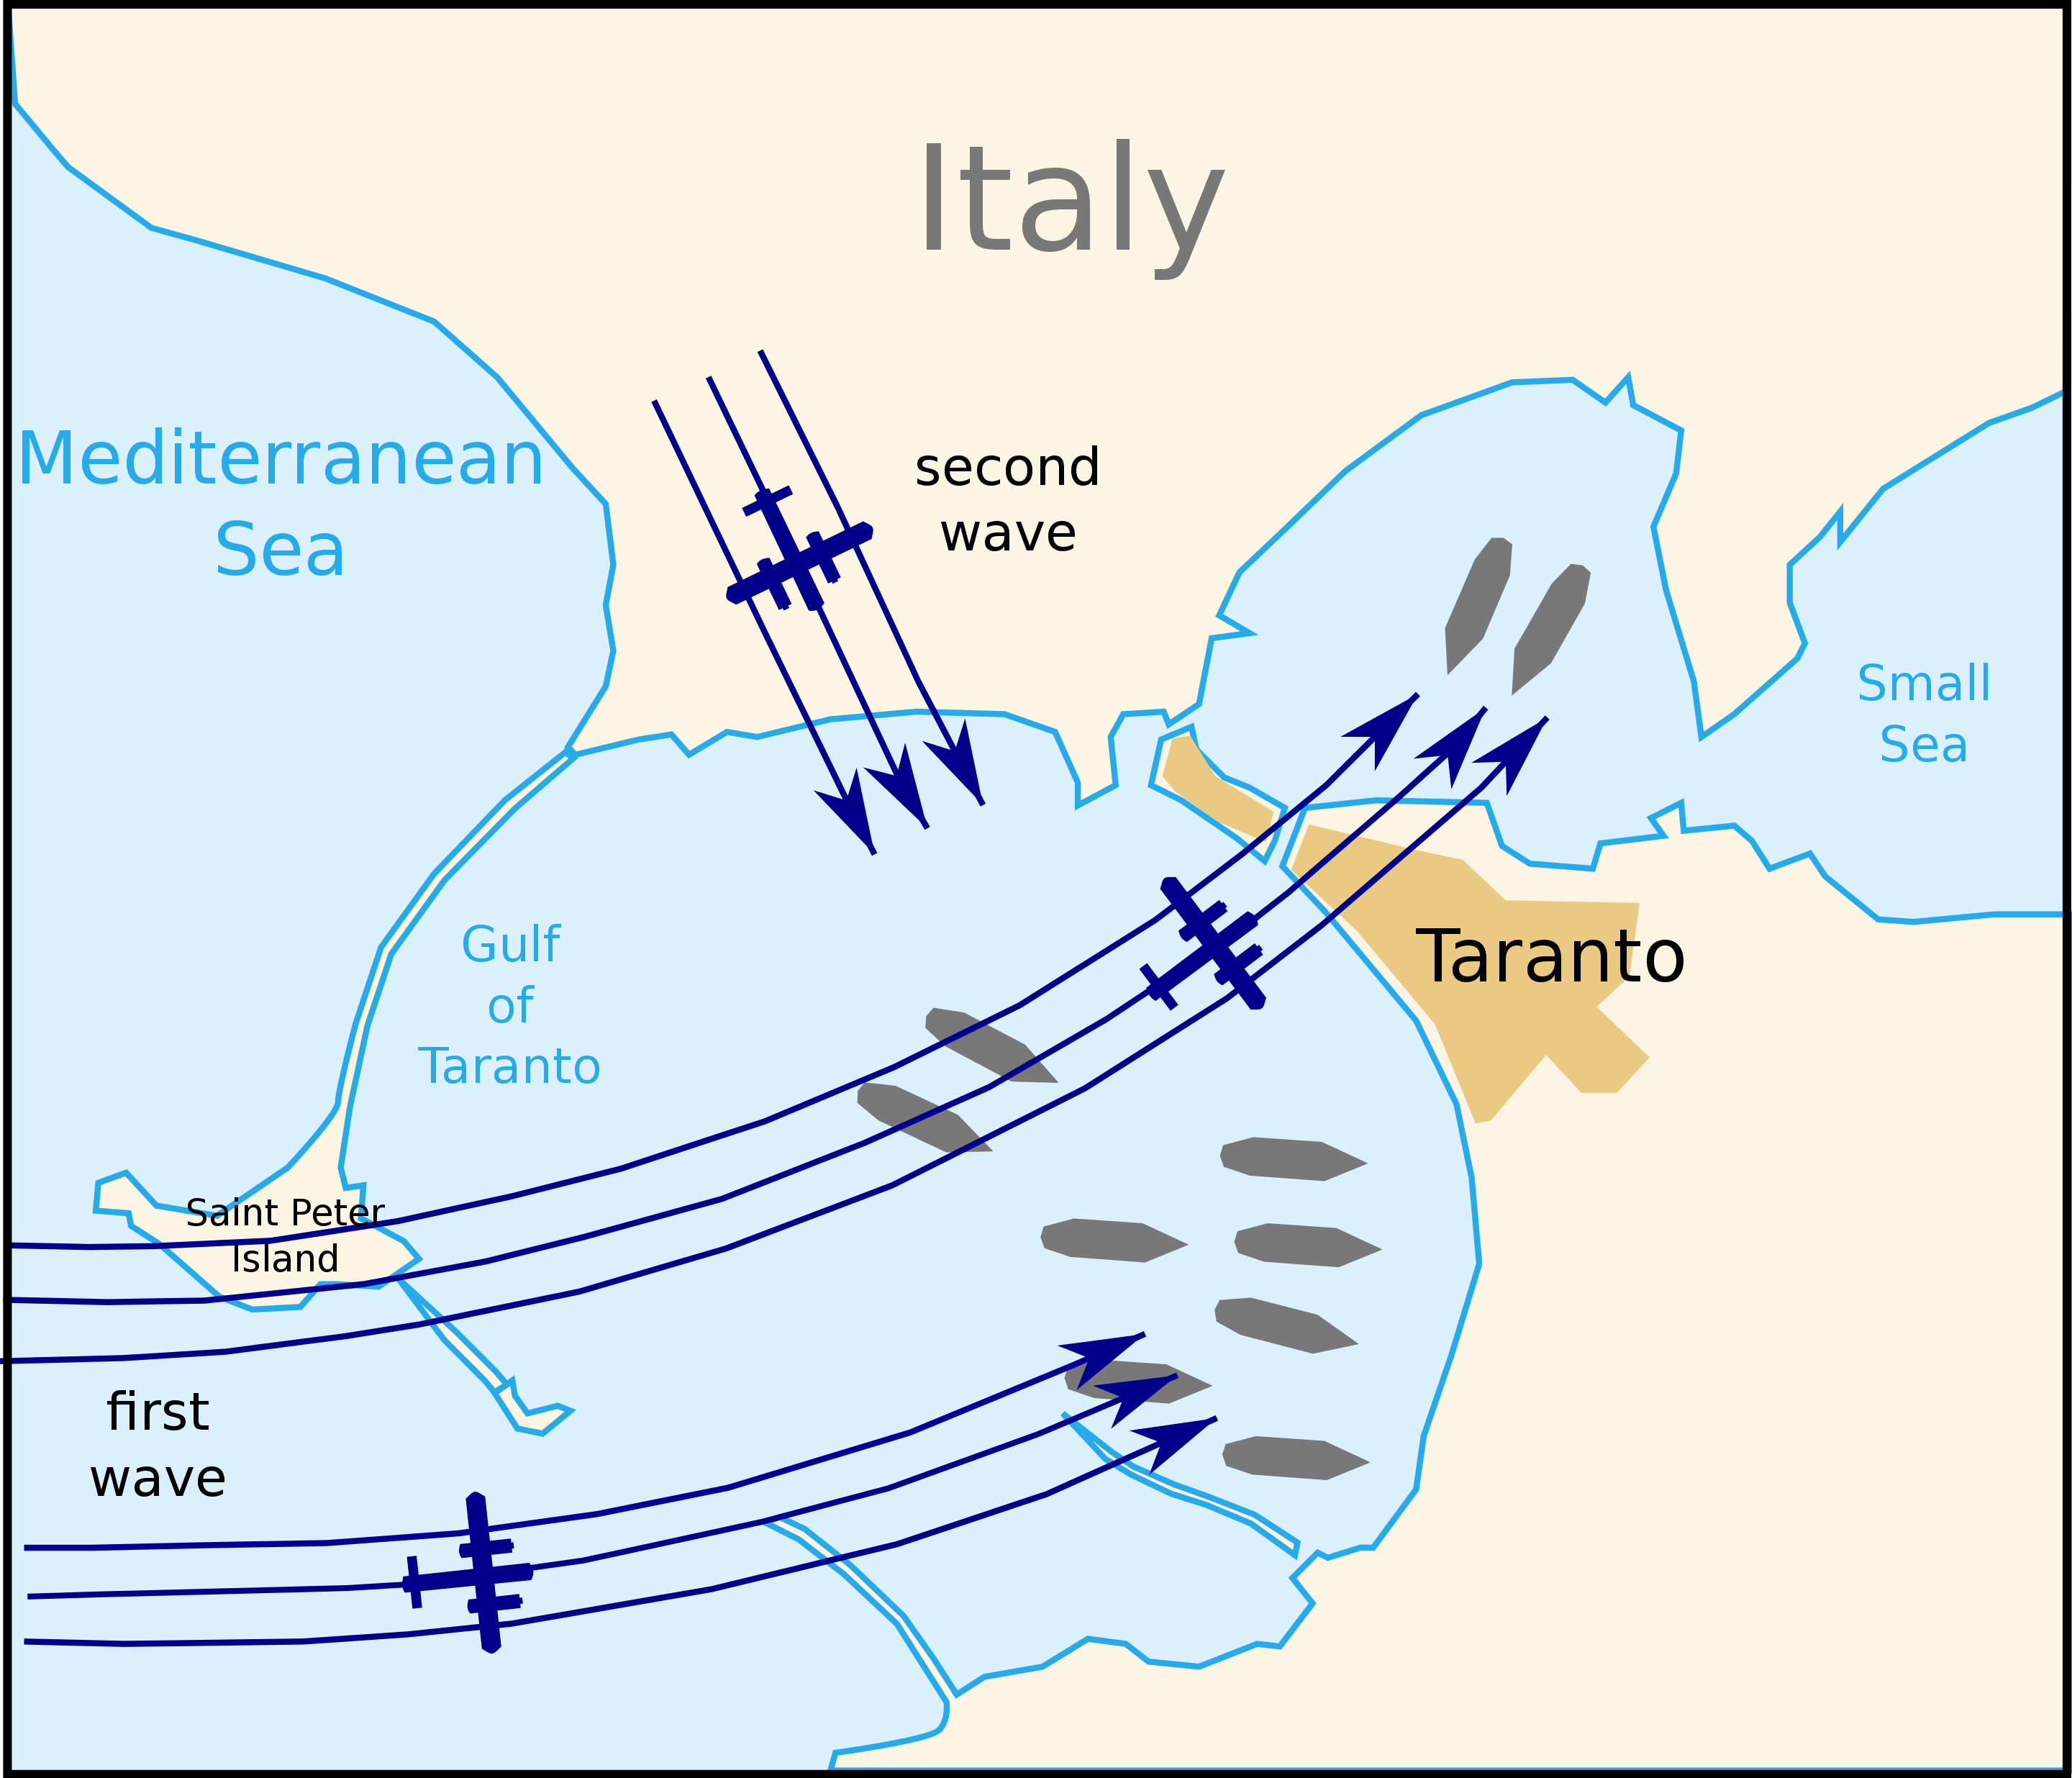
At 2030hrs the first of the twelve Swordfish from 815, 819 and 824 NASs in the first wave launched from HMS Illustrious. Six carried torpedoes, four bombs and two carried both flares and bombs.
The plan was relatively simple; approaching from the west, the two Swordfish carrying flares took a wide loop to drop their flares to the east of the targets thereby backlighting them for the remainder of the wave such that targets were clearly visible. The second wave of ten Swordfish, all coming from the same squadrons plus one from 823 NAS, departed about an hour after the first wave and were to follow the same plan but approach from a more northerly direction.
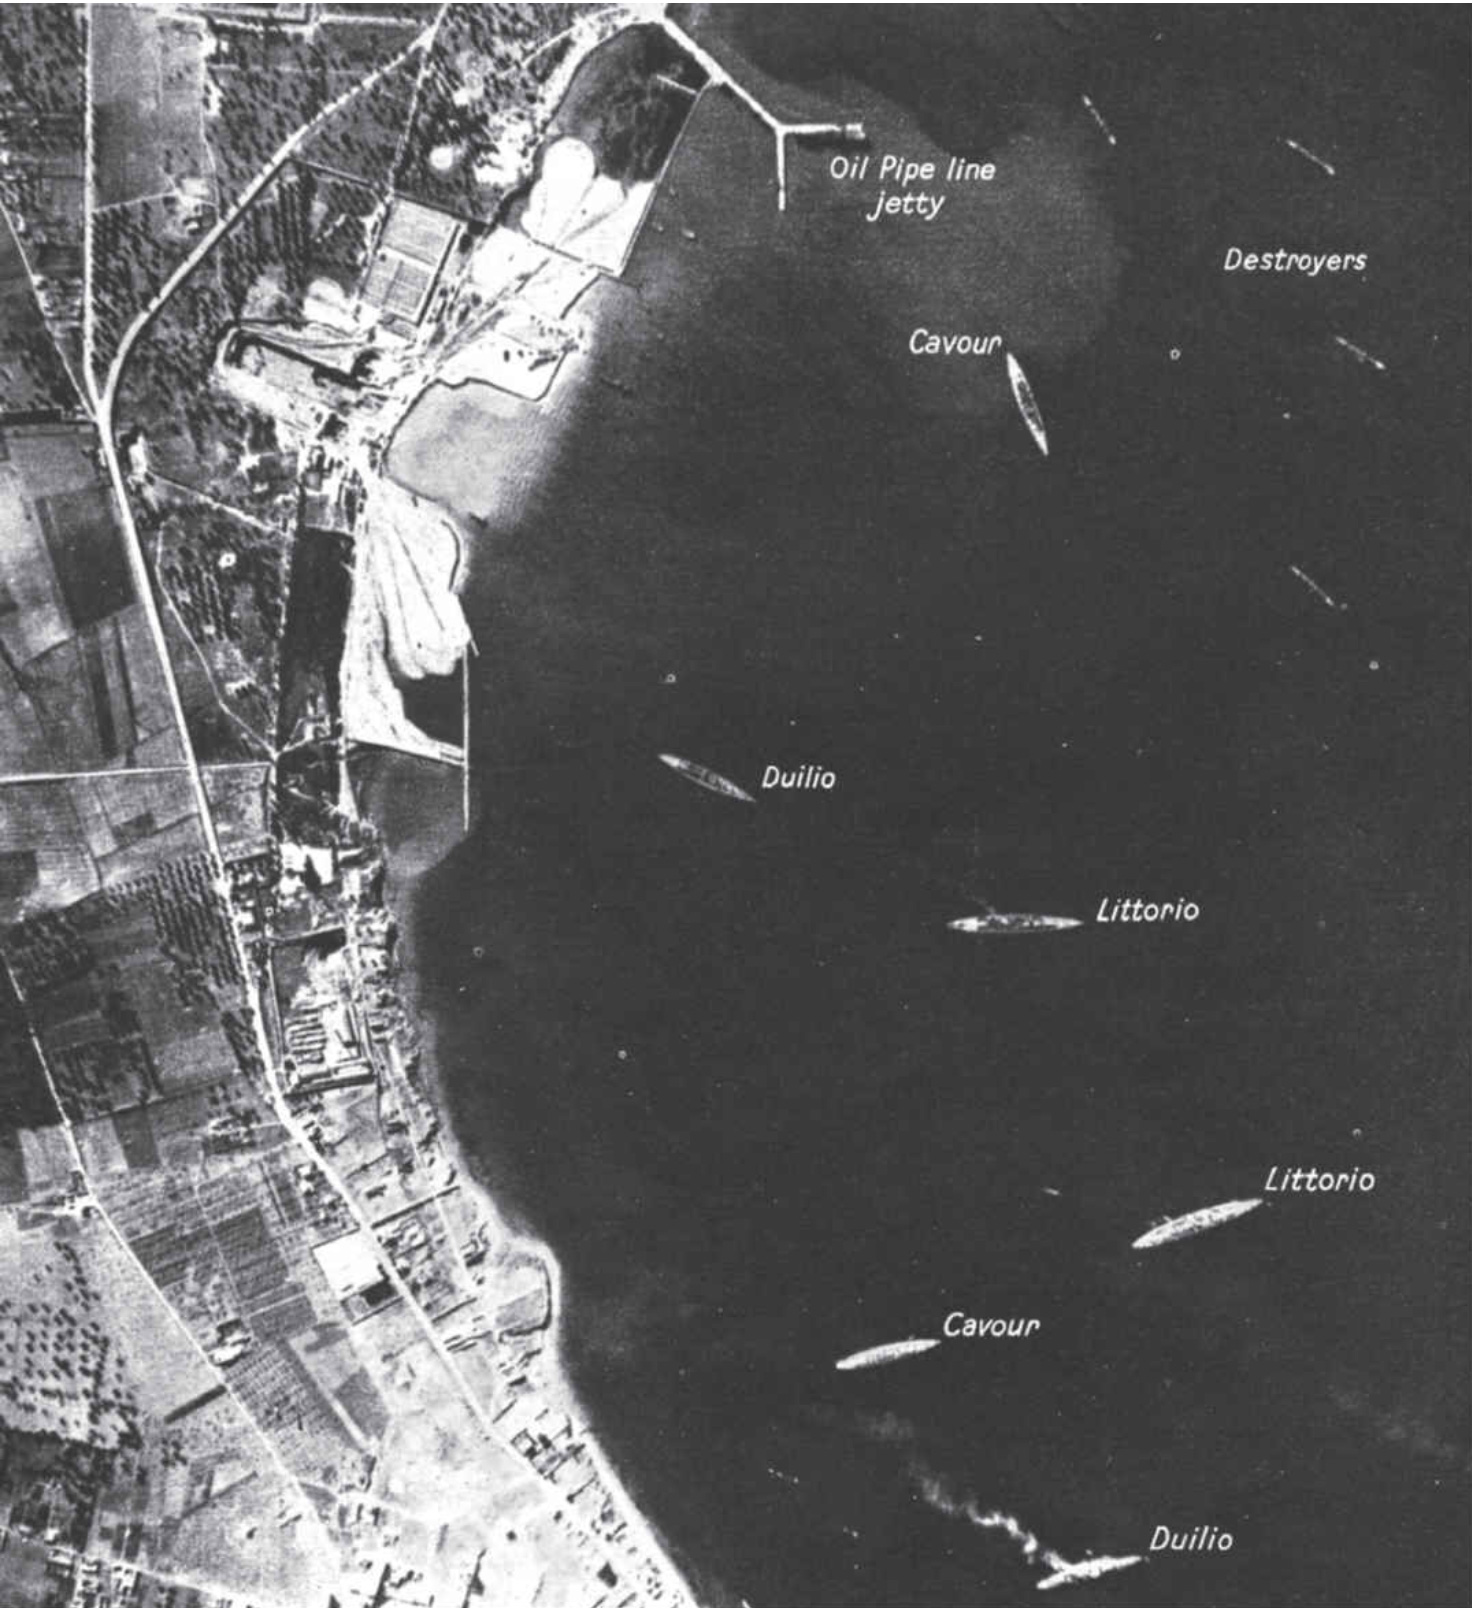
Waiting for them at Taranto, some 2hrs flying time away was the cream of the Regia Marina – six battleships of the 1st and 9th Divisions, ten cruisers of of the 1st, 3rd and 8th Division and eight destroyers of the 4th Destroyer Flotilla.
The first wave arrived at 2250hrs to fierce but uncoordinated anti aircraft already blazing away all across the harbour. This was likely caused by the early arrival of one Swordfish which had become separated from the rest of the wave and had sped up, expecting to arrive late but infamy arrived 15 minutes early.
The flare-carrying aircraft went in first. Lt. Janvrin of 815 NAS and the Observer in aircraft “L4P” later wrote that
We had a grandstand view, as we didn’t go down to sea level. We dropped our flares at about 8,000 feet … and in fact we were fired at considerably. We had a fair amount of ackack fire, and most extraordinary things that looked like flaming onions – one just sort of went through it, and it made no great impression.
Lt. H. Janvrin, 815 NAS
Following the release of their flares they moved to the north to bomb the fuel tanks.
Next, the torpedo bombers attacked. The first was L4A flown by 815 NAS’s commanding officer Lt. Cdr. Williamson and his Observer, Lt. Scarlett. Almost immediately after releasing their torpedo towards the battleship Cavour, L4A was in the water. Scarlett later wrote
We put a wing-tip in the water. I couldn’t tell. I just fell out of the back into the sea. We were only about 20 feet up. It wasn’t very far to drop. I never tie myself in on these occasions. Then old Williamson came up a bit later on and we hung about by the aircraft which still had its tail sticking out of the water. Chaps ashore were shooting at it. The water was boiling so I swam off to a floating dock and climbed on board that. We didn’t know we’d done any good with our torpedoes. Thought we might have, because they all looked a bit long in the face, the Wops.
Lt. N. Scarlett, 815 NAS
The remaining torpedo bombers loosed their weapons and exited the harbour as fast as their obsolete Stringbags could take them.
Meanwhile, the bombers were attacking the cruisers and destroyers in the inner harbour. The anti-aircraft fire was intense but somehow the bomb-carrying Swordfish all escaped unscathed having dropped their bombs on the target-rich environment of the Inner Harbour. Frustratingly though, most of their bombs failed to explode, even that dropped by “E5Q” which was clearly seen to strike the destroyer Libeccio but failed to explode.
Twenty three minutes after arriving all but one of the first wave was away, the only loss being L4A. Williamson and Scarlett were by now prisoners of the Italians and would spend the remainder of the war as such.
The second wave, now only seven aircraft after a launch incident which delayed one aircraft and eventually enforced the early return of another arrived at 2350hrs and their attack progressed much a the first wave’s had.
The flare-droppers moved ahead of the wave and released their flares drawing heavy fire around 1000ft below them as the Italians fired at the flares, not at the aircraft above them. Next, the torpedo bombers set up their approaches. Soon after beginning their run on target 813 Squadron’s E4H flown by Lt. Gayley and his Observer, Lt. H. Slaughter was hit by anti aircraft fire and crashed into the harbour; both were killed.
The remaining attackers flew on into the fierce fire coming from the Italian ships. Lt Torrens-Spence in L5K wrote later that
The flash of her close range weapons stabbed at us, as first one and then another along her length opened up… We were in the centre of an incredible mass of crossfire from the cruisers and battleships and shore batteries.
Lt F. Torrens-Spence, 819 NAS
The rest of the torpedo bombers were able to drop their loads and make their way out of the harbour safely.
Finally, L5F, the one remaining bomb carrying Swordfish in the second wave arrived. Delayed by 24 minutes at launch due to a slight collision with L5Q which required repairs to its fabric pilot Lt. Clifford and his Observer Lt. Going had pushed the throttle hard forward in order to catch up. Nonetheless, when they arrived the flares were spluttering and their targets were limited. Spotting the heavy cruisers near the seaplane base they dropped to 500ft and attacked and then made haste to leave as fast as they had arrived. The time was 035hrs on 12 November and by 0250 all Swordfish that had left Taranto had been safely recovered on their carrier.
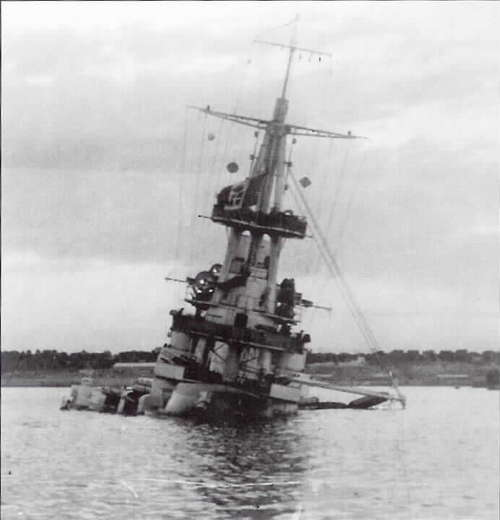
What of the results; the Italians lost one battleship, the old but updated Conti Di Cavour with a further two severely damaged. A destroyer and heavy cruiser were lightly damaged. Two seaplanes and their hangars were destroyed on the ground.
In defending the harbour the Italians shore batteries alone fired 1,430 12.5cm rounds, 313 10.7cm and 6,854 8.8cm from the heavy guns. The 20mm cannons fired 2,635 shells and 40mm 931. The number of rounds fired by the warships was not recorded.
Against this the Fleet Air Arm put up 21 Fairey Swordfish Mk.I, losing two, only one of which to enemy action. Two aircrew were captured, two were killed.
How did 20 of 21 Swordfish escape such a fierce barrage of fire from the shore and the ships they were attacking? Certainly, the Swordfish crew couldn’t believe they’d escaped with such low losses. The key to their survival lay in two critical elements, both as a direct result of the obsolete design of the aircraft they were flying.
The first was that they were slow and highly manoeuvrable, and their pilots highly skilled. The Swordfish could stand on one wing and turn inside a very small radius. The antiaircraft fire directed at them had trouble leading them effectively.
The second reason was the height they were able to attack from. Because they were so low, and slow – mostly in order to drop their torpedoes low enough that they would run in the shallow Taranto waters, the Italians’ fire couldn’t get low enough to hit them.
Lt. Charles Lamb in L5B wrote in his book “War in a Stringbag” that believed he understood why.
‘From above I could see that the opposite was the case; because the aircraft were only a few feet above sea level, the use of searchlights would have floodlit the six battleships and the harbour defences, and greatly assisted the attacking aircraft in selecting their target…
Lt. Charles Lamb
So, unable to depress their guns sufficiently, unwilling to use searchlights as they would silhouette the target warships, unable in many instances to fir at all for fear of hitting other ships, the Navy’s, the town’s and the harbour facilities were all unable to effectively engage the the Royal Navy’s Stringbags as they attacked the might of the Italian Navy with bombs, torpedos and lit by flares they brought with them. A mixed stringbag of wares indeed.
Epilogue
On board HMS Illustrious that night was Lieutenant Commander John N. Opie III, USN. Strictly speaking his presence violated the neutrality of the United States but nonetheless he was there to observe and report on the Royal Navy’s operations in the Mediterranean in general and the Taranto Raid in particular.
Opie observed a highly effective low level attack against capital ships in a shallow harbour – waters which were supposed to be shallow enough to protect against torpedoes in particular.
In fact, the general depth at Taranto was shallower than at Pearl Harbour, the parallels were unavoidable and Opie submitted dozens of reports detailing his direct observations as well as arranging for the forwarding of many of the RN’s own Top Secret internal reports and reviews.
Opie’s reports on Taranto to the US Navy Command were ignored.
Editor’s Note; for a more in-depth analysis and narrative of the raid, its preparation and aftermath, the article listed the references below at https://www.armouredcarriers.com is highly recommended.
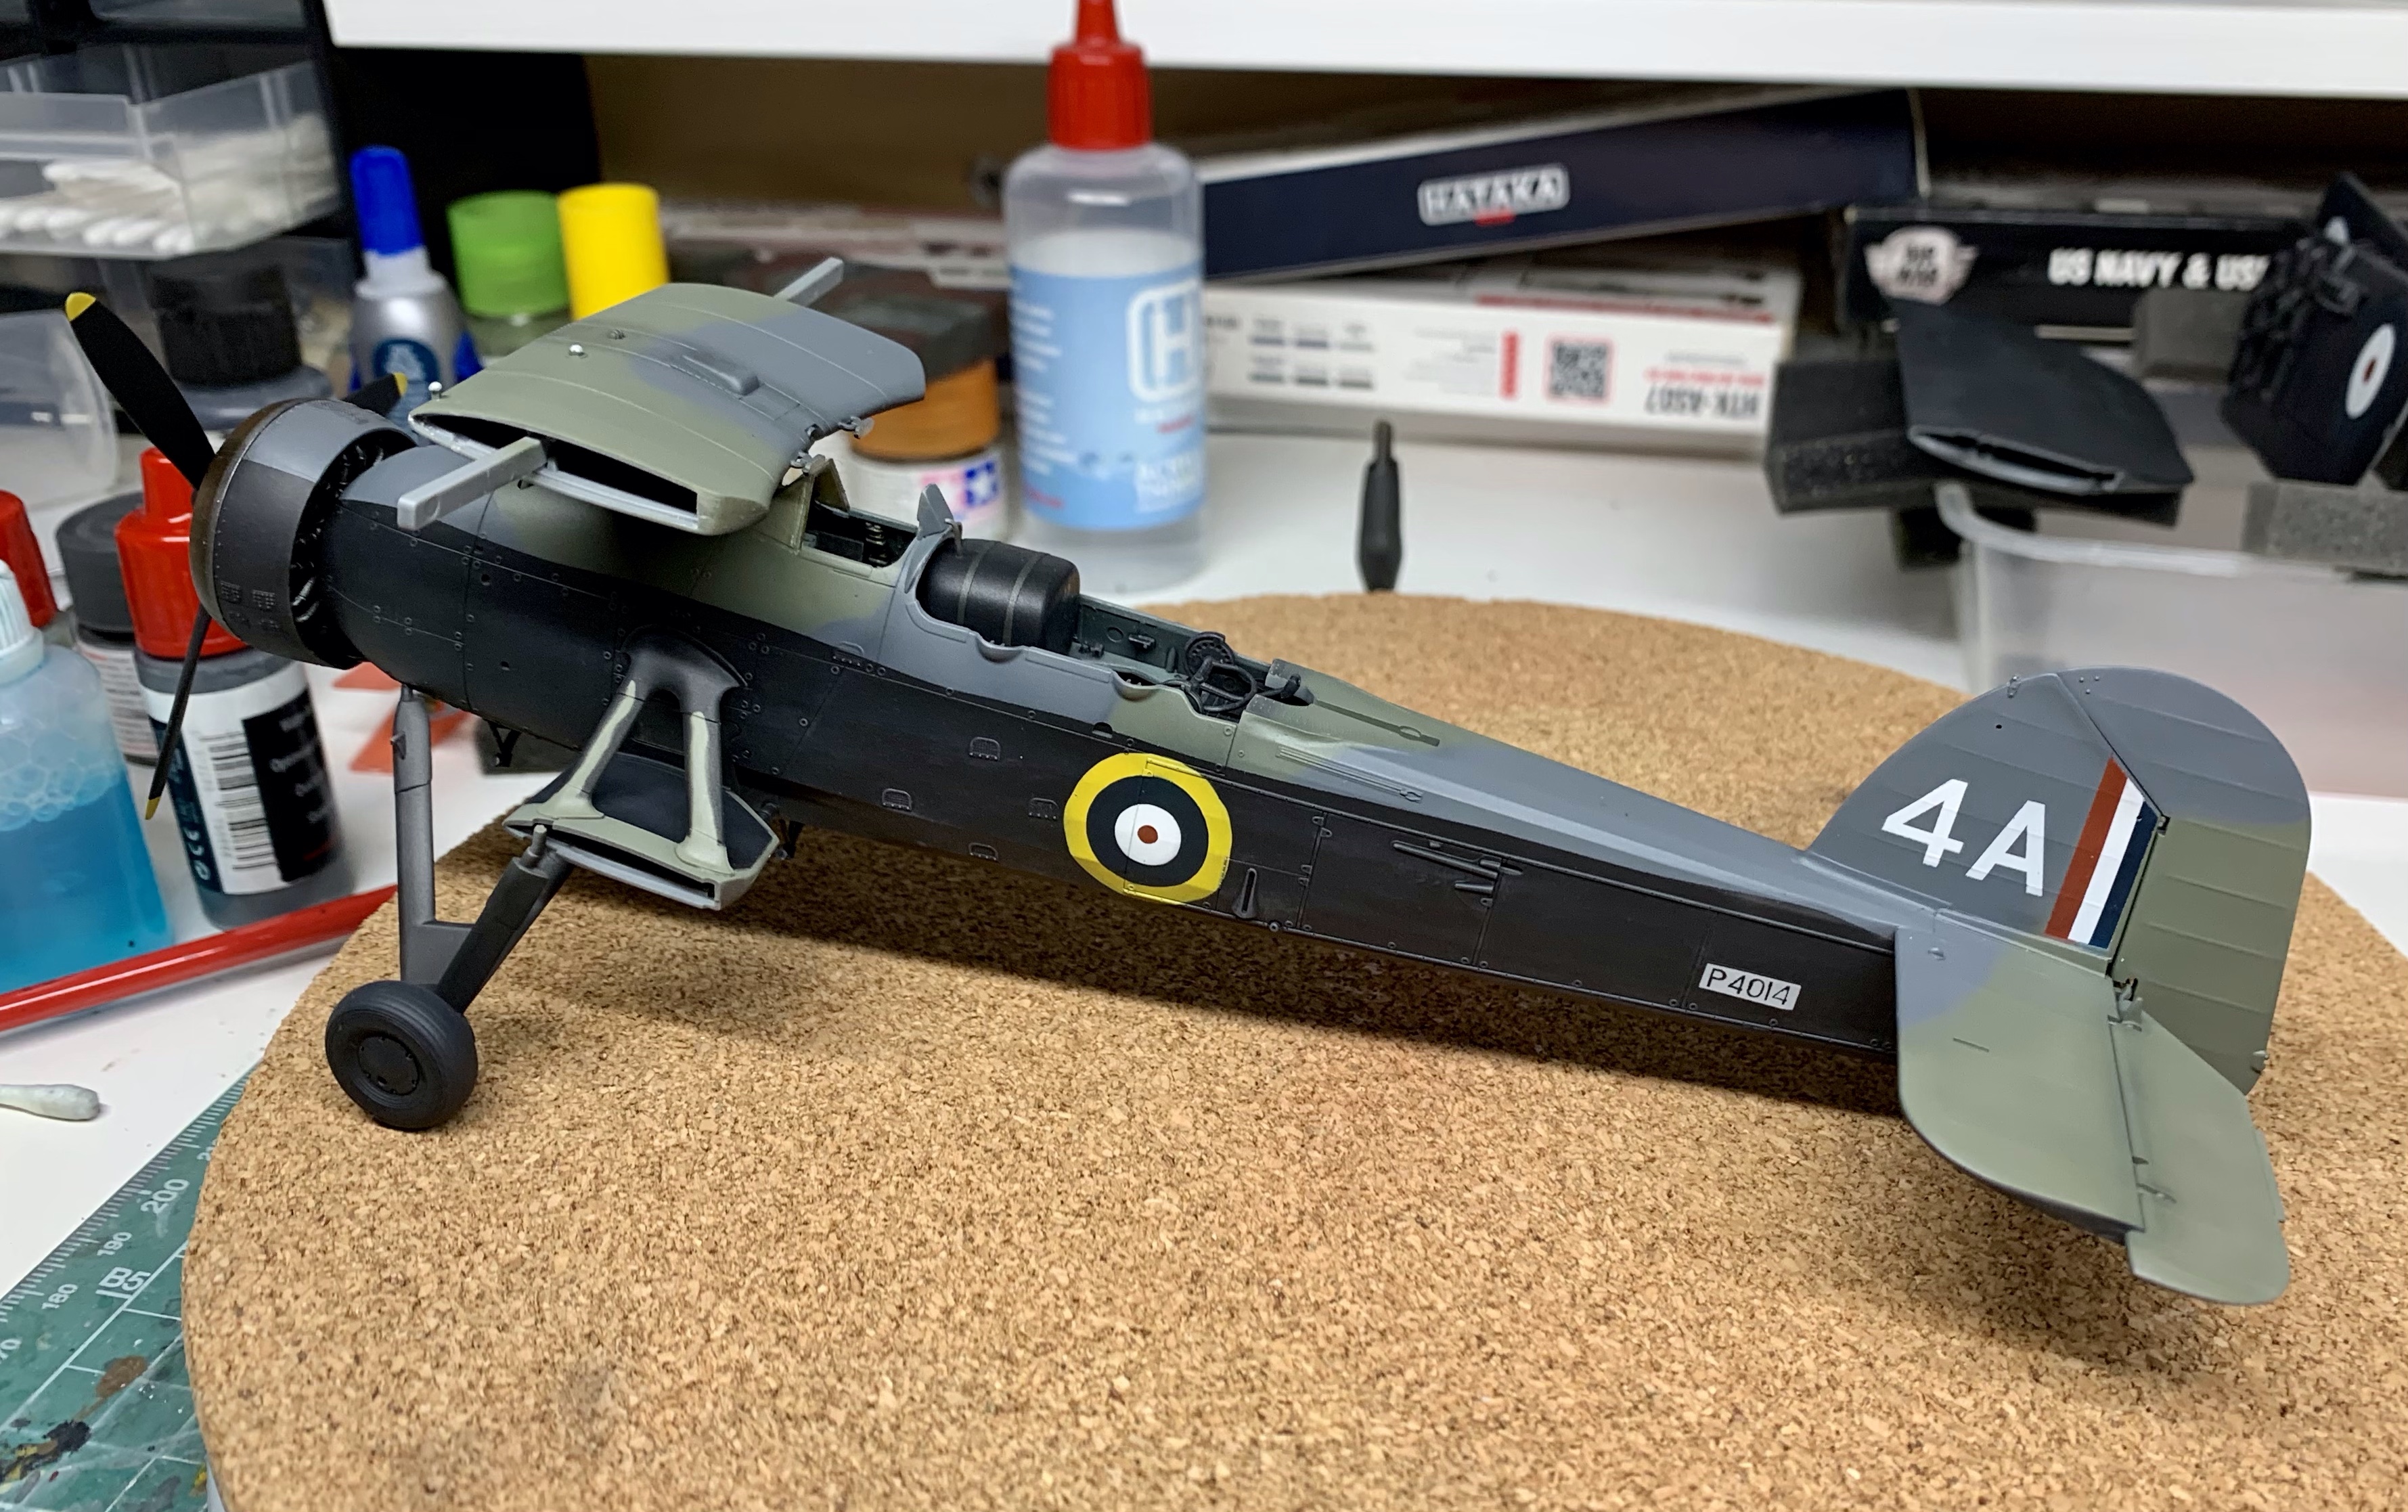
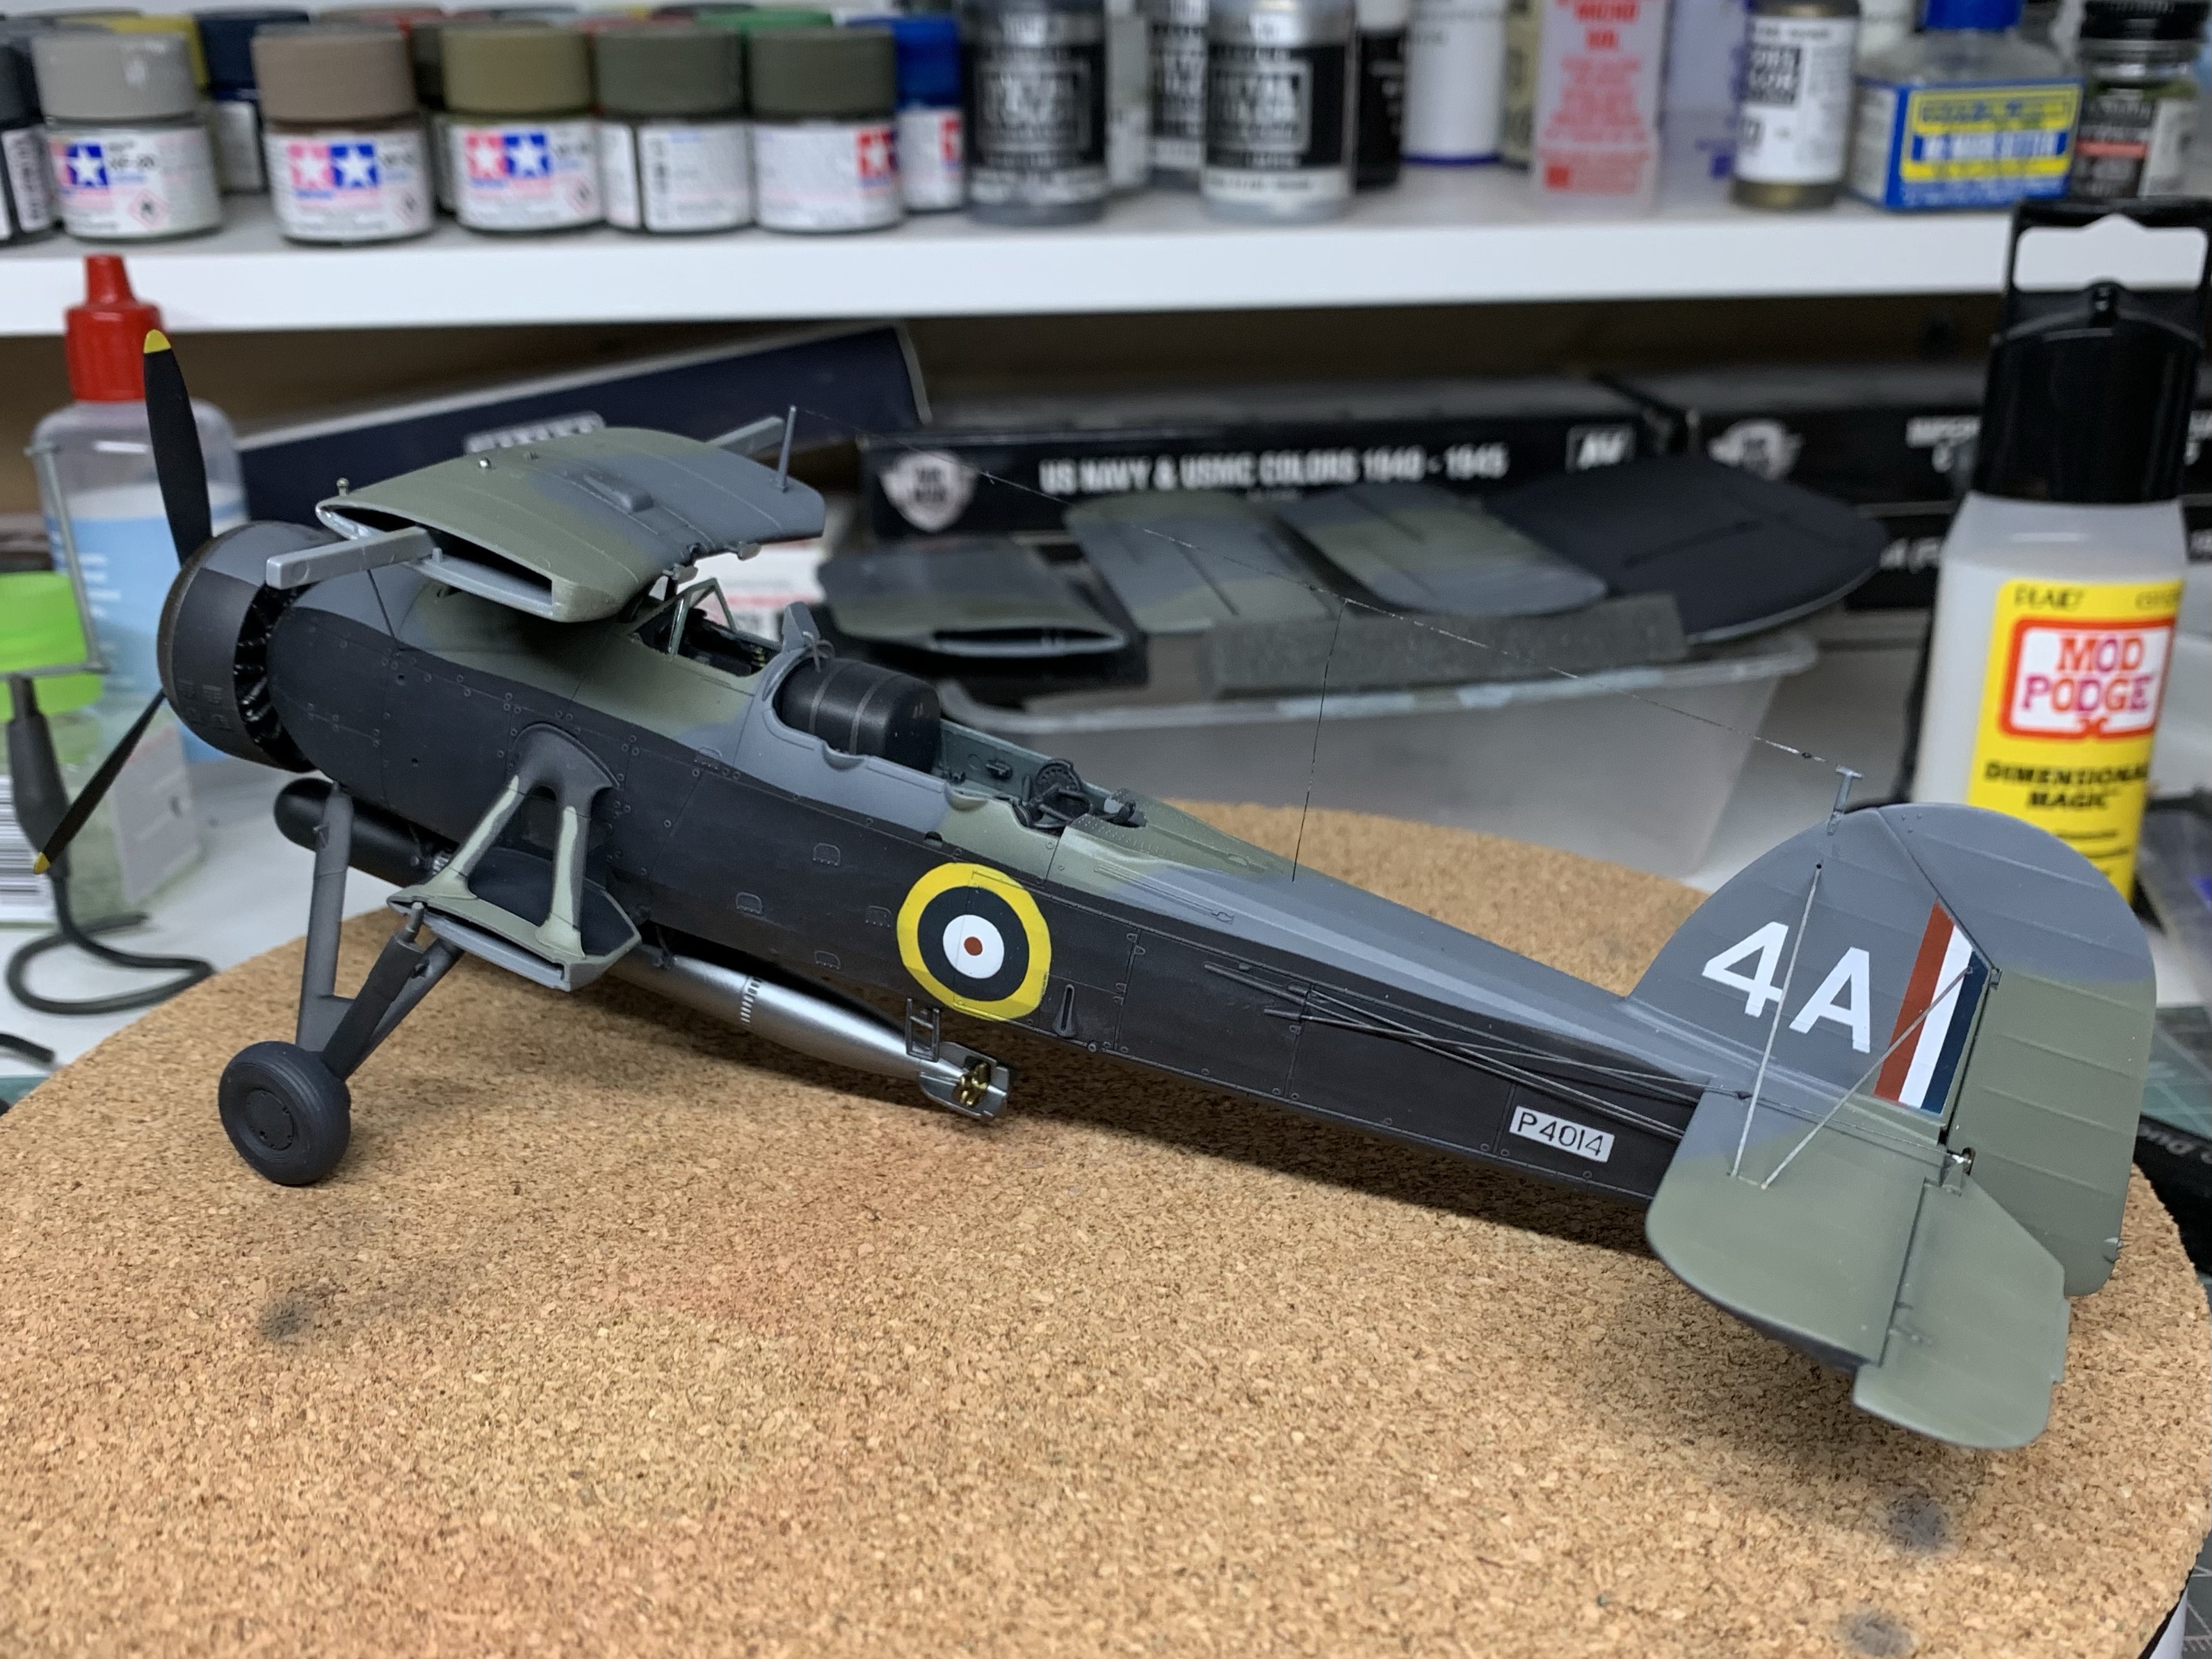
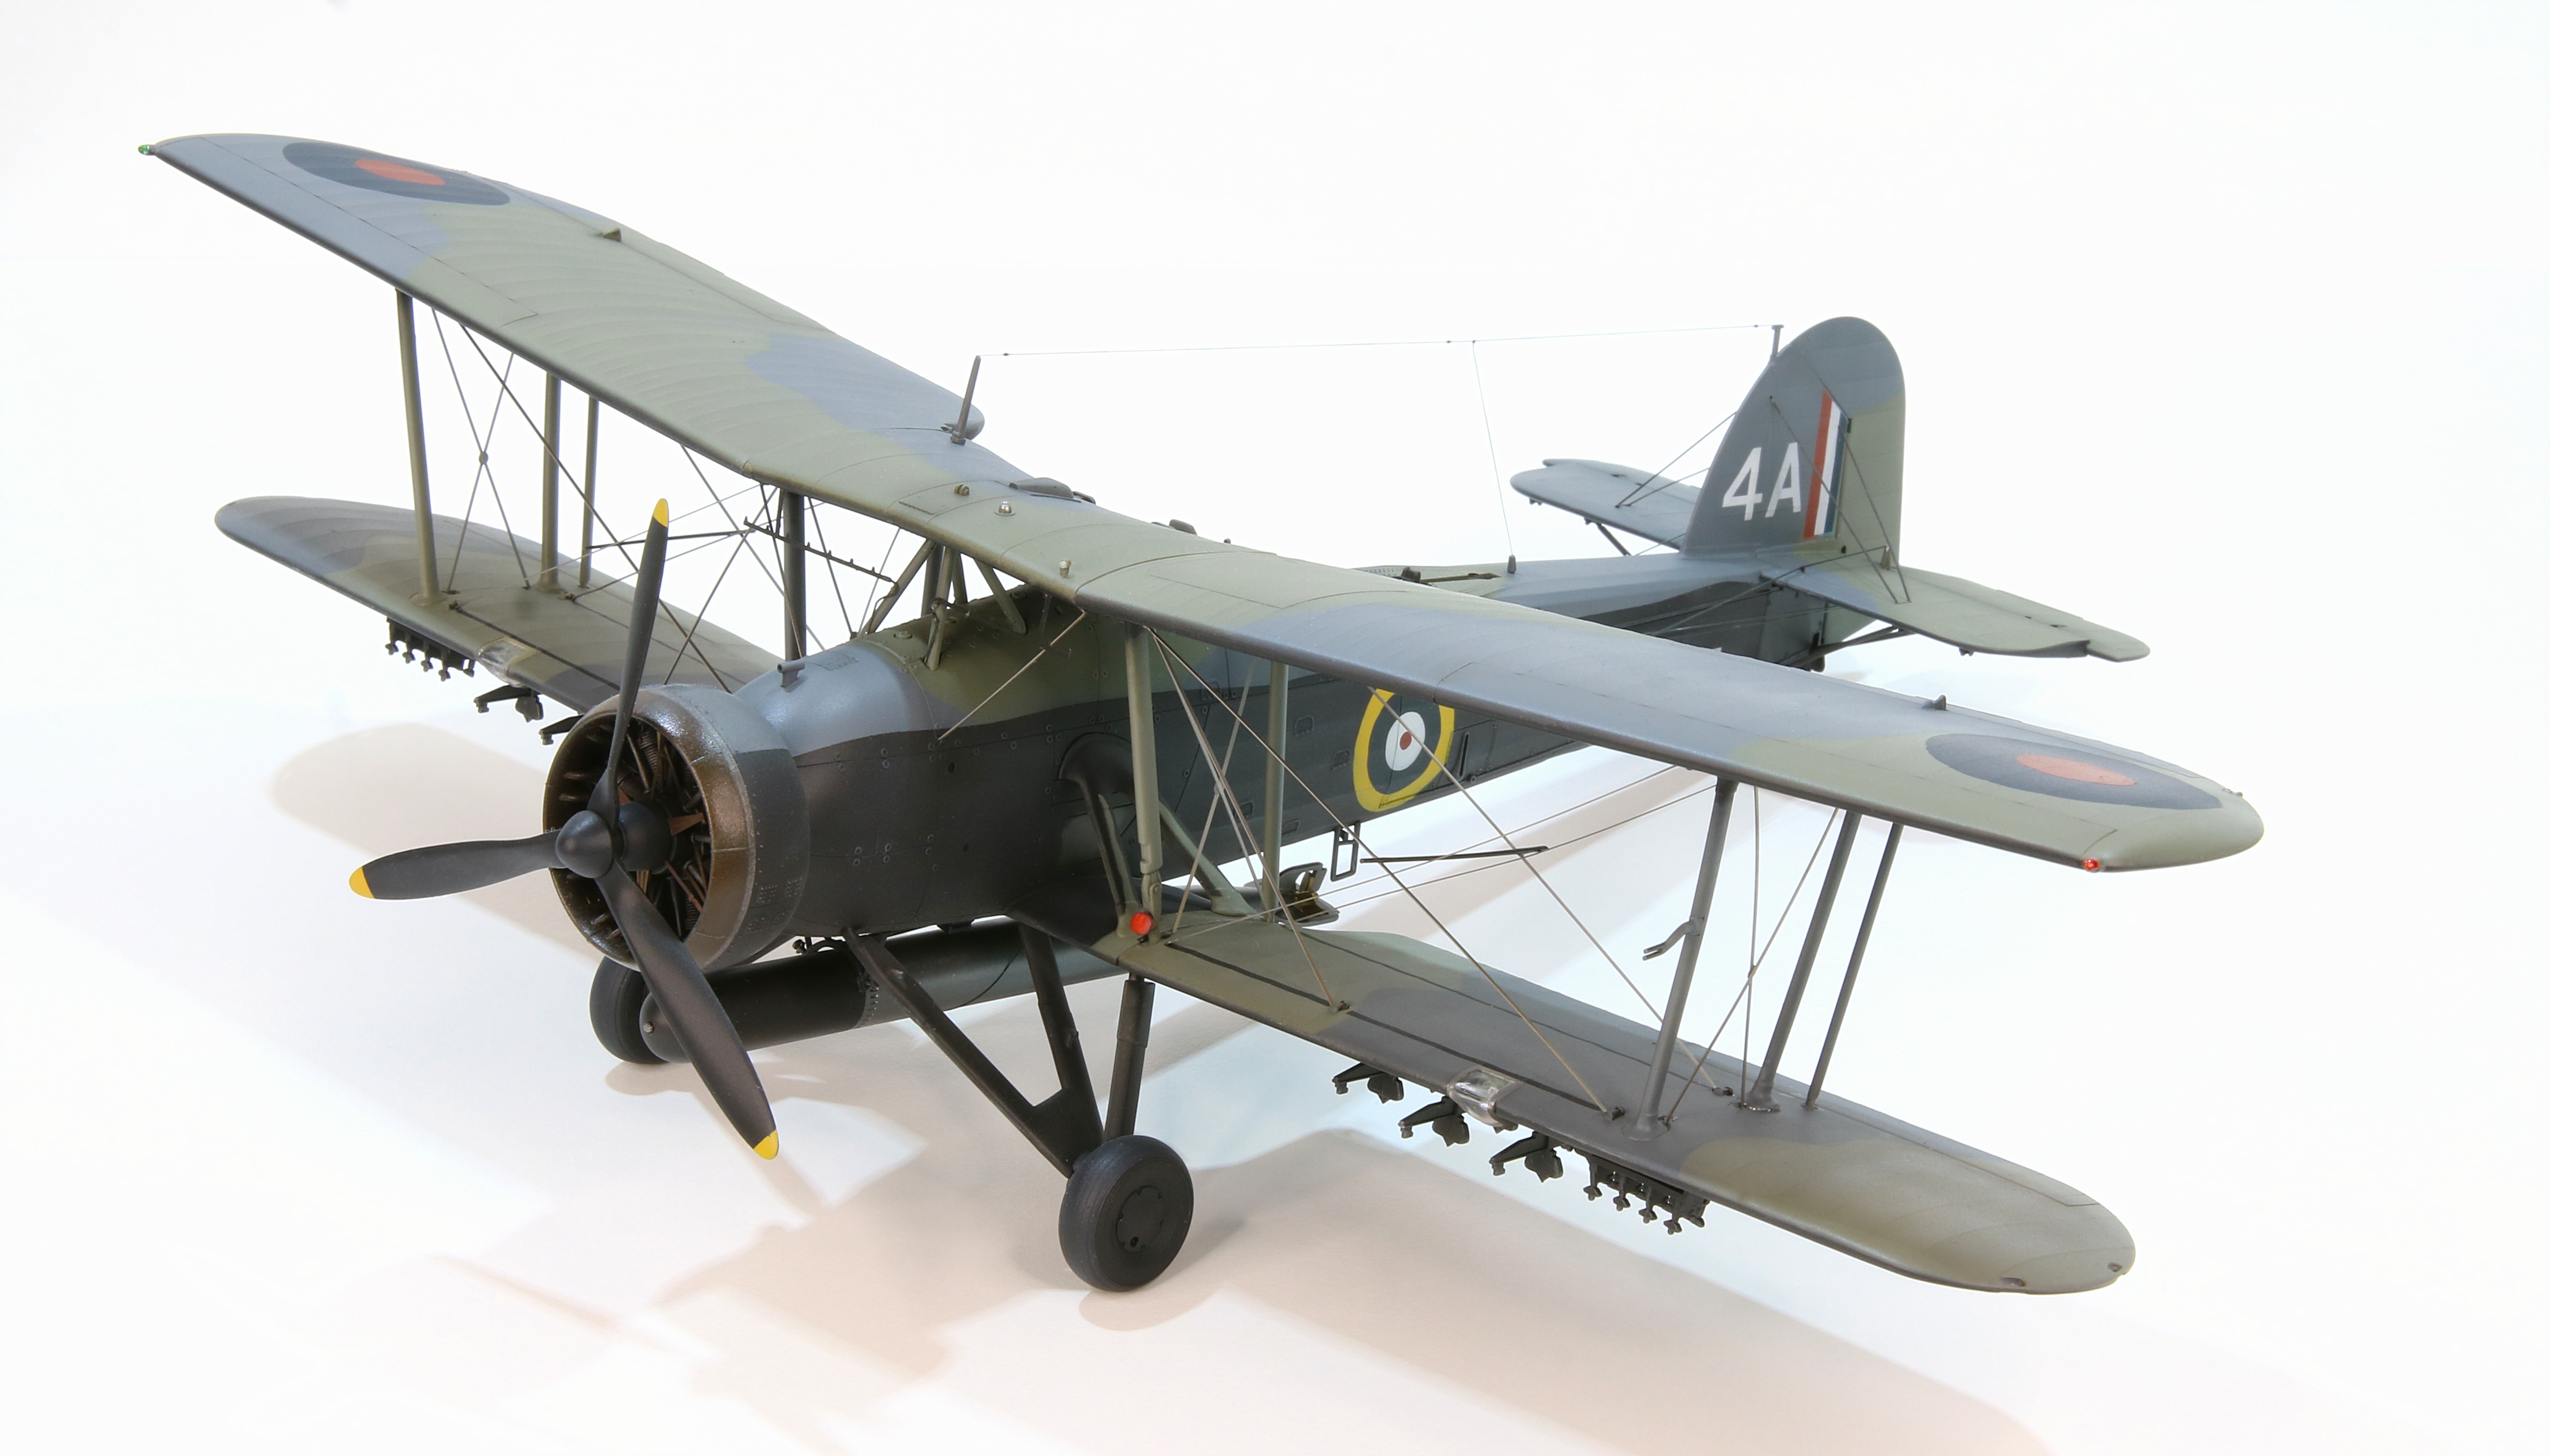
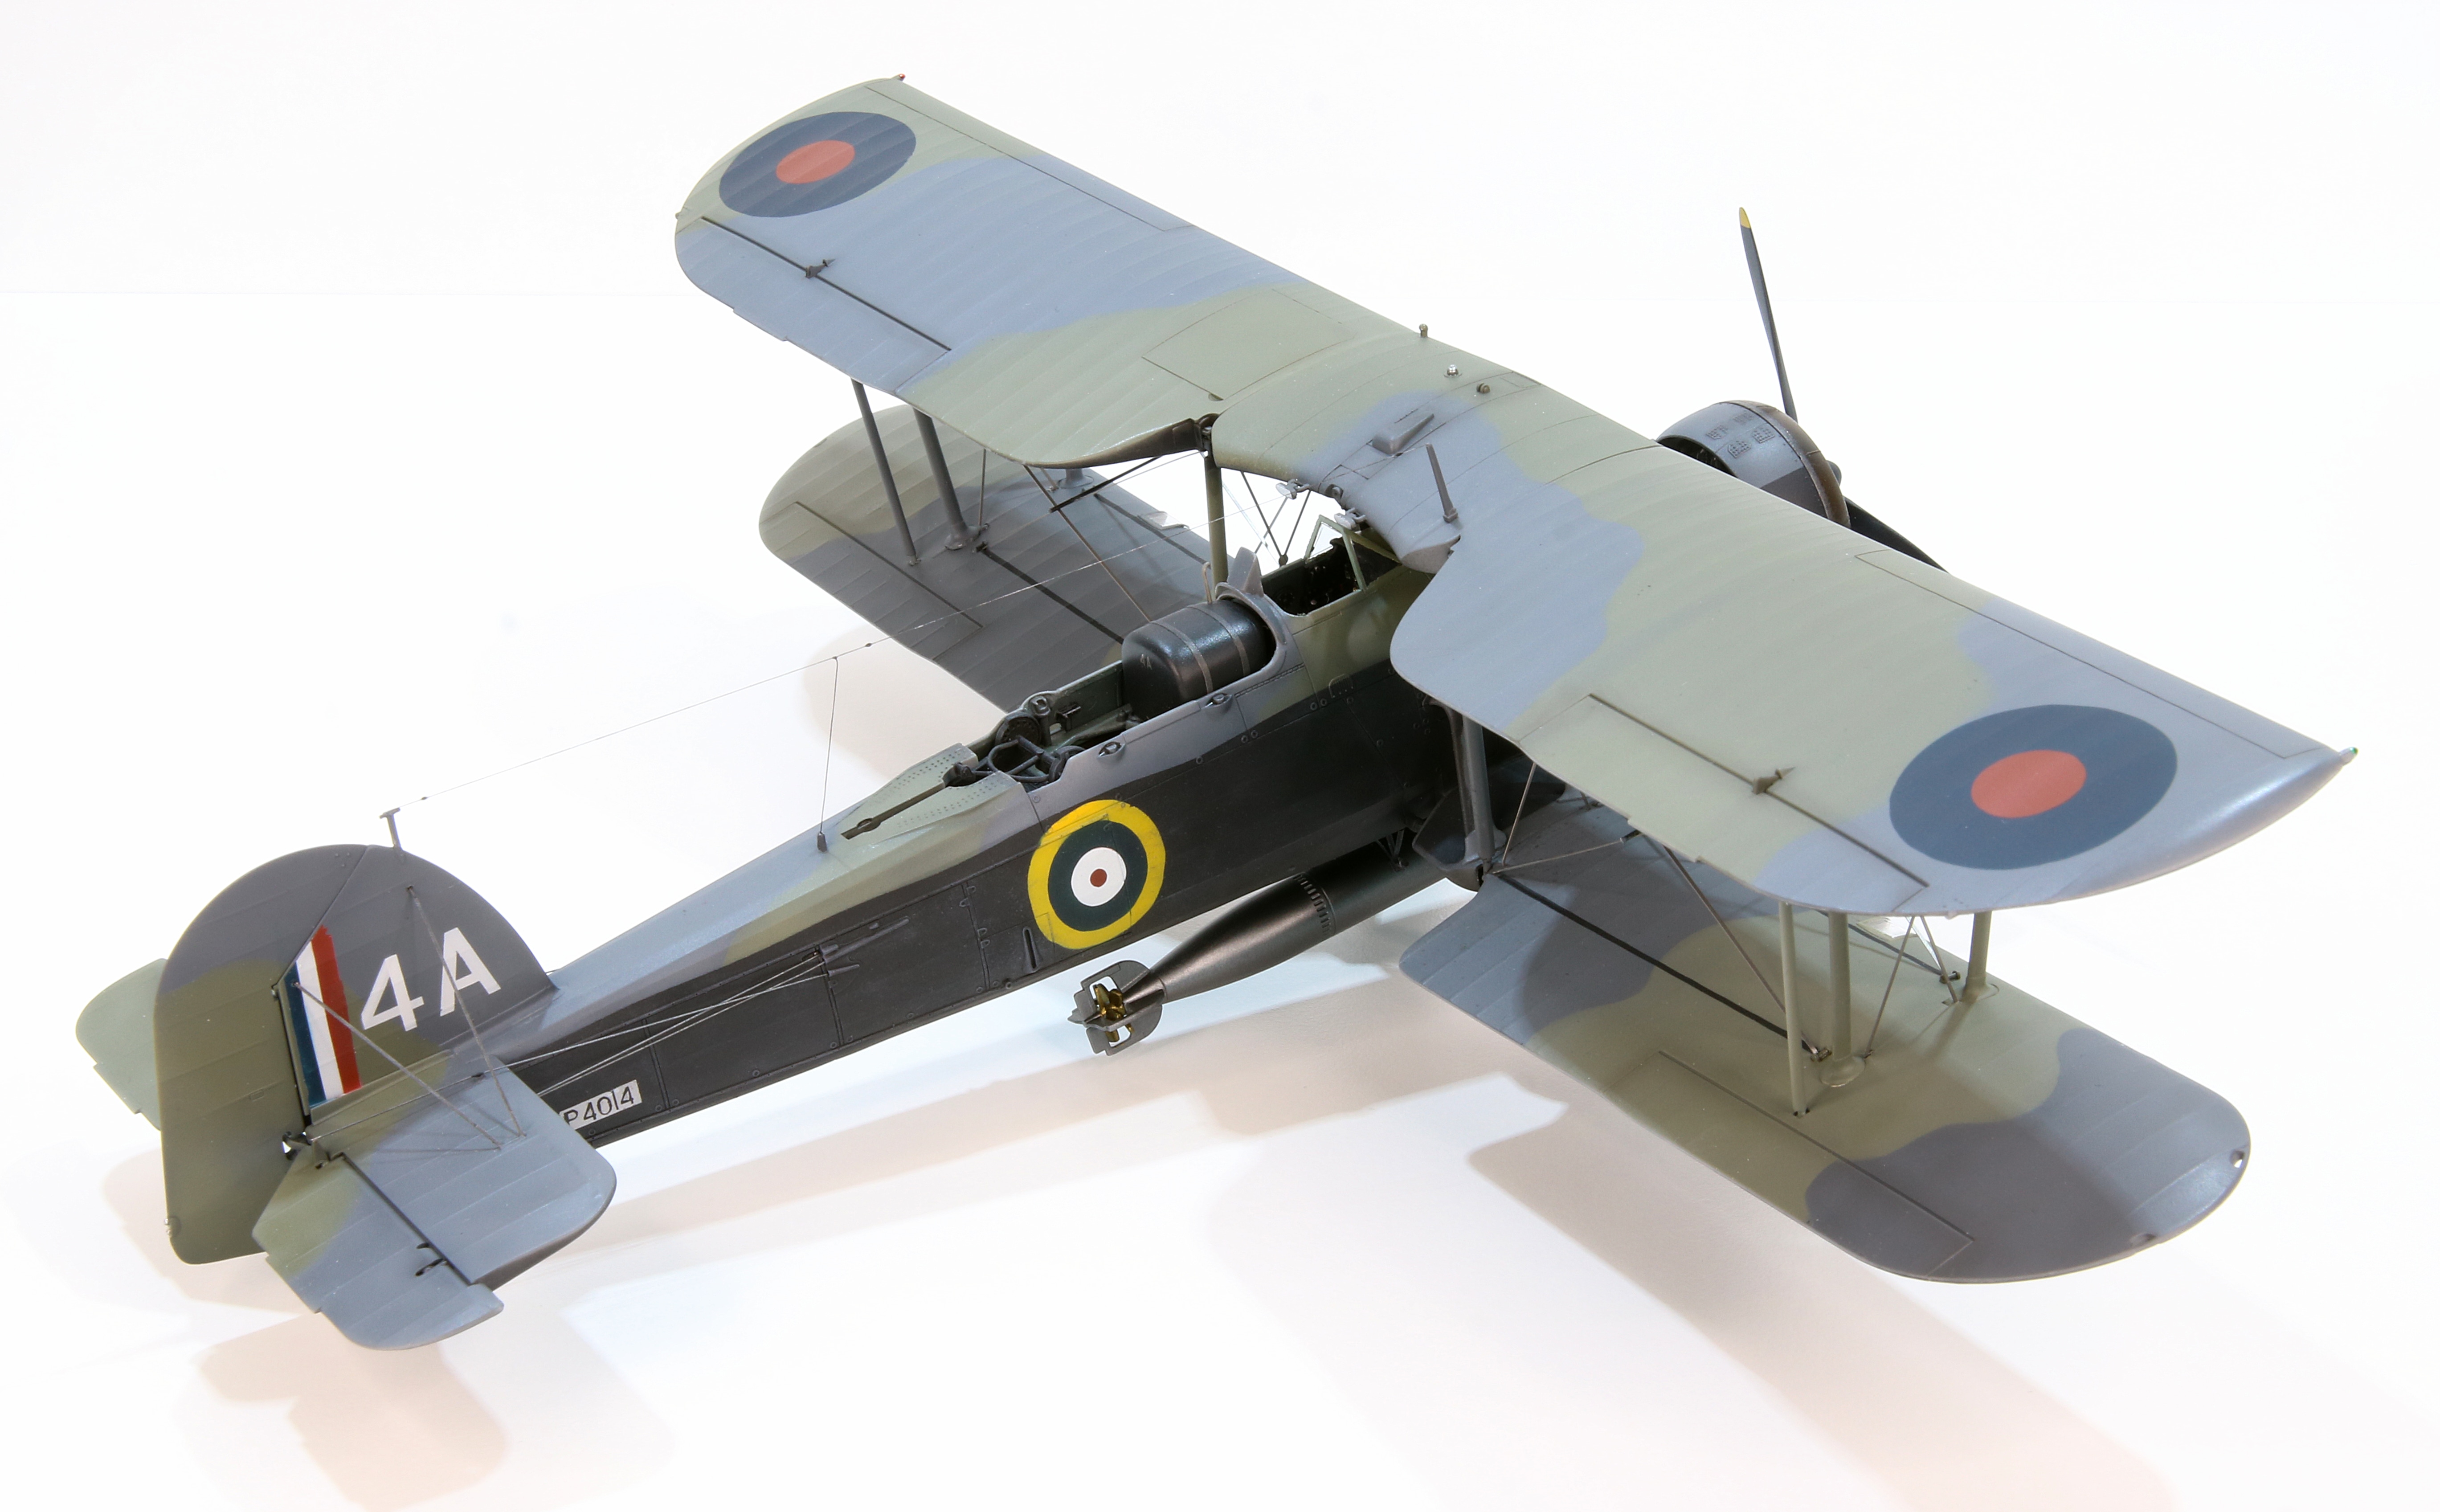
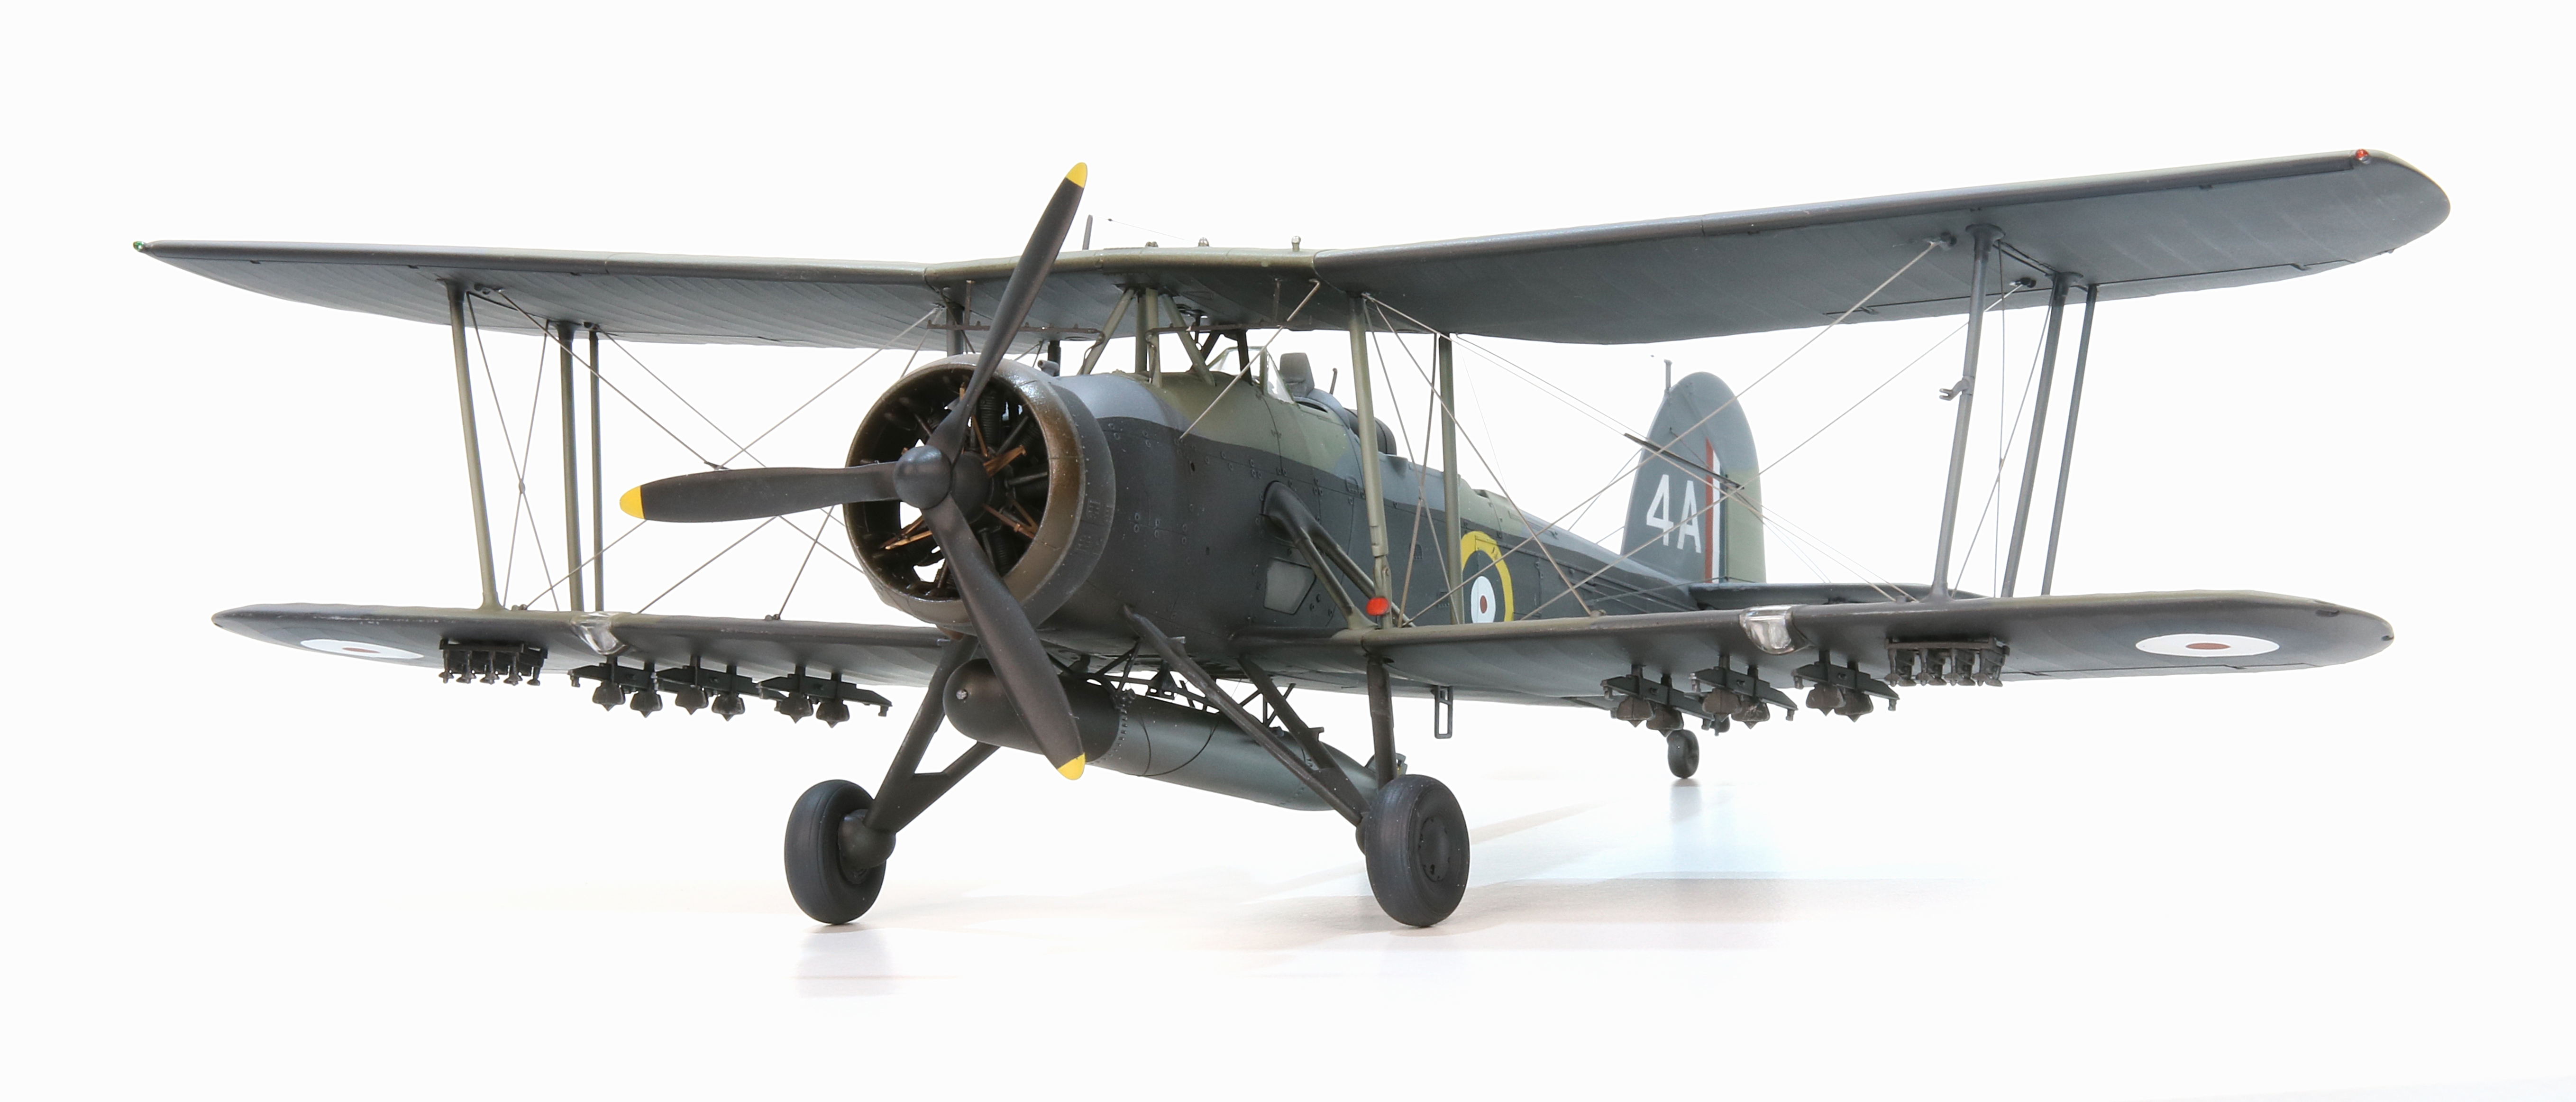
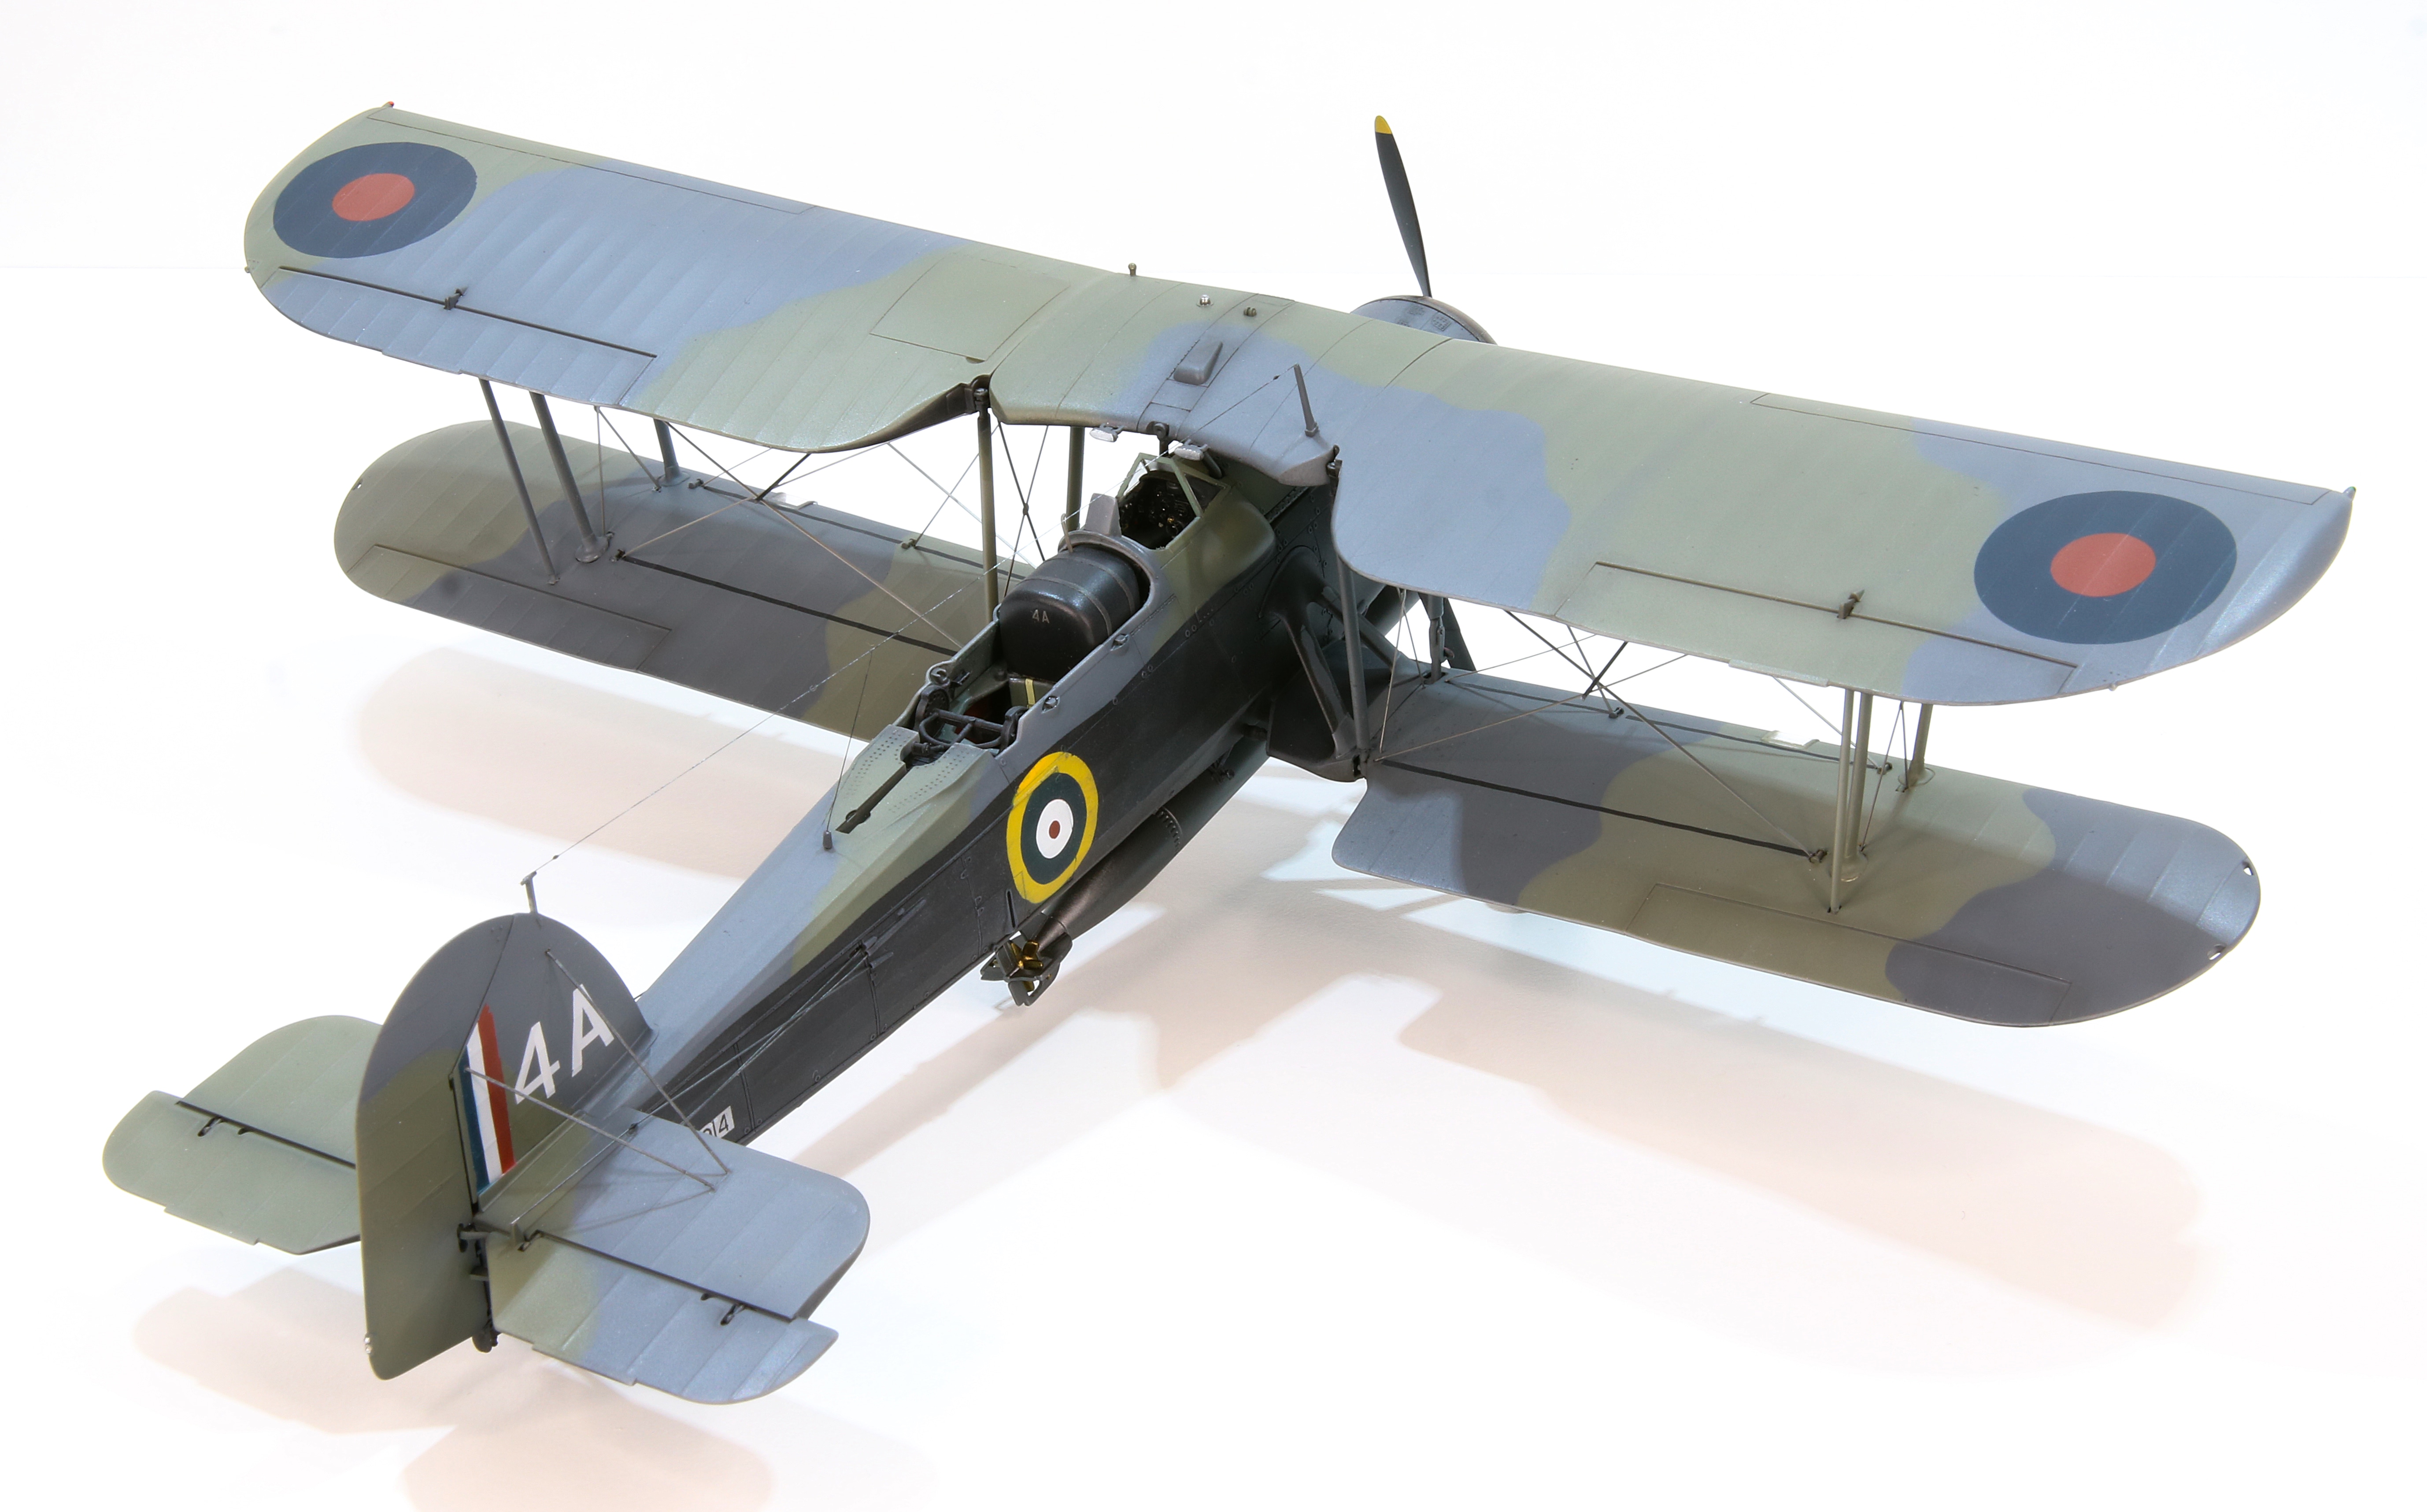
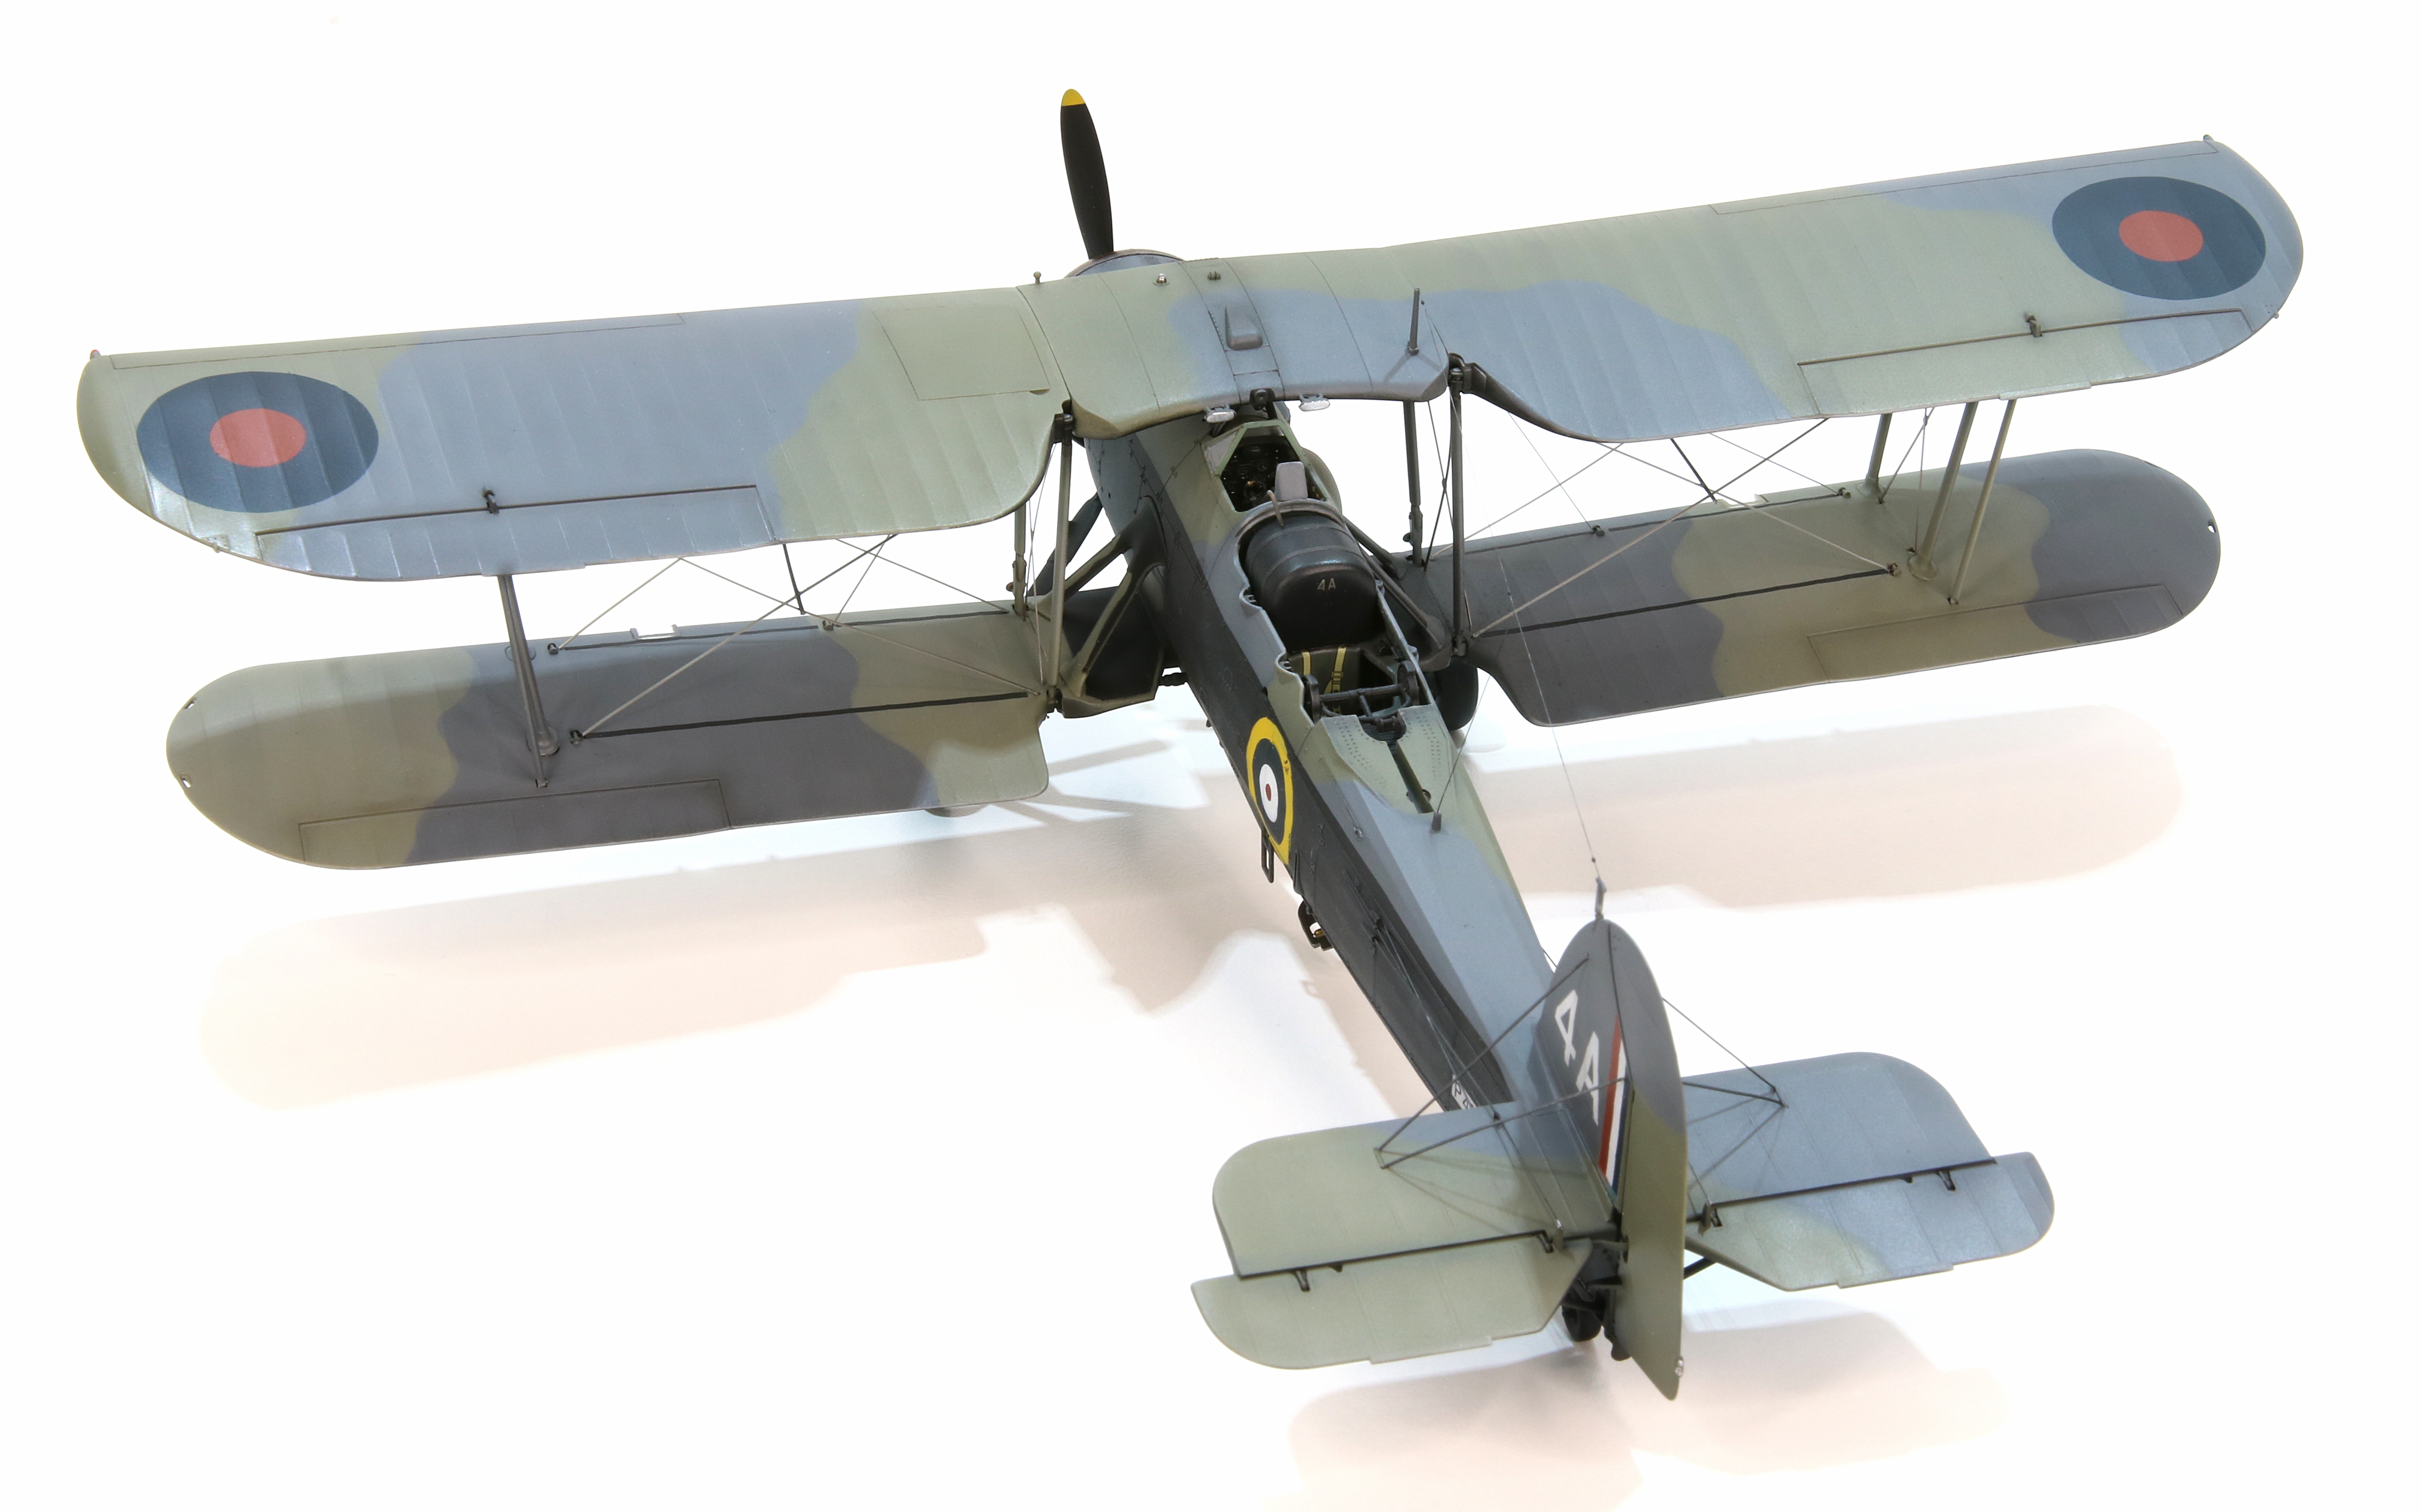
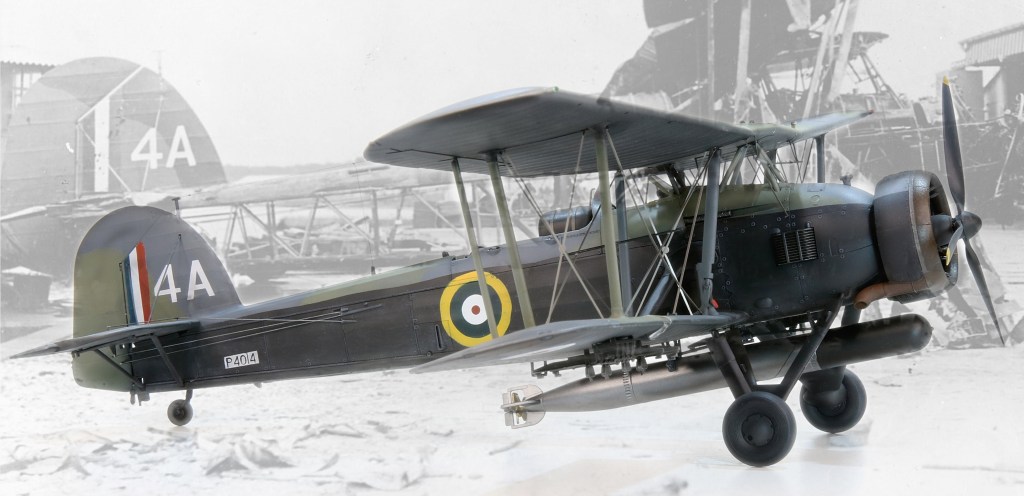
Tamiya 1/48 Fairey Swordfish Mk.I
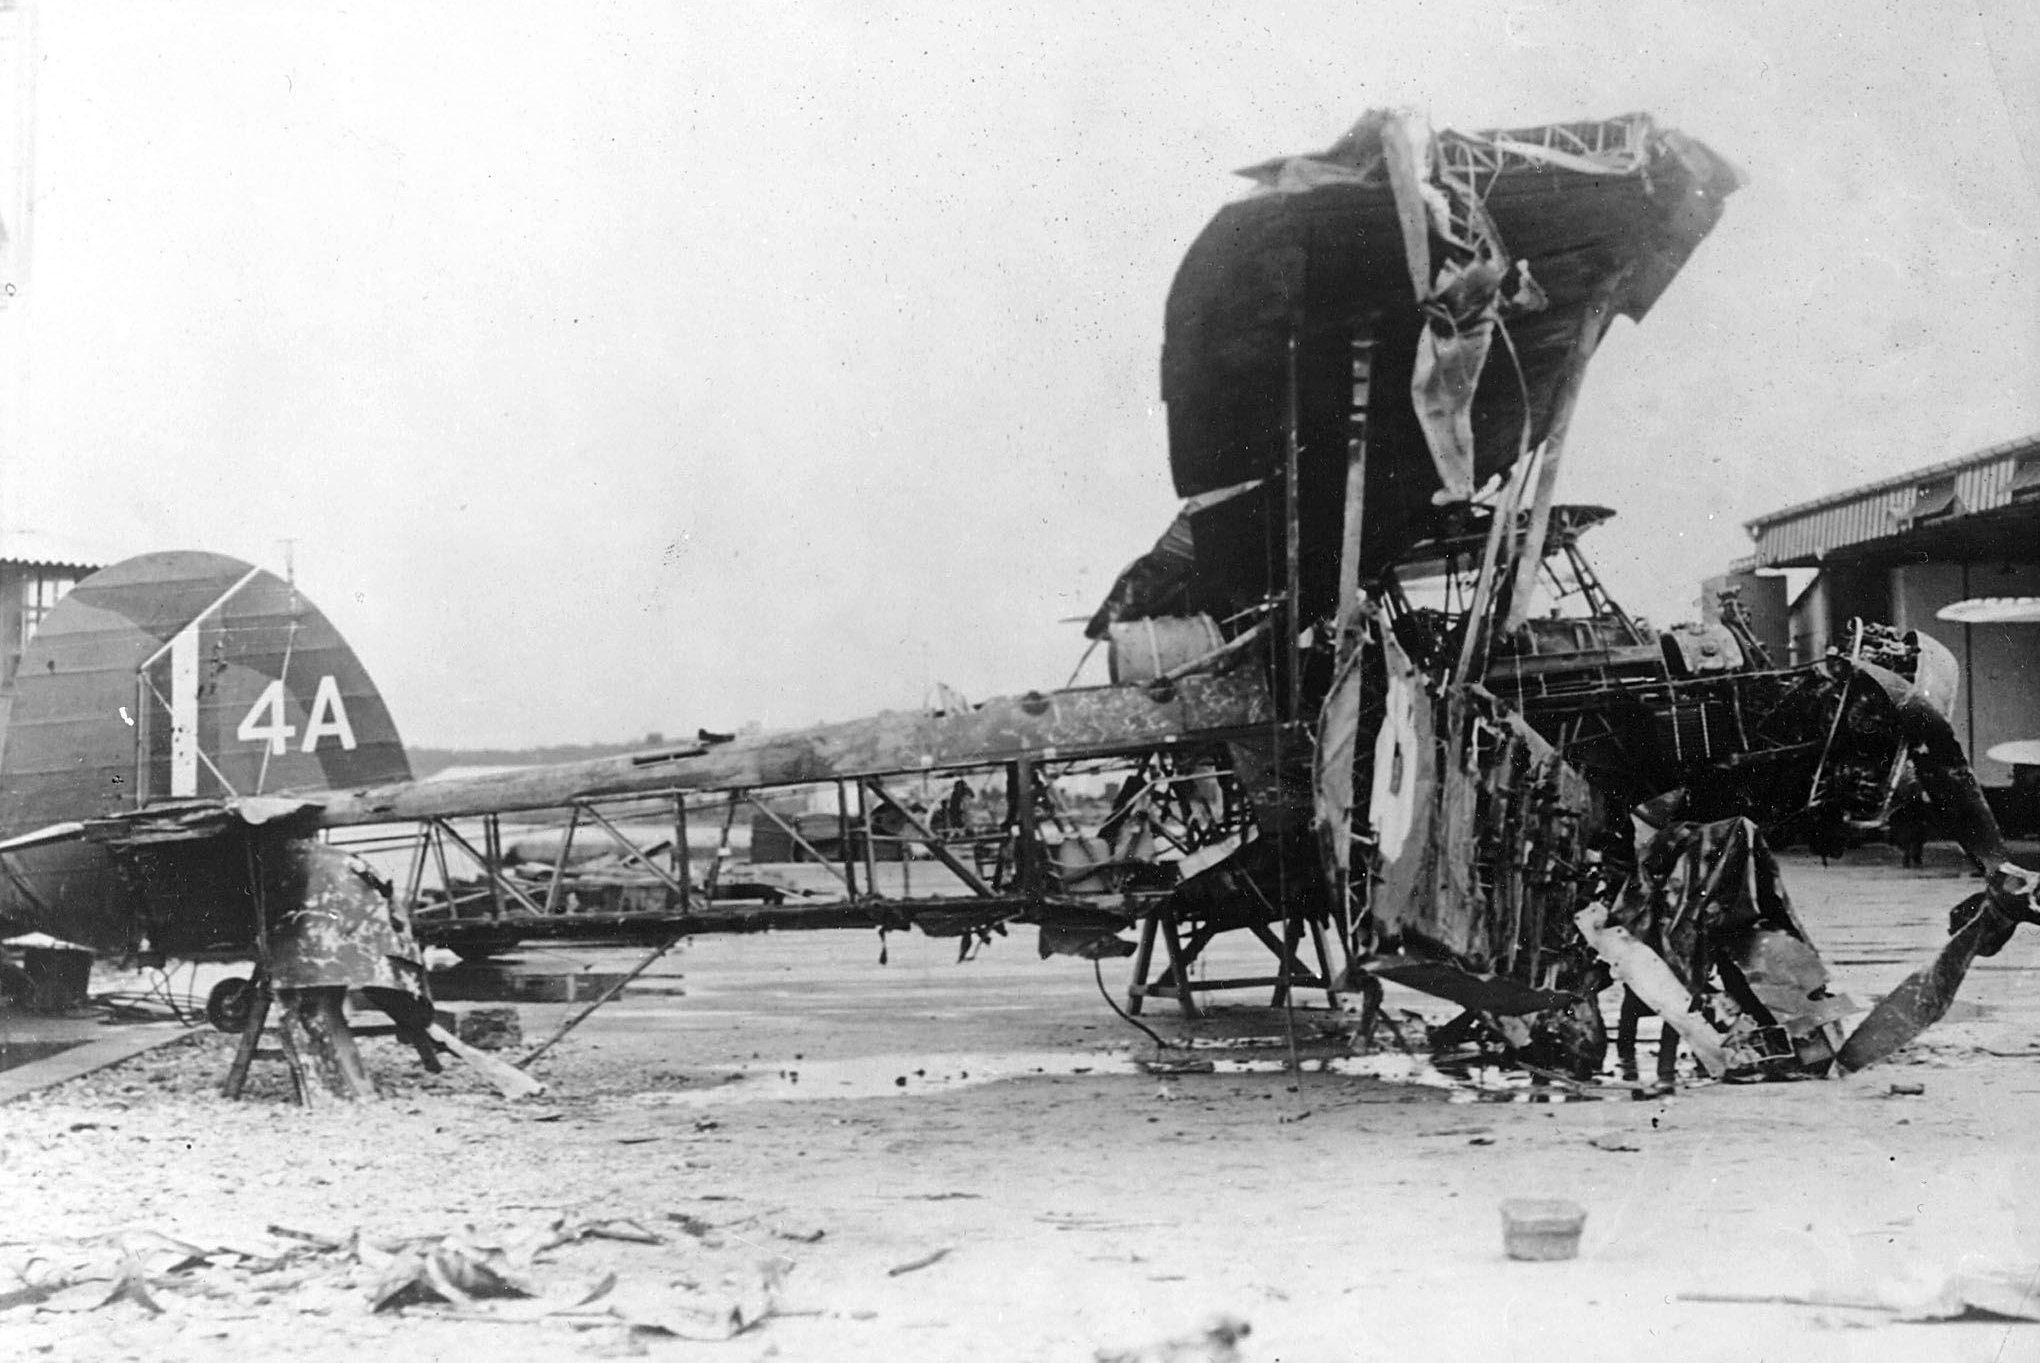
I decided that my Stringbag would be one of those that took part in the Taranto Raid, specifically “4A” belonging to 815NAS and flown by Lieutenant Commander K. Williamson with Observer Lieutenant N. J. ‘Blood’ Scarlett. “4A” was one of two lost in the attack, both crew members surviving and taken as POW. The airframe itself was recovered by the Italian Navy and the photos of it are the only photos taken of the Taranto Swordfish.
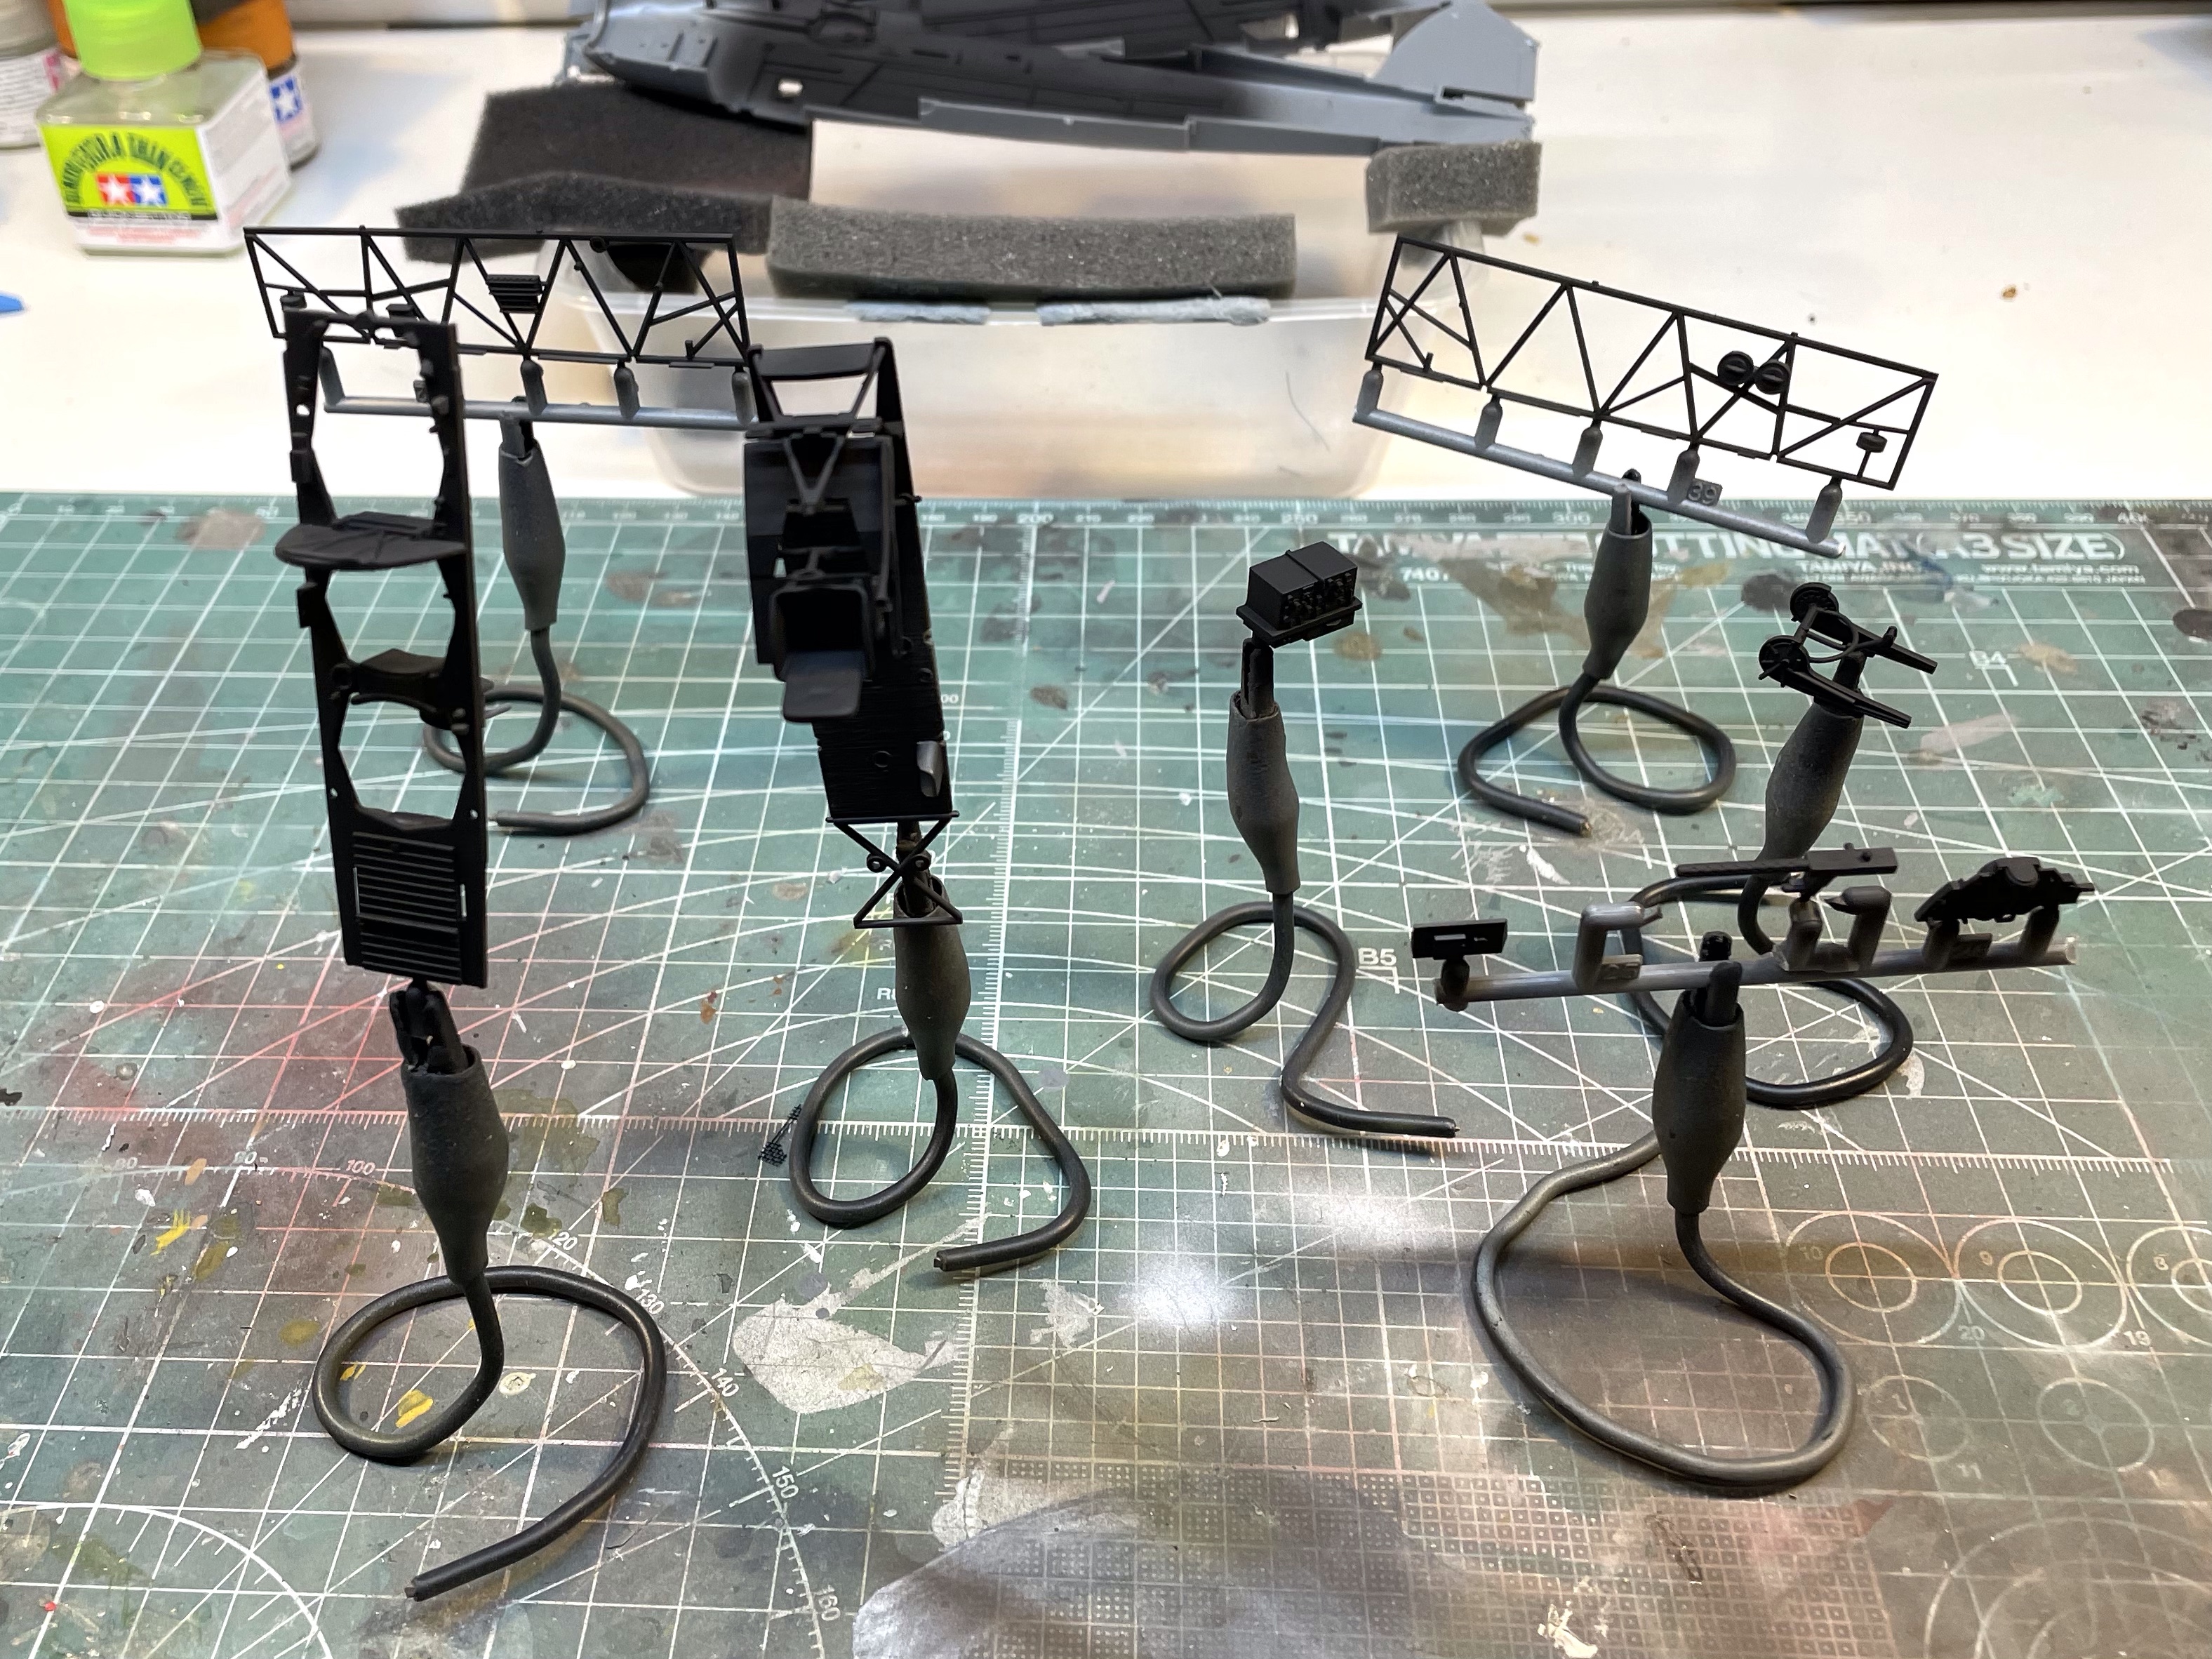
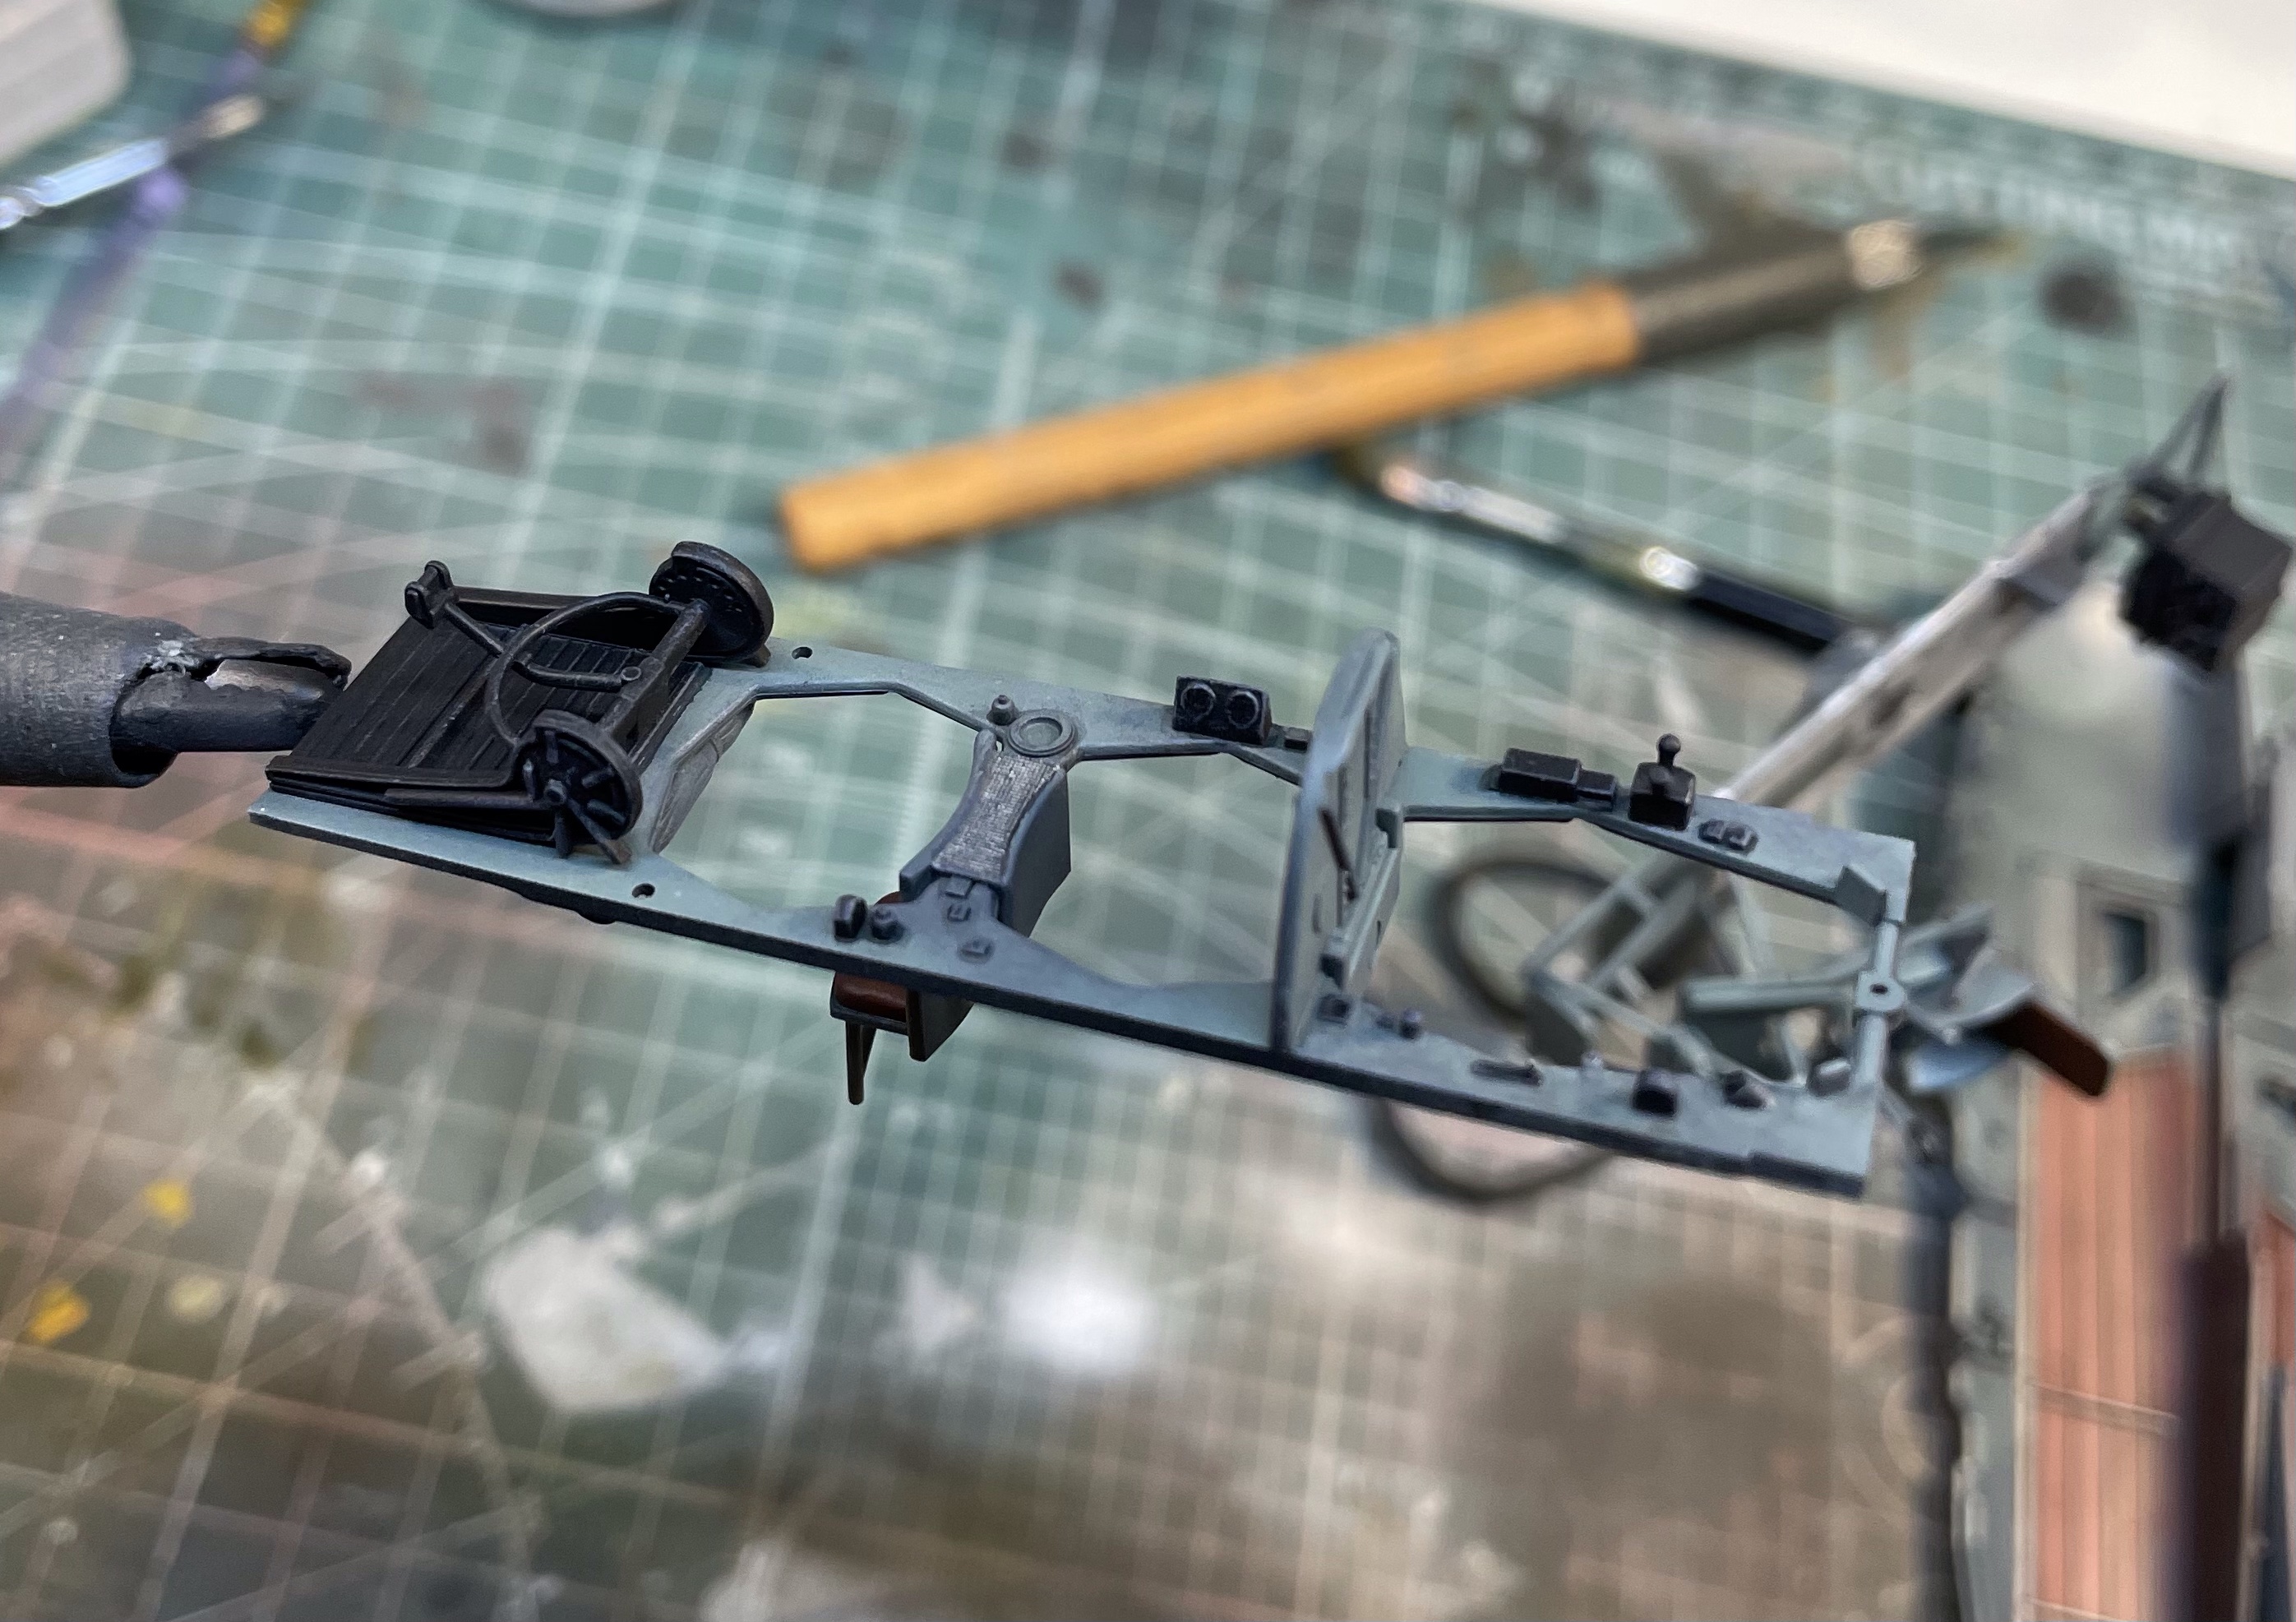
Assembly
As usual, assembly begins with the cockpit. The kit instructions are reliably accurate in terms of colour callouts and when supplemented by basic internet searches a very nice result can be obtained.
Click on an image below to scroll through the construction slideshow
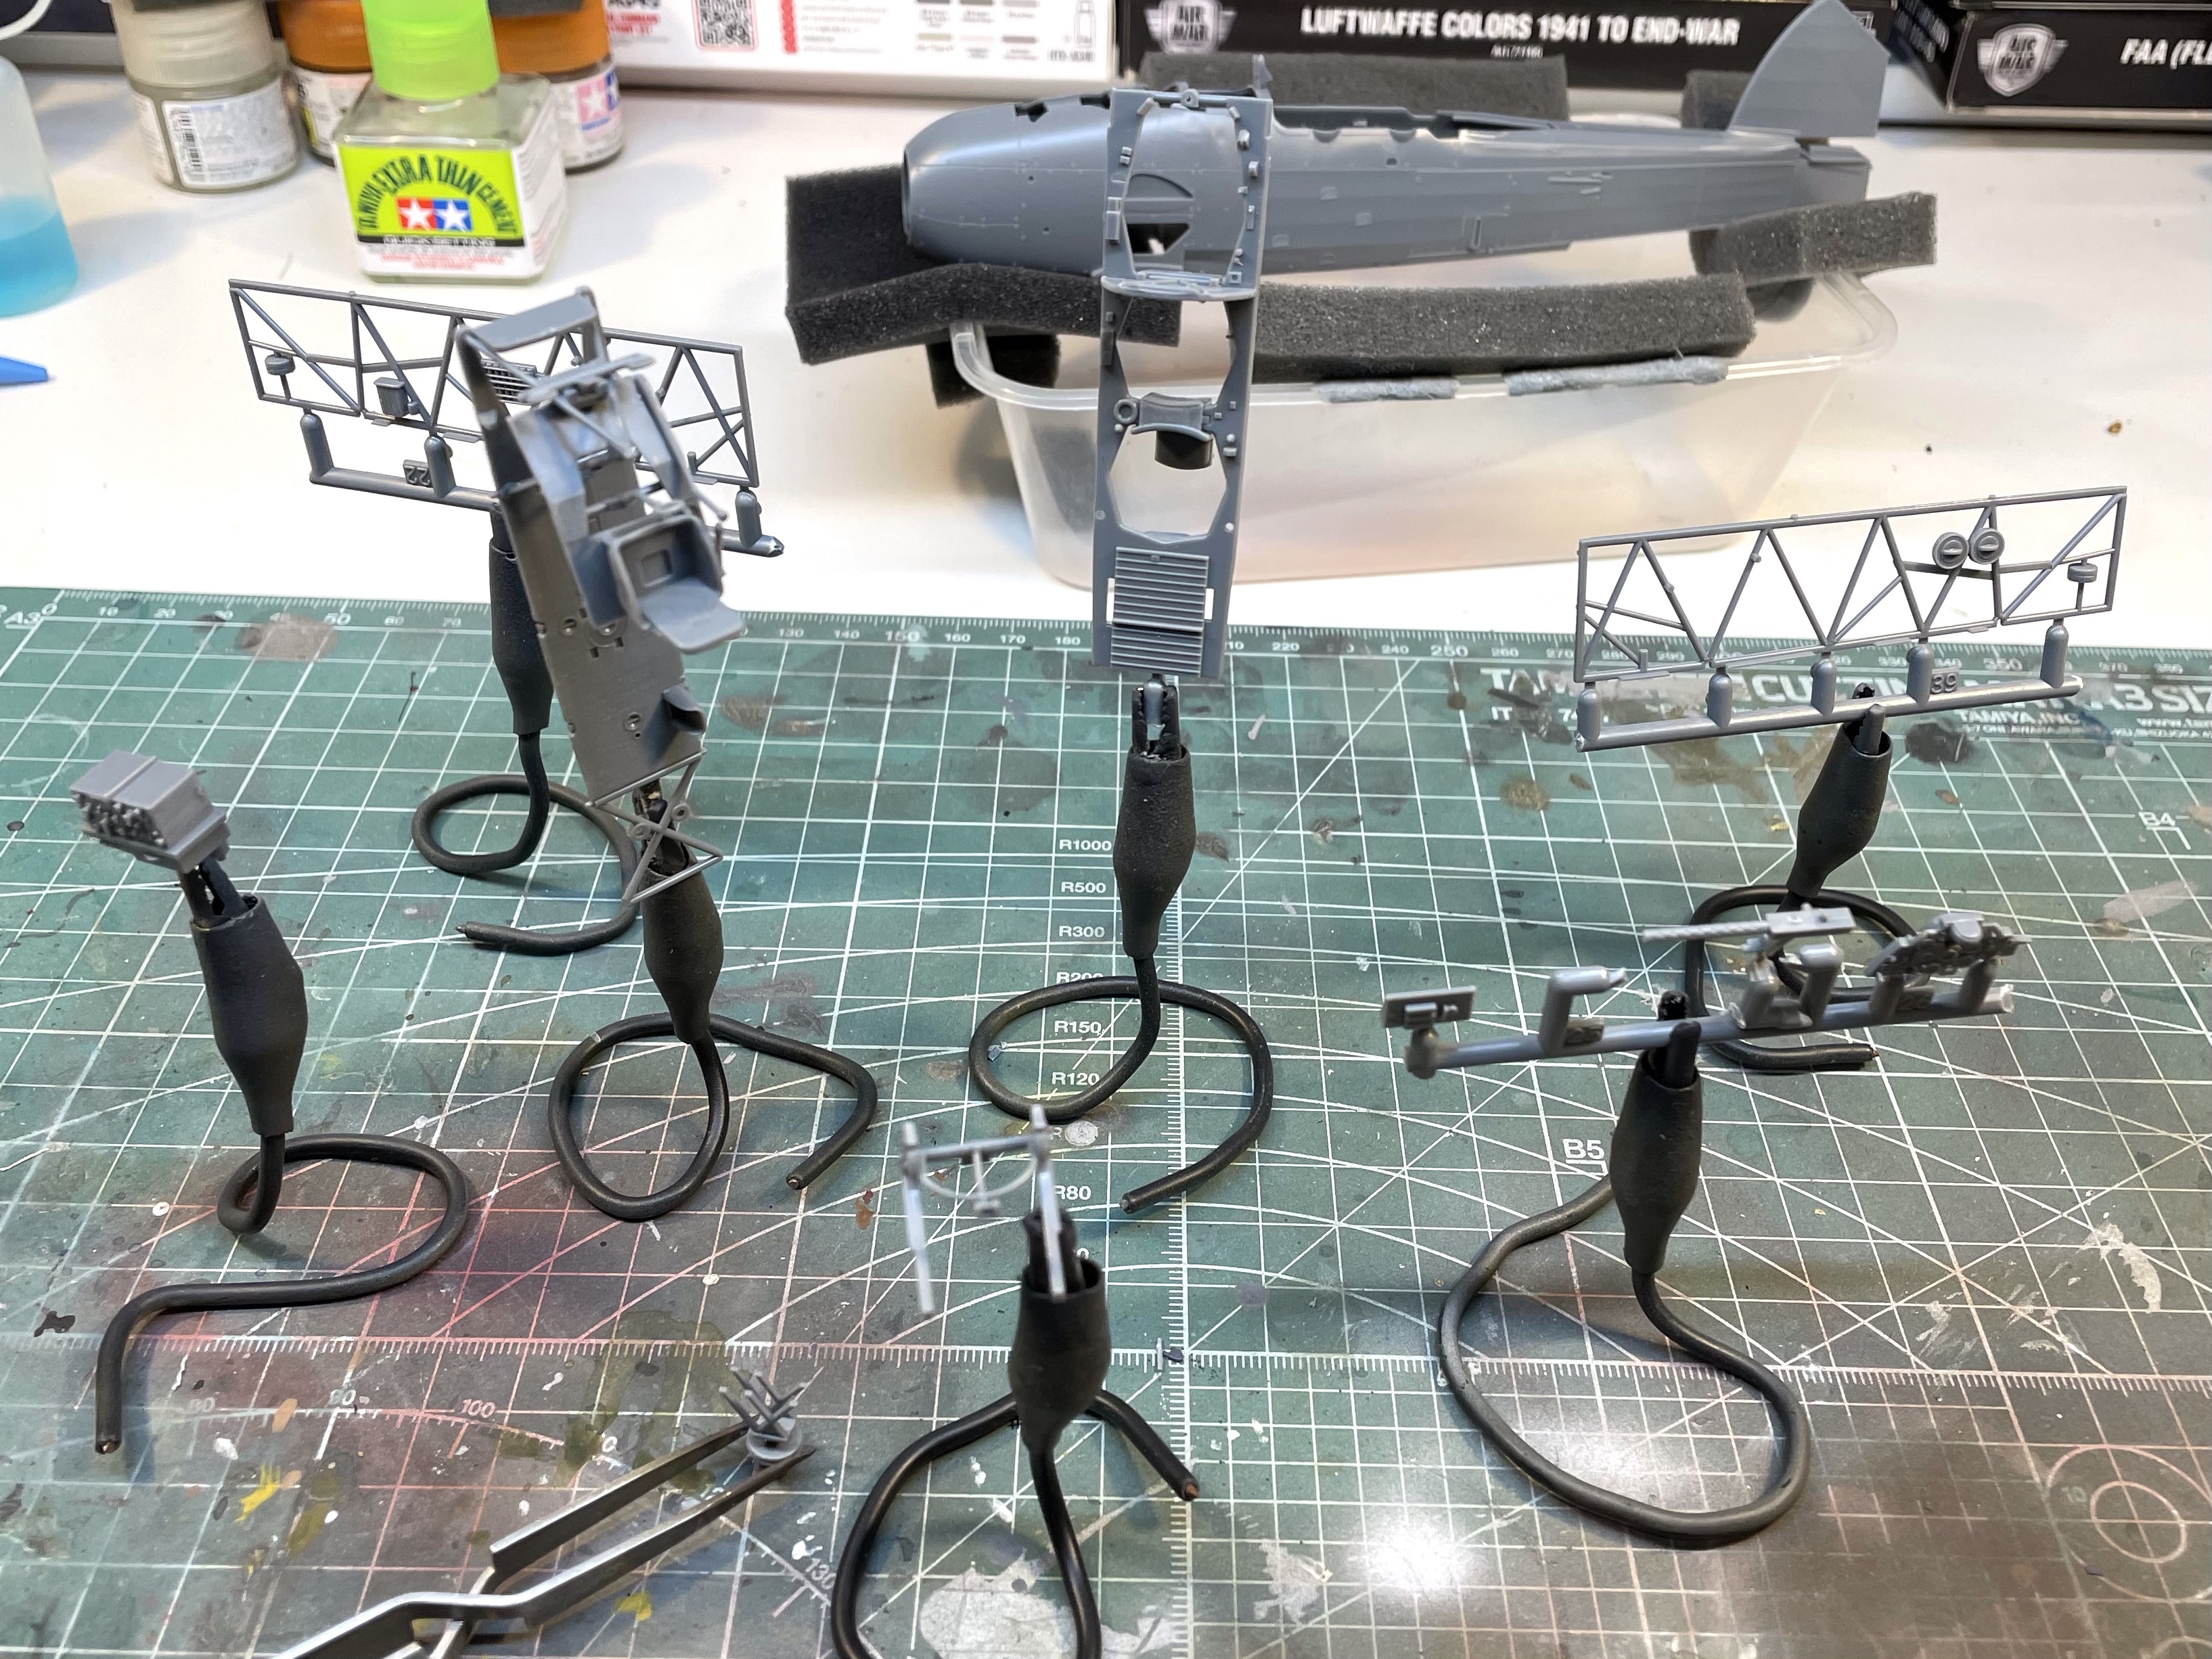


There were no fit issues inclosing up the fuselage, the only thing to be careful of is in opening all of the holes needed for the rigging later. Ask me how I know.
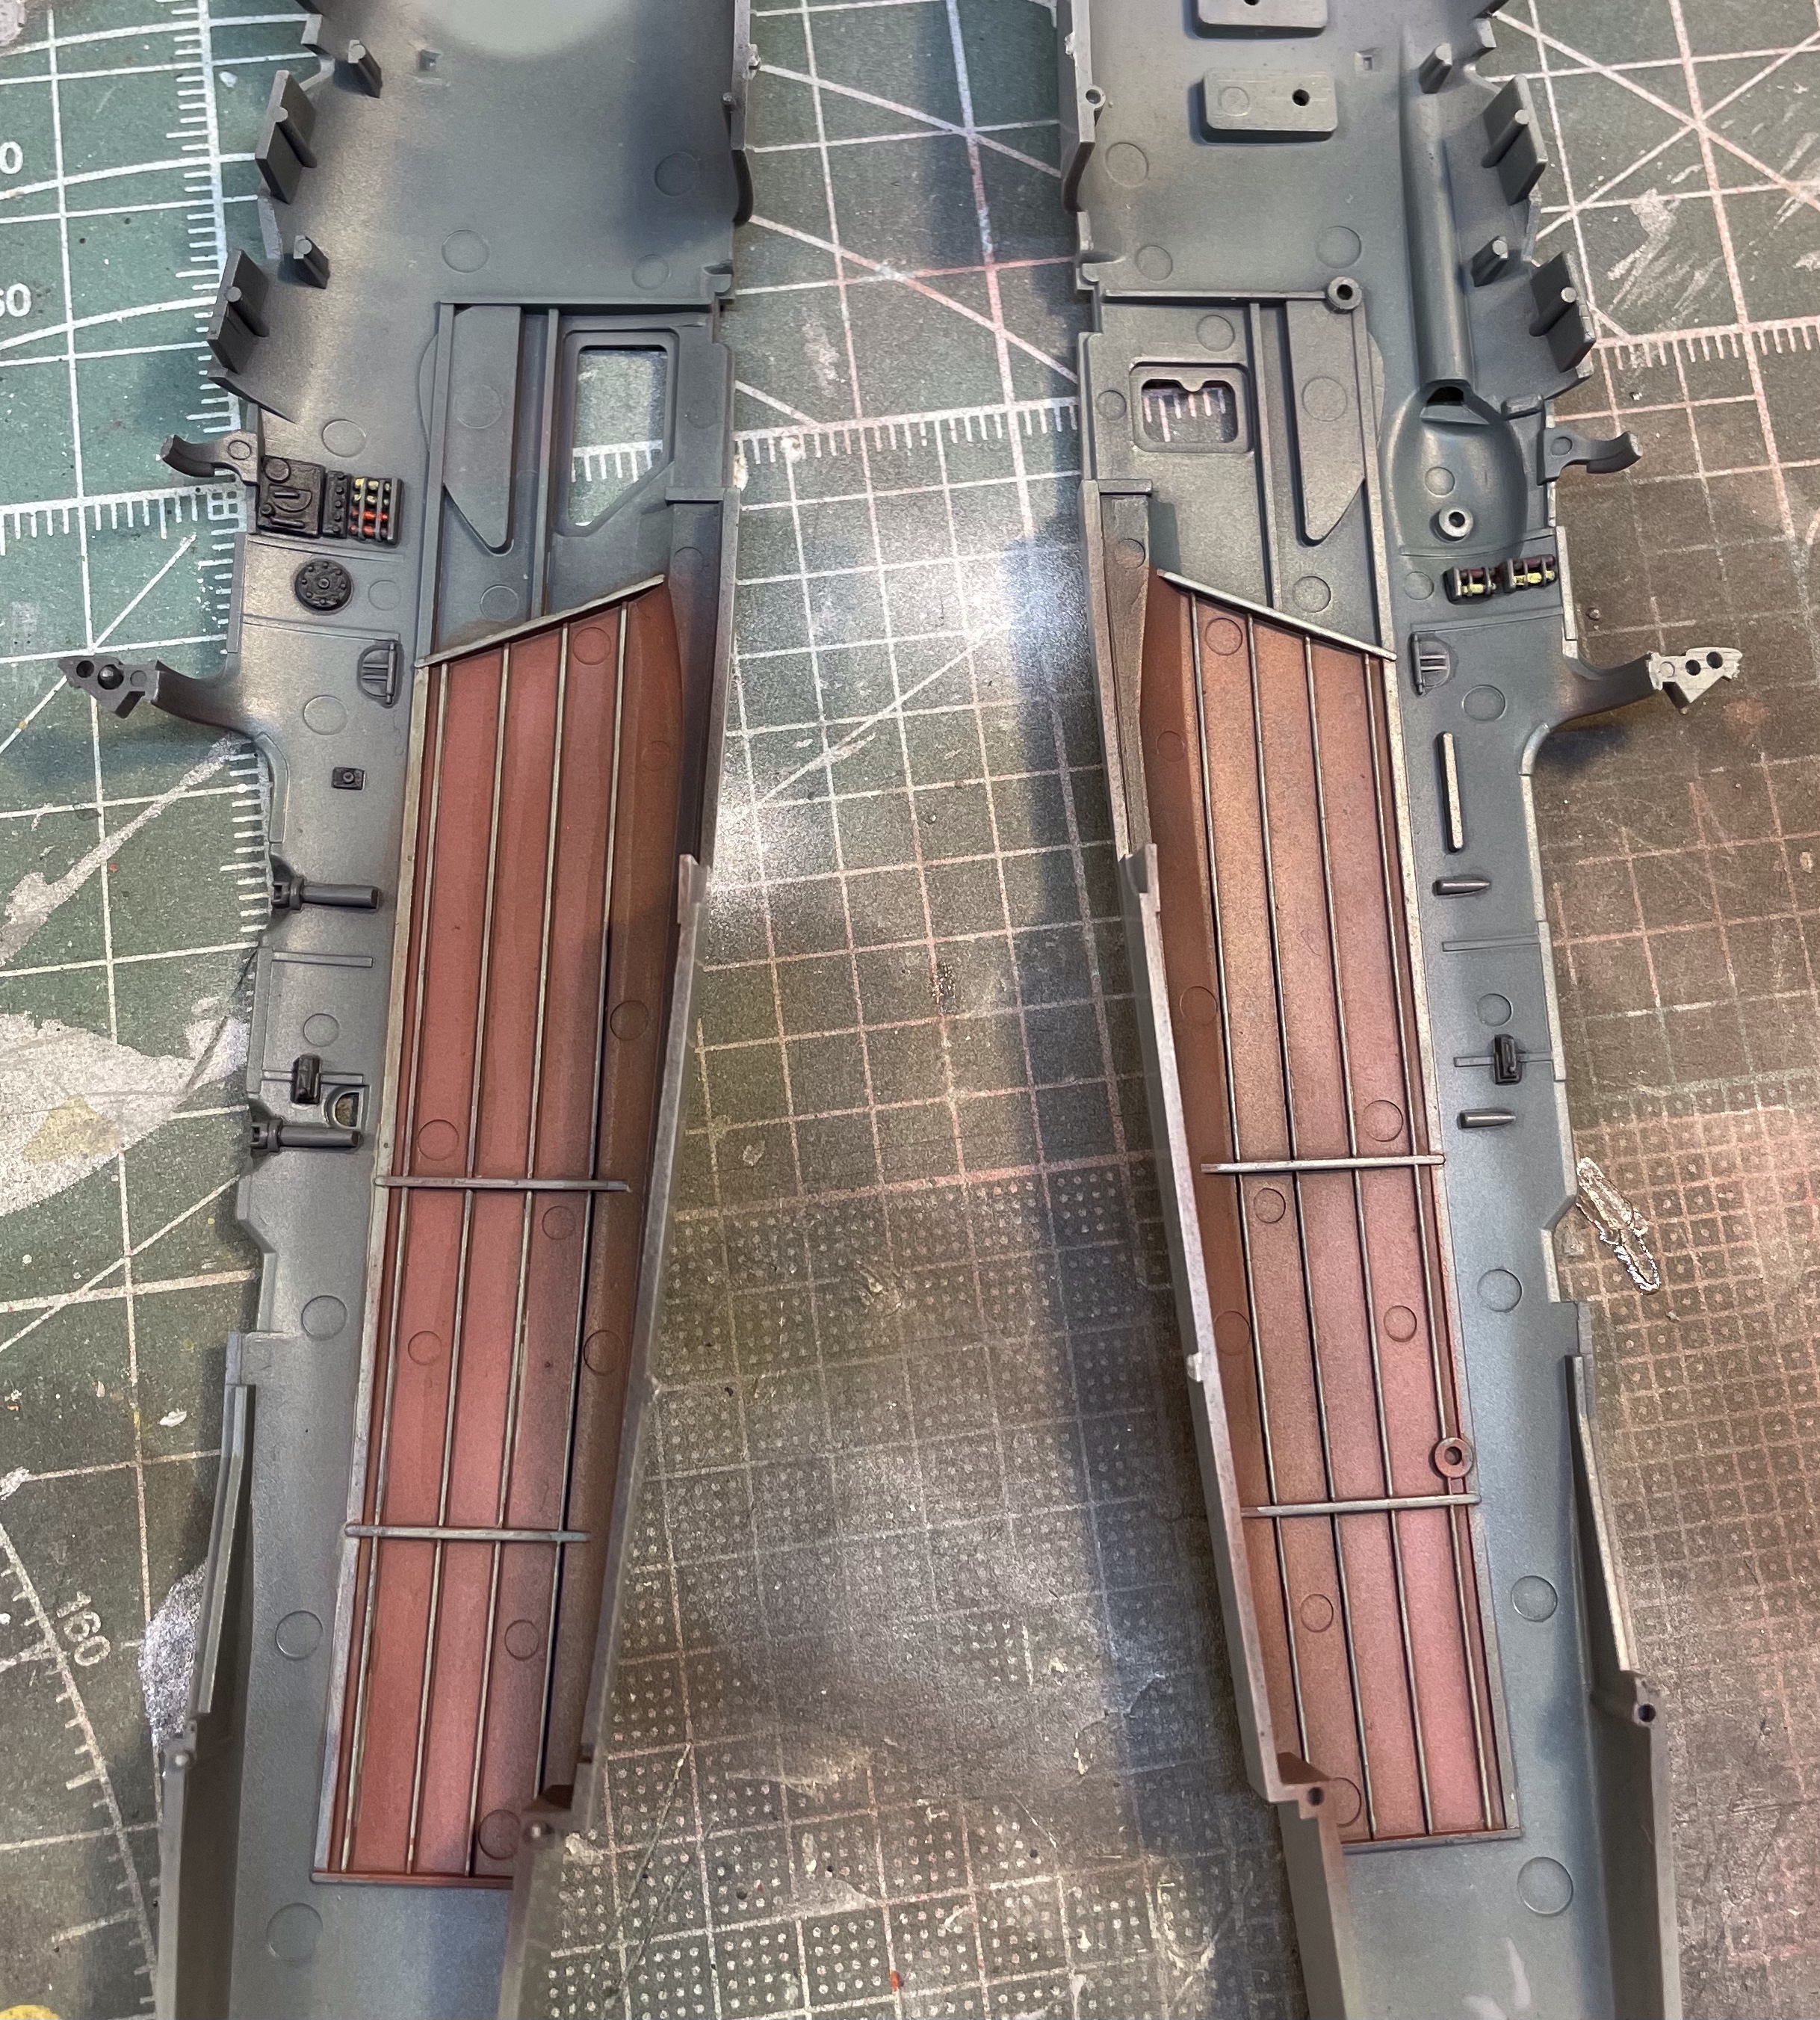
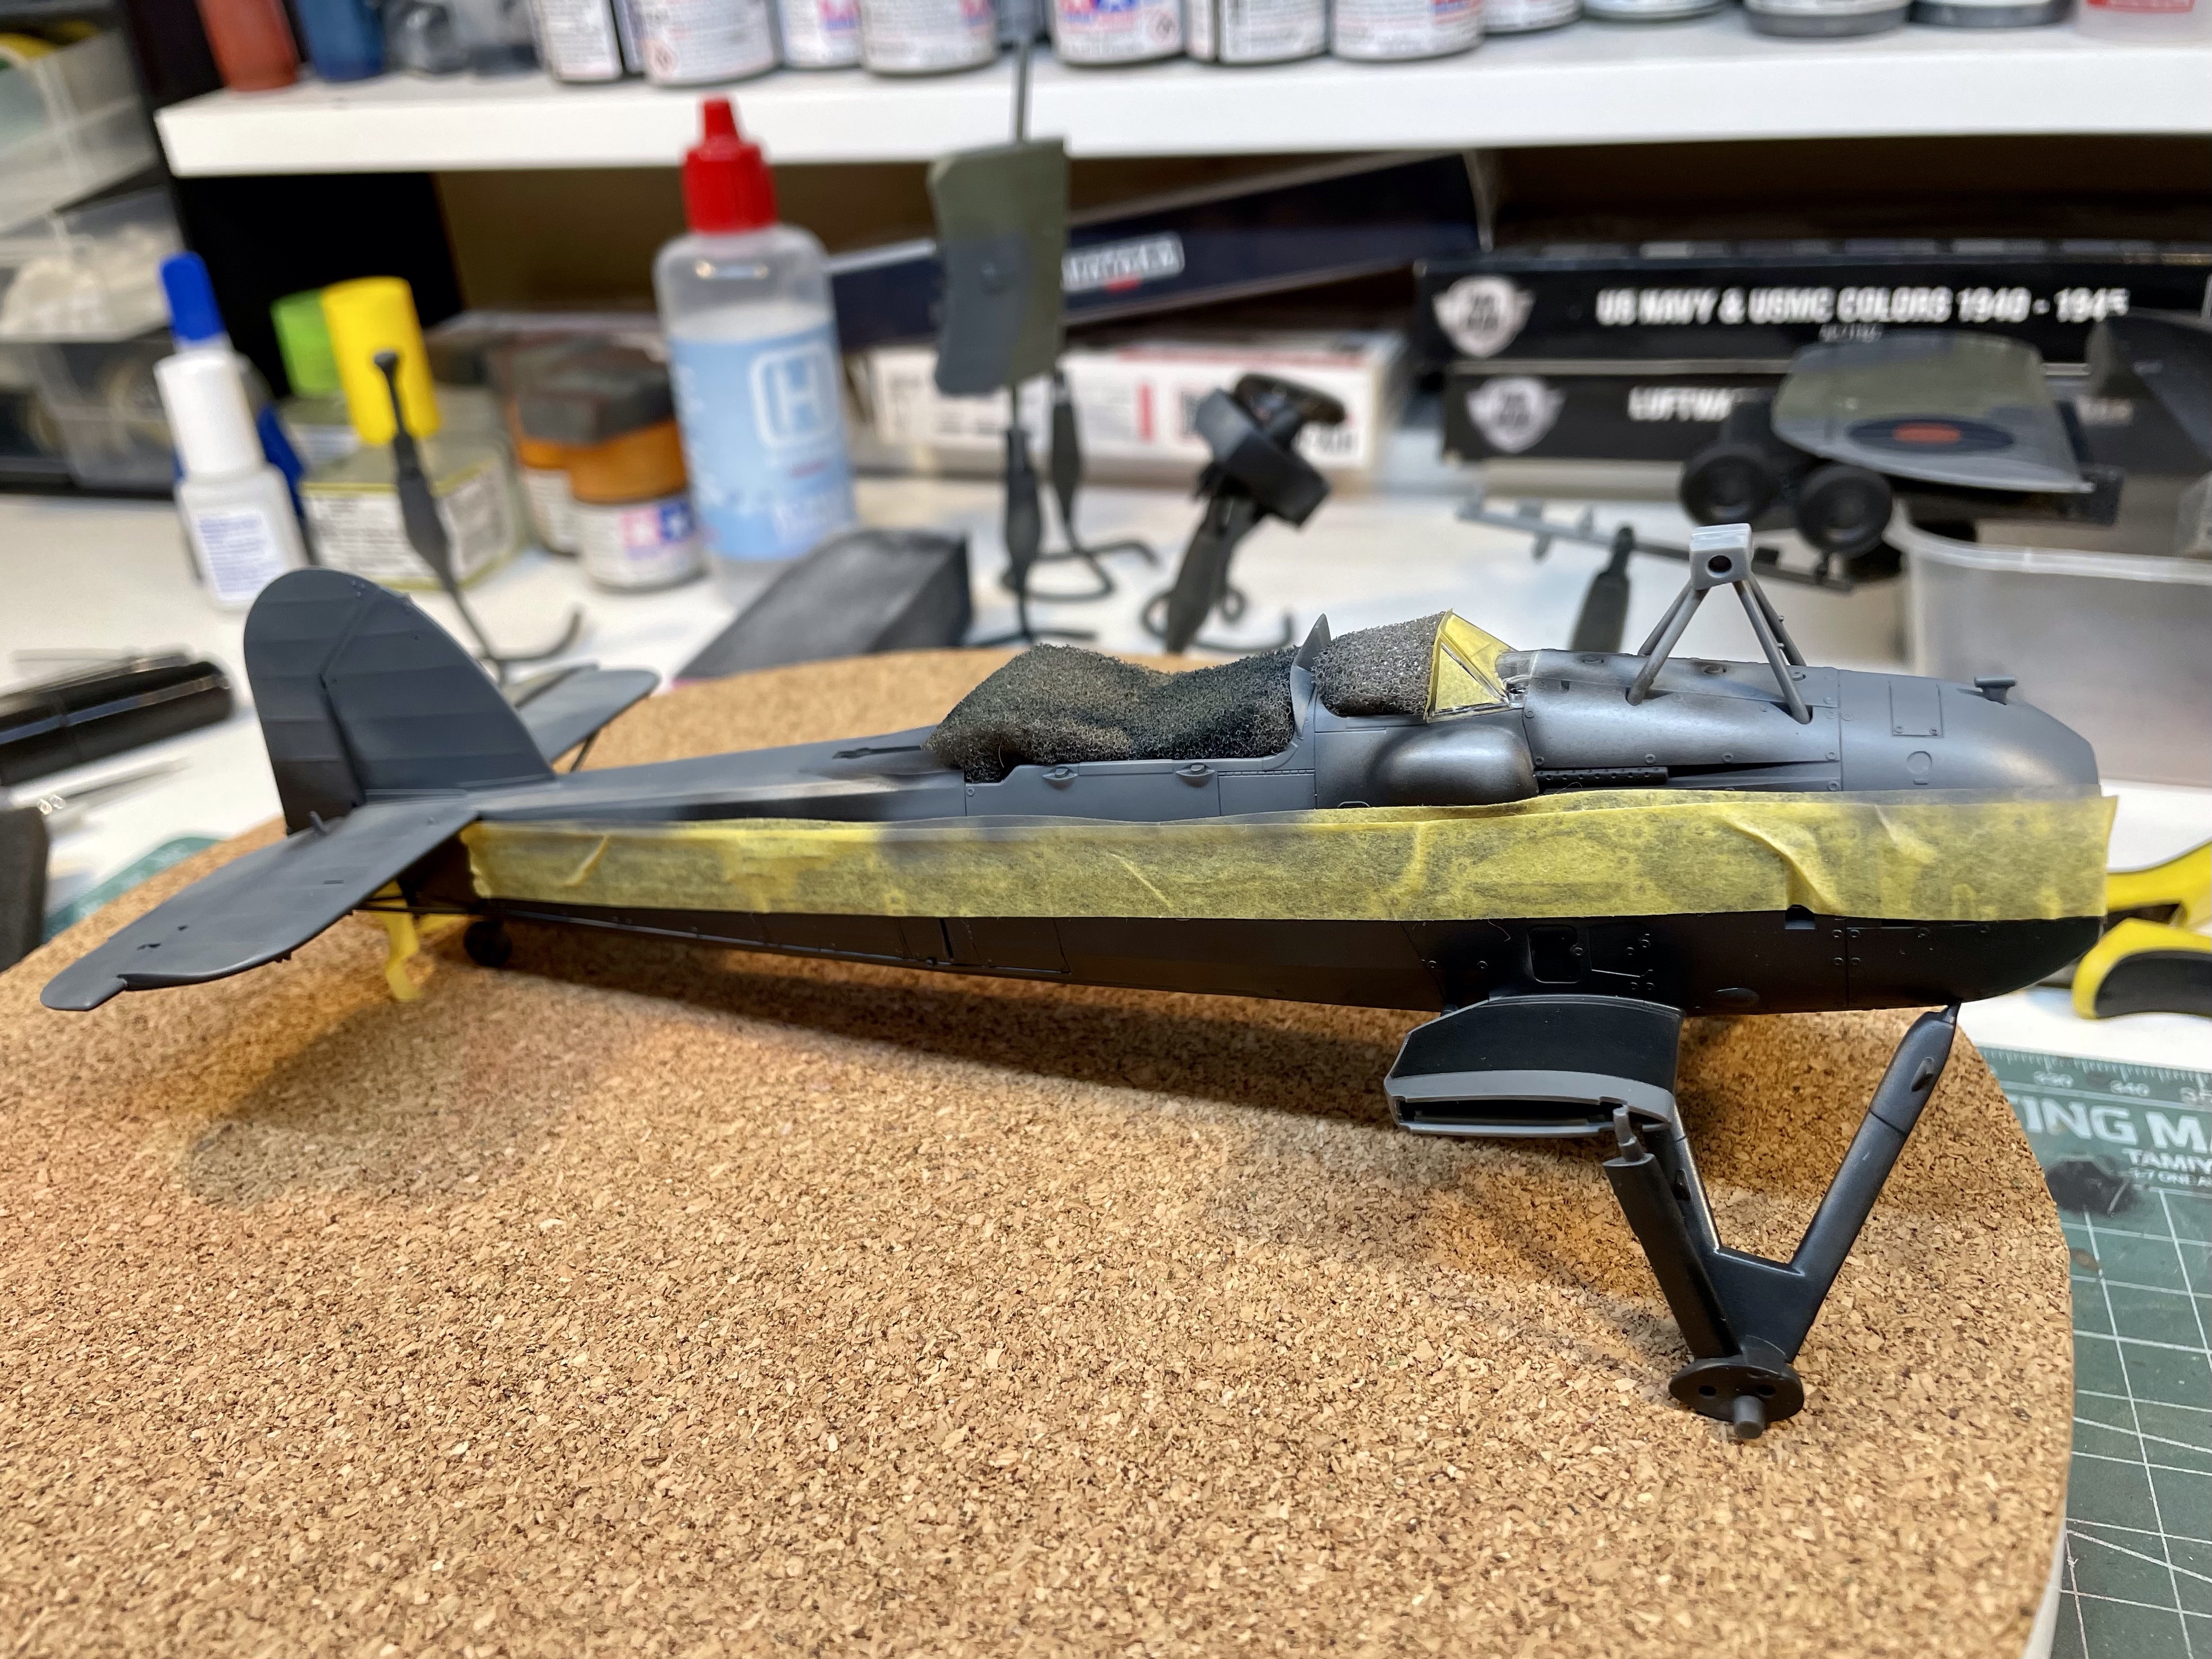
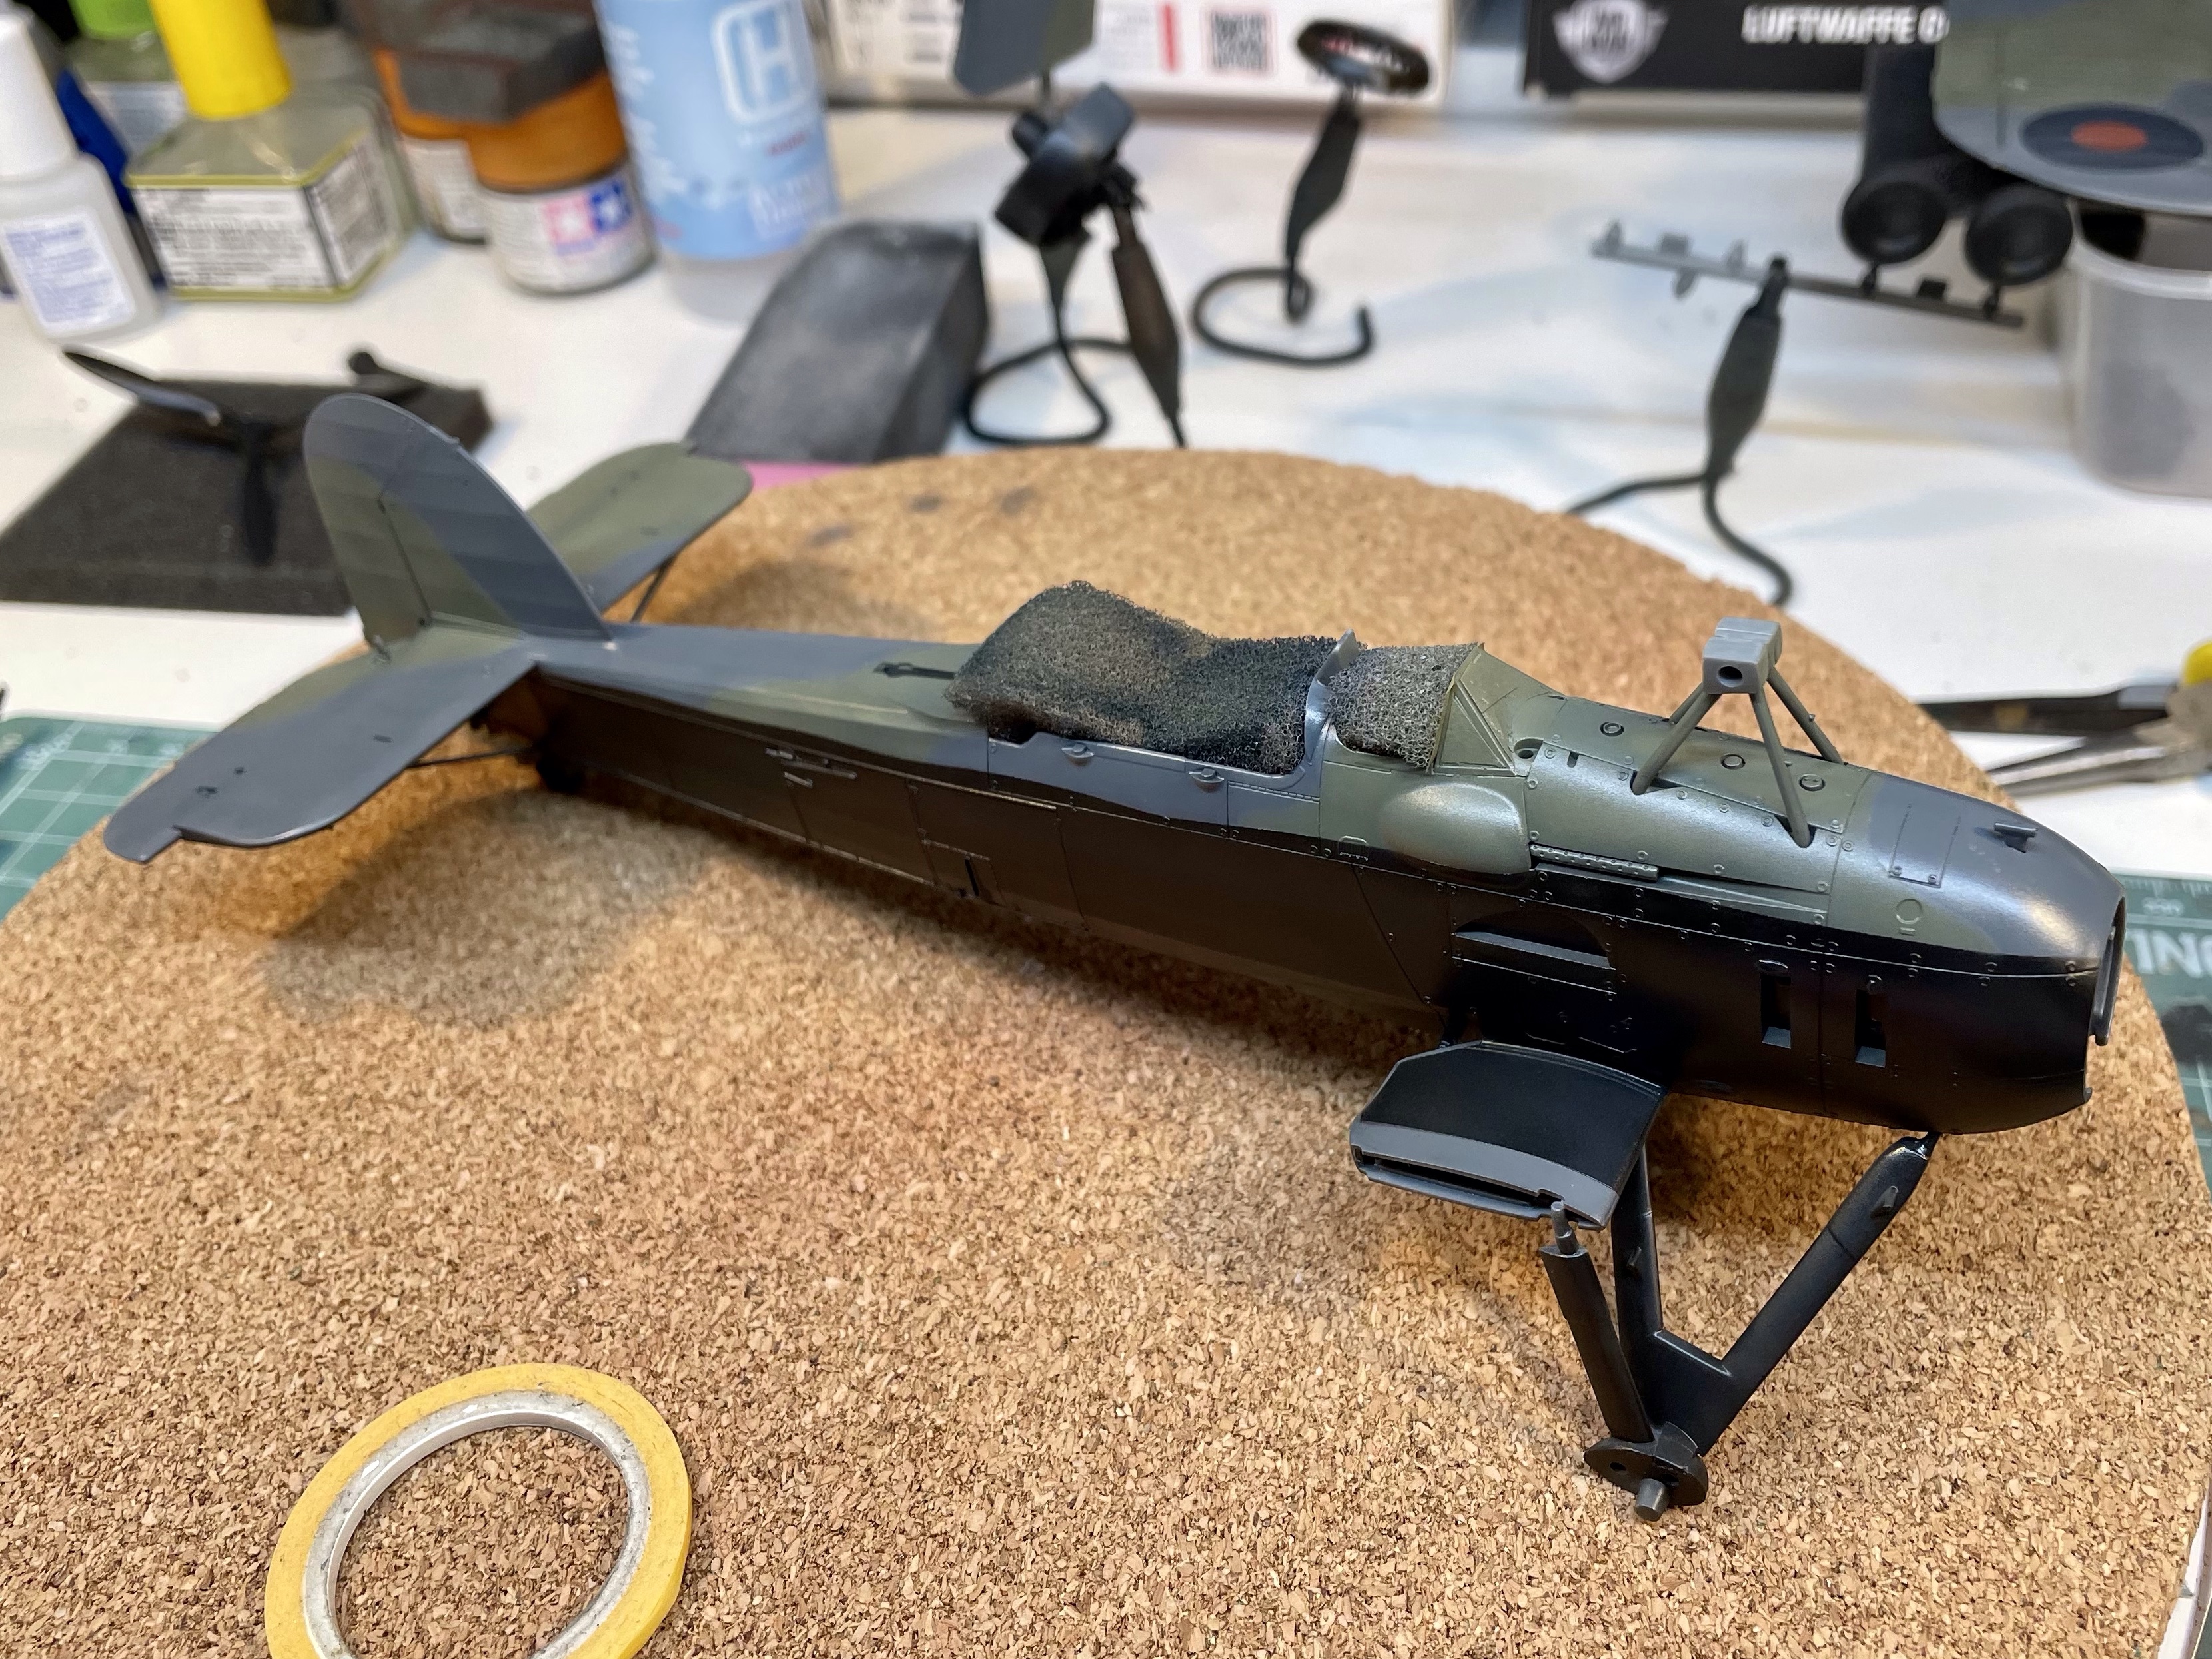
Painting
Below two of the few photos of any of the Taranto Raid Swordfish, “4A” after it was recovered by the Italians. There’s not a lot to go on… The main question in my mind was how far up the fuselage the black distemper went. I already knew that it was only 815NAS that painted black on their Swordfish, but was the original paint scheme the SE1 or TSS, with Sky undersides or MSG?

Discussion and research led to an understanding that Fairey-built Swordfish (before mass production by Blackburn) were painted in SE1 which included MSG to high up the fuselage sides. That meant the the black, if it were to cover the MSG needed to come high up the fuselage sides too.
Click on an image below to scroll through the painting and markings slideshow

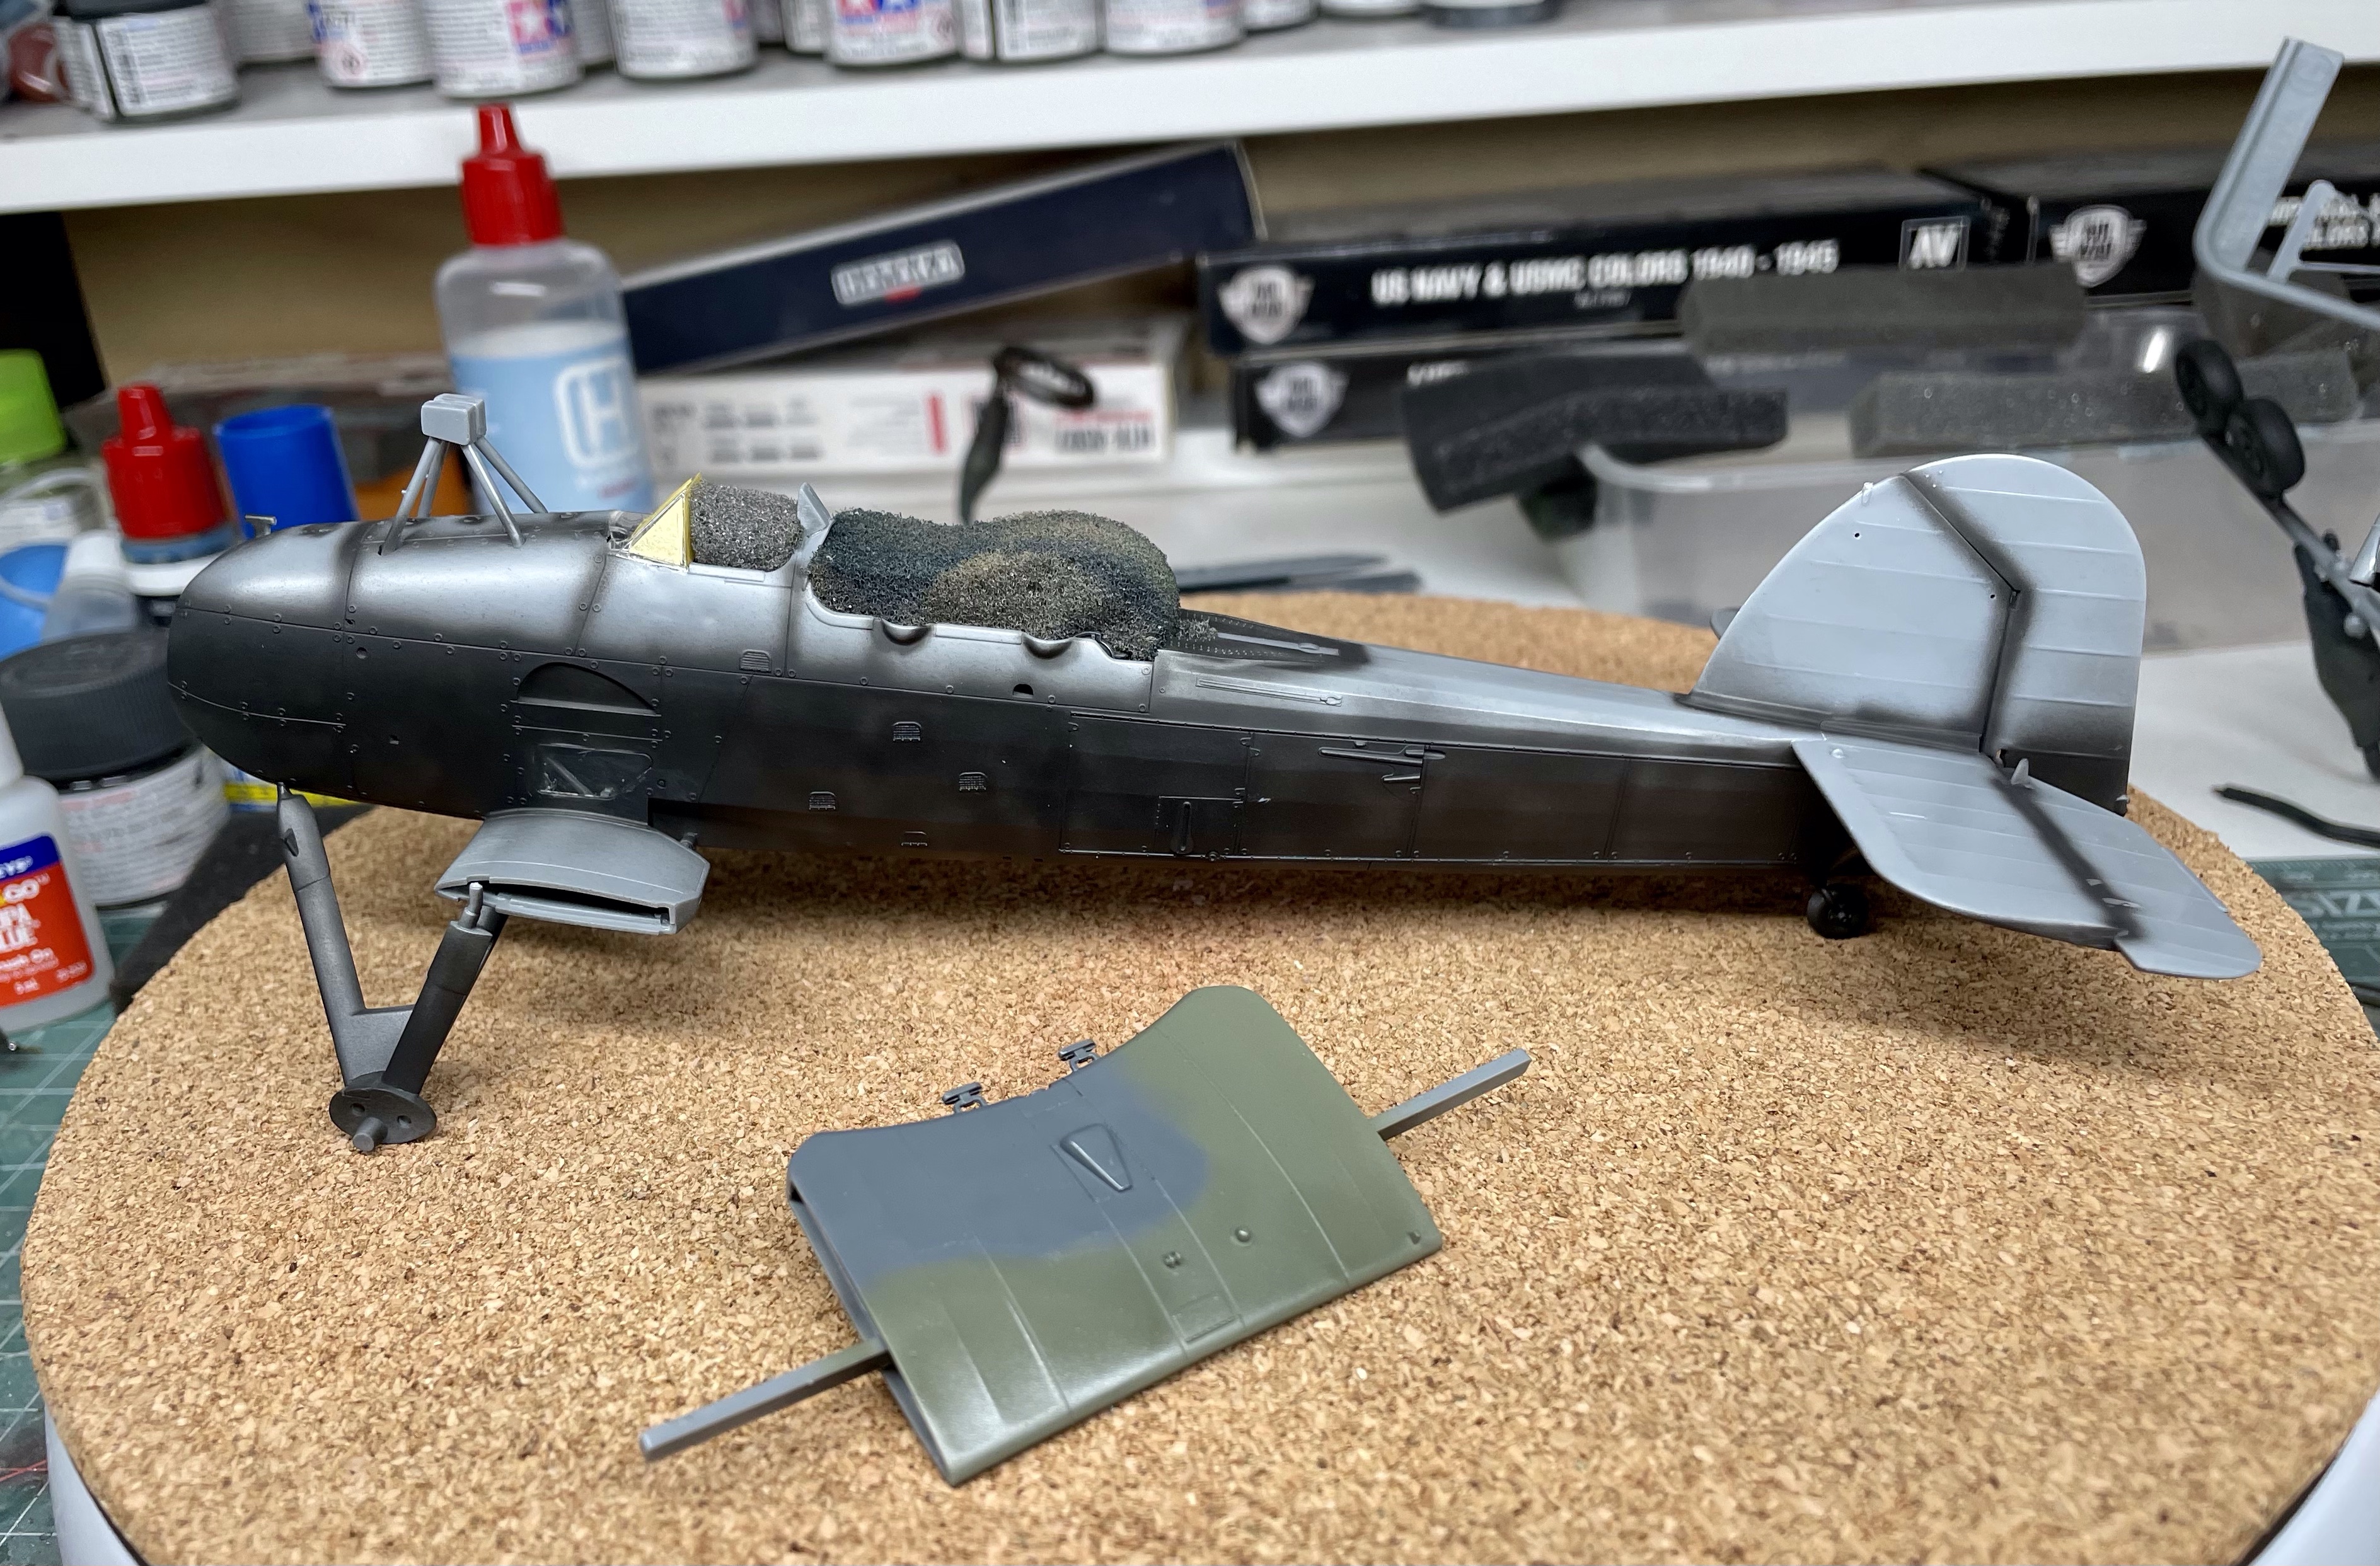


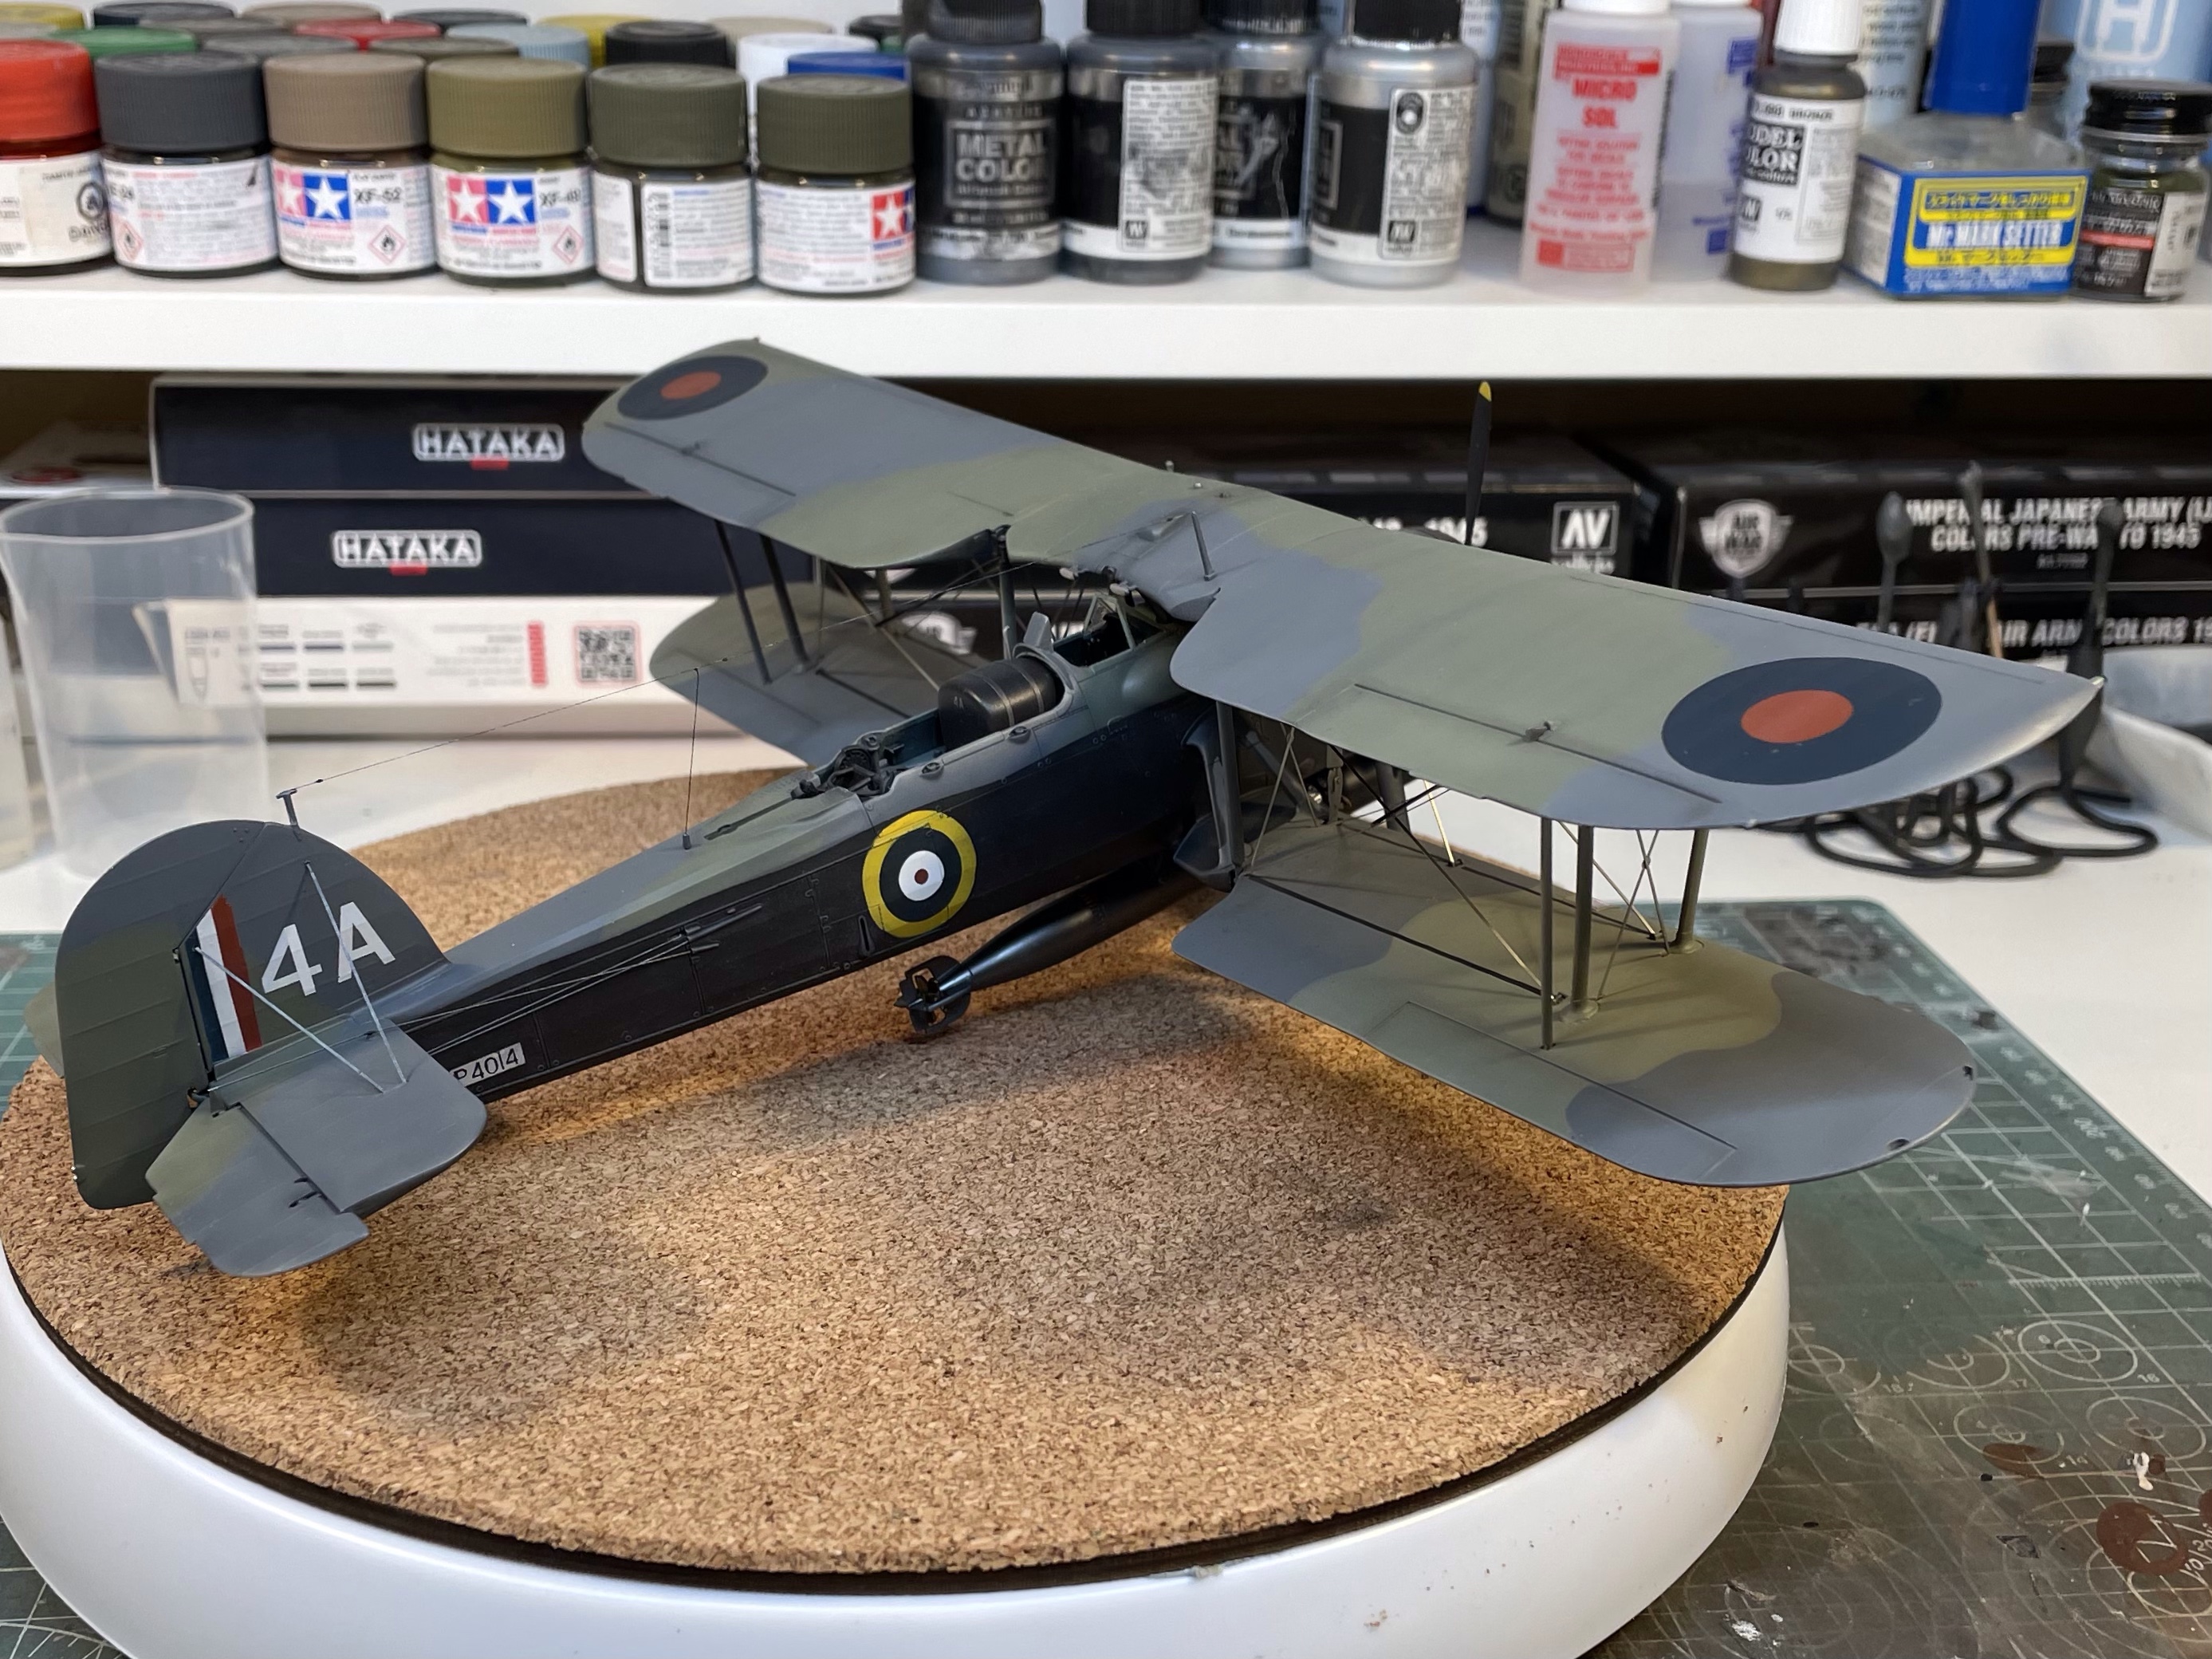
The photo of the painted wings to the lower right in the gallery above shows the other learning I gained, that being the “shadow shading” practise of lightening the lower wing colours on biplanes in the early part of the war. While not universal, and impossible to know for sure on this airframe, I lightened the DSG and ESG by 20% with MSG to represent shadow shading on my model.

All of the markings were painted, and there are no decals on it as the airframe stencils were all overpainted with the black.
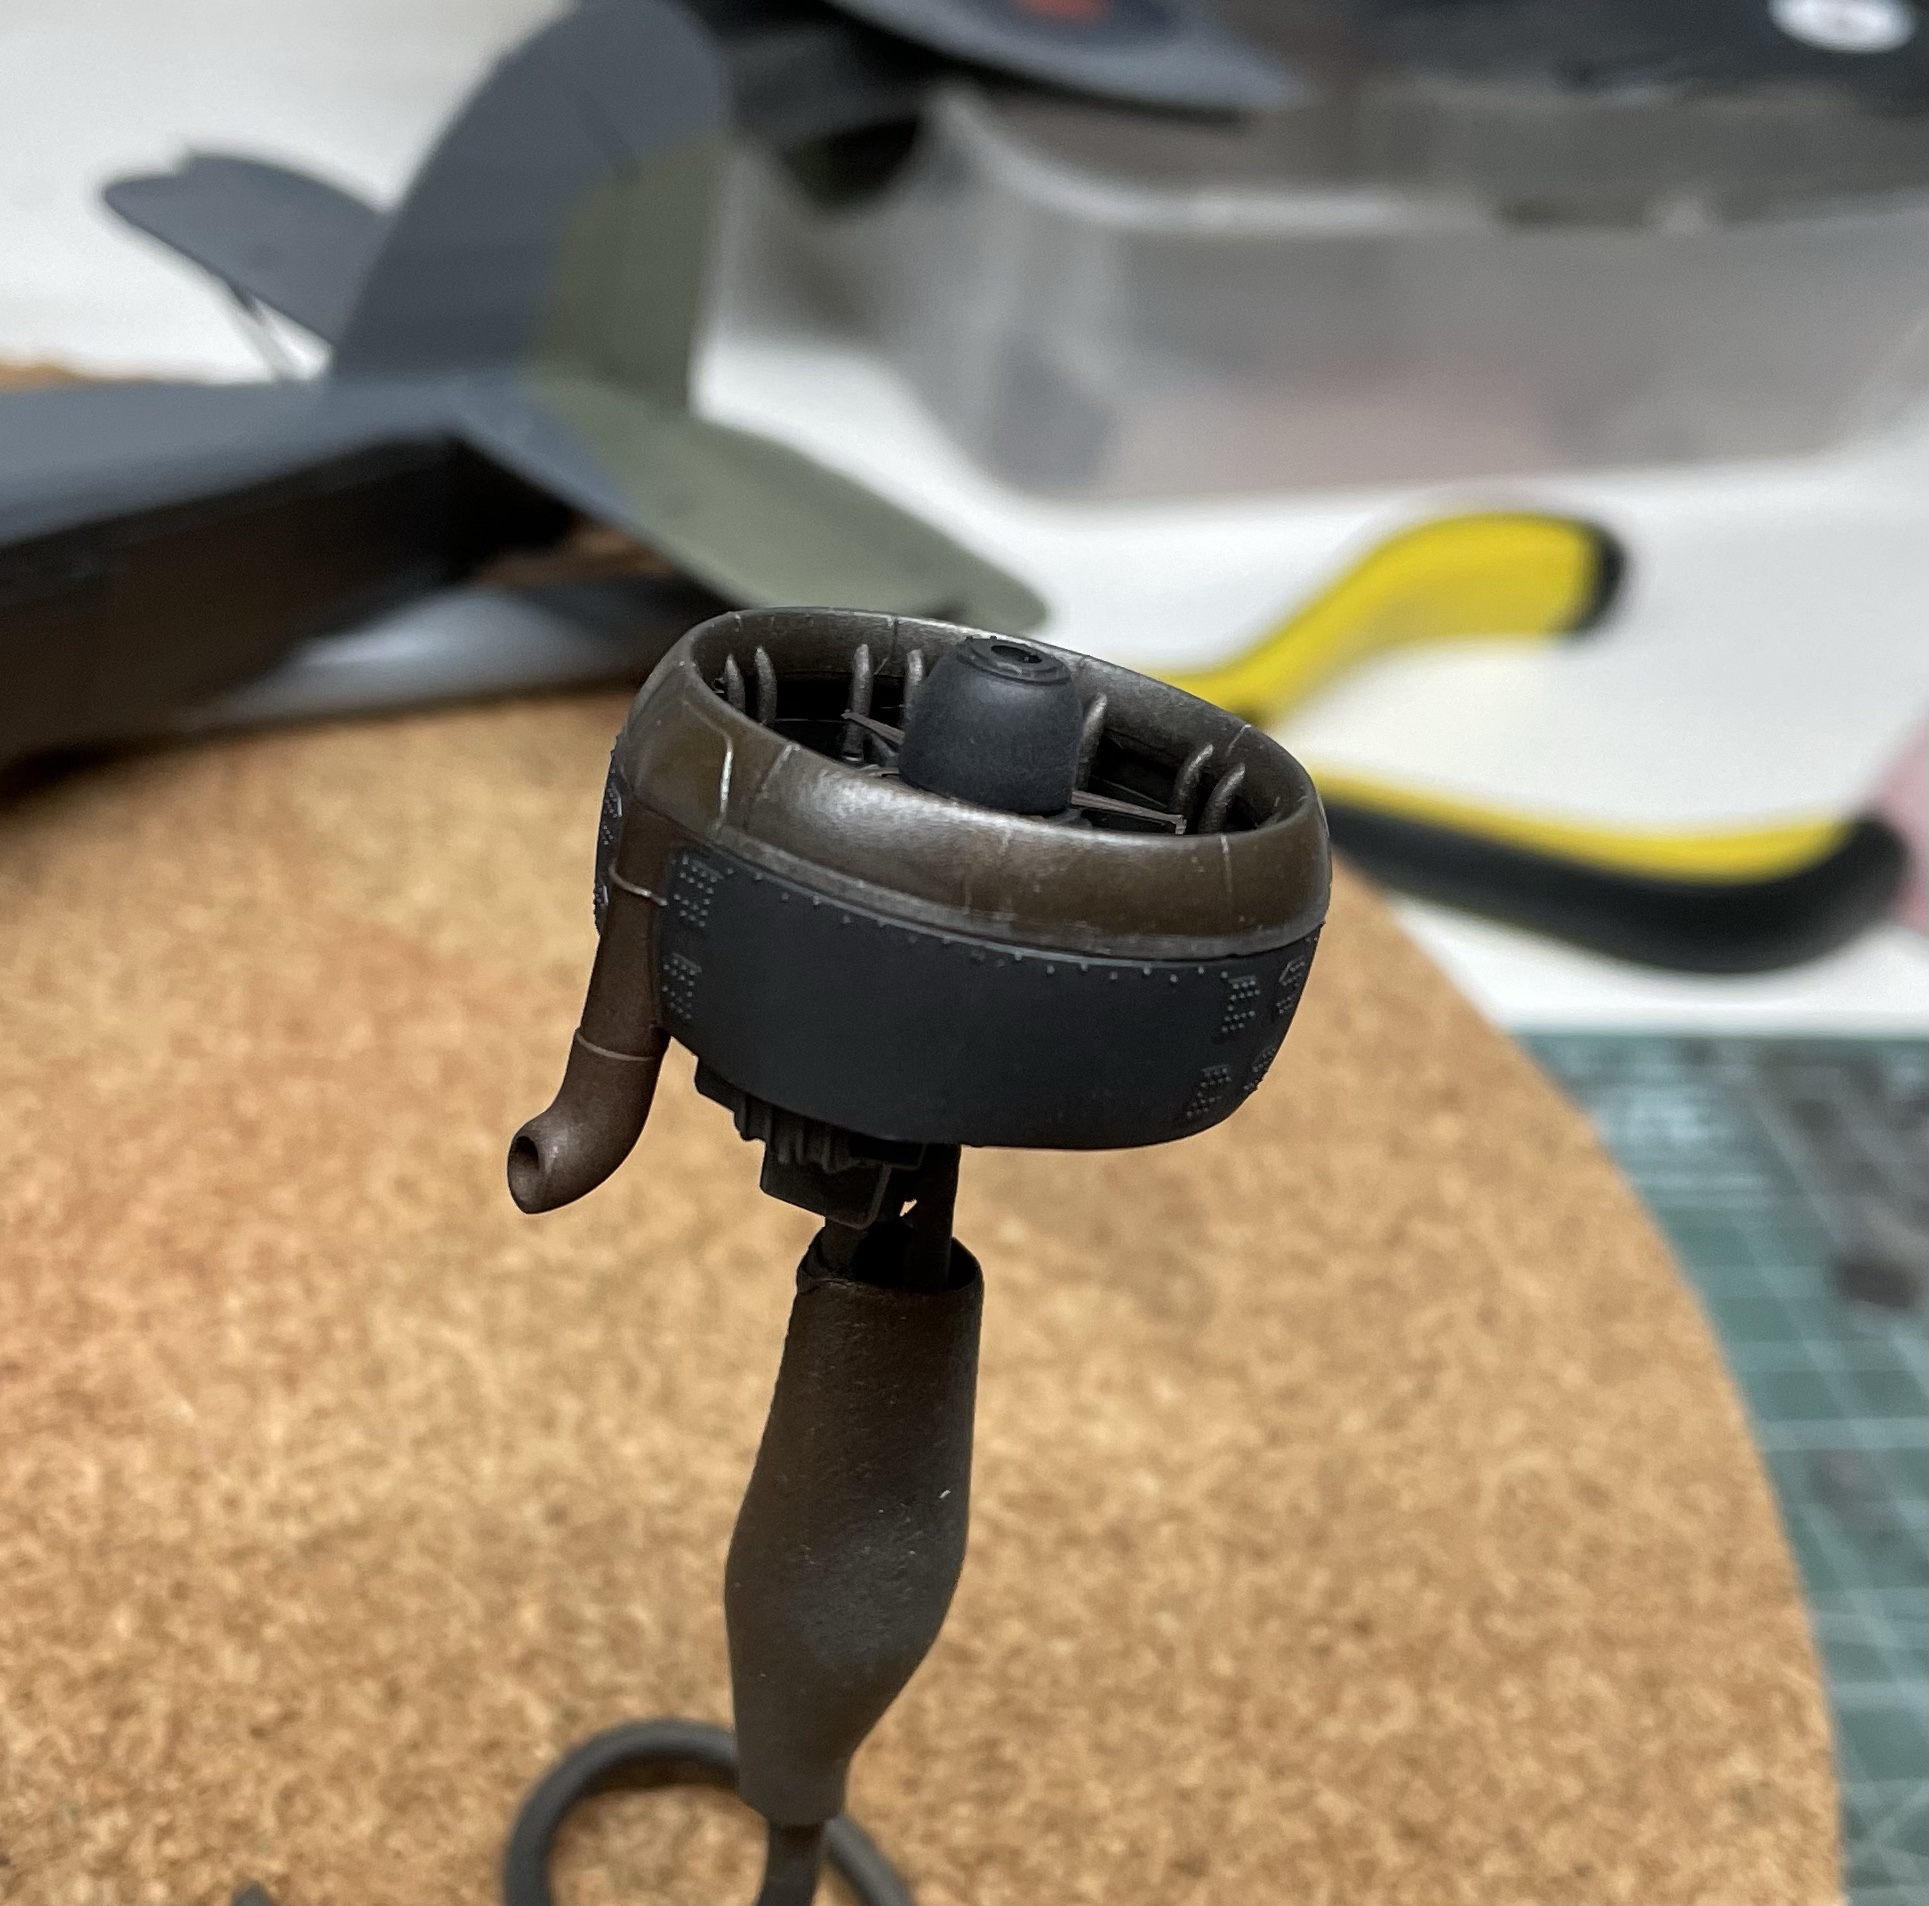
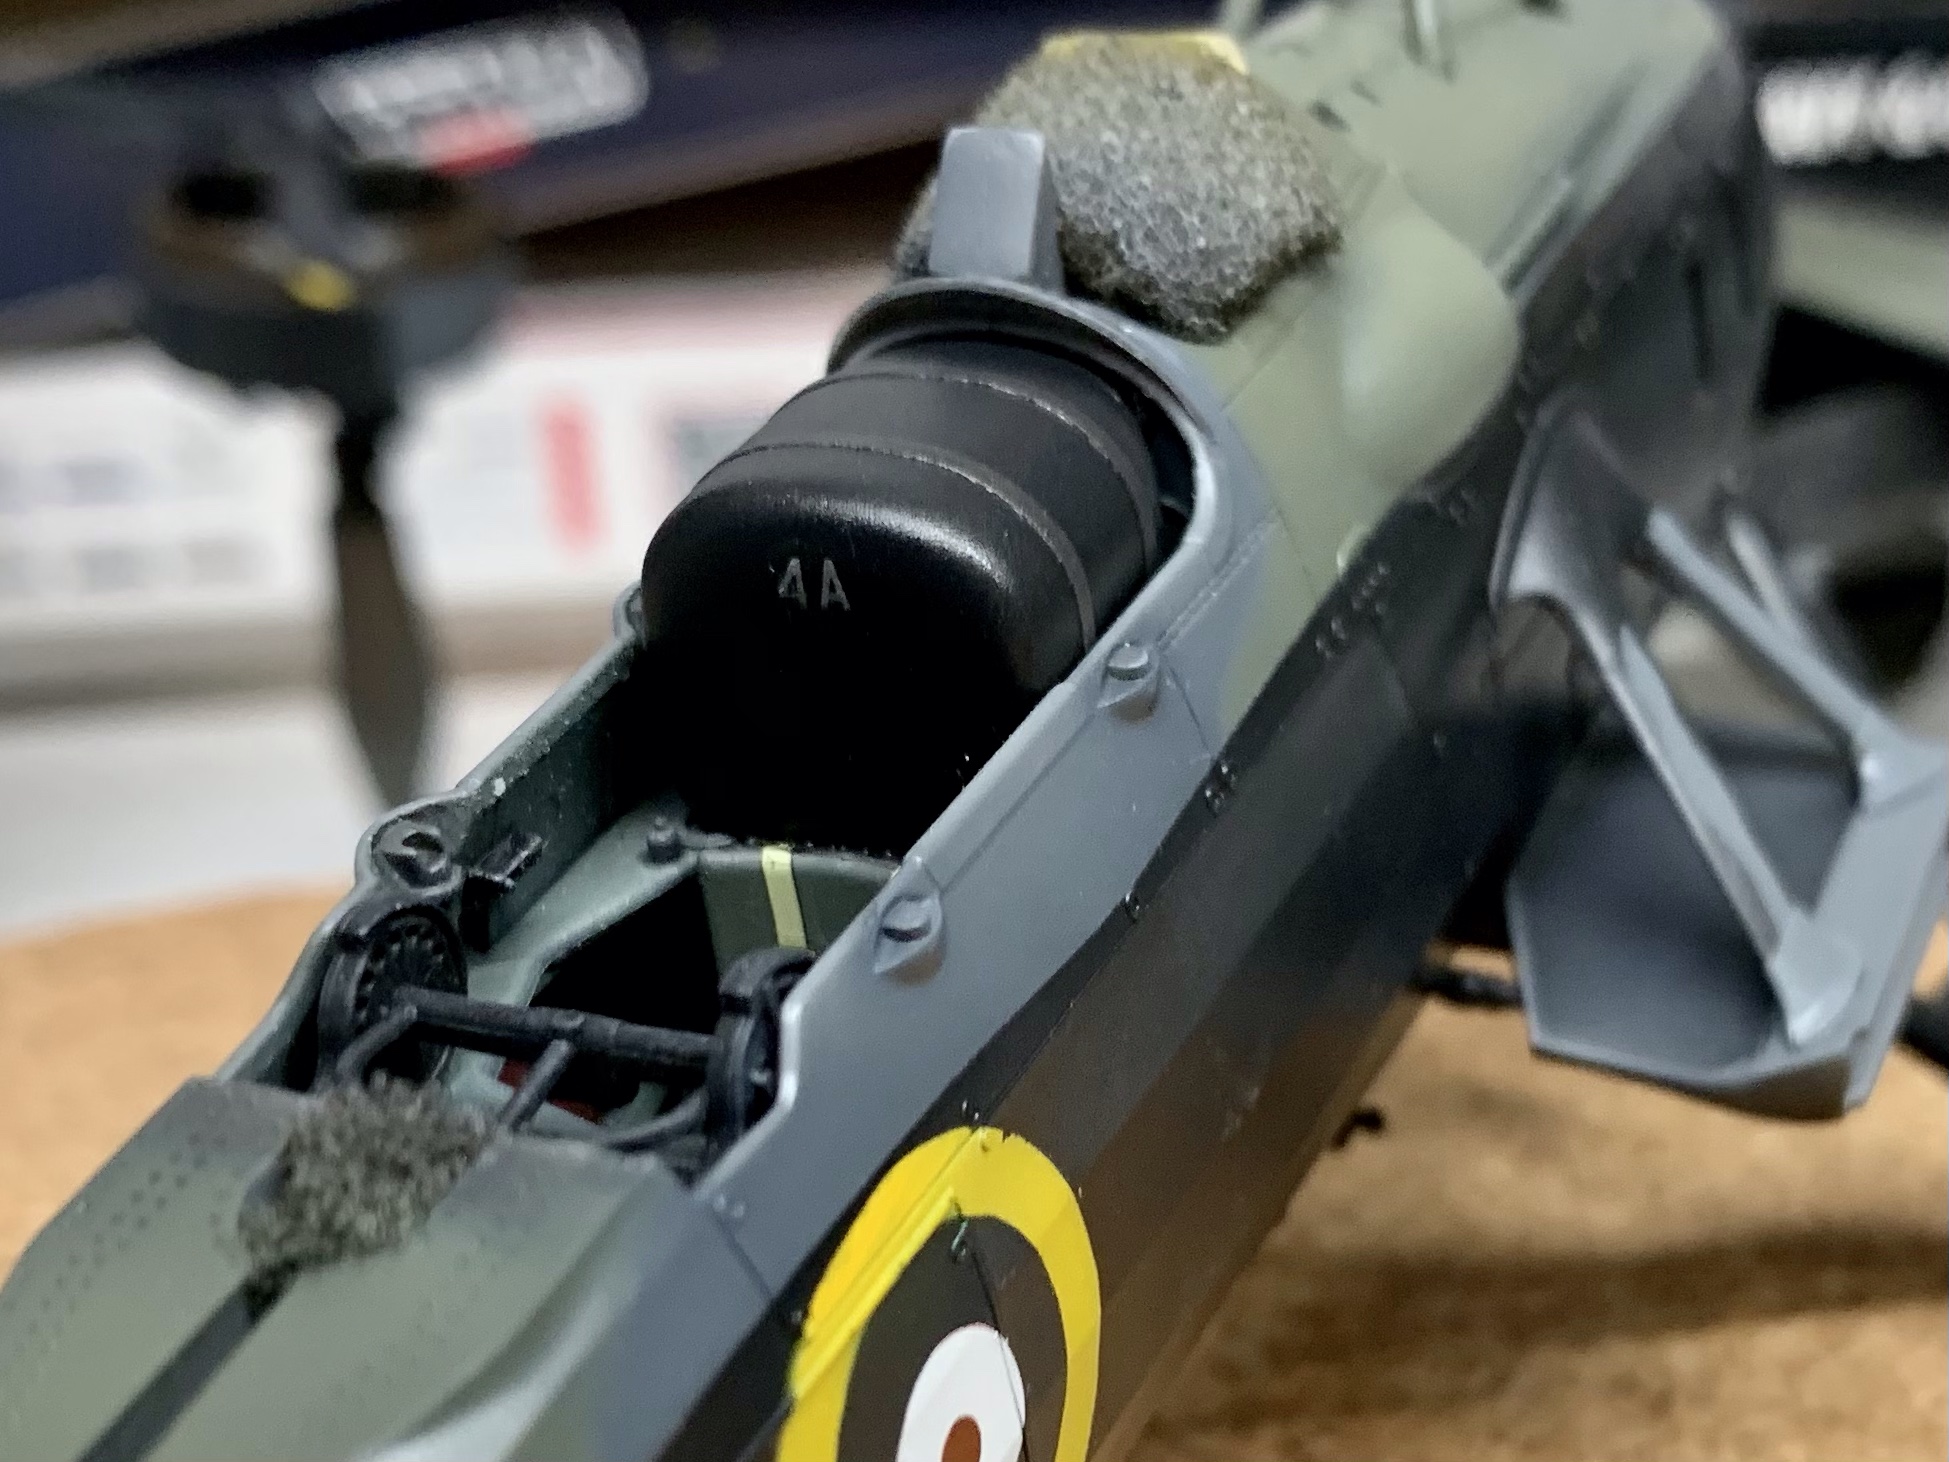
Details
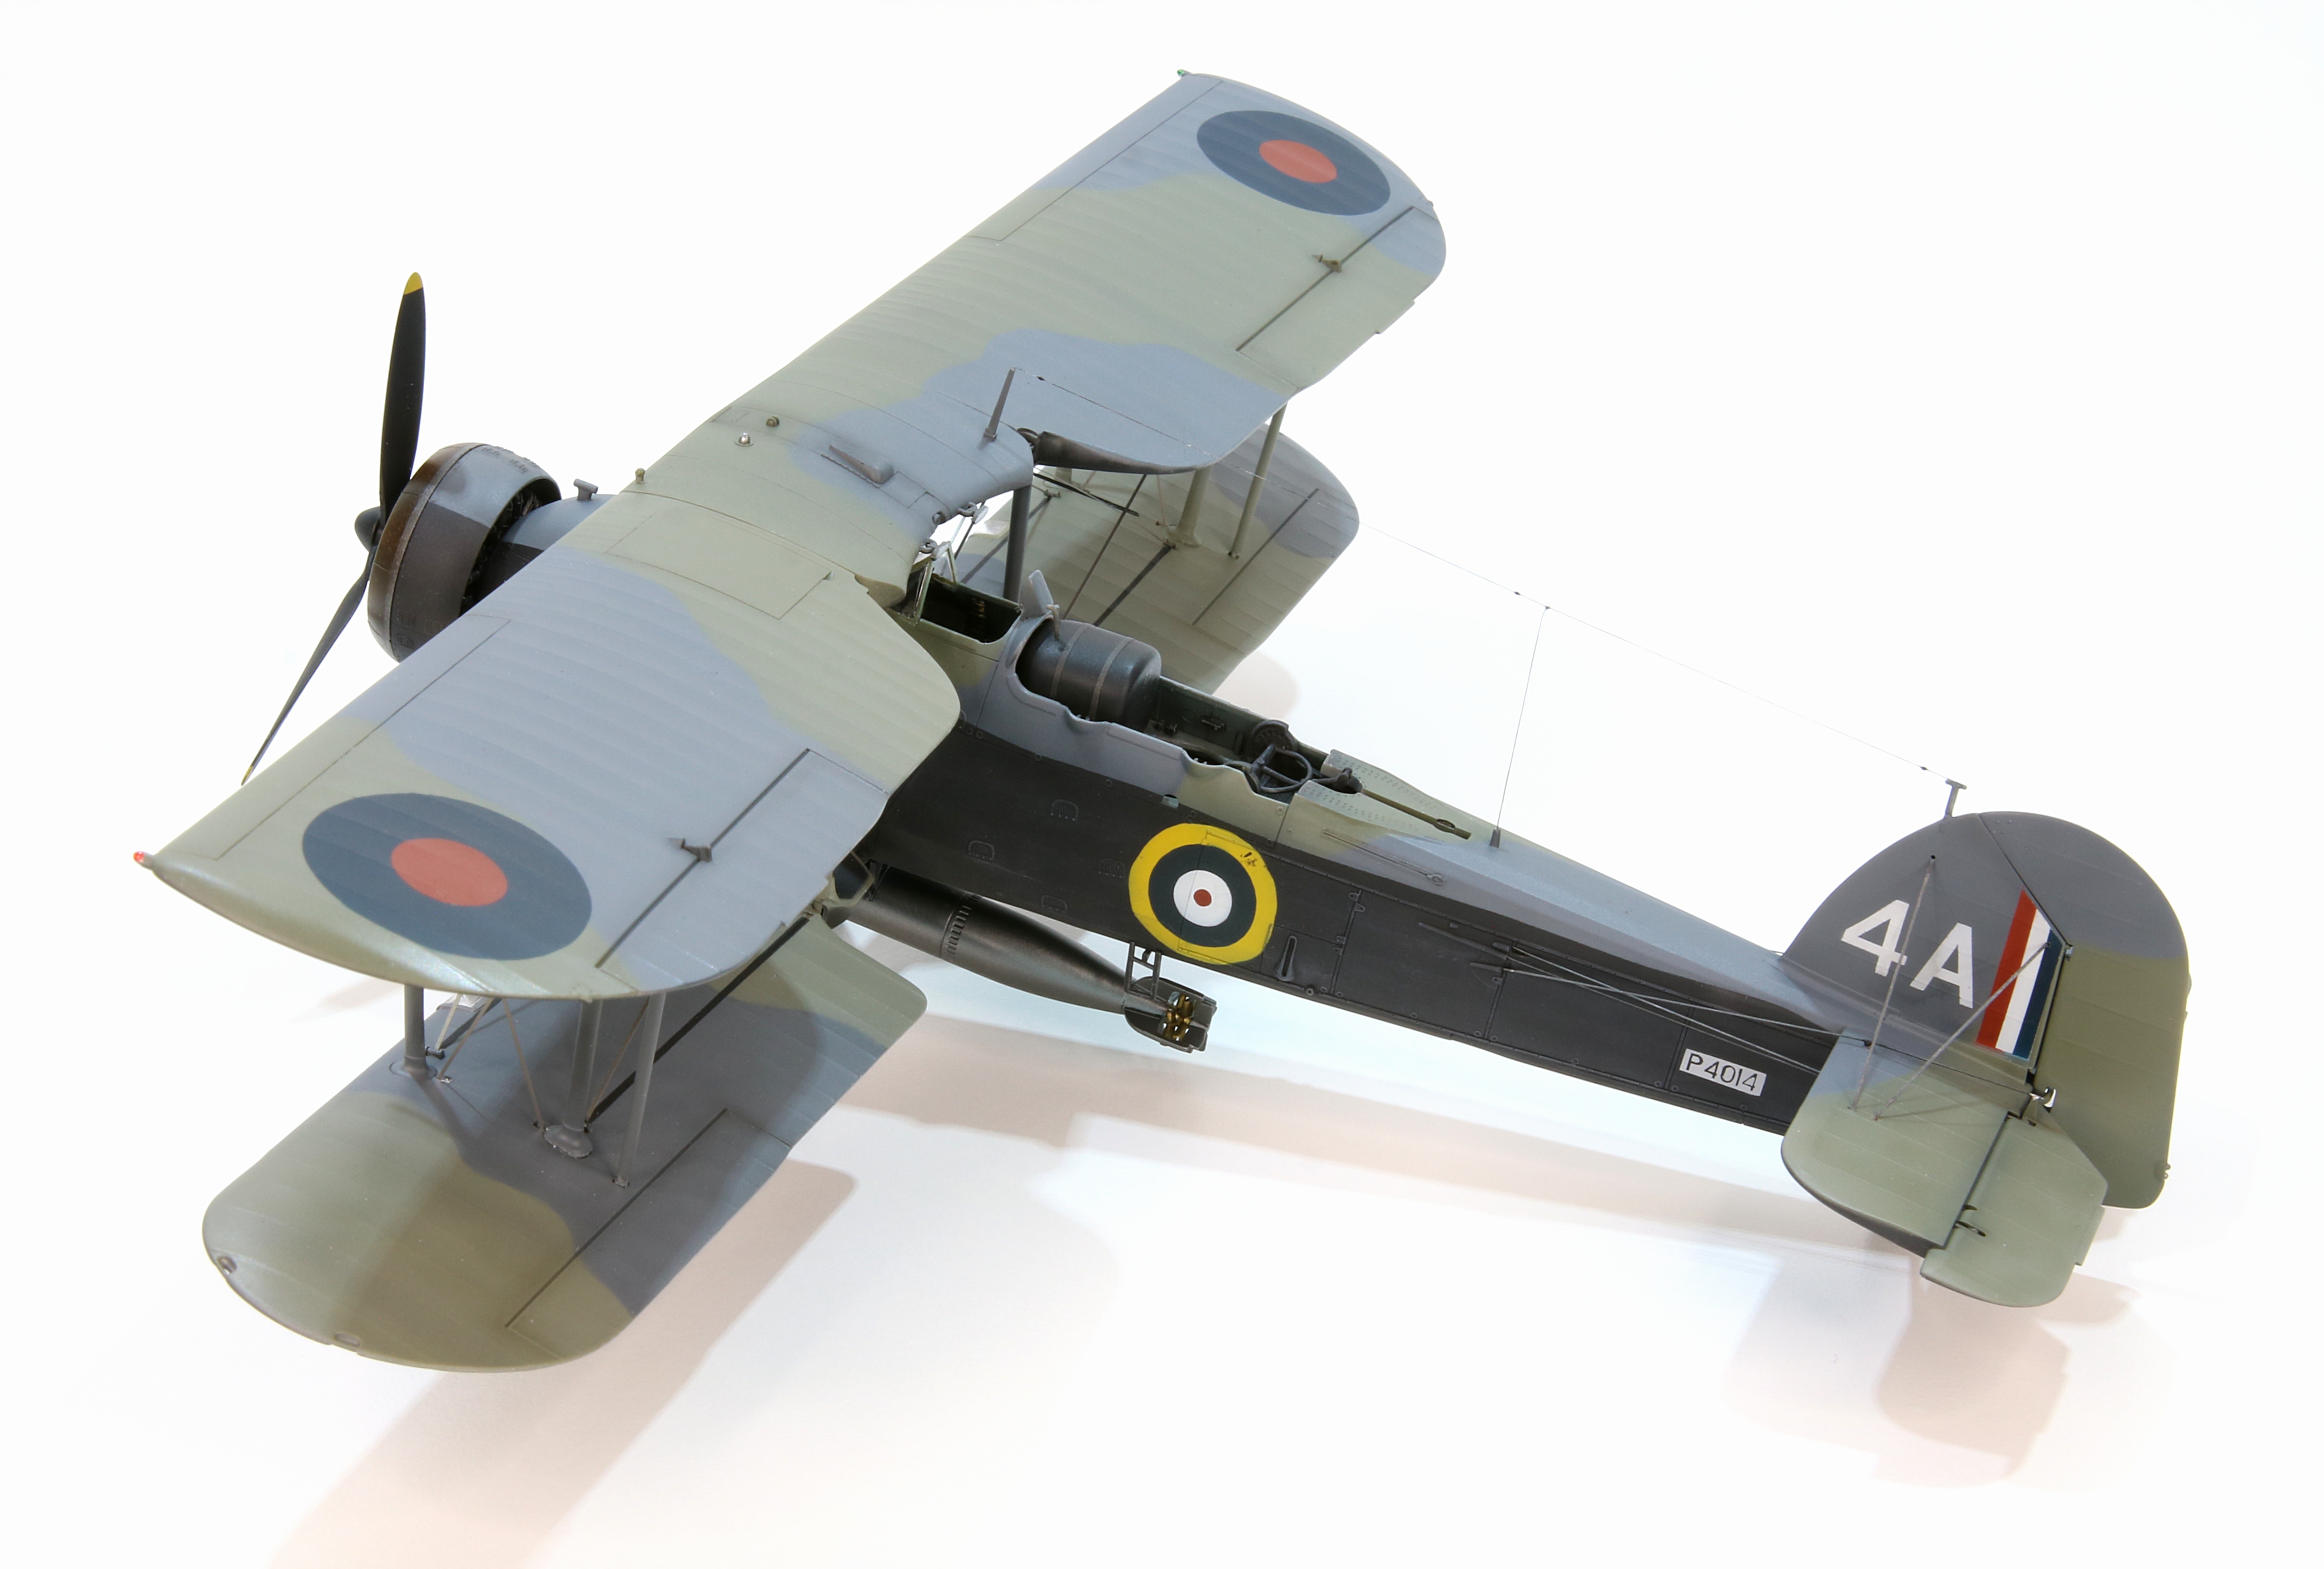
There are a couple detailed areas on the Swordfish that add realism. I tried a couple of times to get a result on the engine collector ring before achieving a result I was happy with. The real one is a bronze coloured semi-gloss finish which tapers to a matt finish on the exhaust itself.
I noticed that the main lower wing to fuselage struts [seemed to] have the black applied only to the leading and trailing edges so I replicated that using blutack to mask.
The auxiliary fuel tank carried by the torpedo armed Swordfish at Taranto (some reports state ALL had the tank installed, even those with bombs) was fabricated out of some spare parts and painted with gloss black mixed with metallic as the enamelled look these tanks had.
Click on an image below to scroll through the details slideshow


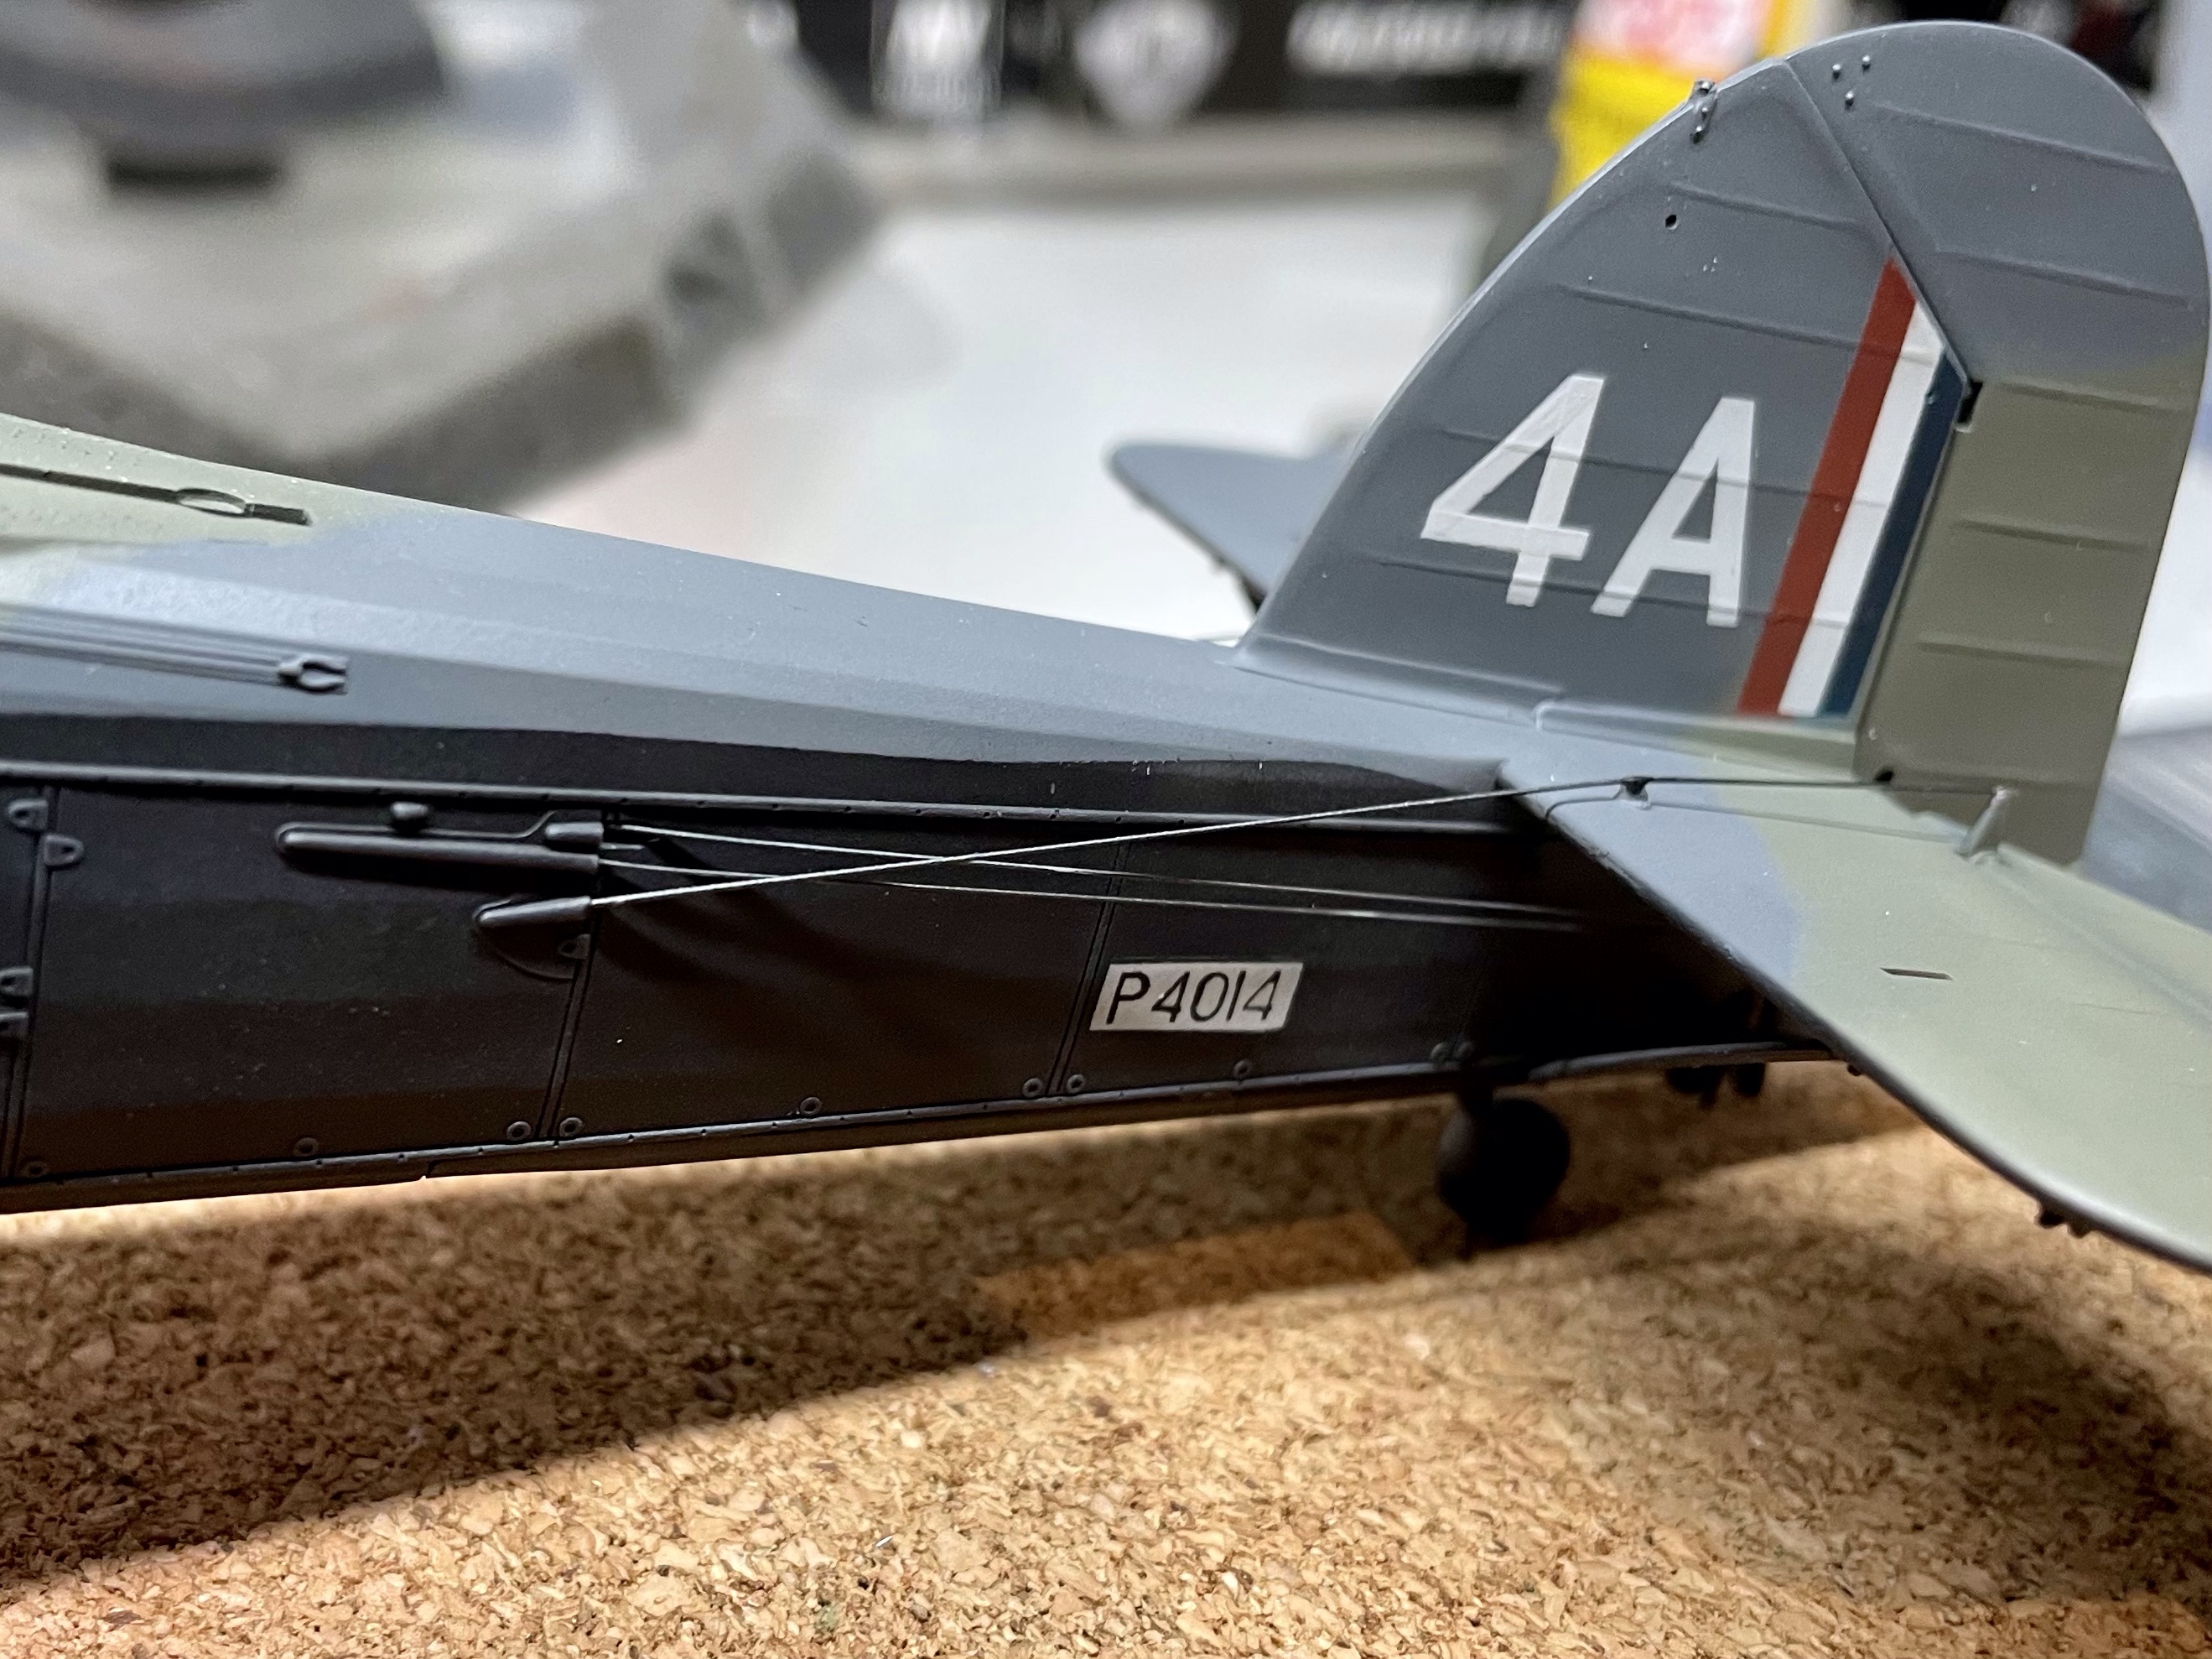


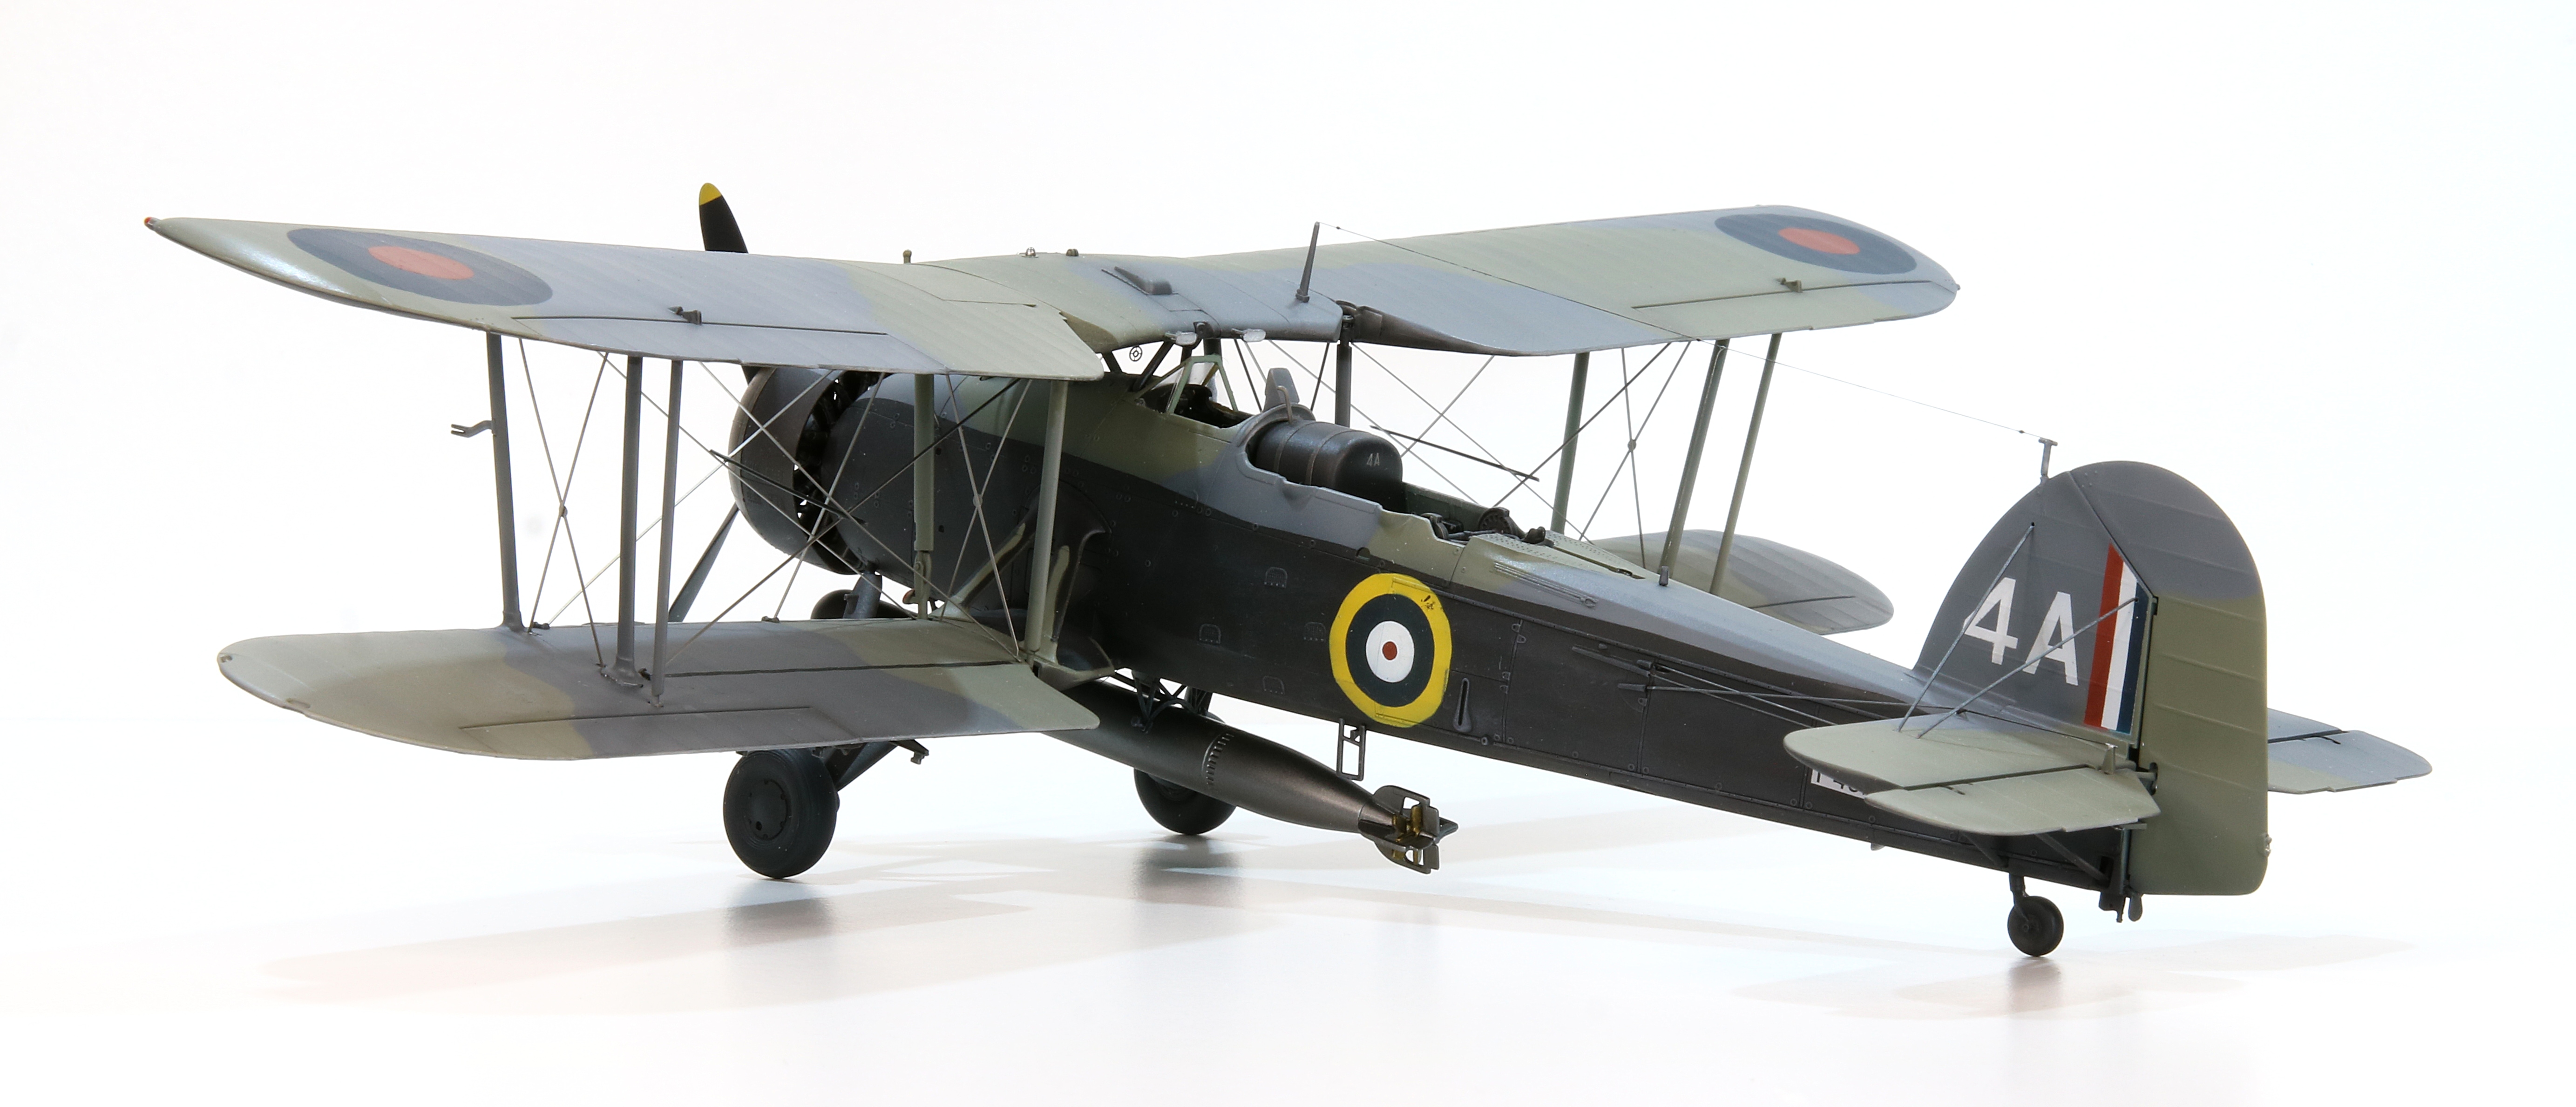
I was puzzled in how the torpedo was attached to its rack; pictures showed wires that wrapped around the torpedo which I represented with thin line, I also added the tail control lines with stretched sprue.
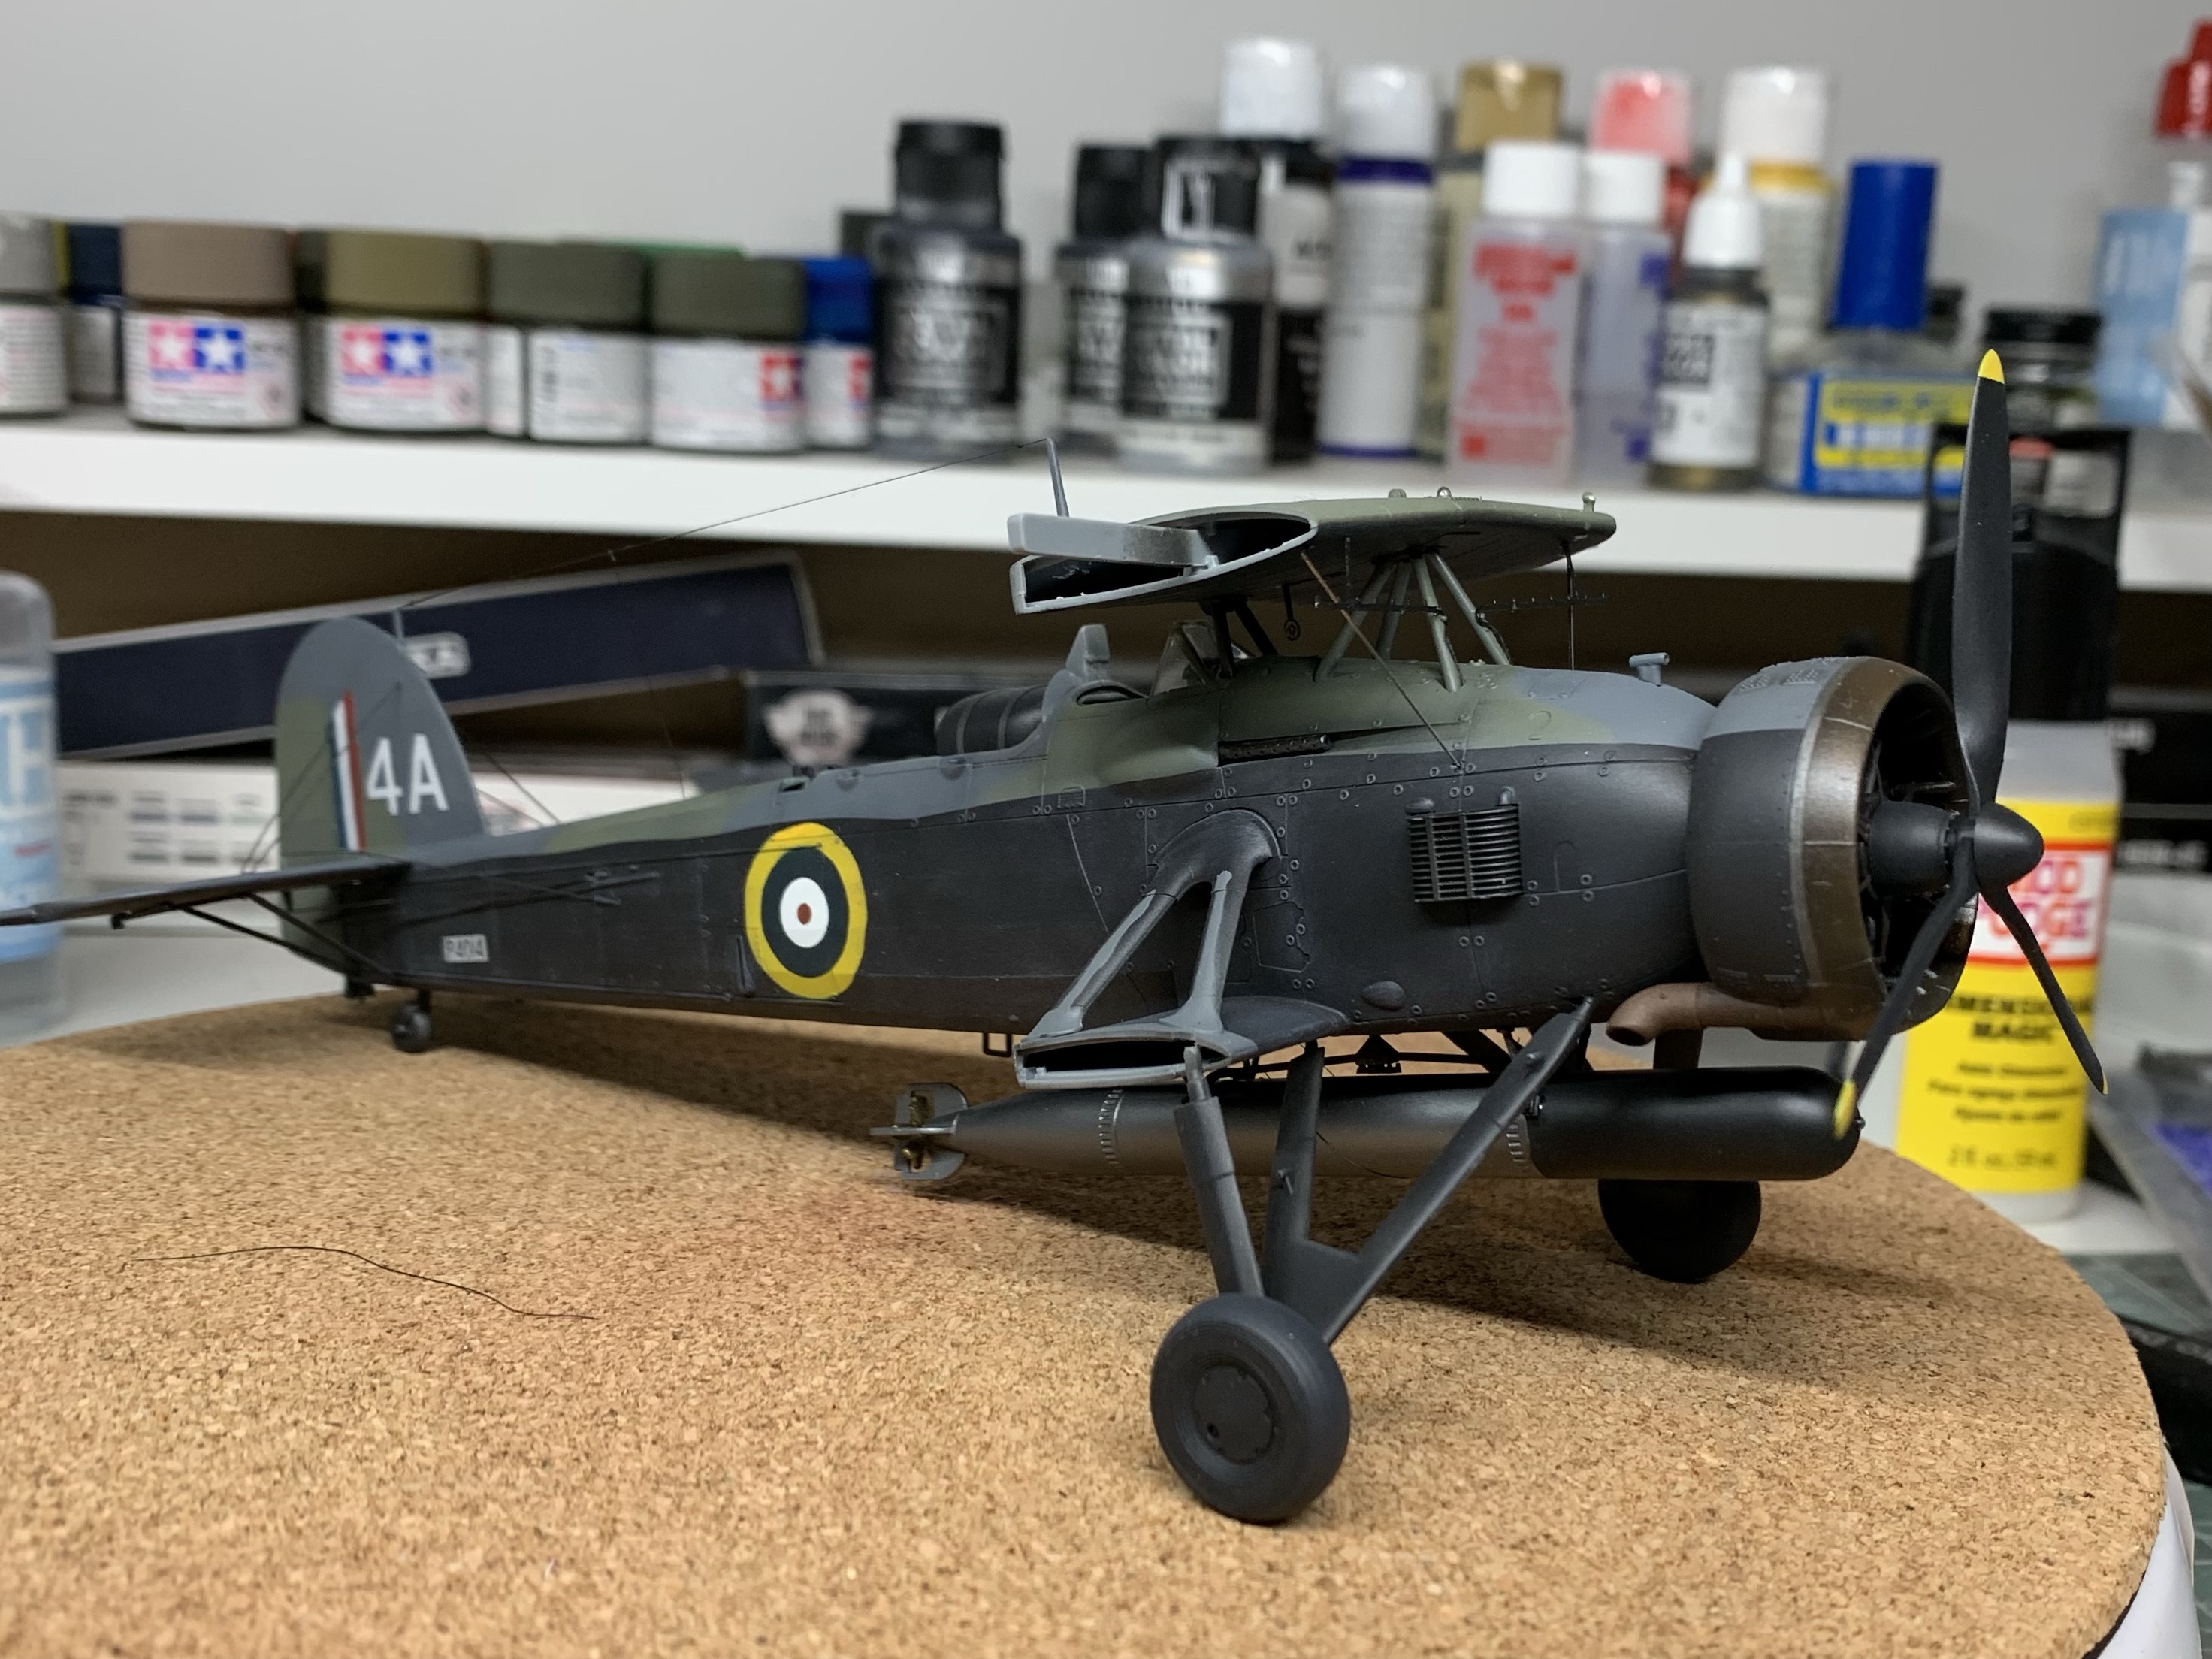
Lastly I added a dark grey dry brush to bring the black down to a more weathered appliance – some photos appear to show the black wore out to an almost grey appliance. I didn’t want to take mine that far but did want it to look less than pristine. Otherwise there was no real weathering, these airframes were well looked after.
At this stage now, the fuselage was complete and only required the wings
Rigging and Final Assembly
I chose to use Tamiya’s PE rigging and while it simplified some aspects of the rigging process it was a bit tricky to use as well. My main issue was that all of the parts marked #20 were too short so I needed to get a little imaginative in installing them.
Click on an image below to scroll through the rigging and final assembly slideshow


Notwithstanding the fiddeliness of the rigging, it looks quite convincing when installed. The Swordfish had aerofoil rigging wires, not round so the flat PE, while not perfect, does a good job of representing it.
The wings attached without much fuss – I was quite nervous as they weren’t as strong an assembly as I anticipated and a couple of the rigging lines did come loose during the operation. However, once I had cleaned the well-engineered joint areas the wings slotted on nicely. With that, the model was done.
The preceding description is an abbreviated one which relies mostly on the photos to tell the story. For those who may prefer a more in depth narrative, the full build diary can be found at Britmodeller – please click here to reach it.
Gallery

Click on an image below to scroll through the gallery


References and Sources
My references on this piece were the sites listed below, particularly the first listed link which provides an excellent description of not only the operational at Taranto, but also the planning and execution of the build up to it.
- https://www.armouredcarriers.com/operation-judgement-swordfish-attack-taranto-from-hms-illustrious
- https://en.wikipedia.org/wiki/Battle_of_Taranto
- https://www.nationalww2museum.org/war/articles/taranto-november-1940
- https://www.iwm.org.uk
- https://navywings.org.uk/portfolio/battle-of-taranto/
- https://www.modelingmadness.com/review/allies/gb/michaelsswf.htm
For the model’s markings in particular, I was the beneficiary of some great advice and assistance from a few individuals on the forums at Britmodeller.com, notably user @iang, author of “Fleet Air Arm Camouflage and Markings: Atlantic and Mediterranean Theatres 1937-1940“.
If you are interested in following the build as it unfolded, the full build diary is logged in the Britmodeller Aircraft WIP Section.
Copyright ©2022
This article, its text, and photos of the model is my original work and is protected by copyright in its entirety, except where noted. All research sources are listed in the References and Credits section above, including photos from official sources. All other images and quoted content were sourced from the internet and are used here under protection of fair-use. Any copyrighted content will be happily removed and/or credited forthwith upon request by its rightful owner.


Leave a comment