

- 8th PRS USAAF
- “Leaping Lizzie”
- “Lizzie” and Errol Flynn
- RAAF No.75 Squadron
- Tamiya’s 1/48 Scale P-38F Conversion to F-4-1-0-LO
- Gallery
- References and Sources
8th PRS USAAF
S/N 41-2156 was originally ordered as P-38E, but completed as a Photo Reconnaissance specification F-4-1-LO and was delivered to the USAAF on 17 January 1942. In April it was received by Long Beach Fighter Command and then sent on to the 8th PRS in late April. The airframe spent the next few momths bouncing around depots in the United States before embarkation from San Fransisco in July, landing in Melbourne, Australia in August. On 8 September it was delivered to the 8th Photo Reconnaissance Squadron’s depot at Townsville, Queensland. Soon afterwards, it was shipped out to Port Moresby in what is now Papua New Guinea.
The 8th Photographic Reconnaissance Squadron (8th PRS) provided intelligence used to create aerial maps and target documentation for combat missions. These missions, like all Photo Recon missions were especially dangerous, as they entailed solo missions over enemy held territory (the nature of which I explore in a couple of pieces on Making-History; Foresight and Zero Feet and Throttle Wide Open). The danger was further compounded by the thick, inaccessible jungle they operated over.
“Leaping Lizzie”

41-2156 gained her notoriety in early March, 1943. On the 2nd, “Limping Lizzie” as it had been christened, was flown by First Lieutenant(?) Vince Murphy on a mission to photograph enemy positions towards the south west. During his return he was forced down under a 200 foot ceiling and was faced with less than one mile visibility. Low on fuel and with little other option, he succeeded in landing “Lizzie” on Hisiu Beach, which was fortunately at low tide. After a skilful landing on the sand, Murphy was able to taxi the aircraft above the high water mark and radioed for assistance.
Two days later, Captain Frank S. Savage (C.O. of the 8th PRS) was flown down to Hisiu beach to inspect “Lizzie” and, if possible, fly her home again. Deemed airworthy, Savage ran up her engines and commenced his take off run. Fortunately, instead of damaging the undercarriage or worse, initiate a ground loop, the impact with the log caused the aircraft to literally leap into the air! The entry in the 8th PRS diary that day renamed the aircraft “Leaping Lizzie”.
“Lizzie” and Errol Flynn
At some time during the 8th’s stay at 14 Mile Airstrip near Port Moresby “Leaping Lizzie” became a movie star, her leading man being none other than Errol Flynn in “Objective, Burma!”.
Made in 1945, the movie is loosely based on the six-month raid by Merrill’s Marauders in the Burma Campaign. It caused some controversy when it ignored the the contribution of almost a million Commonwealth service men and women, prompting even Winston Churchill to write of his concern.
The opening shot shows “Lizzie” landing at a jungle airstrip and having her film unloaded. The link below is her glamour shot, right at the beginning of the movie as she brings vital intelligence on enemy positions to Errol Flynn’s character, Captain Nelson.
RAAF No.75 Squadron
75 Squadron had been formed at Townsville, Queensland, on 4 March 1942, under the command of Squadron Leader Peter Jeffery. On 21 March the squadron’s first four Kittyhawk aircraft landed at the Seven Mile Strip, Port Moresby. The squadron was the sole fighter defence of Port Moresby during its 44-day deployment from 21 March to 3 May 1942.
On 21 July 1942 the squadron flew to Gurney Field, Milne Bay, where it operated with 76 Squadron in the defence of Milne Bay. Milne Bay was being developed to protect the left flank of Port Moresby and to enable the Allies to project air power over the north coast of New Guinea and the Louisiade Islands. After being withdrawn on September for rest, they returned to Milne Bay in January 1943, from where patrols were flown over the bay and Goodenough Island.
It was while at Milne Bay in August 1943 that the Squadron asked the 8th PRS based nearby for the loan of some PR Lightnings. The Americans agreed and readied two F-4-1-LO Lightnings, one of which was “Lizzie”. Four pilots from 75S flew to the 8th base at 14 Mile Airstrip where between the 10th and 12th August they each flew familiarisation in the new type. On the 16th Sq/Ldr Atherton and F/Lt. Brown flew their new PR Lightnings back to Milne Bay.
During September and October 1943 Squadron Leader Atherton flew “Lizzie” on more than twenty recon missions largely without incident. On 25 October Atherton was chased by four Janaese Zeros but the enemy was unable to intercept. “Lizzie’s” last mission with 75S was also on the 25th October when Wing Commander Wilfrid “Woof” Arthur took it up for a recon mission.

“Lizzie” flew no more missions with 75 Squadron, with recon operations being suspended soon after the end of October. In December “Lizzie,” along with the other loaned F4 spec Lightning were returned the to 8th PRS.
That wasn’t the end of the story for “Lizzie” and the 75th though. In February 1944 the 8th was once again asked for the loan PR Lightnings, this time the request was for three. “Lizzie” was one of those allocated. However, when the first two – one of which was “Lizzie” – arrived at 3AD Amberley in Queensland, they were both rejected by the RAAF owing to their poor condition. The third Lightning force landed at Rockhampton but its identity is unknown. “Lizzie” was condemned as salvage in September and was ultimately struck off charge in December.
Tamiya’s 1/48 Scale P-38F Conversion to F-4-1-0-LO

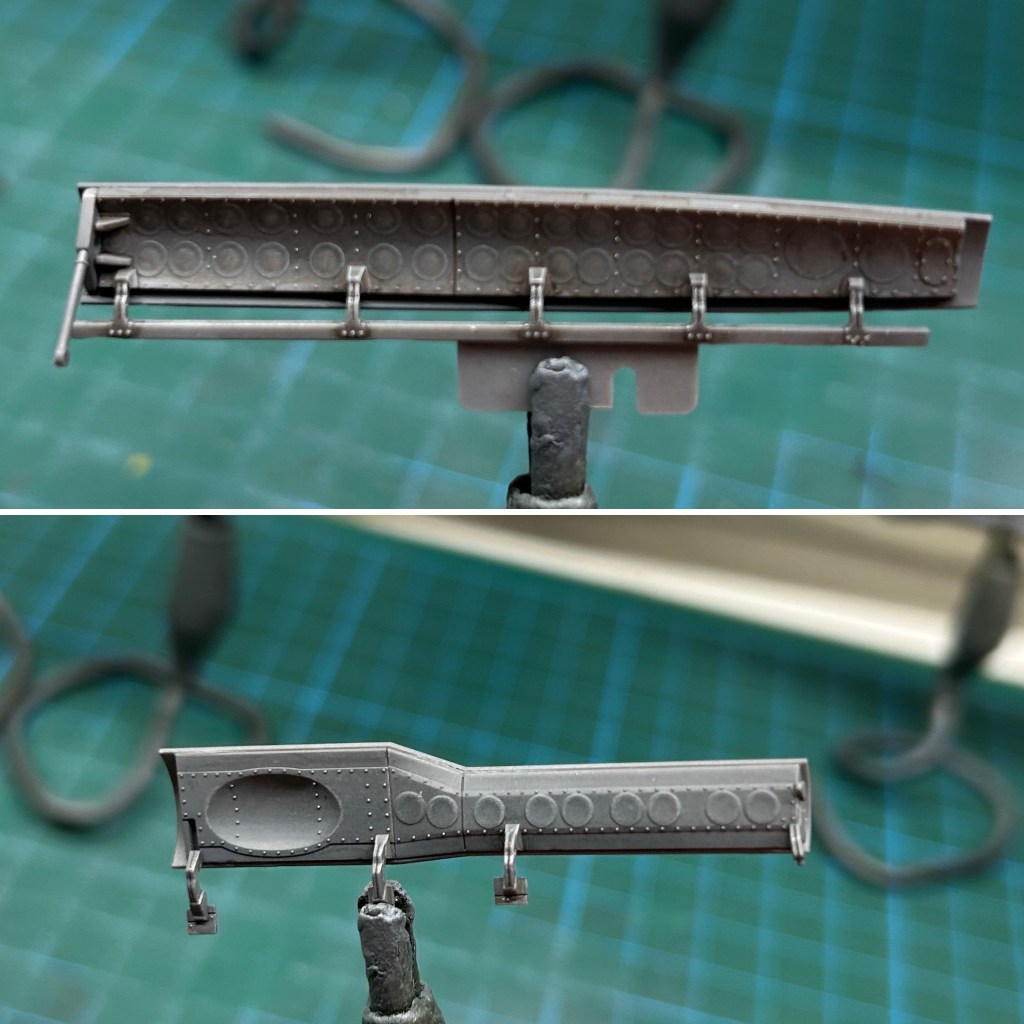
It’s difficult to describe this kit without resorting to superlatives. Suffice to say – and if you want to read more follow the link in the references section below to the build’s WIP at Britmodeller – that the kit’s fit and engineering is so good that I was able to paint, mark, and complete most of the weathering before final assembly of the booms, fuselage and tail.

The CMK conversion kit was a little trickier. The fit of the replacement nose wasn’t quite right and some adjustment was required which left a less than sharp fit. Likely a more skilled modeller would have made a better job of it than I. Also included in the set are decals for “Lizzie” as well as the F-4 control yoke and additional camera operating instruments for the cockpit.
Assembly
The cockpit, like the rest of the kit is exquisite. I did use a 3D decal improvement set but only because I had it. The next time I build one of these I won’t bother, it doesn’t need it.
Most of the effort was in fitting the new nose. I aligned the new nose to the cockpit and windscreen to get the best match without making trouble for myself later when fitting the canopy. I used the windscreen as the datum and from there all went reasonably well.
Click on any of the images below to scroll through the gallery.


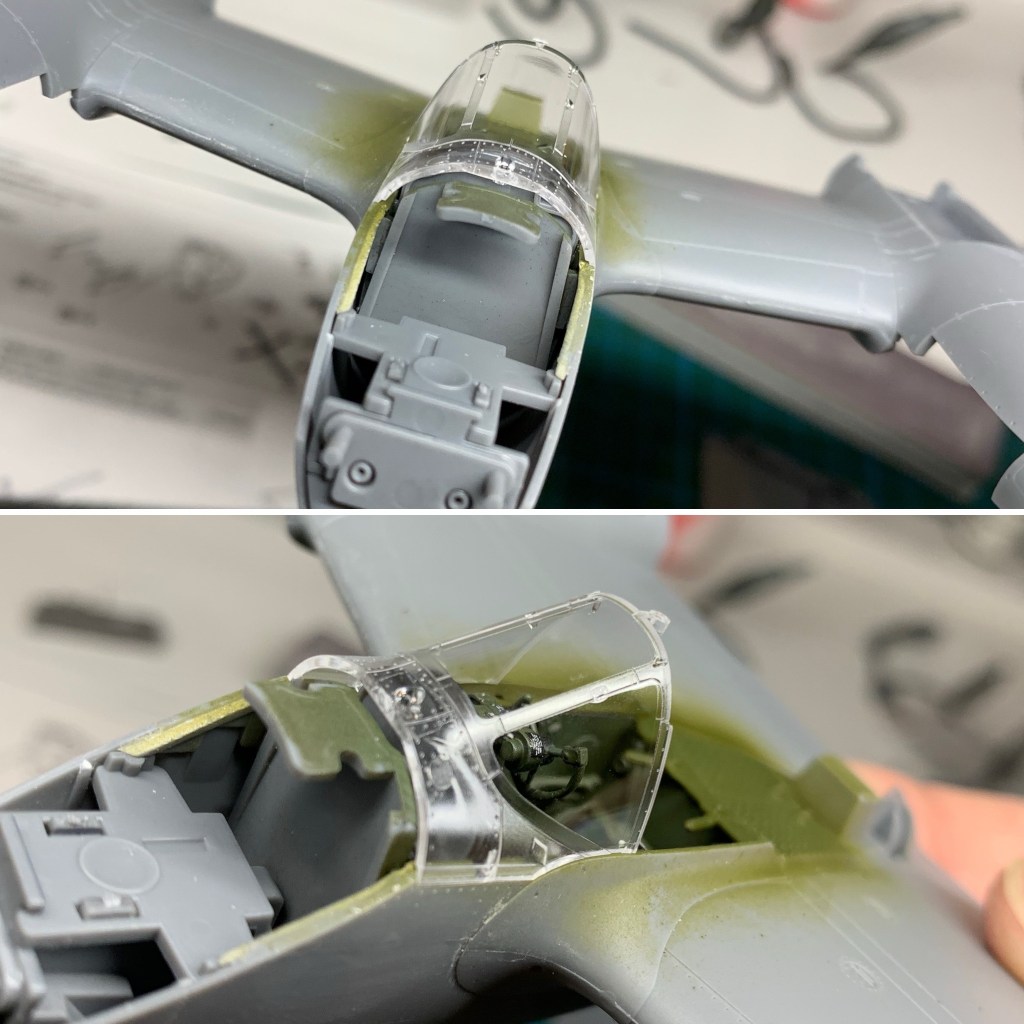


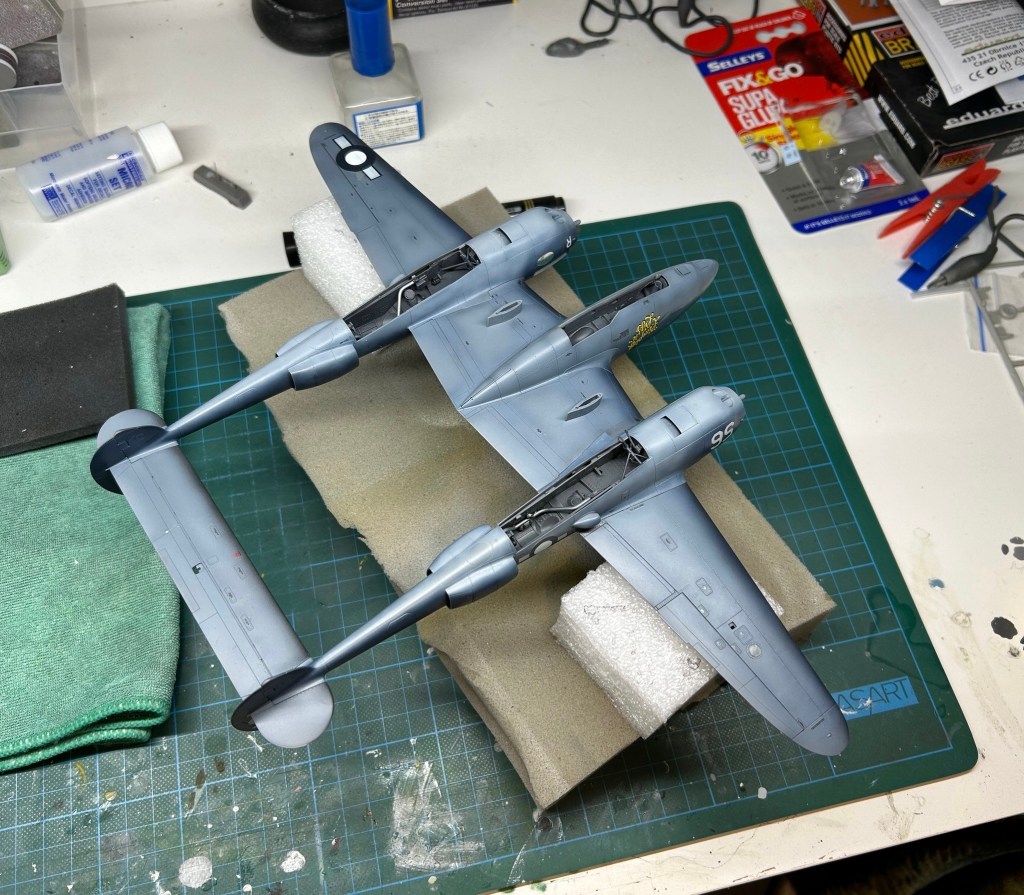
The rest of assembly was as near perfect as I’ve ever found in a plastic kit. The bottom photo in the gallery above shows the airframe assembled, ready for paint. None of it is glued, just clicked into place – there are no gaps.
Paint – “Cabot [Blue] Haze“
“Lizzie” wore an original Cabot Haze paint scheme. This finish was developed by Samuel Cabot for high altitude reconnaissance aircraft to reduce their visibility to both ground and airborne adversaries by reflecting only blue light, thereby blending into the sky to near invisibility.
Cabot’s Blue Haze required the airframe to be painted black, and then over-sprayed with a special pigment that reflected only the blue light. The application was heavier on the underside and its density was lesser on the sides and least of all on the upper surfaces. The result was a dark blue topside with medium blue sides and a very light blue underside.
The graduation of dark to light blue was defined by the Lockheed factory specification drawing seen below.

Unfortunately the paint wasn’t durable and was difficult to repair. As it wore, both from slipstream and ground crew activity and maintenance, it tended towards the black undercoat such that the more wear, the darker the finish. This happened with particular emphasis on leading edges and traffic areas which soon wore down to the black base paint. Worse though, was the realisation that at high altitudes the paint began to glow with obvious concerns for the finish’s overall efficacy.
Because of the difficulties experienced with Cabot Haze, Lockheed developed a two-colour lacquer scheme during F-5A production that became known as Synthetic Haze Paint – a deep blue was applied on the upper surfaces with a much lighter blue on undersides, in shadow areas, and graded up vertical surfaces in a similar way to the classic USN tricolour scheme.
How to Paint Cabot Blue Haze?
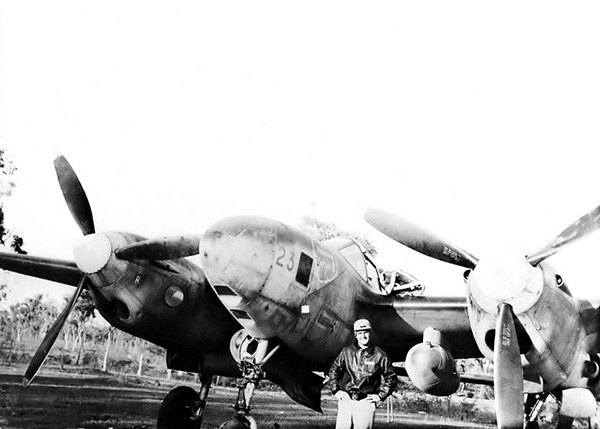
I looked at as many photos of original Haze as I could find, most important of which are a few photos of “Lizzie” on the AWM’s website as well as at Ron Cuskelly’s website The Lockheed File. All show the paintwork to be faded, inconsistent and well weathered. I found some other shots of what appear to be Haze-painted F-4s and they appear the same as the RAAF photos.
Every photo I could find of a Haze painted F-4 was consistently with Dana Bell’s description plus my own understanding of how paint weathers and machines become grubby as they are used.


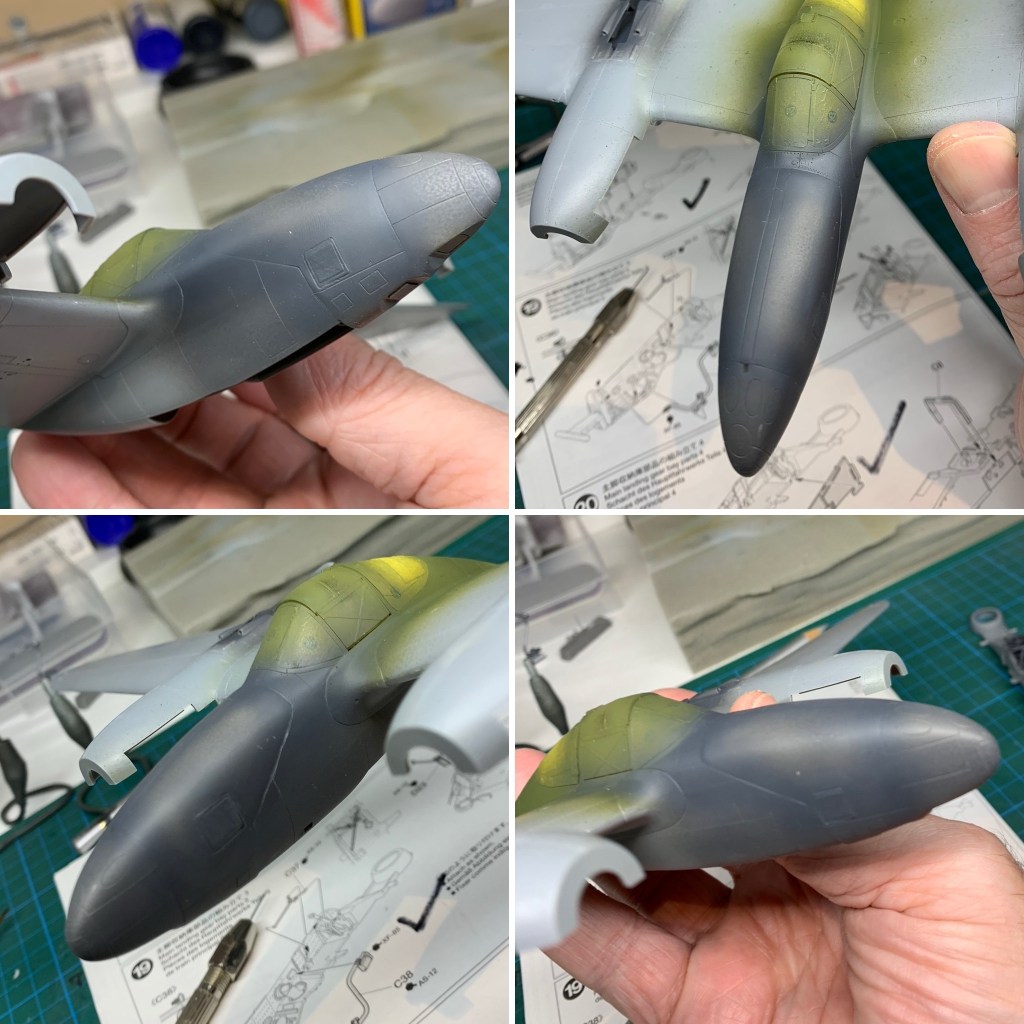
I really should have taken more photos of the paint phase. However, even had I done so, I’m not sure they would convey the process I used adequately. I began, like the Cabot process I was trying to replicate, with a black base. I mottled it somewhat because my paints don’t work the same way as Cabot’s but nonetheless I felt it was a good way to start.
The undersides were more conventional inasmuch as I applies a very light grey/blue of varying density to achieve a worn paint effect. The undersides didn’t wear as much on the real thing because they didn’t have as much traffic. Furthermore, because the Cabot pigment was applied thickest on the undersides it was more durable there, too.
The uppers were more challenging and my approach was much like Cabot’s. I used a dark blue over the black base and simply applied more paint where I wanted there to be more blue. I left the hue darker – less blue – in areas where there would have been traffic and/or more slipstream.
To blend it all I used highly thinned coats of both the dark blue and bottom grey/blue mottled on the vertical surfaces until I was happy with the result.
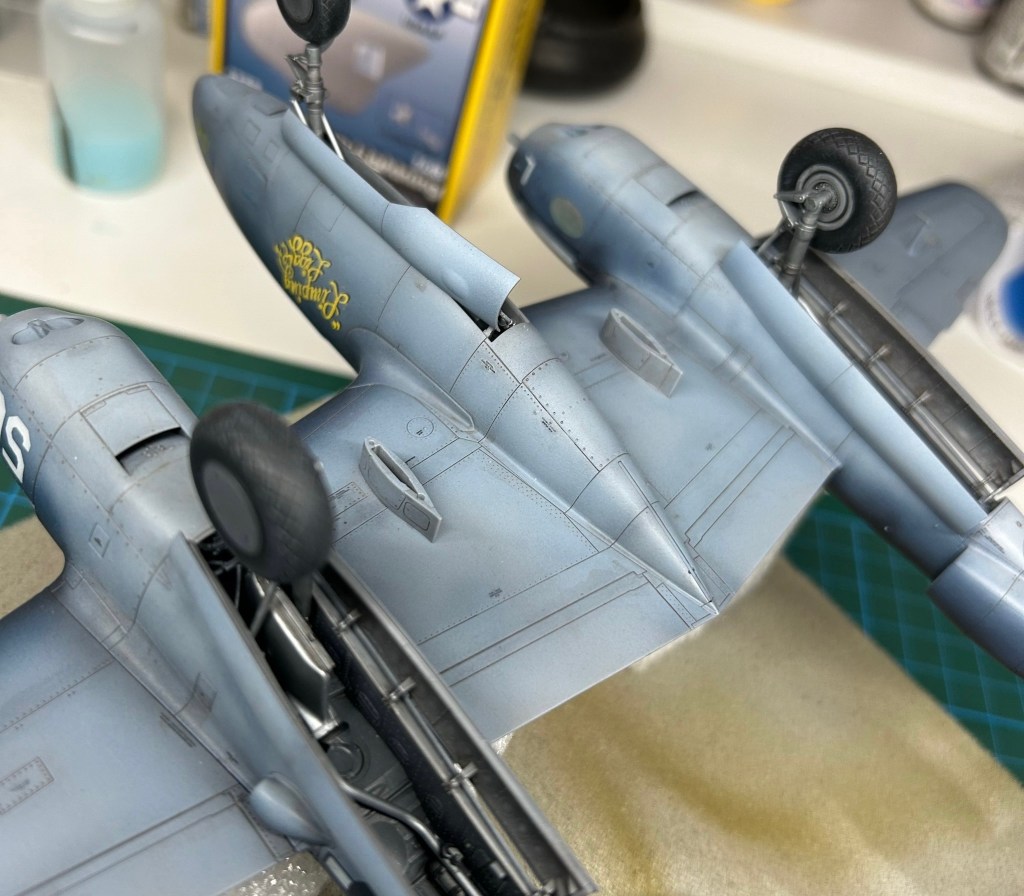
Click on any of the images below to scroll through the gallery.


I was very pleased with the result, at least in so far as it looked exactly like I wanted it to. I think it captures the variability and worn look of the original. As for the actual colours, it again appears to me as I planned. I replicated Dana Bell’s description in one of his posts on Britmodeller as best I could.
Markings
A short [semi-fictional] story…
Once upon a time 75S RAAF asked 8th PRS USAAF if they could borrow some F-4s because they needed better intel. 8th PRS said “No worries, mate” (because they’d been around Aussies long enough to have picked up some of the lingo) and offered to paint them up in RAAF markings because the 75S ferry pilots – not unreasonably – hadn’t brought any paint with them. Because it was easier, and there was a war on after all, the USAAF simply painted an RAAF roundel over the four US markings leaving the bars uncovered. The Aussies told the Americans that there needed to be a roundel on both wings but didn’t specify top and bottom so the US guys only put an extra one on the top wing.
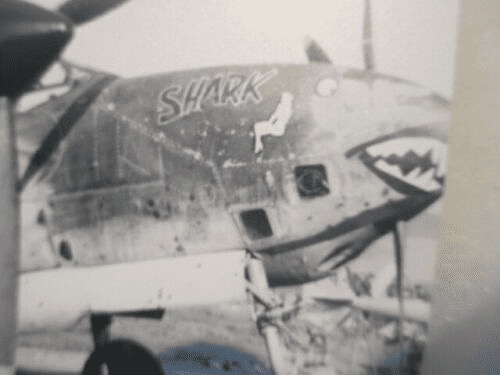
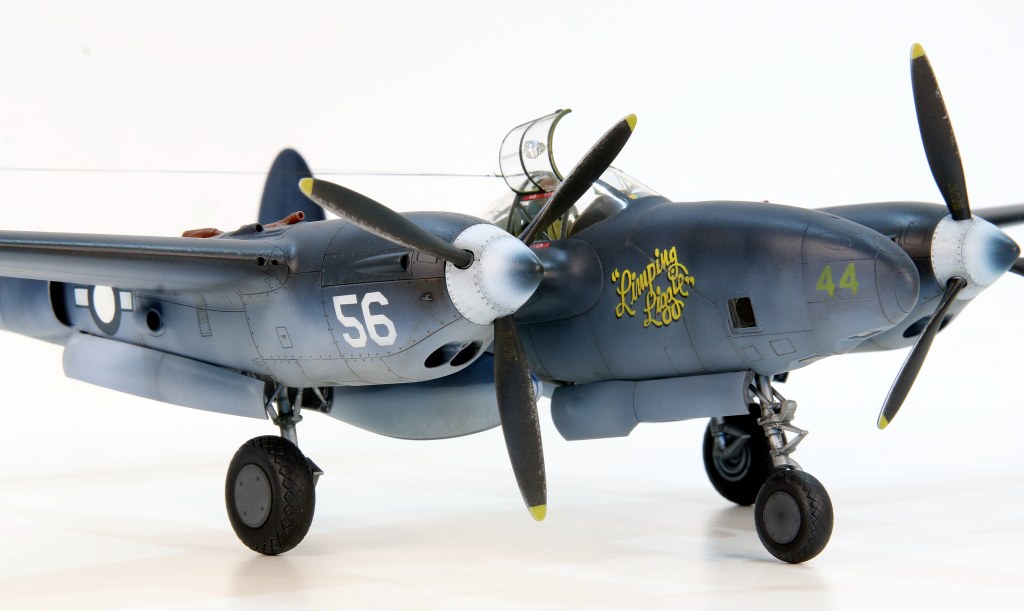
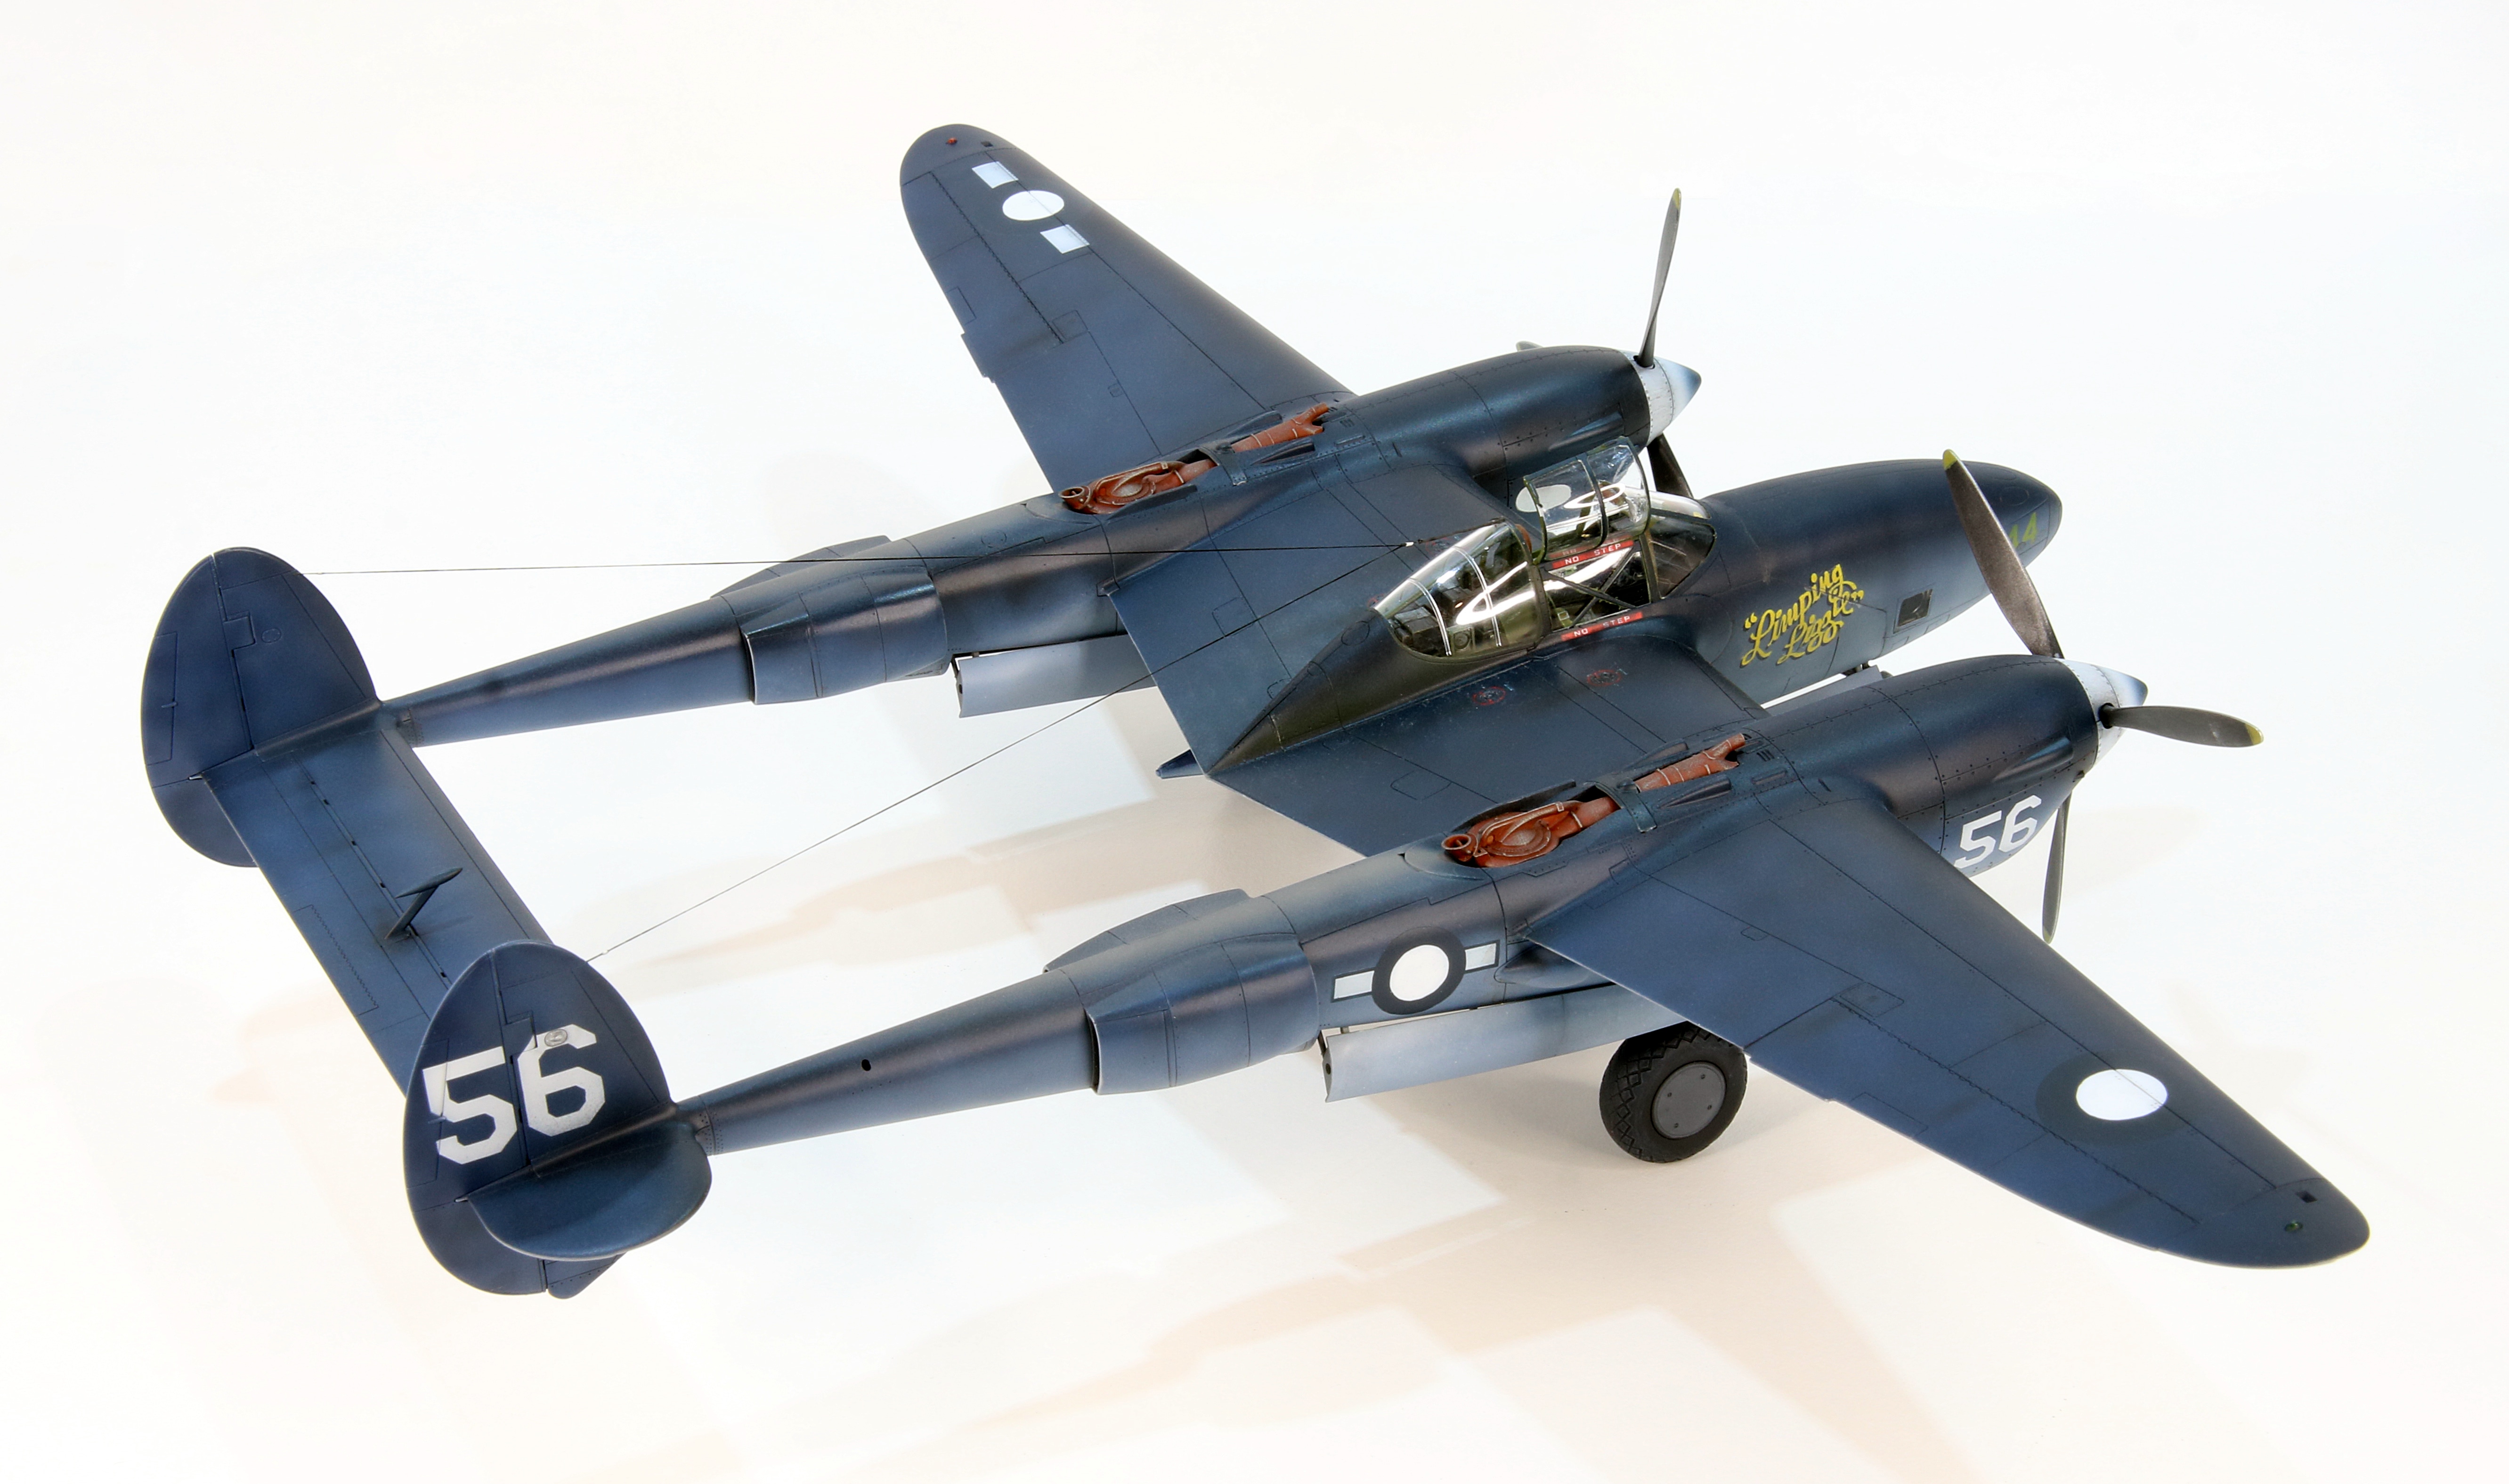
The RAAF markings sure looked pristine painted over the somewhat tired looking US markings, especially as the only blue they had was their own darker insignia blue (as compared to the slightly lighter blue the RAAF typically used). Because this was actually only a loan of some aircraft and not a gift, and the Americans expected their airplanes to be returned, they left their own tactical markings on the airframe, and because it looked nice and someone had gone to a lot trouble to paint it, they also left its nickname, “Limping Lizzie” on the nose too.
Seems plausible?

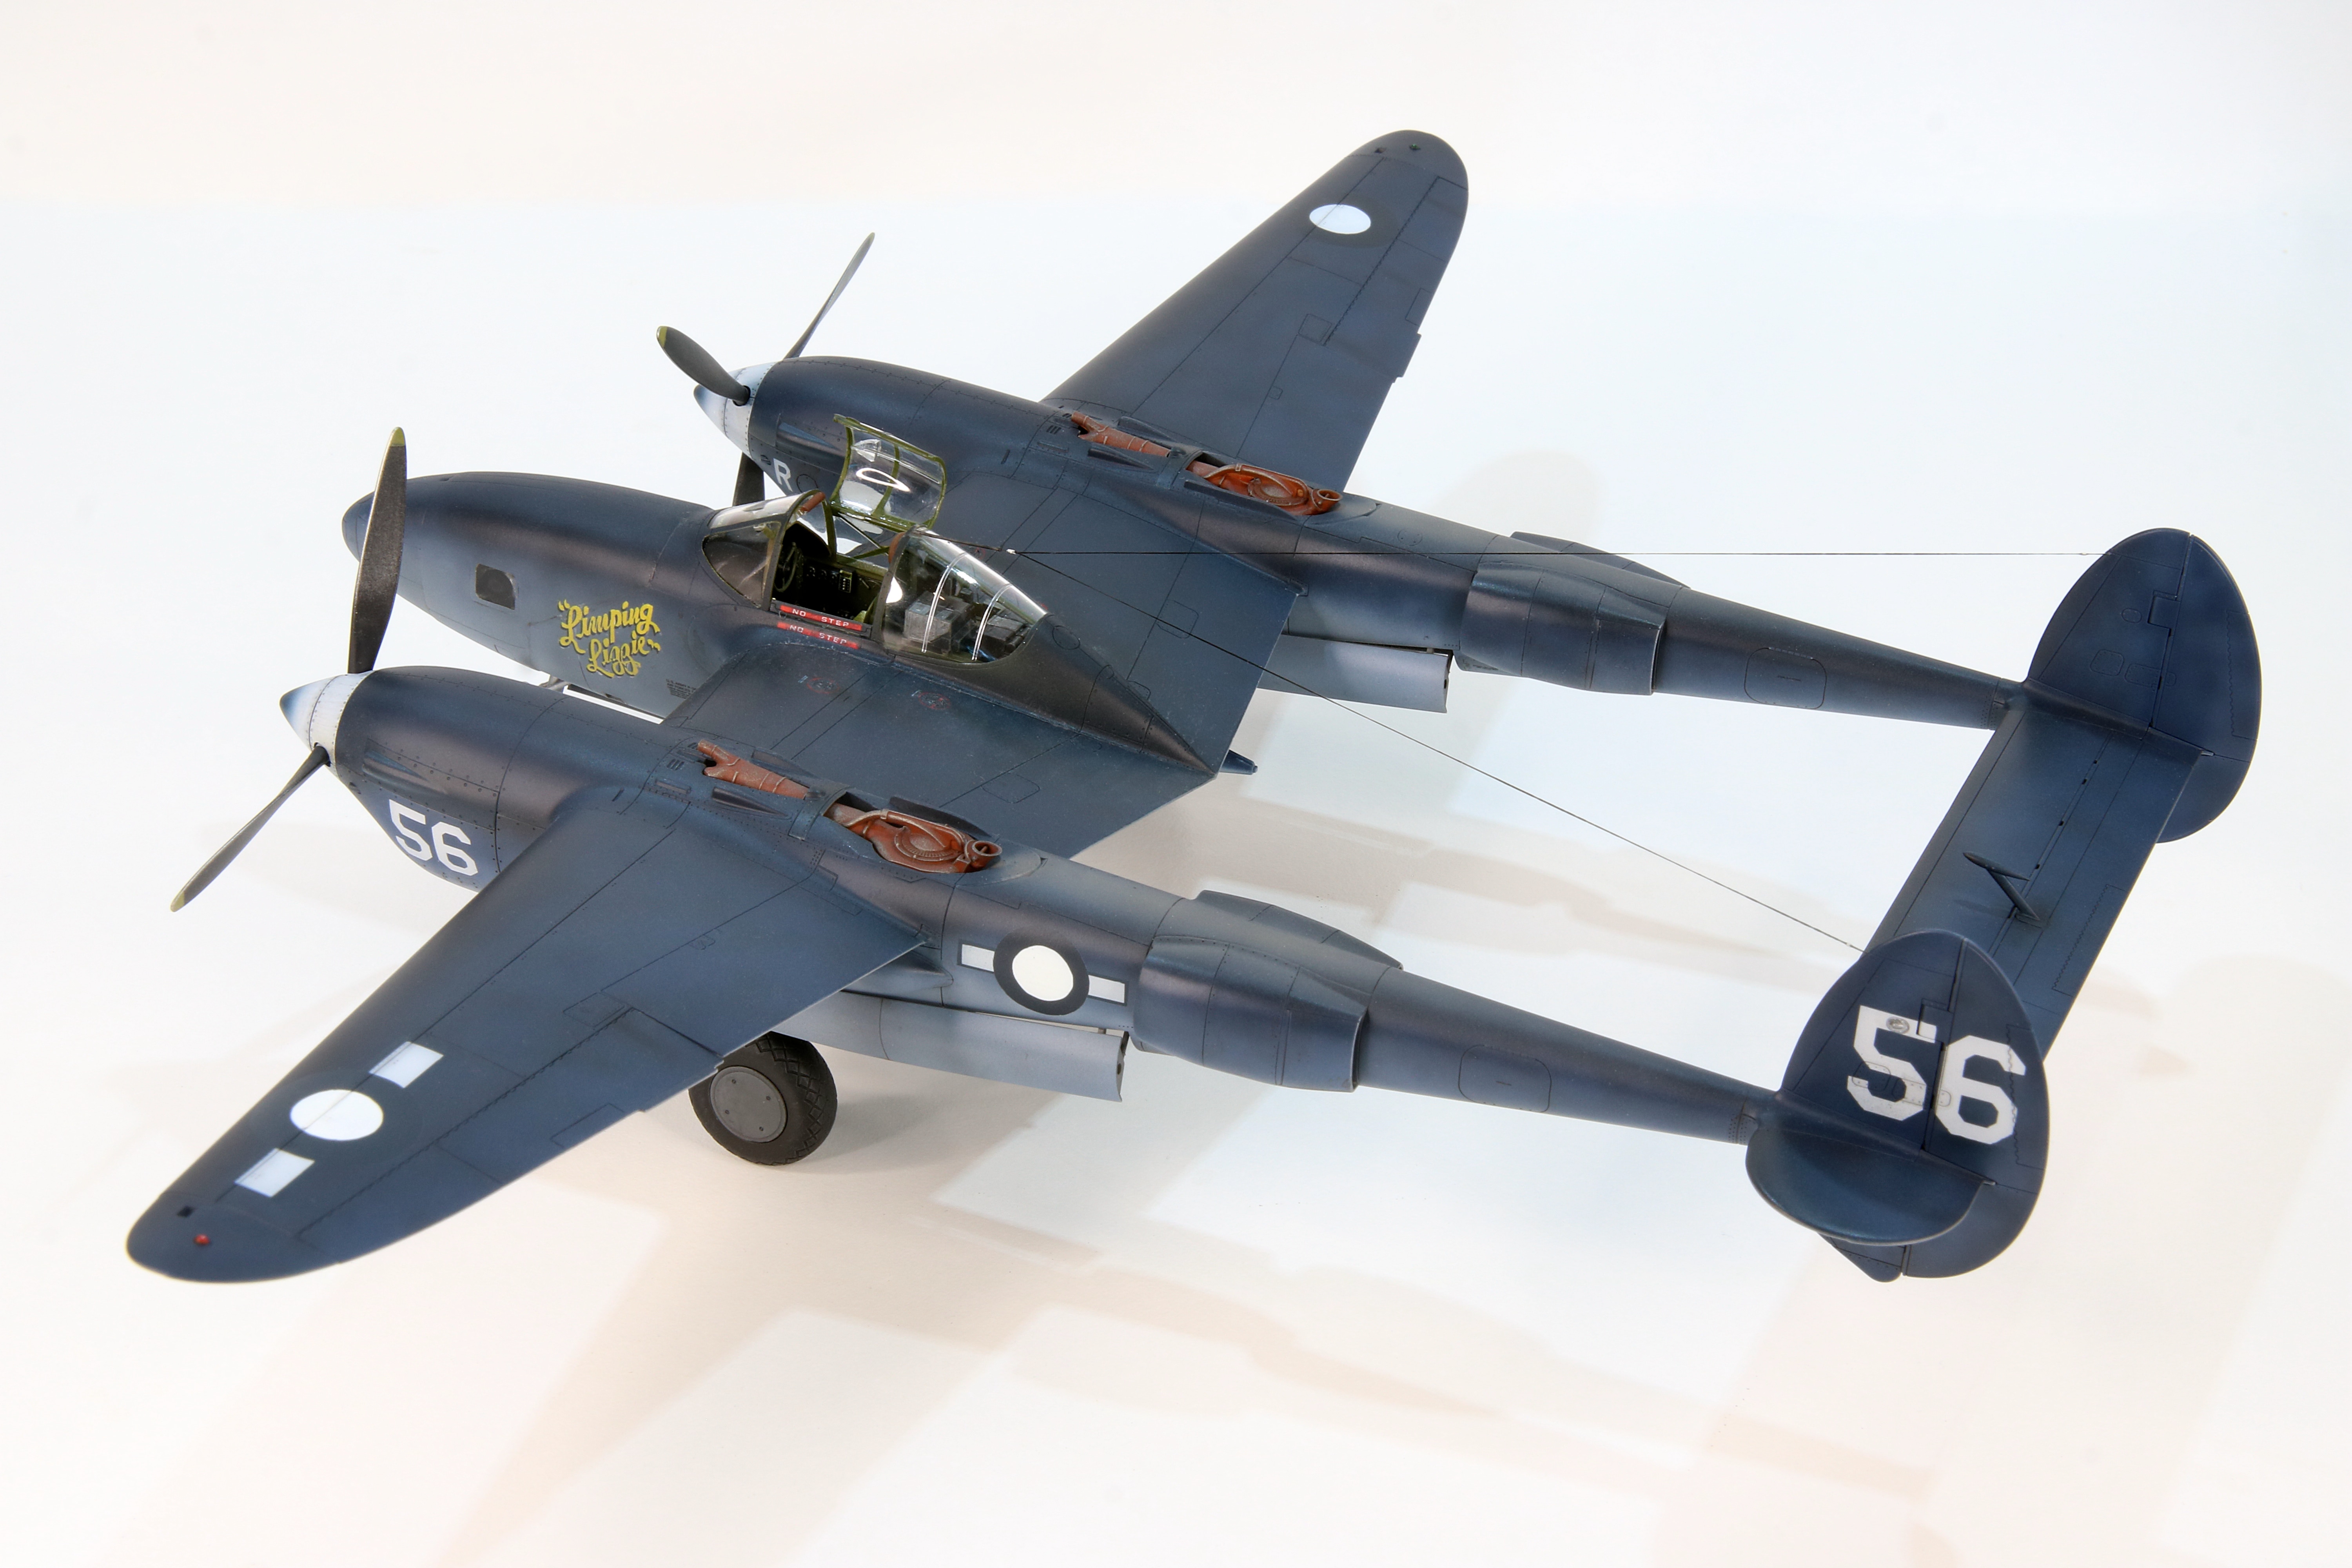
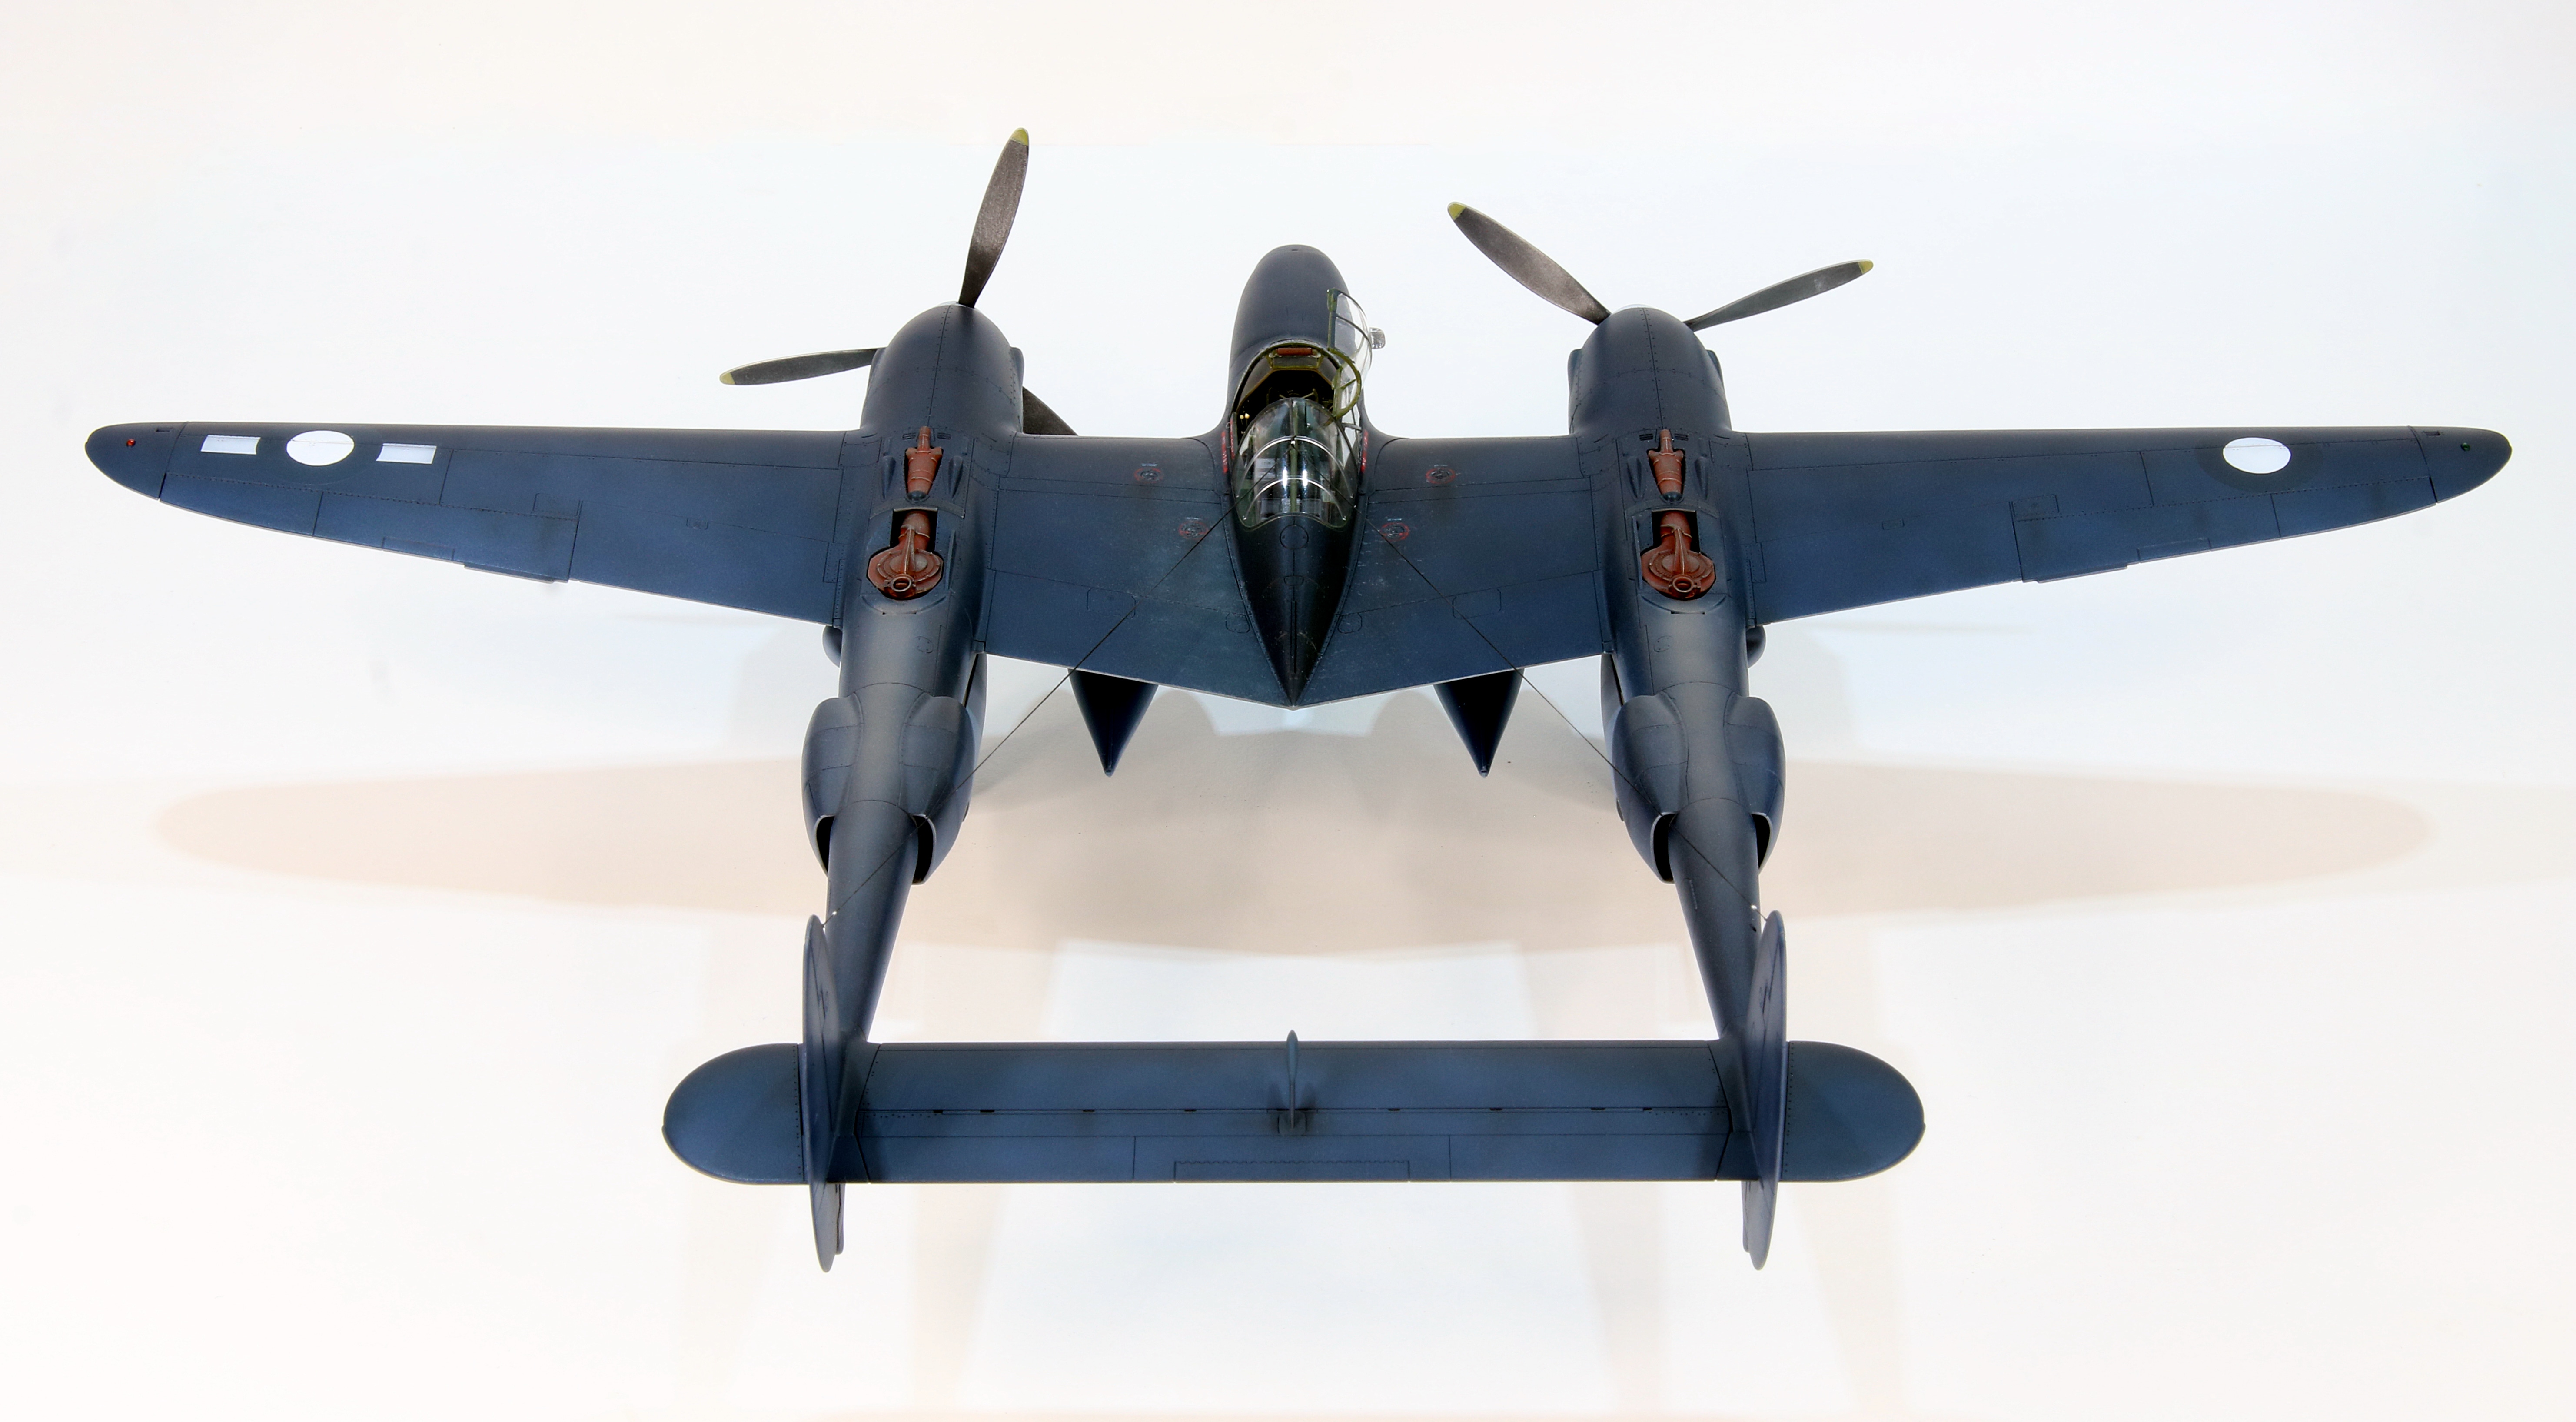
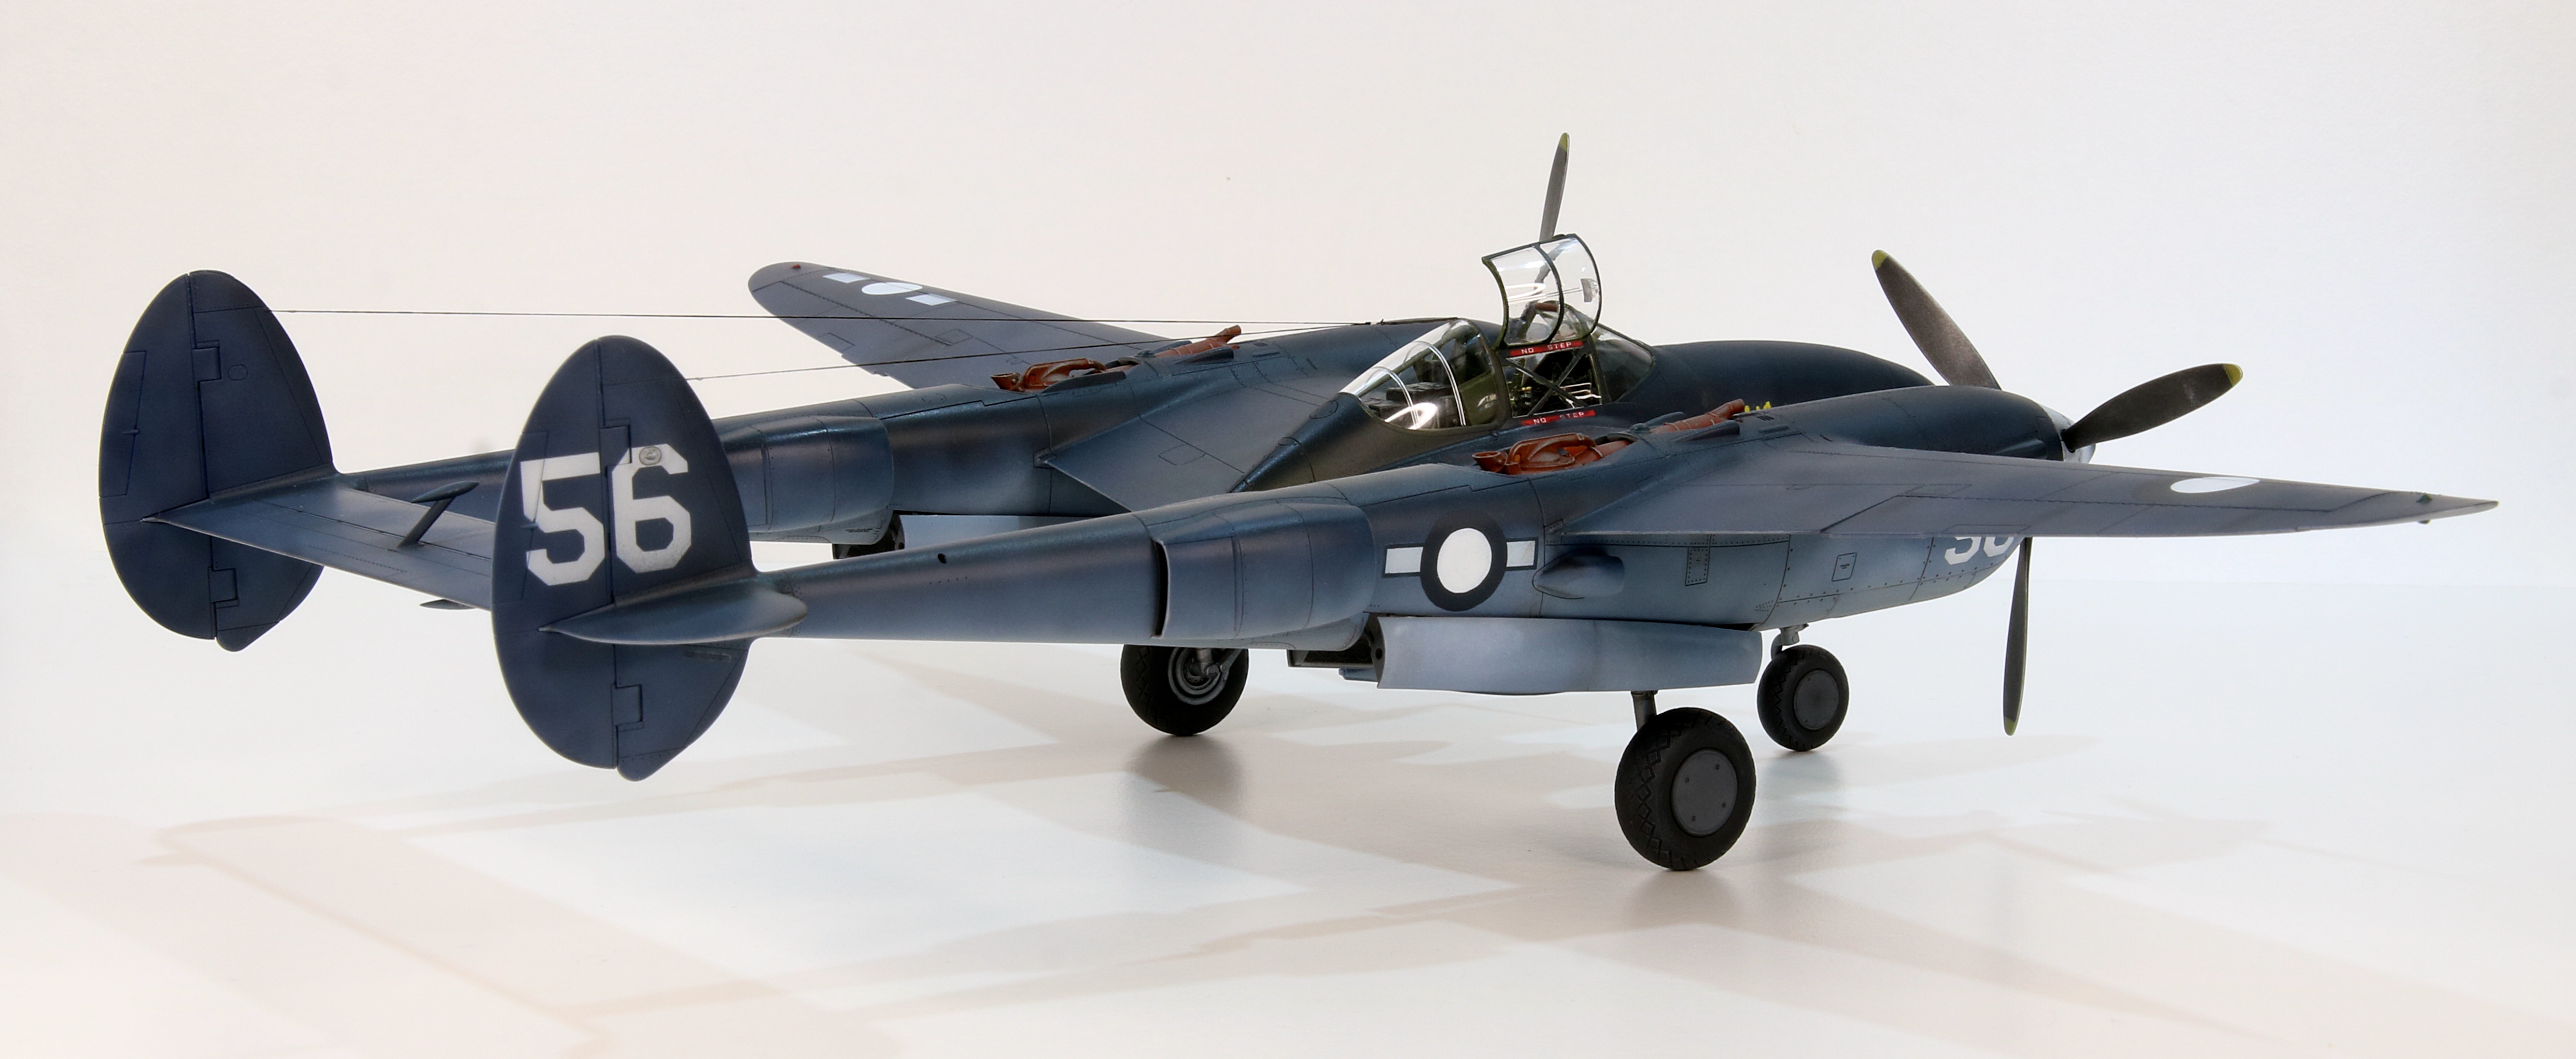
I think it’s a safe assumption that the RAAF roundels were painted directly on top of the US stars and bars. Certainly, there’s an RAAF roundel painted over the original US marking on the port boom in the photo above. In the circumstances of this being a loaned aircraft at short-ish notice, that would be an expedient way of marking the airframe up for RAAF service. There is an RAAF roundel on the photo-aircraft’s upper starboard wing; no bars however, there would not have been a US marking on the upper starboard wing to be painted over. There is no roundel visible (to my eye) on “Lizzie’s” port wing underside though, an inconsistency between it and the photo aircraft in terms of adding RAAF roundels where they would be placed on any other RAAF aircraft, being in addition to overpainting the US markings.
The booms are both painted with roundels over bars. The wing undersides I thought would be roundel over bars as per the booms on the starboard wing; the port I believe has no marking. On the wing topsides the port would be roundel over bars and starboard most likely a roundel notwithstanding the inconsistency with the underside.
The nose art “Limping Lizzie” is clearly visible in all the photos while she was in US service and there are no pics where it’s clear either way while in RAAF service. Would the Americans have removed it at the same time as painted the roundels? No one knows. I decided to leave it on as I was unable to come up with a compelling reason as to why it would have been removed.
Click on any of the images below to scroll through the gallery.


I decided to paint the bars separately as that makes the masking considerably simpler. The insignia blue is very close to the Haze but that’s just the way it must have been. There’s actually a bit more contrast than these pictures suggest, the clear gloss blended the shades under the lights. I tried to make a clear difference between the old white in the bars and the new white of the roundel. I made the roundels themselves a fraction larger than the US markings as I would have expected the overpaint would have been the same on the real thing. It’s maybe 0.5mm larger in radius.
The faded “44” on the nose I chose to paint in yellow. I have no evidence for any colour in particular, but it seems yellow was often used and it certainly wasn’t white, and blue wouldn’t offer much contrast.
Lastly, I added a few of the Tamiya stencil decals and the nose art decal that came from the CMK detail set. The decals all behaved well enough and “Lizzie” was ready for its finishing touches.
It’s worth noting here that the model was still in its sub-assemblies. It was only when I had completed the markings and sealed them with a final clear coat that I finally brought the model together as one.

Weathering
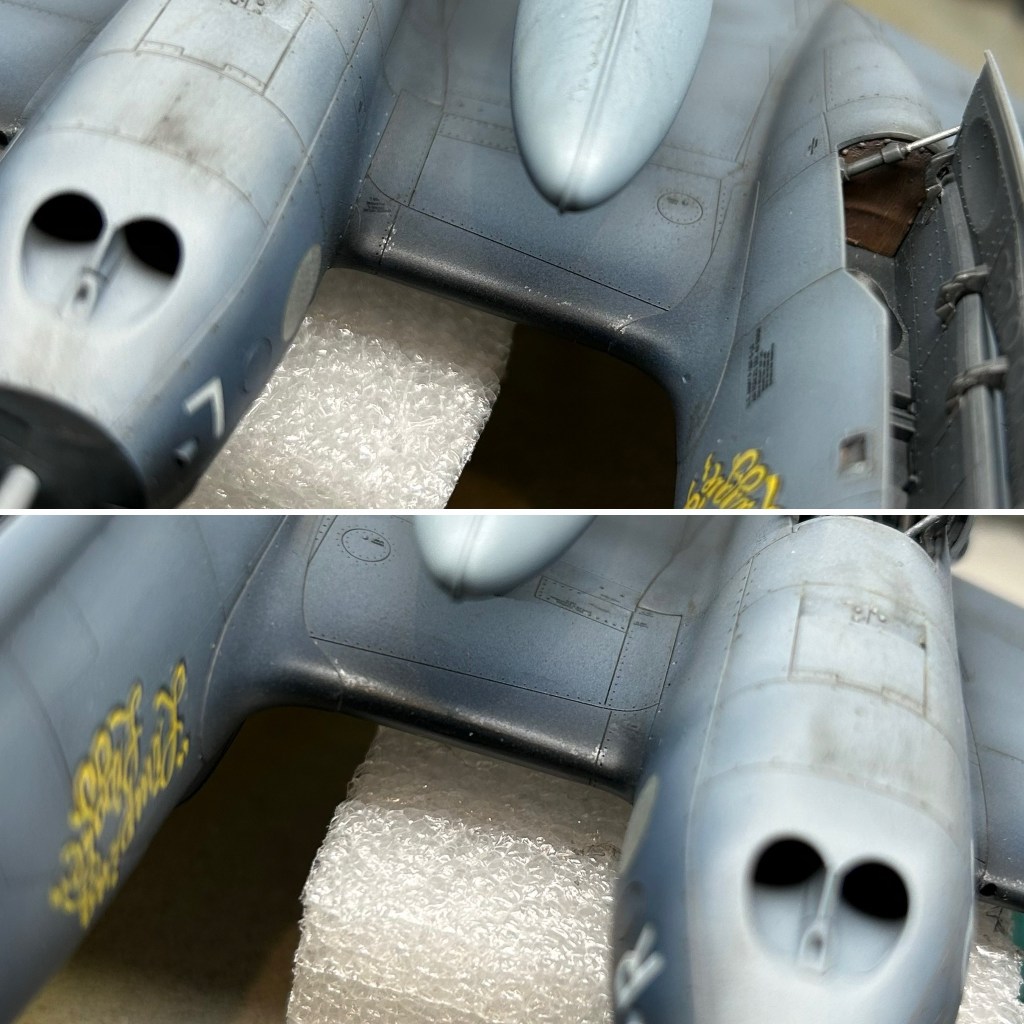
Almost all of the weathering was accomplished in the painting. I added some grime to maintenance panels and areas that would typically attract dirt or stains, but I kept it to a minimum.
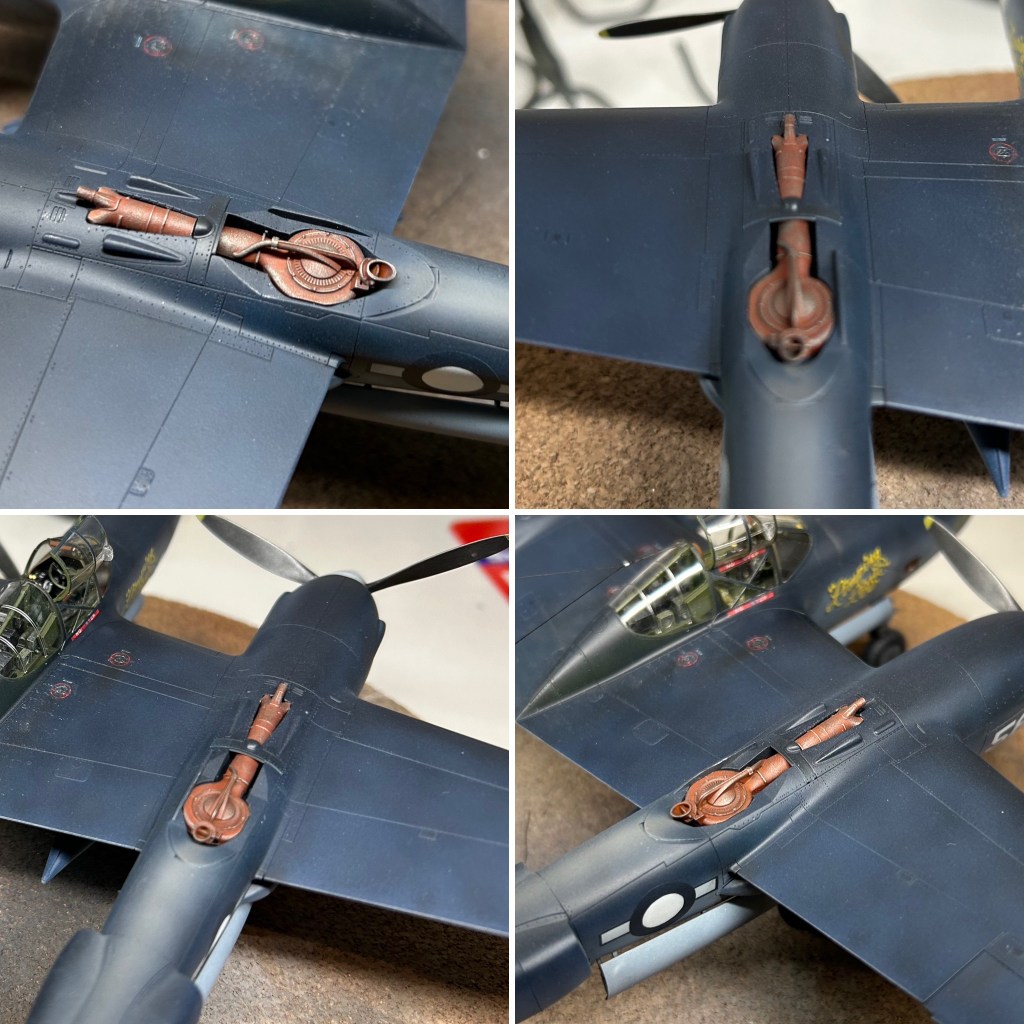
Three specific areas of weathering worth mention are the propellers, the exhaust stains and the auxiliary fuel tanks. The props I weathered heavily based on the photos using a silver pencil and dry brushed metal powder. The exhaust was applied with my airbrush, light coats slowly building to the effect I was looking for. The superchargers left very distinct exhaust marking and I didn’t want to under do it. Finally, the fuel tanks were dirtied up with very dilute black stain which I dropped on the tanks and blew back with my airbrush.
Click on any of the images below to scroll through the gallery


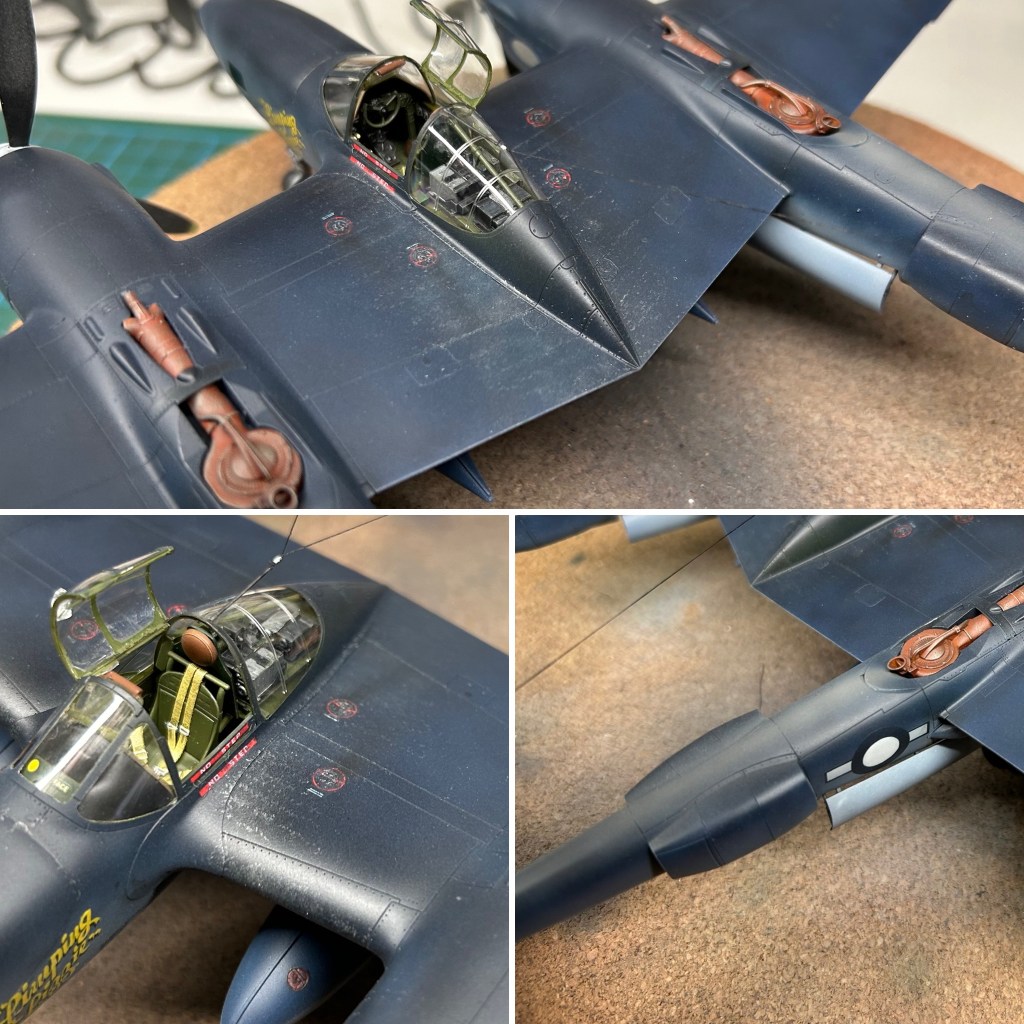

The final weathering application was silver pencil chipping to the leading edge of wings and the walkway areas around the cockpit. I built up the chipping slowly and stopped before I felt it went too far. I probably could have done more, particularly around the cockpit but less is more, as they say.
Finish
Last but not least, in terms of detail, was the finishing touches such as undercarriage and antenna wire.
The antenna was installed using EZline and posed no problems. In the contemporary photos it was clear to me that the wire was attached to a horizontal pole fixed to the top of the canopy. I replicated this with a little wire.
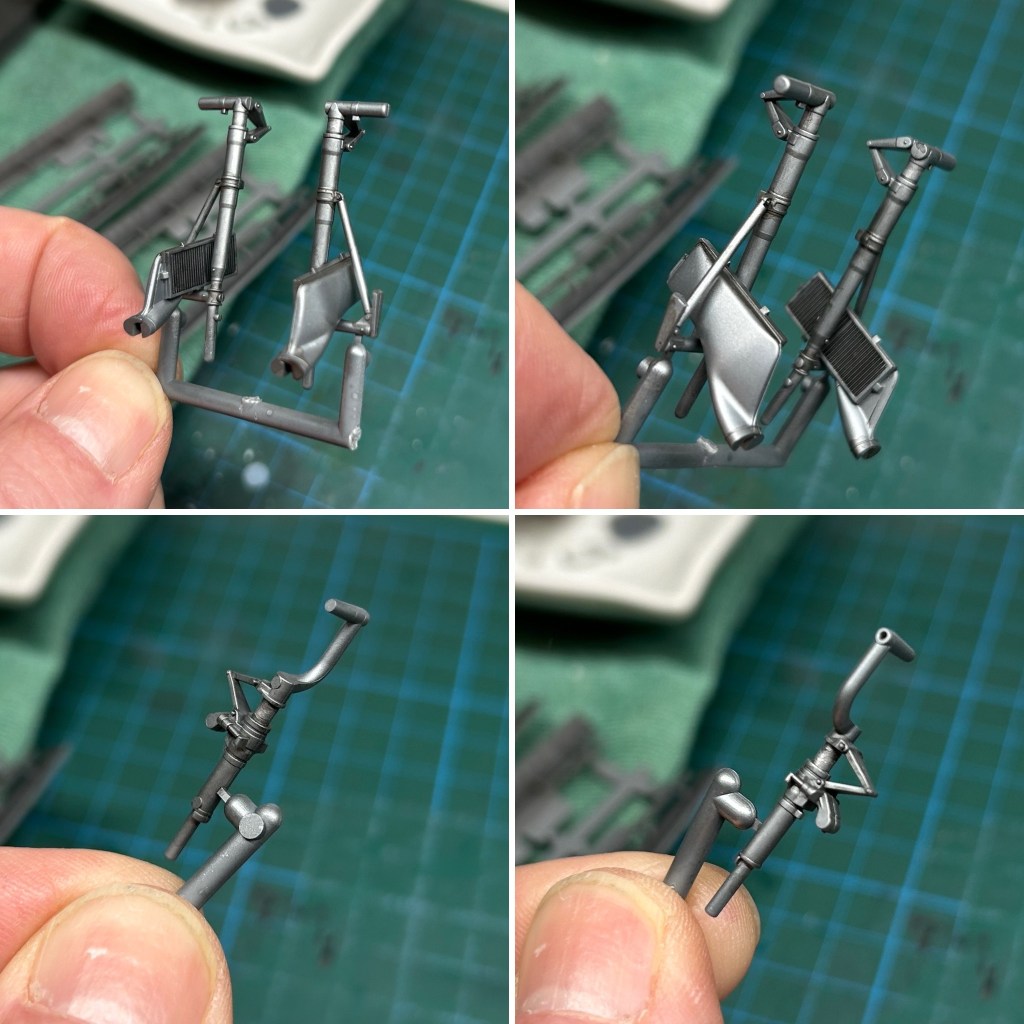
The undercarriage posed the only slight inconvenience with the kit’s engineering. Some elements of the main gear have to be installed early in the process and required great care lest they be damaged in handling. I did break one piece but it was easily repaired. When final assembly begins the reason for engineering it that way becomes apparent. Final assembly is consequently both easy and an accurate representation of the real thing. The undercarriage doors are the final revelation – fit was so good that I didn’t use glue while appearance so realistic that the doors appear as if they could actually close. Colour me impressed. Again.
Click on any of the images below to scroll through the gallery.


I was not sure I could get through that write up without superlatives. This kit is state of the art; even the sprue attachment points were largely at places on the kit part where it wouldn’t be seen. The whole thing was really quite remarkable, there was care in every aspect of its design and engineering. The finished piece is one I am very happy with. Between this one and the VLR Mustang that preceded it I am hard put to choose which was my favourite for 2024.
I am pleased with the finished Haze paintwork. I achieved exactly what I was aiming for. This is not to say it is correct, that this is what Cabot Haze looked like when it was worn. But, it is to say it what I think these aircraft looked like.
This kit sat unbuilt in my stash for a long time because I didn’t want to mess it up. Having built it, I can say say that this kit is virtually impossible to make a mess of. The next one, and there will be more, will not wait nearly as long to get on the bench.
Gallery


References and Sources
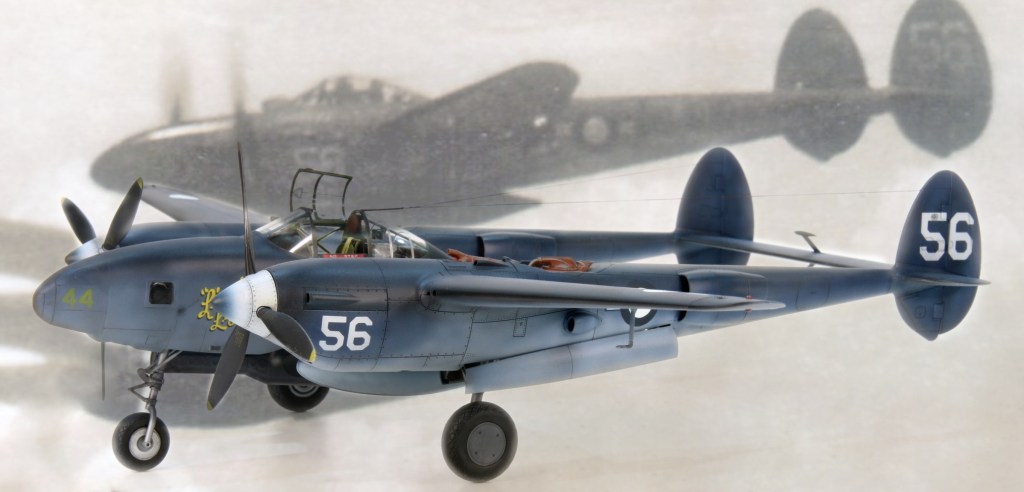
My thanks go to Ron Cuskelly for giving permission to use the photo of “Lizzie” taken on its ferry flight. Ron’s website The Lockheed File is invaluable for anyone building a model of an RAAF Lockheed airframe.
- http://www.lockheed.adastron.com/lightning/75sqn.htm
- https://www.lockheed.adastron.com/lightning/41-2156.htm
- https://www.britmodeller.com/forums/index.php?/topic/235054938-f-5e-lightning-paint-colour/#findComment-3340538
- http://cgibin.rcn.com/jeremy.k/serialSearch.html
- https://www.awm.gov.au/collection/U59413
- https://pacificwrecks.com/unit/usaaf/6prg/8prs.html
If you are interested in following the build in real time as it were, as well as the research that led to the choice of markings, the full build diary is logged in the Britmodeller Aircraft WIP Section.
I really hope you enjoyed this article!
Making-History is a labour of love for me, but it’s becoming more expensive and time consuming. I’m loath to put advertising on it, so if you feel inclined please consider making a donation to help cover site hosting costs as well as the time it takes to produce its content. All donations get a receipt with my thanks.
Mark.
Make a one-time donation
Make a monthly donation
Make a yearly donation
Choose an amount
Or enter a custom amount
Your contribution is very much appreciated and 100% of it will be recycled back into Making-History.
Your contribution is appreciated.
Your contribution is appreciated.
DonateDonate monthlyDonate yearlyCopyright ©2025
This article, its text, and photos of the model is my original work and is protected by copyright in its entirety, except where noted. All research sources are listed in the References and Sources section above, including photos from official sources. All other images and quoted content were sourced from the internet and are used here under protection of fair-use. Any copyrighted content will be happily removed and/or credited forthwith upon request by its rightful owner.


Leave a reply to nekoprice Cancel reply