One of the things I enjoy most about this hobby, and which I fully indulge in my approach to it, is the investigative nature of interpreting old photos to arrive at how I will paint and mark my models. In this piece, which will form part of a series on captured airframes, I will explain how I arrived at what turned out to be a fairly unusual paint scheme for this Me262.
- Me262A-1, Wk/Nr 111690 “White 5”
- “Photos Never Lie…”
- A Most Curious Swallow
- 1/48 Scale Hobby Boss Me 262 A-2
- Gallery
- References and Sources
Me262A-1, Wk/Nr 111690 “White 5”
“White 5” was a Jg7 Me262A-1 and was captured by the British at Fassberg in May 1945. The Australian War Museum holds photo of it in its Luftwaffe markings parked next to “Black X”, another Me262 which the museum exhibits to this day.

Next, there’s a photo showing it with over-painted Luftwaffe markings. I suspect this photo was also taken in Germany post-war, a suspicion based mainly on the presence in the background of at least one other Me262. It’s impossible to know, however.

The next time it appears in the photo record is at Farnborough in the UK around the time of the exhibition in October, 1945. It is now wearing “Air Min 80” in addition to its RAF roundels.


The final set of photos show it in Canada, where it was shipped in late 1945 and subsequently languished in a field for over a decade before being destroyed in a fire-fighting training exercise in Aylmer, Ontario.


This is the photo record I had to work from and one which provides a wealth of information and detail not normally available.
In addition to photos however, there is a lot of material available which explores the archival record on how these machines were camouflaged, what colours were used, what shade of grey/green/brown/blue these colours were and even which factory produced which batches of serial numbers. It’s incredible the detail to which some gifted and generous historians and archivists have been able to go to, and then freely shared their work online. I am indebted to them.
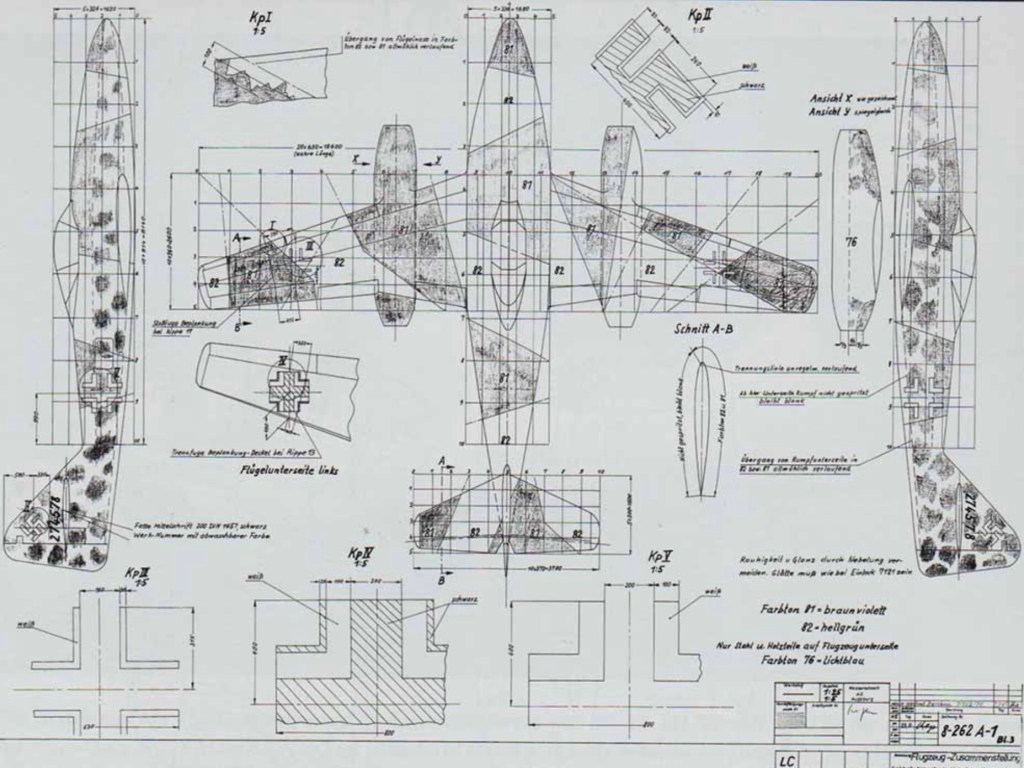
As an example, something I found in my searches gave me what purported to be original factory paint specification for the Me262 (I am ashamed to write that I did not keep track of where I found these images and cannot credit the website in the references section below).

Lastly, in this case I have another avenue of reference which should make things even easier. In the top photo above, the AWM photo of “White 5” with “Black X” while still in their Luftwaffe markings they look very similar to eachother. The AWM has restored “Black X” to its wartime colours by stripping back the later paintwork which affords me, as I live not 10km form the AWM, the opportunity to view the real thing, in the same paint it was wearing when it left the factory in 1945.

So, with a photo record, factory schematics, and an example of the real thing I can look at with my own eyes, it would be a relatively easy process to replicate this particular Me262, right?
“Photos Never Lie…“
…but they sure can lead one down a rabbit hole. In deciding how I was going to paint this one there were some decisions to be made.
First, I thought about the paint scheme. My assumption was that at least the wings would have a splinter scheme, and the fuselage should too, as per the schematics. Then I looked at the photos.

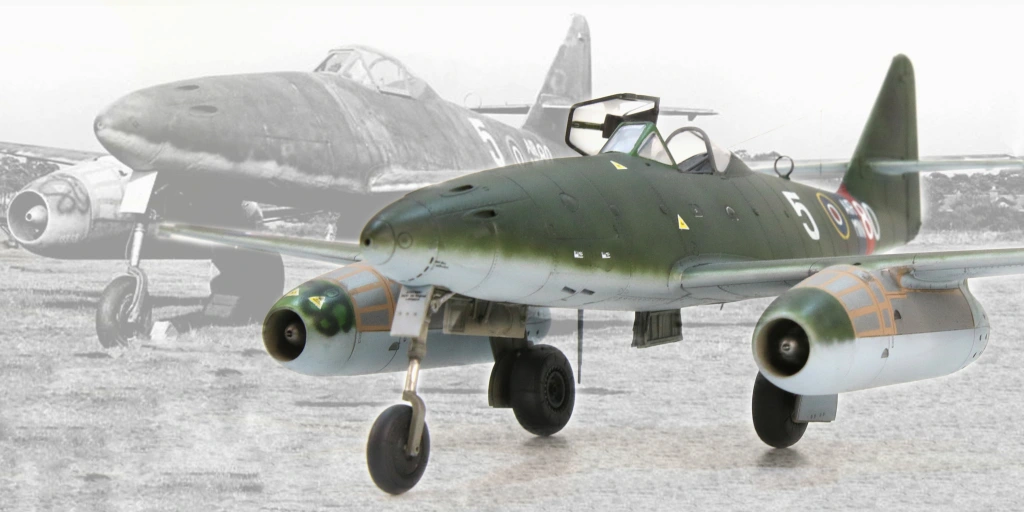
In looking at the fuselage, this image has the best clarity and it is clear there simply isn’t any tonal difference along the length of the fuselage. I looked for evidense on the wings…
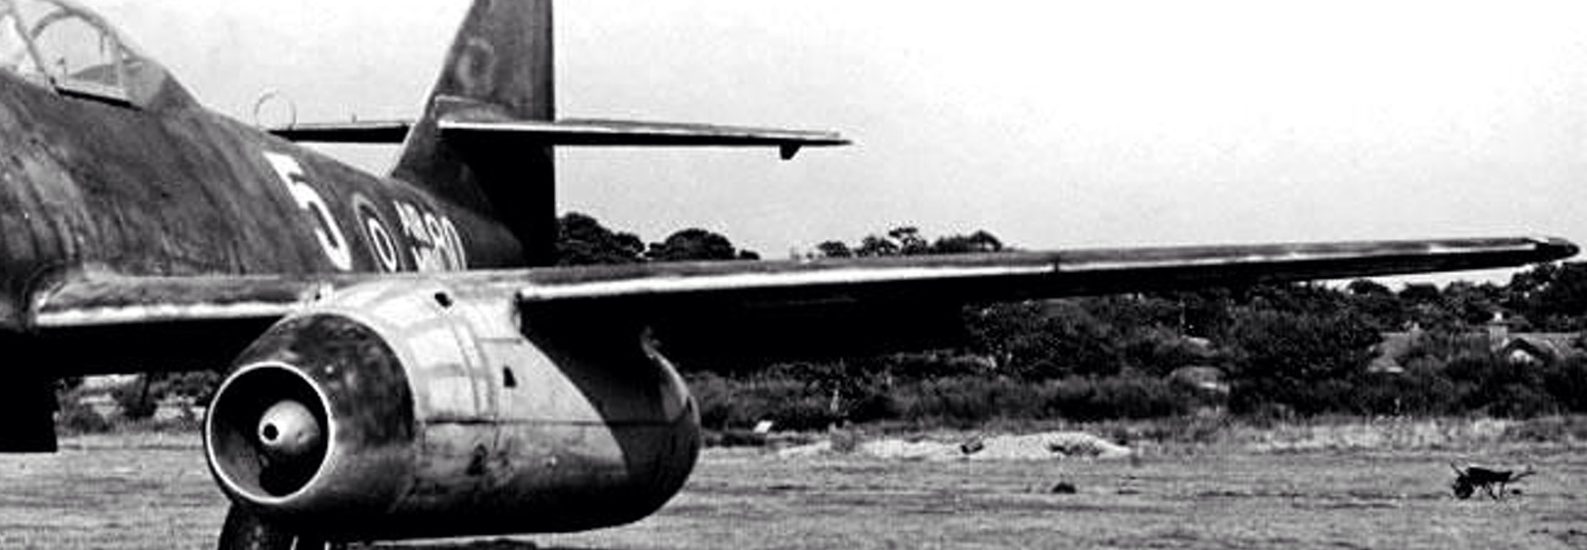
…and once again, though hardly an ideal angle to view from, there’s no discernible difference in the paint colour all along the leading edge of the port wing, or for that matter on the tail either.
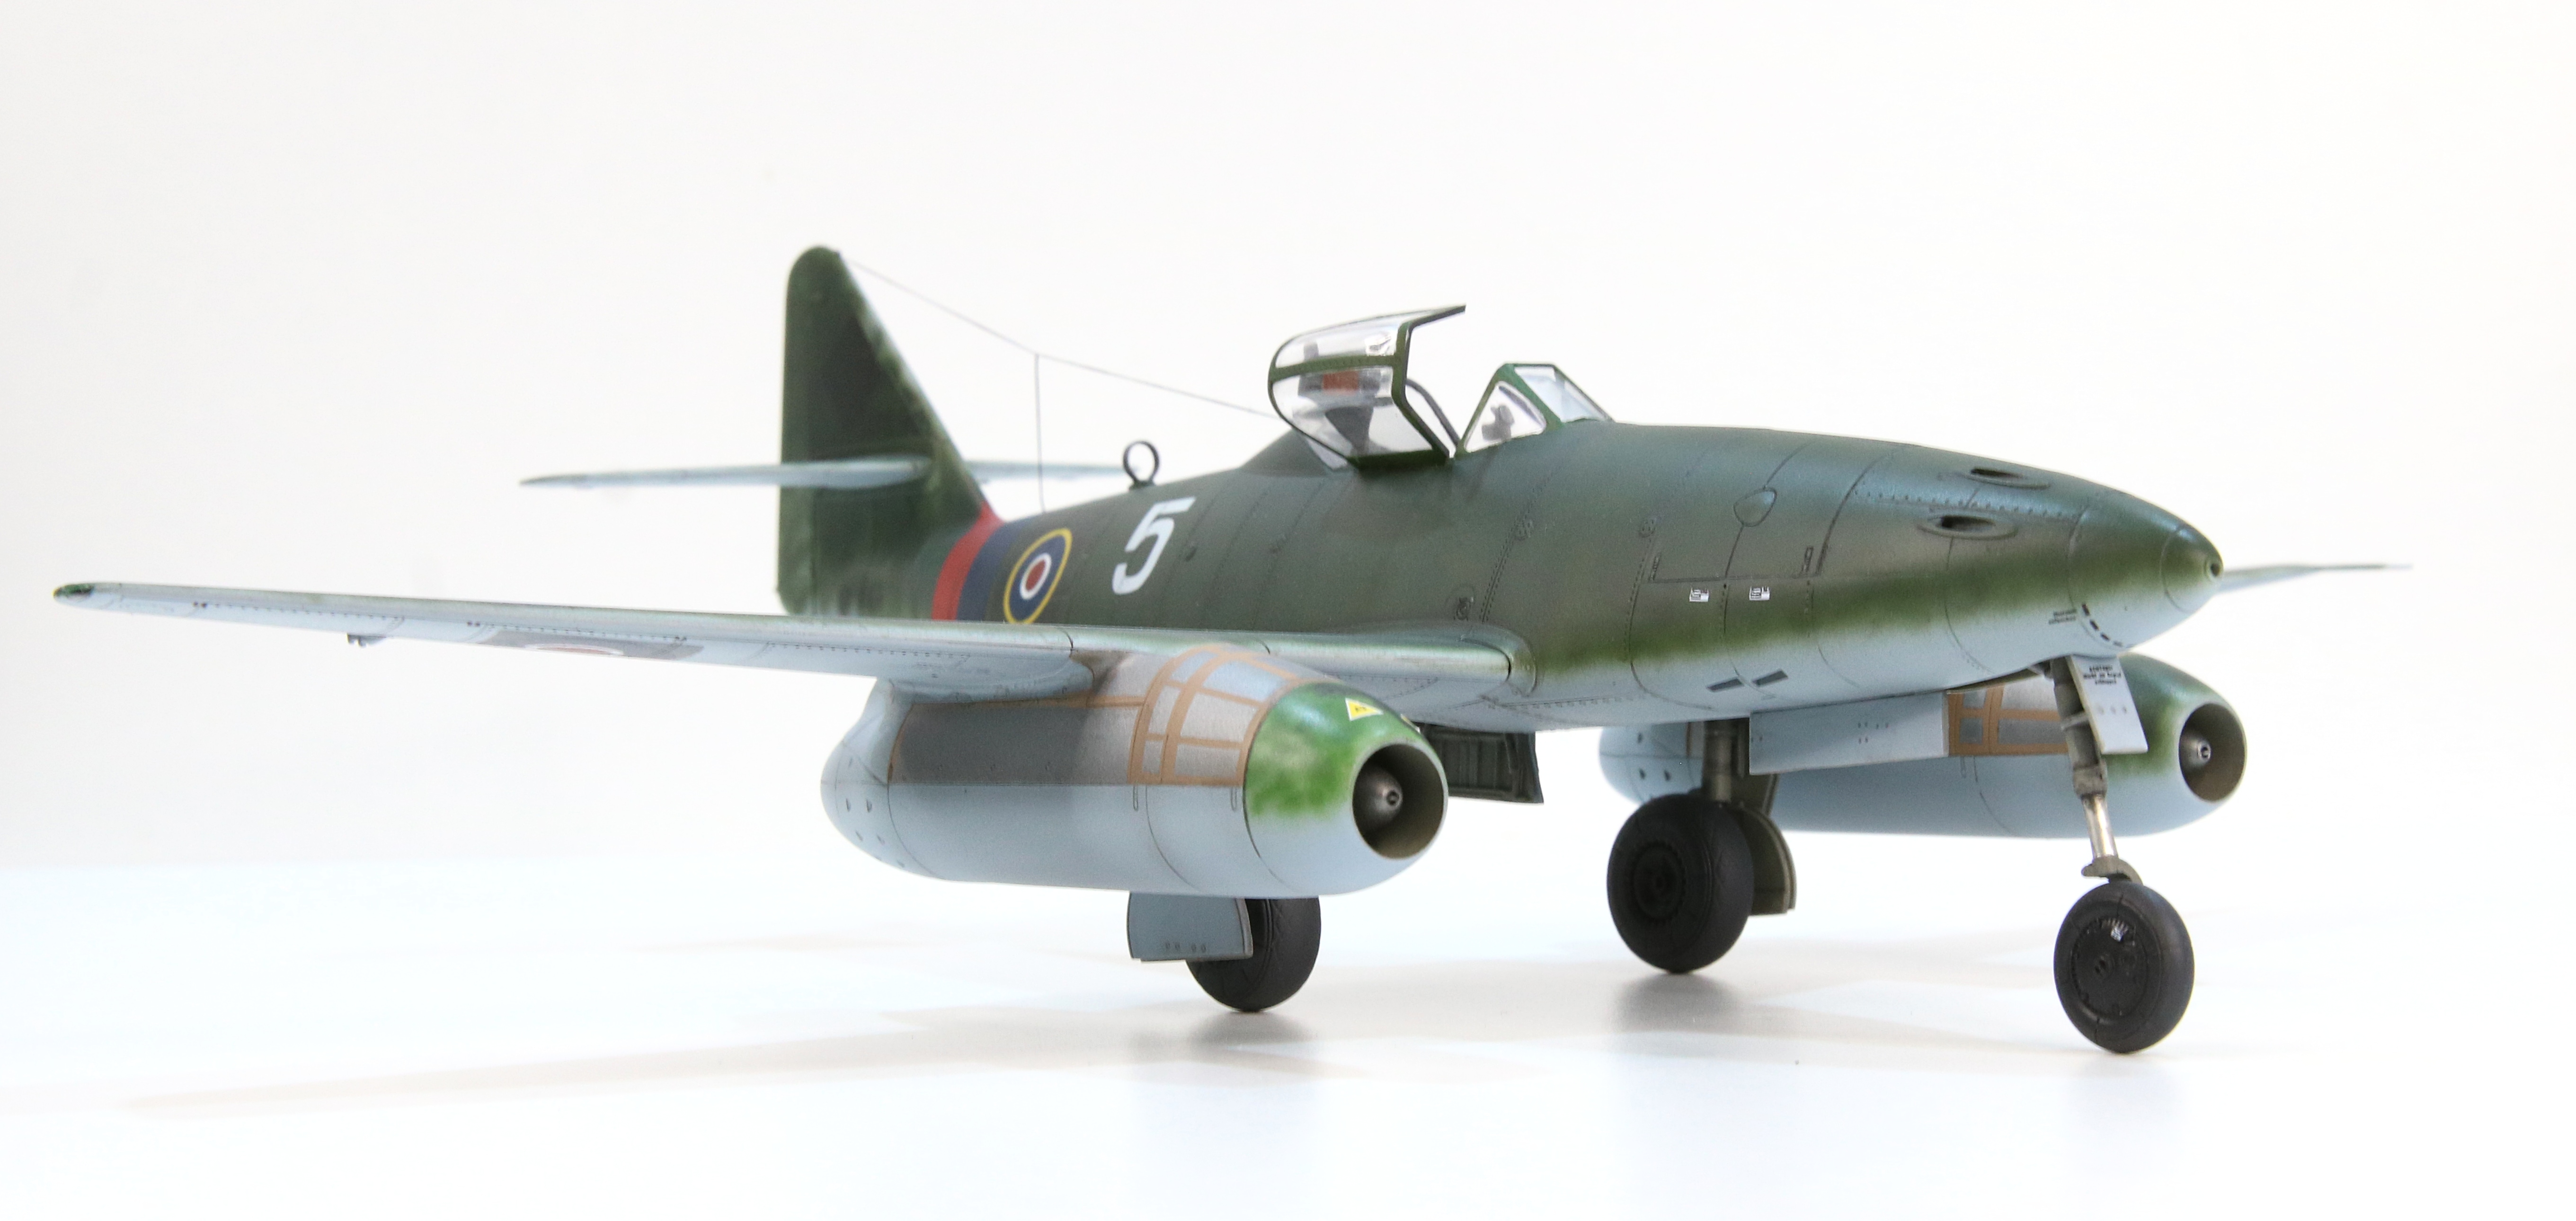
What became apparent was that this was a monochrome finish, most likely RLM81 Dark Green. When later I made the connection between the AWM Me262 and this one, I became certain that the finish was overall green, there was no camouflage pattern on this airframe.
In the process of looking for a pattern I did becomes aware of something more curious which was the paint finish along the leading edges. Looking closely at the photo above one can see the the paint finishes short of the leading edge and in a soft, mottled manner. Looking at the trailing edge confirmed it was there, too (though clearly the starboard inner flap is a replacement which is either natural metal or left in RLM76 Light Blue).
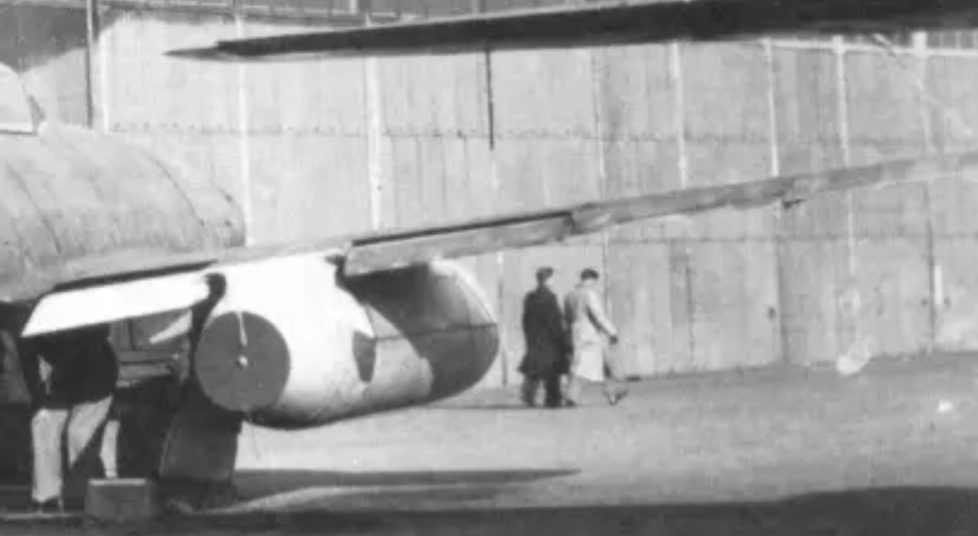
Furthermore, there’s a soft edge around the fin, as is clearly seen in the detail phot below.

A close look at the paint on the port outer flap, and on the trailing cover of the port engine also shows a very mottled finish to the paint.
Finally, looking at the photos as a collection I concluded that the overall green paint finish was a soft one, for want of a better term. It looks to me like the green was applied in a dense mottle rather than a solid colour coat and allowed to feather around all of its edges.
Having decided my plan for the airframe, I turned my attention to the engines, which were a whole other scenario!

The port engine (lower image) is fairly clear; on the upper portion we see bare metal with the sealing putty visible. To me, the lower cowling appears to be a different shade – slightly darker -than the bare metal above it and I concluded that the lower panels were painted with RLM76 rather than left bare metal. The forward cowling has a dense mottle of the same colour as the airframe, RLM81 Dark Green.
The starboard engine is the same except for the forward cowling. I see four finishes on the that one; the bare metal and RLM76 the same as the the port engine. I see two colours on the upper portion, there’s a lighter colour, but darker than the RLM76 underlying the “89” shaped squiggle which is painted in dark green. My hypothesis is that the forward cowl was originally painted RLM82 Light Green, perhaps from a different airframe or perhaps from a different batch of parts in assembly, and it was field painted with the squiggle to match the rest of the airframe. Whatever the reason, I do see four finishes.
A Most Curious Swallow
Having analysed the photos almost obsessively over the course of the assembly phase of this build, my conclusion then become a paint plan. But, having decided on how to paint this one I must acknowledge that plan is inconsistent with my previous understanding of paint finishes on late war 262’s. Indeed, it’s inconsistent with the AWM 262’s finish which clearly has its RLM81 painted all the way to both the trailing and leading edges.
And yet, the photos don’t lie (in this case) and I cannot come to any other conclusion based on what I see.
So, that’s the analysis of this airframe. In the end, as an online friend said to me once while I was pondering a colour choice or some such, “Mark, these are 80 year old black and white photos, give it your best guess and move on 🙂” it’s all educated guess work and we do our best.
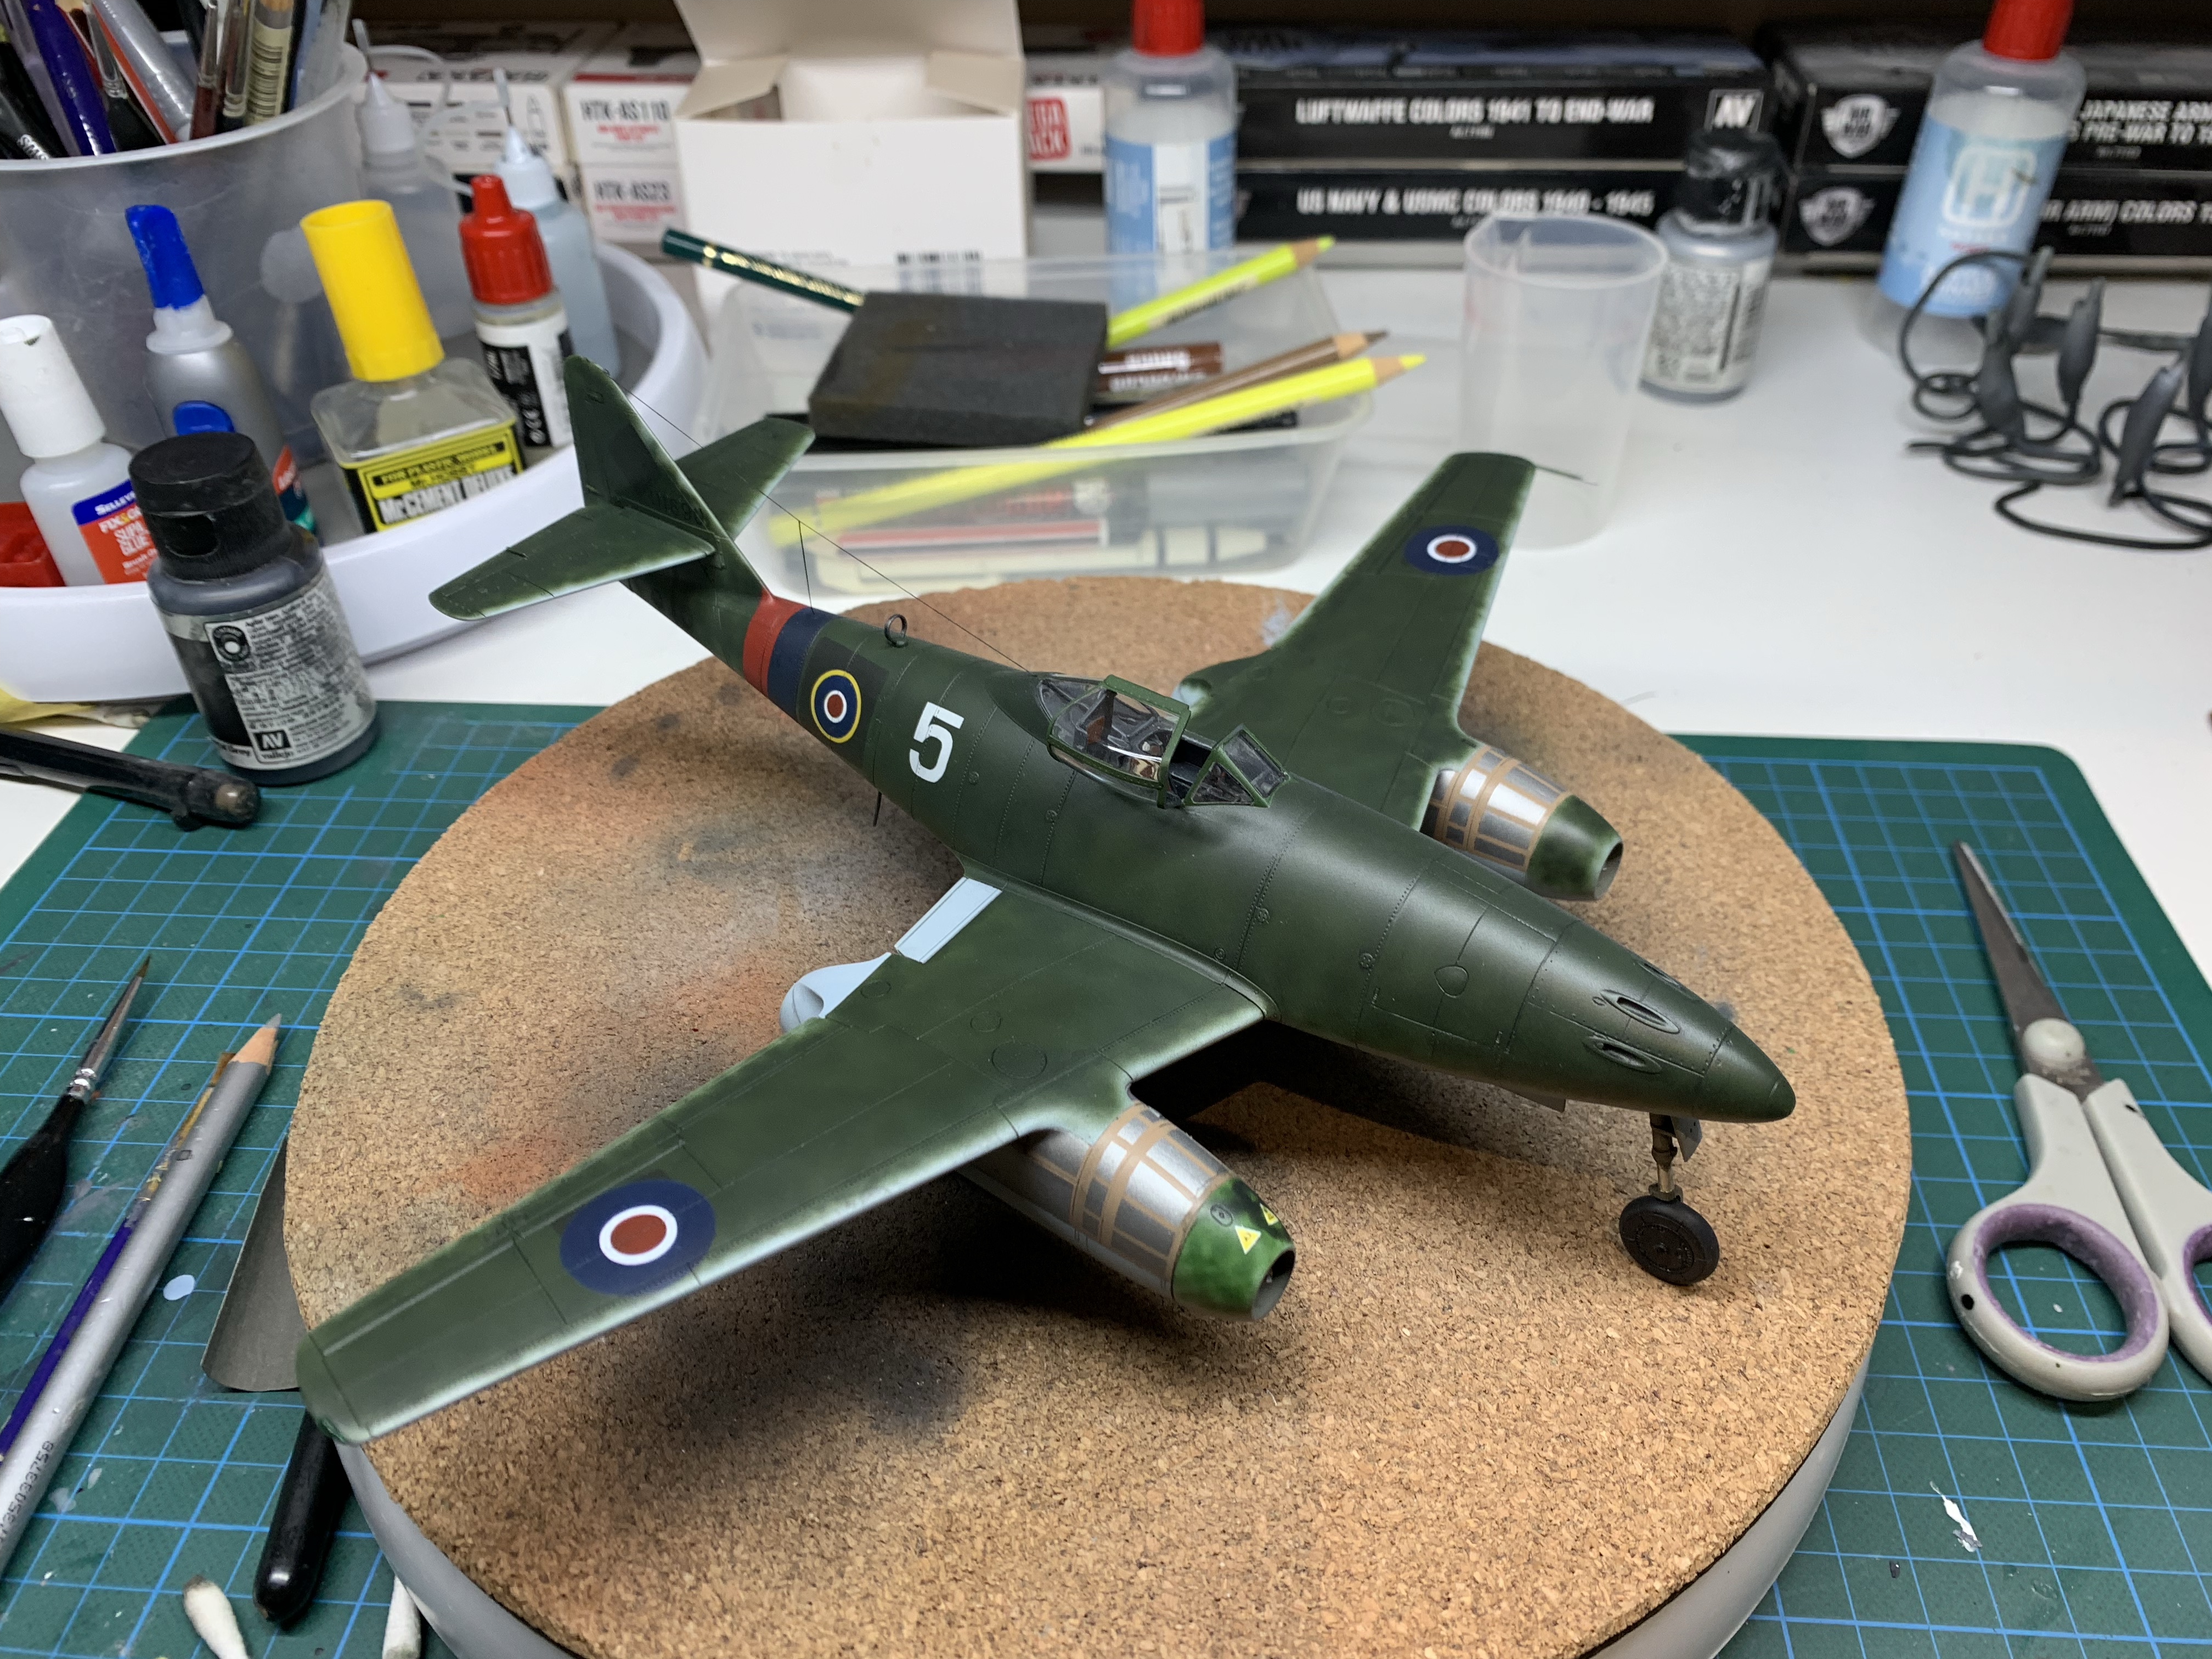
1/48 Scale Hobby Boss Me 262 A-2

Hobby Boss’s kit is well priced, has decent reviews and looks very nice on the sprues. There’s some interesting choices in the parts breakdown; the inclusion of the radios and other inner fuselage components is curious as it cannot be seen through the radio hatch and it seemed to me to be a missed opportunity to mould the ailerons and flaps to the wings rather than have them as separate parts – particularly the flaps and slats as 262’s were often seen parked with flaps down. Notwithstanding that, for those modellers that like to build with panels open and interior details displayed, there’s a lot of detail provided, including for the weapons bay up front. Finally, decals are provided for two aircraft though as usual I planned my own markings.
Build
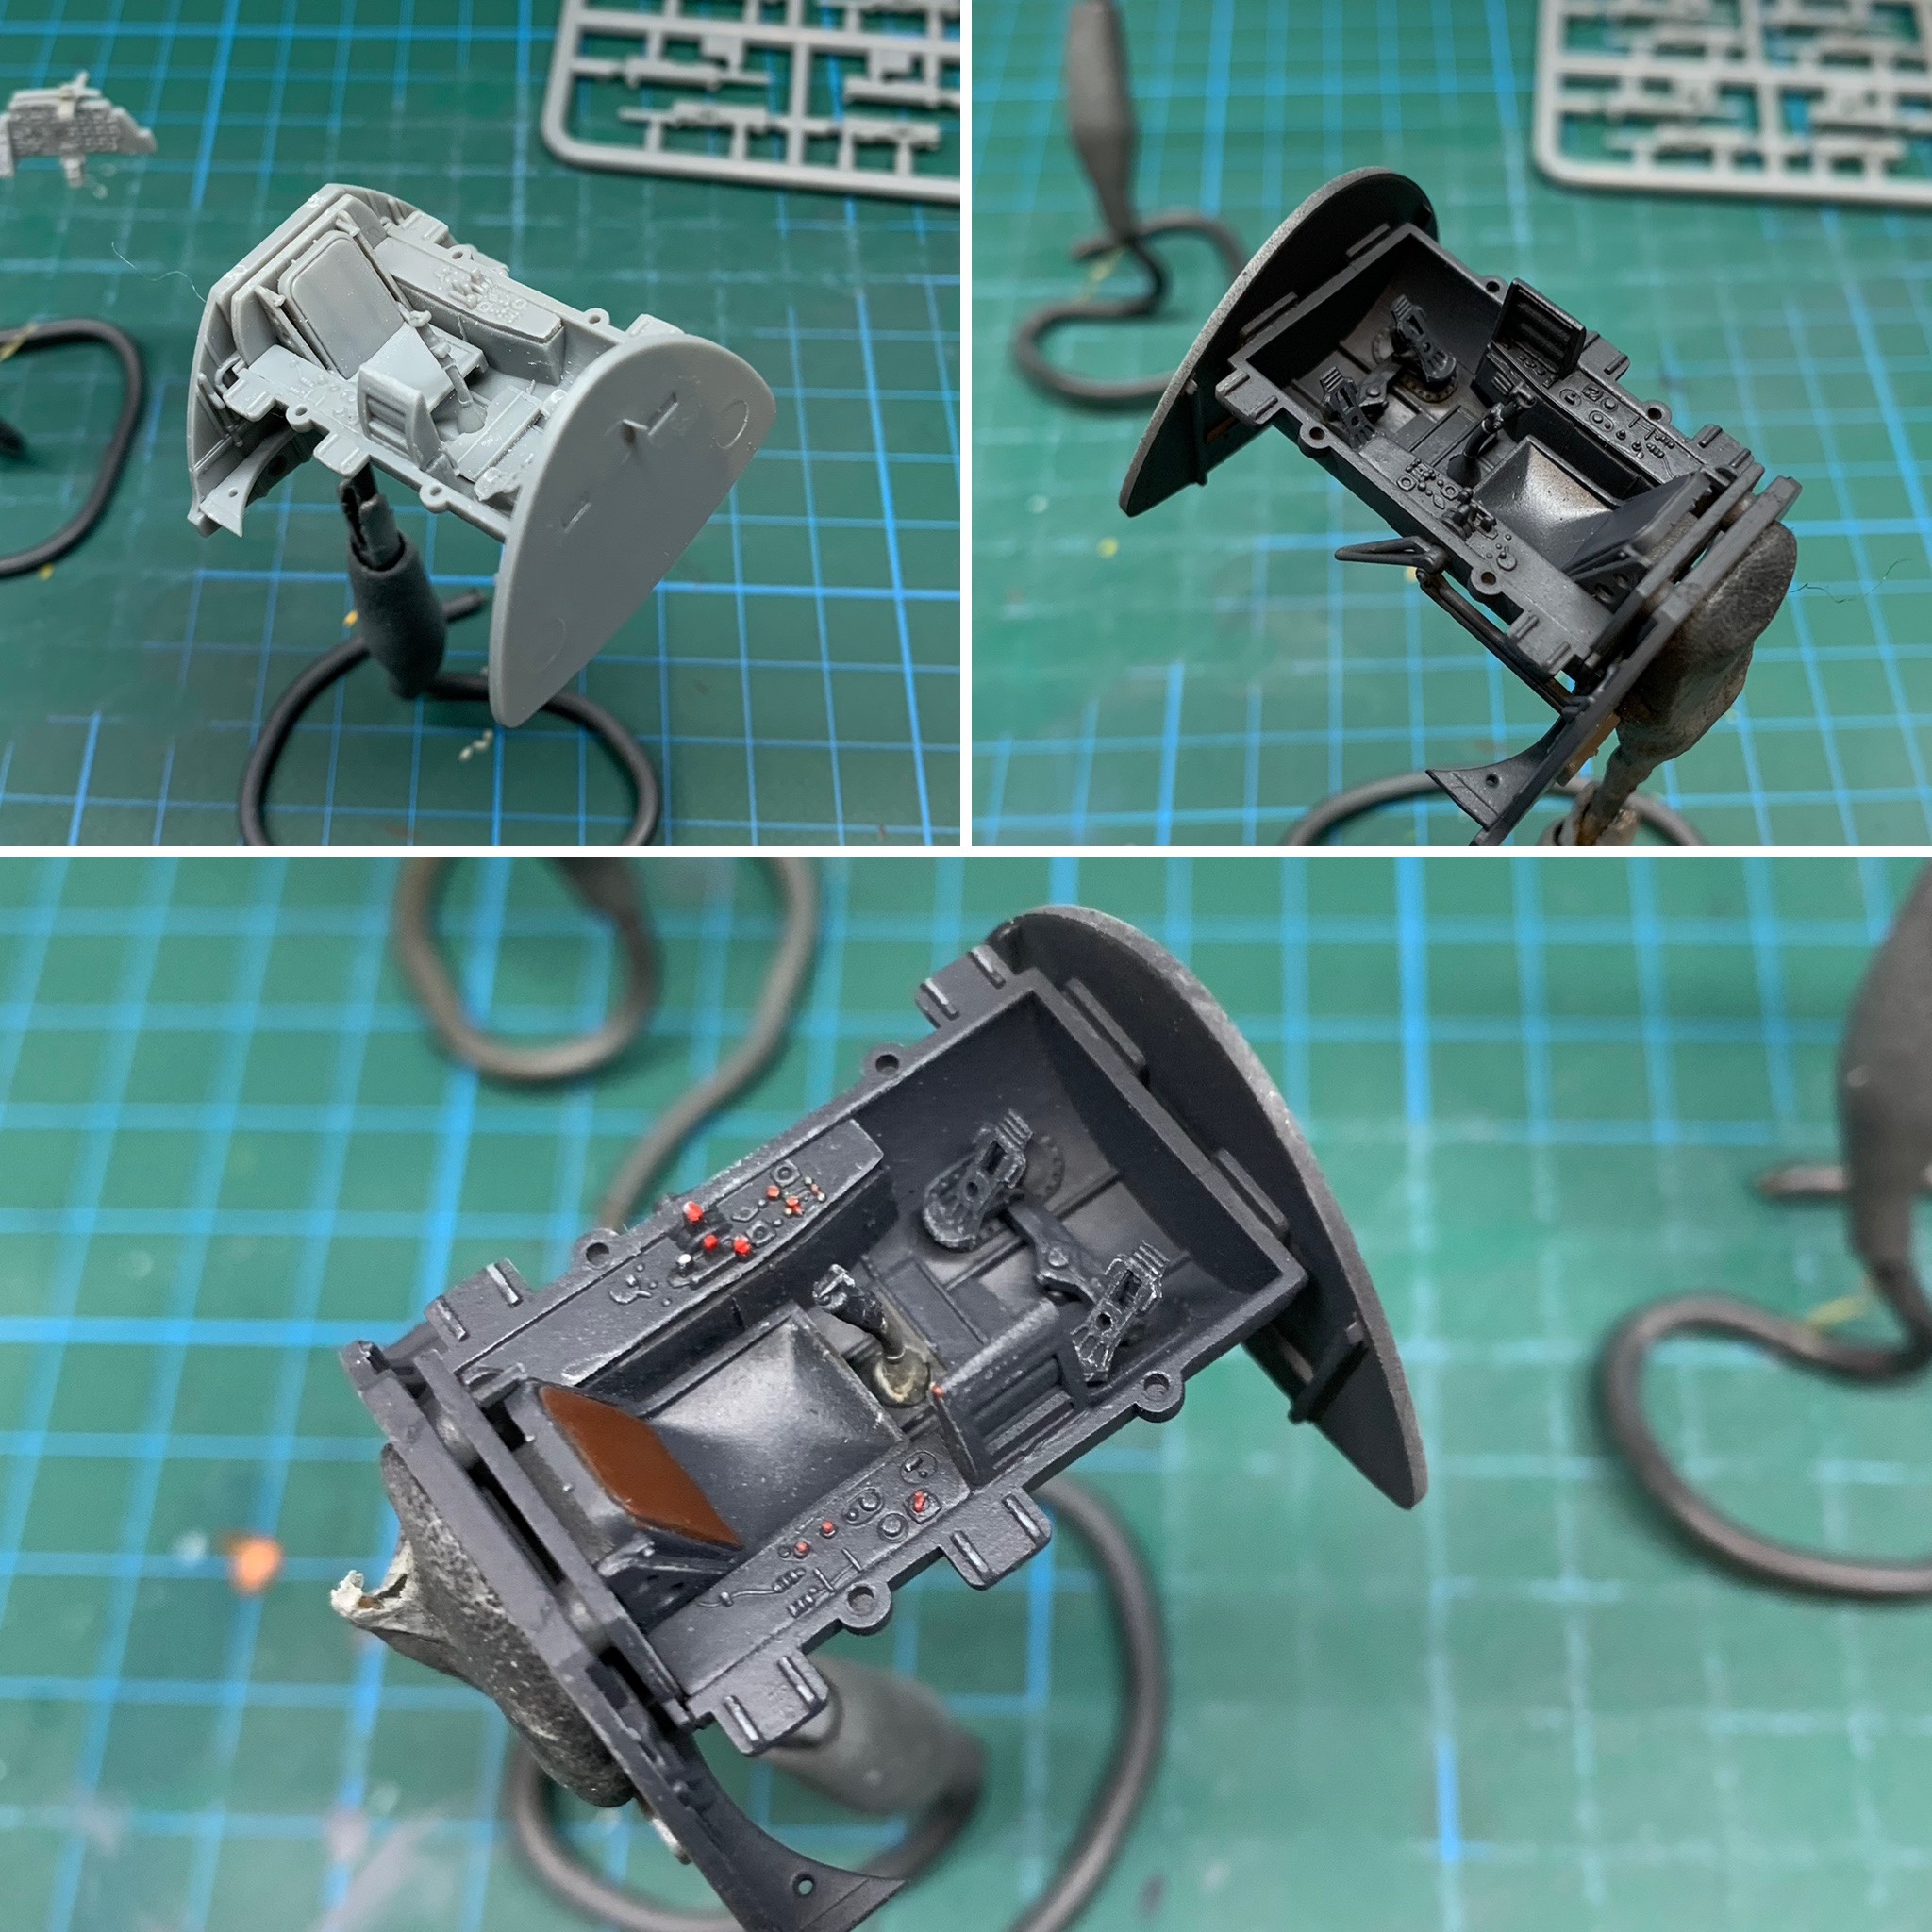
Assembly was very easy as the fit was remarkably good throughout. I only built enough of the weapons bay to ensure the panels would fit correctly, and I ignored the radio gear completely. I did however mess up the radio cover and had to make a new one our of plastic card to avoid a recessed appearance for it.
The cockpit builds up nicely and I took some time to paint the instrument panel and other details as well as I could. This was destined to be displayed canopy open (because the kit parts are designed that way, it would require some surgery to pose it closed and I didn’t want to do that). I used some spare PE seatbelts.
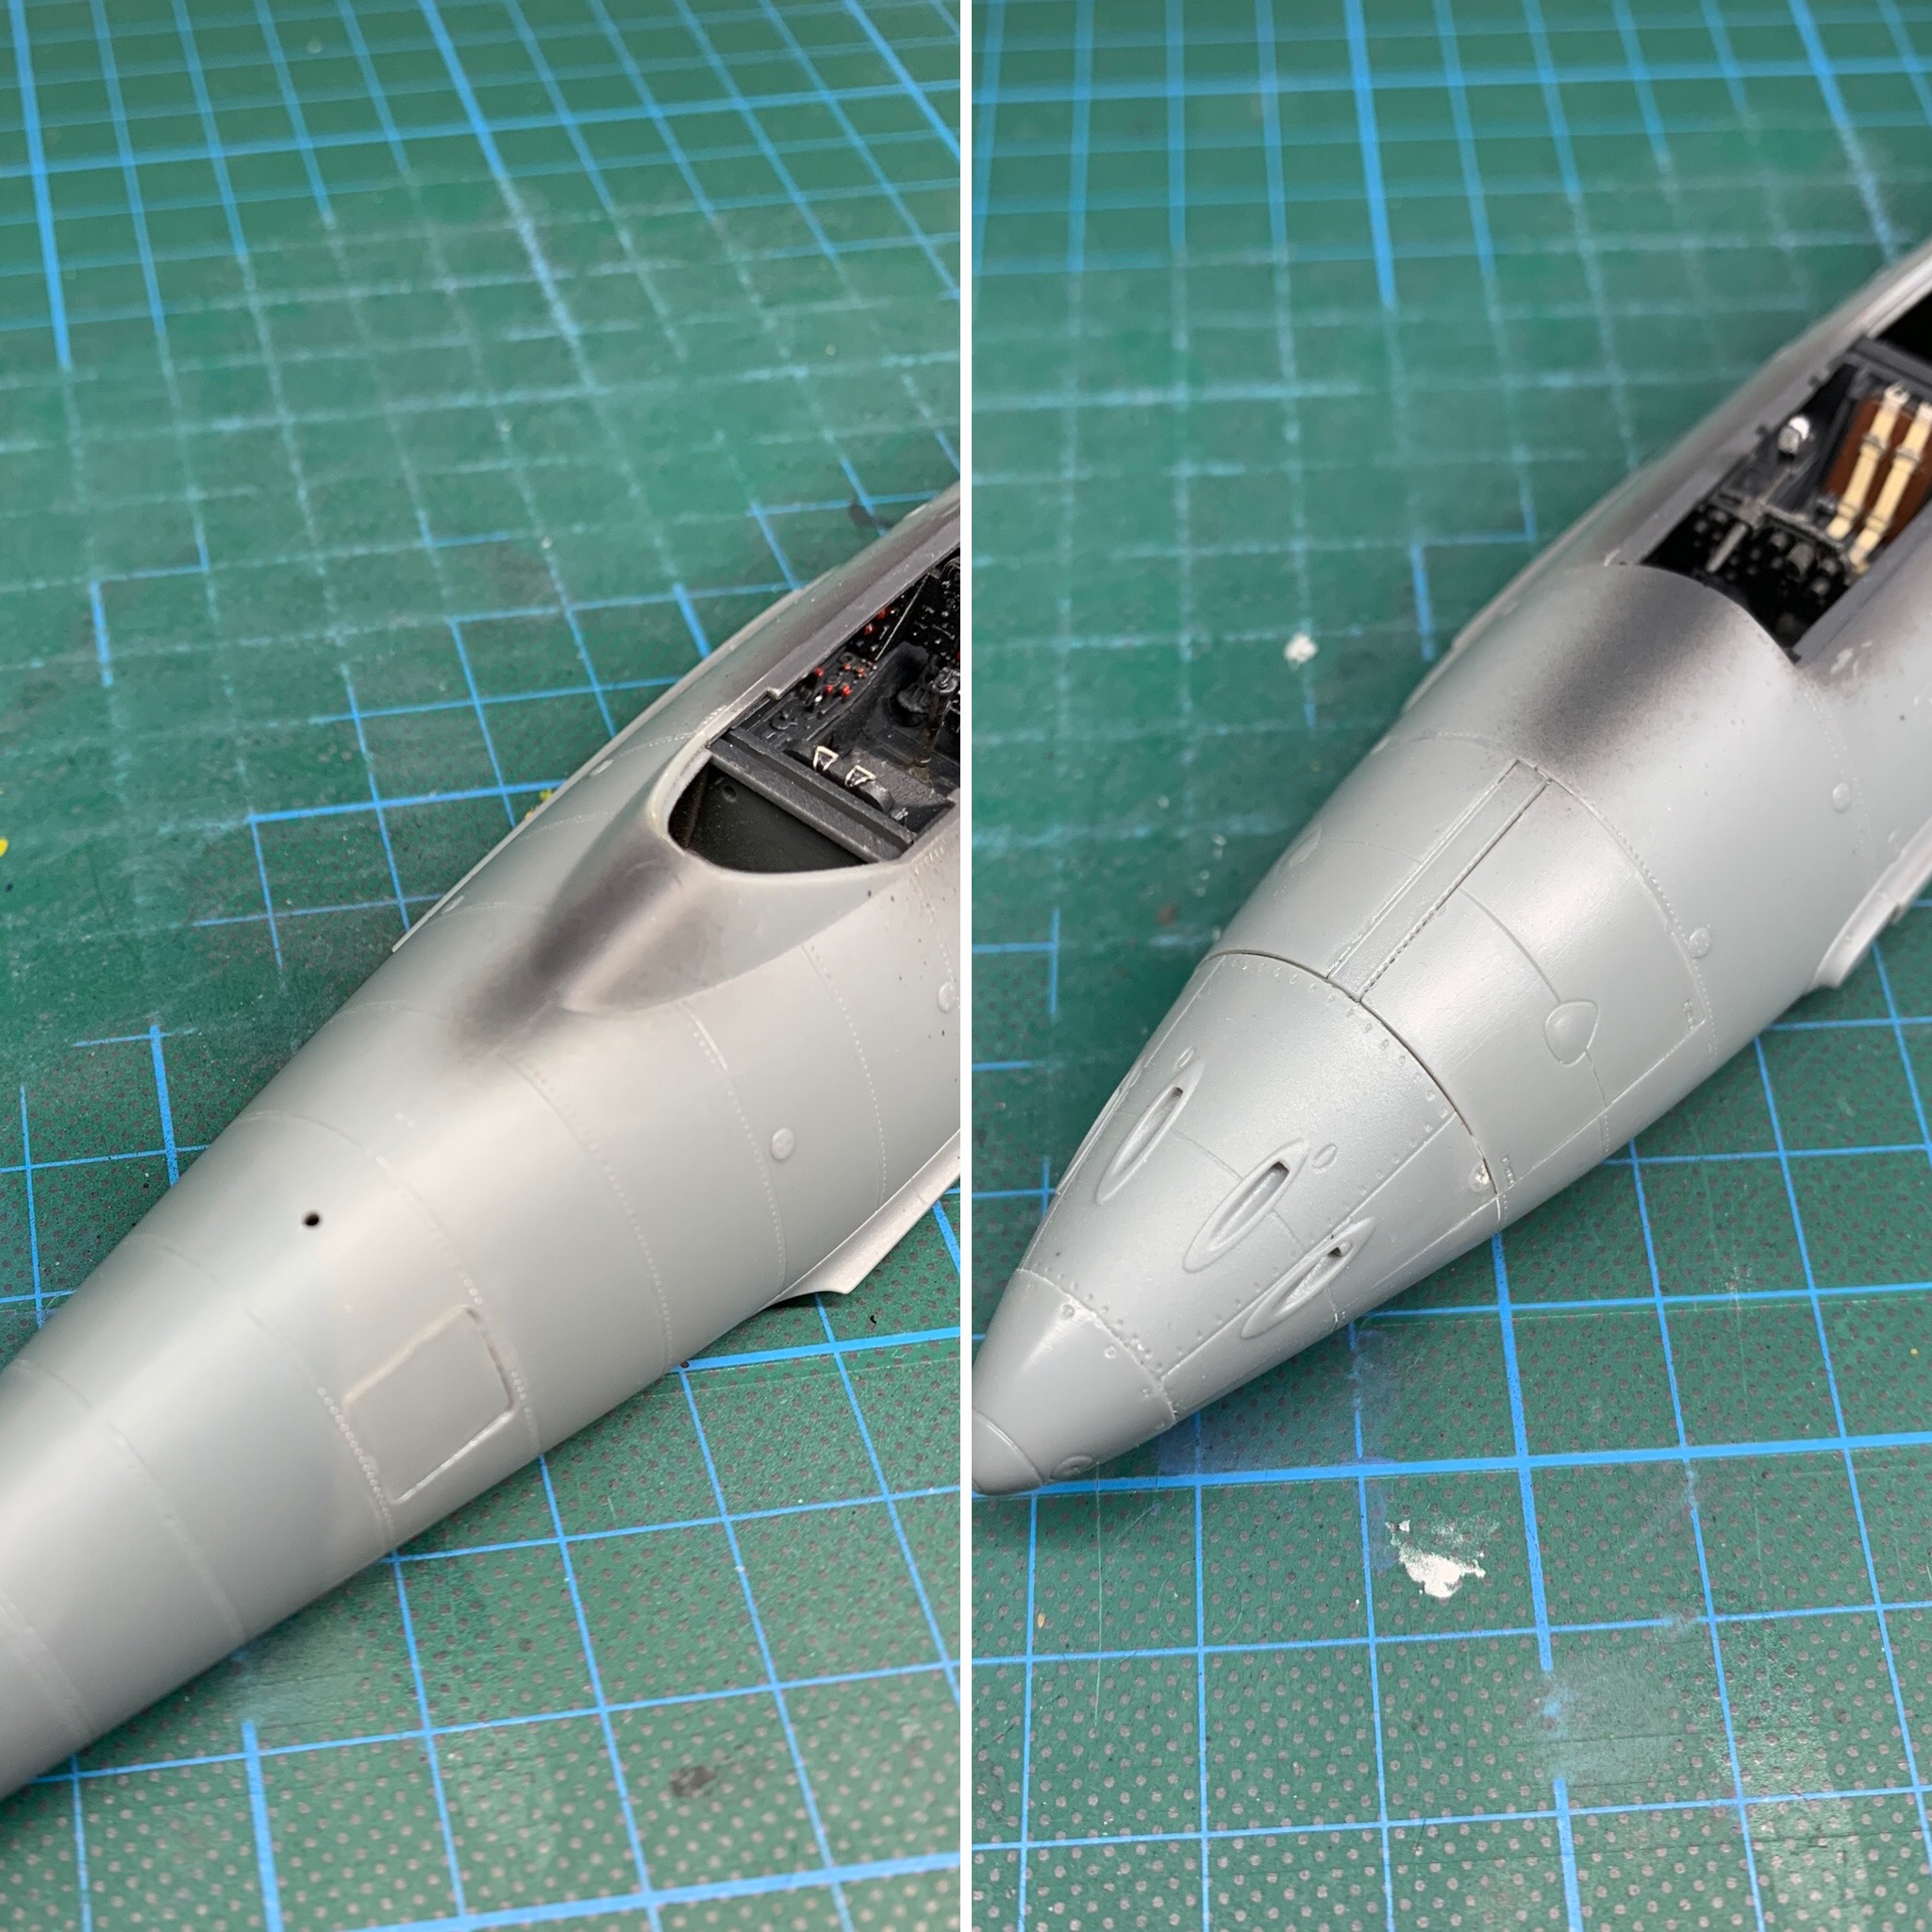
The fit of the access panels was reasonably good; I used a little filler here and there but nothing that required much in the way of sanding or blending. A couple of the photos towards the end of the gallery below show the fit.
Click on any of the images below to scroll through the gallery.


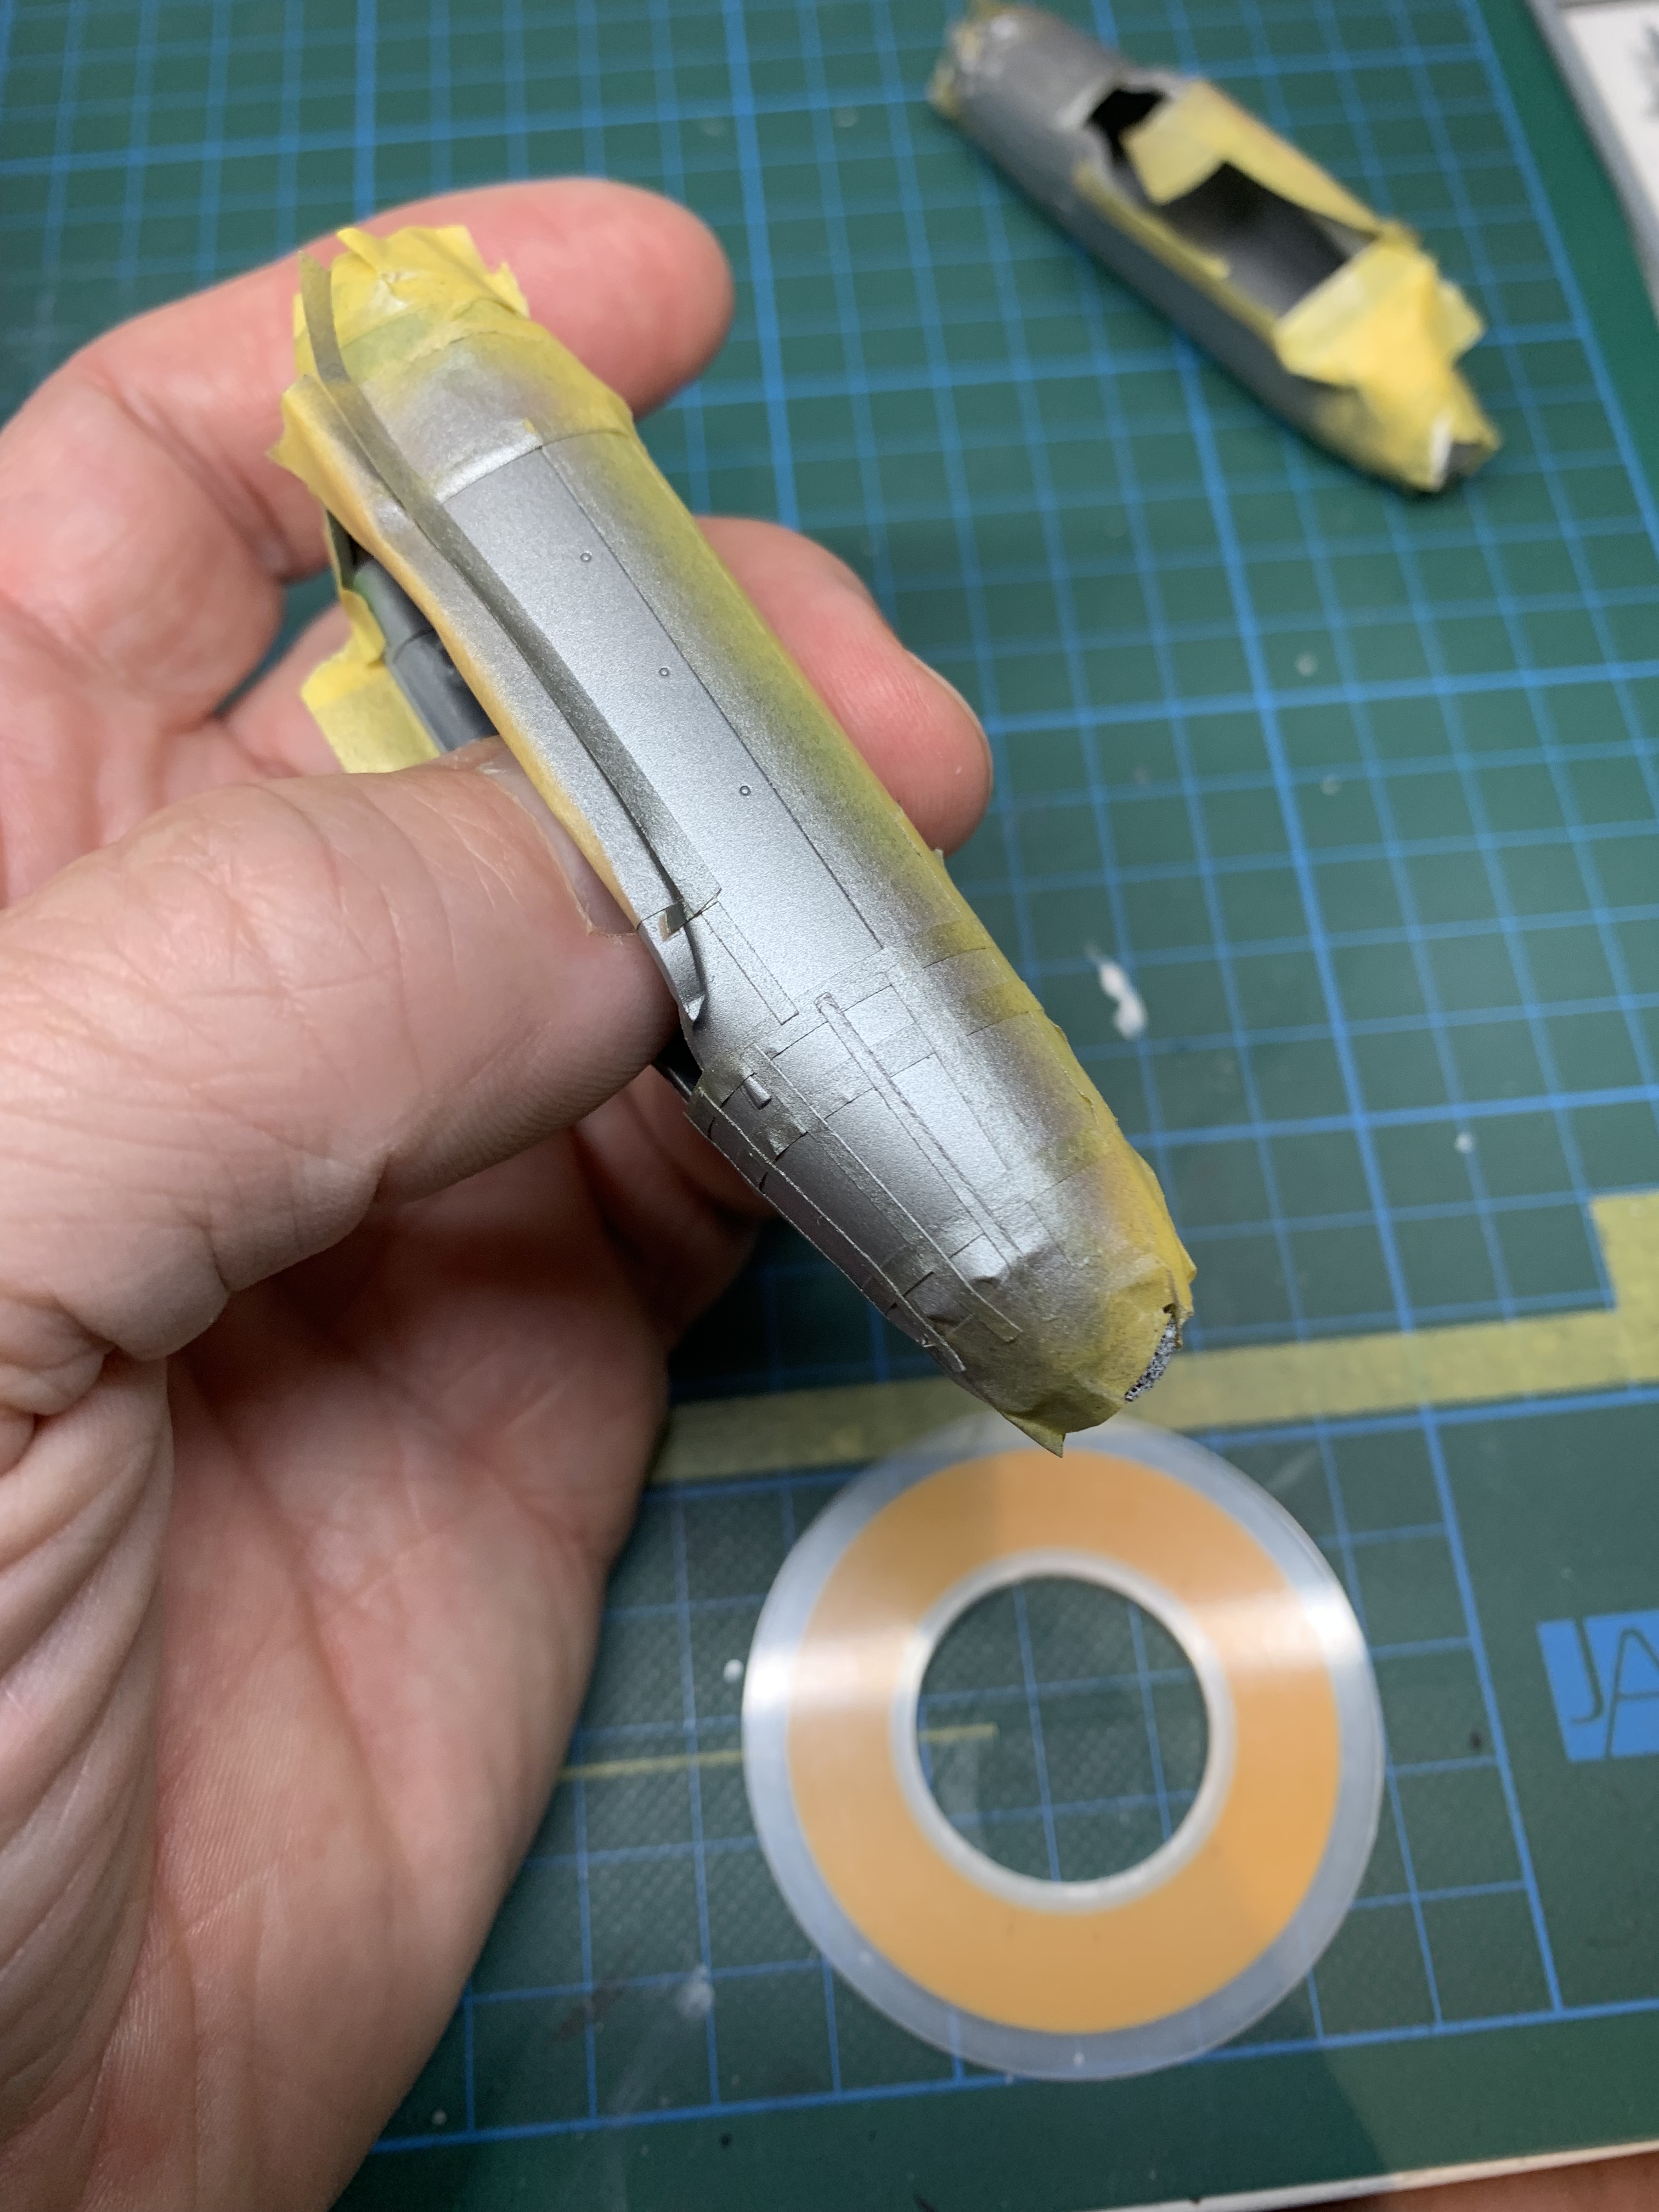
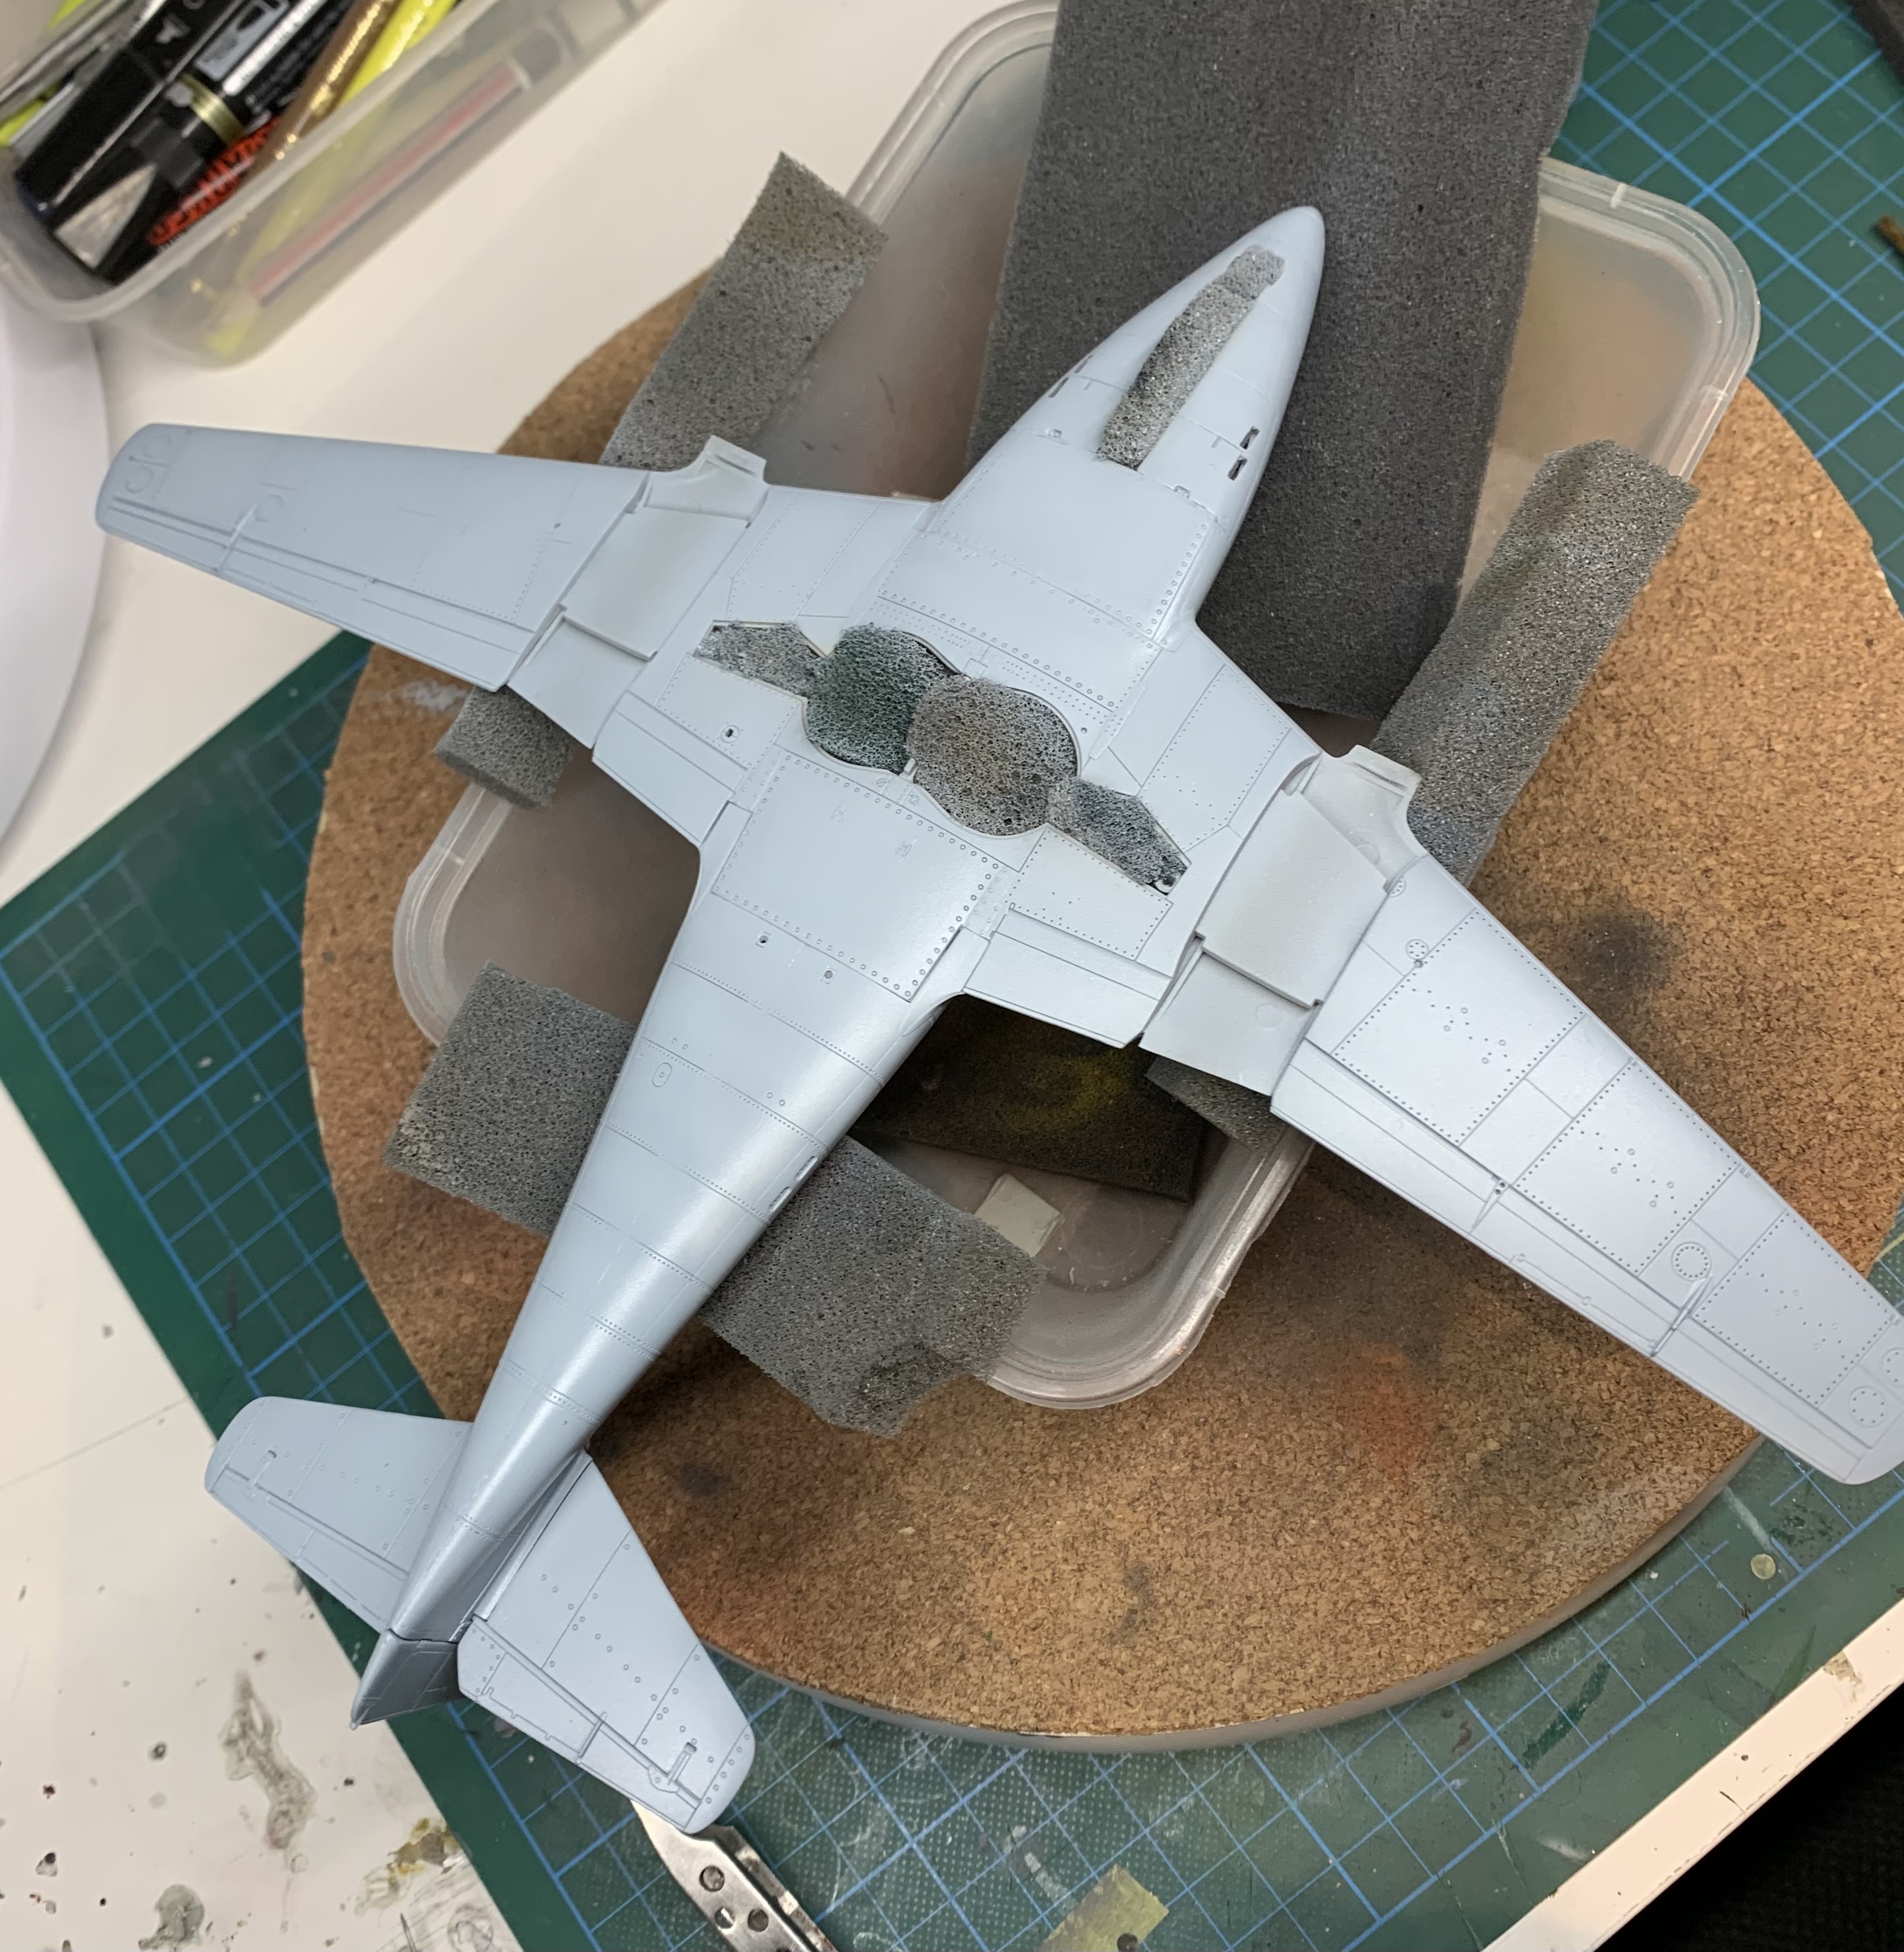
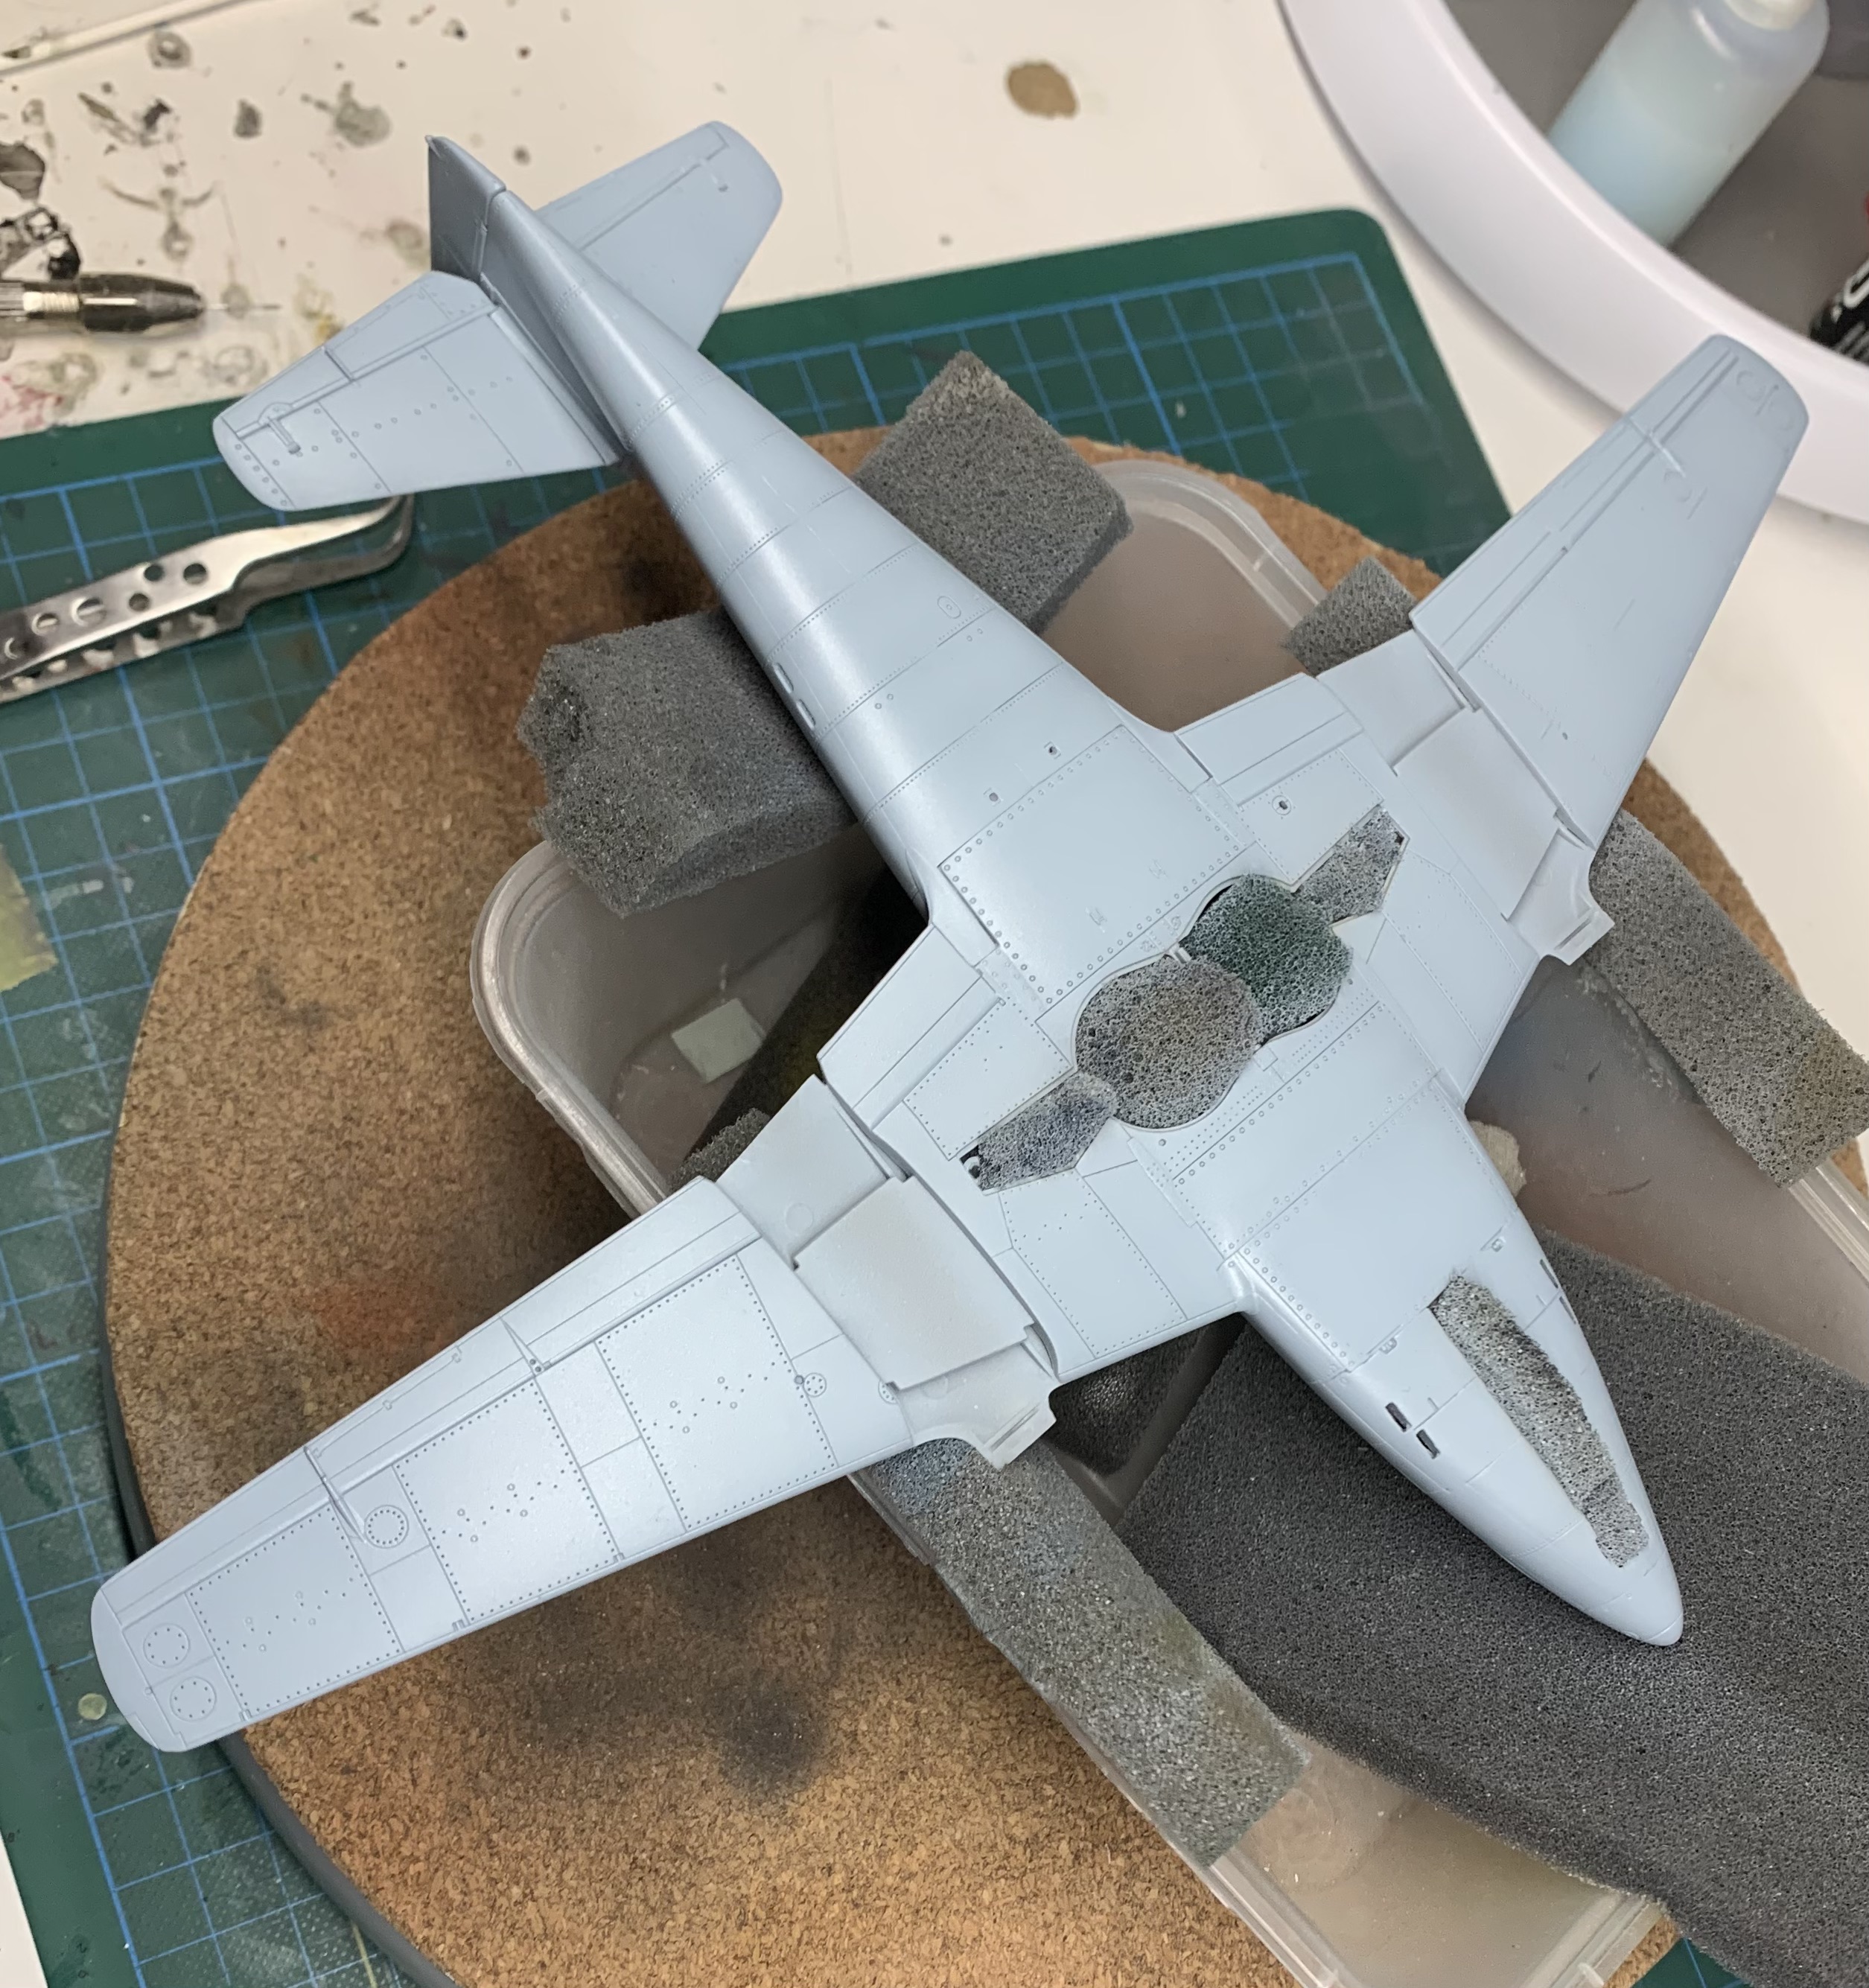
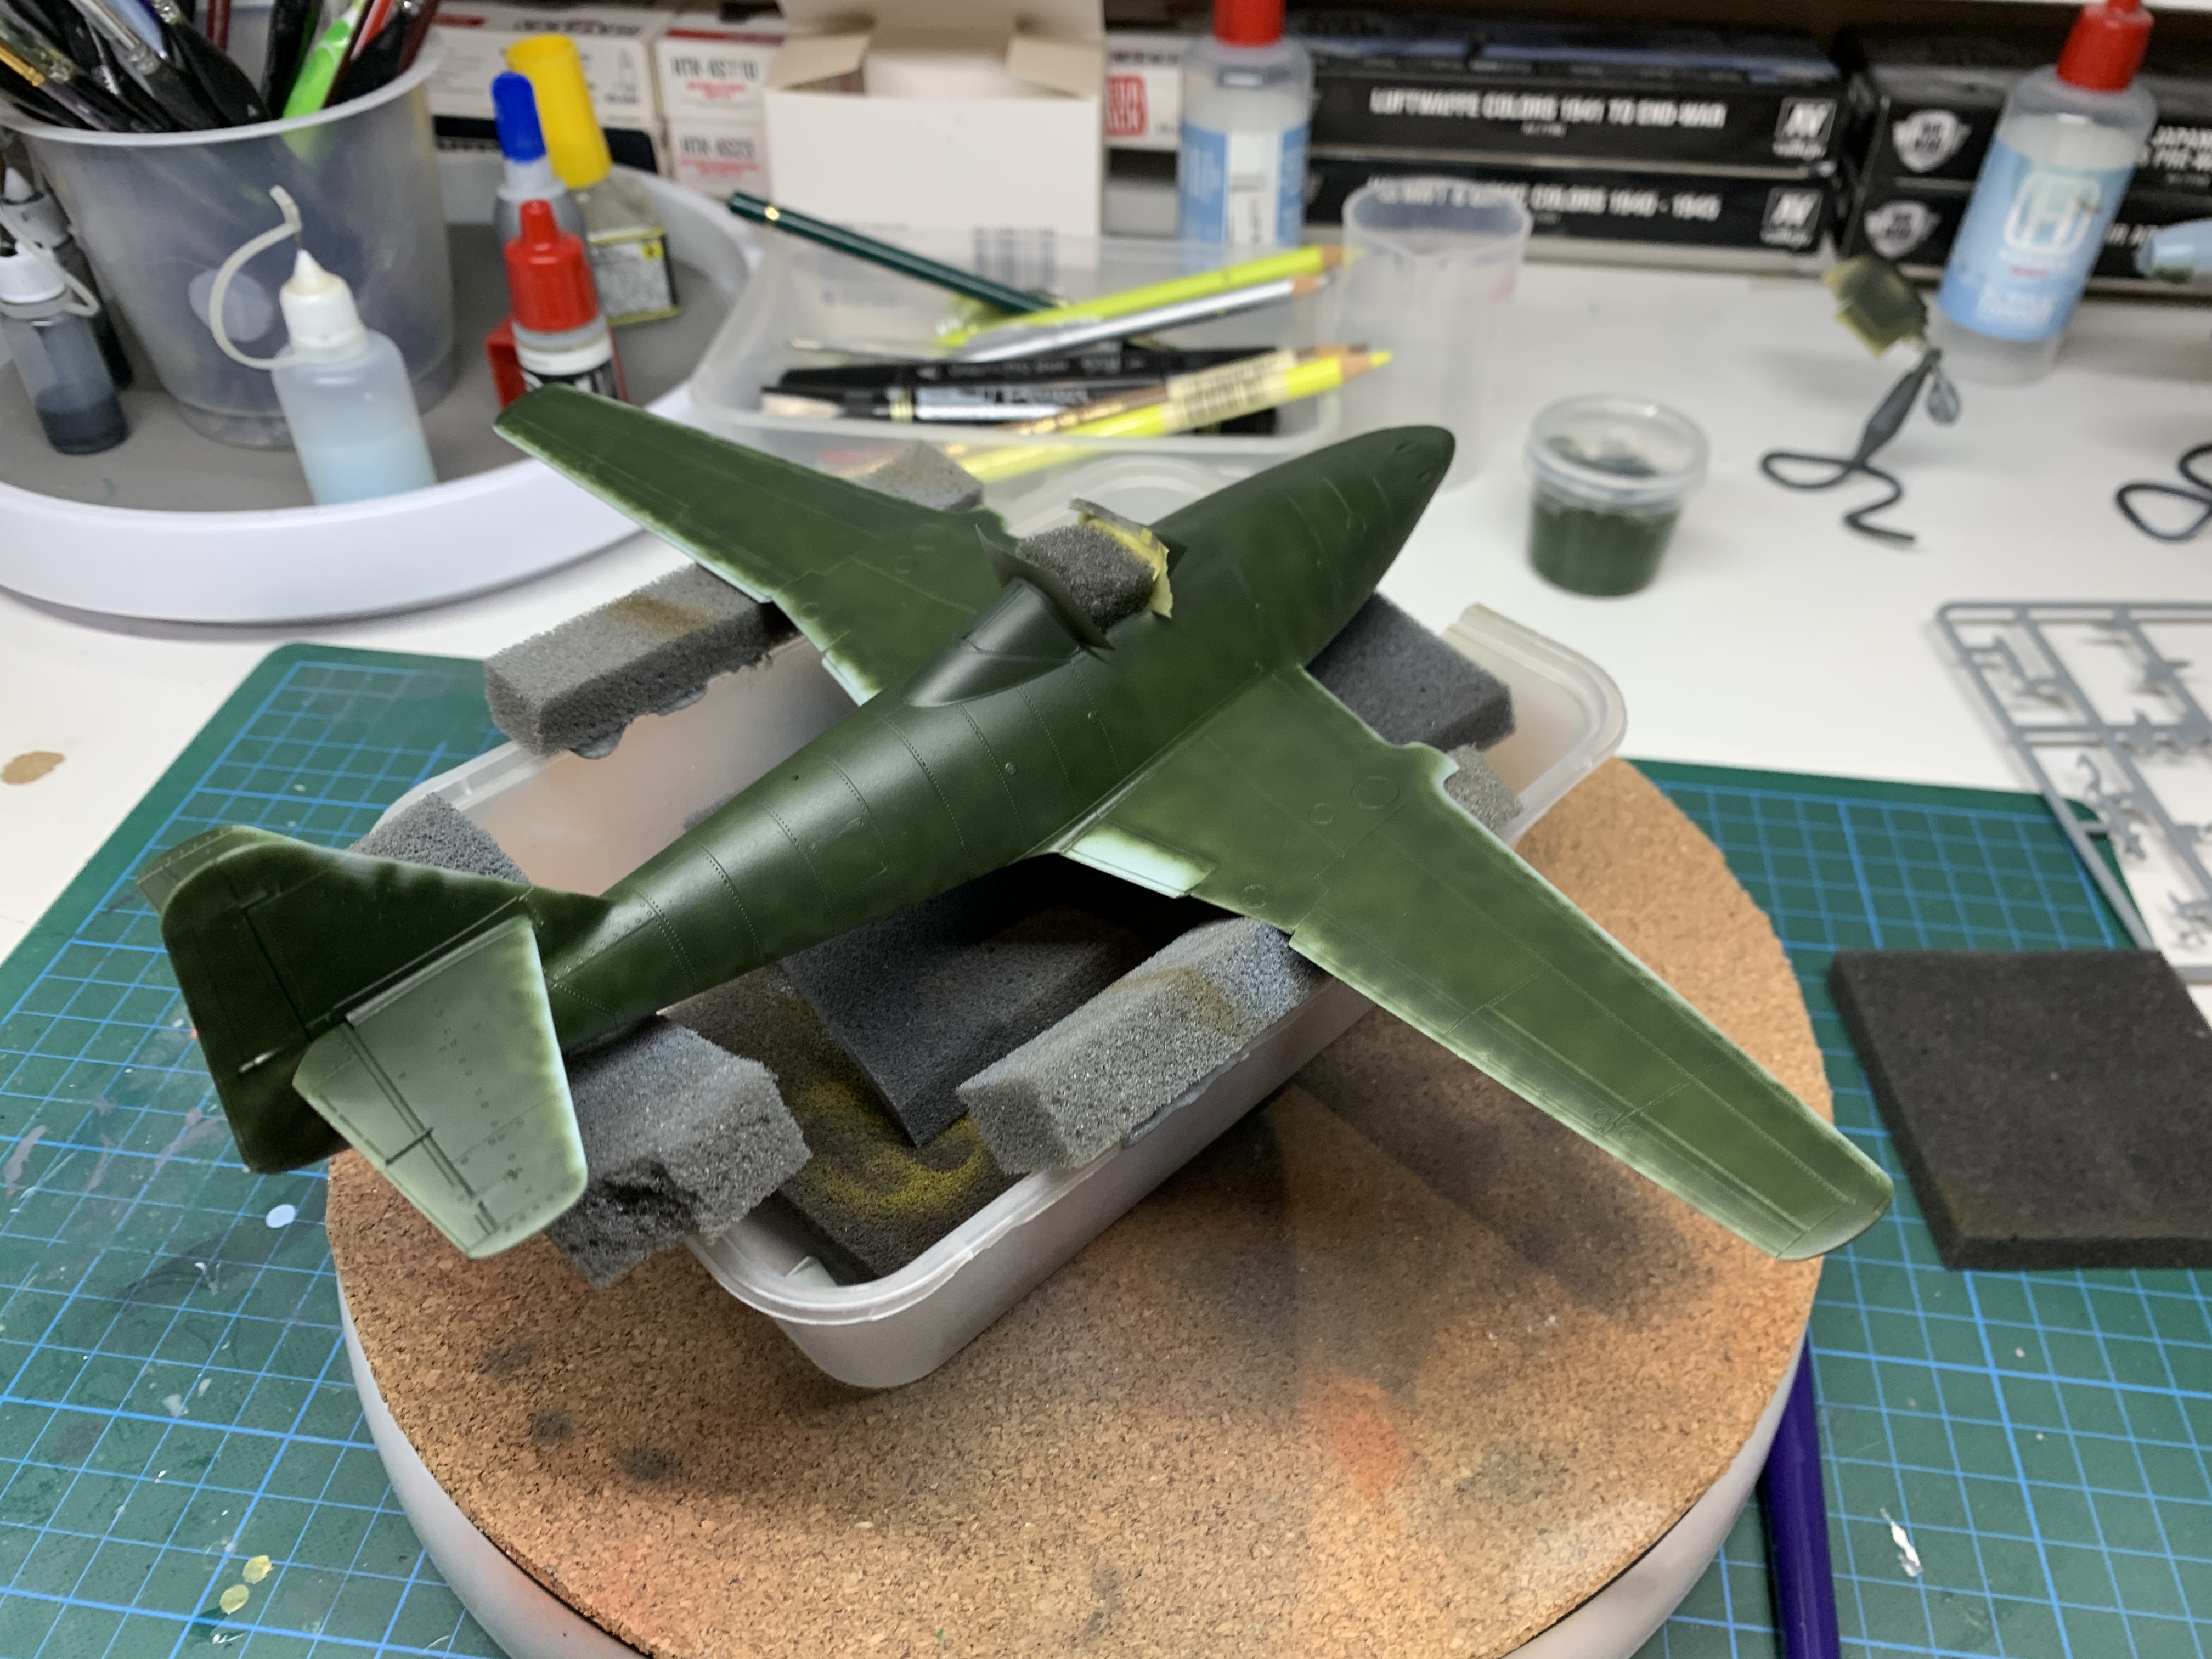
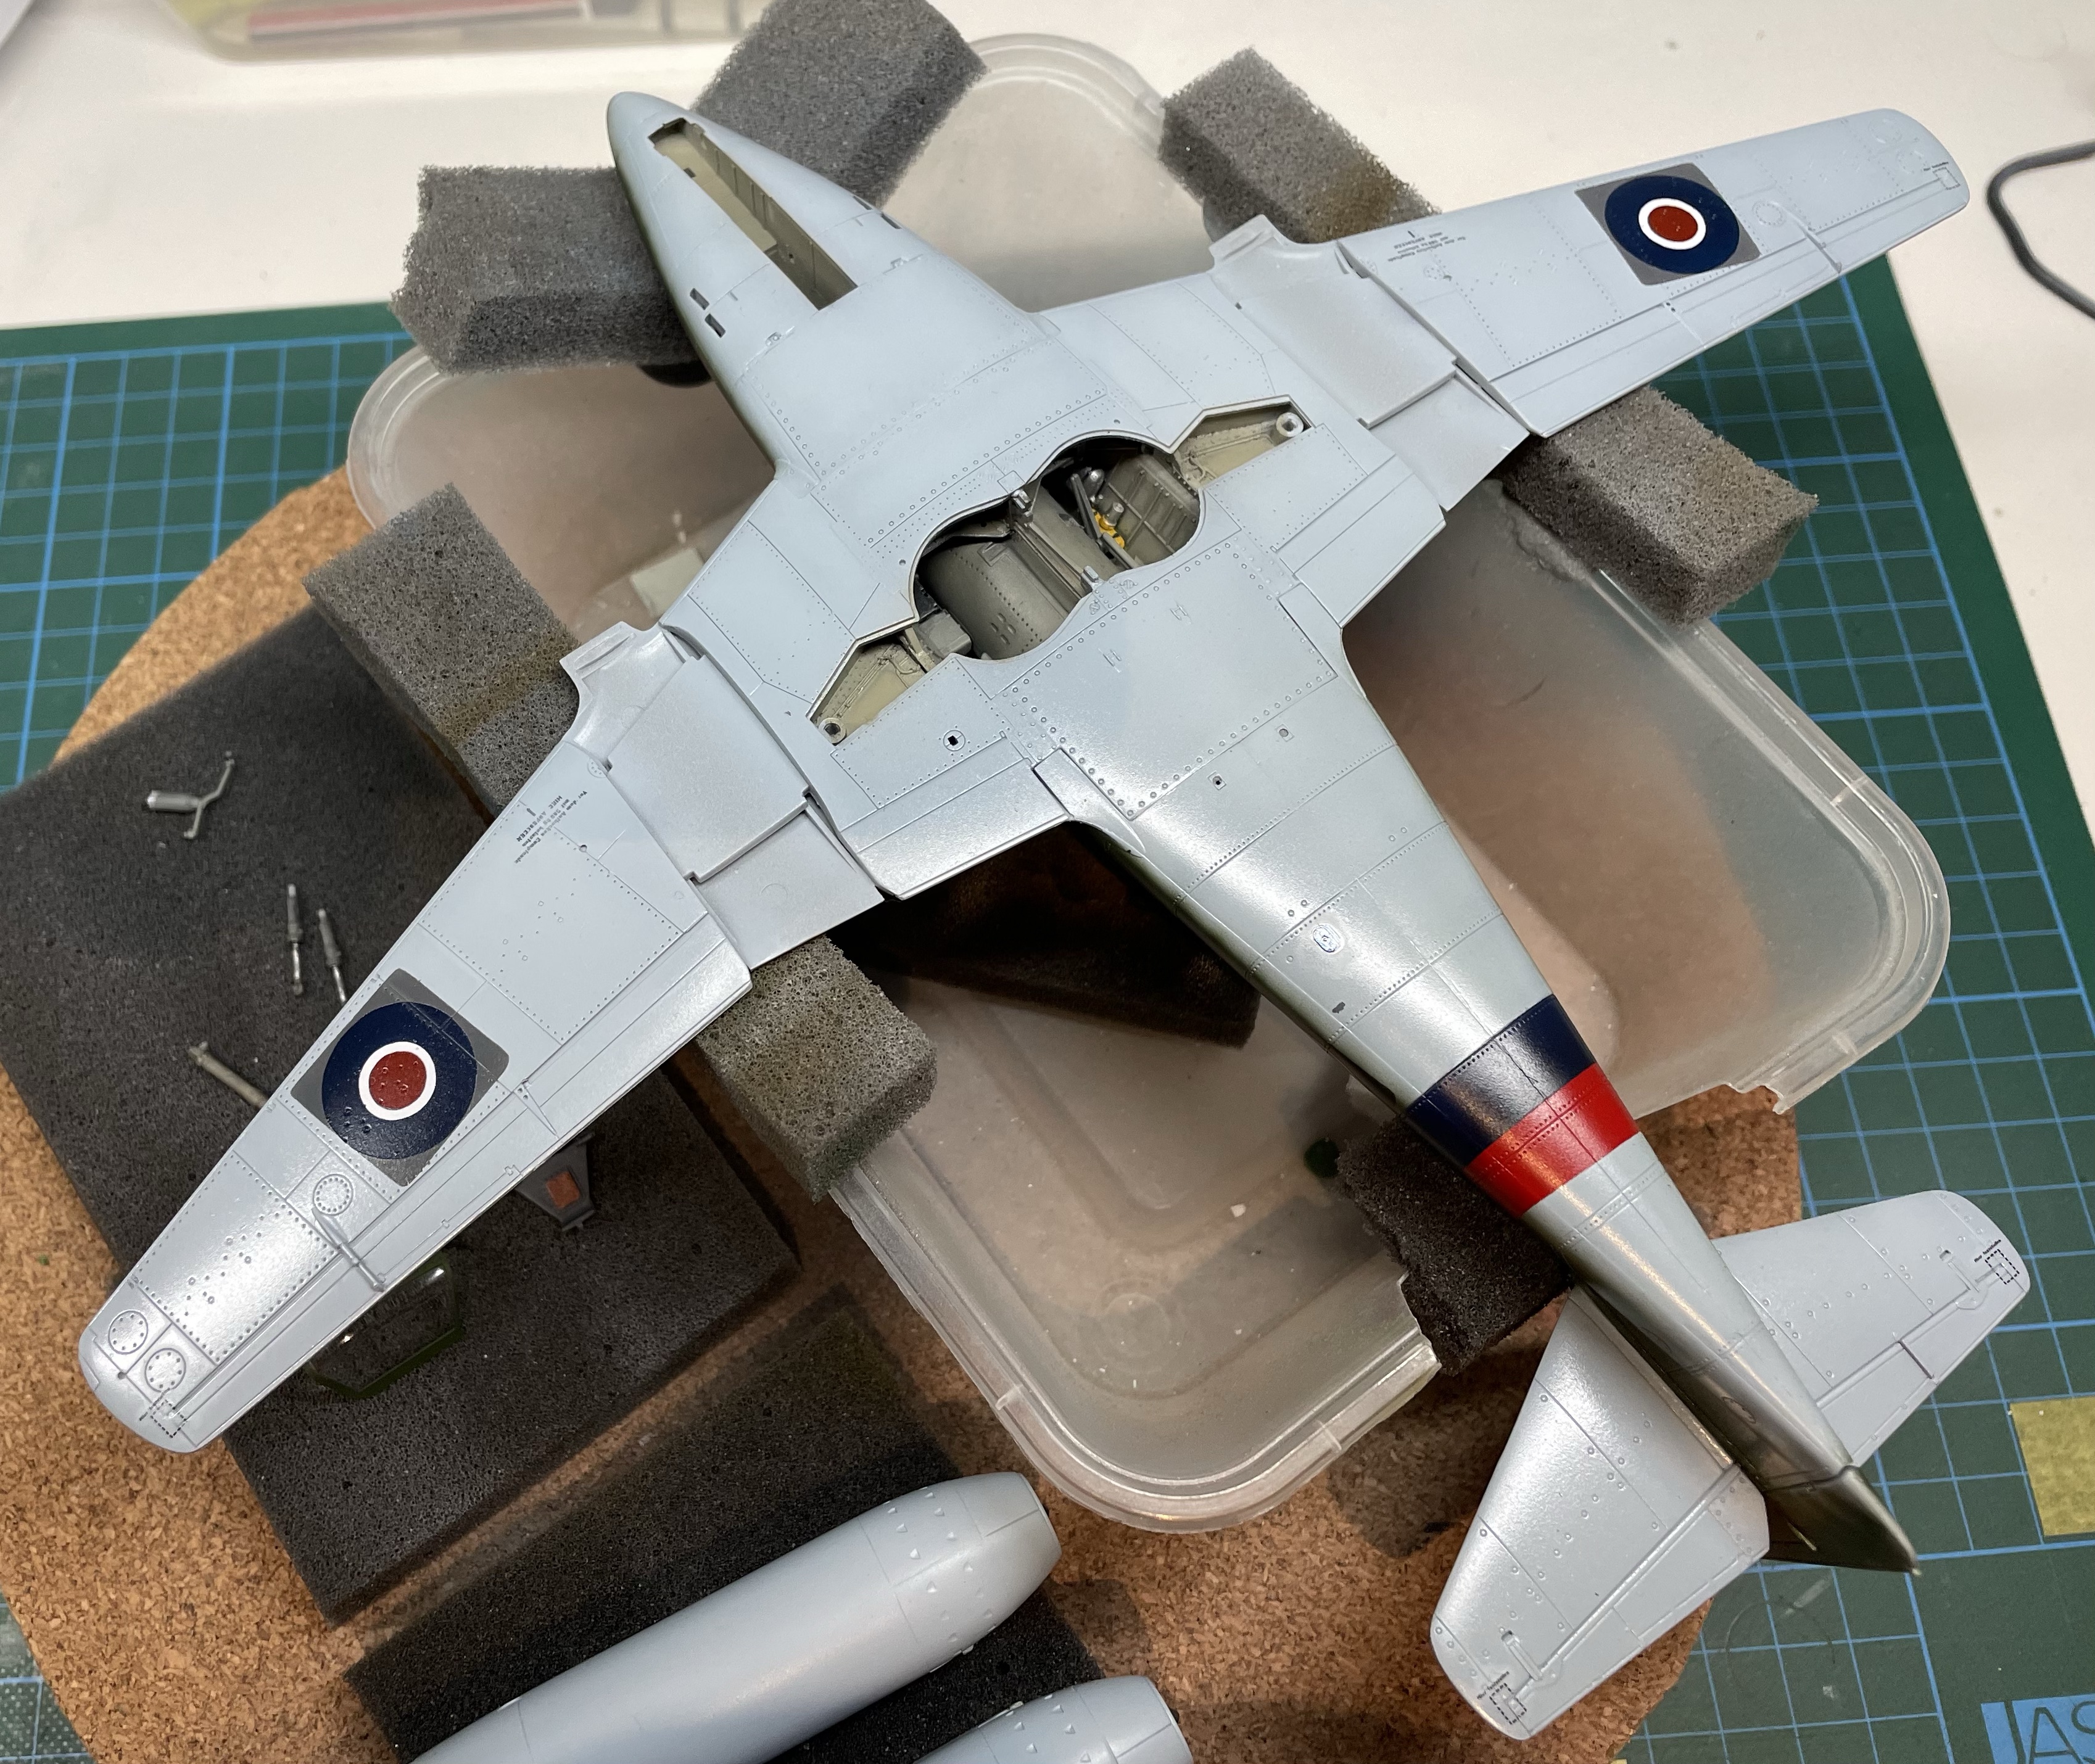
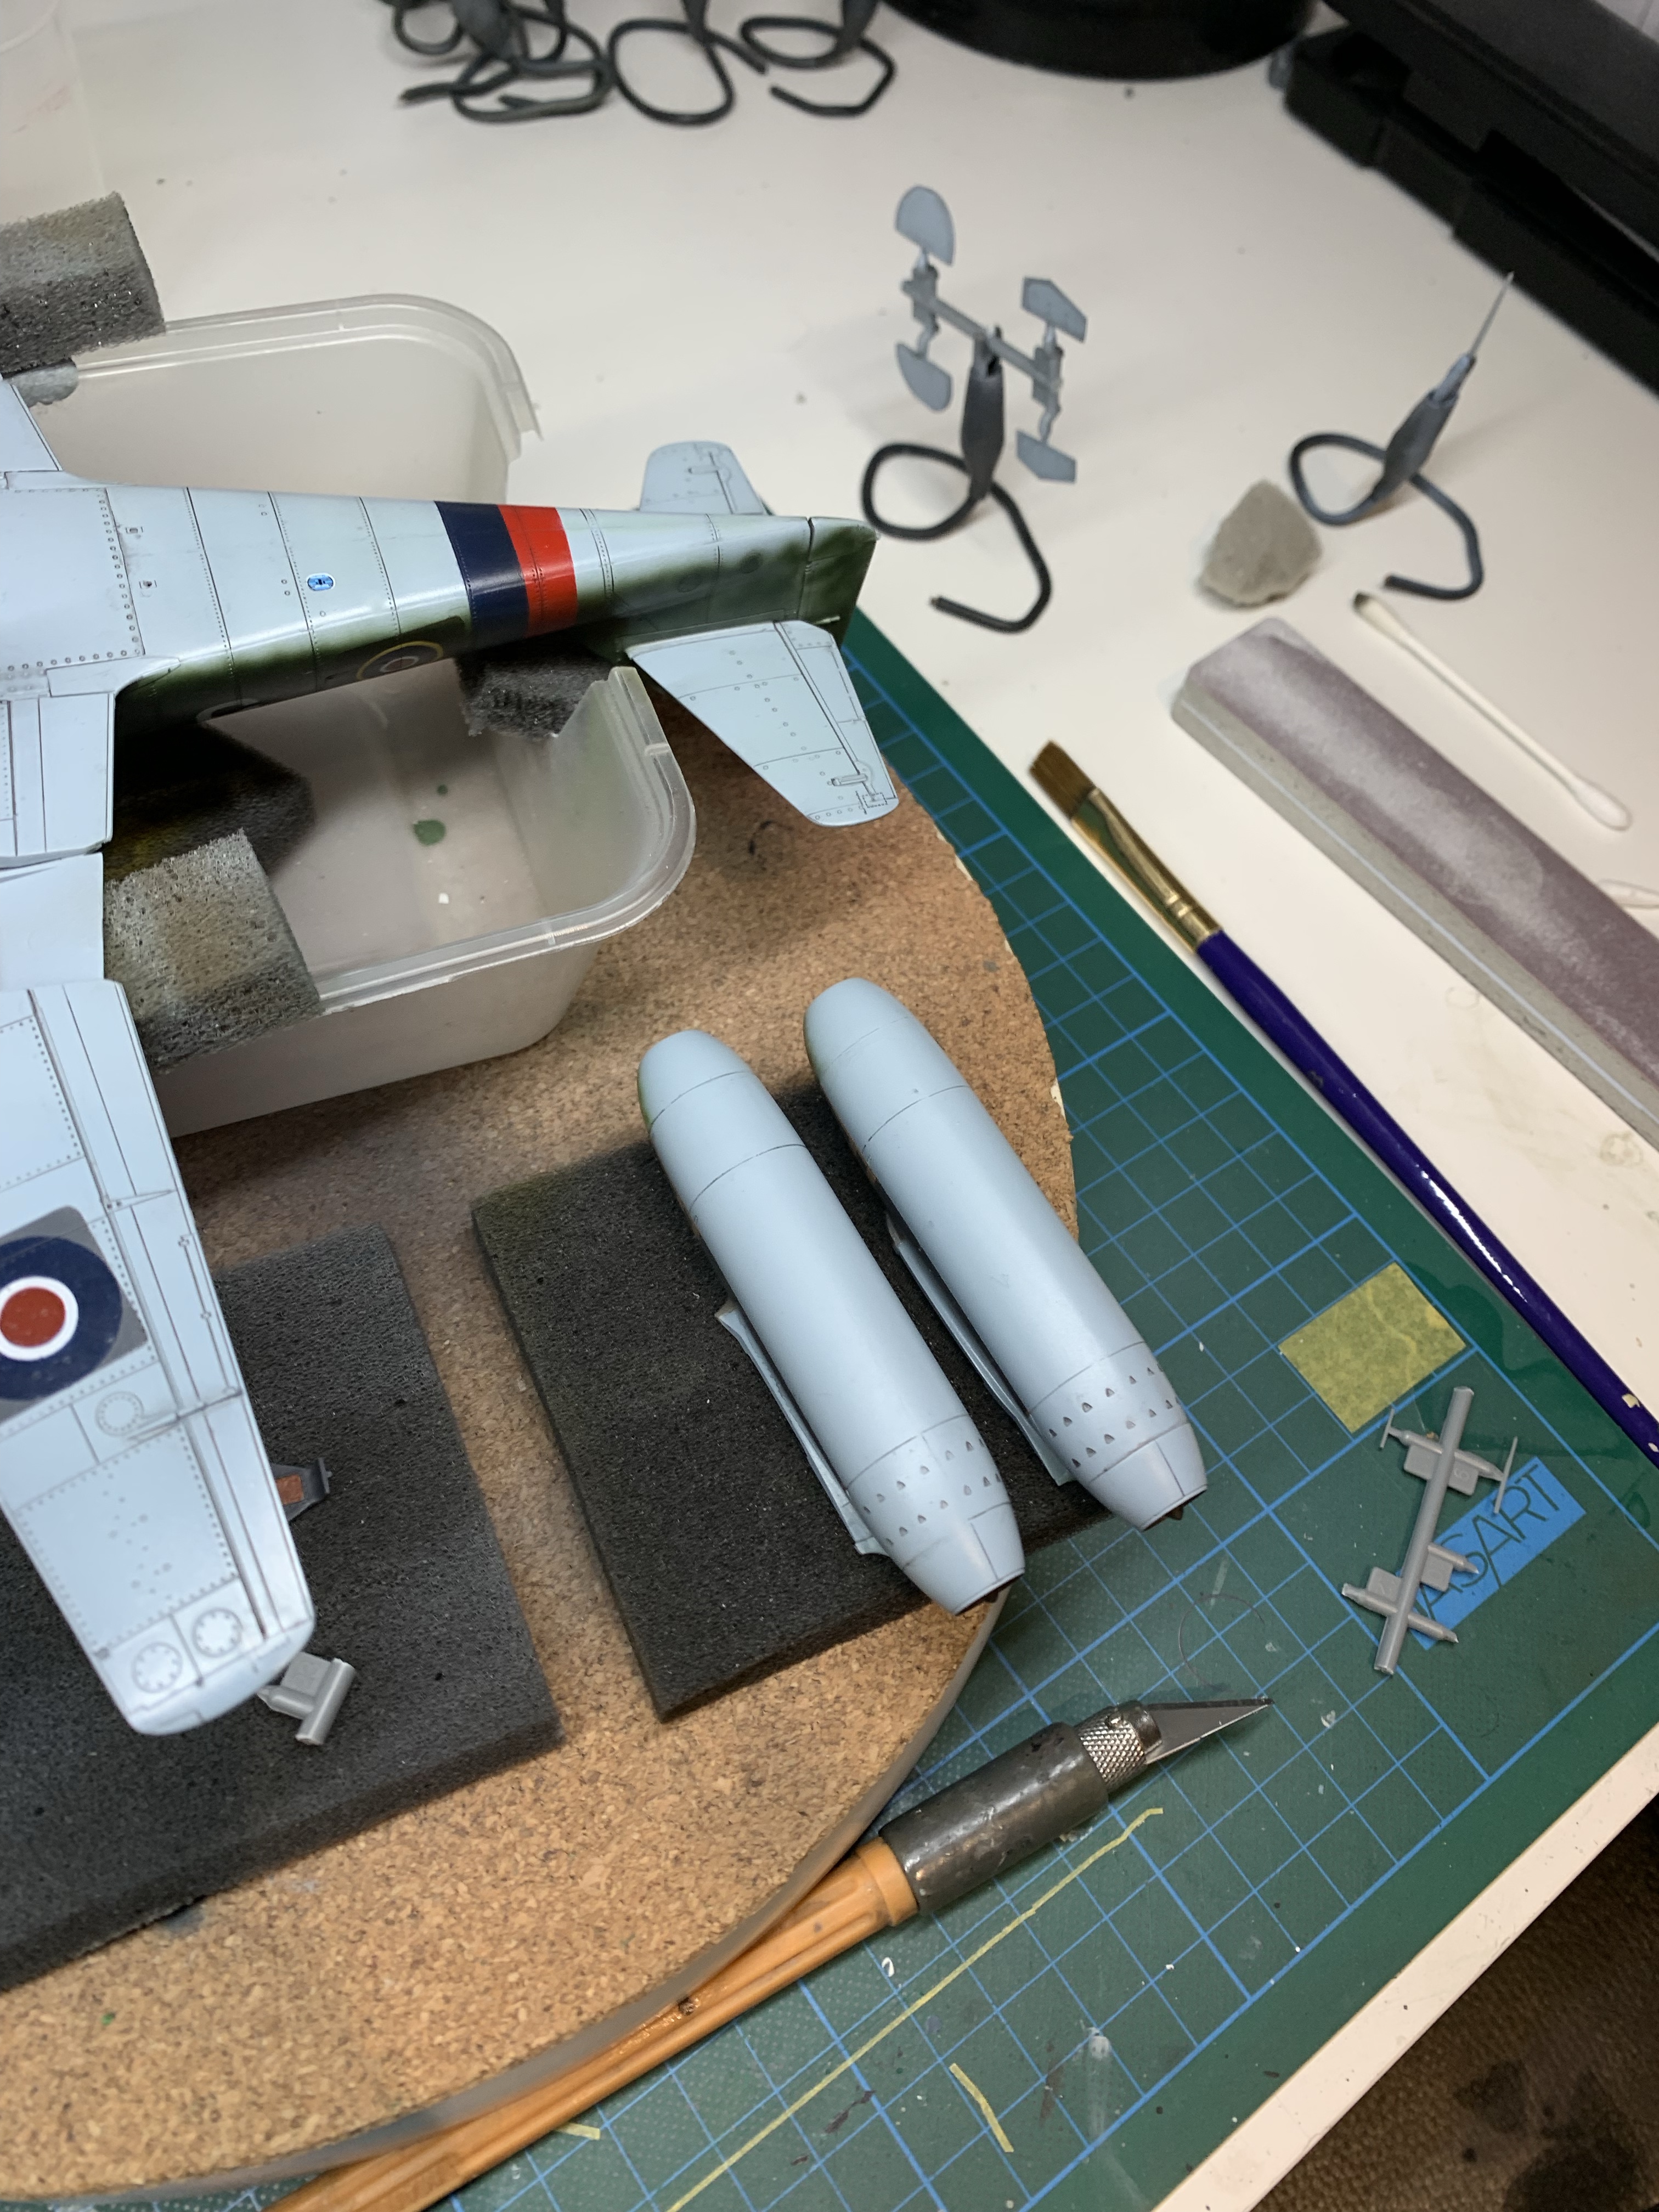
I pondered on whether to leave the wings oof for painting as the fit was pretty good but in the end did attach them; the tape is to ensure a good seam at the wing root. I did leave off the engines though because their fit was very good and there was some fairly intricate paint required which was much easier with them separate from the wings.
Paint
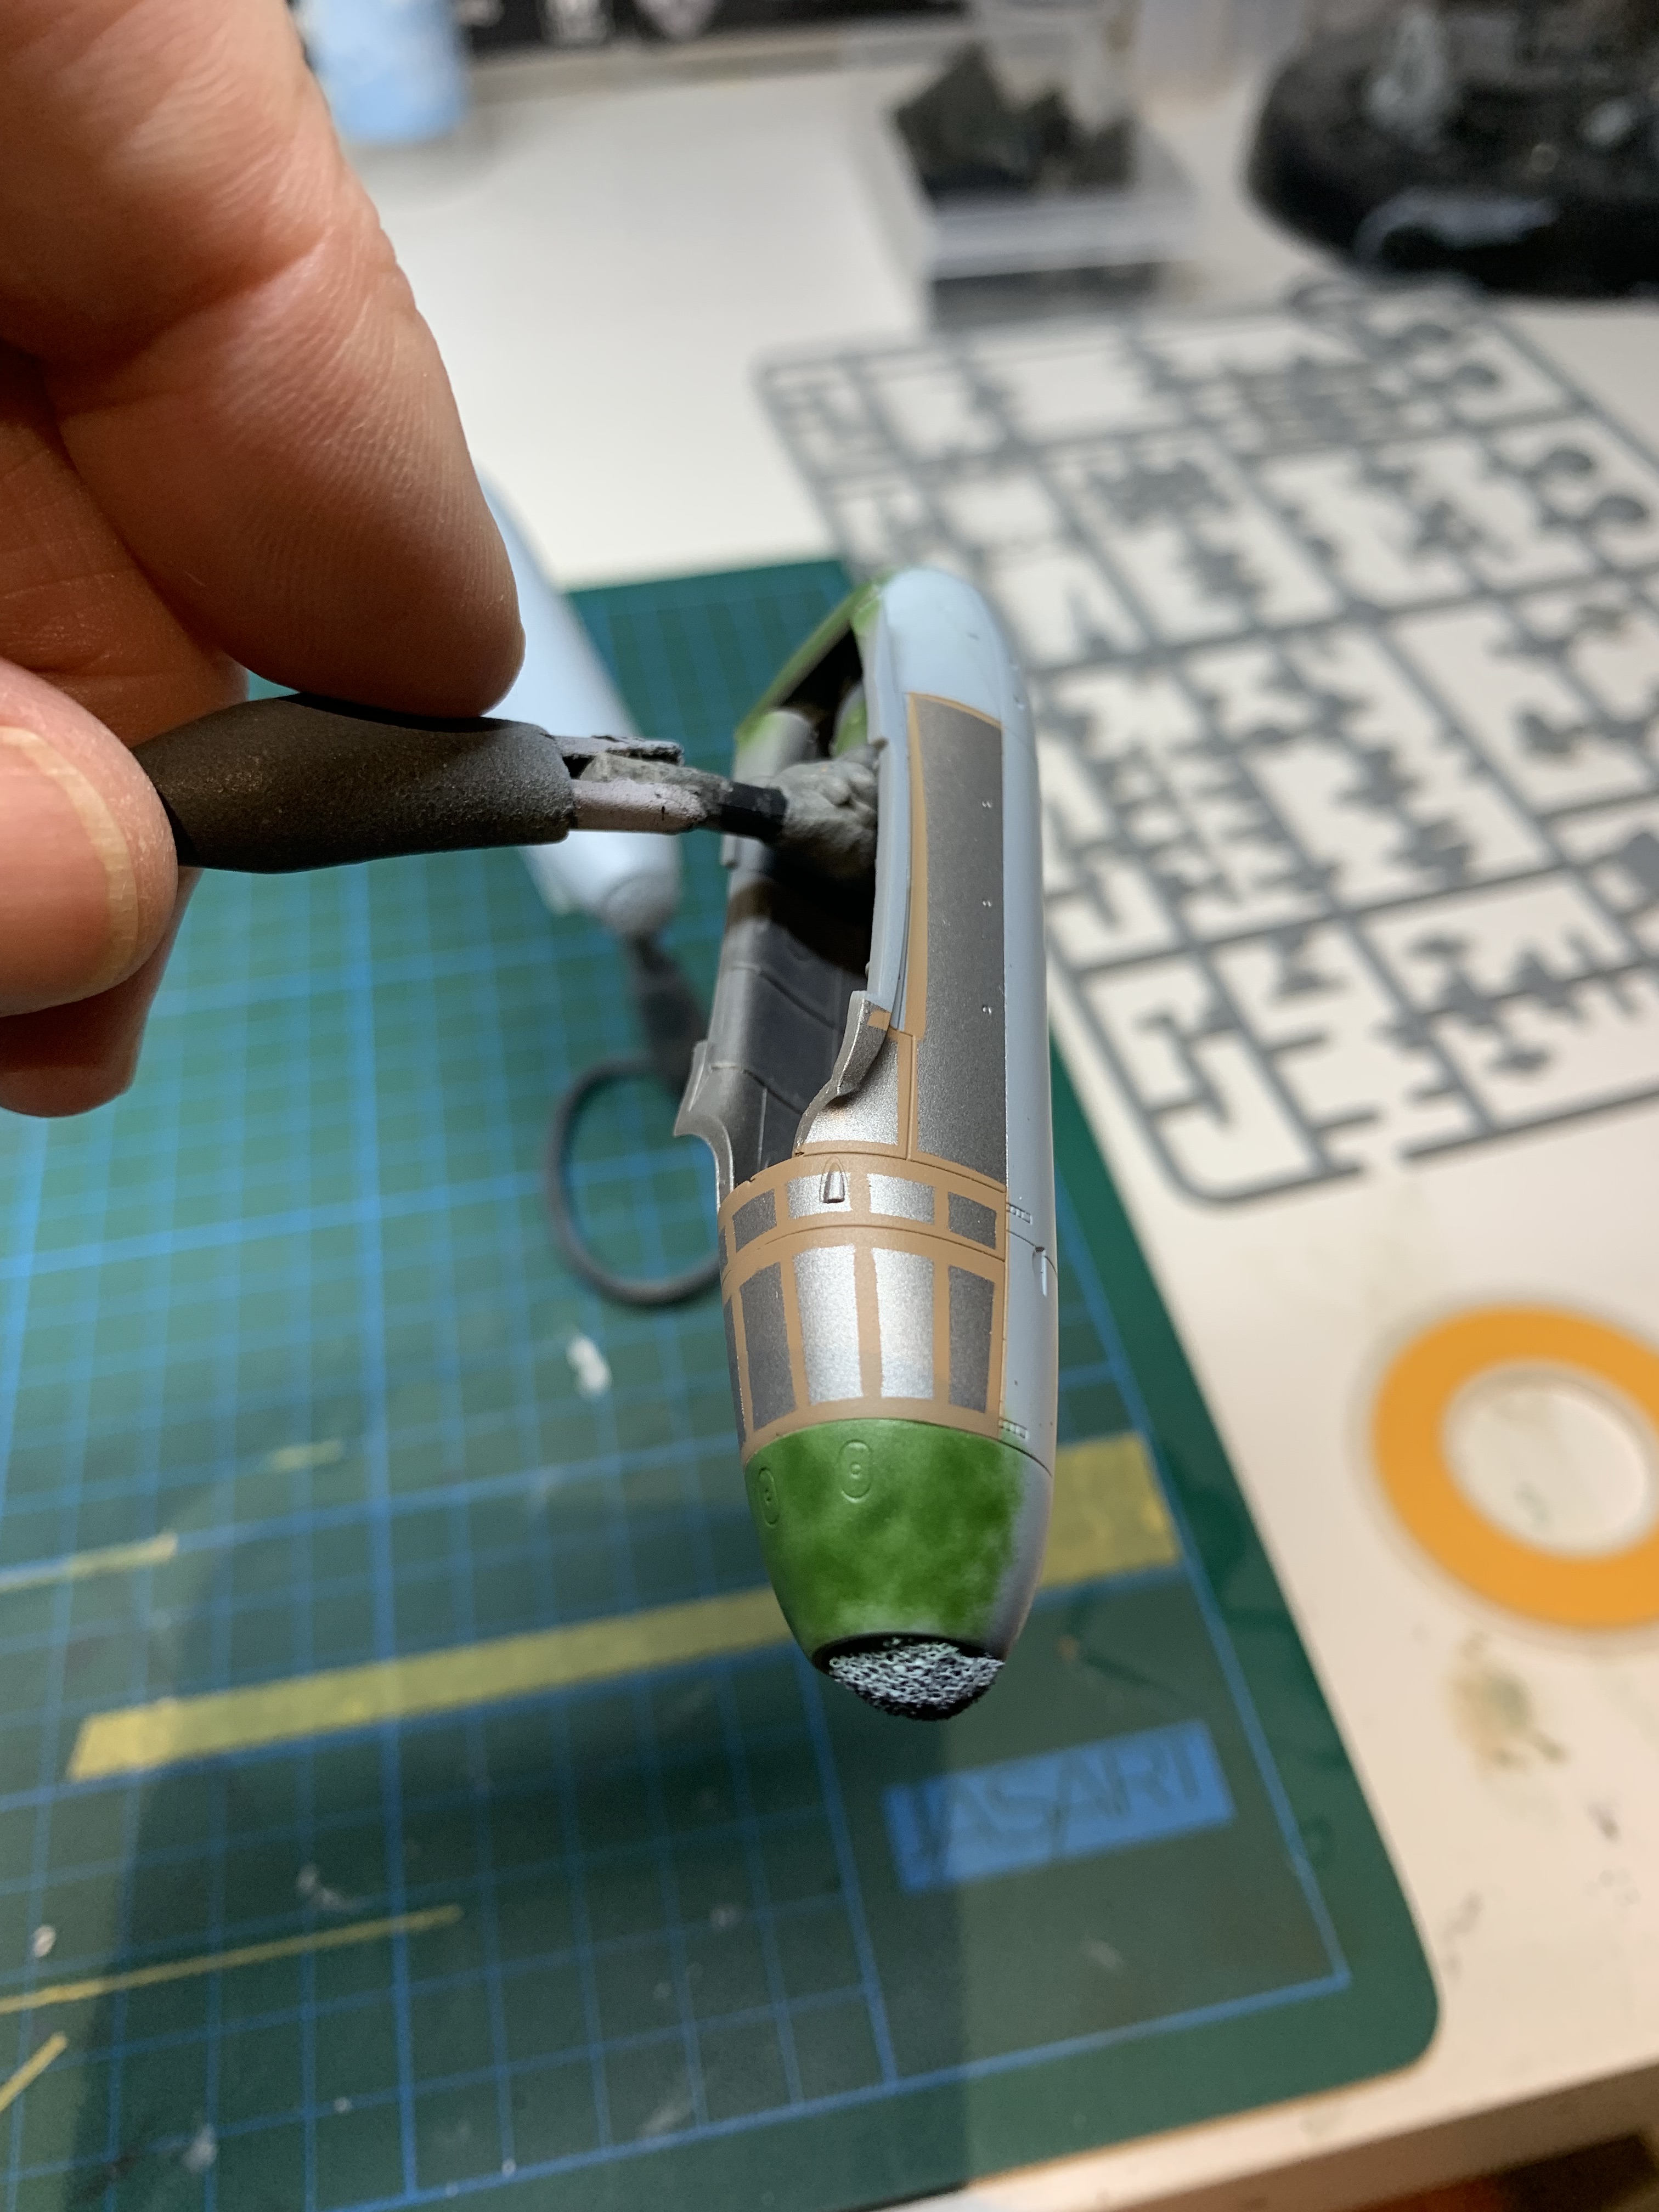
I began paint with the engines. They were clearly a mishmash (as described above) and required some though as to the process. I painted the RLM76 first, then the tan for the putty lines between panels, and then masked and painted the aluminium. Finally, I painted the mottle on the forward cowlings. The squiggle on the starboard engine required more than one attempt but I was quite happy with how I got it in the end.
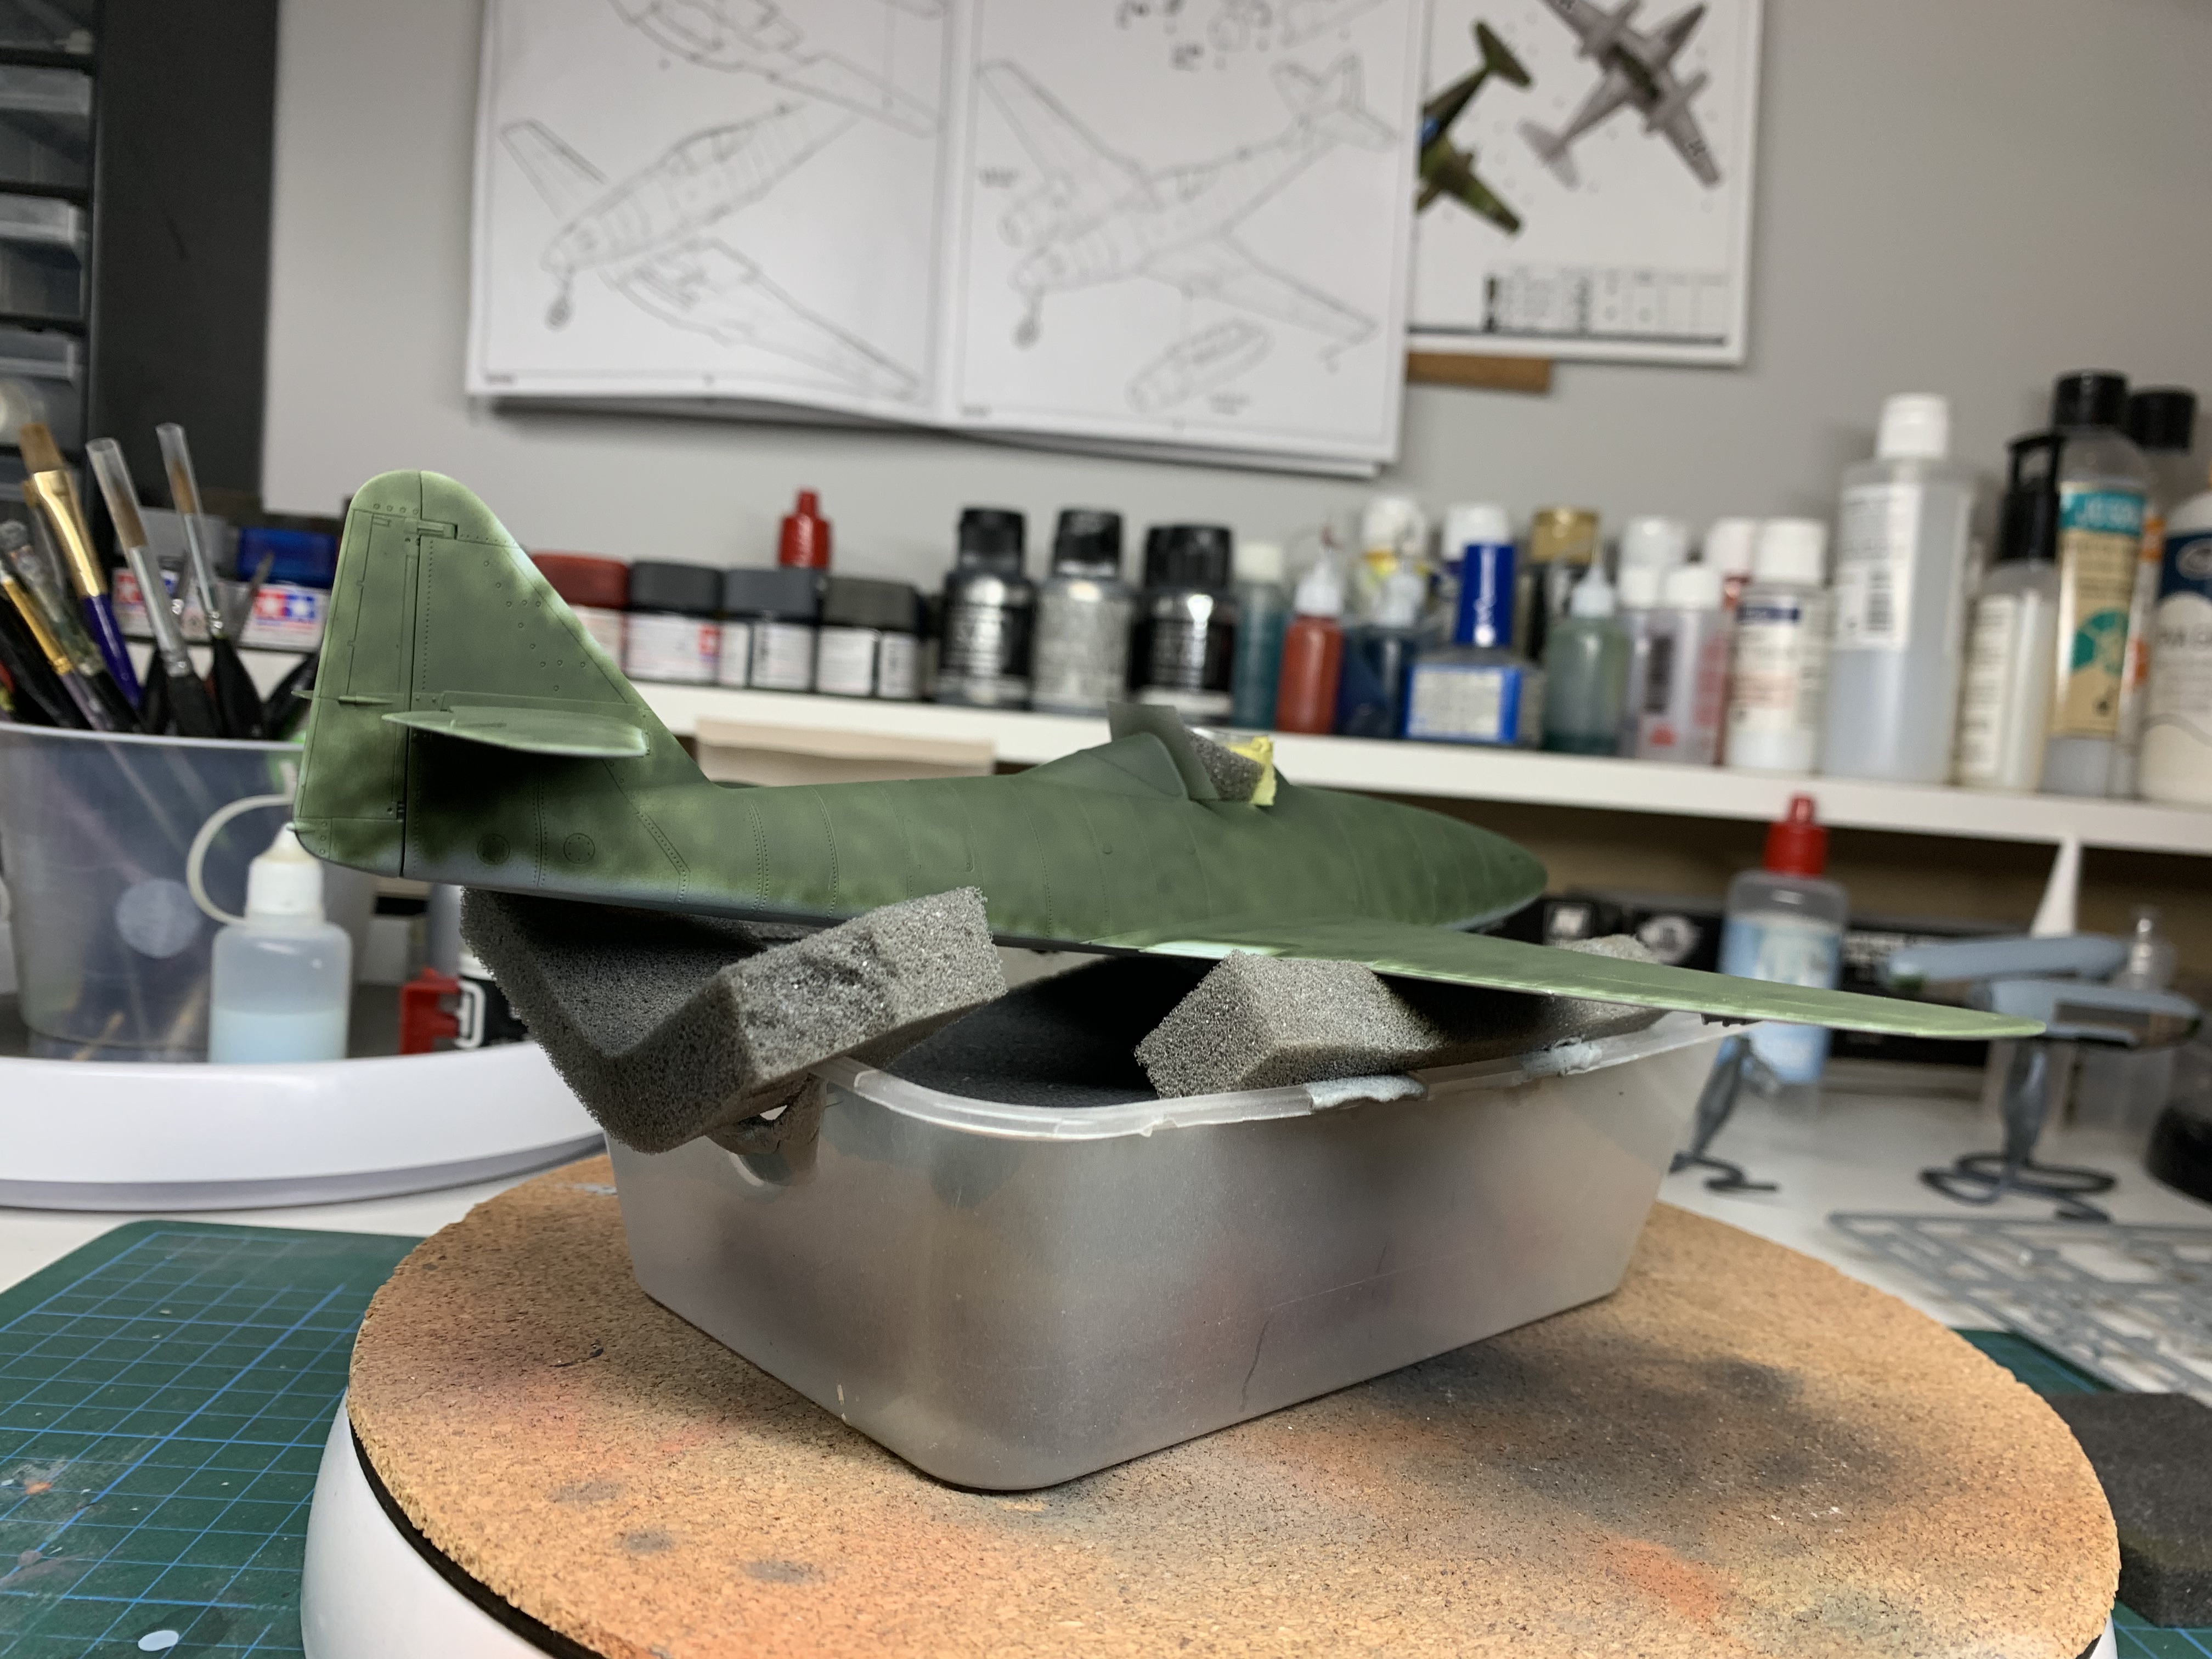
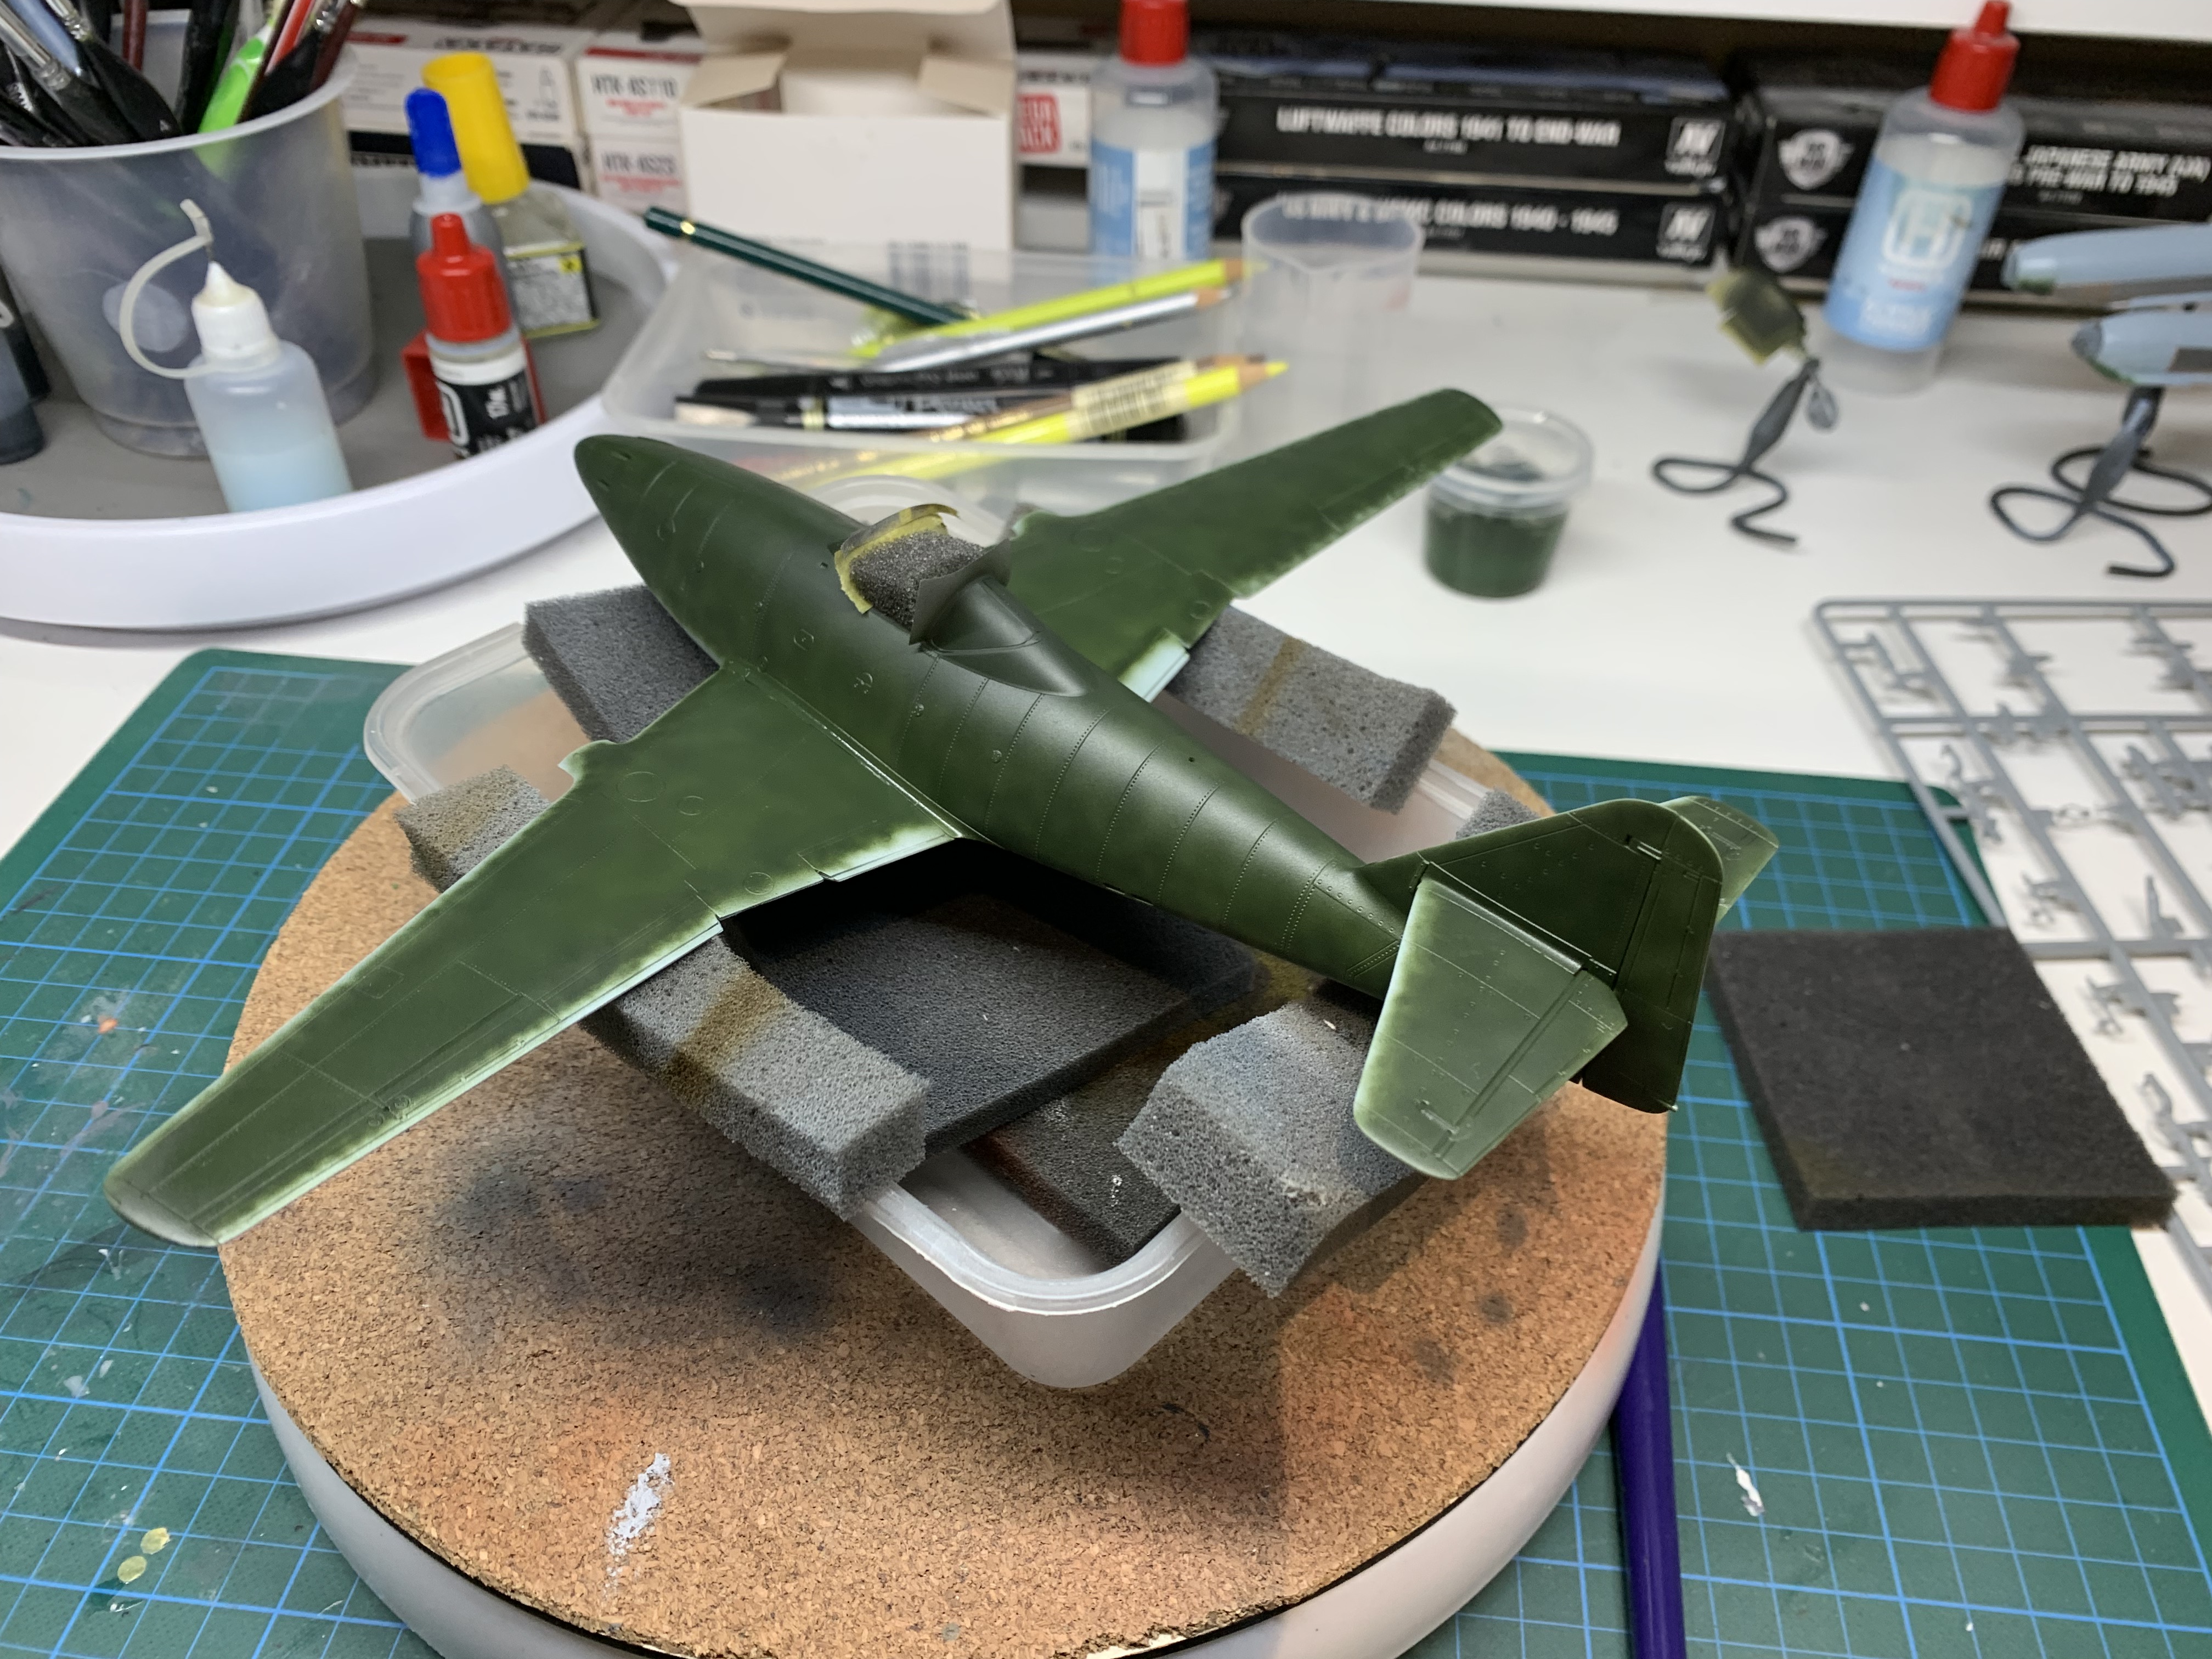
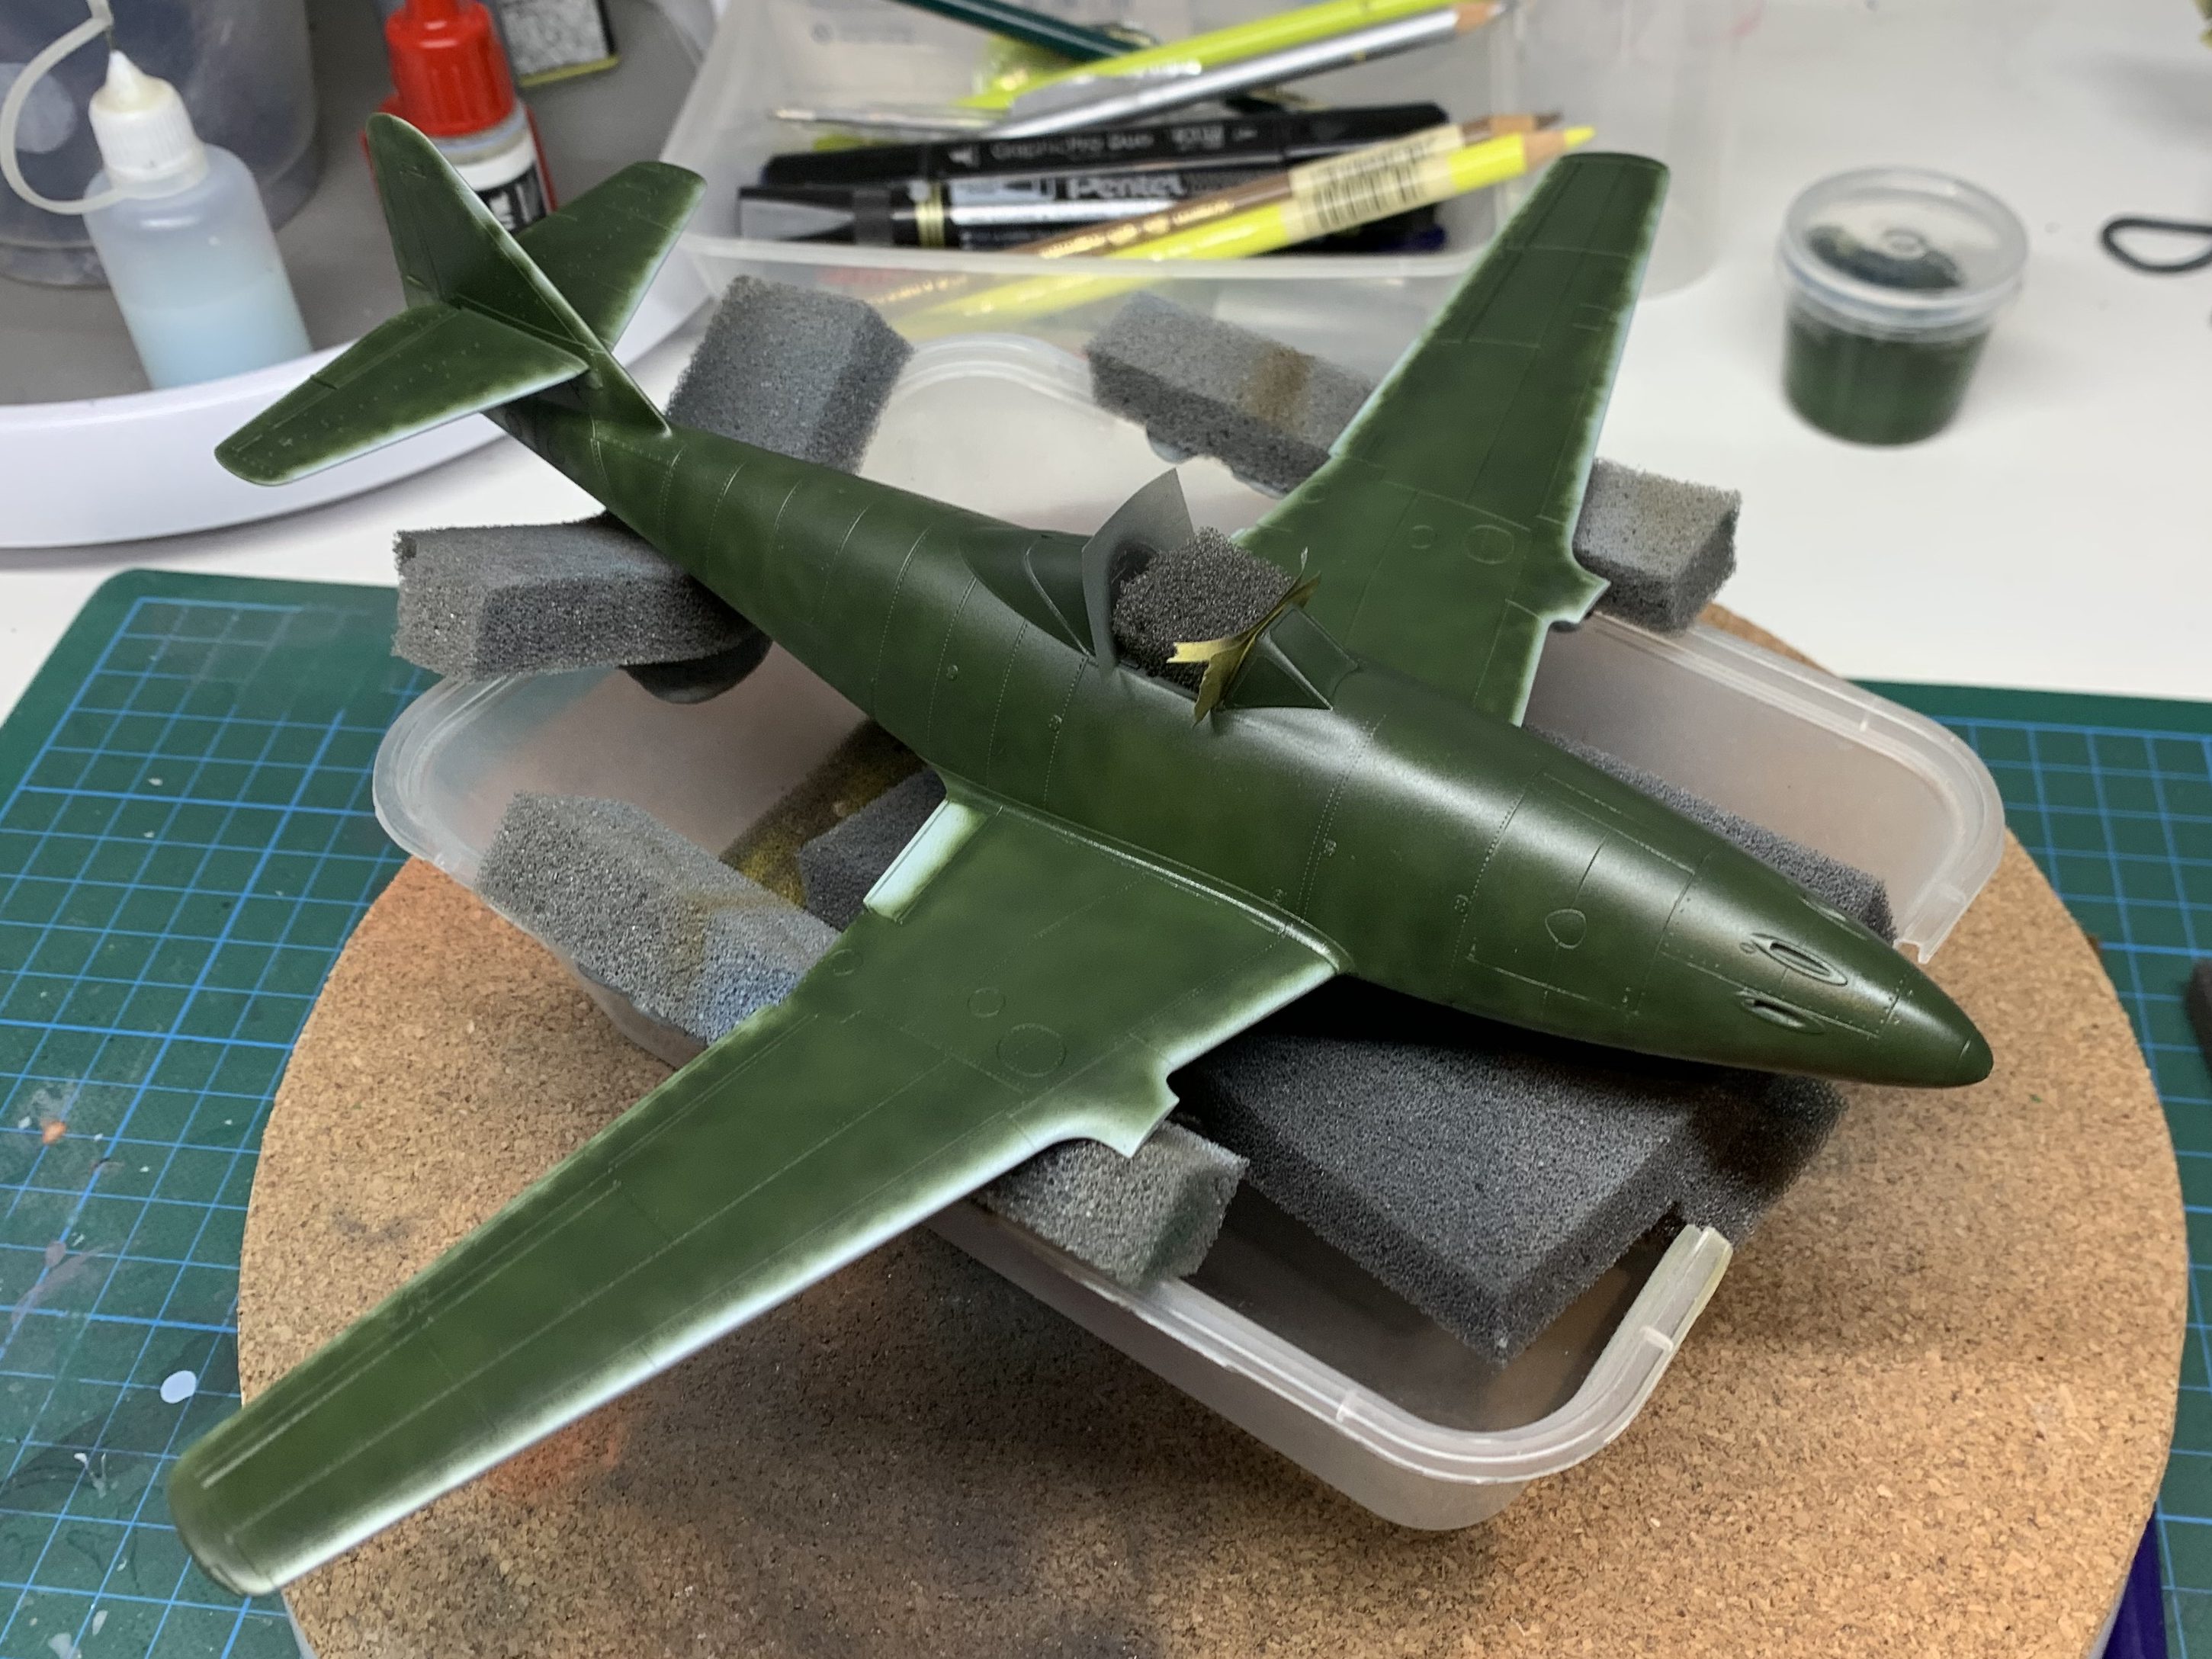
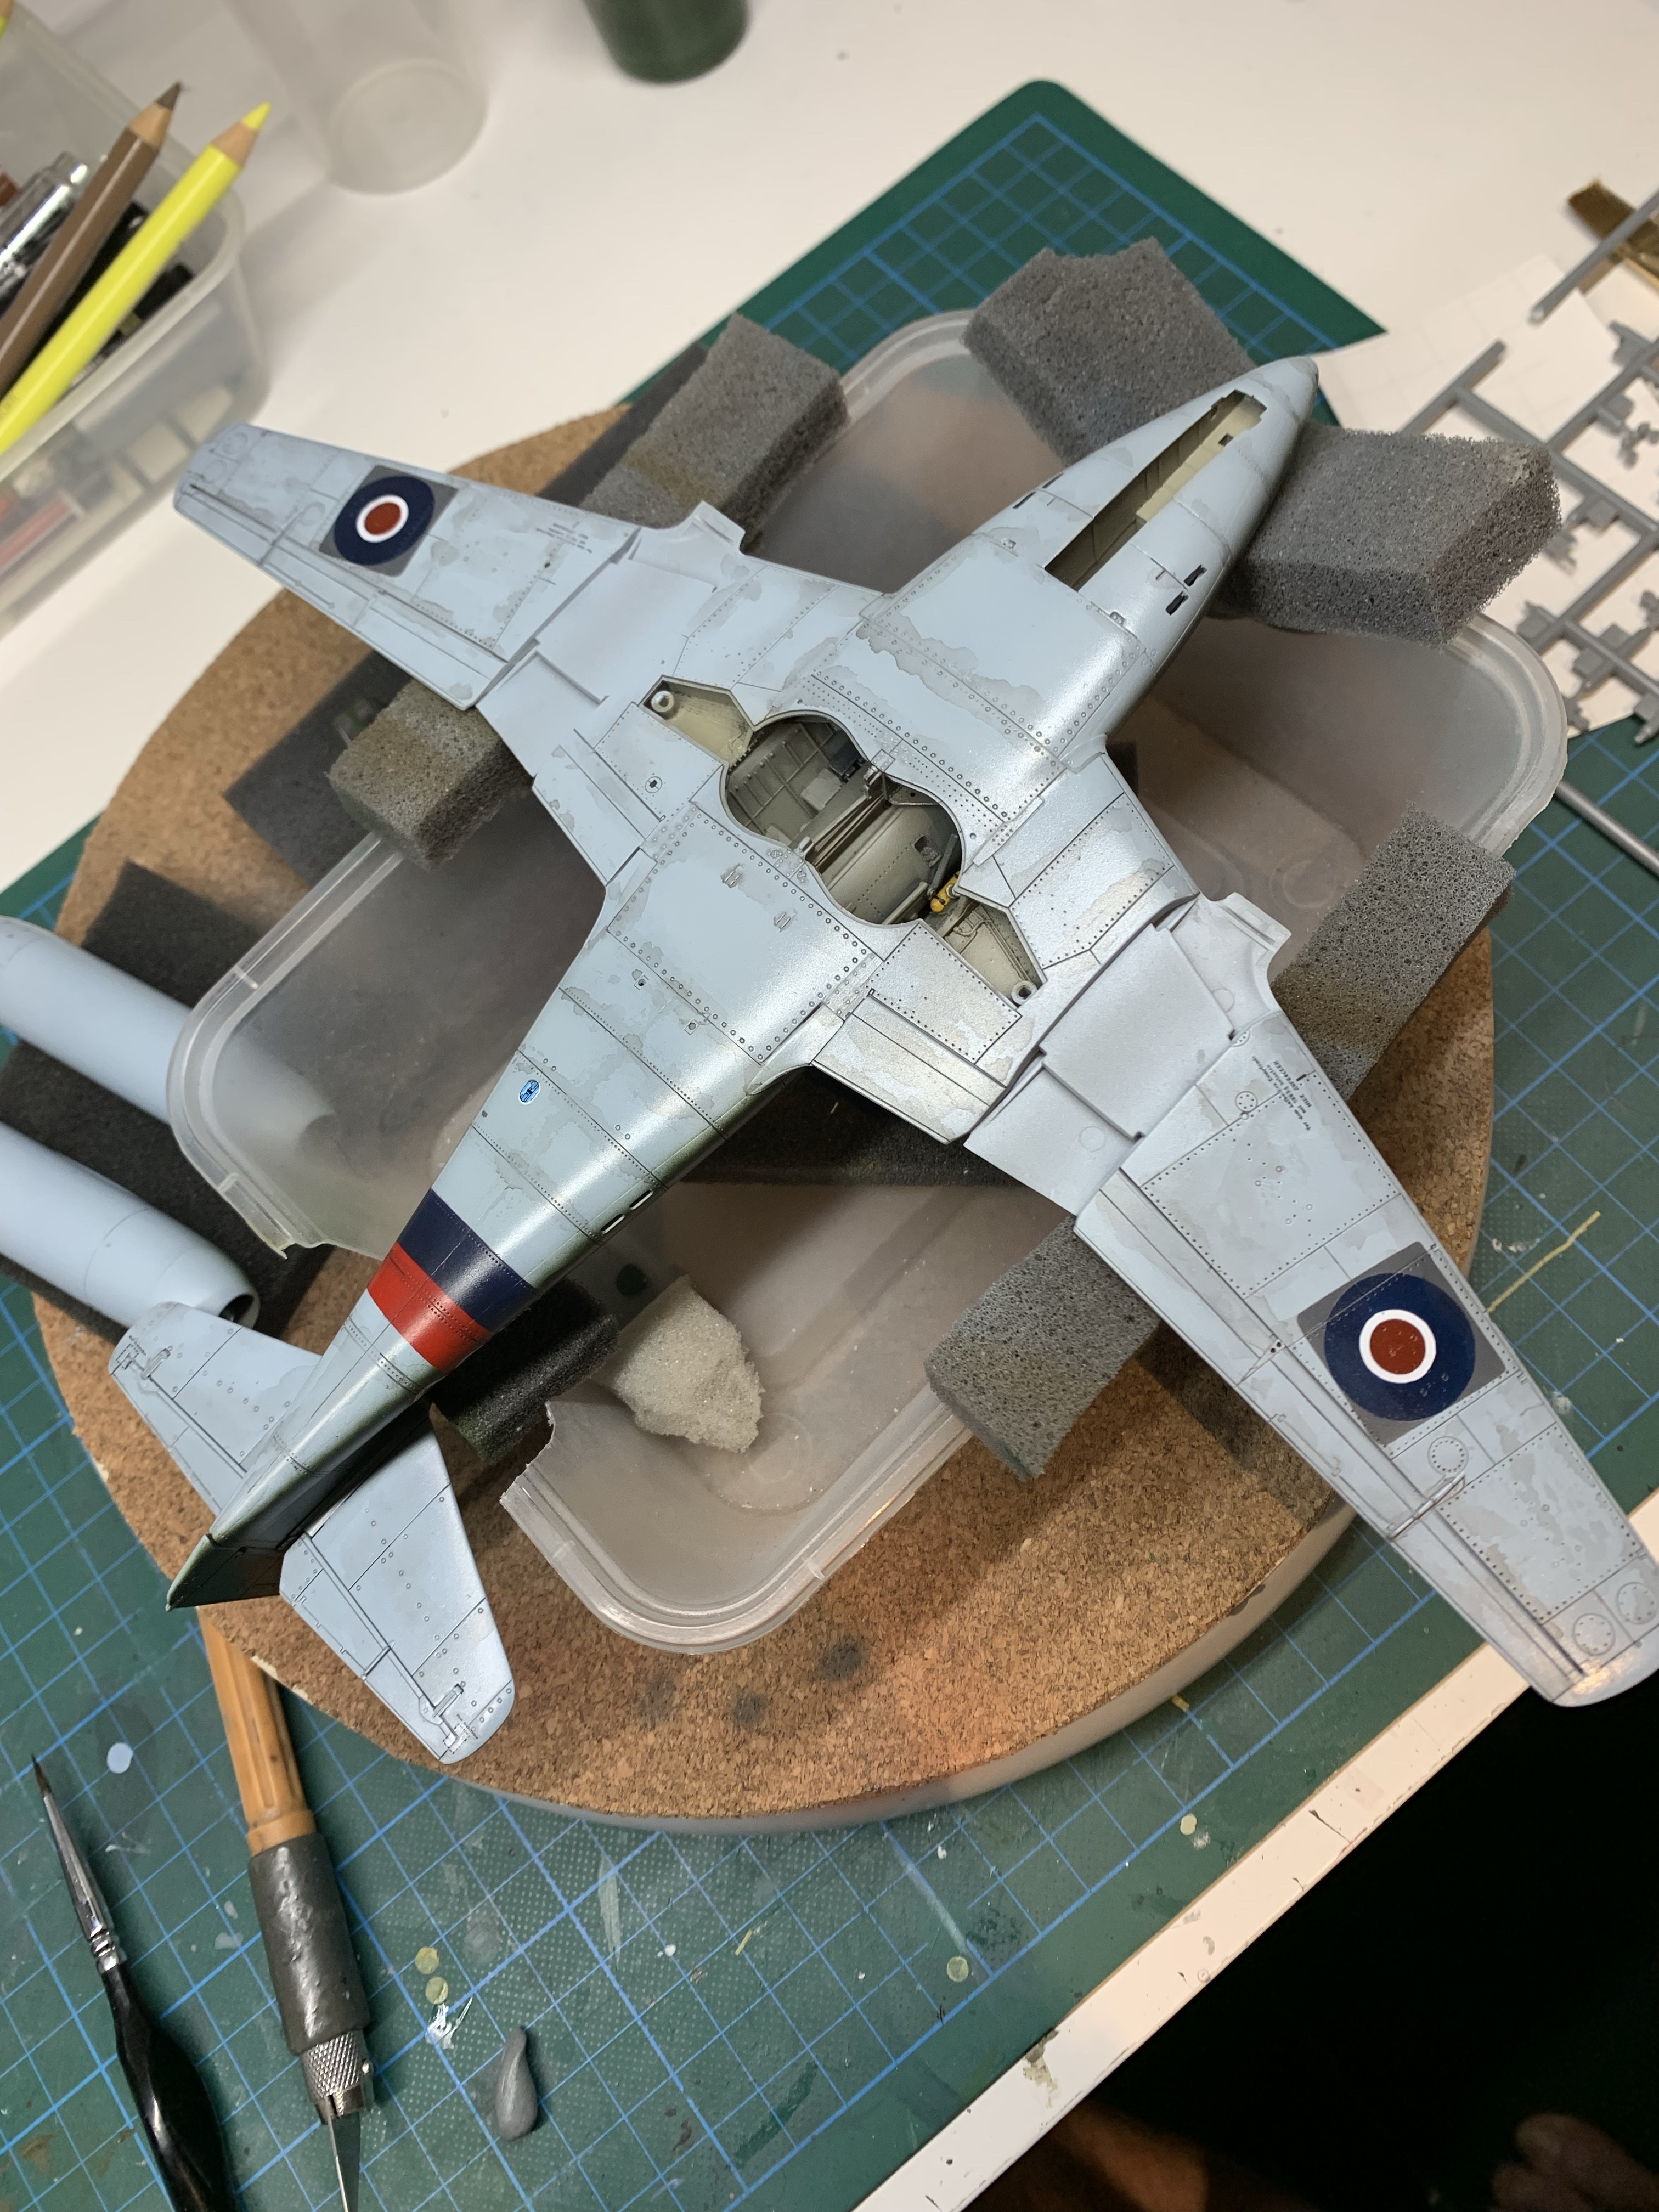
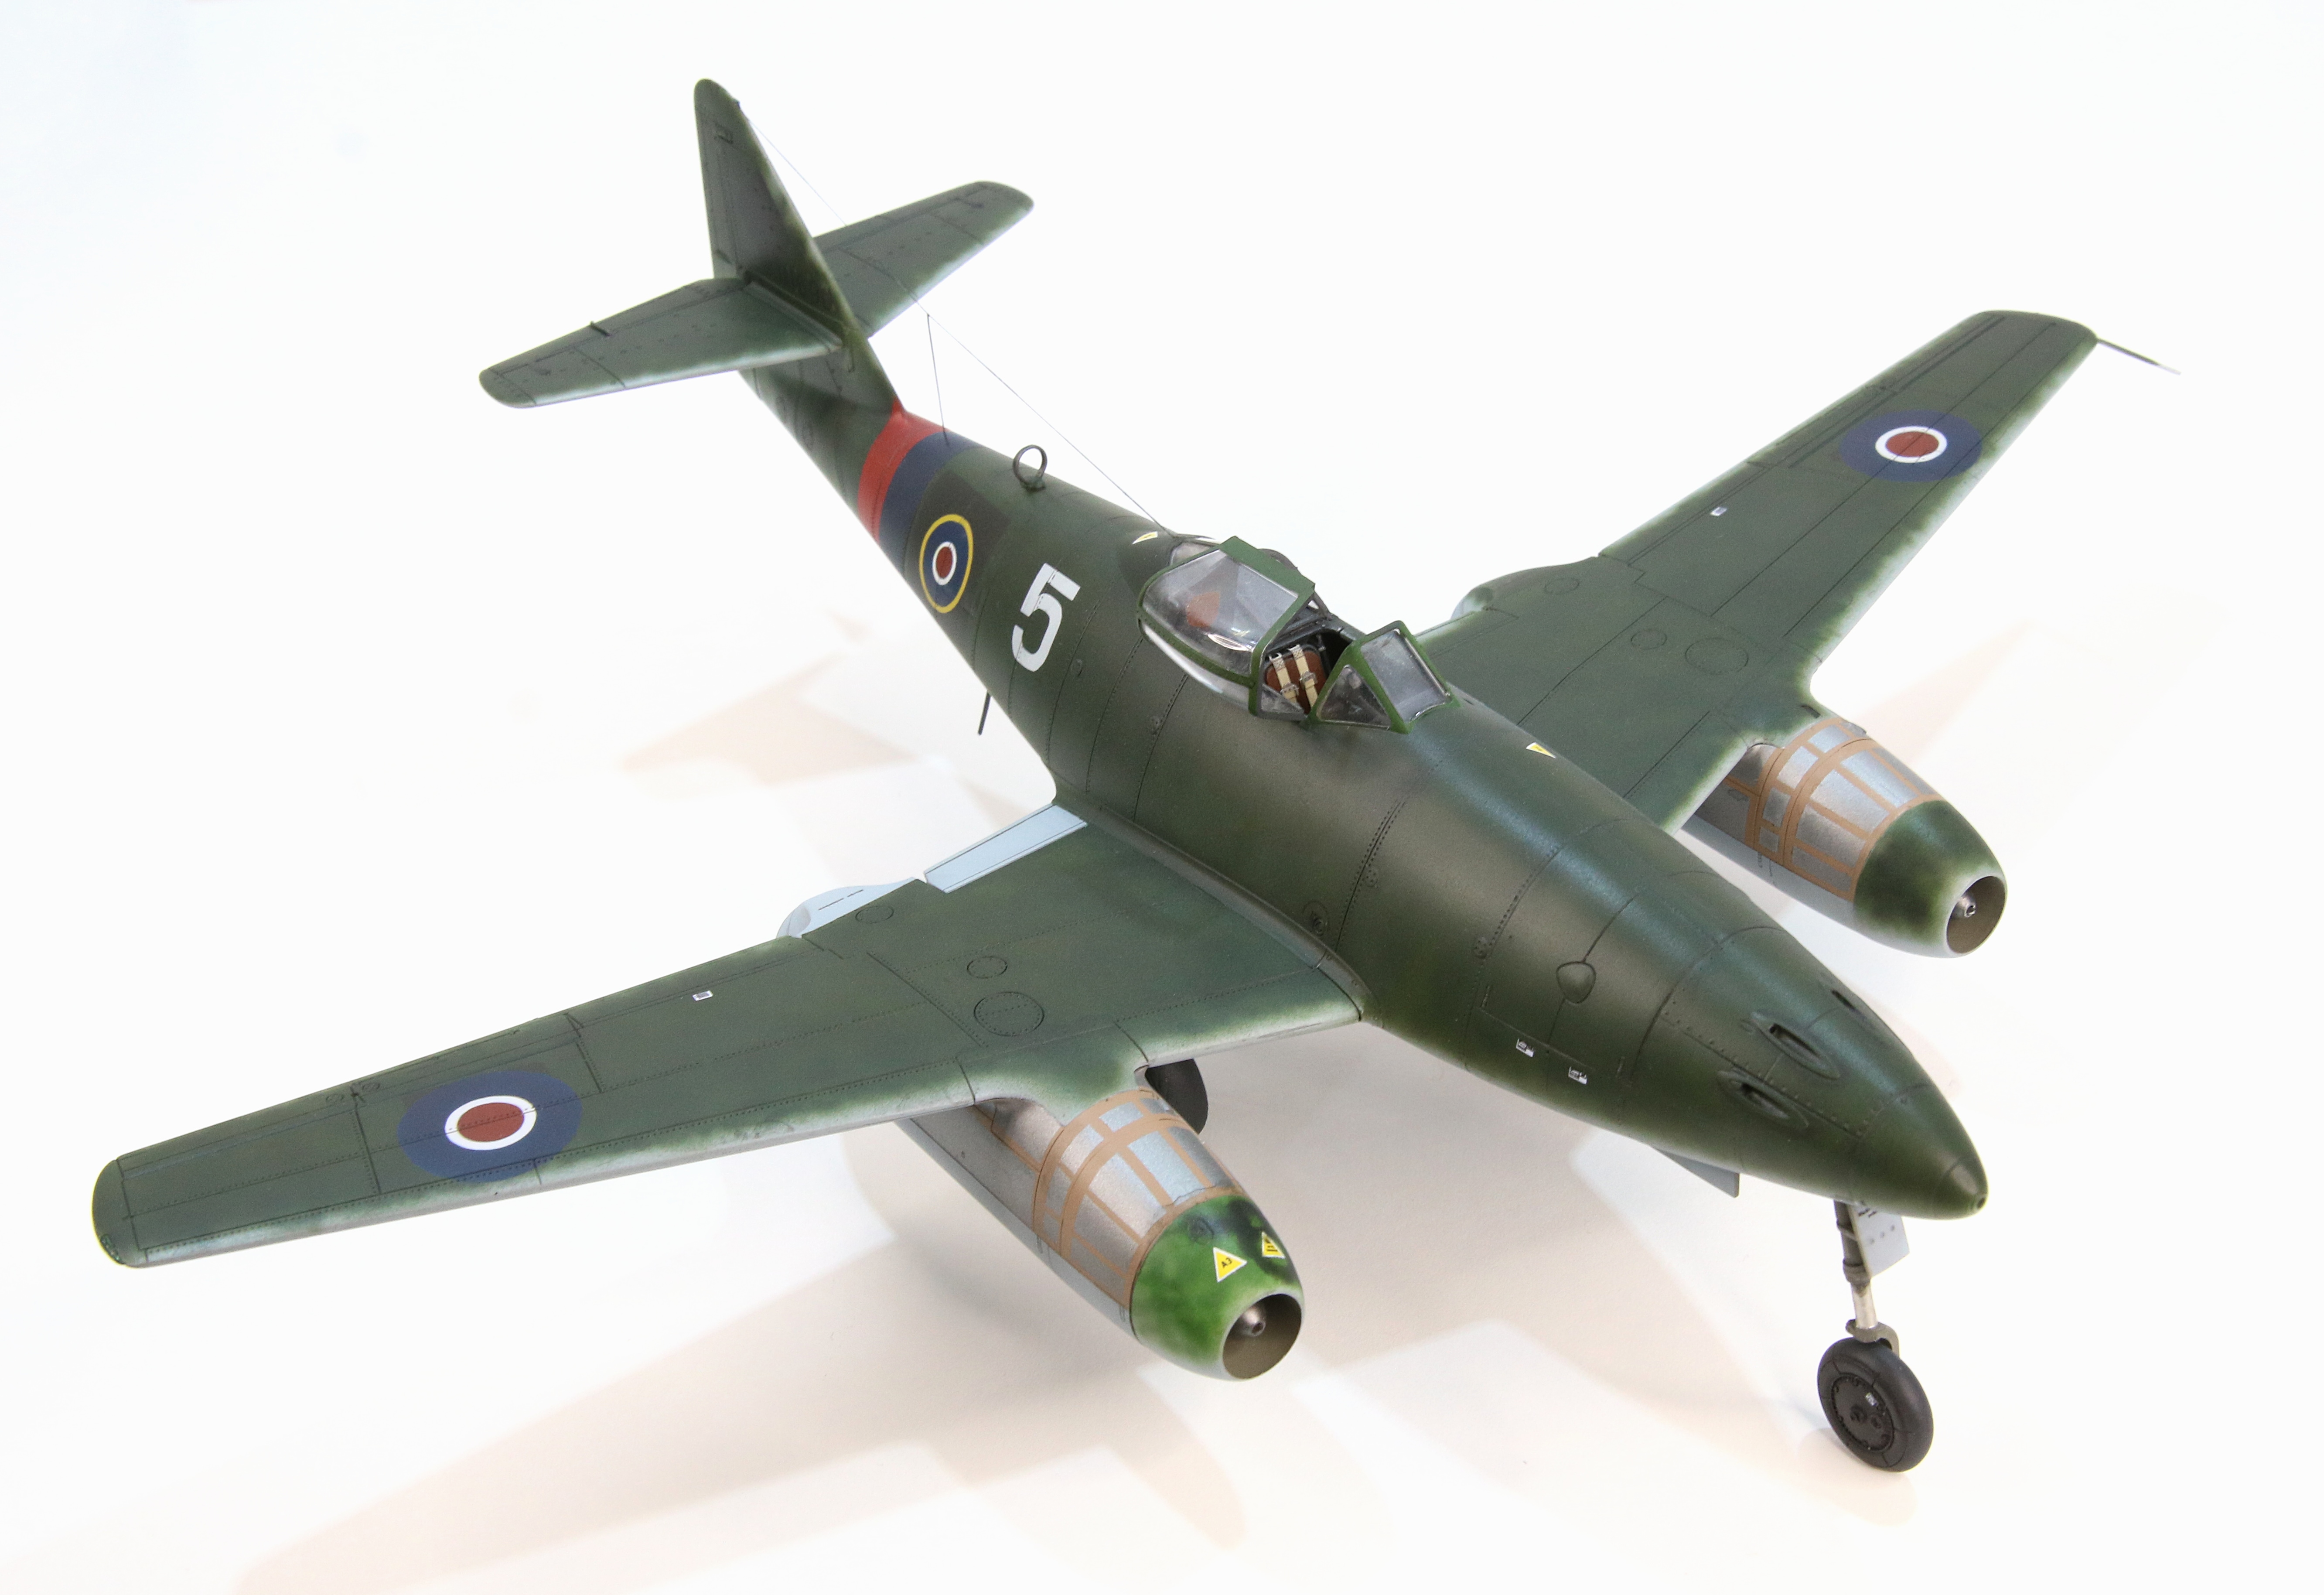
Next, the underside RLM76 was straight forward. Finally, the RLM81 Dark /Green. I made the paint a little thinner than usual and slowly built up the coverage with a random, swirling and fairly narrow application. I worked slowly and with some patience to ensure I applied enough paint, but not so much as to obliterate the lack of depth I was aiming to reproduce. It took a little while but I was really happy with the result.
Click on any of the images below to scroll through the gallery.


A final clear gloss coat finished off the paint stage and prepared the model for the markings.
Markings
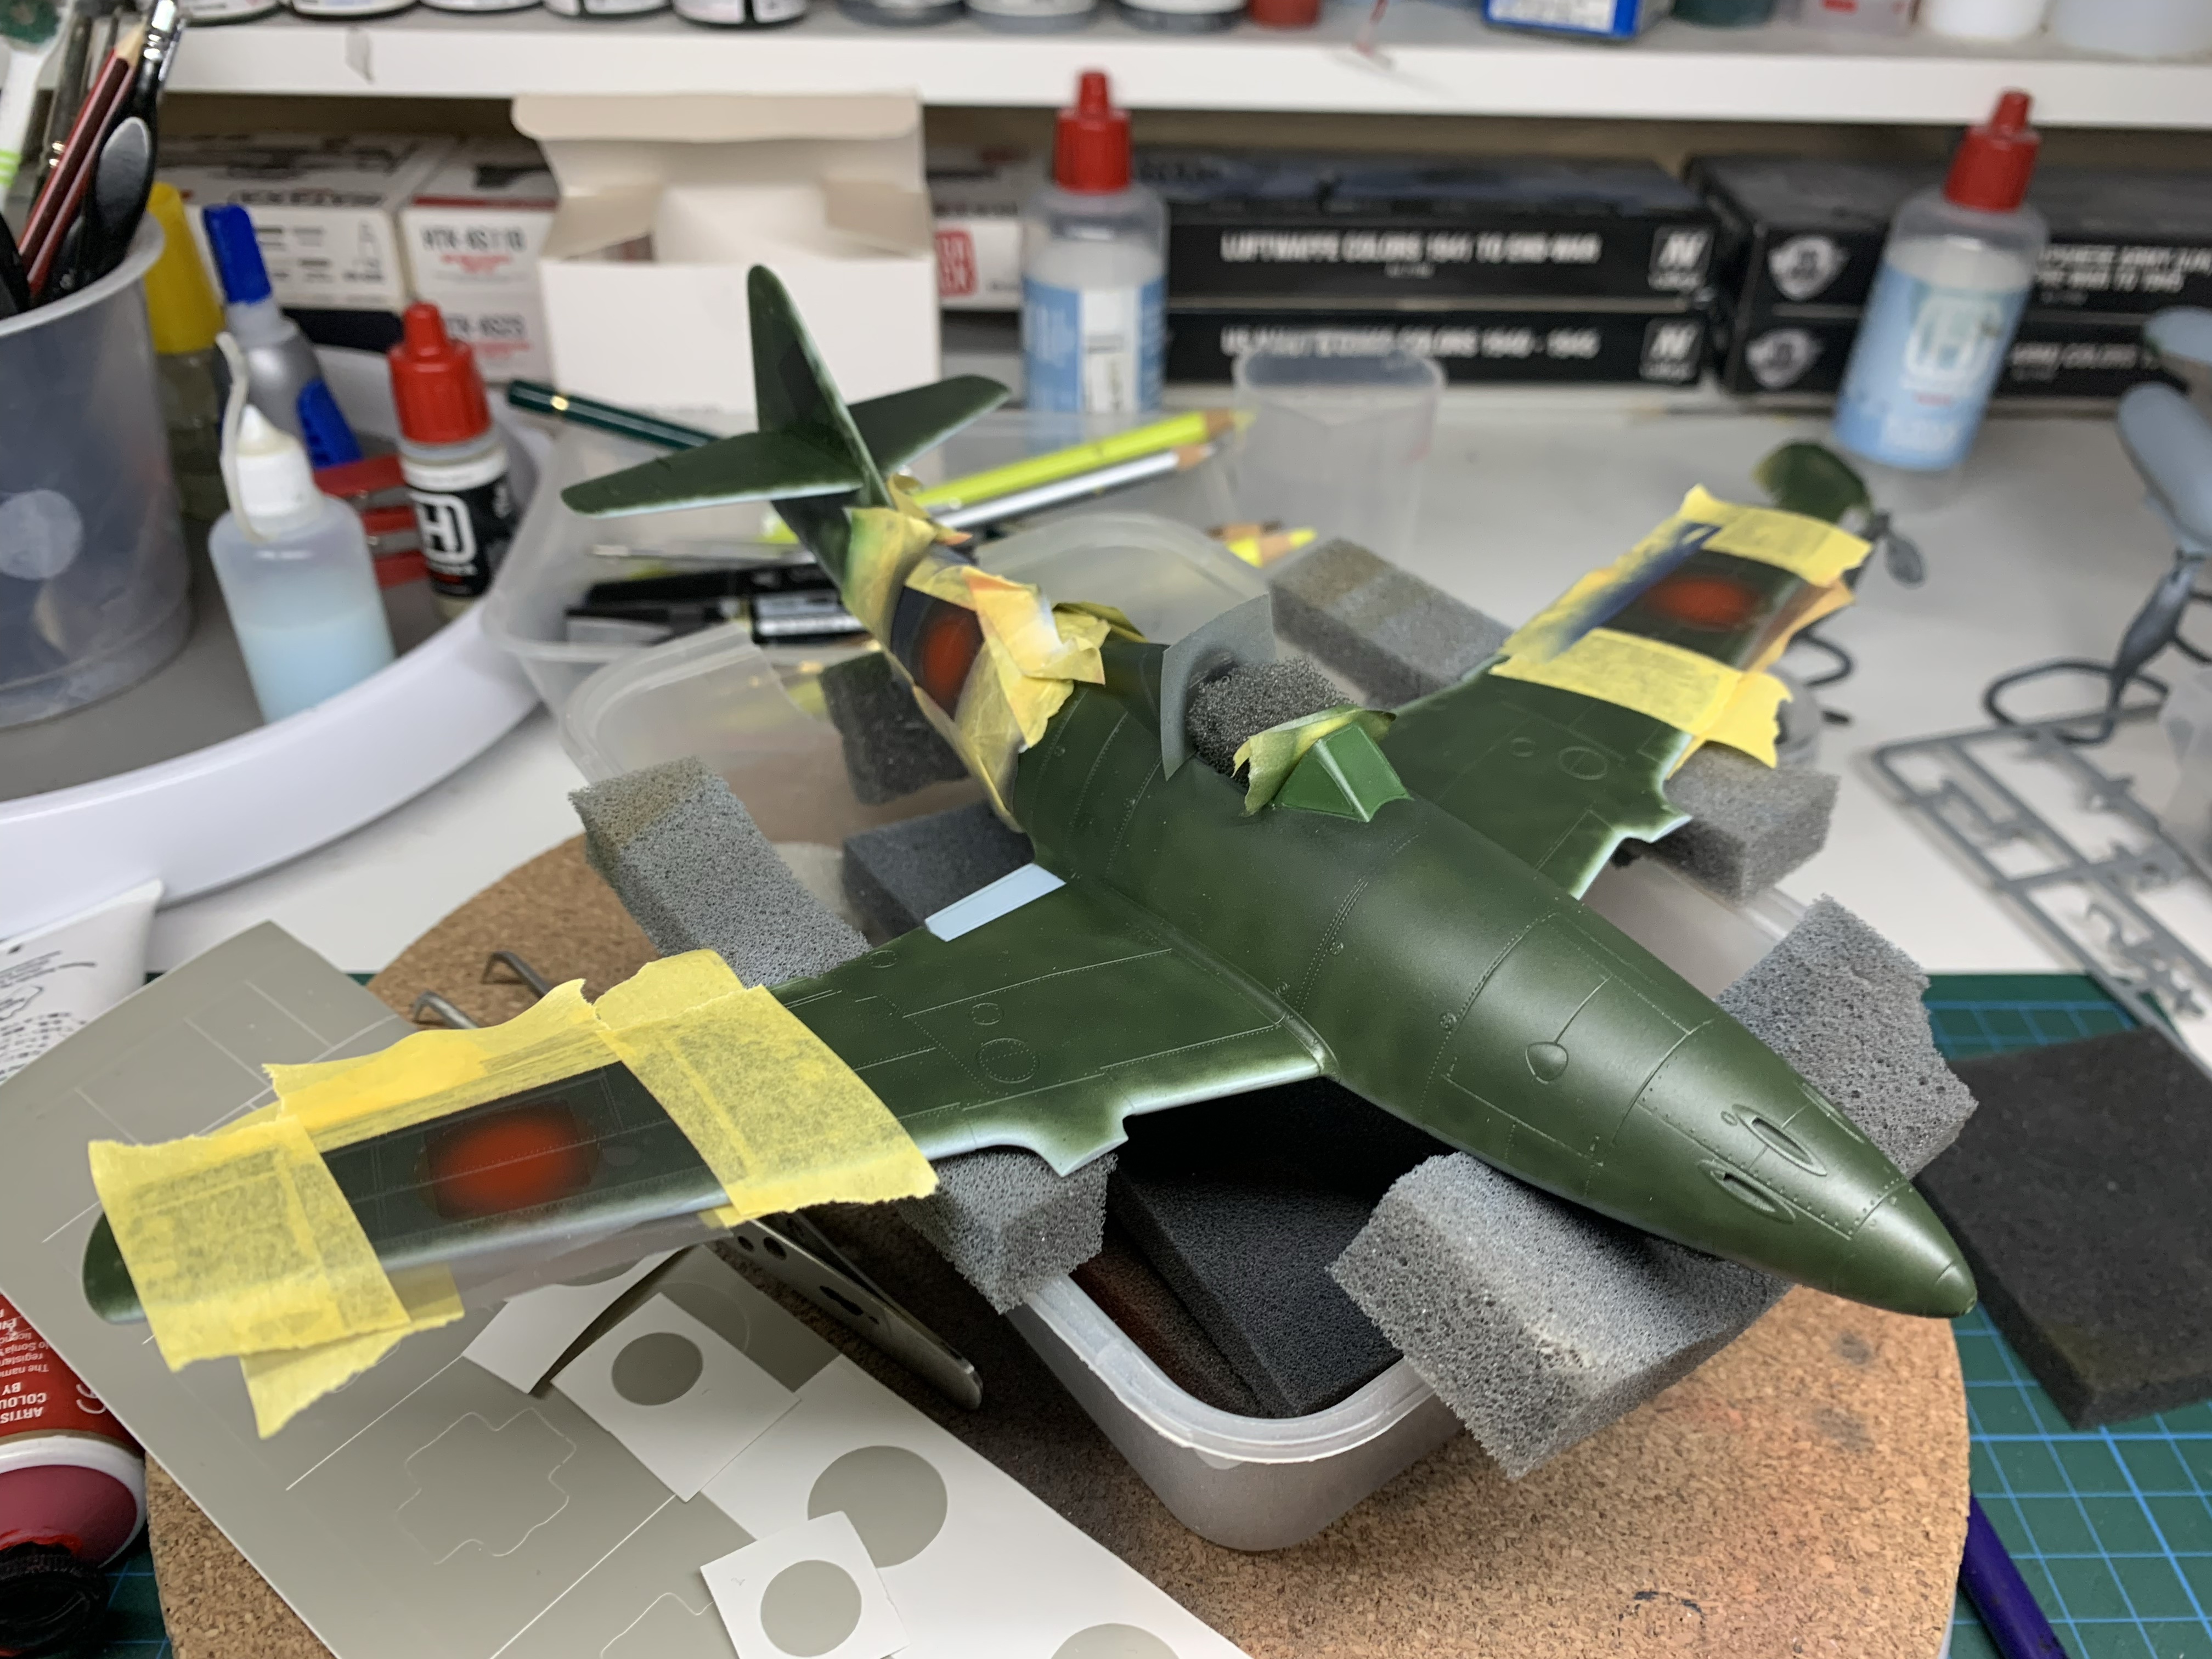
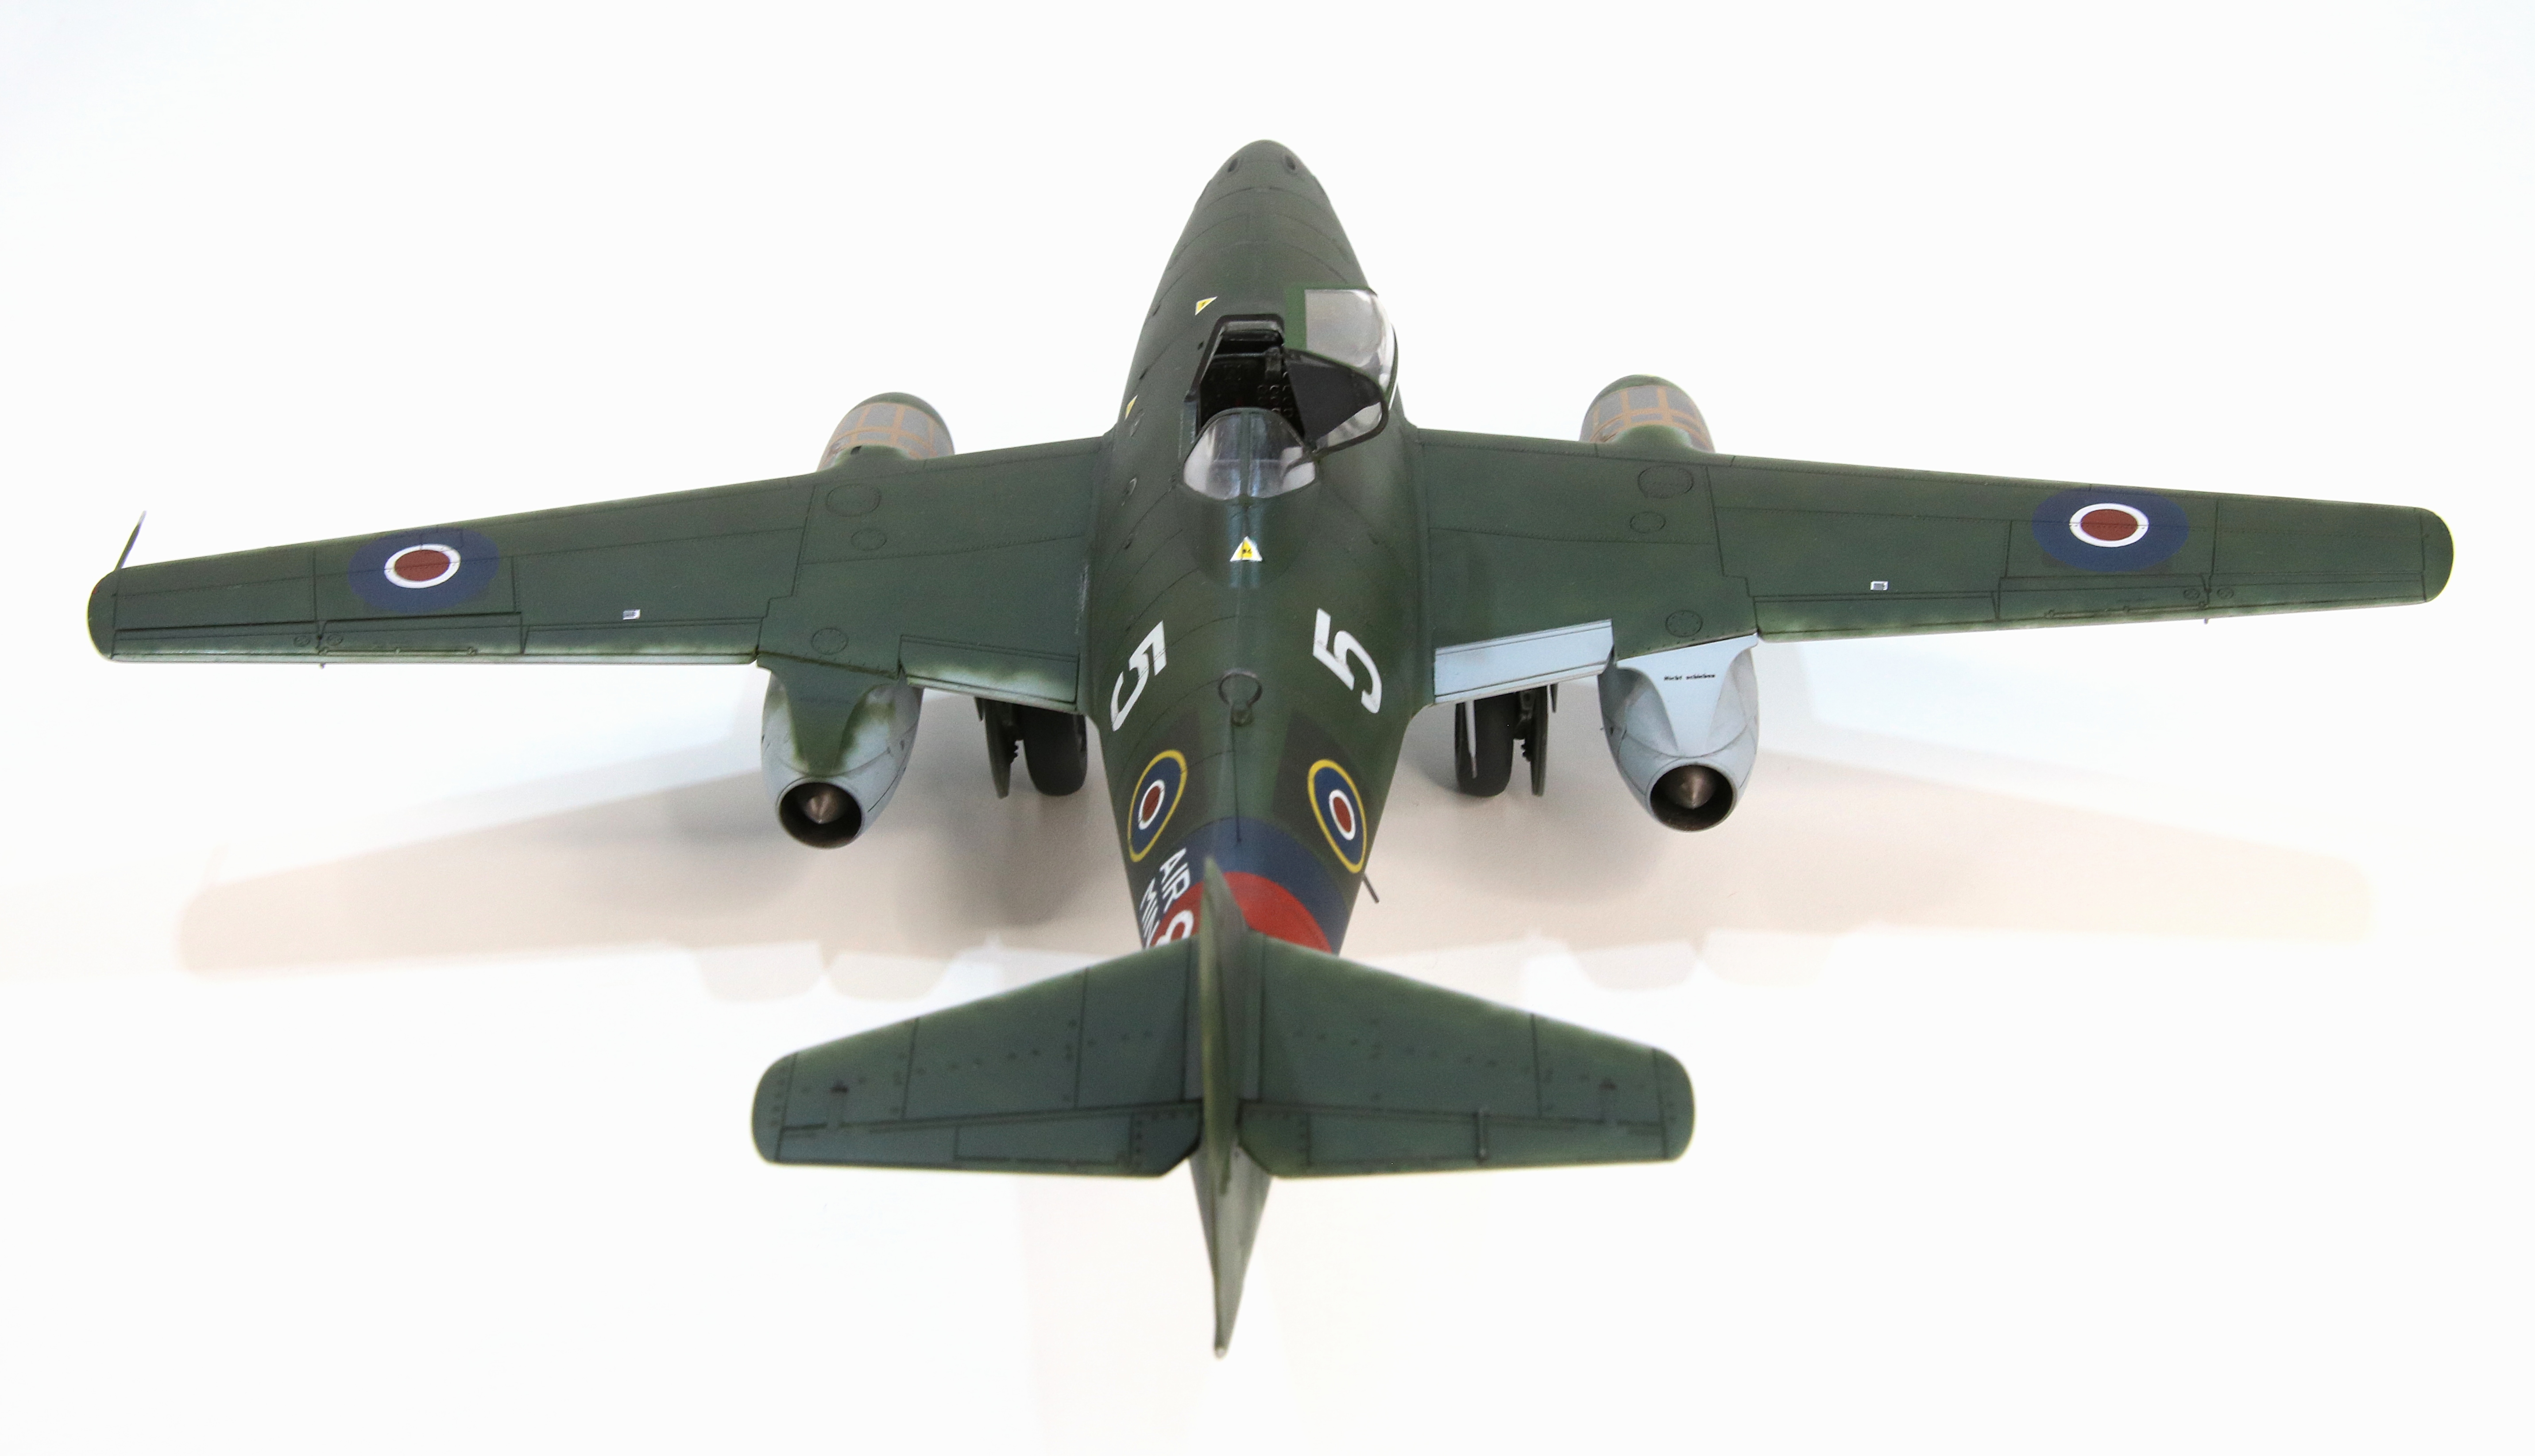
The markings were relatively easy to determine and apply. Unusually, the RAF left the fuselage band in place (in most cases all of the Luftwaffe markings were painted over) so I painted that first. Next I worked through the red, white and blue masking and painting as appropriate.
Click on any of the images below to scroll through the gallery.

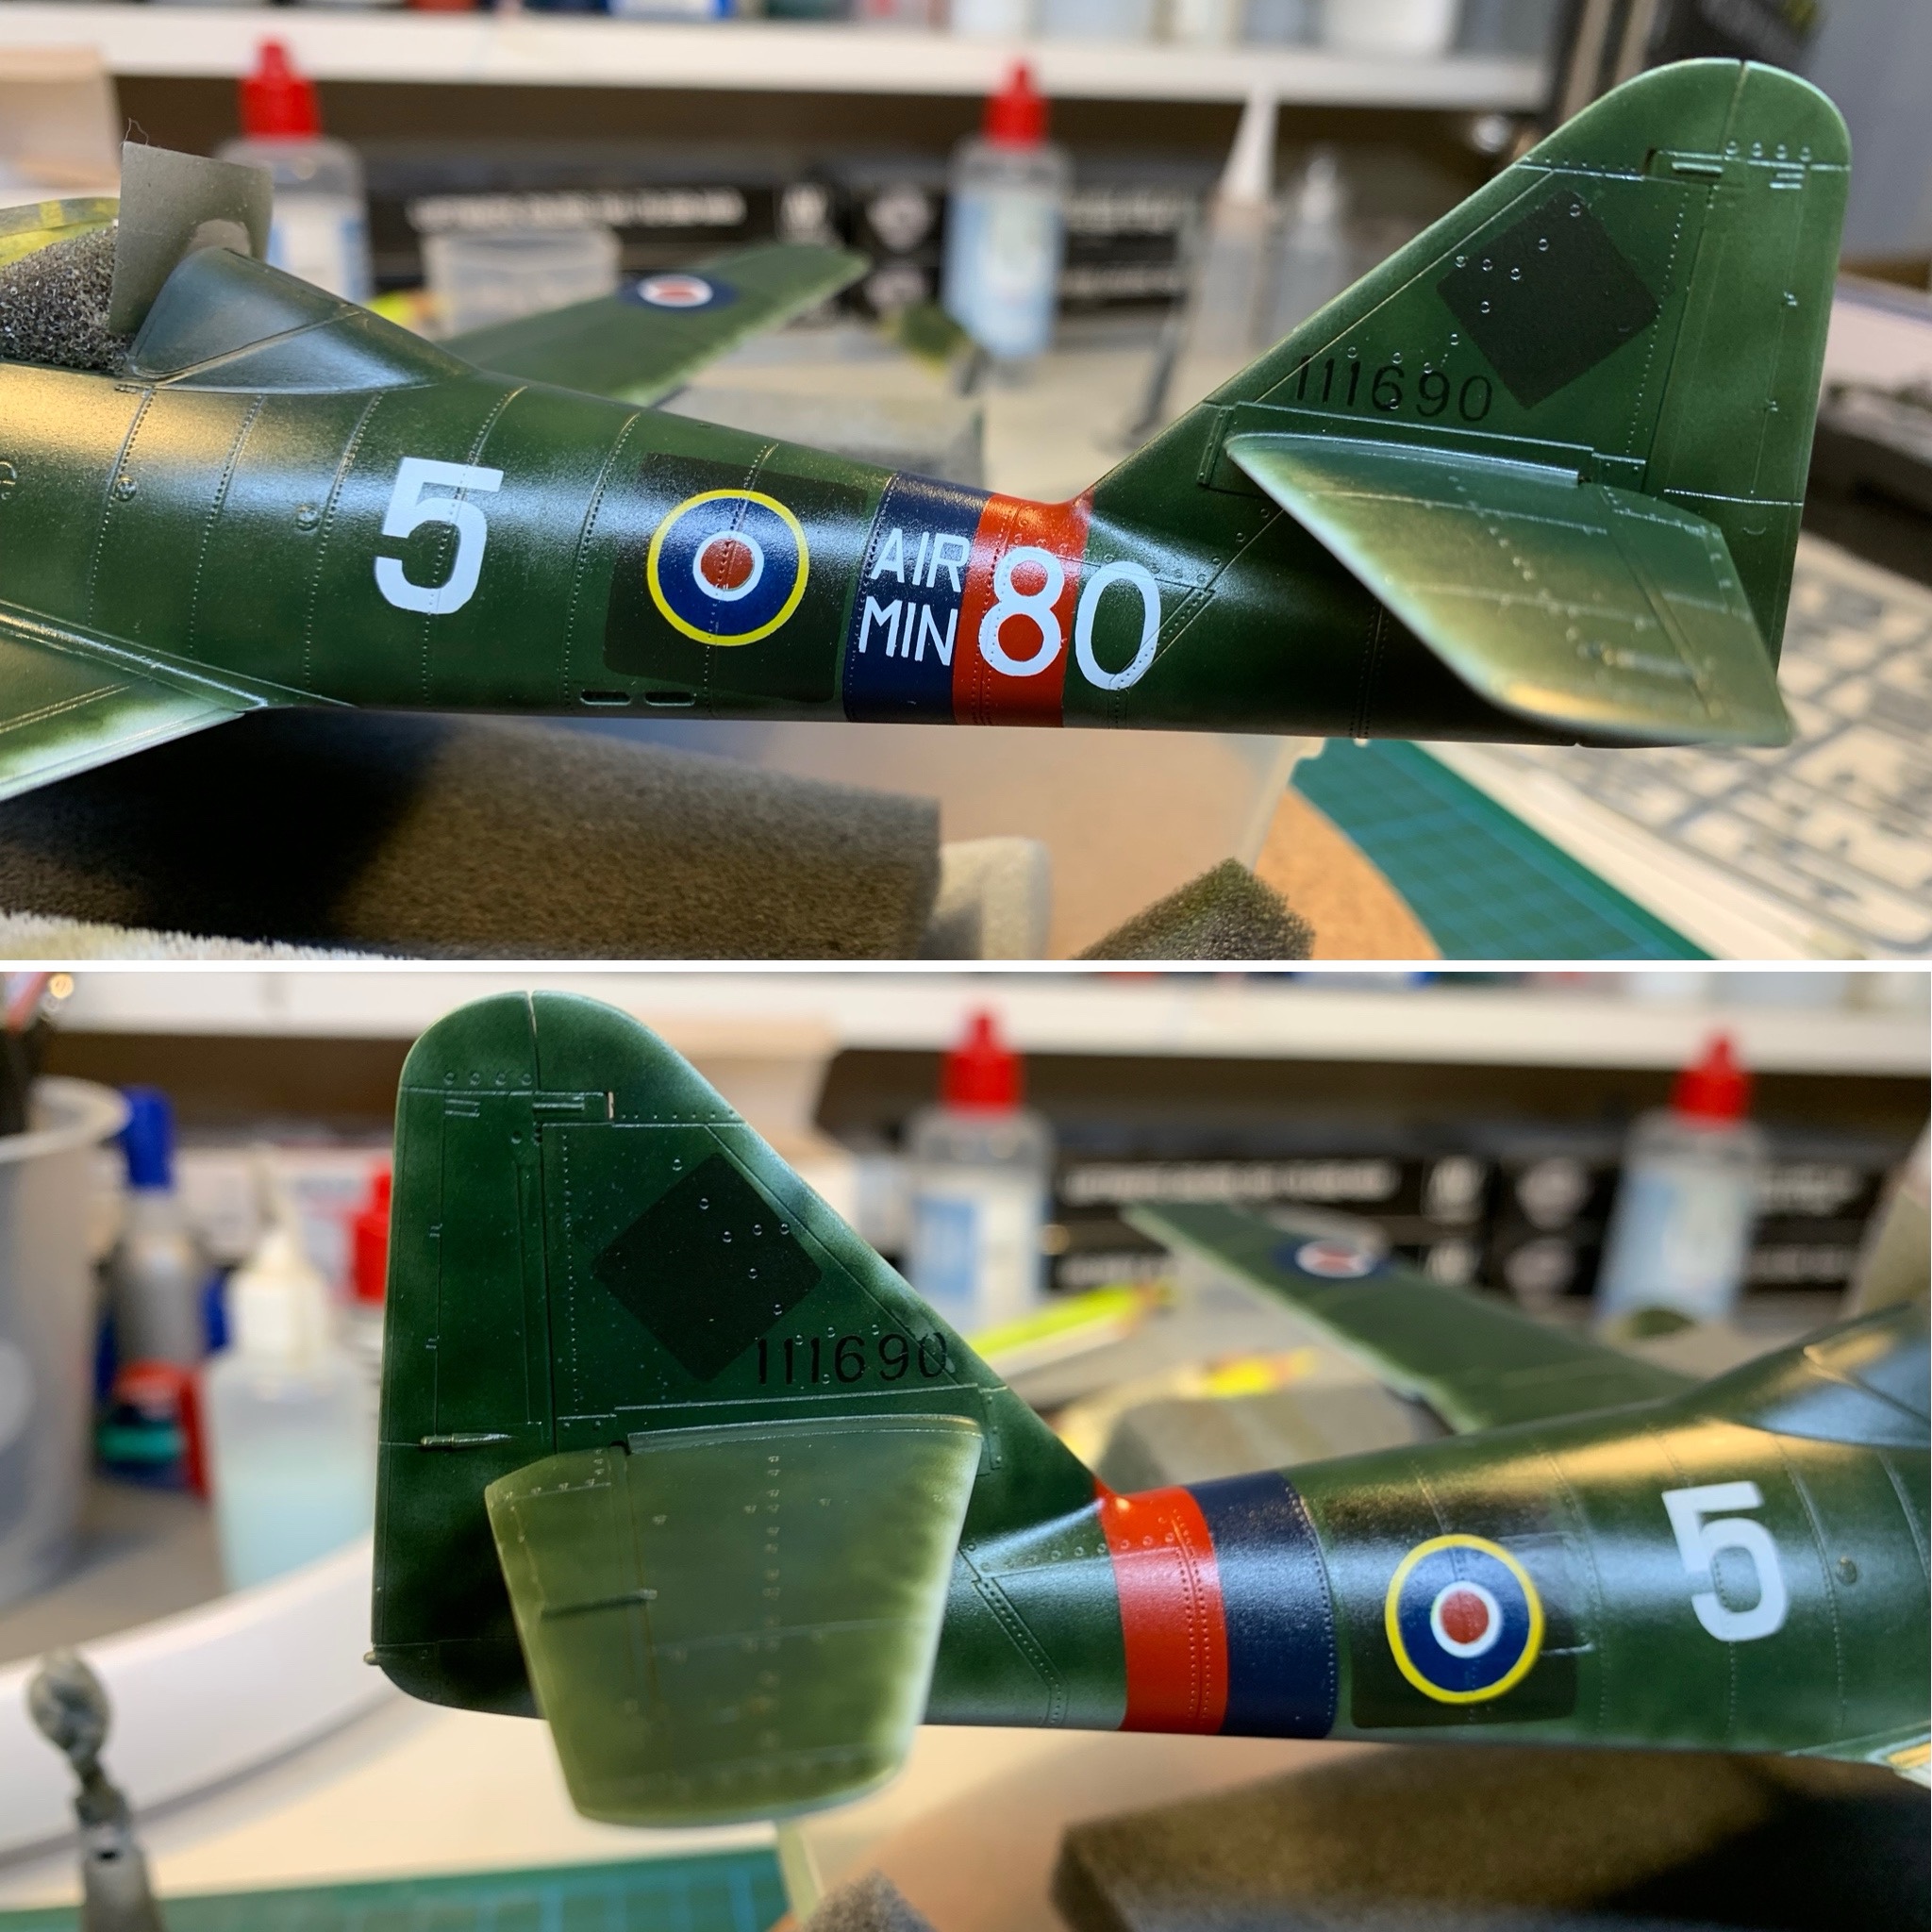


Initially, I wasn’t going to add any of the stencil decals as they cannot be seen in the reference photos. However, I changed my mind and added most as I couldn’t think of a reason they wouldn’t be present on the real thing.
Weathering
I didn’t do much weathering beyond the usual process of a little bit of wash to accent some panels and give the model an overall used look. I applied the wash to to the lower and upper surfaces but it made practically no difference on the topside as the green was quite dark anyway. I did make the control surface lines more obvious though with a denser wash.
Click on any of the images below to scroll through the gallery.


Finish
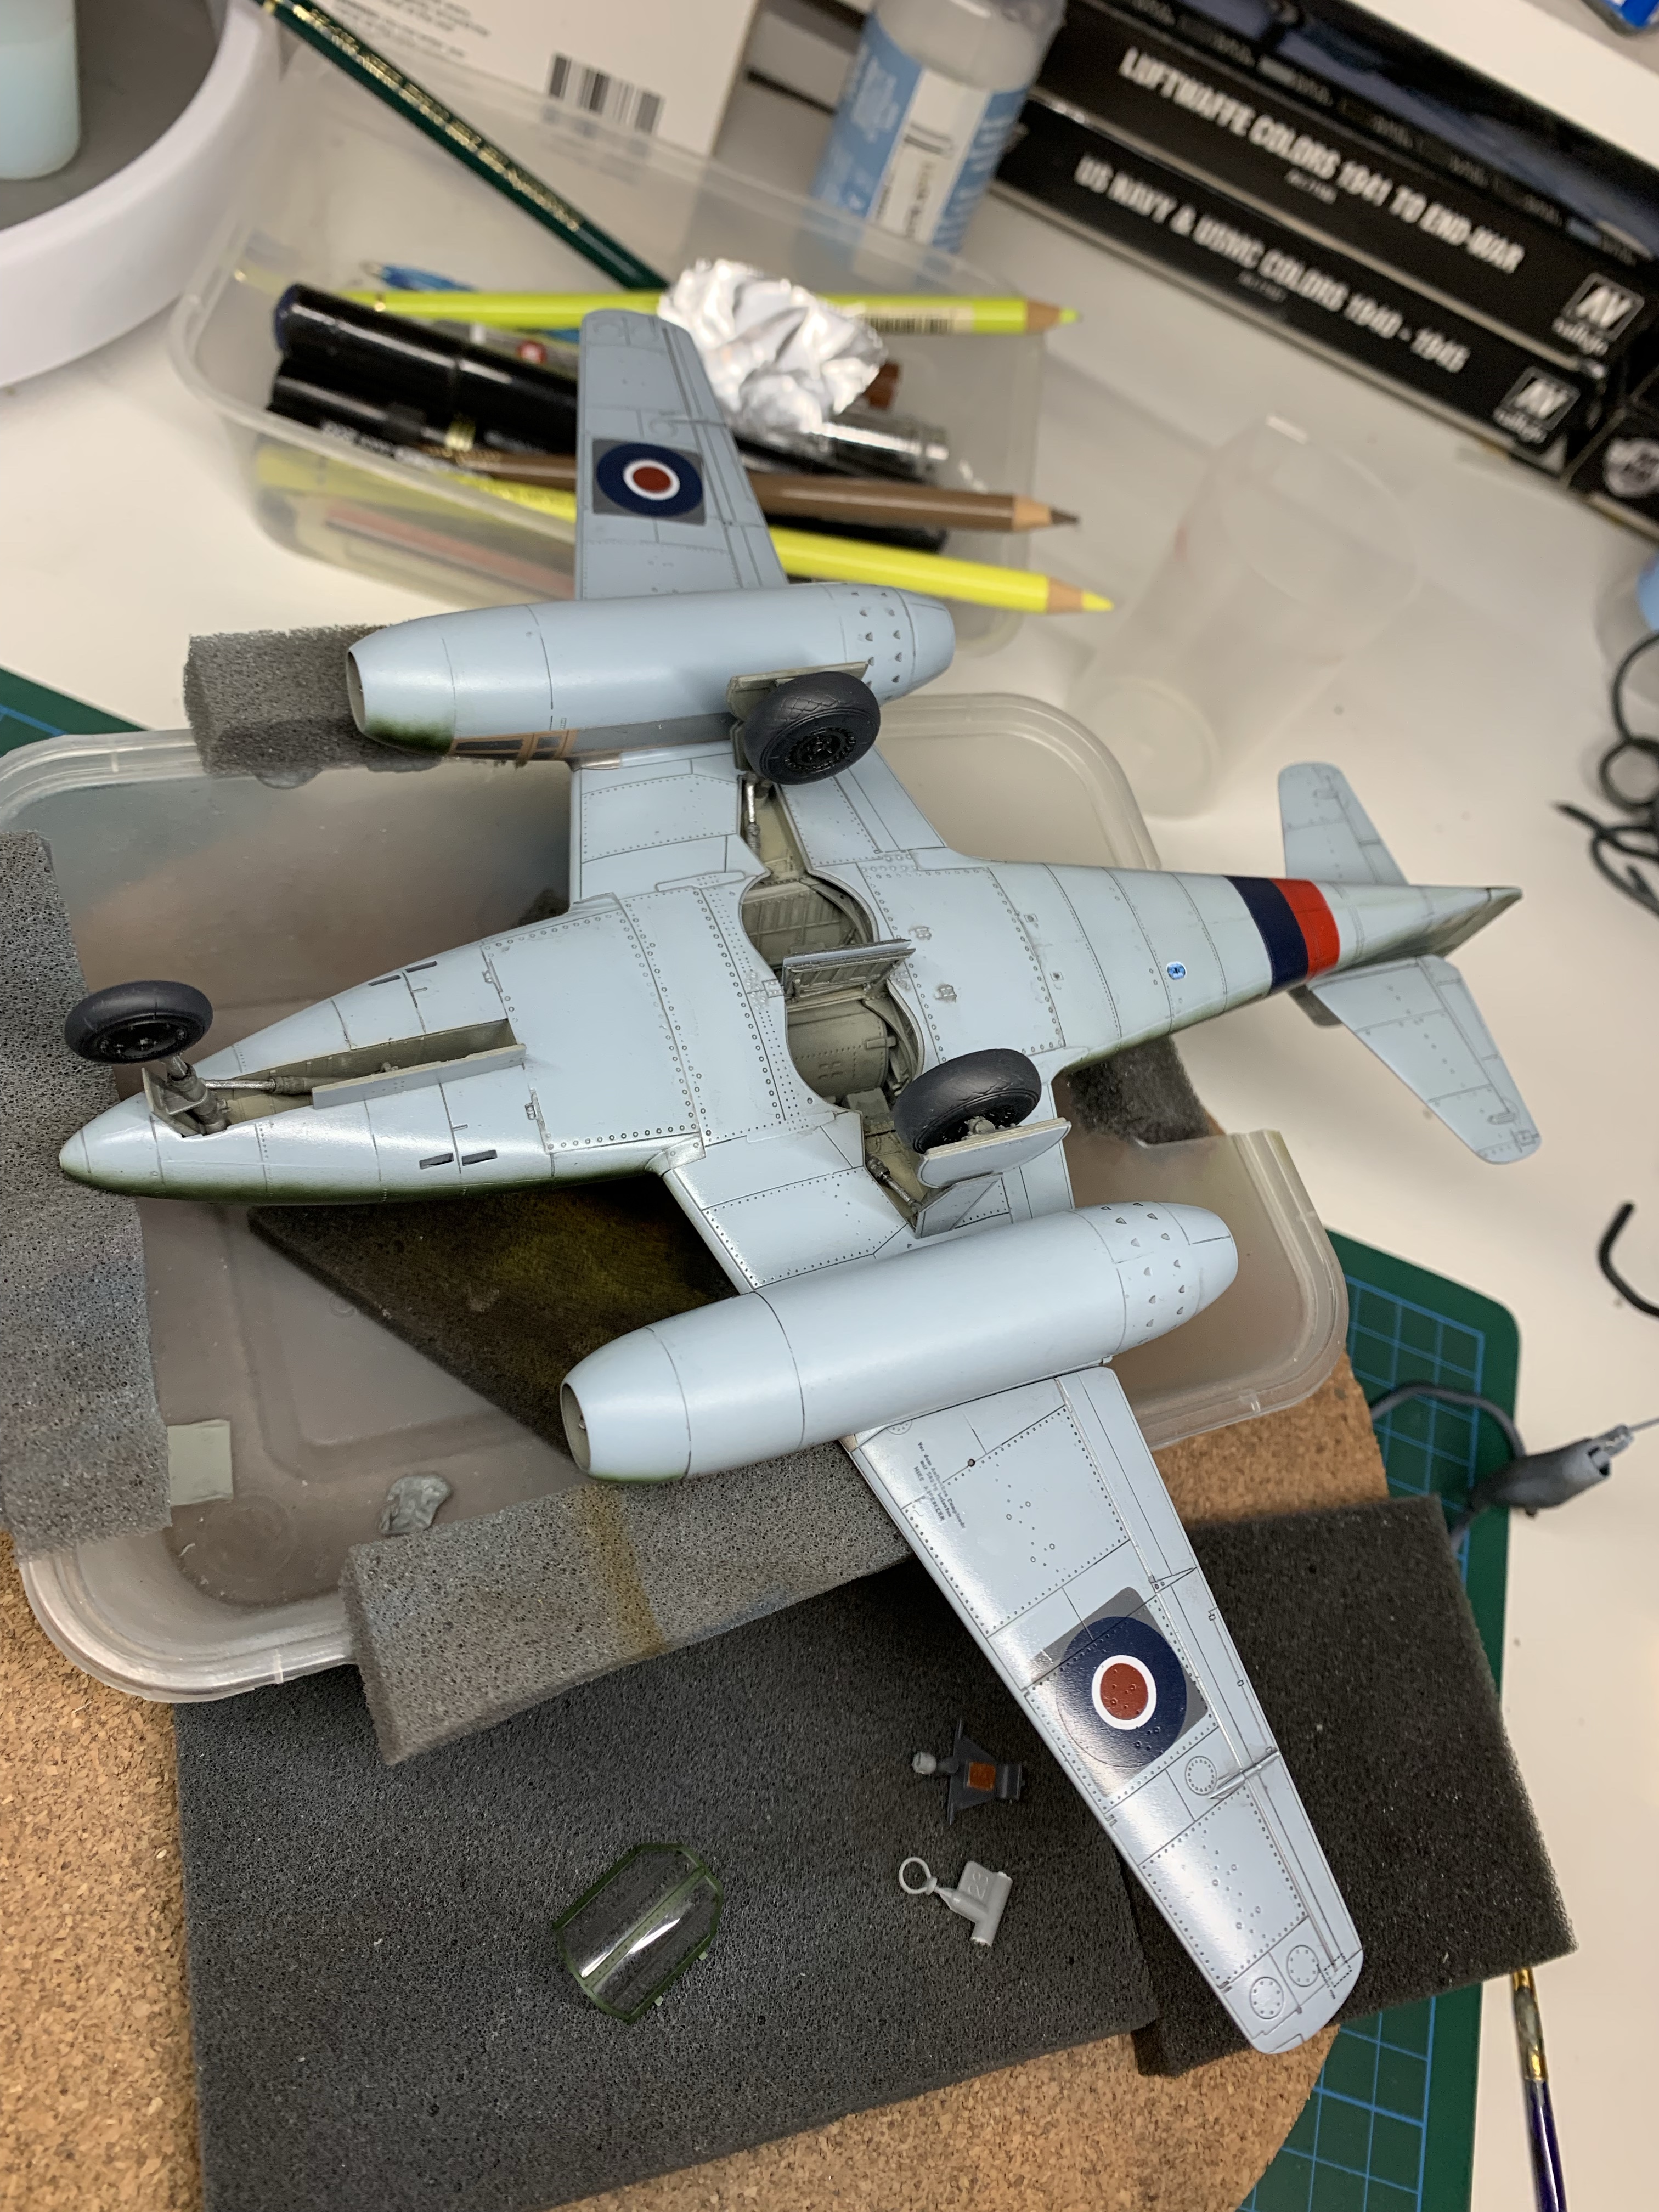
Adding the undercarriage is always a little bit of a fraught moment on a tricycle-gear model; will it be a tail sitter…? No, the kit-supplied metal weight which forms part of the cockpit assembly did its job and the model sits on all three of its wheels. Just.
I added the engines and found they didn’t quite fit as well as I remembered from earlier in the build. The port engine rear seam required a little help to clean up, which in turn required a little paint repair. Otherwise, with the addition of the canopy and removal of masks this one was done.
Click on any of the images below to scroll through the gallery.


I’ve built a couple of Hobby Boss models now, and found them to be of good quality and very user-friendly. This one was no exception and I think does build into a very nice representation of a Me262A-1.
Gallery


References and Sources
The following websites were most useful in gathering information and images for this piece.
- https://acesflyinghigh.wordpress.com/2019/08/17/the-survivors-messerschmitt-me-262-germanys-jet-fighter/
- https://www.silverhawkauthor.com/post/german-luftwaffe-warplanes-1939-1945-messerschmitt-me-262
- https://www.awm.gov.au/collection/C111055
- https://www.vintagewings.ca/stories/wtf
If you are interested in following the build as it unfolded, as well as the research that led to the choice of markings, the full build diary is logged in the Britmodeller Aircraft WIP Section.
I really hope you enjoyed this article!
Making-History is a labour of love for me, but it’s becoming more expensive and time consuming. I’m loath to put advertising on it, so if you feel inclined please consider making a donation to help cover site hosting costs as well as the time it takes to produce its content. All donations get a receipt with my thanks.
Mark.
Make a one-time donation
Make a monthly donation
Make a yearly donation
Choose an amount
Or enter a custom amount
Your contribution is very much appreciated and 100% of it will be recycled back into Making-History.
Your contribution is appreciated.
Your contribution is appreciated.
Copyright ©2024
This article, its text, and photos of the model is my original work and is protected by copyright in its entirety, except where noted. All research sources are listed in the References and Sources section above, including photos from official sources. All other images and quoted content were sourced from the internet and are used here under protection of fair-use. Any copyrighted content will be happily removed and/or credited forthwith upon request by its rightful owner.


Leave a comment