
Dark
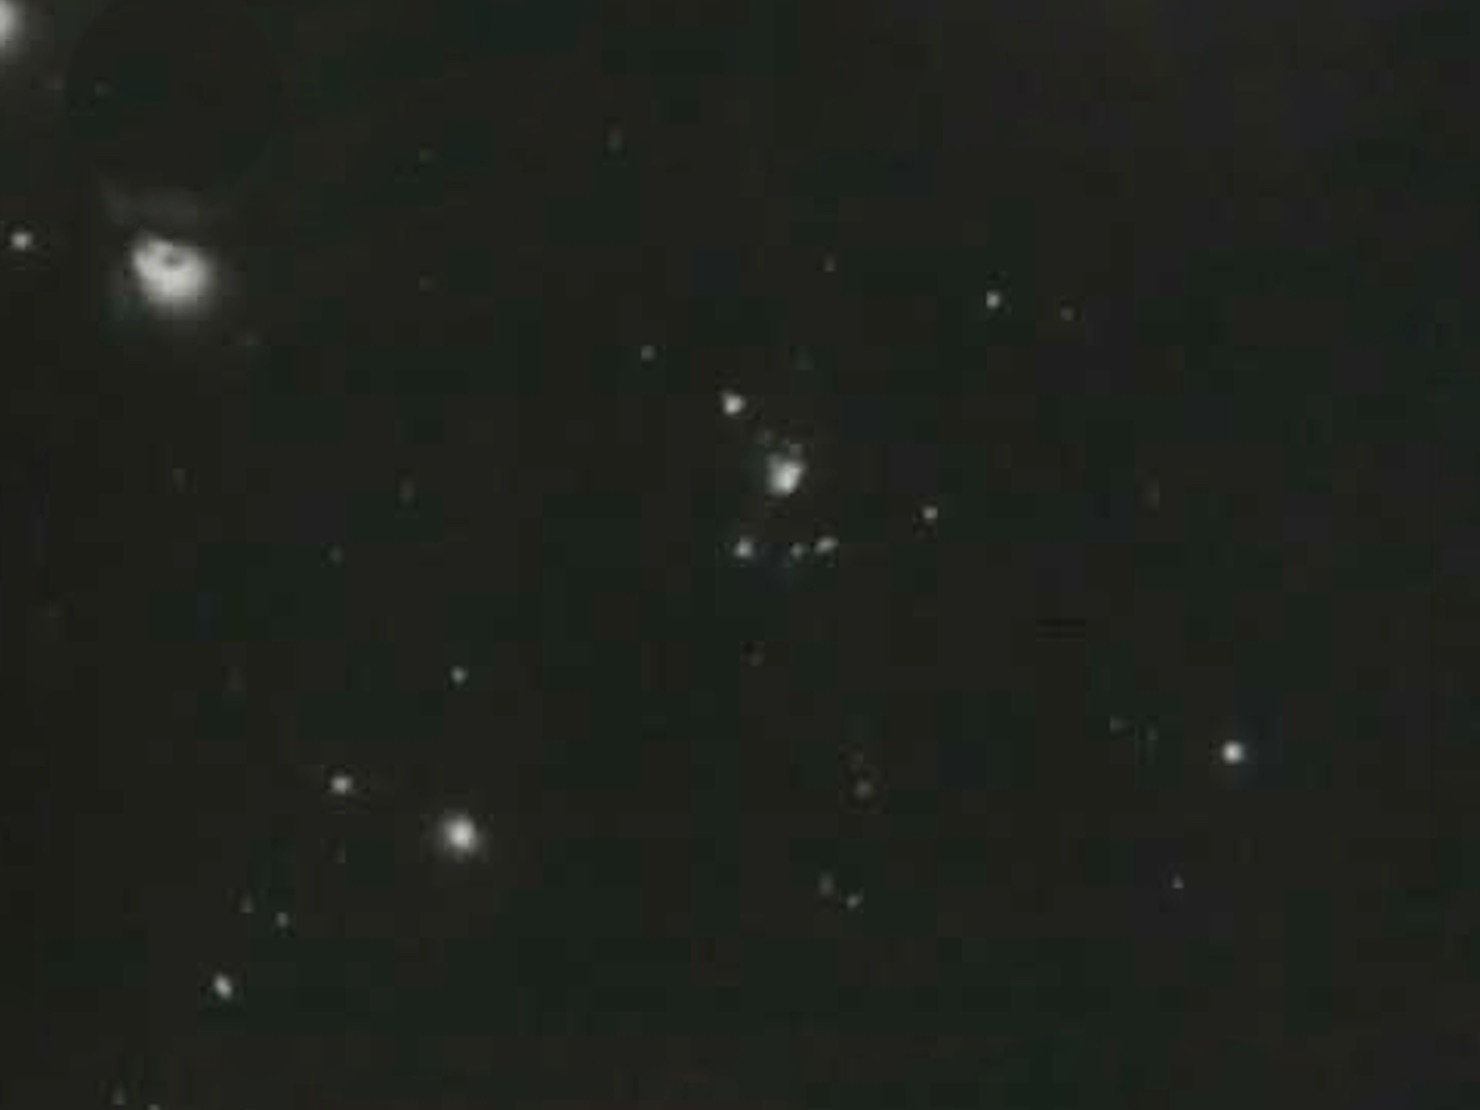
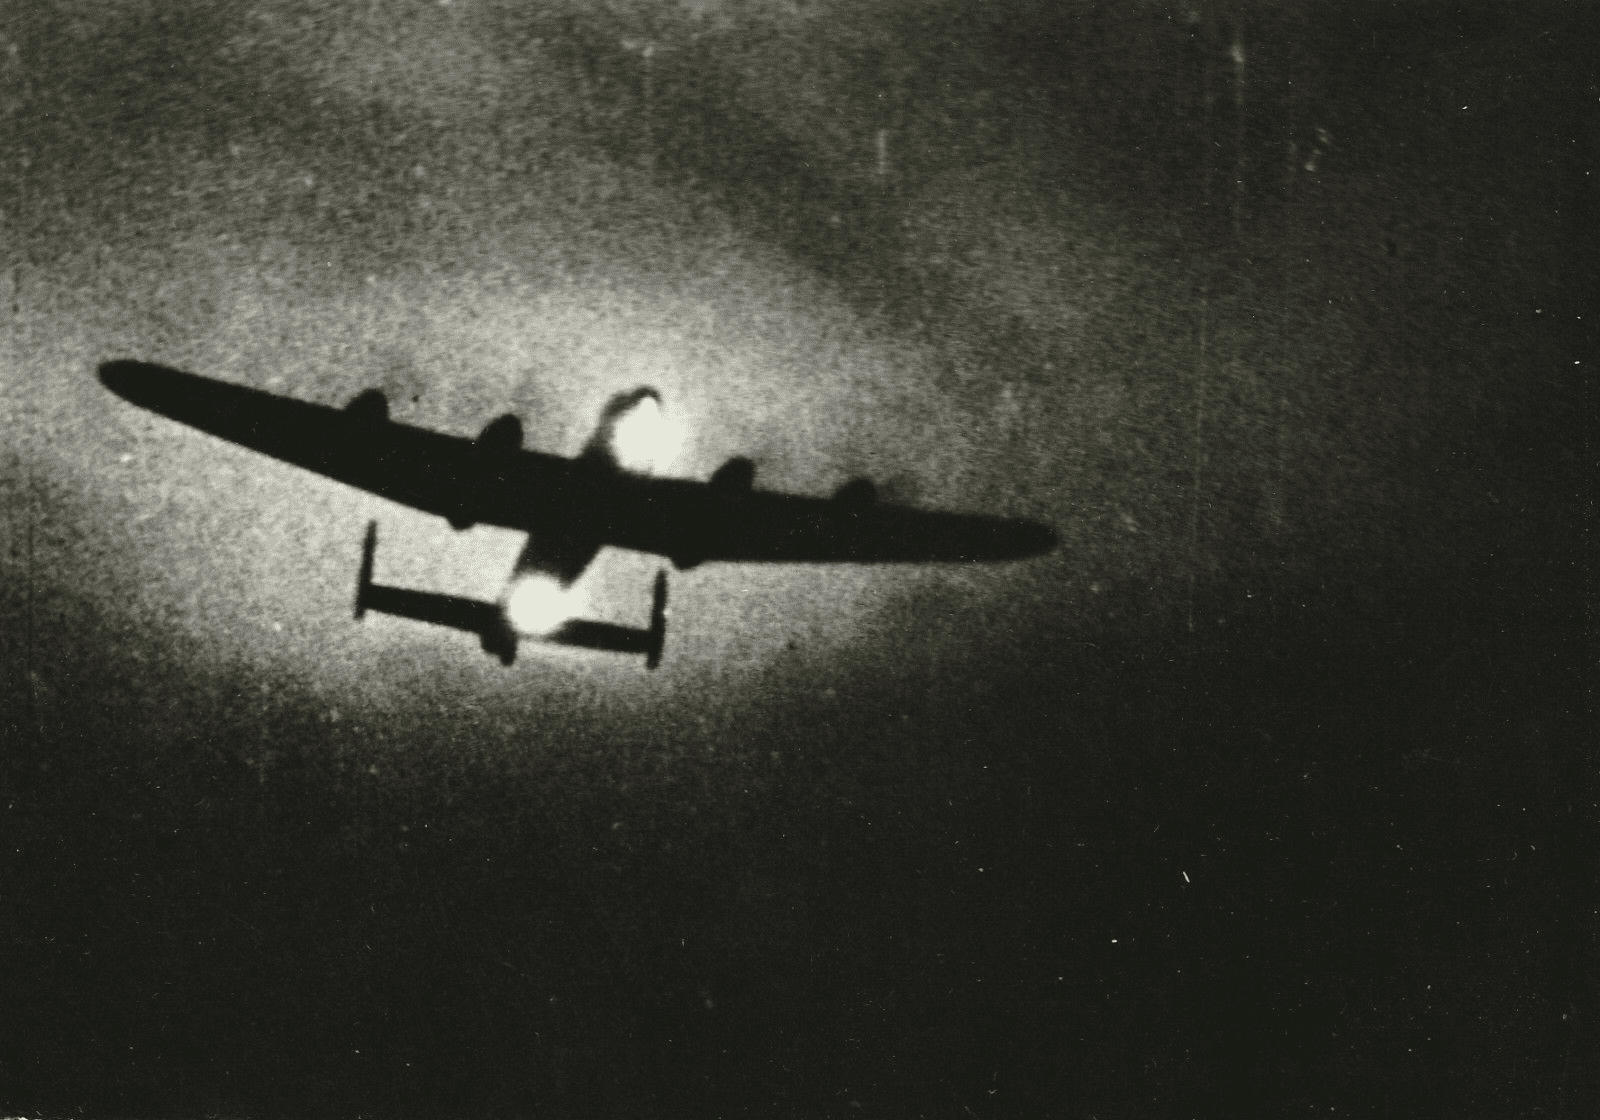
Anyone who has flown on a commercial jet at night will know that it is dark, very dark outside. The moon and stars are clear (assuming the cabin lights are dimmed and one’s near neighbour is not using their reading light, or watching a movie or otherwise throwing light around) and below occasional towns or cites throw up isolated islands of orange light. Sometimes, rarely, you might see another aircraft on its own journey; sometimes parallel to your own, sometimes crossing and rarest of all, closing and then passing on a reciprocal heading at tremendous closing speed.
Imagine having to fight in that environment. Dark – an absolute inky dark except for those nights when the moon was present, something which always favoured the hunters, on both sides – sometimes turbulent, cold, with the constant droning accompaniment of powerful piston engines not more than three meters from your head. And the constant threat of sudden, catastrophic, frequently if not usually fatal, explosive violence. At any moment.
And you have a job to do, find your adversary before he finds you. The rear gunner on a Lancaster, “Tail End Charlie” peering intently into the night looking for the slightest light, or reflection, or exhaust flame, or anything at all that might give him a second’s warning – even half a second might be enough – and fire his four Browning .303 Mk.II machine guns before the other fellow shoots him and mates down.
On the other side of the night fighting duel, a Luftwaffe Radar Operator, one of two crew in a Ju88, Bf110 or He219 would be staring intently not outside – what was there to see? – but at the twin circular cathode-ray screens in front of you to find what you cannot find through the surrounding plexiglass, an RAF four-engined heavy bomber or one of their night fighting guardians – perhaps a Mosquito, or a Beaufighter; who are in their turn looking for you before you can find them.
How do you see in the dark?
Lichtenstein
There were several variants of the Lichtenstein radar, with the primary purpose being to provide night-fighting capability for German aircraft. It allowed pilots to detect the presence of enemy aircraft in low-light conditions, track their movements, and engage them in combat.
Liechtenstein’s maximum range was between 7 and 8km and it was oriented in a slightly depressed angle so that the ground would be shown at end of the screen, even at operational altitudes. Liechtenstein operated in UHF and VHF frequency bands, with later versions using Pulse-Doppler technology (which gave it the ability to track moving objects, obviously of great benefit in this application).
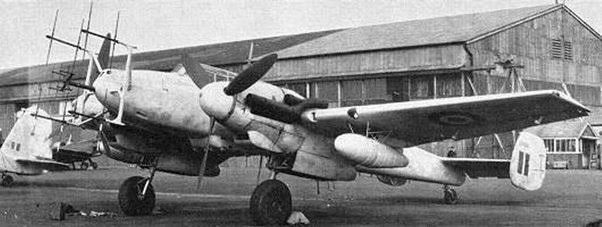
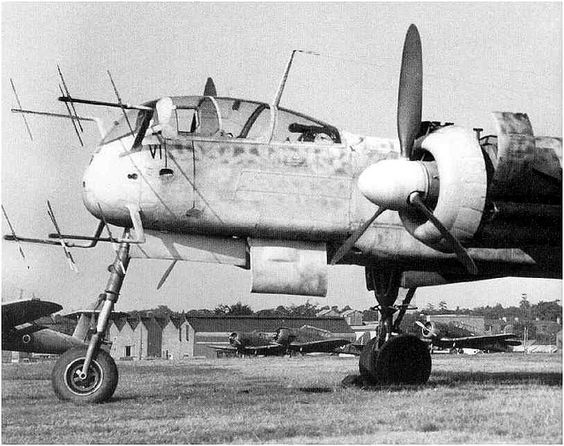
The Liechtenstein radar was installed in various night fighter aircraft, including the Heinkel He 219, Junkers Ju 88, and others. The radar antennas were typically housed in nose radomes or other aerodynamic fairings on the aircraft.
While the Lichtenstein radar was an advanced technology and significantly improved the Luftwaffe’s night fighting capability, it faced challenges. It was vulnerability to jamming and required constant updates and improvements to counter the evolution of Allied electronic countermeasures. Different versions were developed, from 1941’s B/C version through to the late war SN-5, as well as Neptune and the final version FuG240 Berlin, all designed to address technological challenges, to improve its performance, and of course to adapt to evolving air warfare conditions.
Operation
The Liechtenstein Radar installed in the twin engine night fighters, the Ju88, Bf110 and the He219 were operated by a separate crew member. The pilot was responsible for flying and the the weapons while the radar operator was responsible for the radios, navigation and targeting. The system utilised cathode tubes, initially just one and eventually three, to indicate the range, bearing and altitude of the target.
The photo below, taken in the cockpit of a Bf110G shows the layout of the various compnents which comprise the radar as well as navigational and radios. The two screens used by the operator to identify targets are outlined in red.
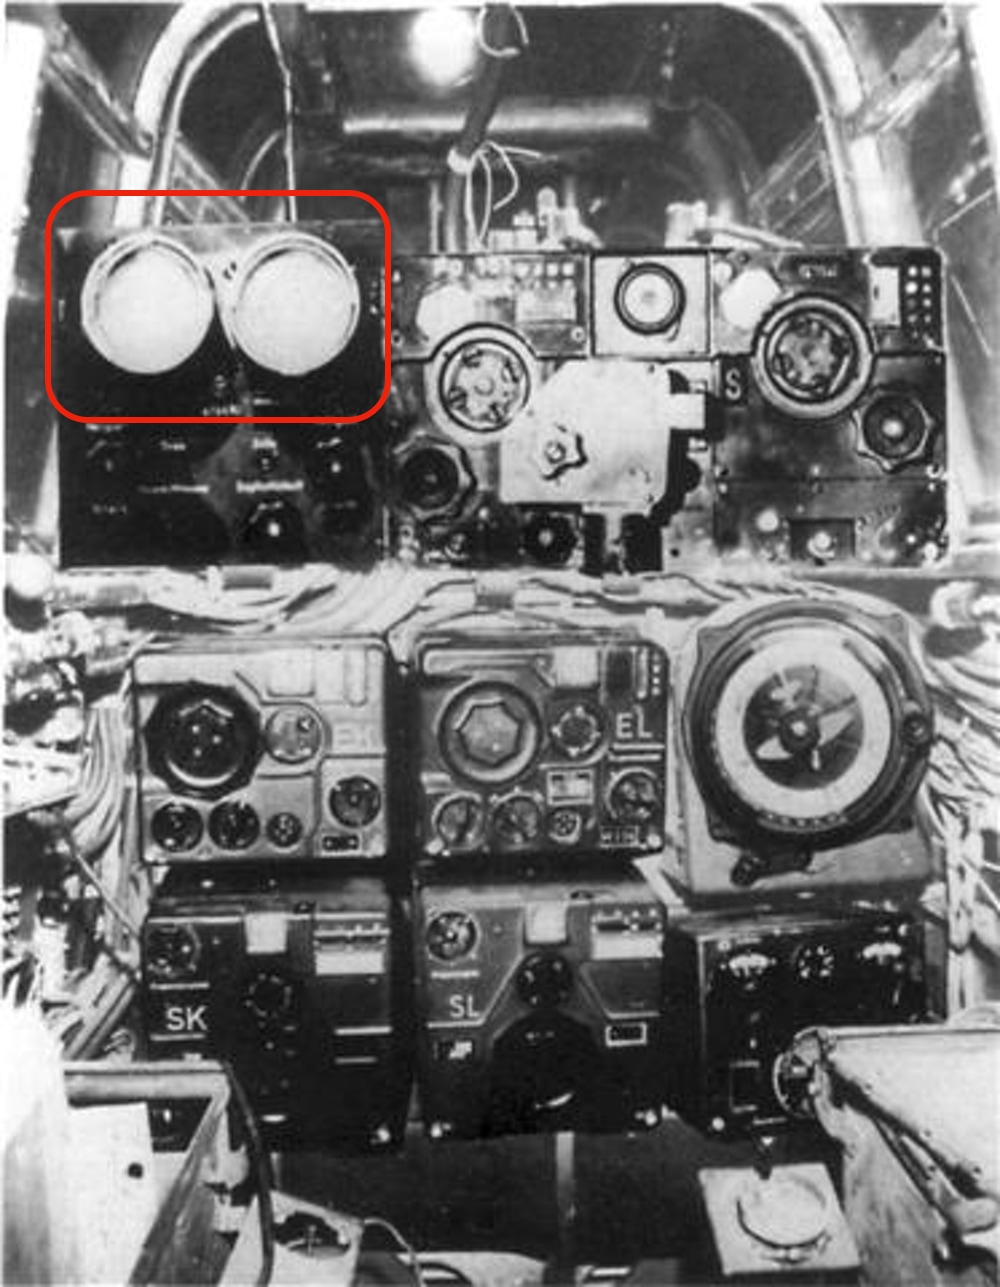
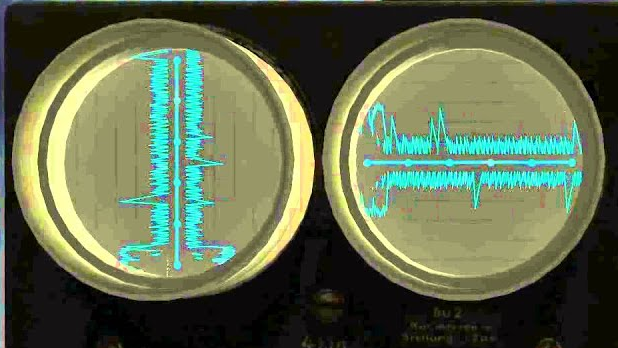
The Operator was required to interpret the images projected on his screens. The left showed the relative altitude of the target while the right showed the range and relative bearing. Ground clutter can be seen at the bottom of the left screen, and left side of the right screen. Targets at identified by the peaks while range is indicated by the relative position of the peaks to the dots on the centre line, each being 1km. A peak which is greater on one side than the other indicates the target is to that side, the same principle applies the the altitude indicator.
Remarkably, restored examples of these radars still exist. The video below, while 12 minutes long and including a couple of ads, is well worth watching to gain a full understanding of the operation and efficacy of the Lichtenstein.
Afterword
Being in the dark, whether literally or figuratively, is in itself disconcerting. Being in the dark in both those senses with the stakes as high as they were for the men that flew those nights would, I think, laugh at “disconcerting” as an descriptor.
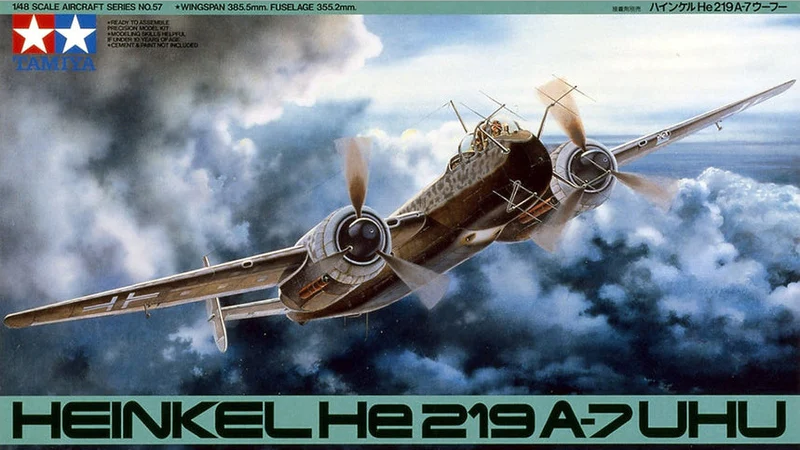
Tamiya’s 1/48 He219A-7 UHU
The next model in my ongoing series of captured airframes is the He219. This series will soon have its own page but in the mean time the others can be found here: Ta152, Me410, Me262
I acquired my copy of this one for not a lot of money as there was a part missing, one which I was confident of being able to make myself without too much trouble. The kit has a good reputation and it’s one I have wanted to build for some time.
Build
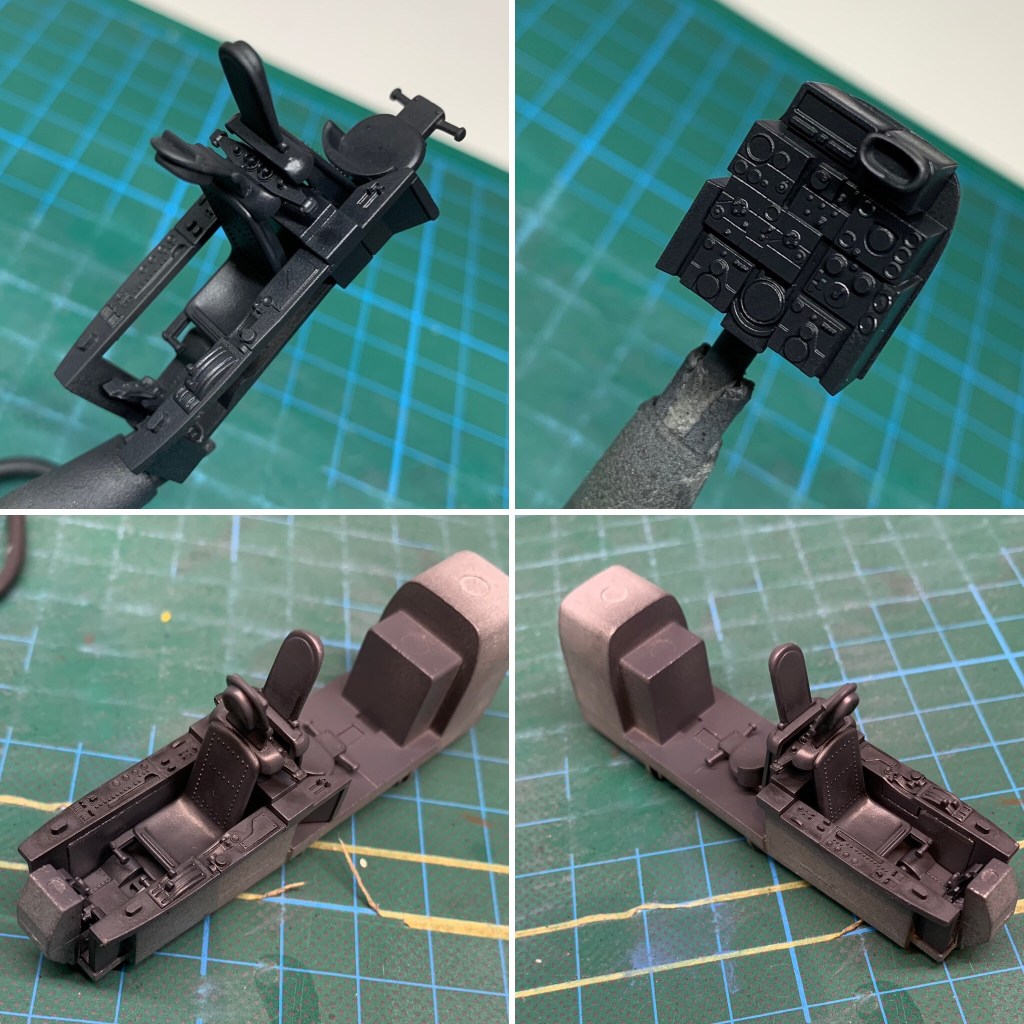
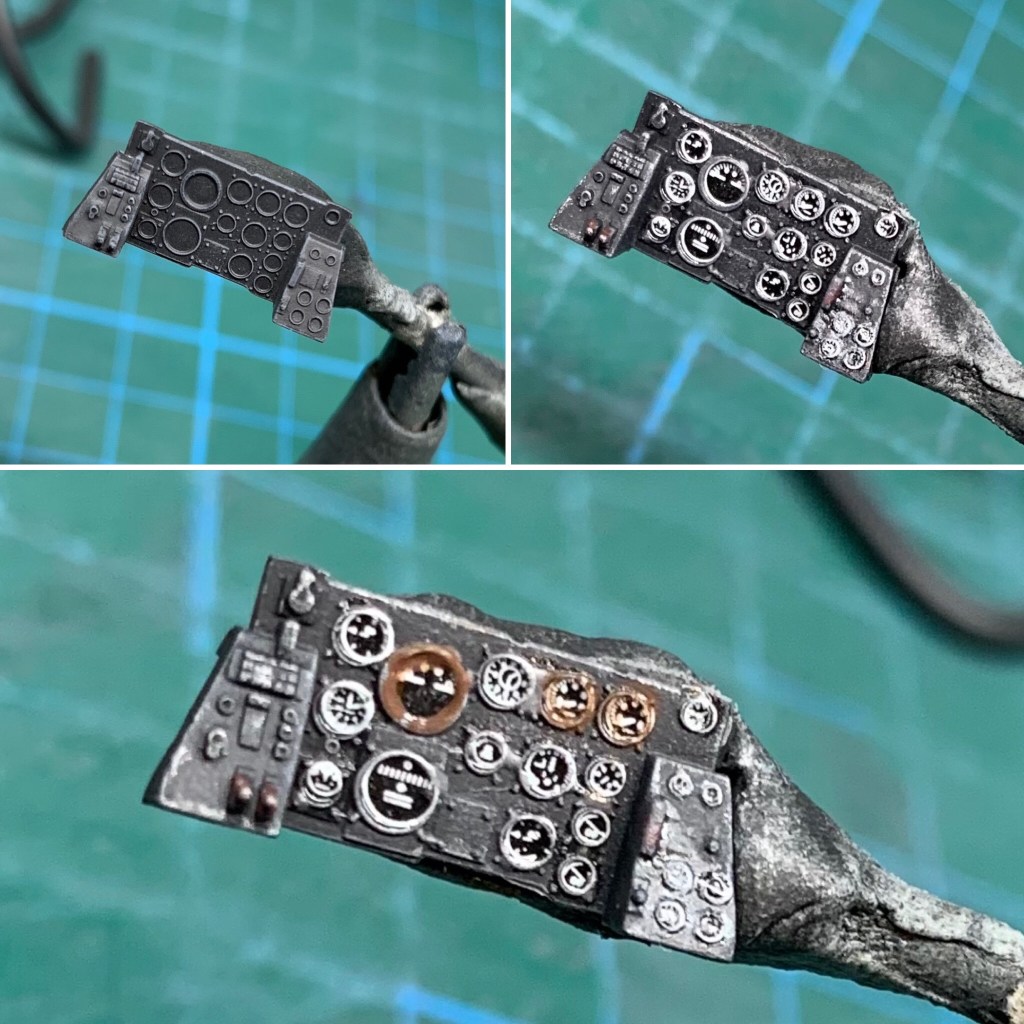
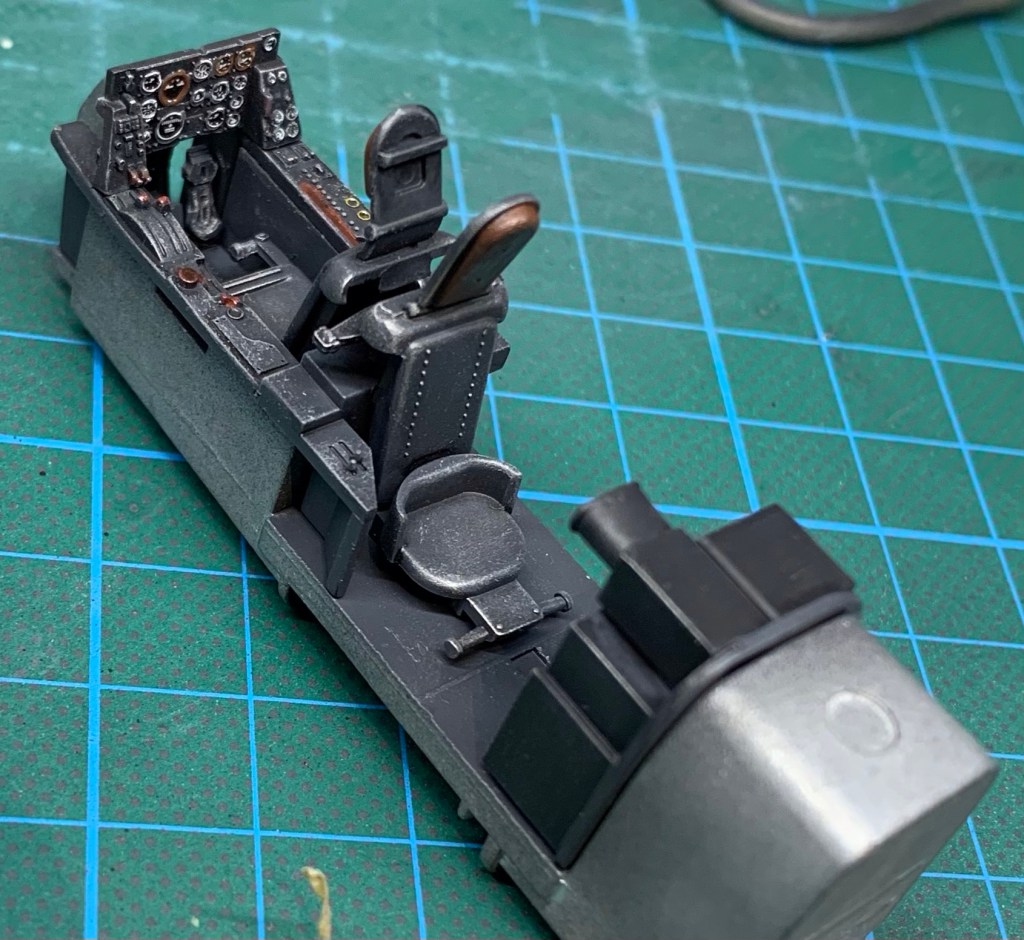
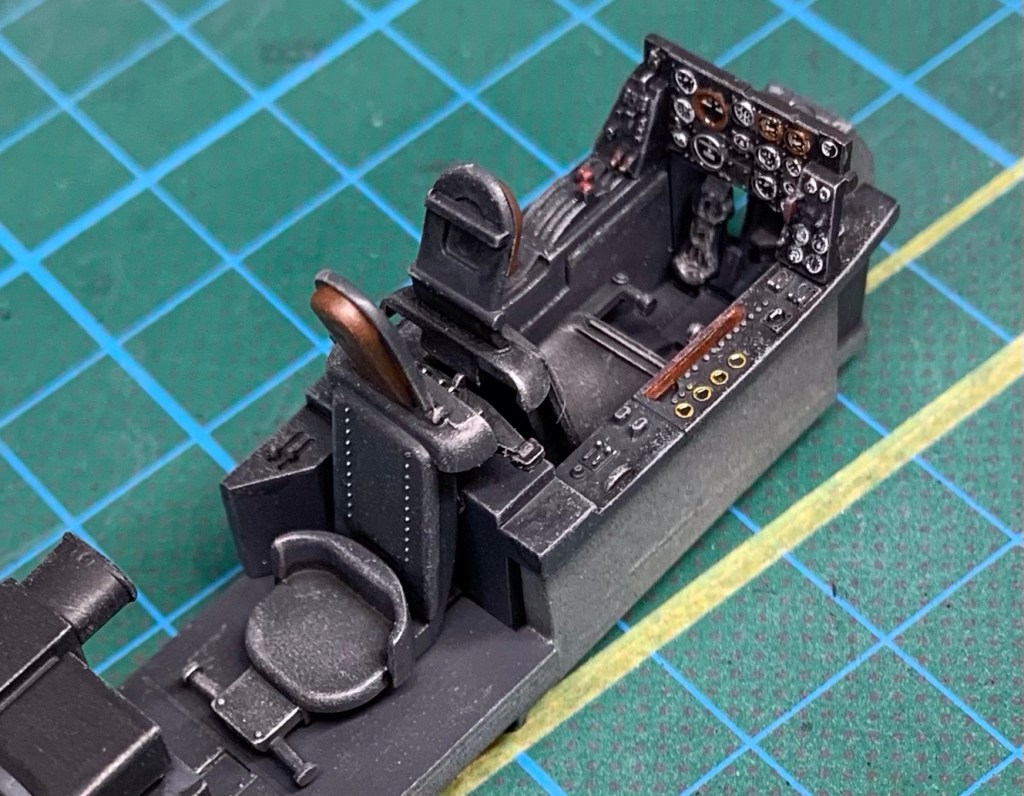
As usual, we start in the cockpit. I took my time with the assembly and then used my usual process of applying a black base coat followed by the correct colour, in this case RLM 66 and then used a lighter grey dry brushed to pick out the details. I picked out some details working from photos of the He219 in the Smithsonian on of the dials and other instruments. As I loathe decal seatbelts, I took a look in the spares box and found some Luftwaffe seatbelts to add to the otherwise finished cockpit.
One of the innovations in this kit was the use of a metal part to both base the cockpit assembly upon as well as provide the counterweight necessary to ensure the finished model sits on its wheels correctly. The fit of the plastic parts to the metal part was perfect.
Click on any of the images below to scroll through the gallery.


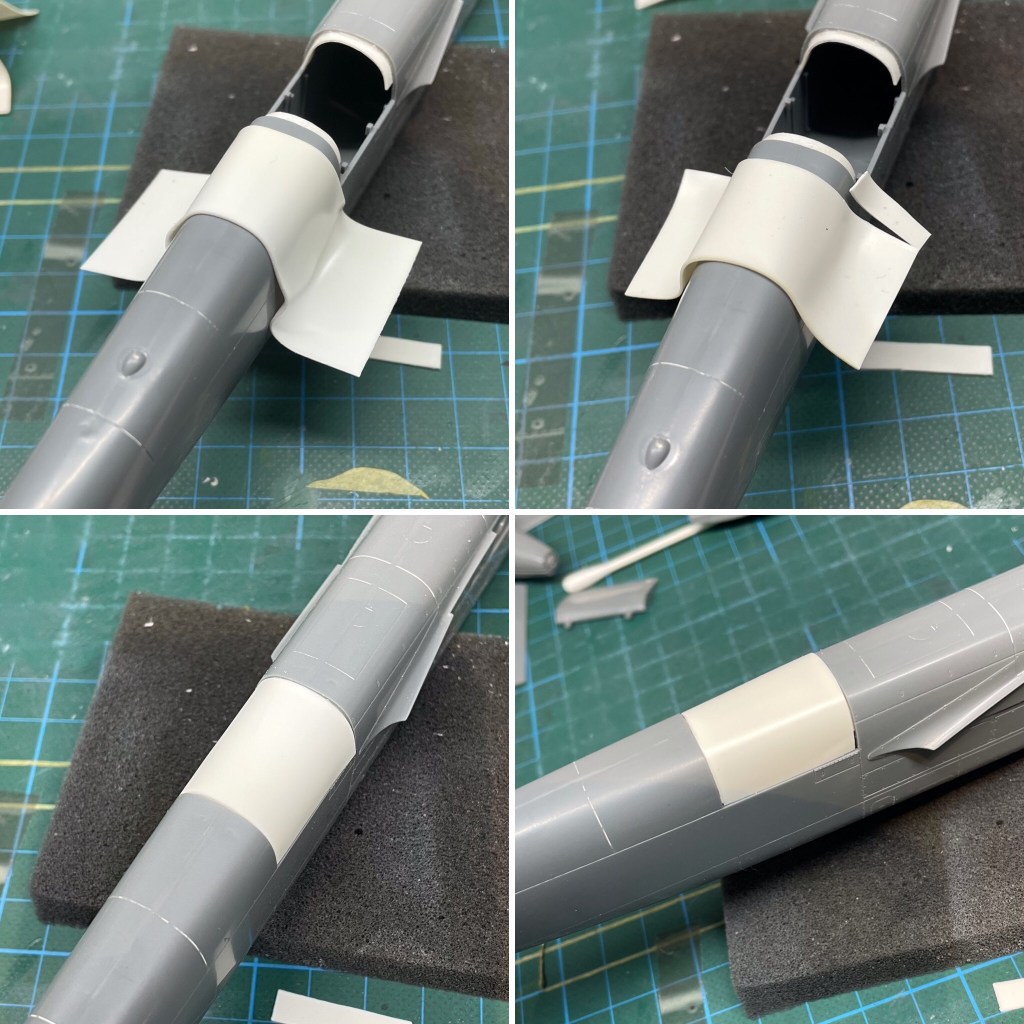

The final task worth calling out in my assembly was the fabrication of the replacement part for the missing gun covers on the upper fuselage. I took a piece of plastic card and smash-moulded it over the model’s fuselage to get the shape right, and then trimmed to achieve the best fit. It took two or three attempts to get a piece that I was happy with, but once I managed that the rest of the process was pretty much the same as fitting any other part.
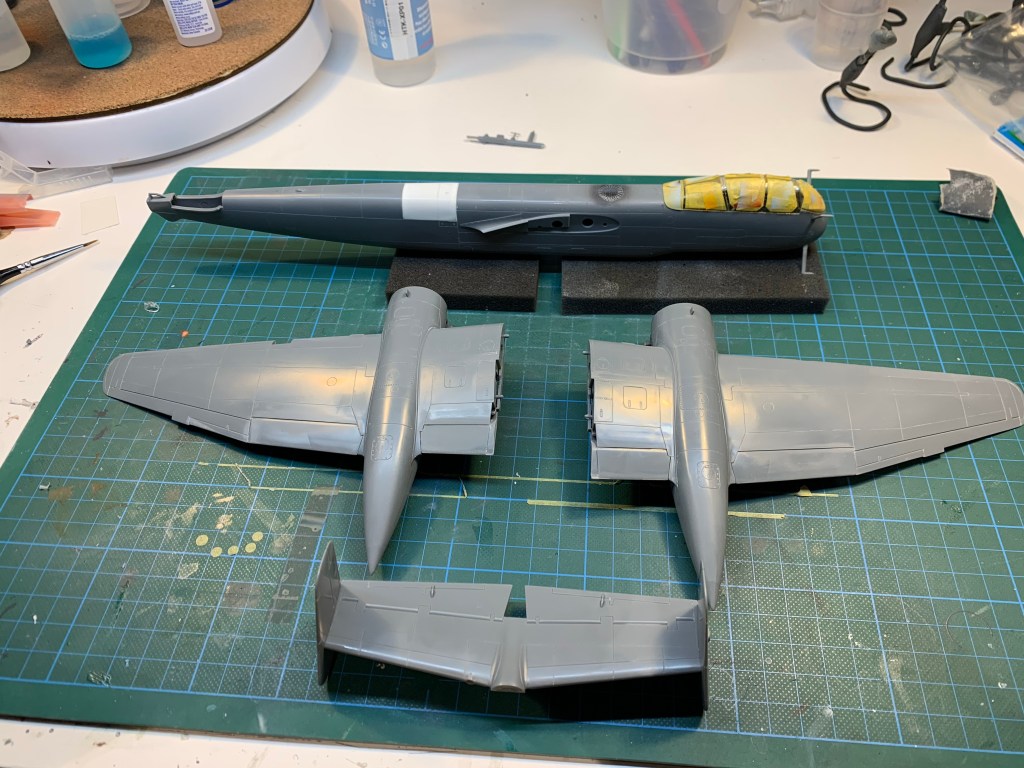
Having already test fitted the wings and a tail to the fuselage, I knew the fit was good enough such that I could paint the four subassemblies independent from each other, and the model was now ready for paint.
Paint
Fortunately, there are a great many photographs of these aircraft available on the web. Without too much trouble, I was able to find several reference photos, both generic and specific.


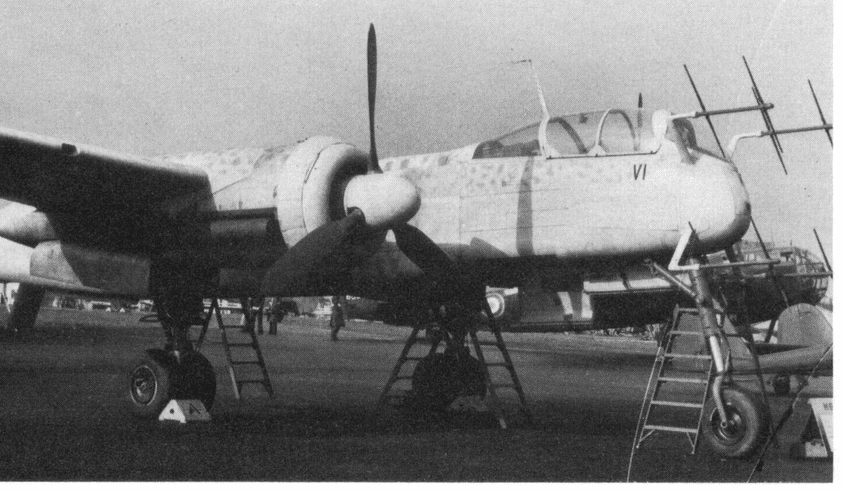
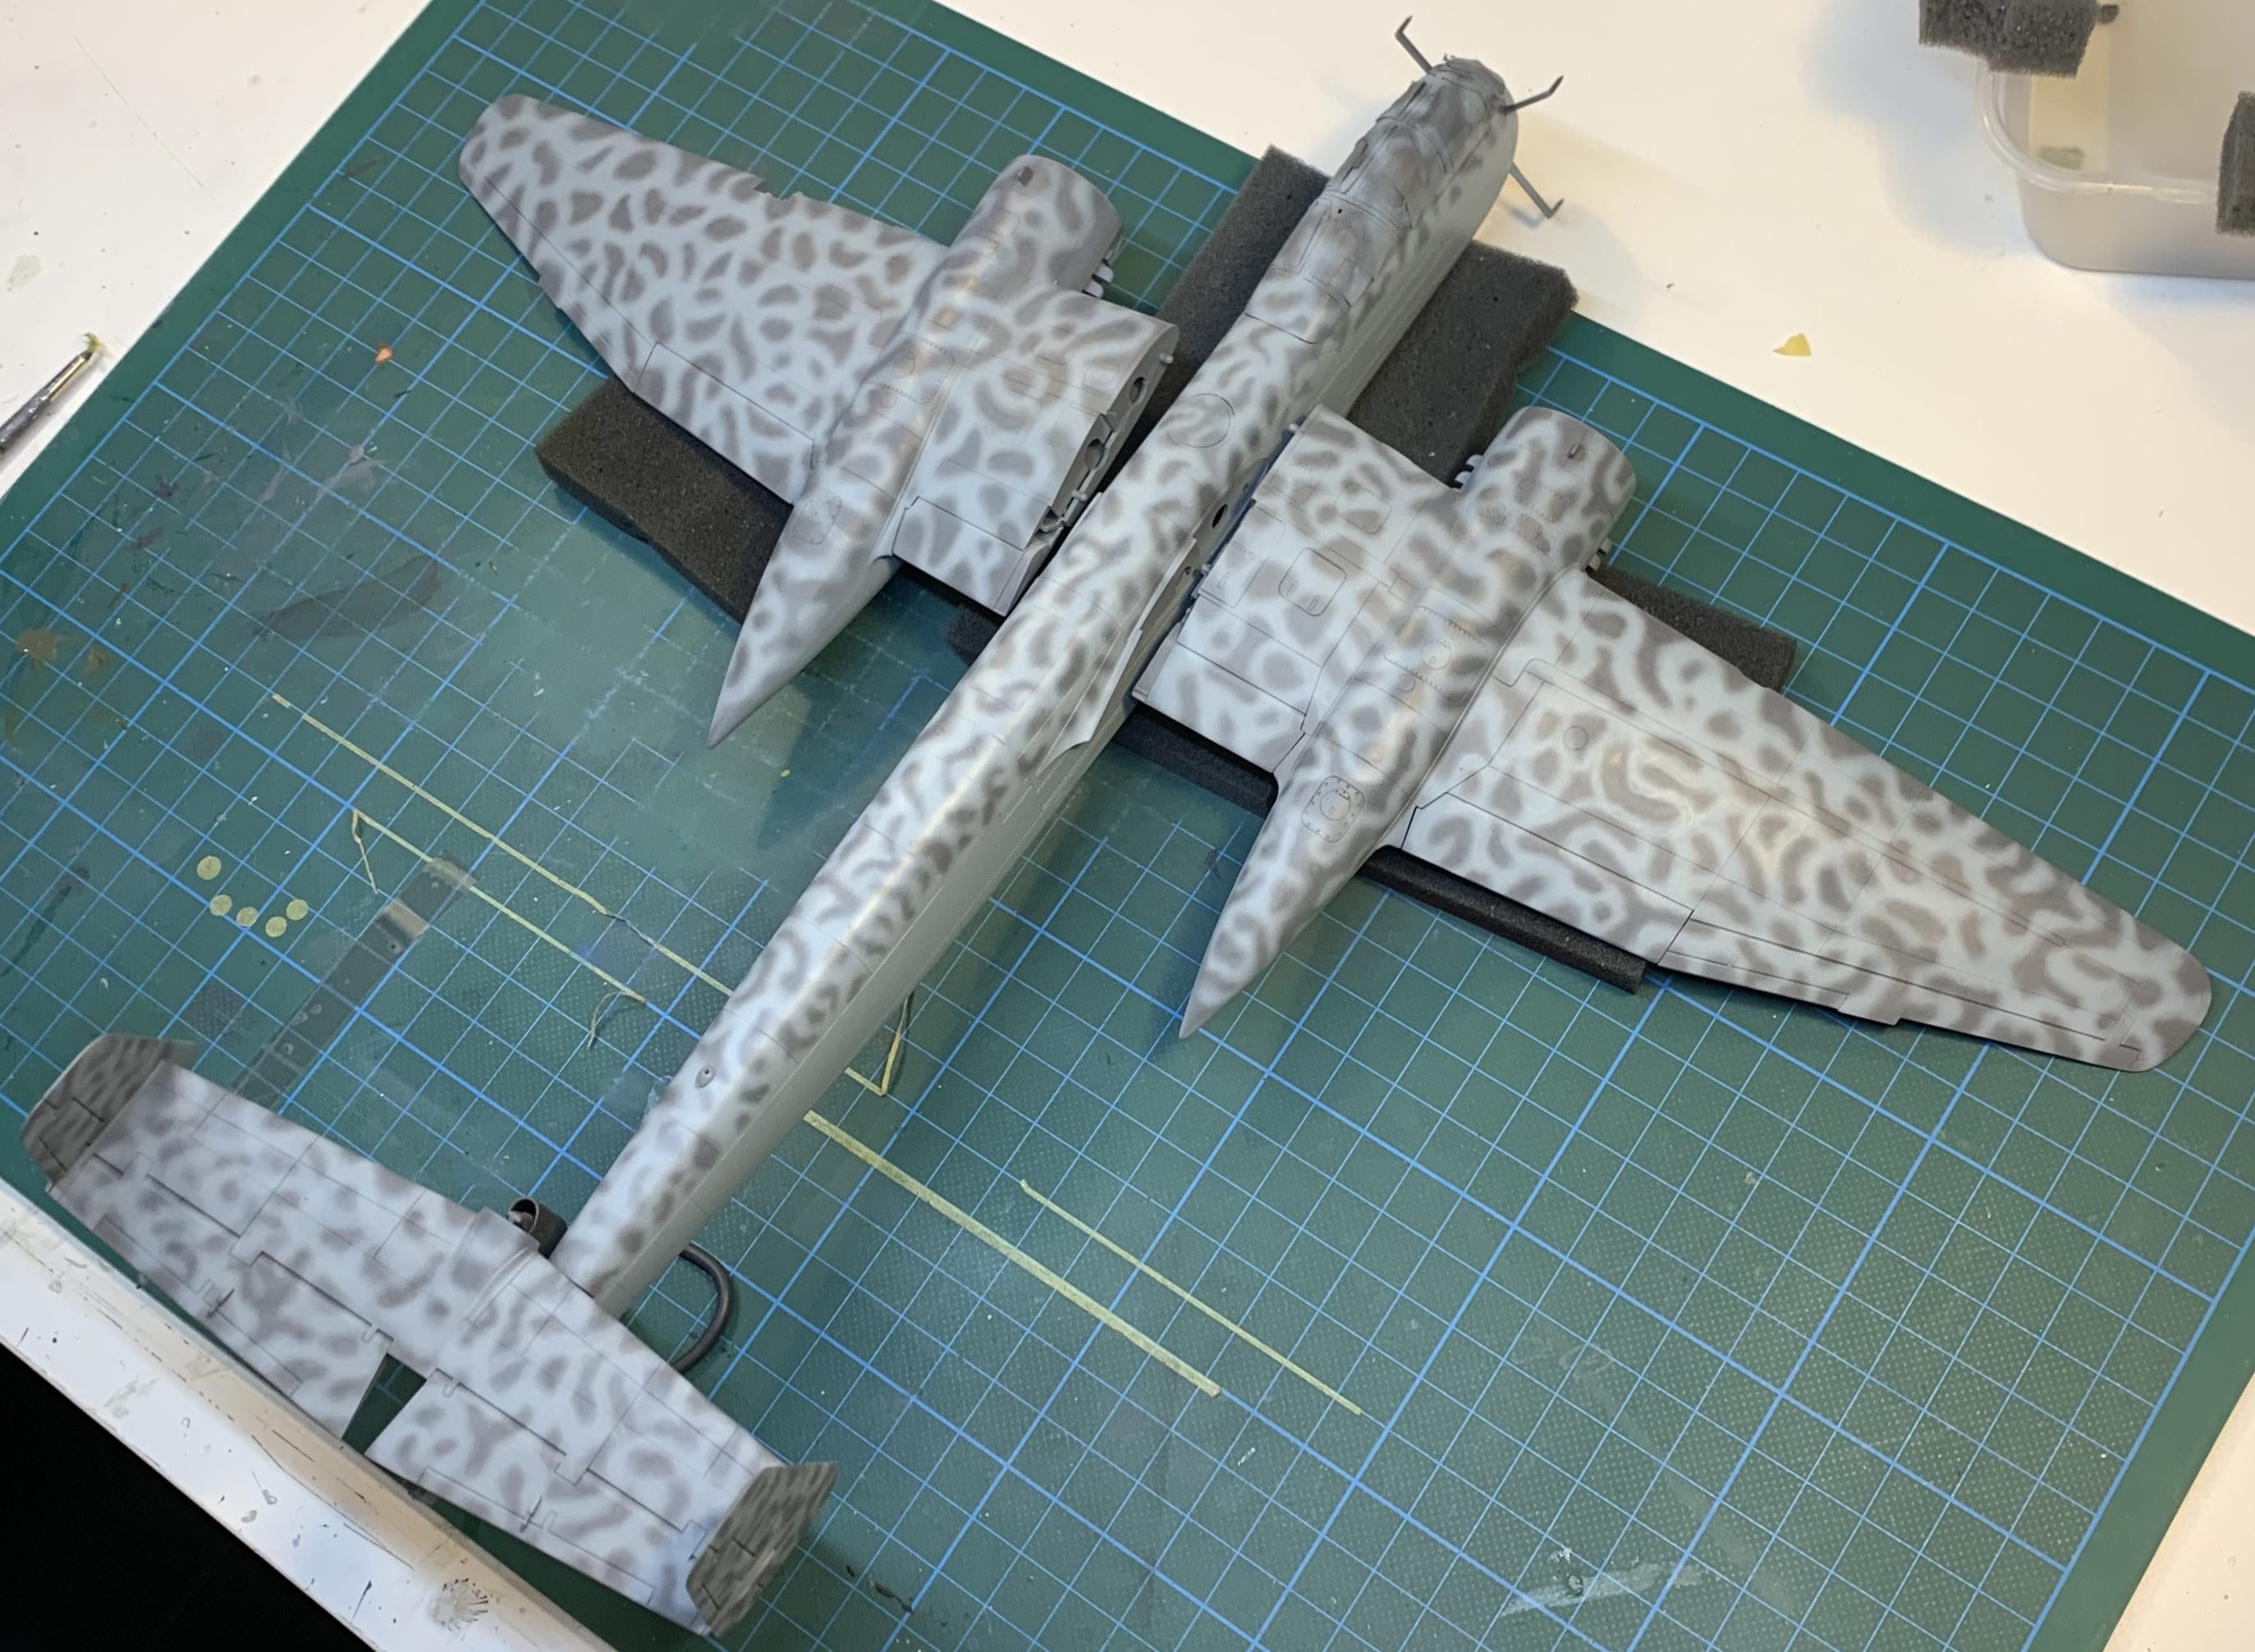
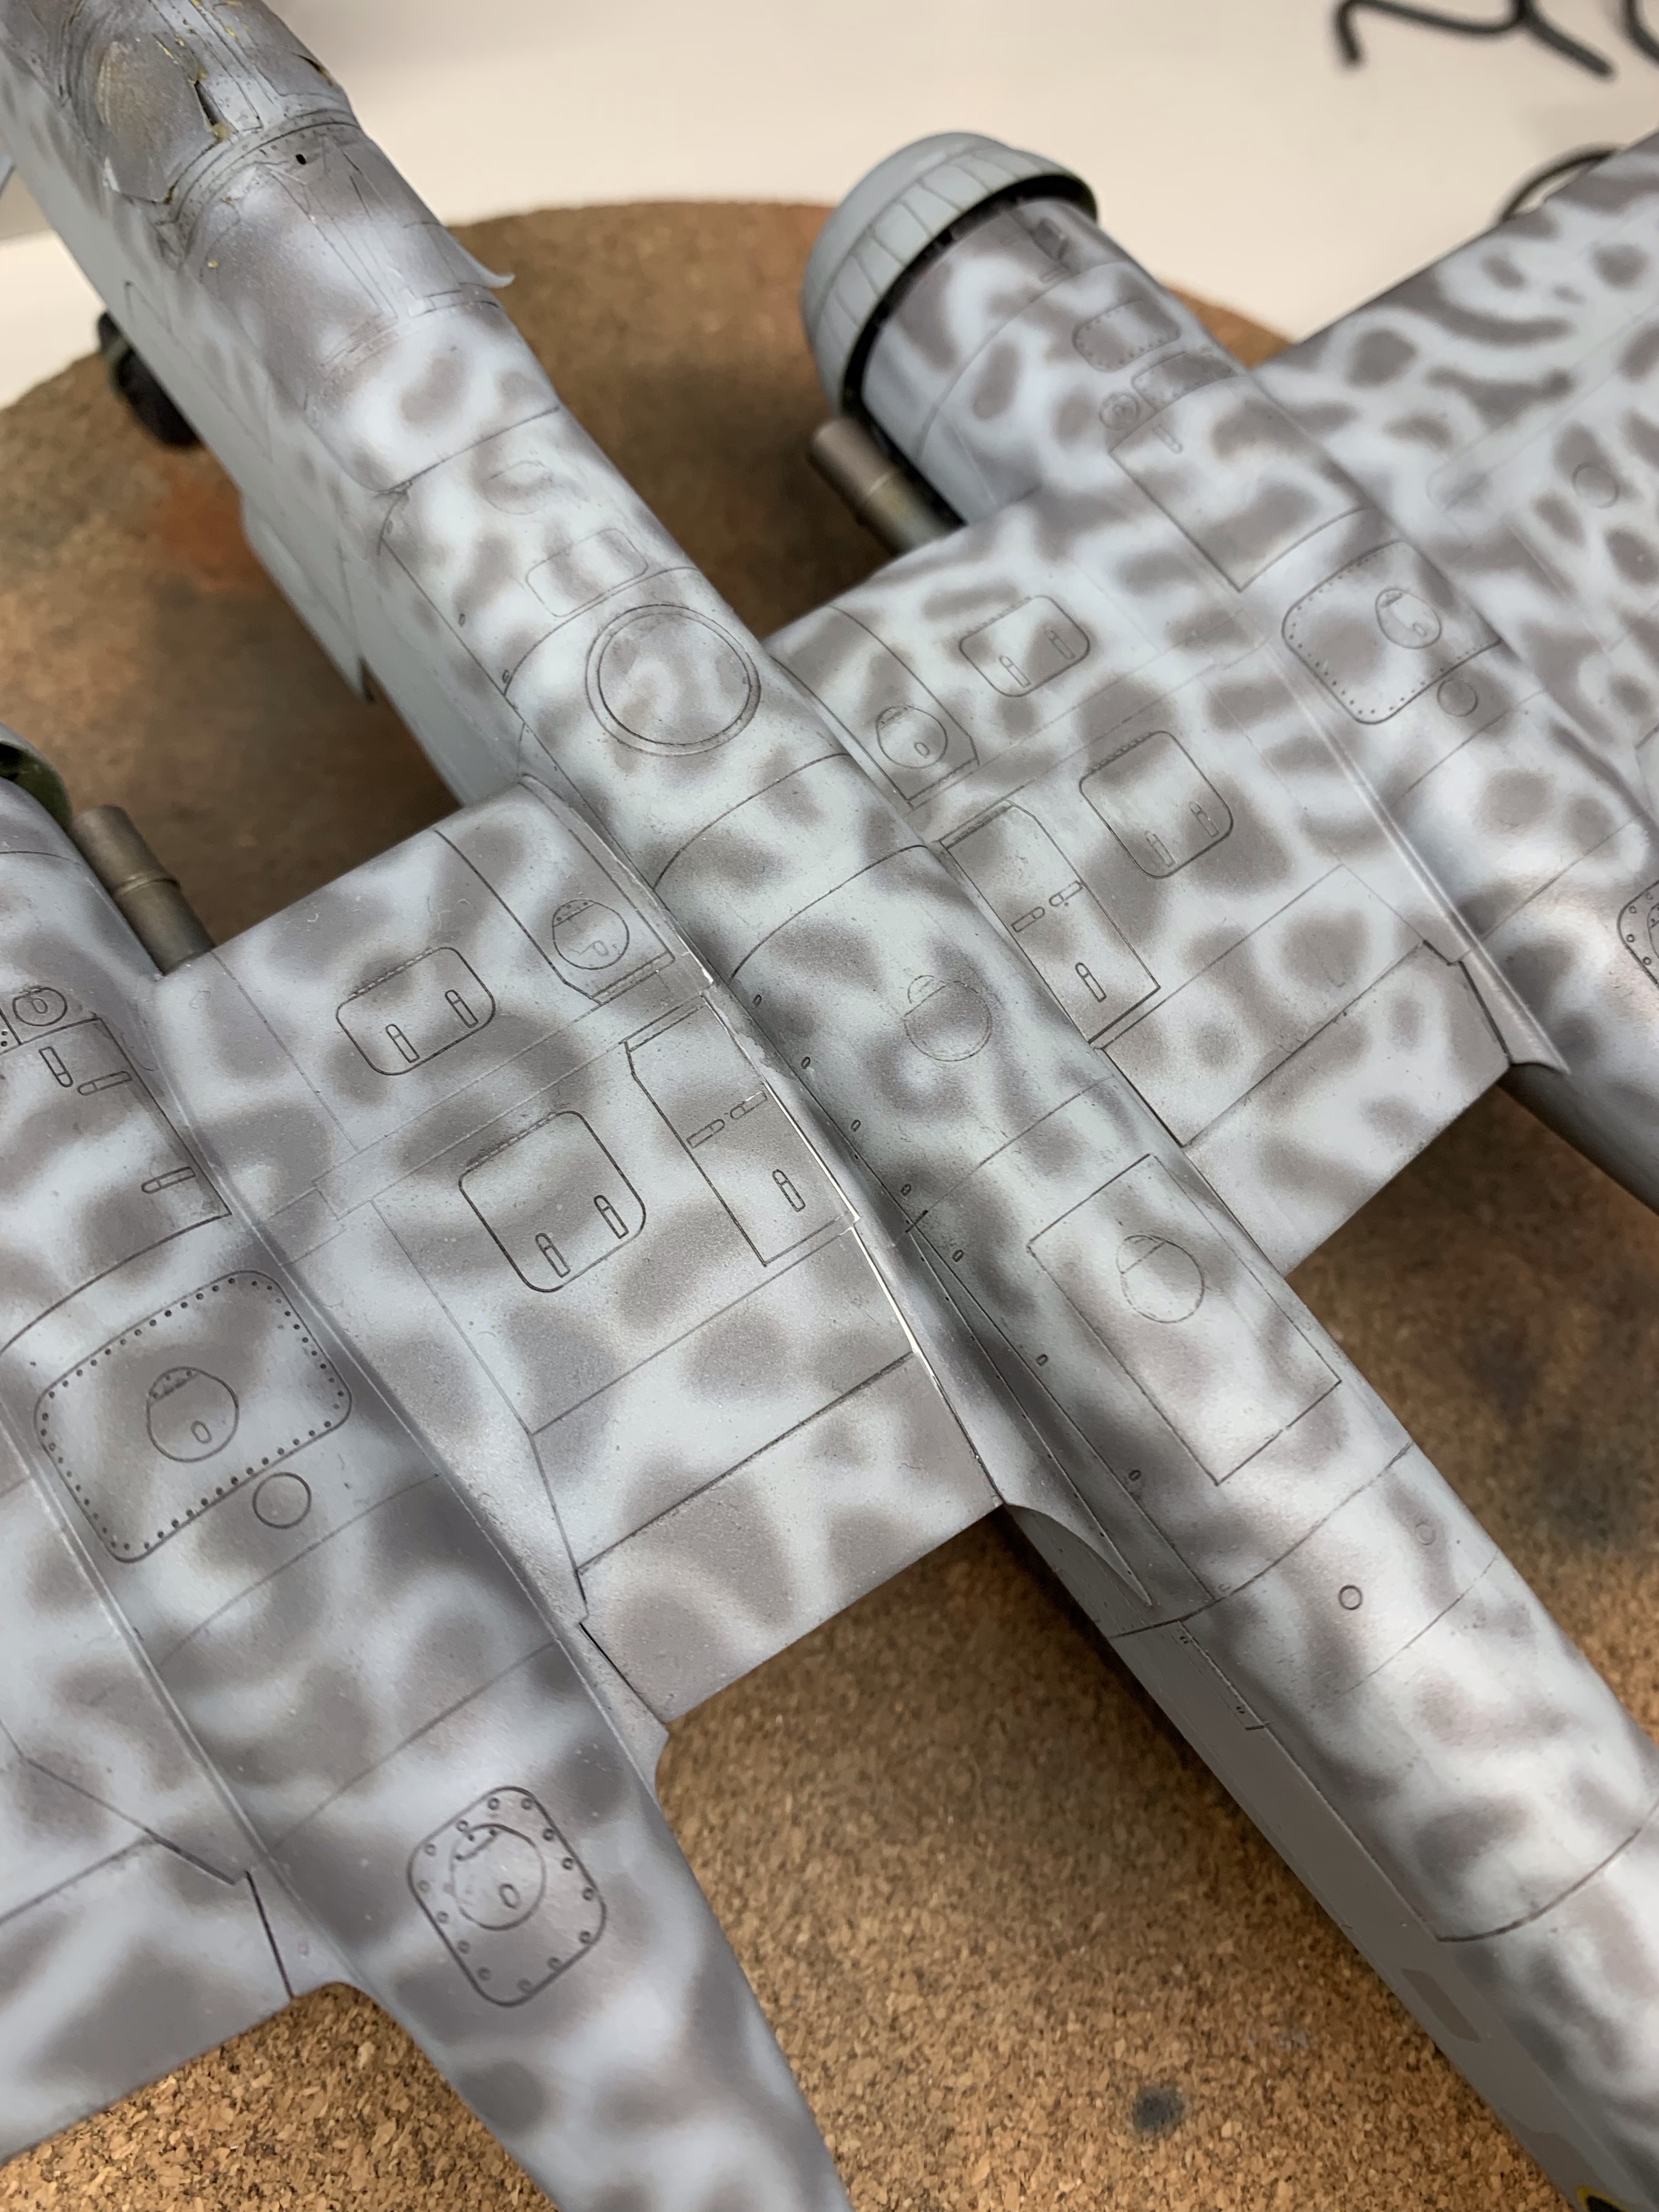
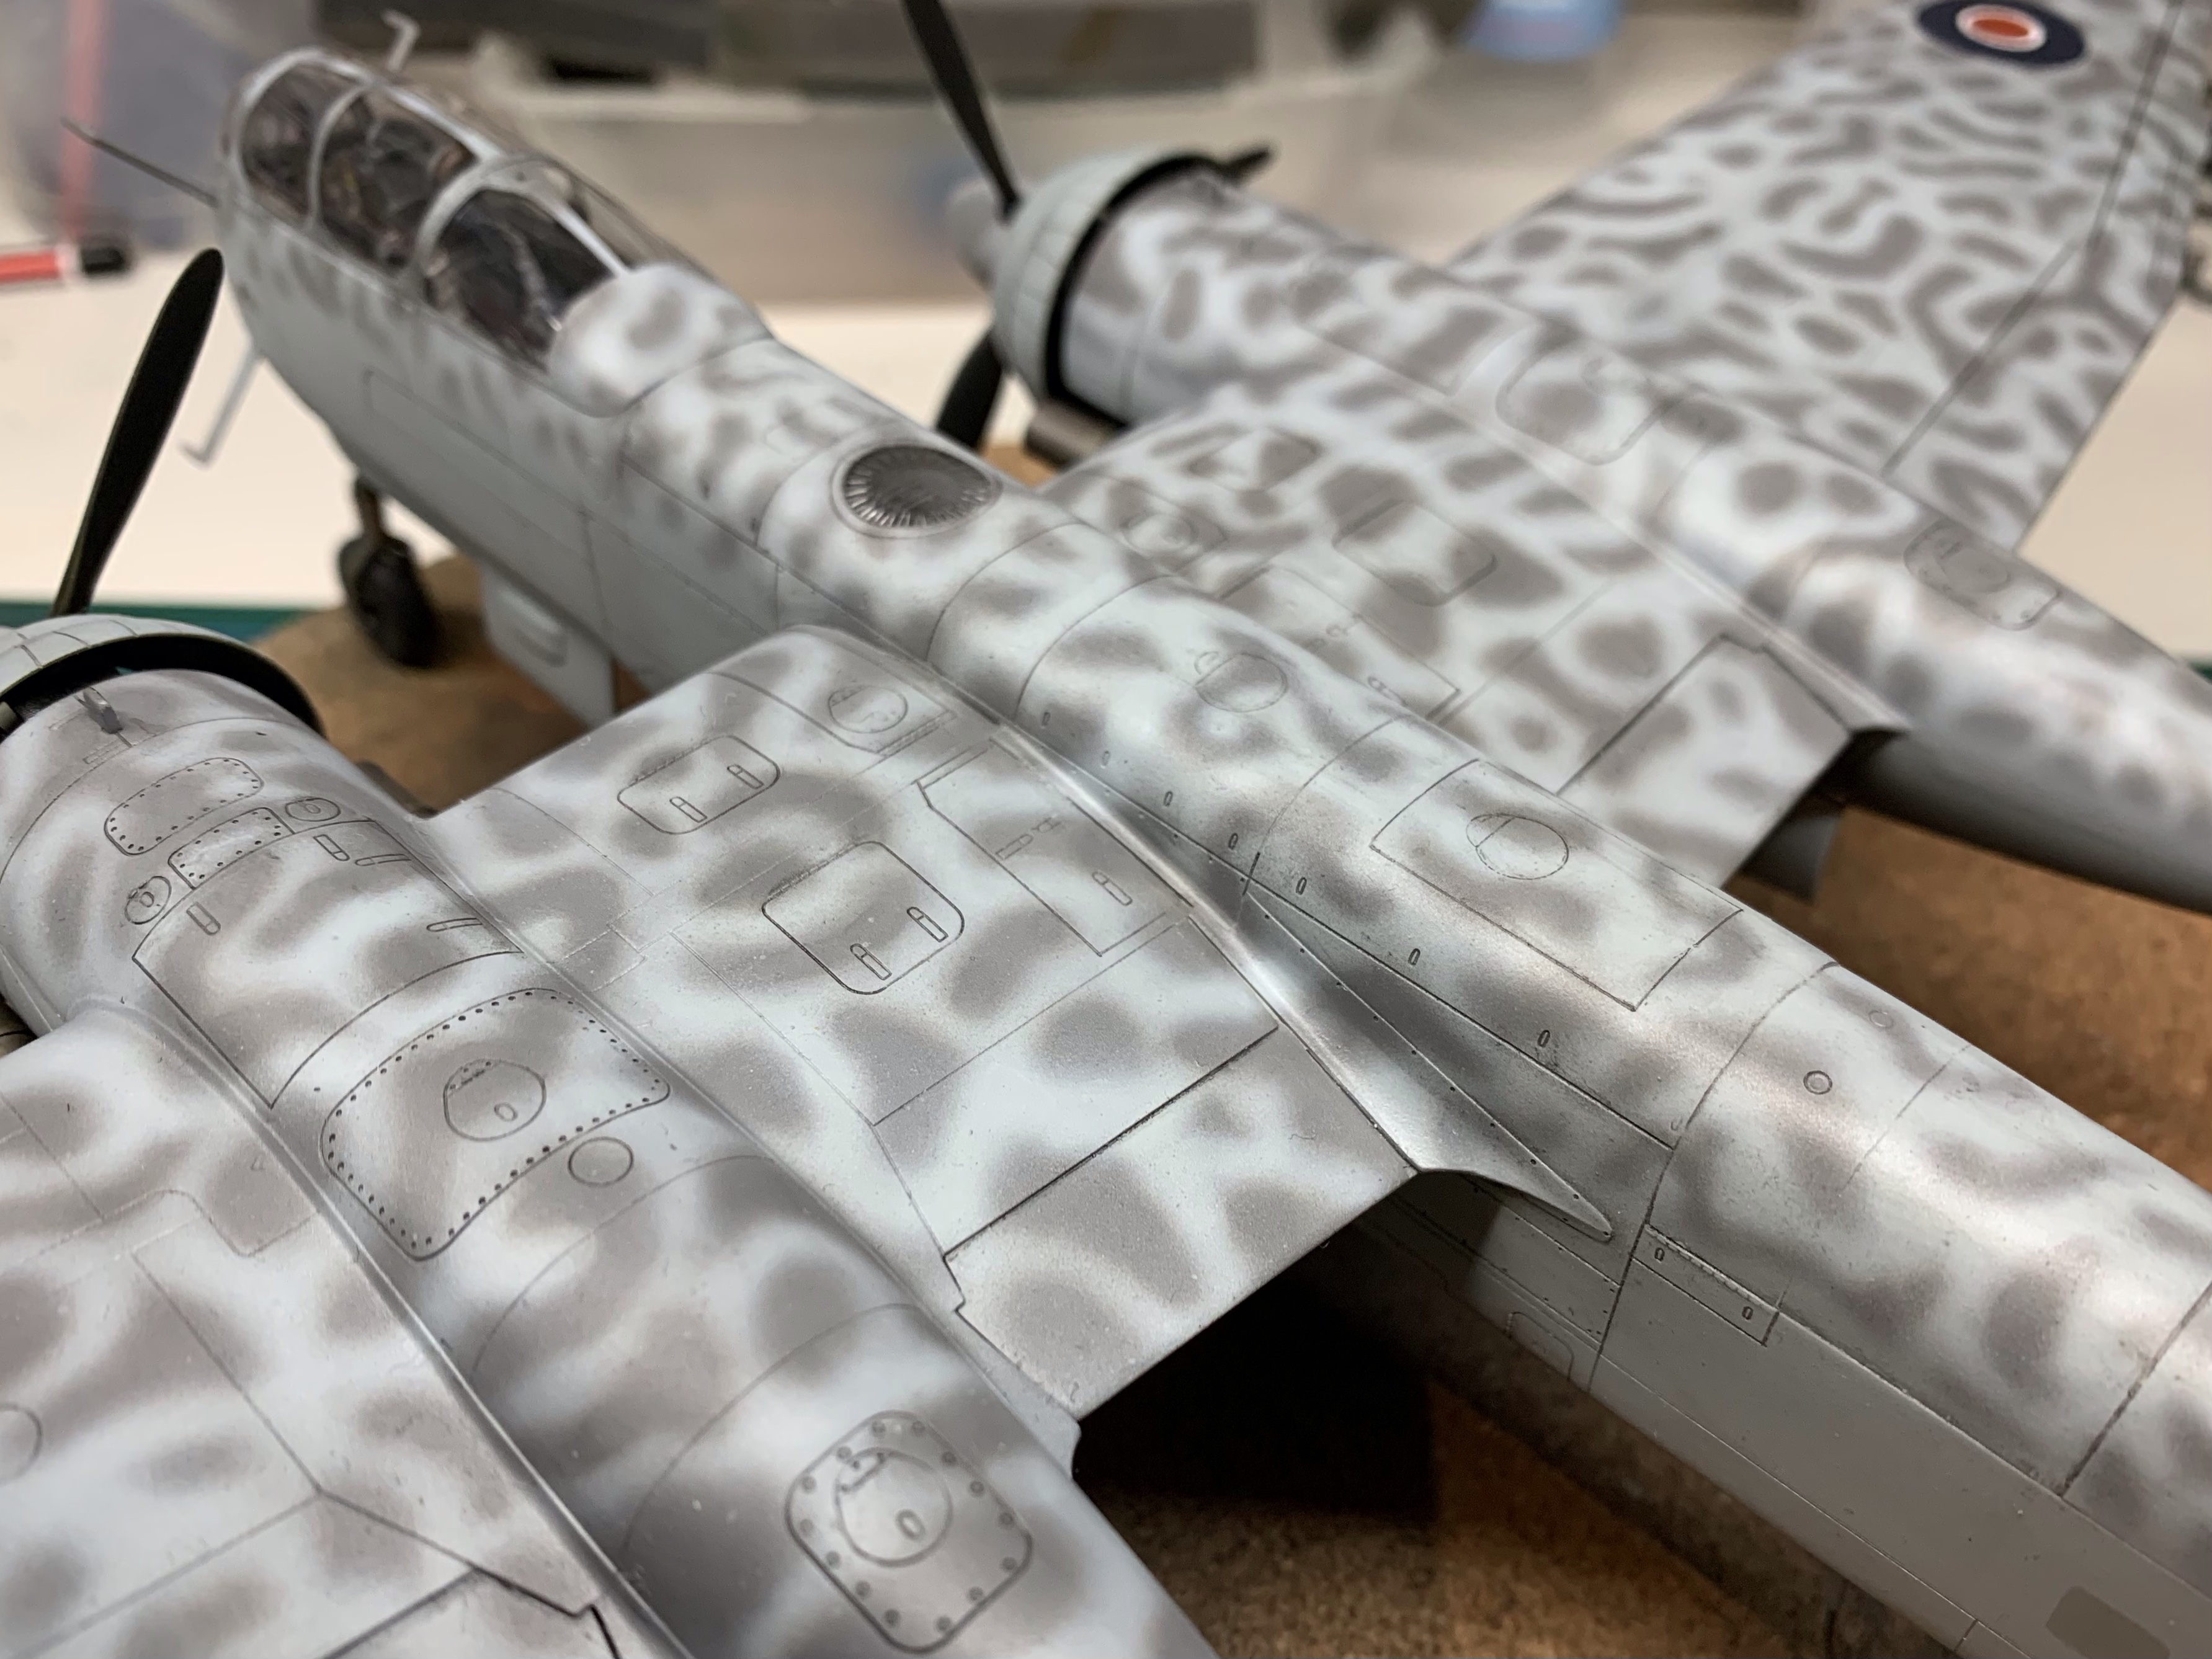
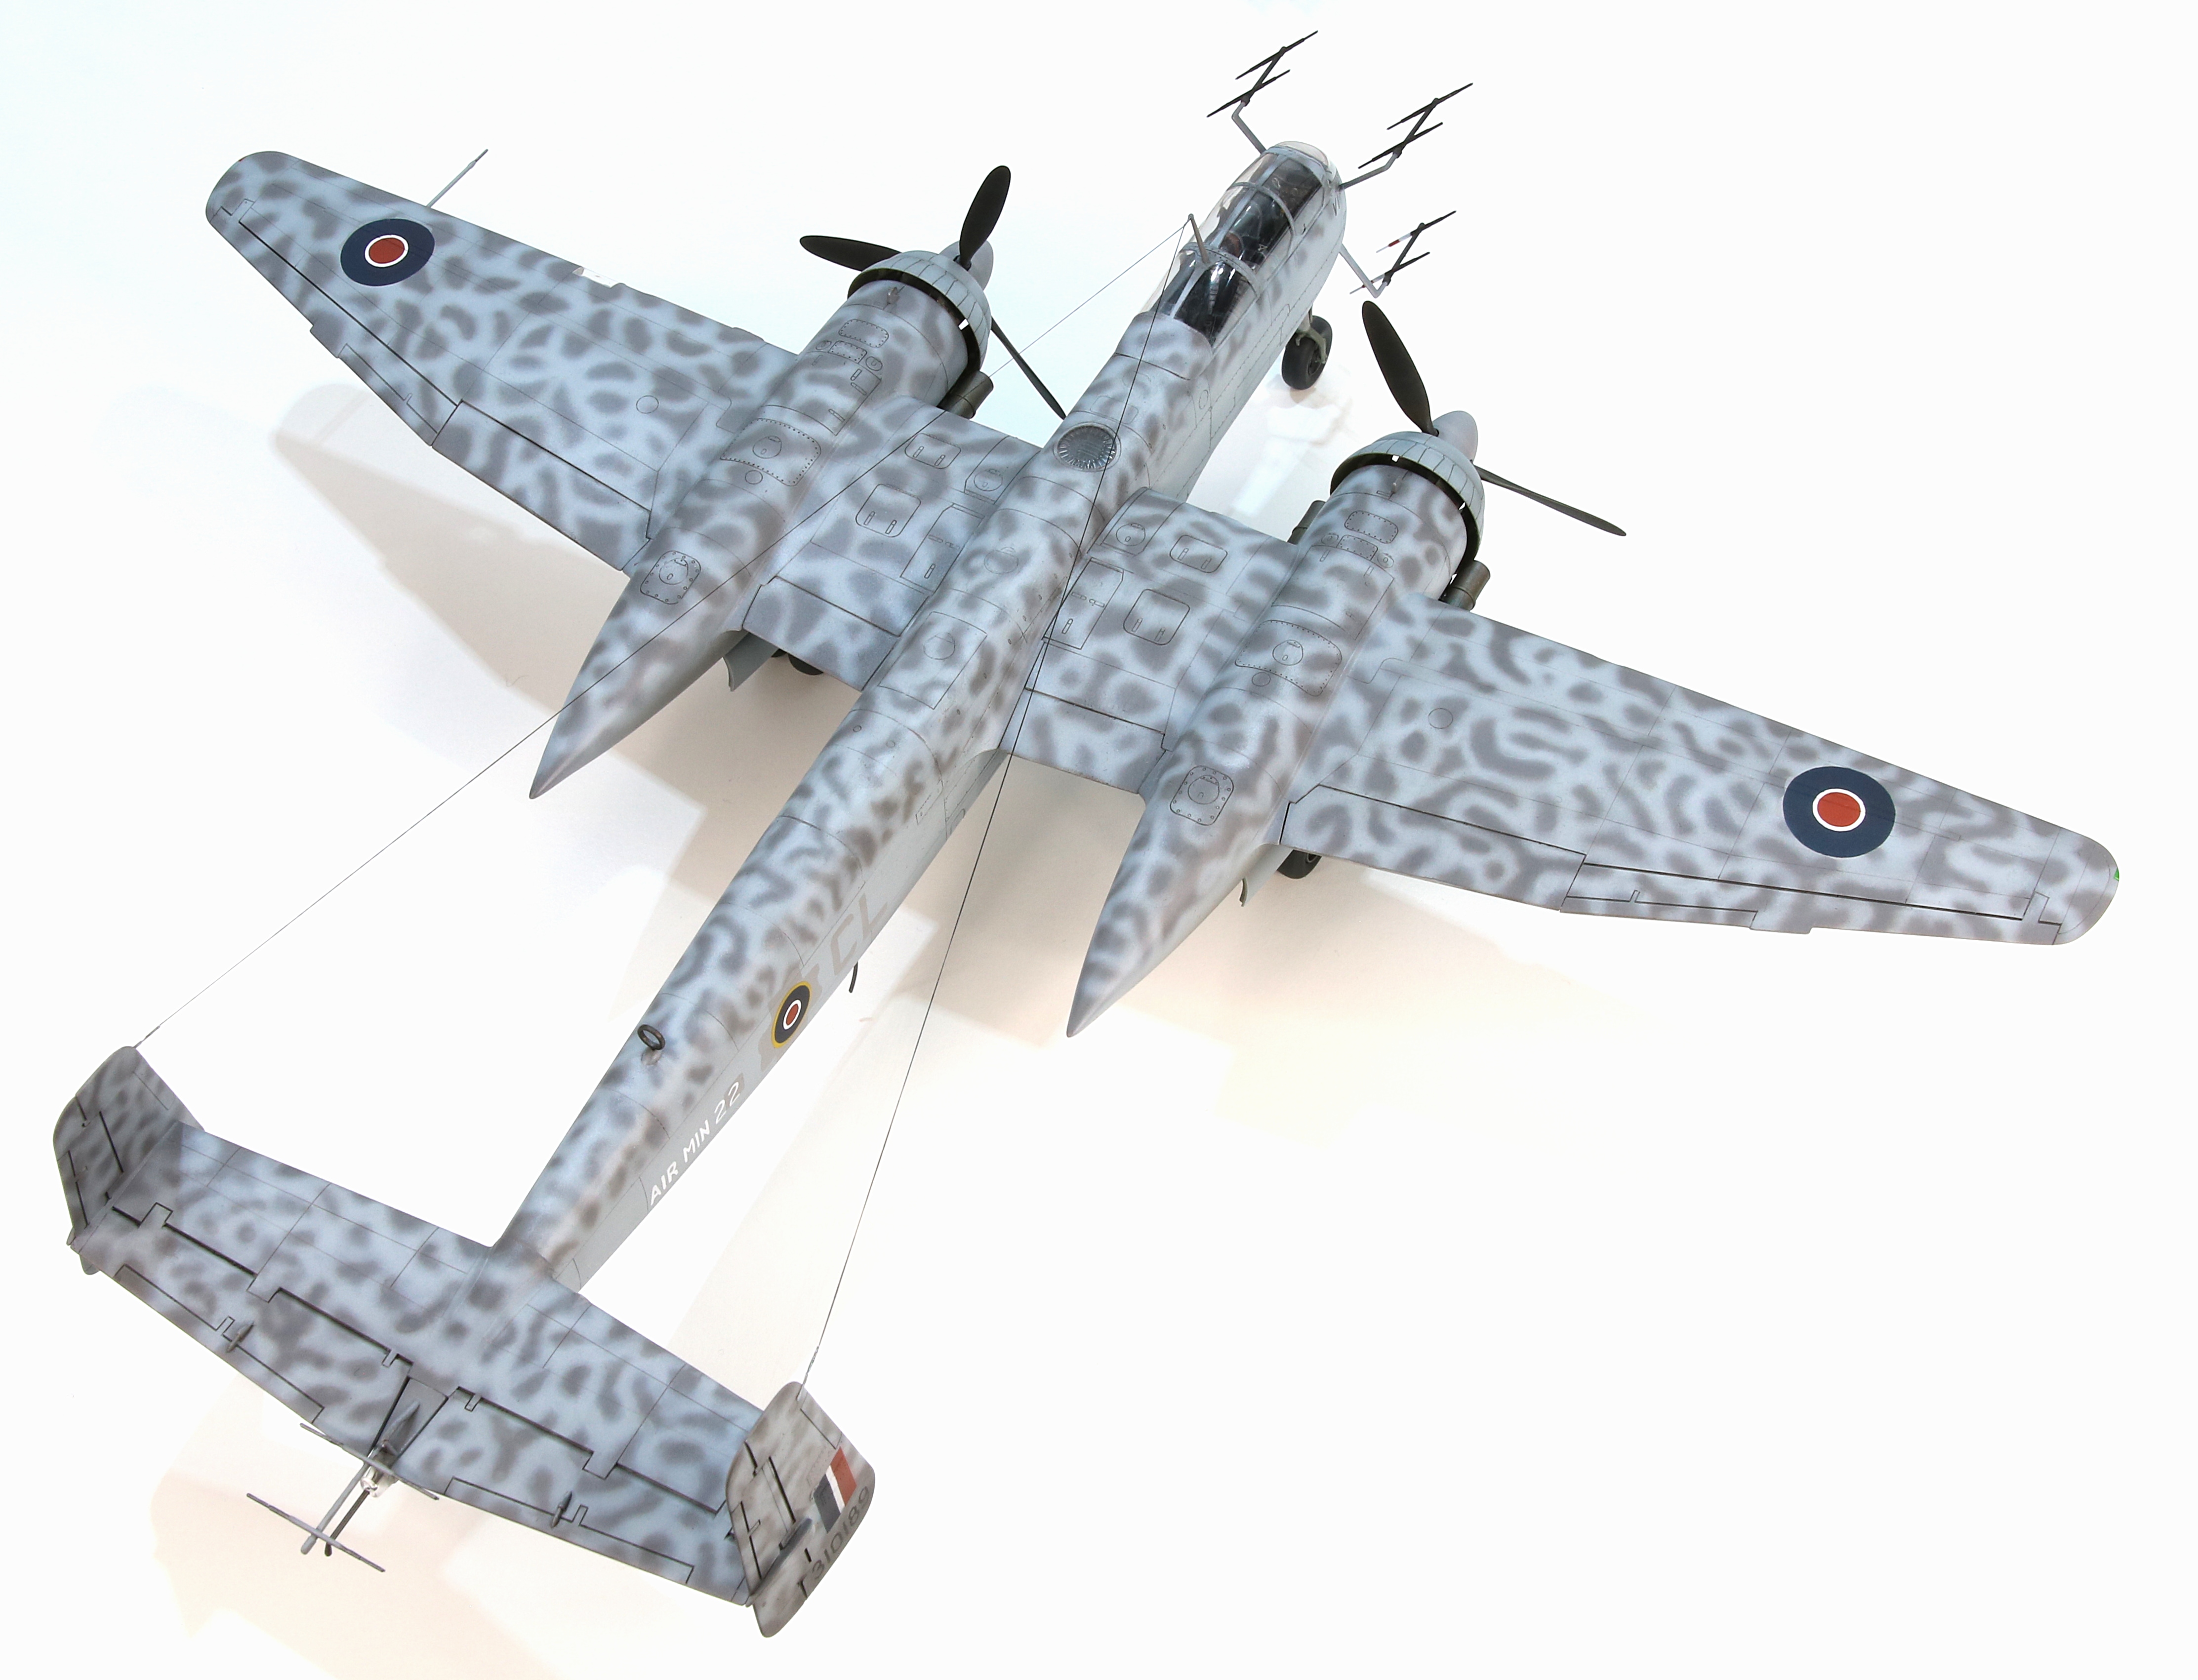
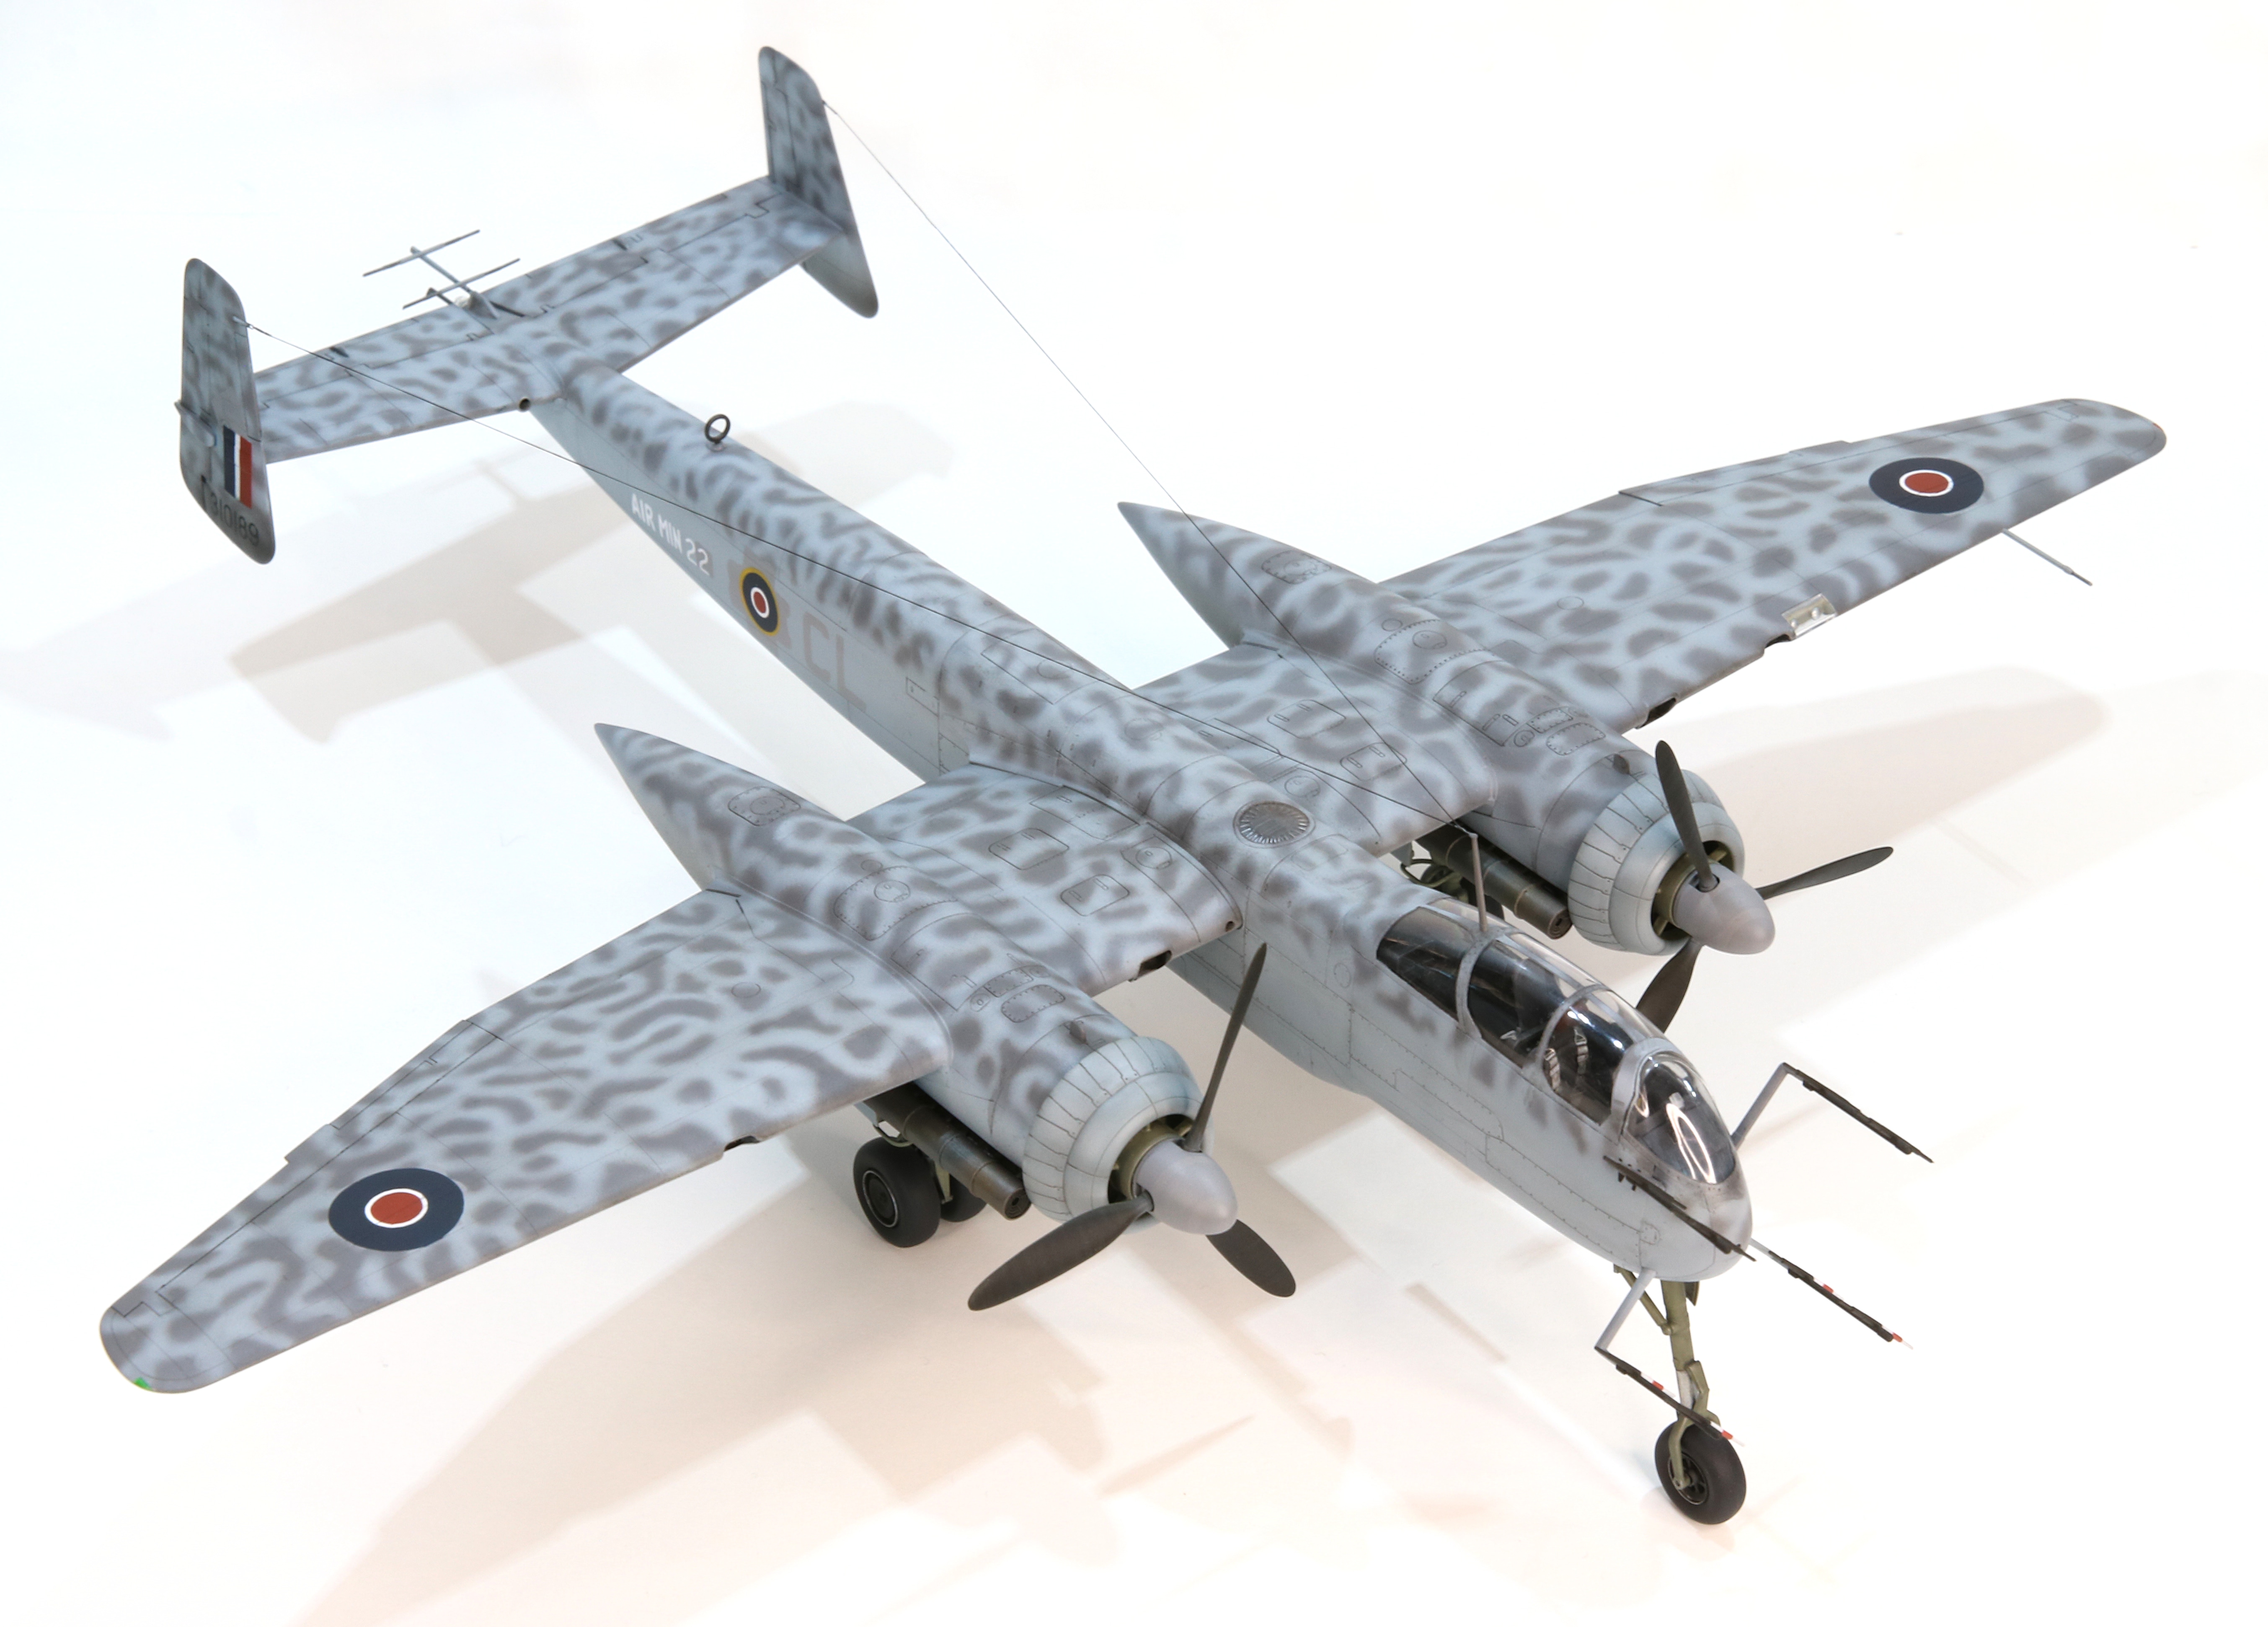
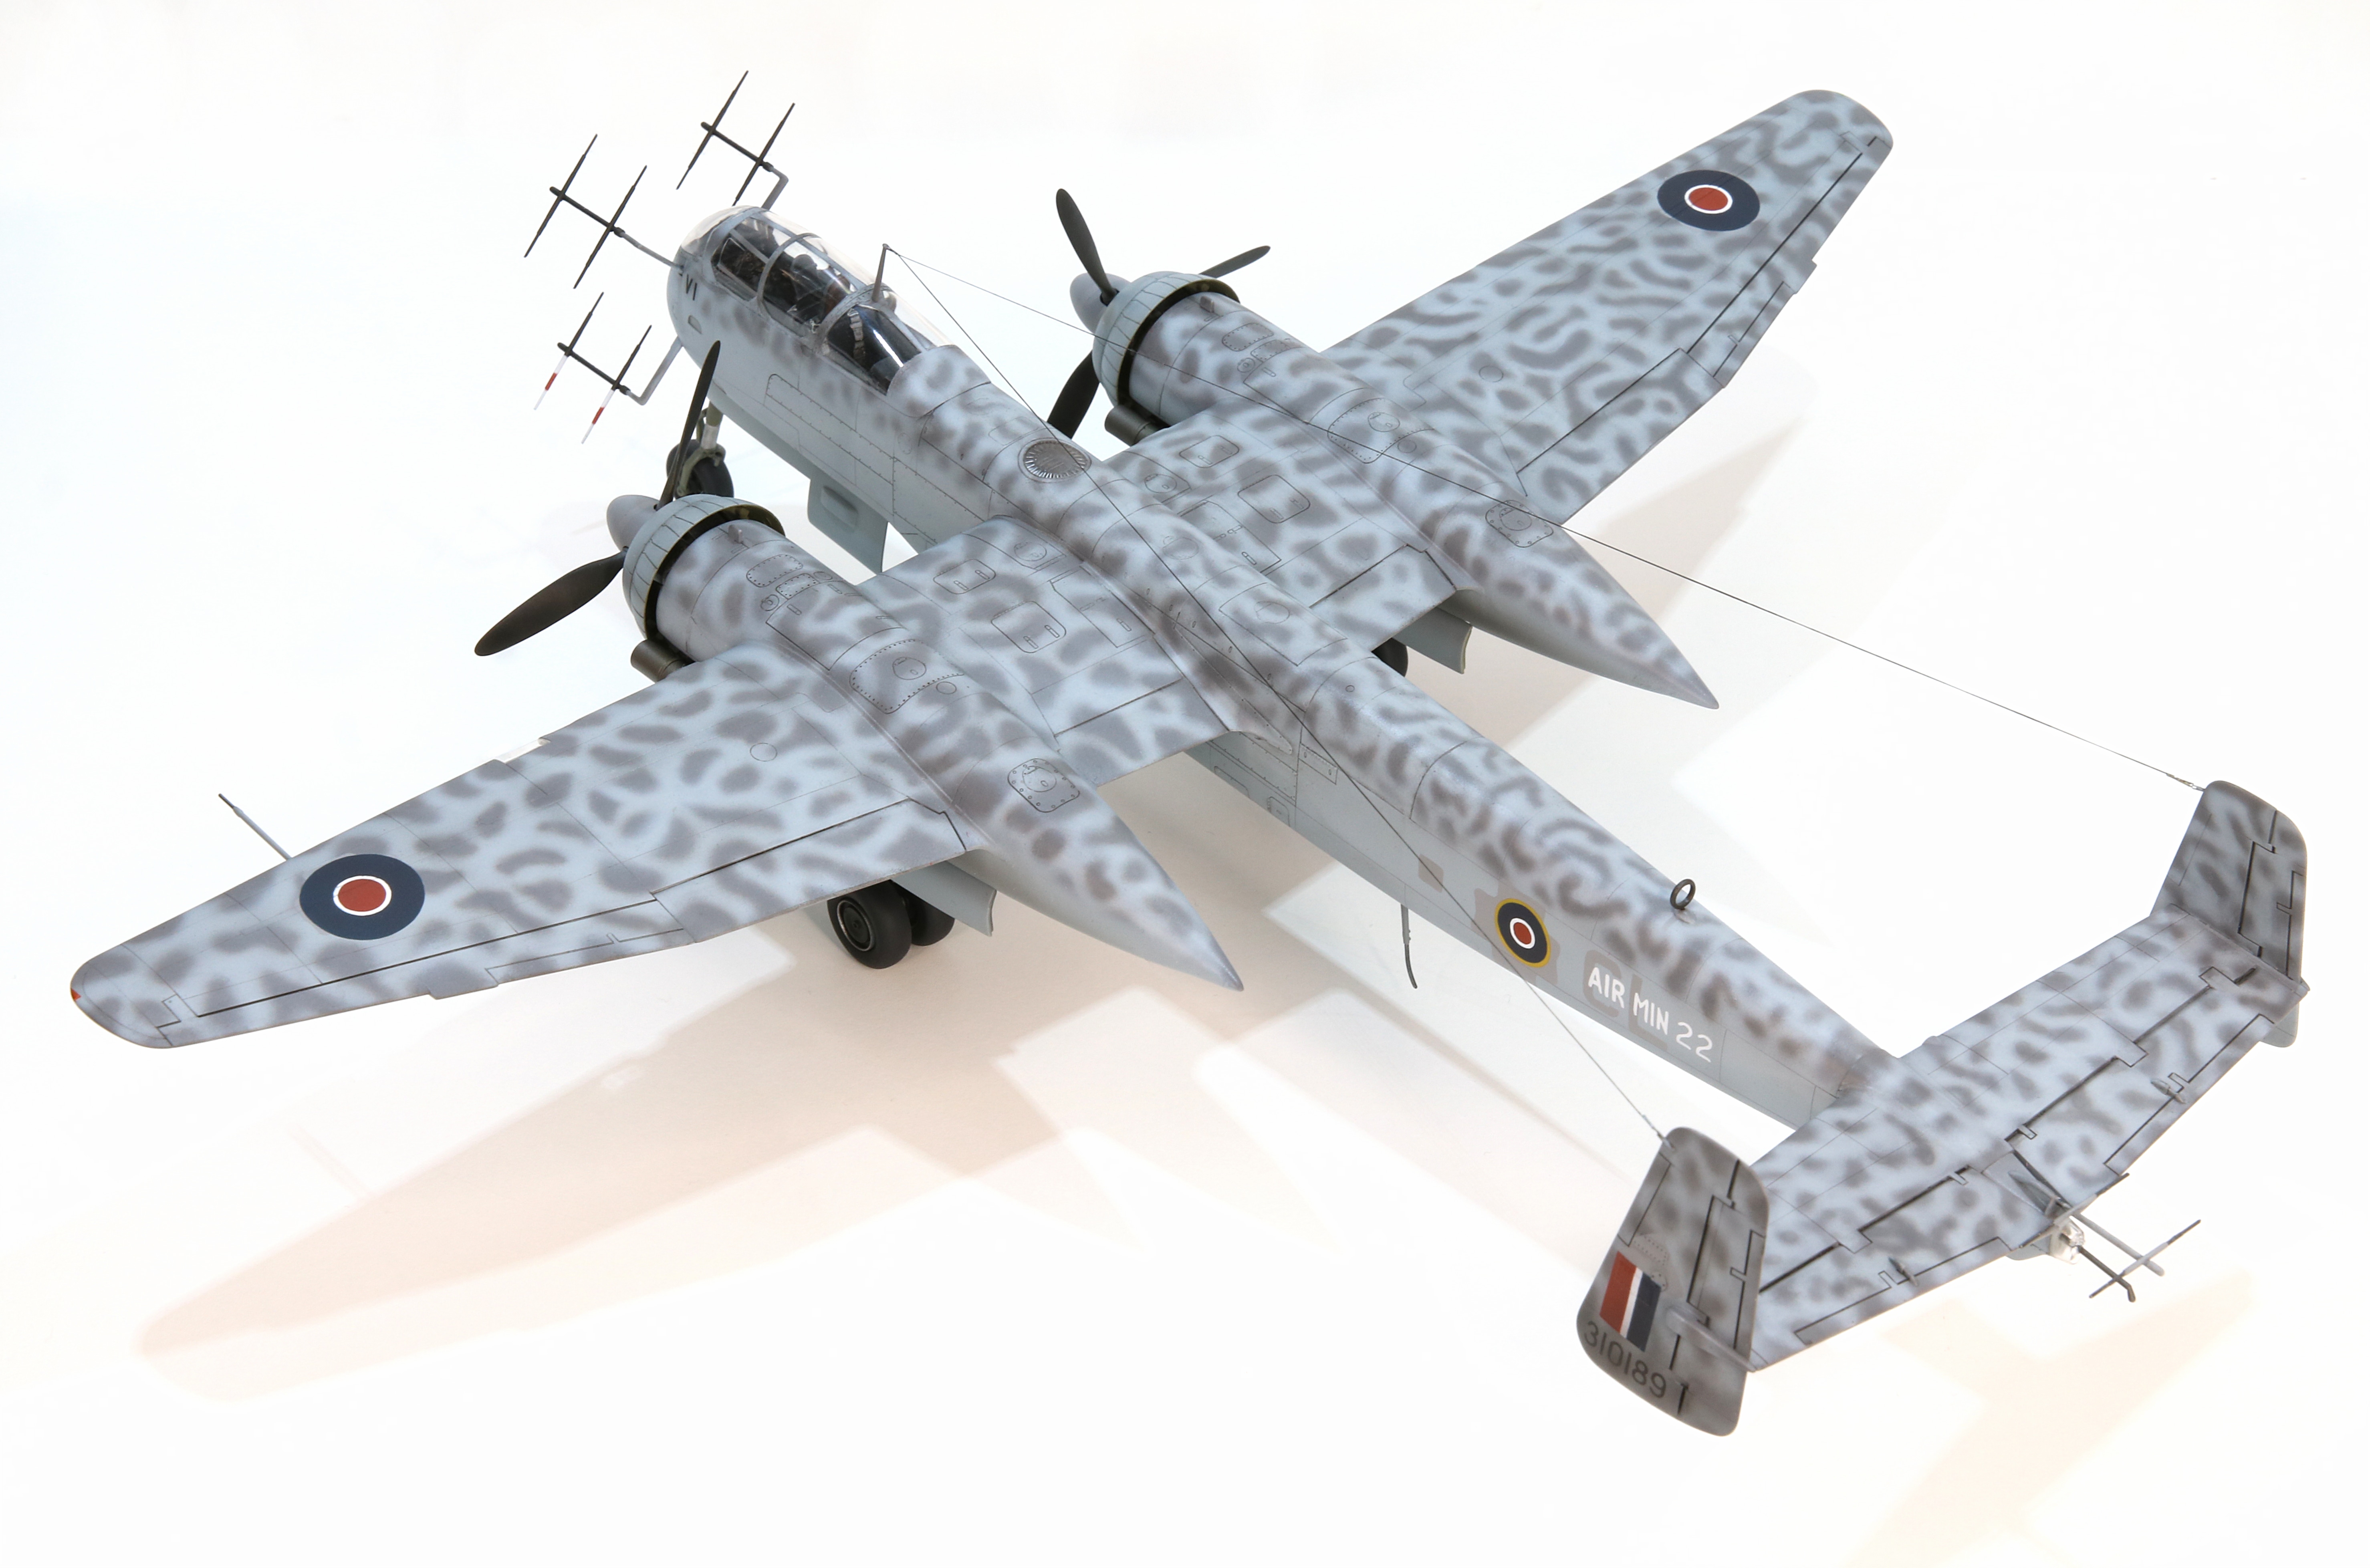
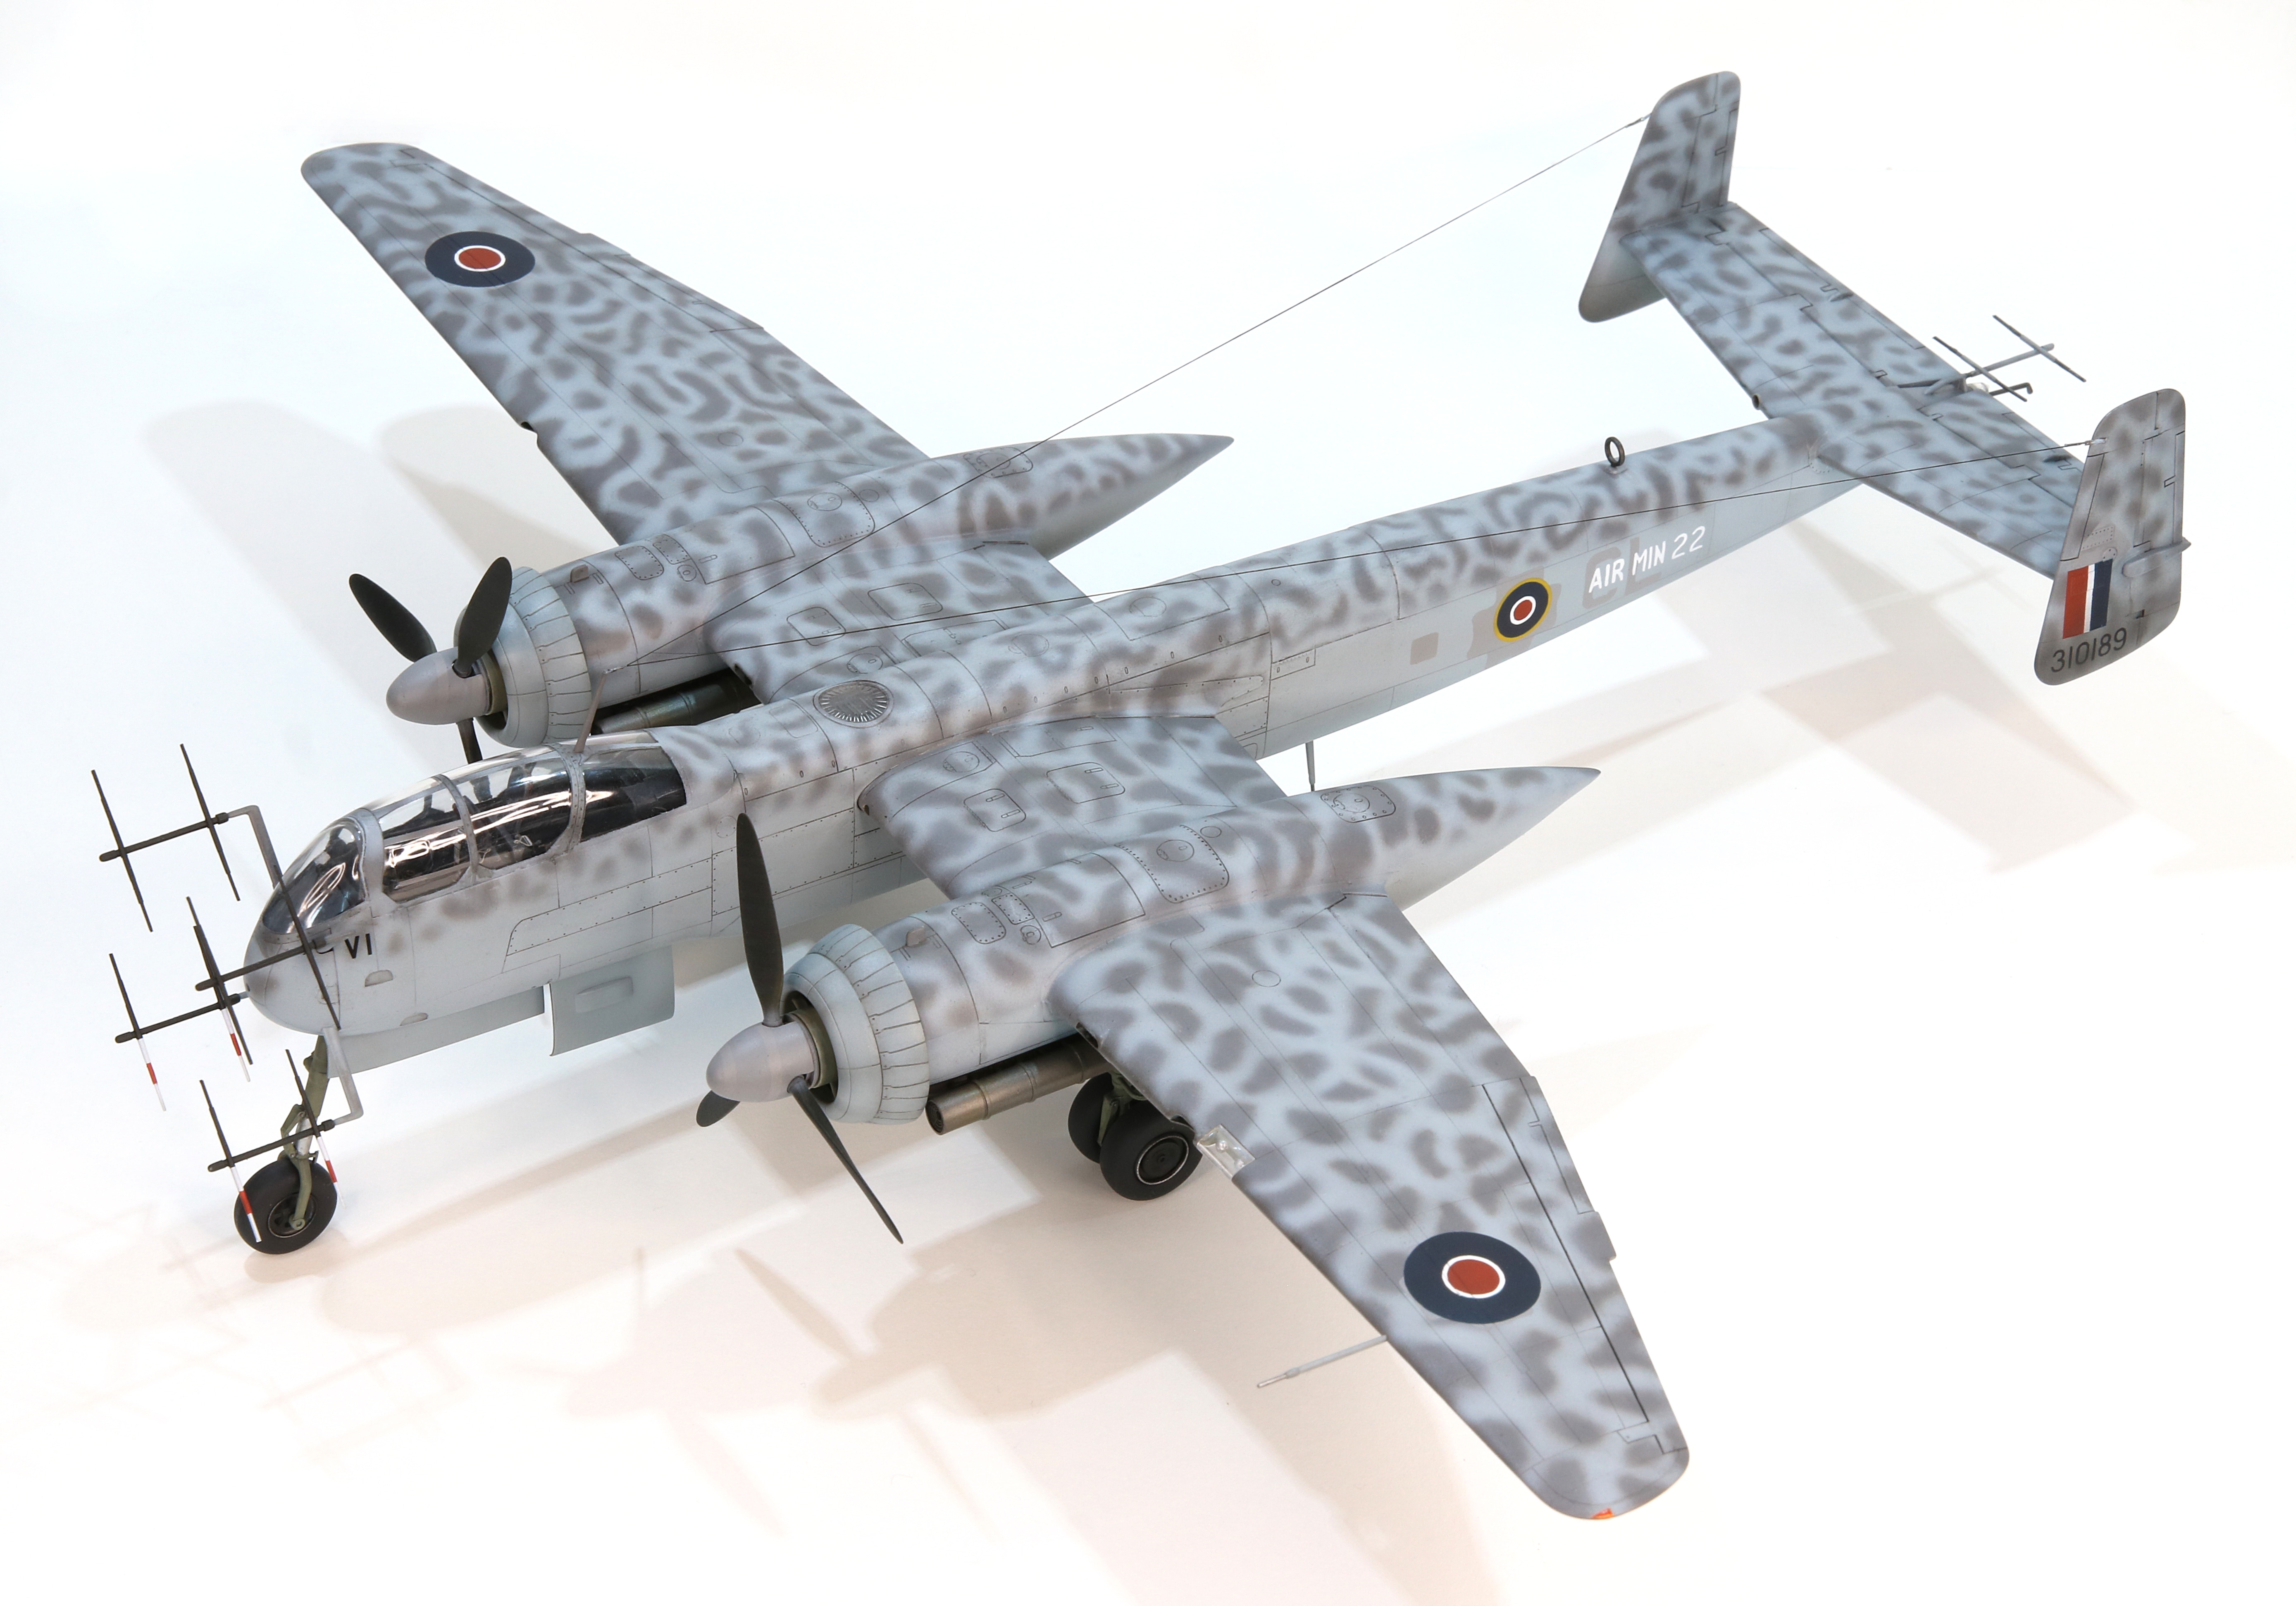
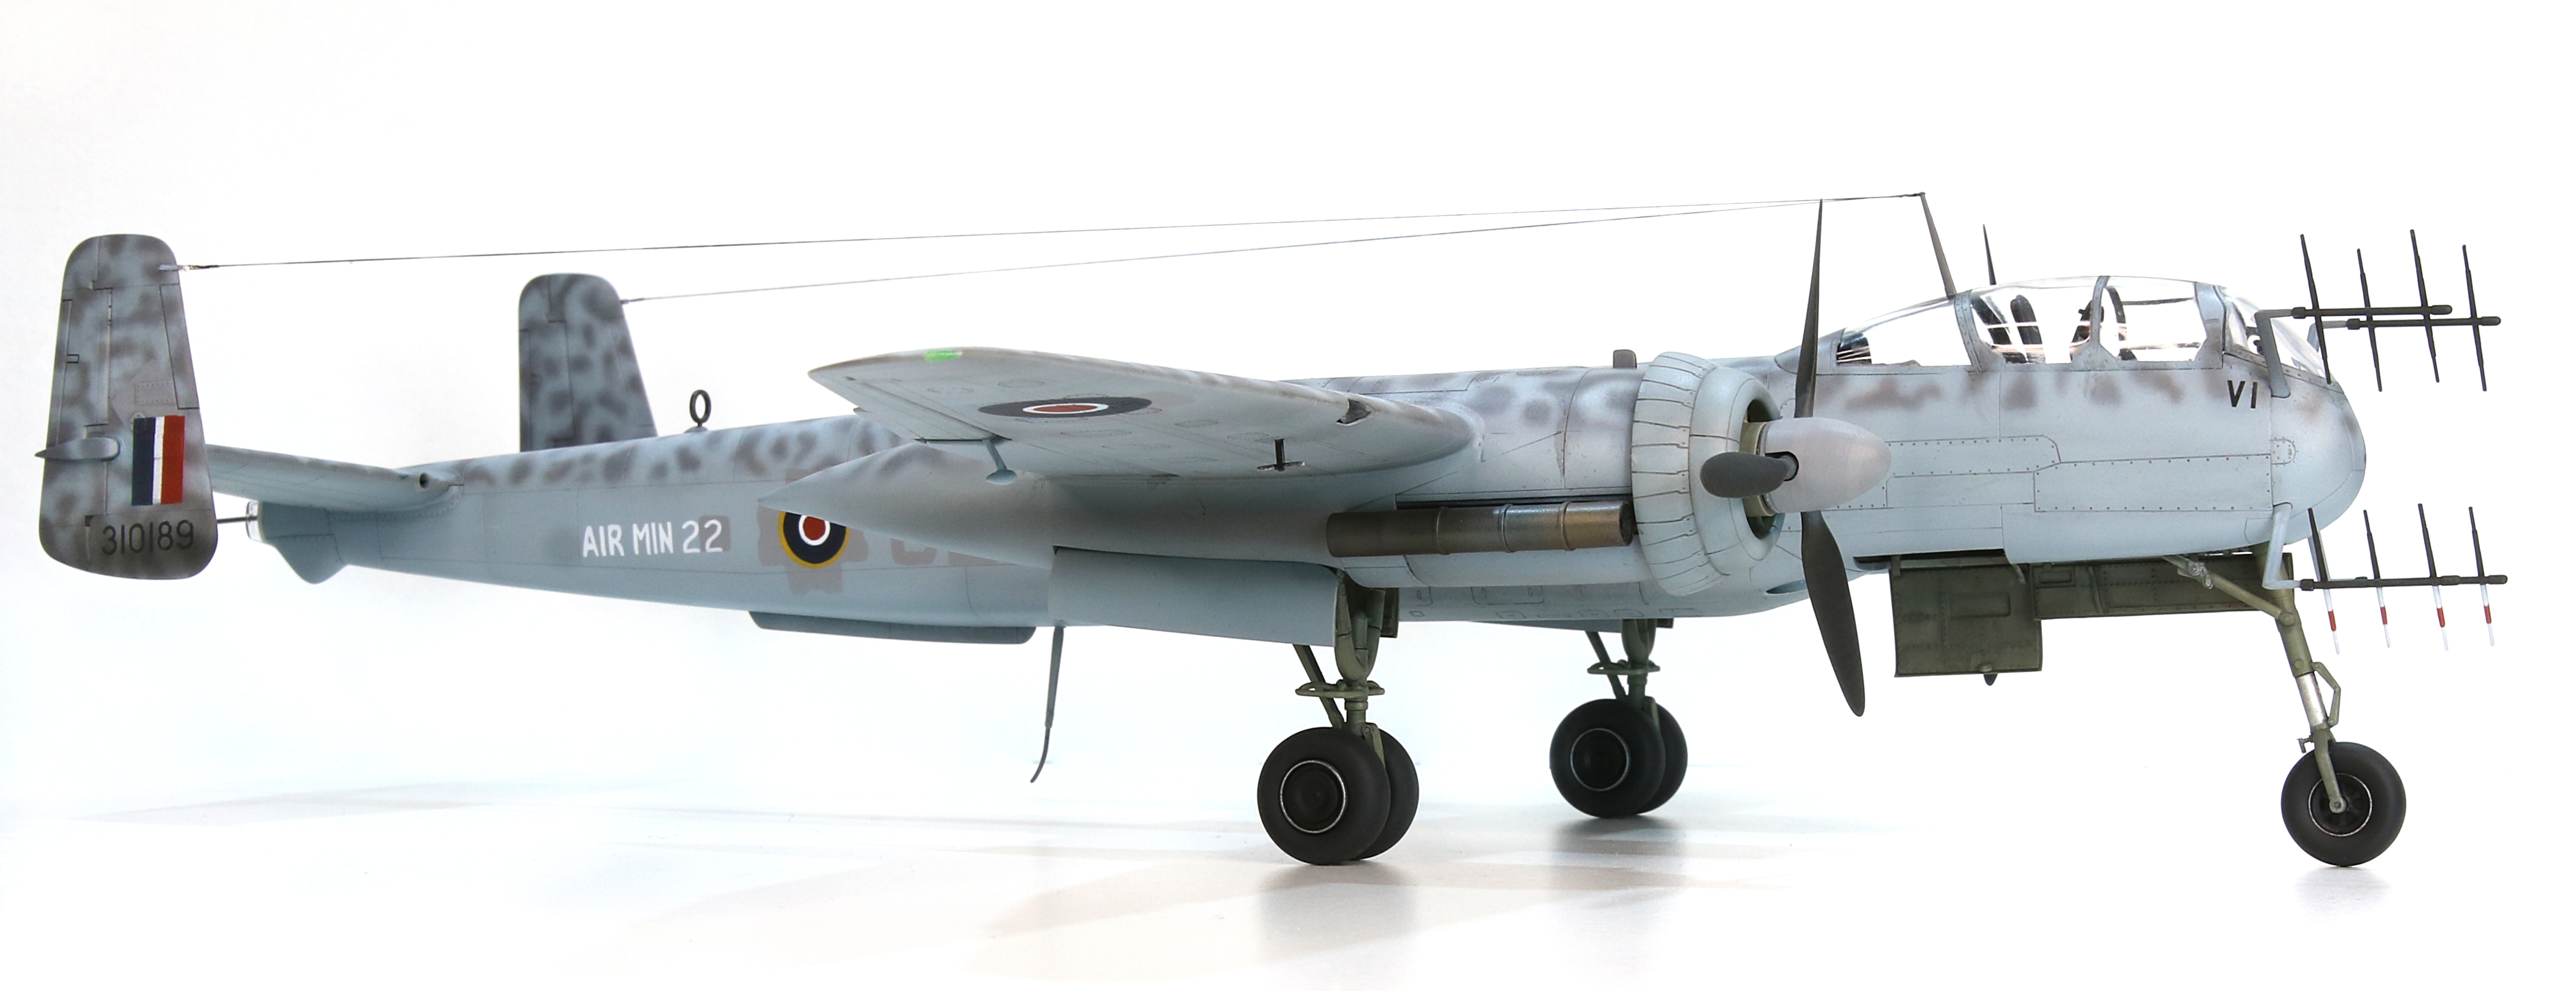
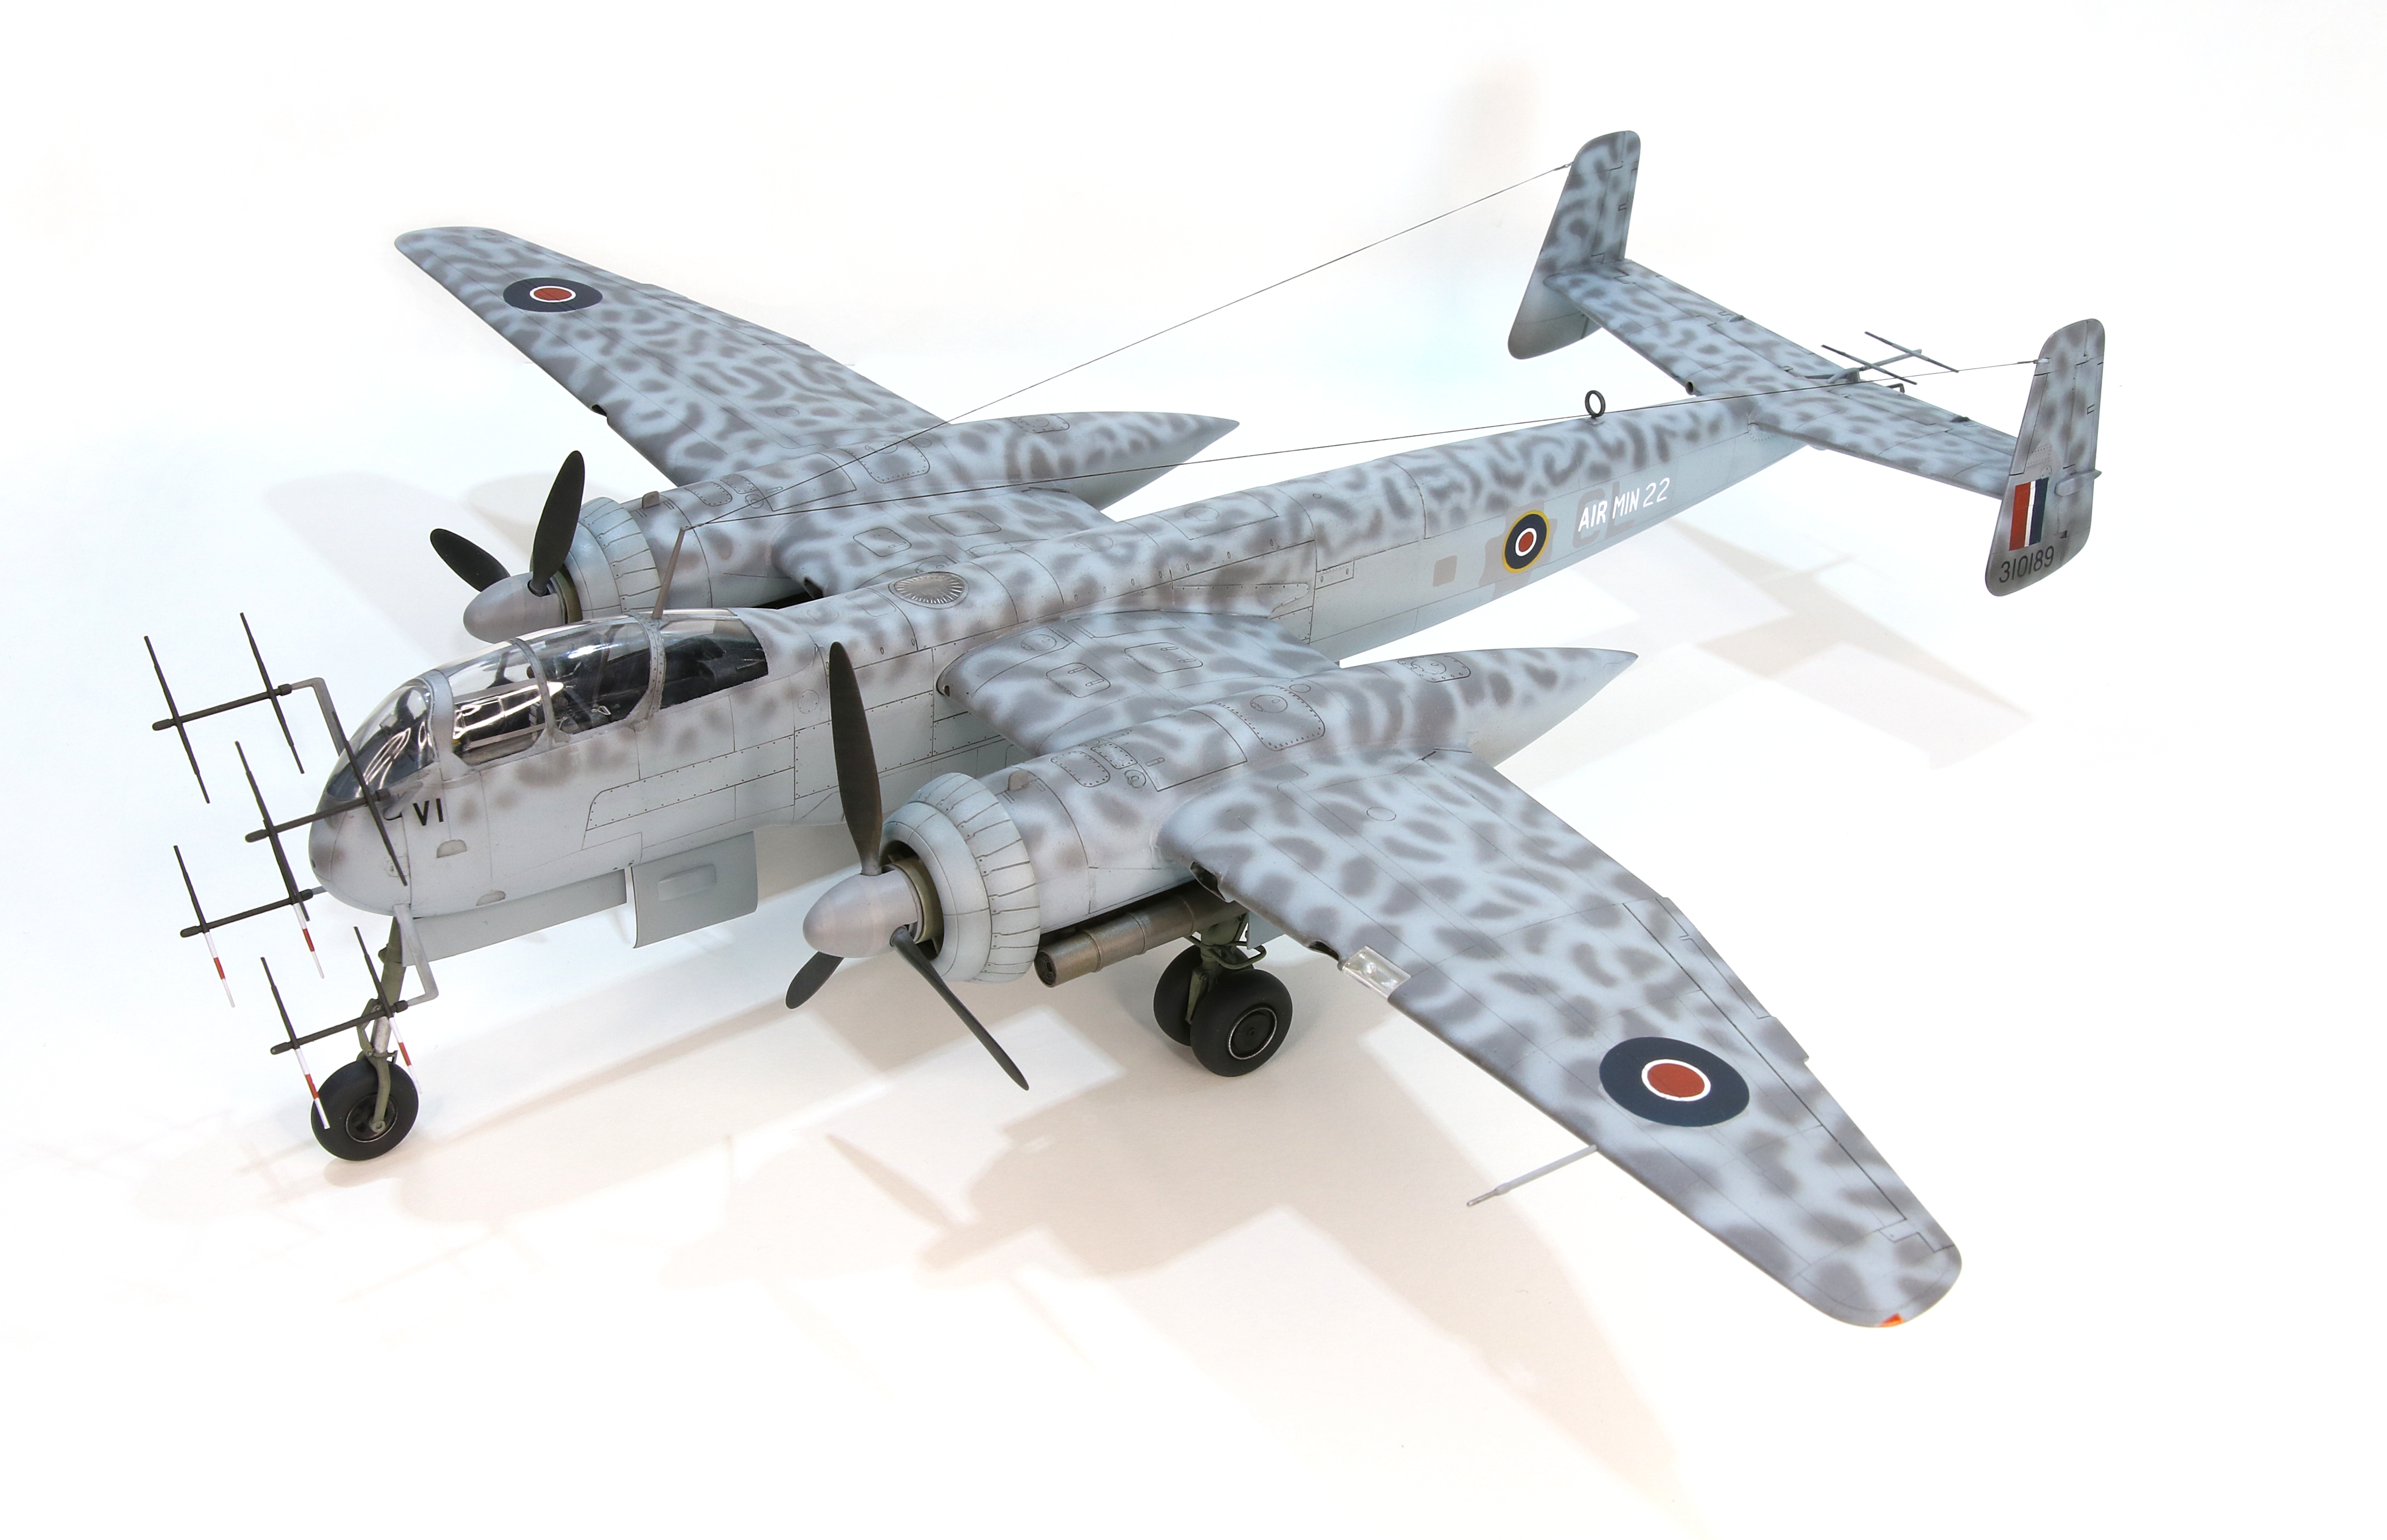
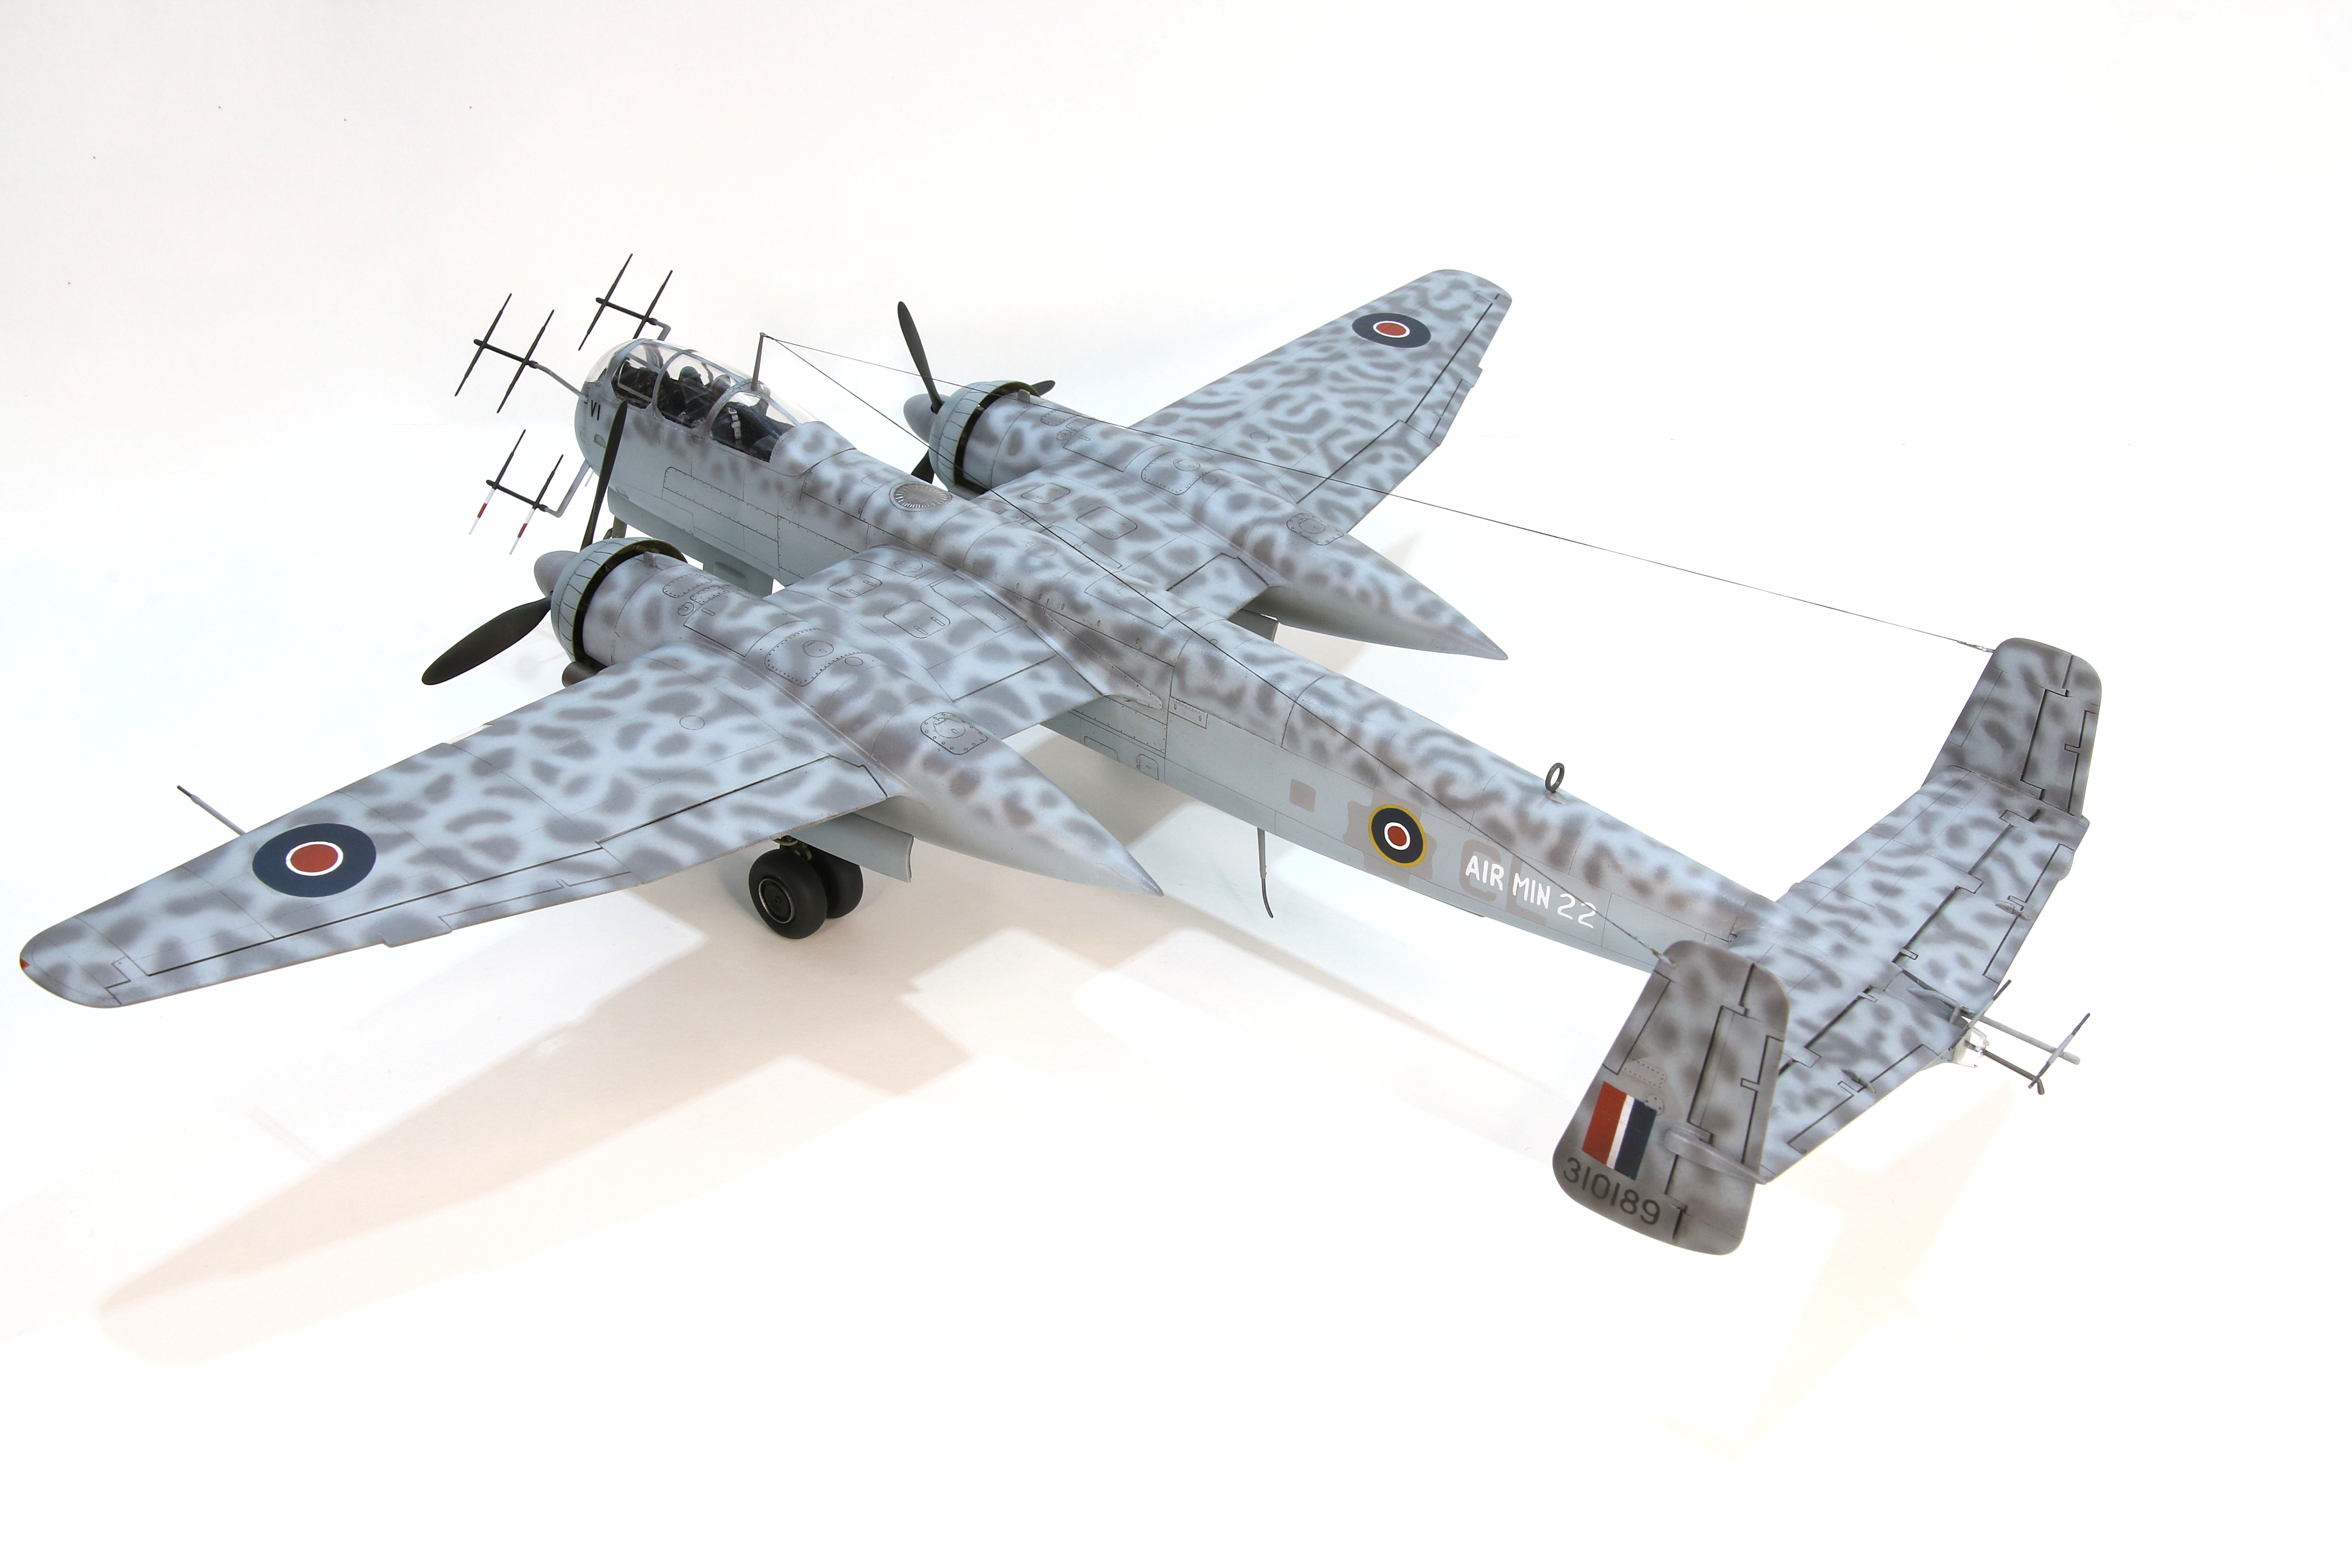
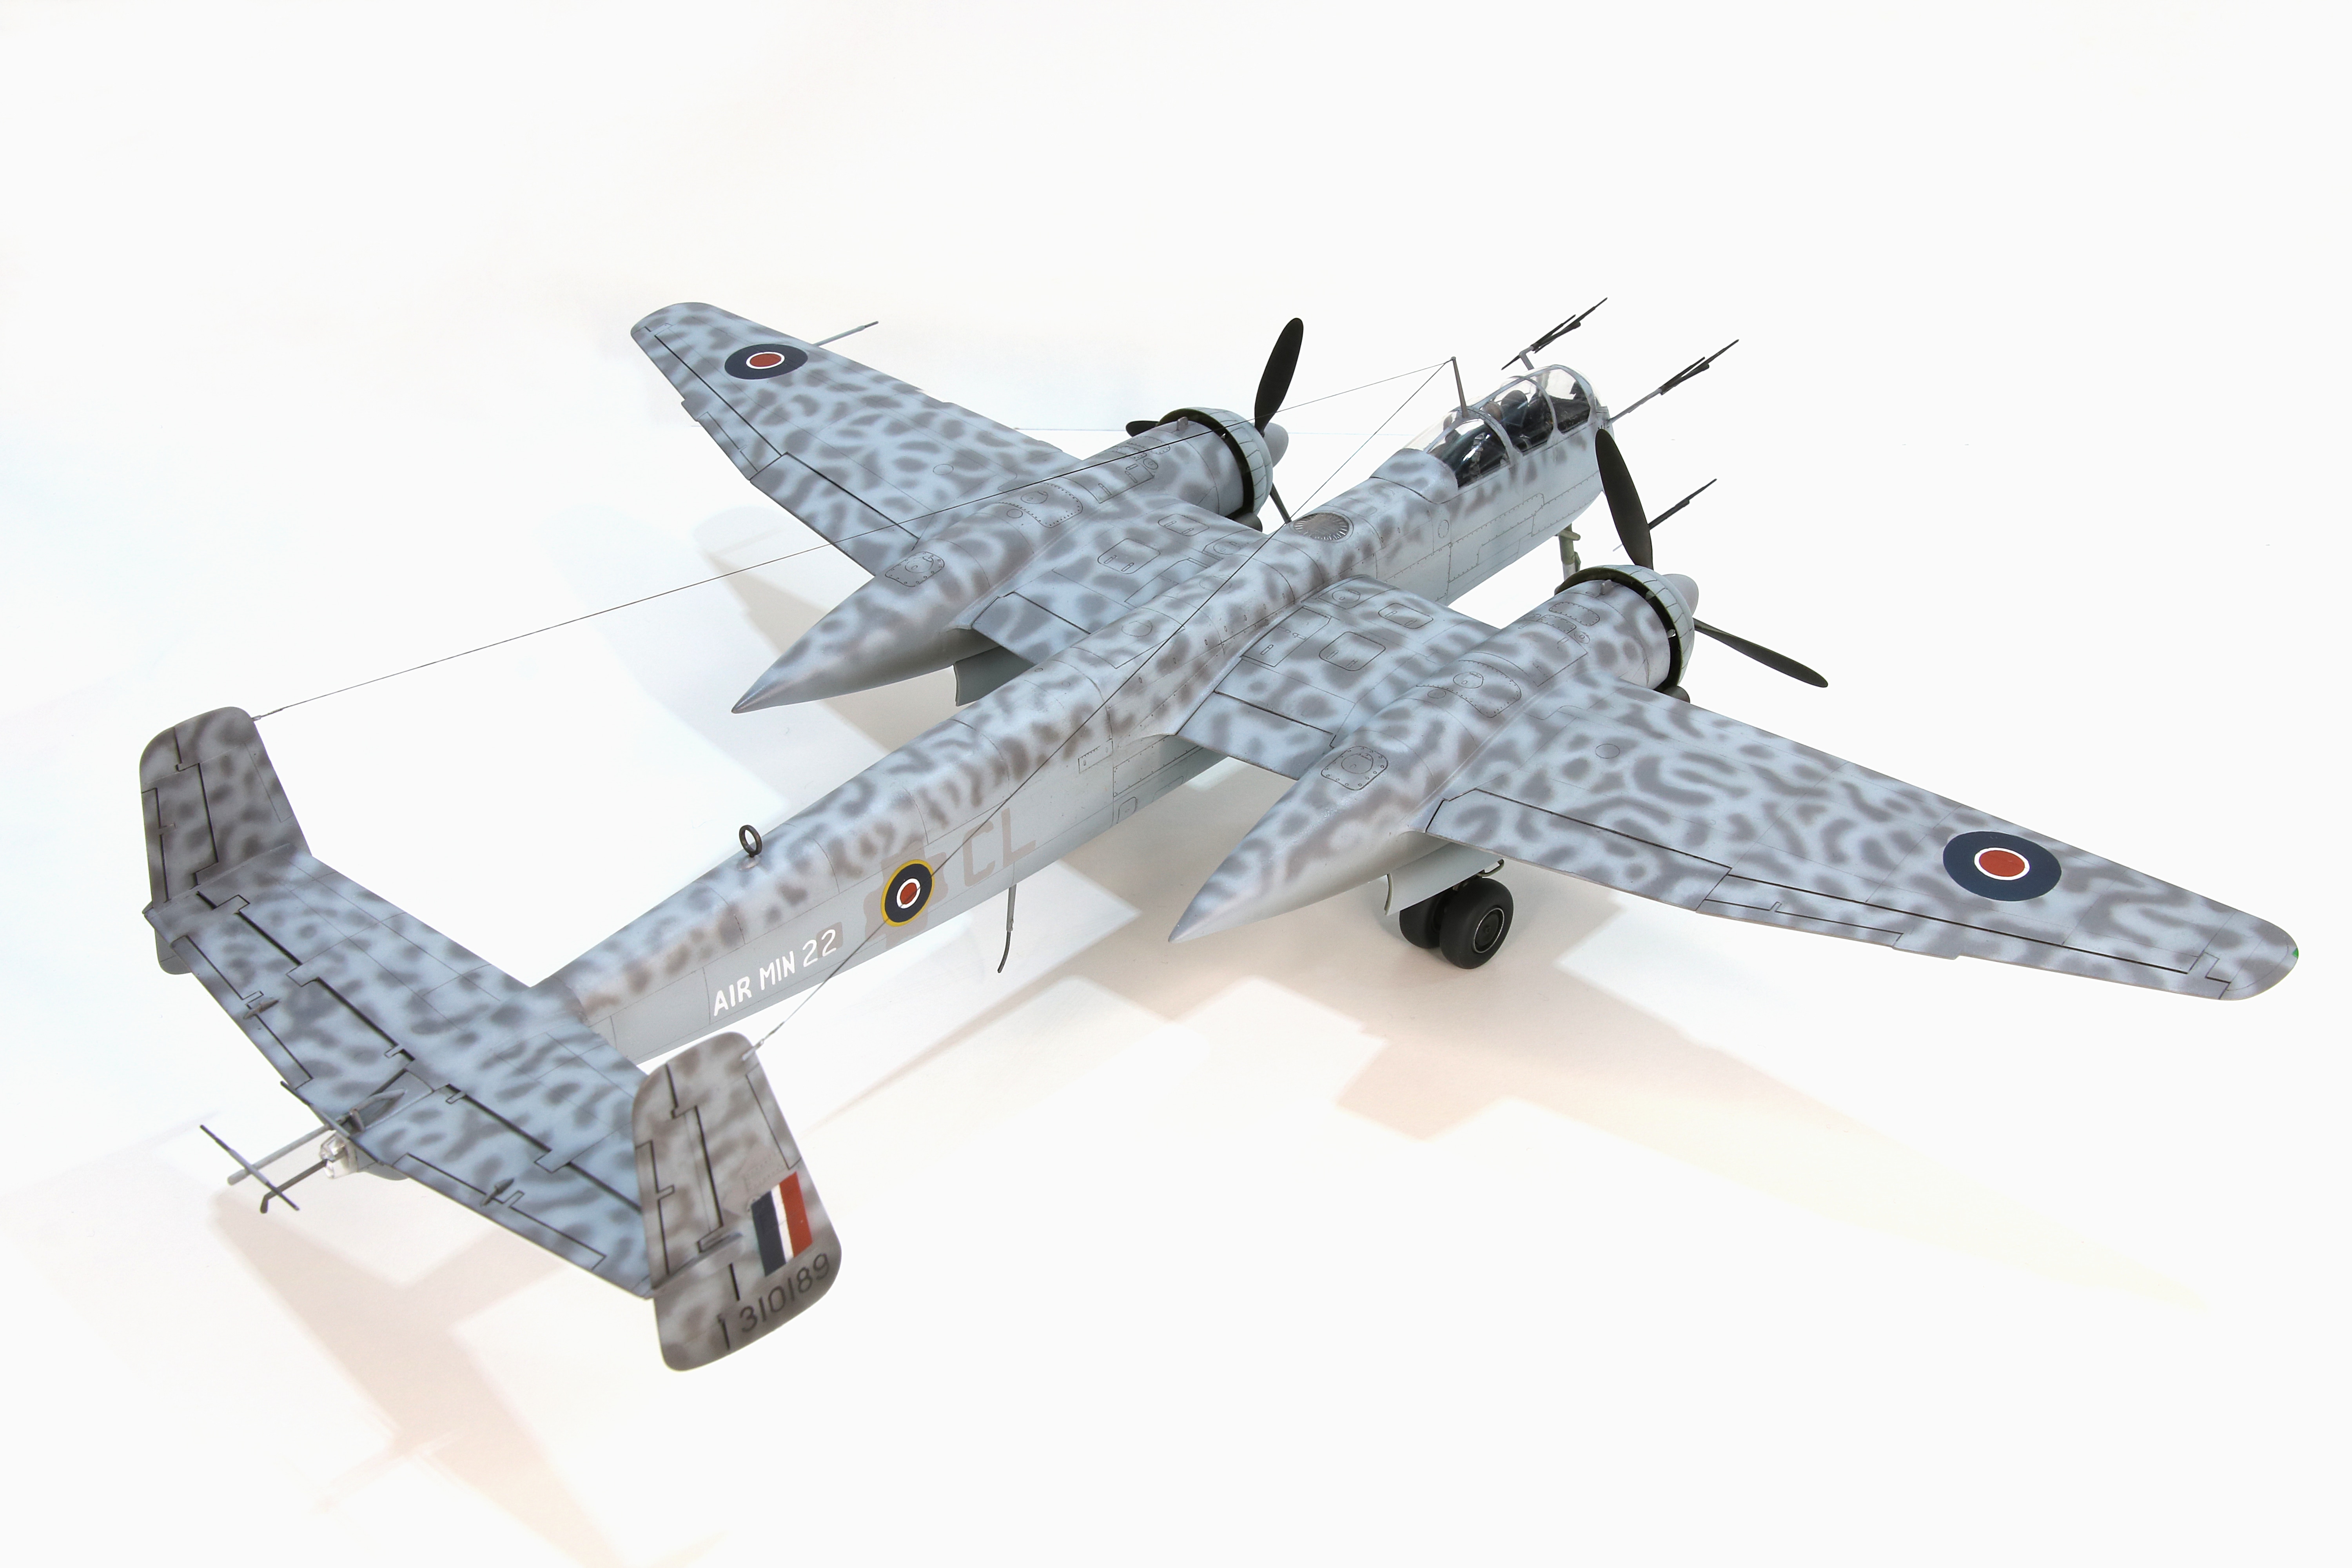
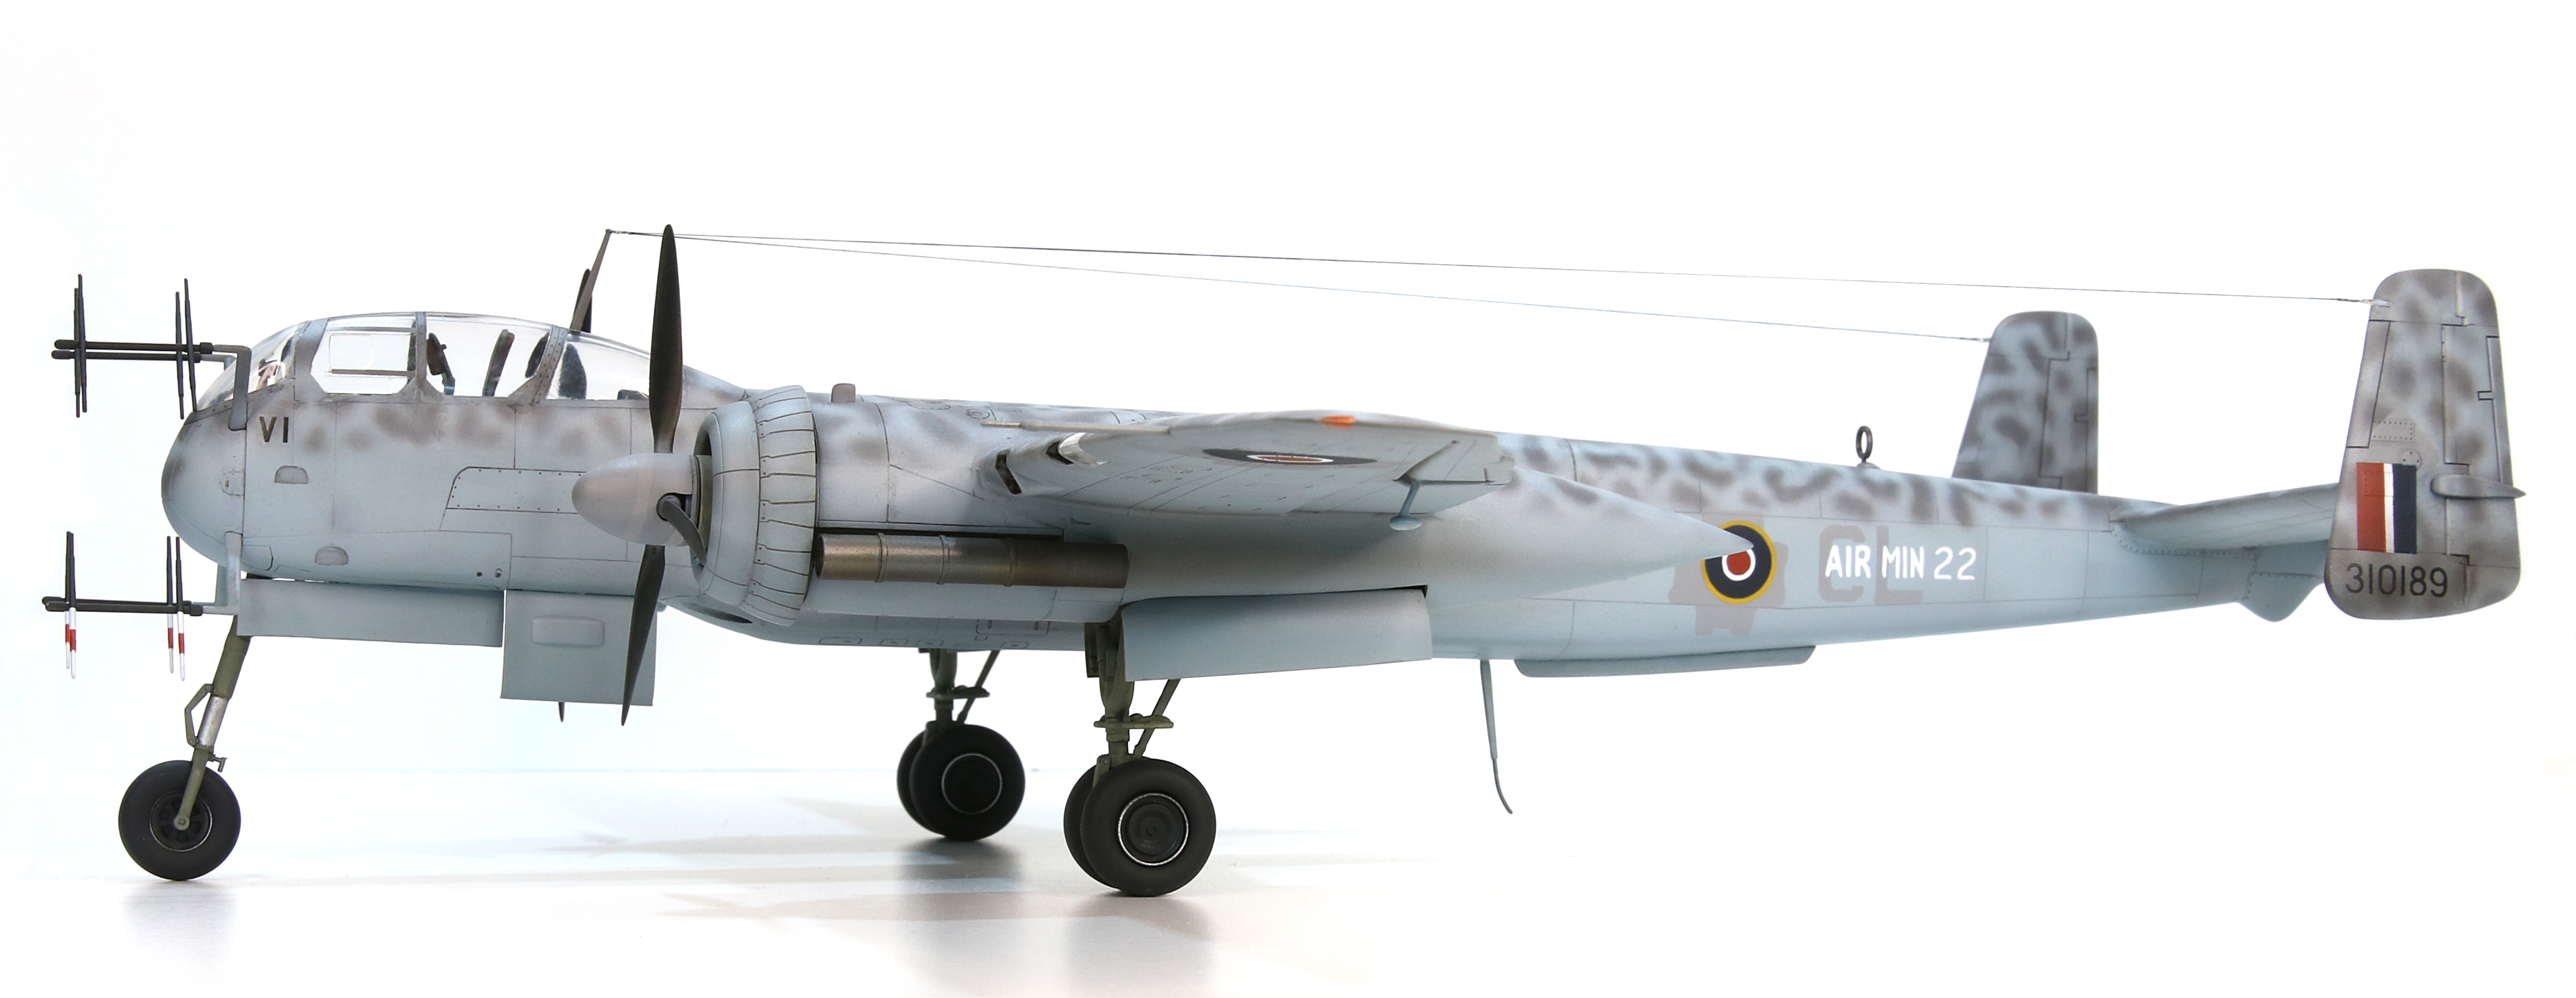
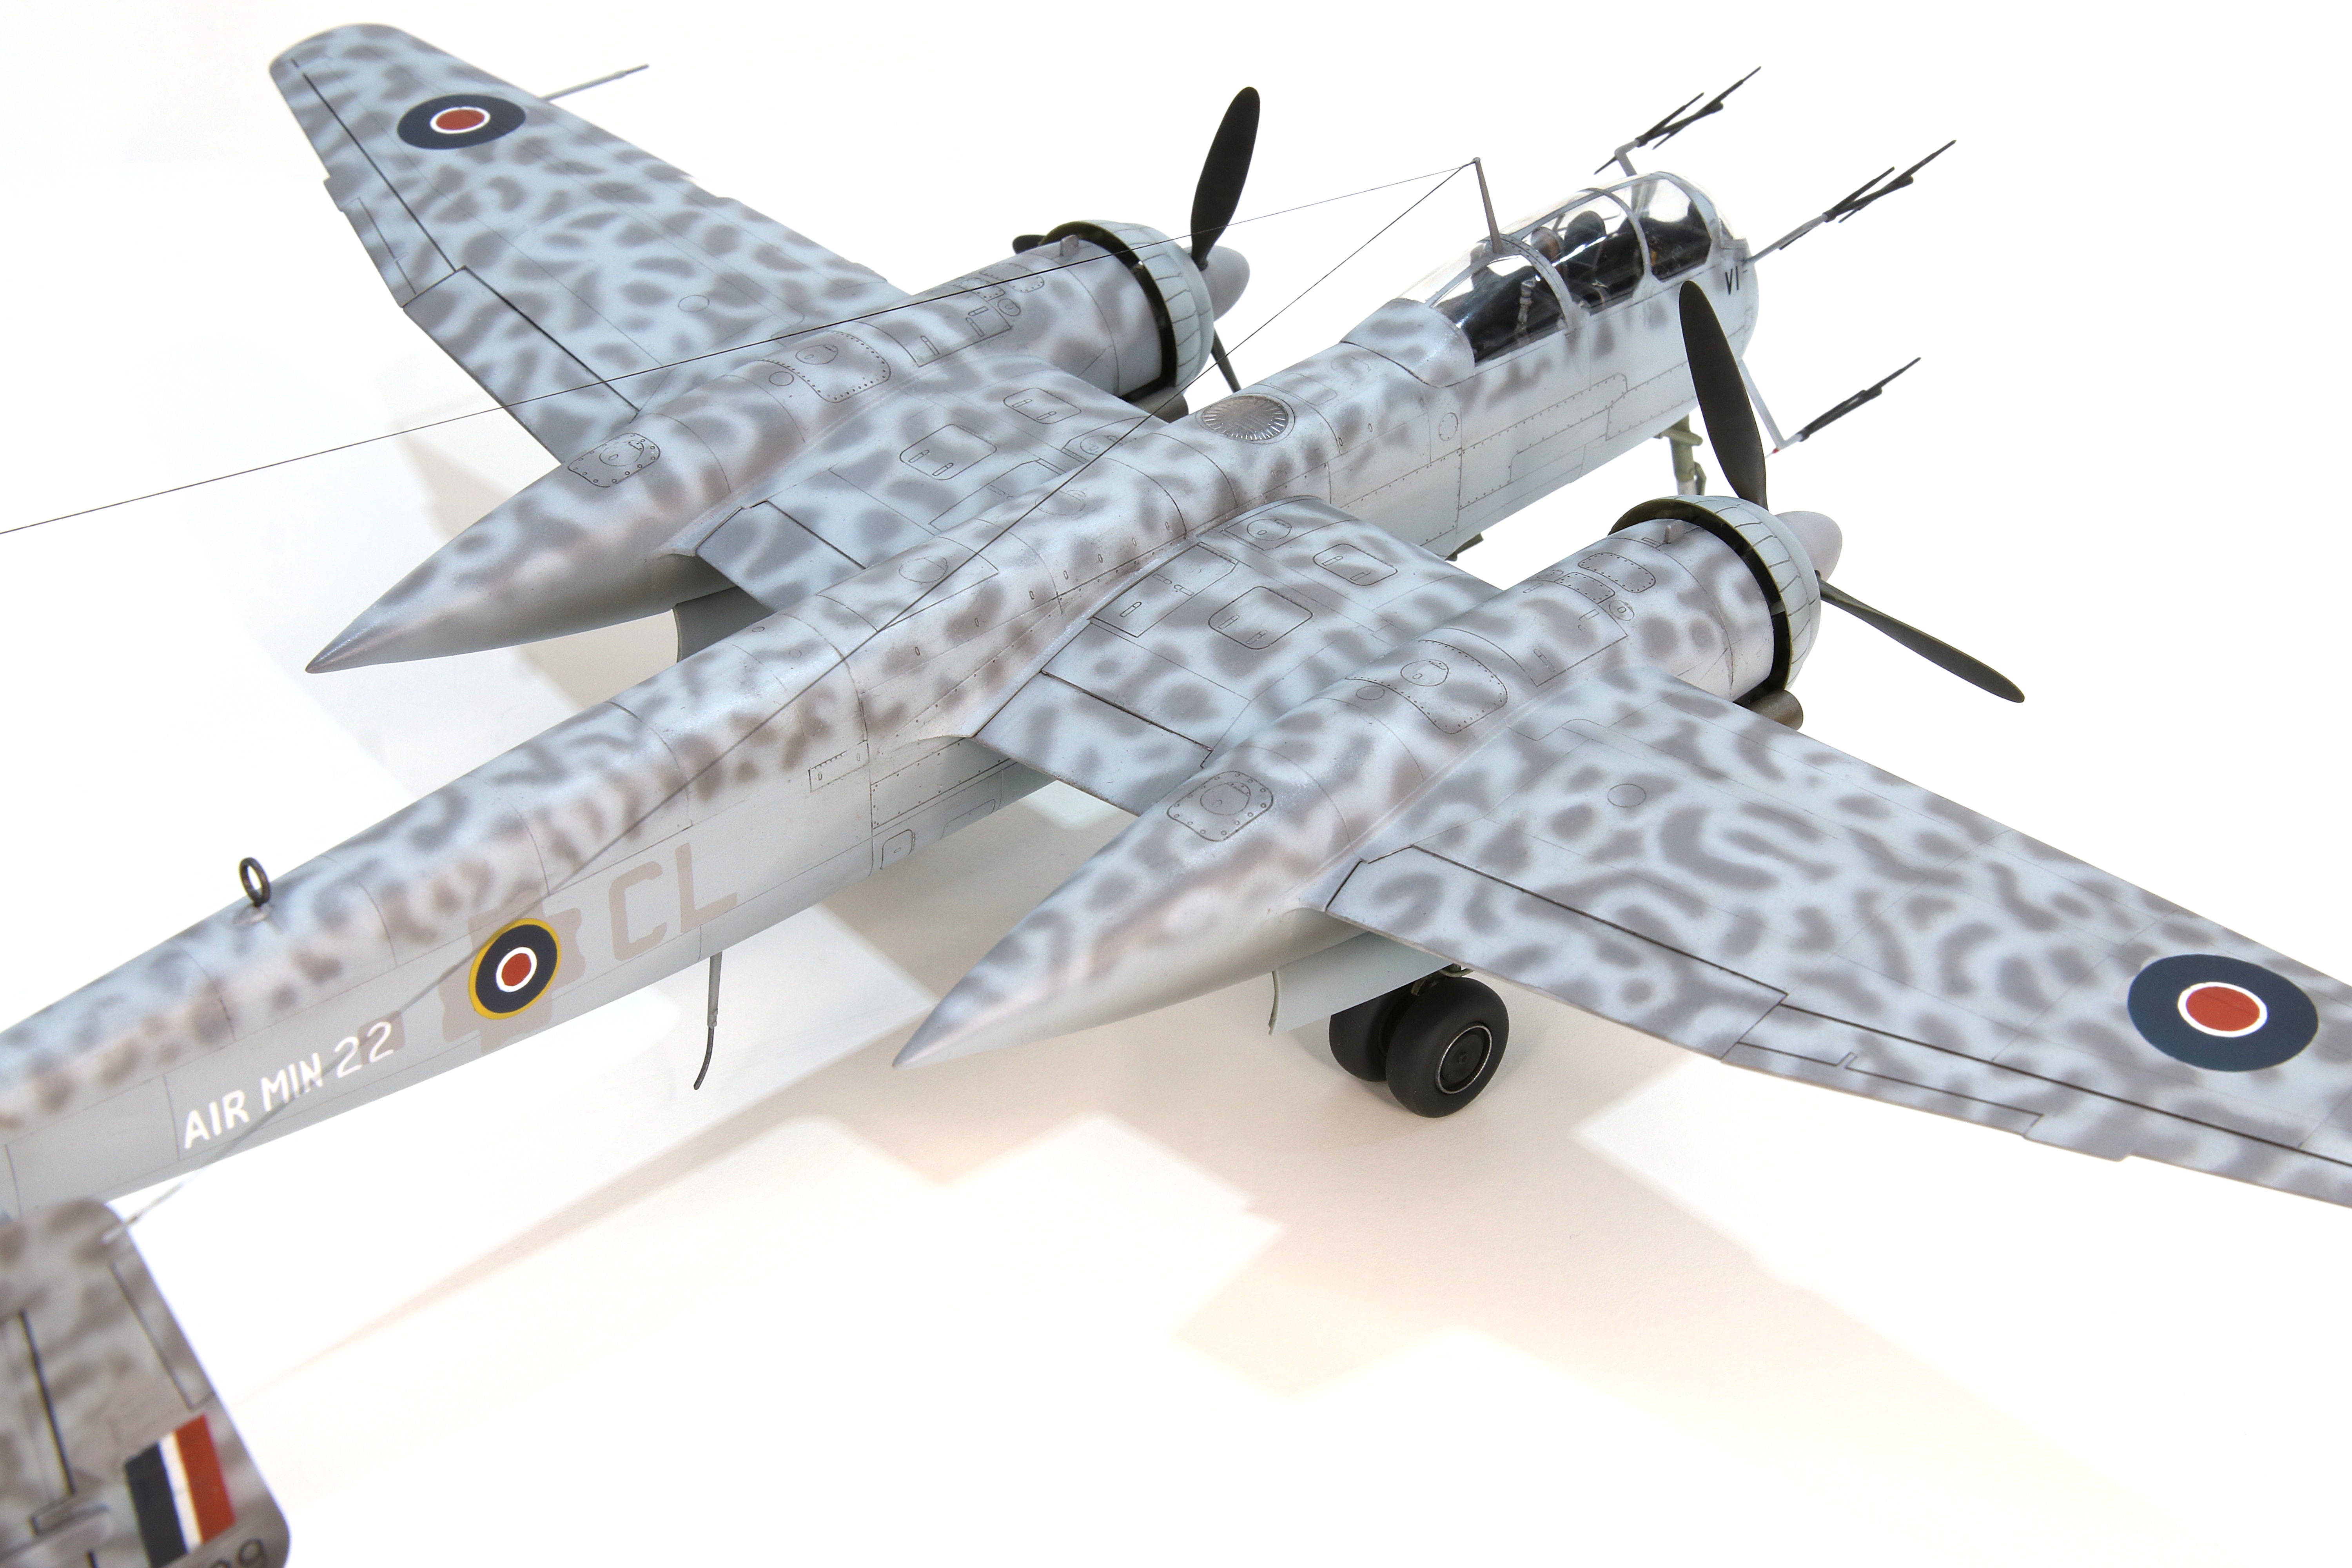
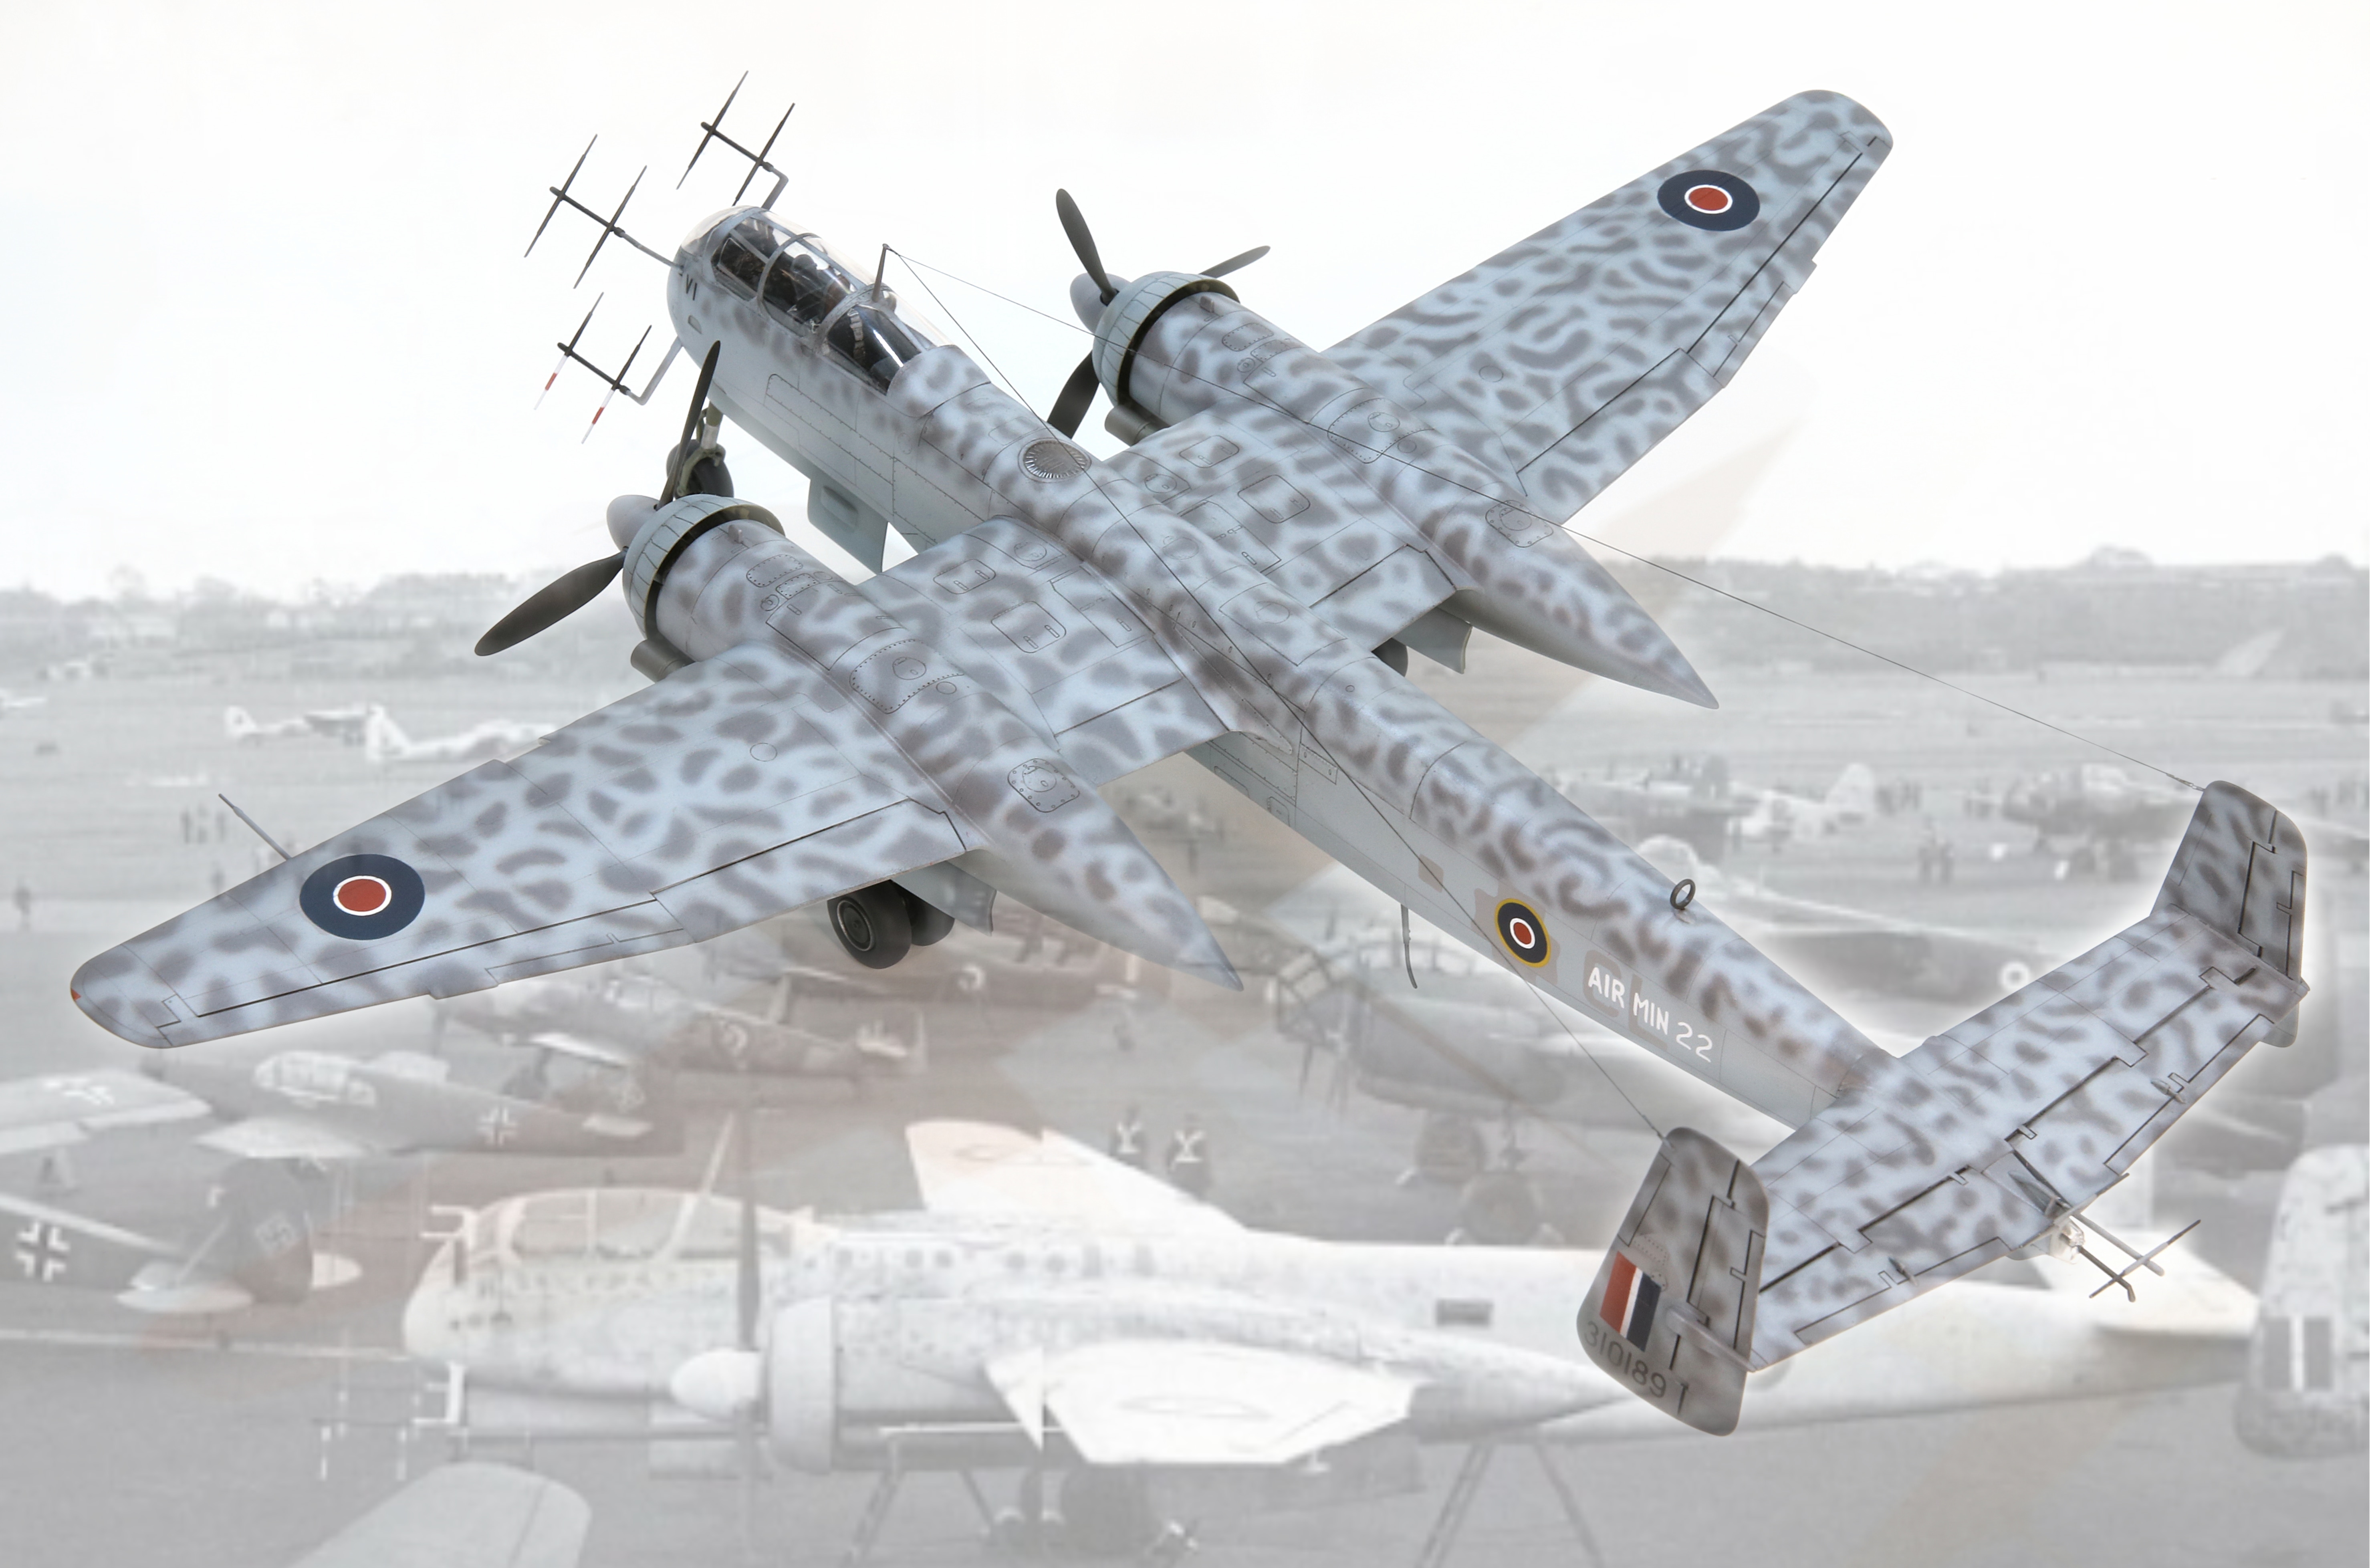
I had a few photos of my subject aircraft to work from which were all taken at the Farnborough exhibition in late 1945. They indicate that the scheme applied appeared to be a fairly typical one, overall RLM 76 with an RLM 75 mottle. At least that was the standard interpretation; upon closer examination of this and other airframes it is apparent that the 76 was applied in a squiggle over the 75. Different airframes show different levels of finesse in this application. On this airframe the squiggle is tight and was, to be frank, a little intimidating as a painting challenge because I haven’t really attempted this kind of camouflage pattern before.
First, I experimented with fine worms of blue tack in a in a reverse masking approach. It became apparent quite quickly that this approach wasn’t going to give me the result I was looking for for a couple of reasons, the first of which is my lack of patients in having to apply the squiggle with blue tack, and the second was the feathering was so difficult to control that I wasn’t confident of getting the result I was looking for.
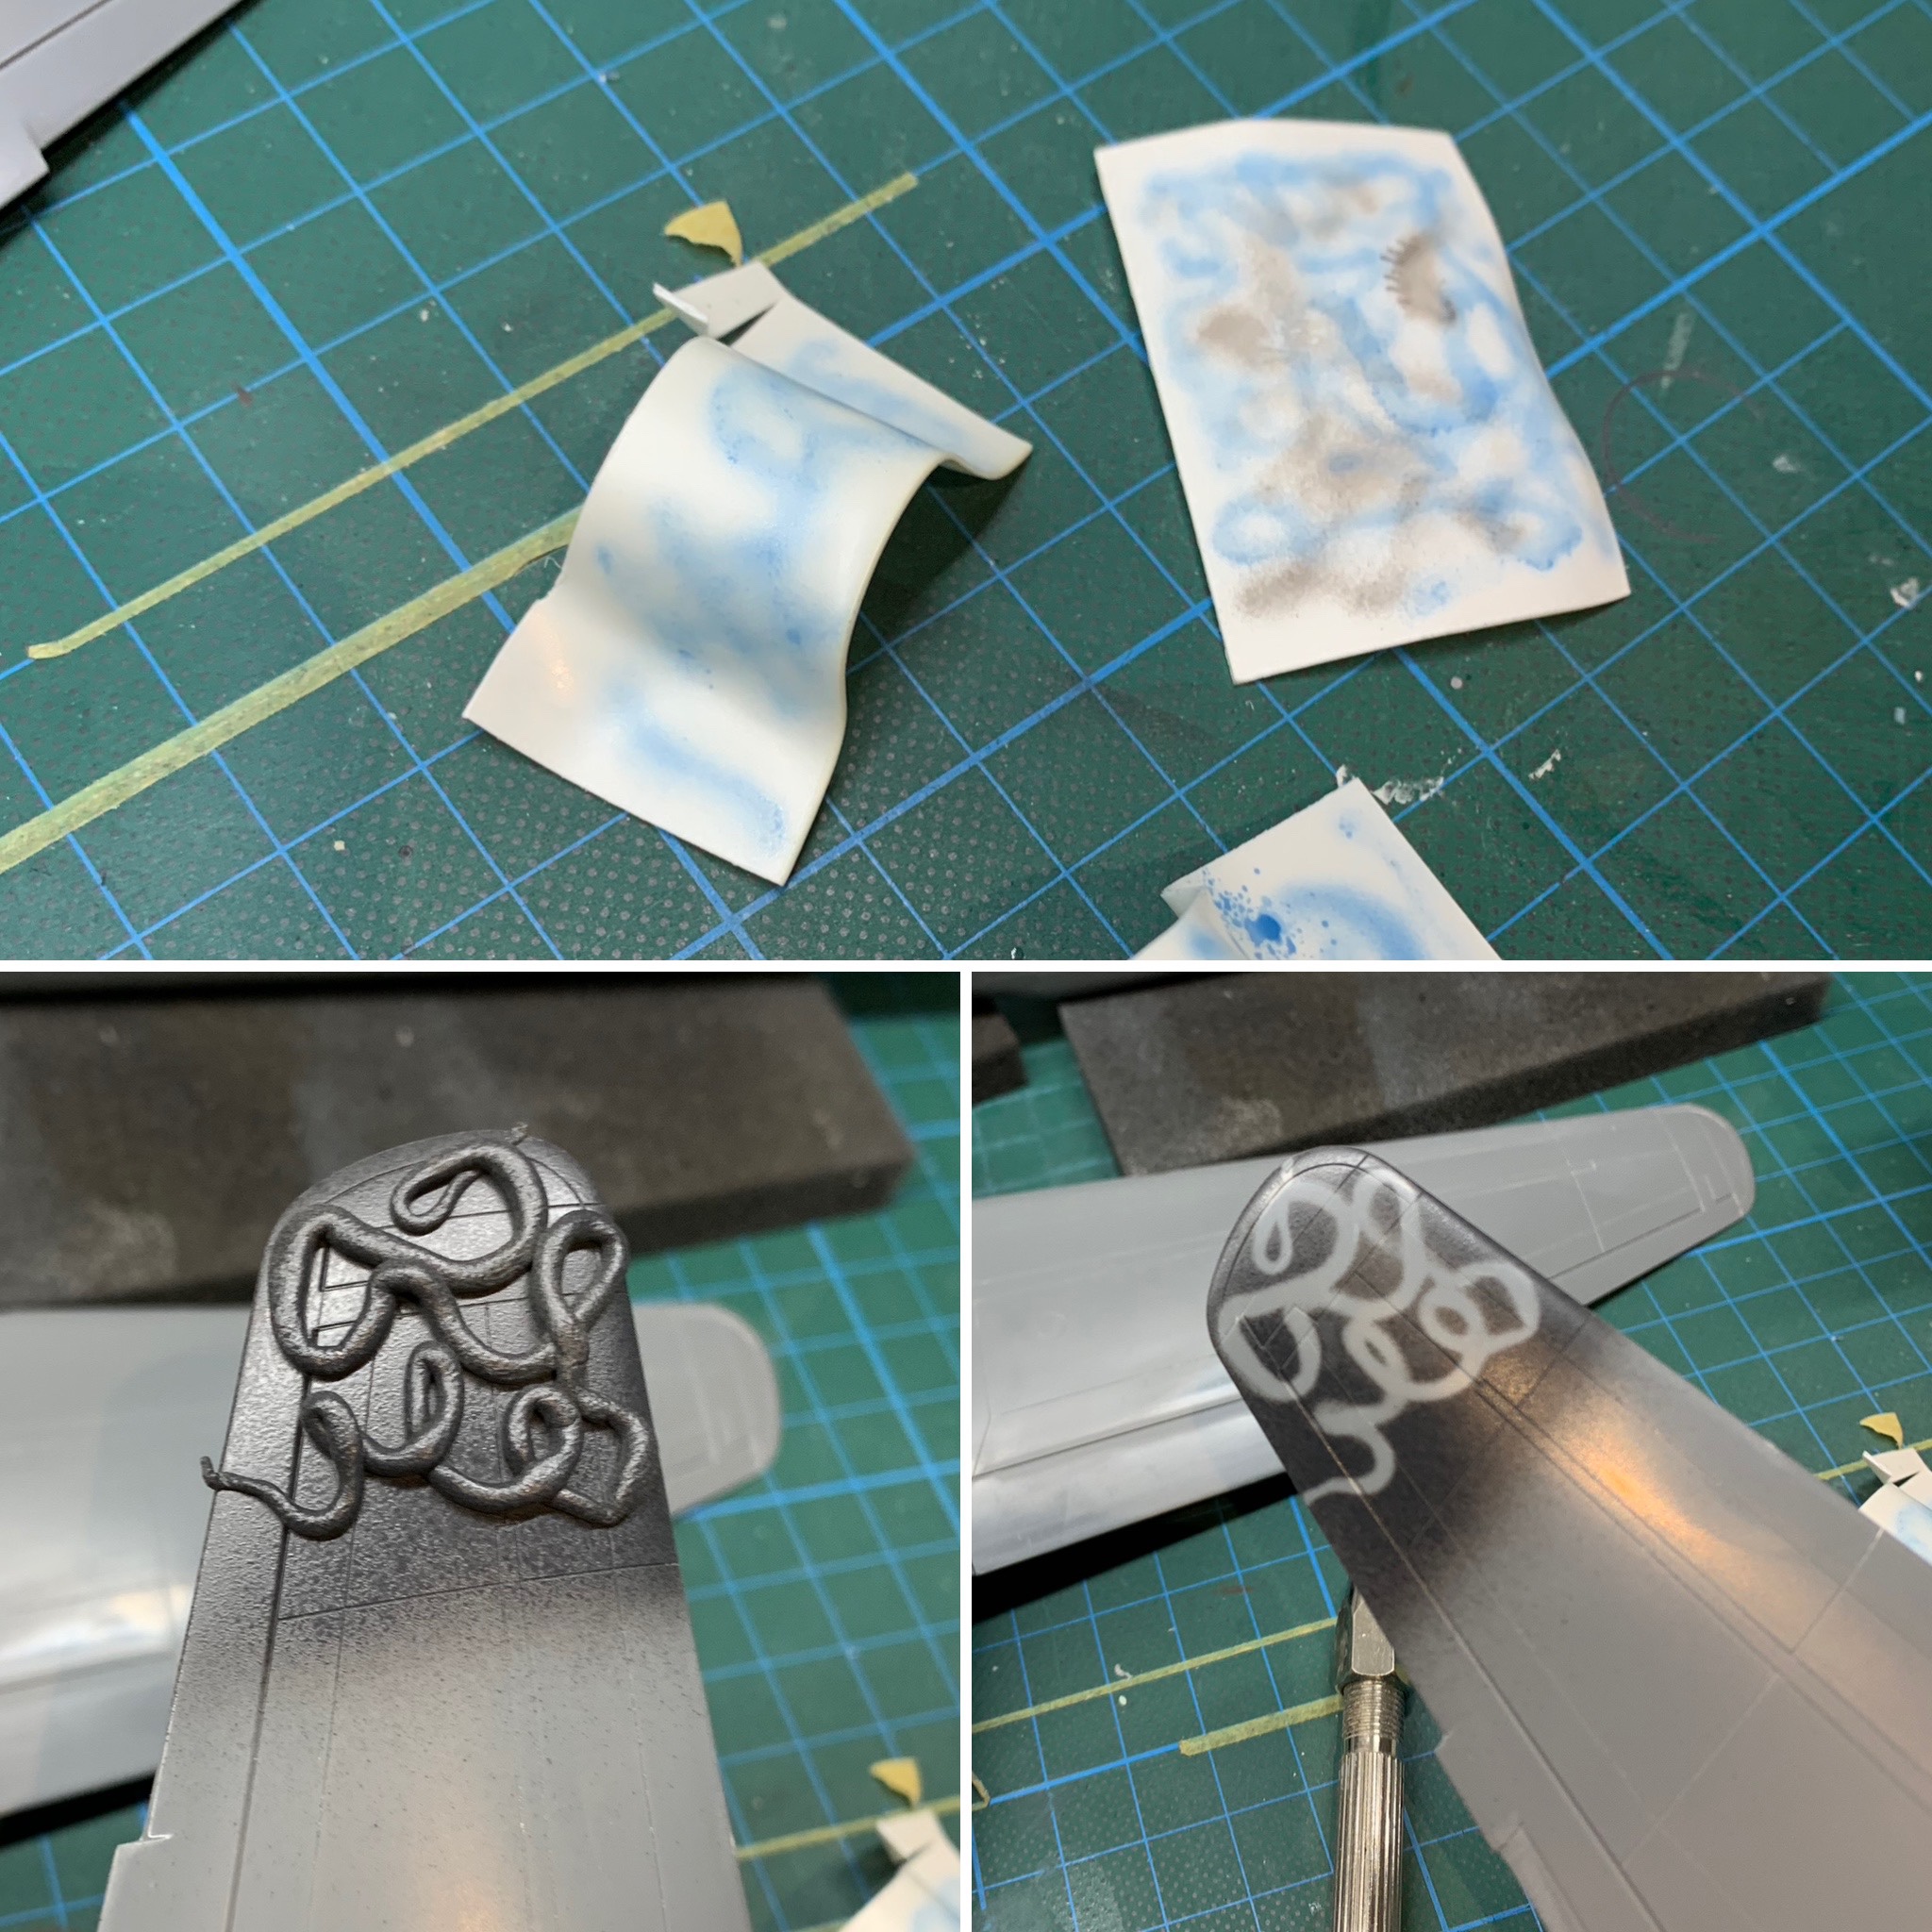
Having eliminated using any kind of mask technique, I knew I’d have to freehand the RLM76 onto a base of RLM75. It took a little while to develop what worked quite well for me, and if you look really closely at the photos, you can see that the results sort of evolved across the various components. I started with the tail, then the fuselage, and then finally the wings.

My method evolved into one where I applied the squiggle in five stages.
- The first application was quick, very freehand and free-flowing, and really just sort of let it happen
- I found a pattern would start to develop, almost of its own accord…
- …which I reinforced in subsequent applications.
- At this point the 75 was a bit overwhelmed with 76 overspray so I carefully “filled in” the RLM75 again to give the squiggle its definition.
- (Not pictured) the final step was a very thin 76 overcoat which blended the two together, and then finally some touchups to reinforce the squiggle.
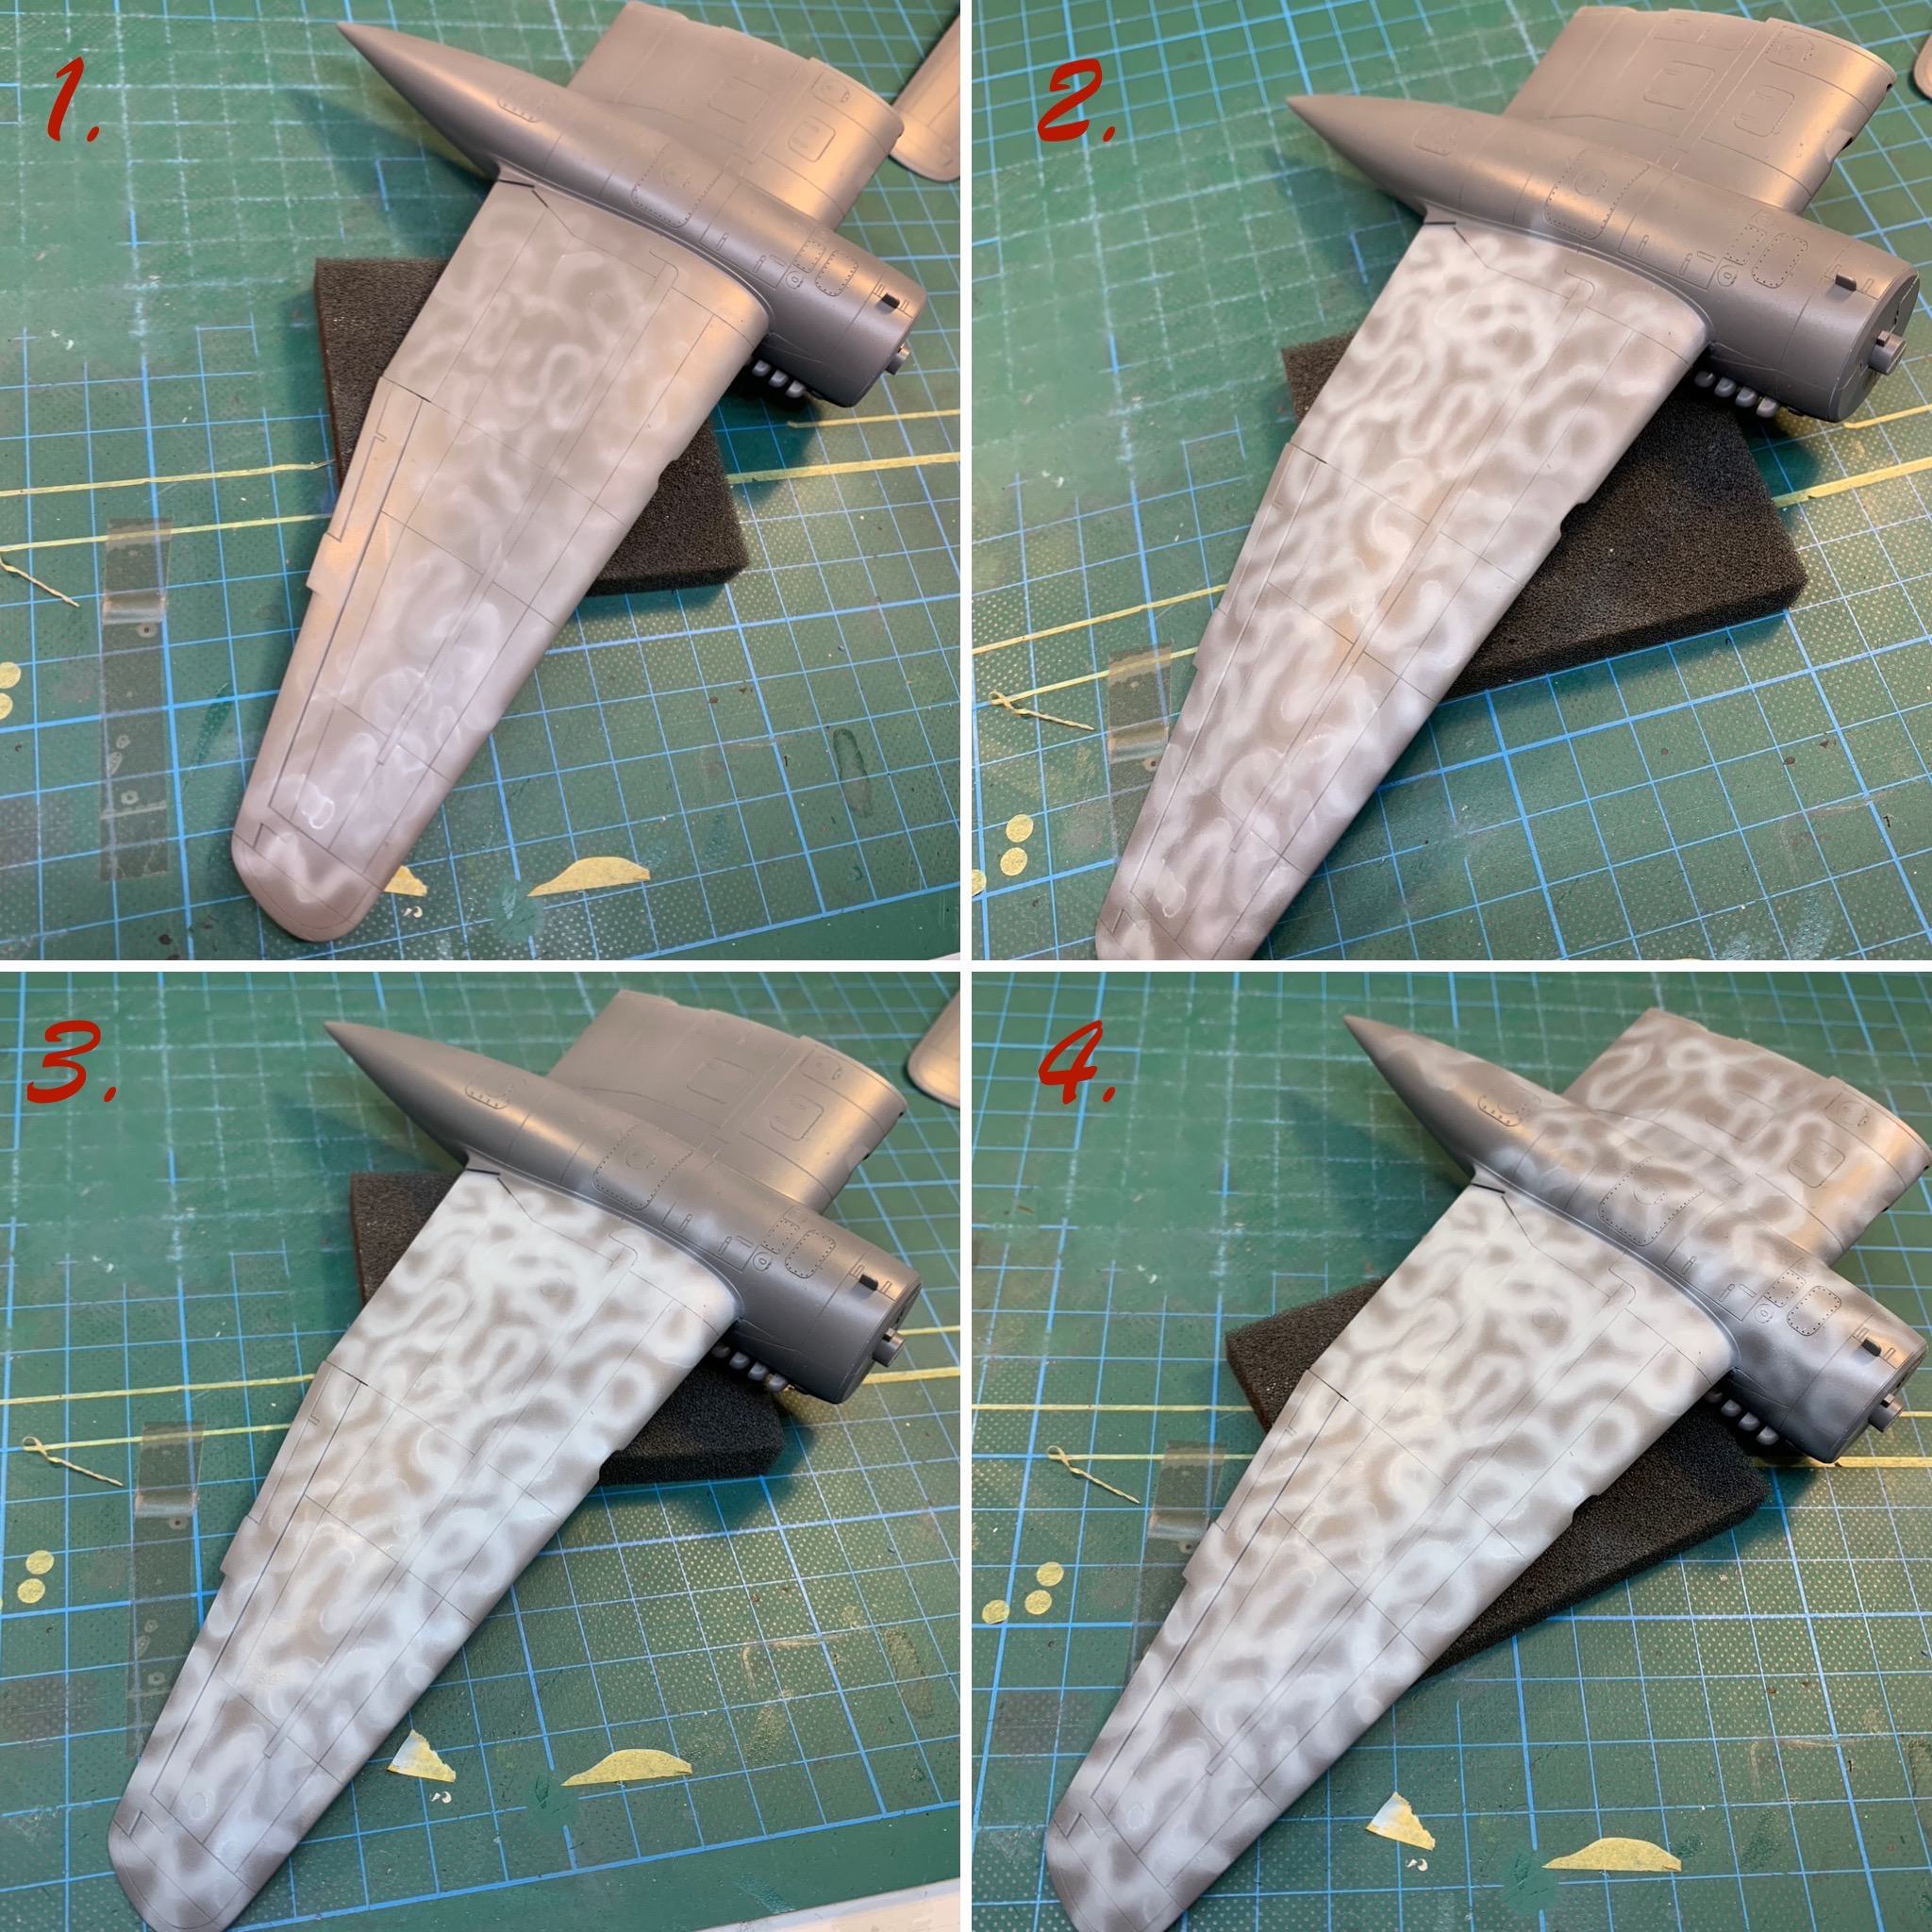
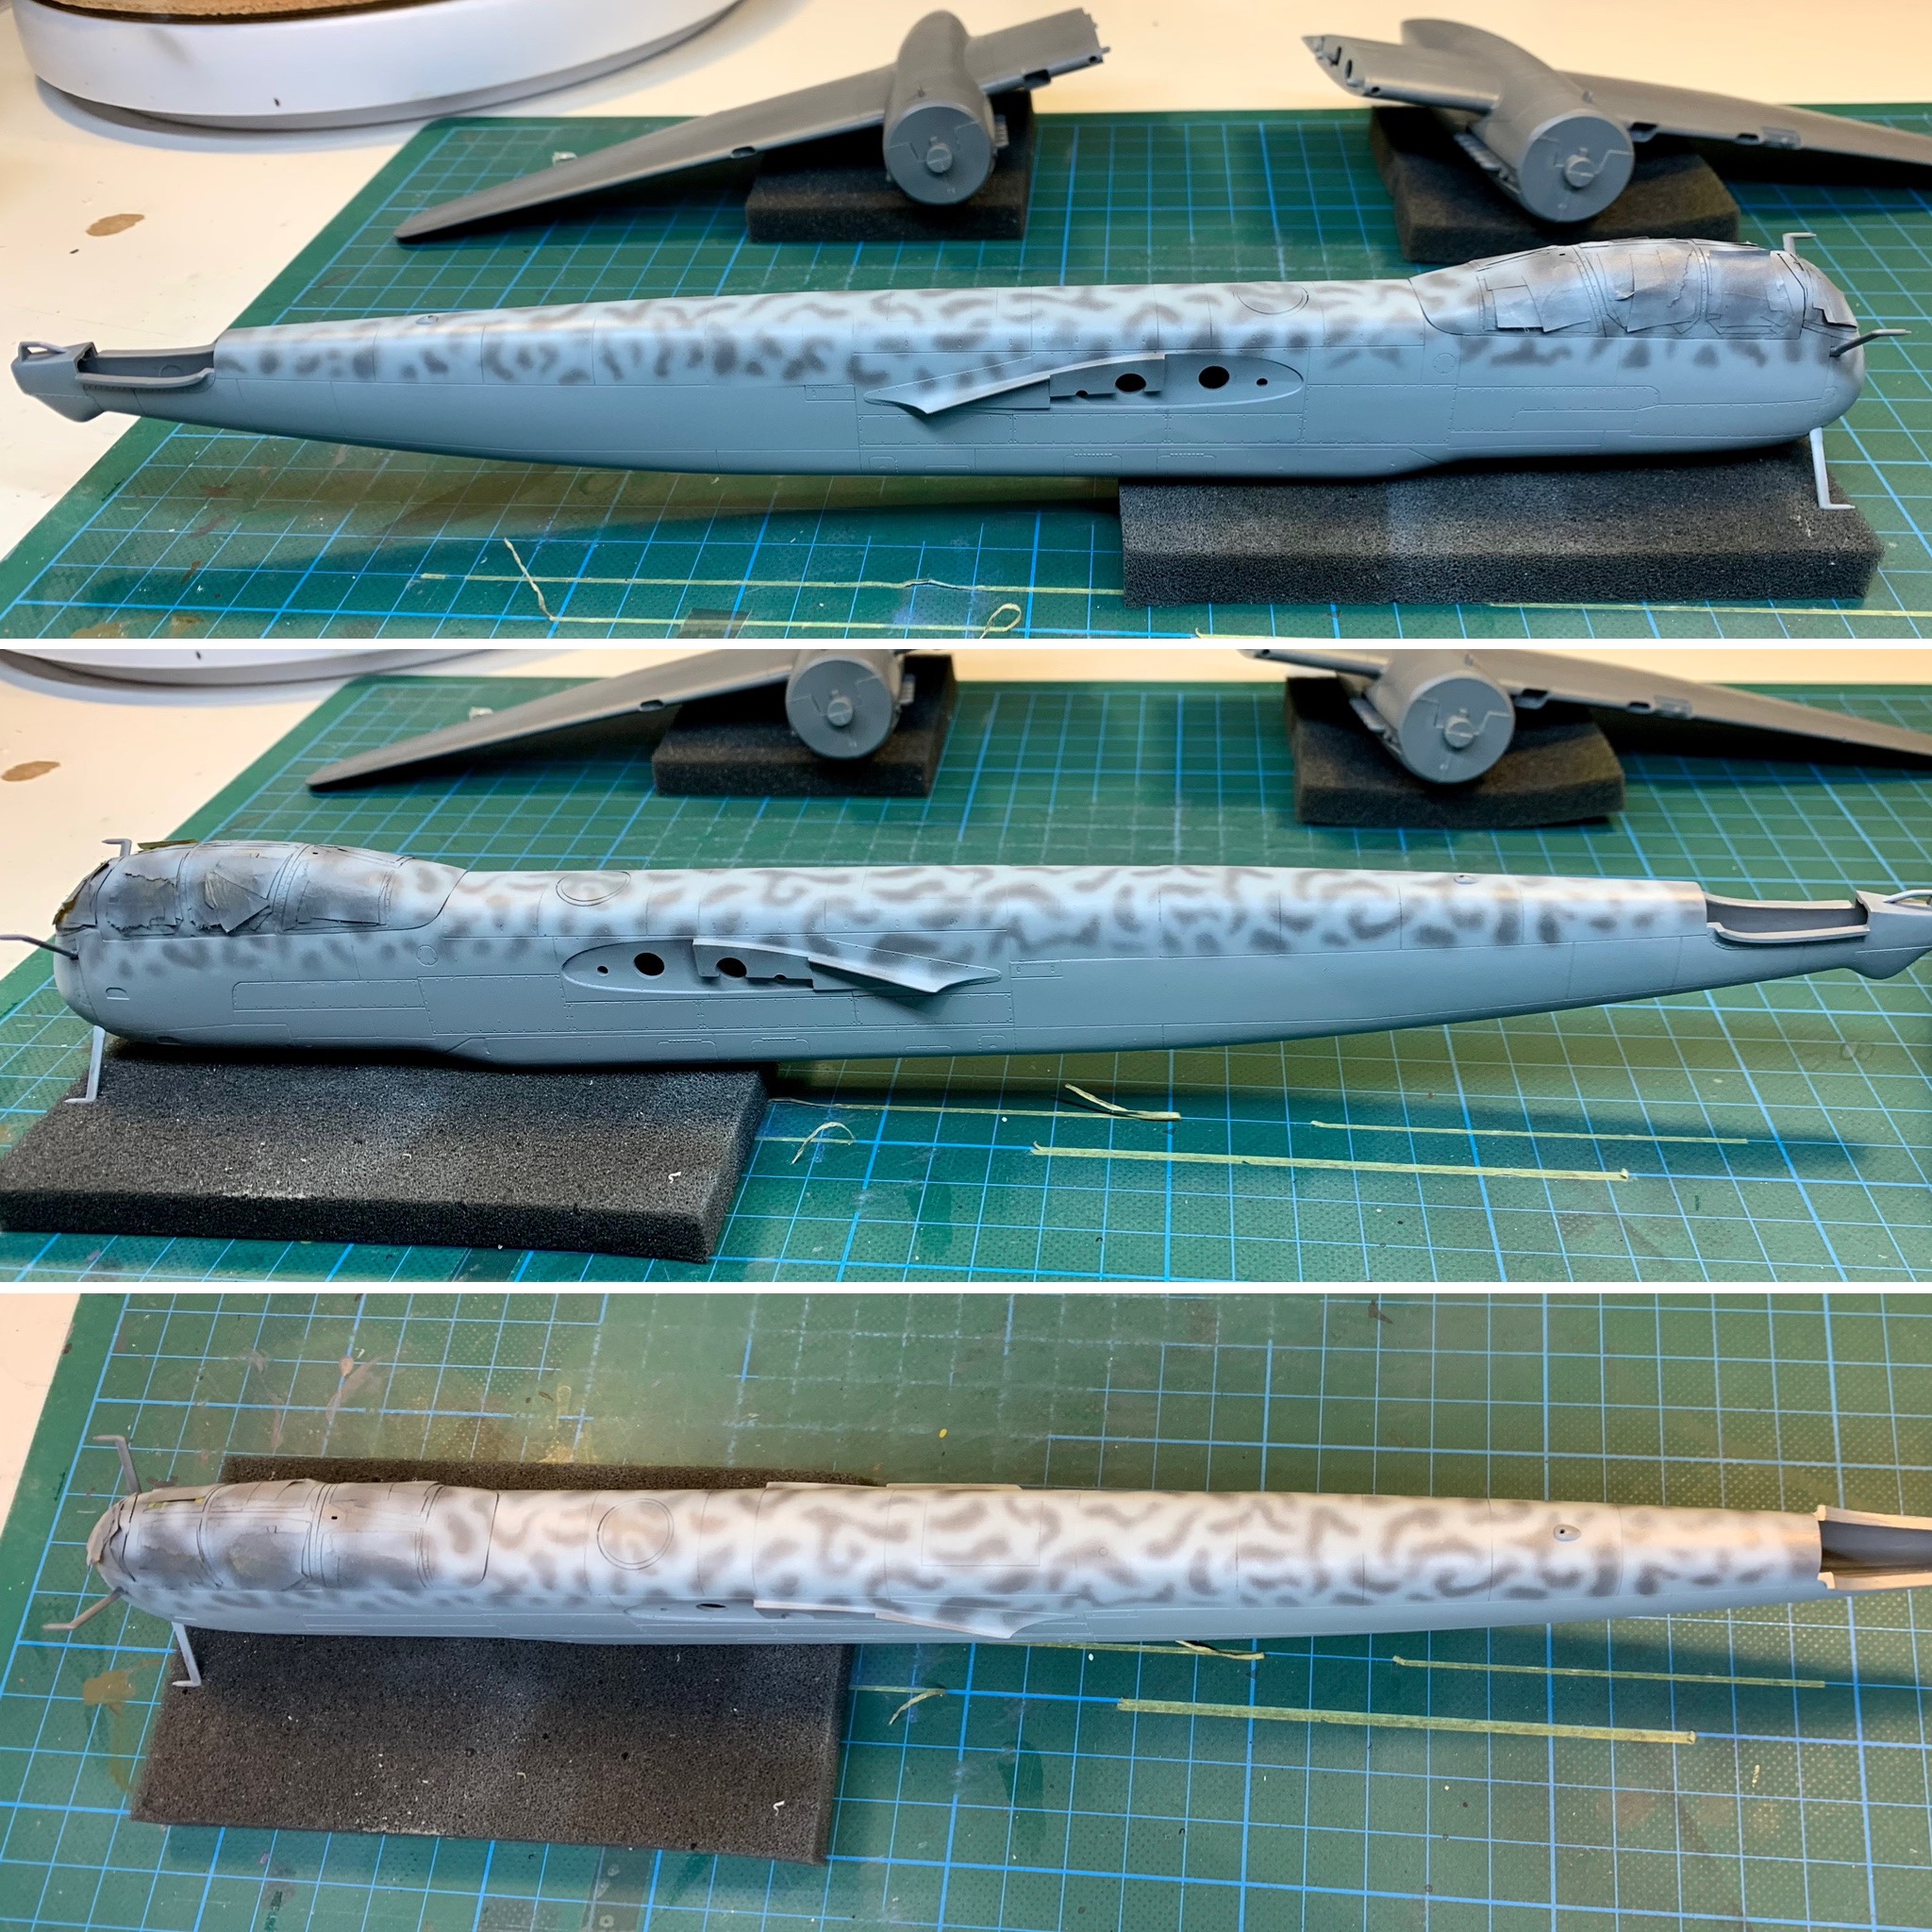
The end result was pretty much what I was hoping for though I’ll be the first to admit that my squiggle isn’t as tight or narrow as the original. I think I can do better the next time I attempt this by being more patient and more careful about the paint mix and its thinning.
When I was finally happy with the scheme, all corrections and touch-ups complete, I applied a light clear coat to protect it and prepare for painting the markings. This is where the adventure really begins.
Coming back to the model I found the clear I’d applied hadn’t cured, and in fact the model was still tacky to the touch. I had used Hataka paints instead of my usual artists acrylic and I suppose that the clear gloss I used is in someway incompatible with that paint. At least, that’s the only explanation I can come up with. Nonetheless, something had to be done because the model couldn’t be handled and I still had a long way to go.
My first attempt at correcting this involved a hairdryer to force cure the clear coat, and while there was some success it didn’t completely fix the problem. Next, I tried a different clear coat over the top in the hope that the new topcoat would cure and provide a protection between the tacky, uncured and the top surface. Again, a little bit of success but I found that wherever the surface had cured after a short time it became tacky again.
Running out of ideas it became inevitable that I was going to have to strip the clear coat. I took a piece of soft cloth, dampened it with Windex and started wiping away the clear coat, expecting the paint to come off with it. Miraculously, not only did the tacky clear coat ball up and wipe away with ease, the paint underneath remained unscathed. The Hataka paint seemed impervious to the Windex and survived the cleanup absolutely intact. I applied a new clear coat to the entire model, which this time cured properly, and was finally ready to paint the markings.
Markings
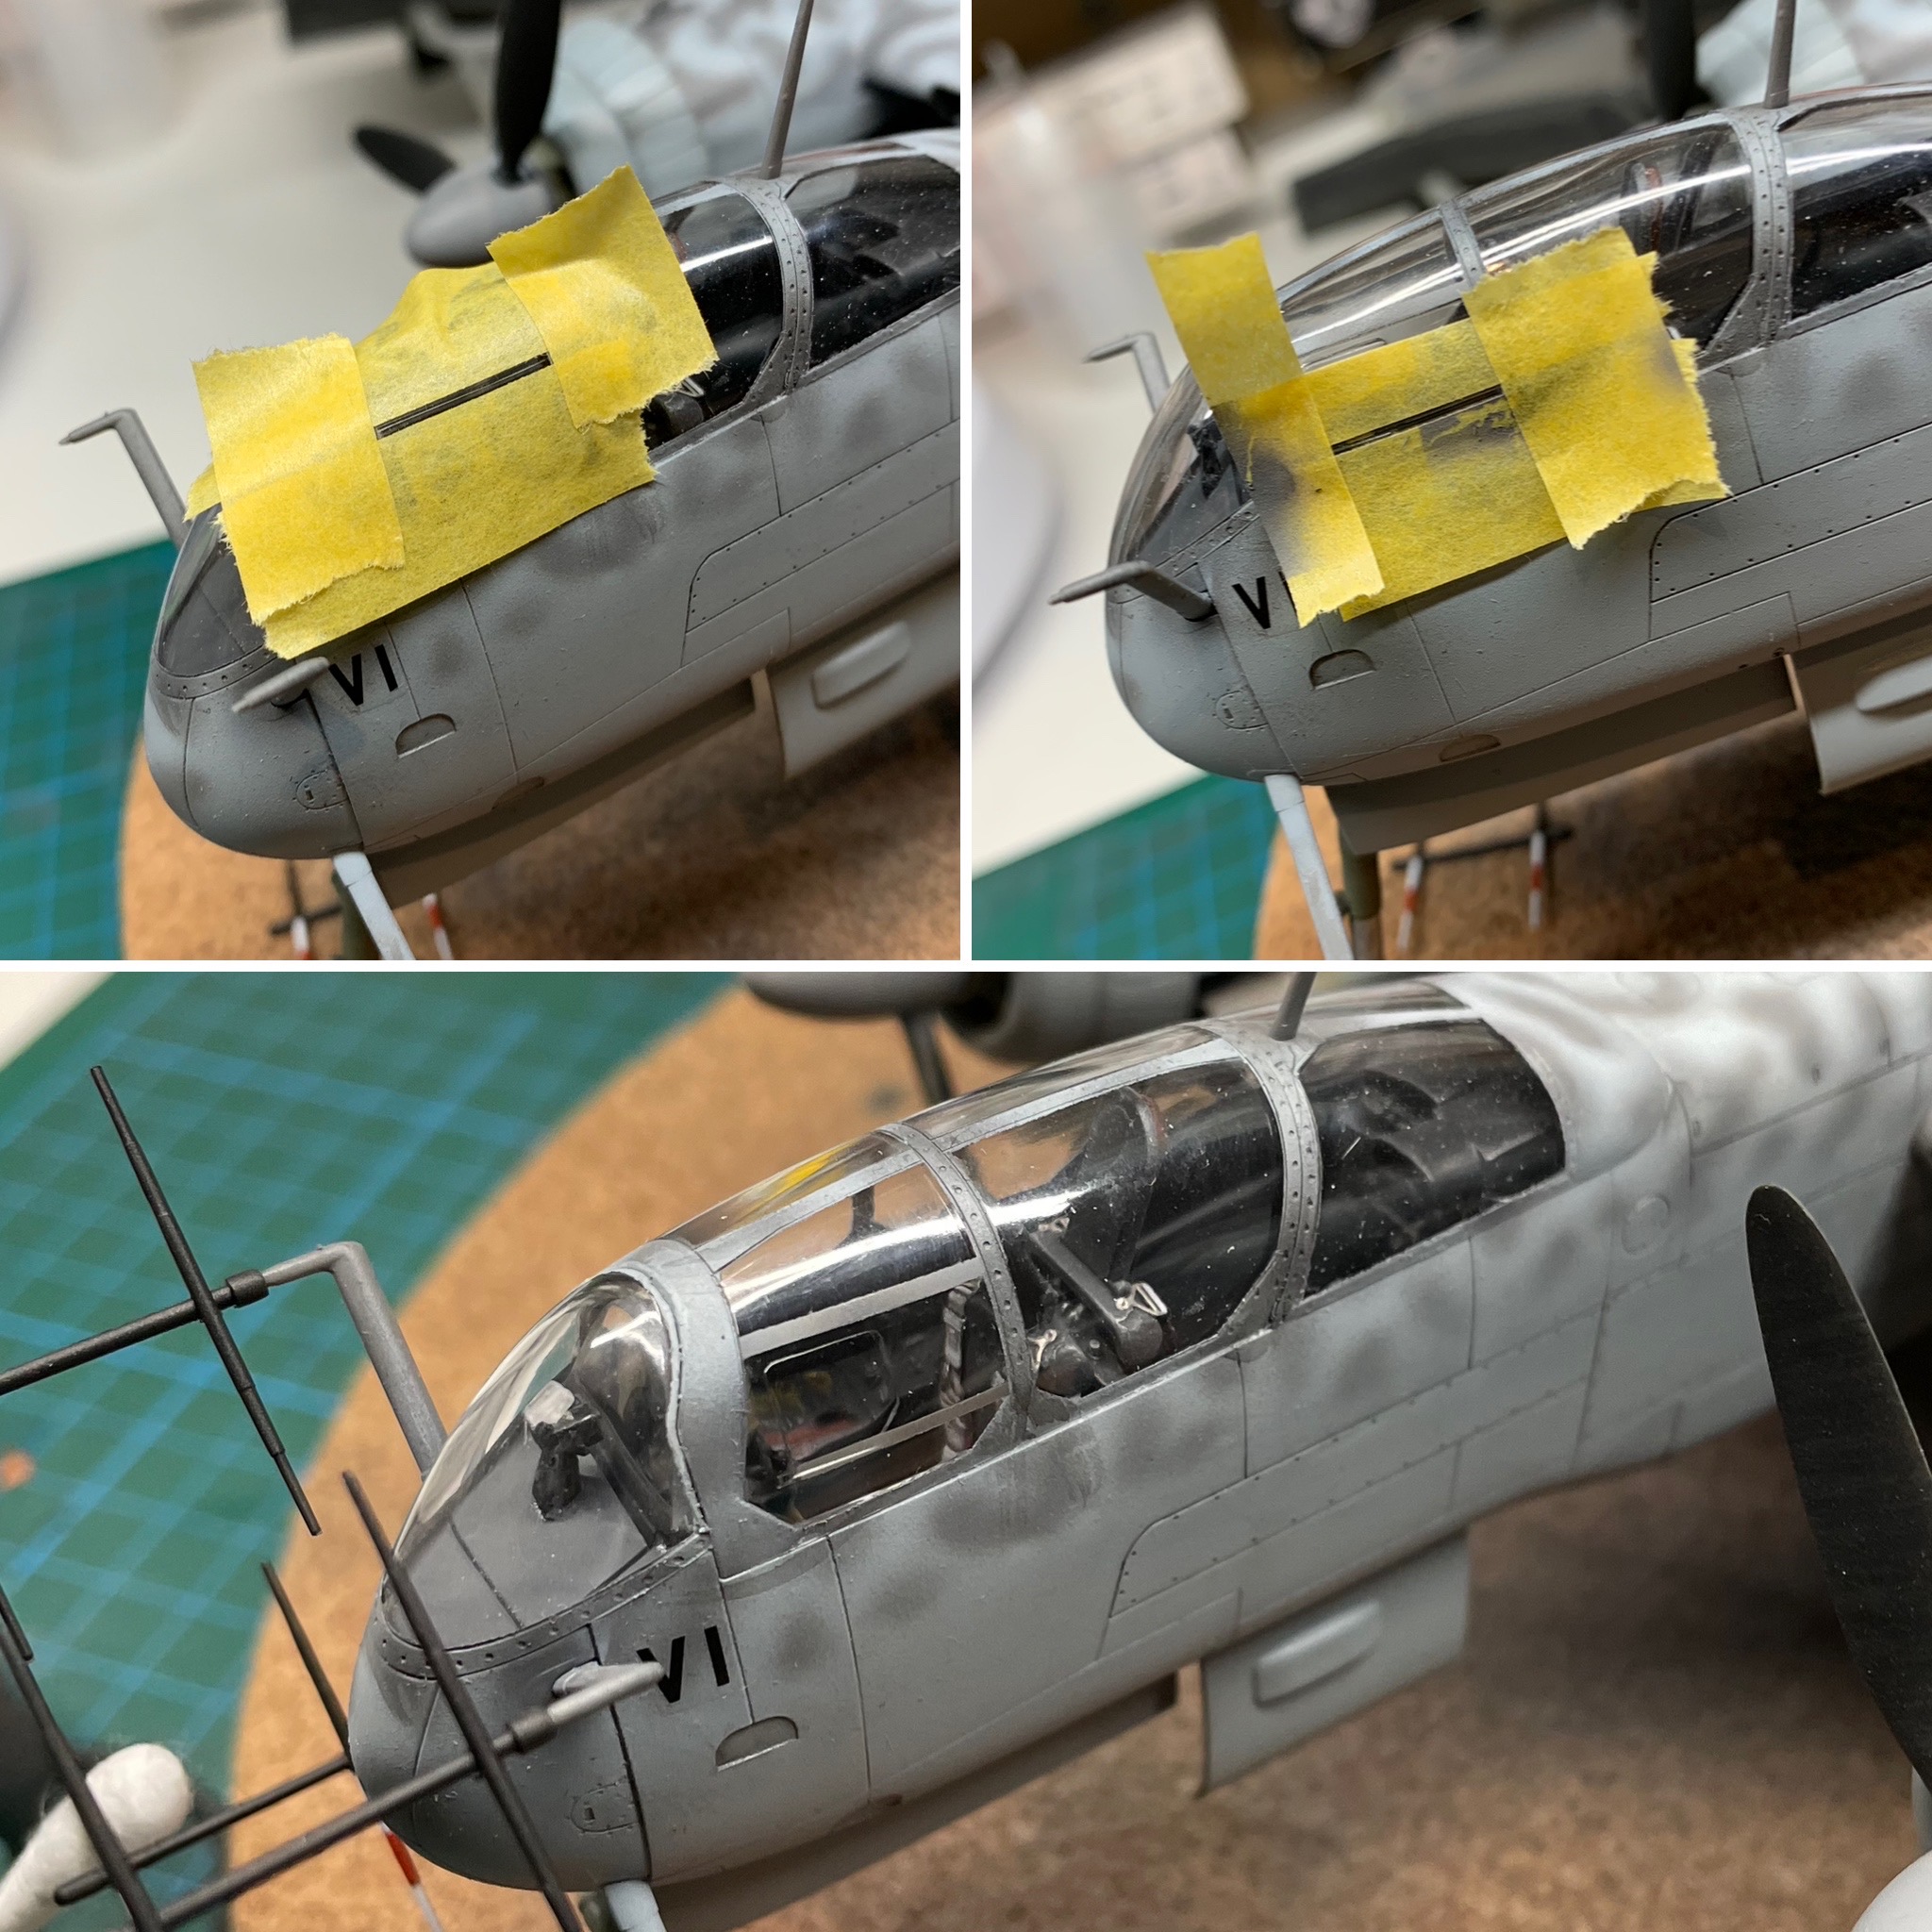
In contrast to the camouflage game, the markings were actually quite simple. The RAF had over painted all of the German markings, except for a very small Roman numeral for just under the carpet. After applying one or two of the kit decals for the airframe stencils, I designed the masks for my Silhouette cutter and began work.


I painted the covered-over Luftwaffe markings with MSG and then applied the roundels in my now familiar and practiced inside-out process. One of the attractions of these captured airframes is that there aren’t a lot of markings to do, and the entire application took only an hour or two.
Click on any of the images below to scroll through the gallery.


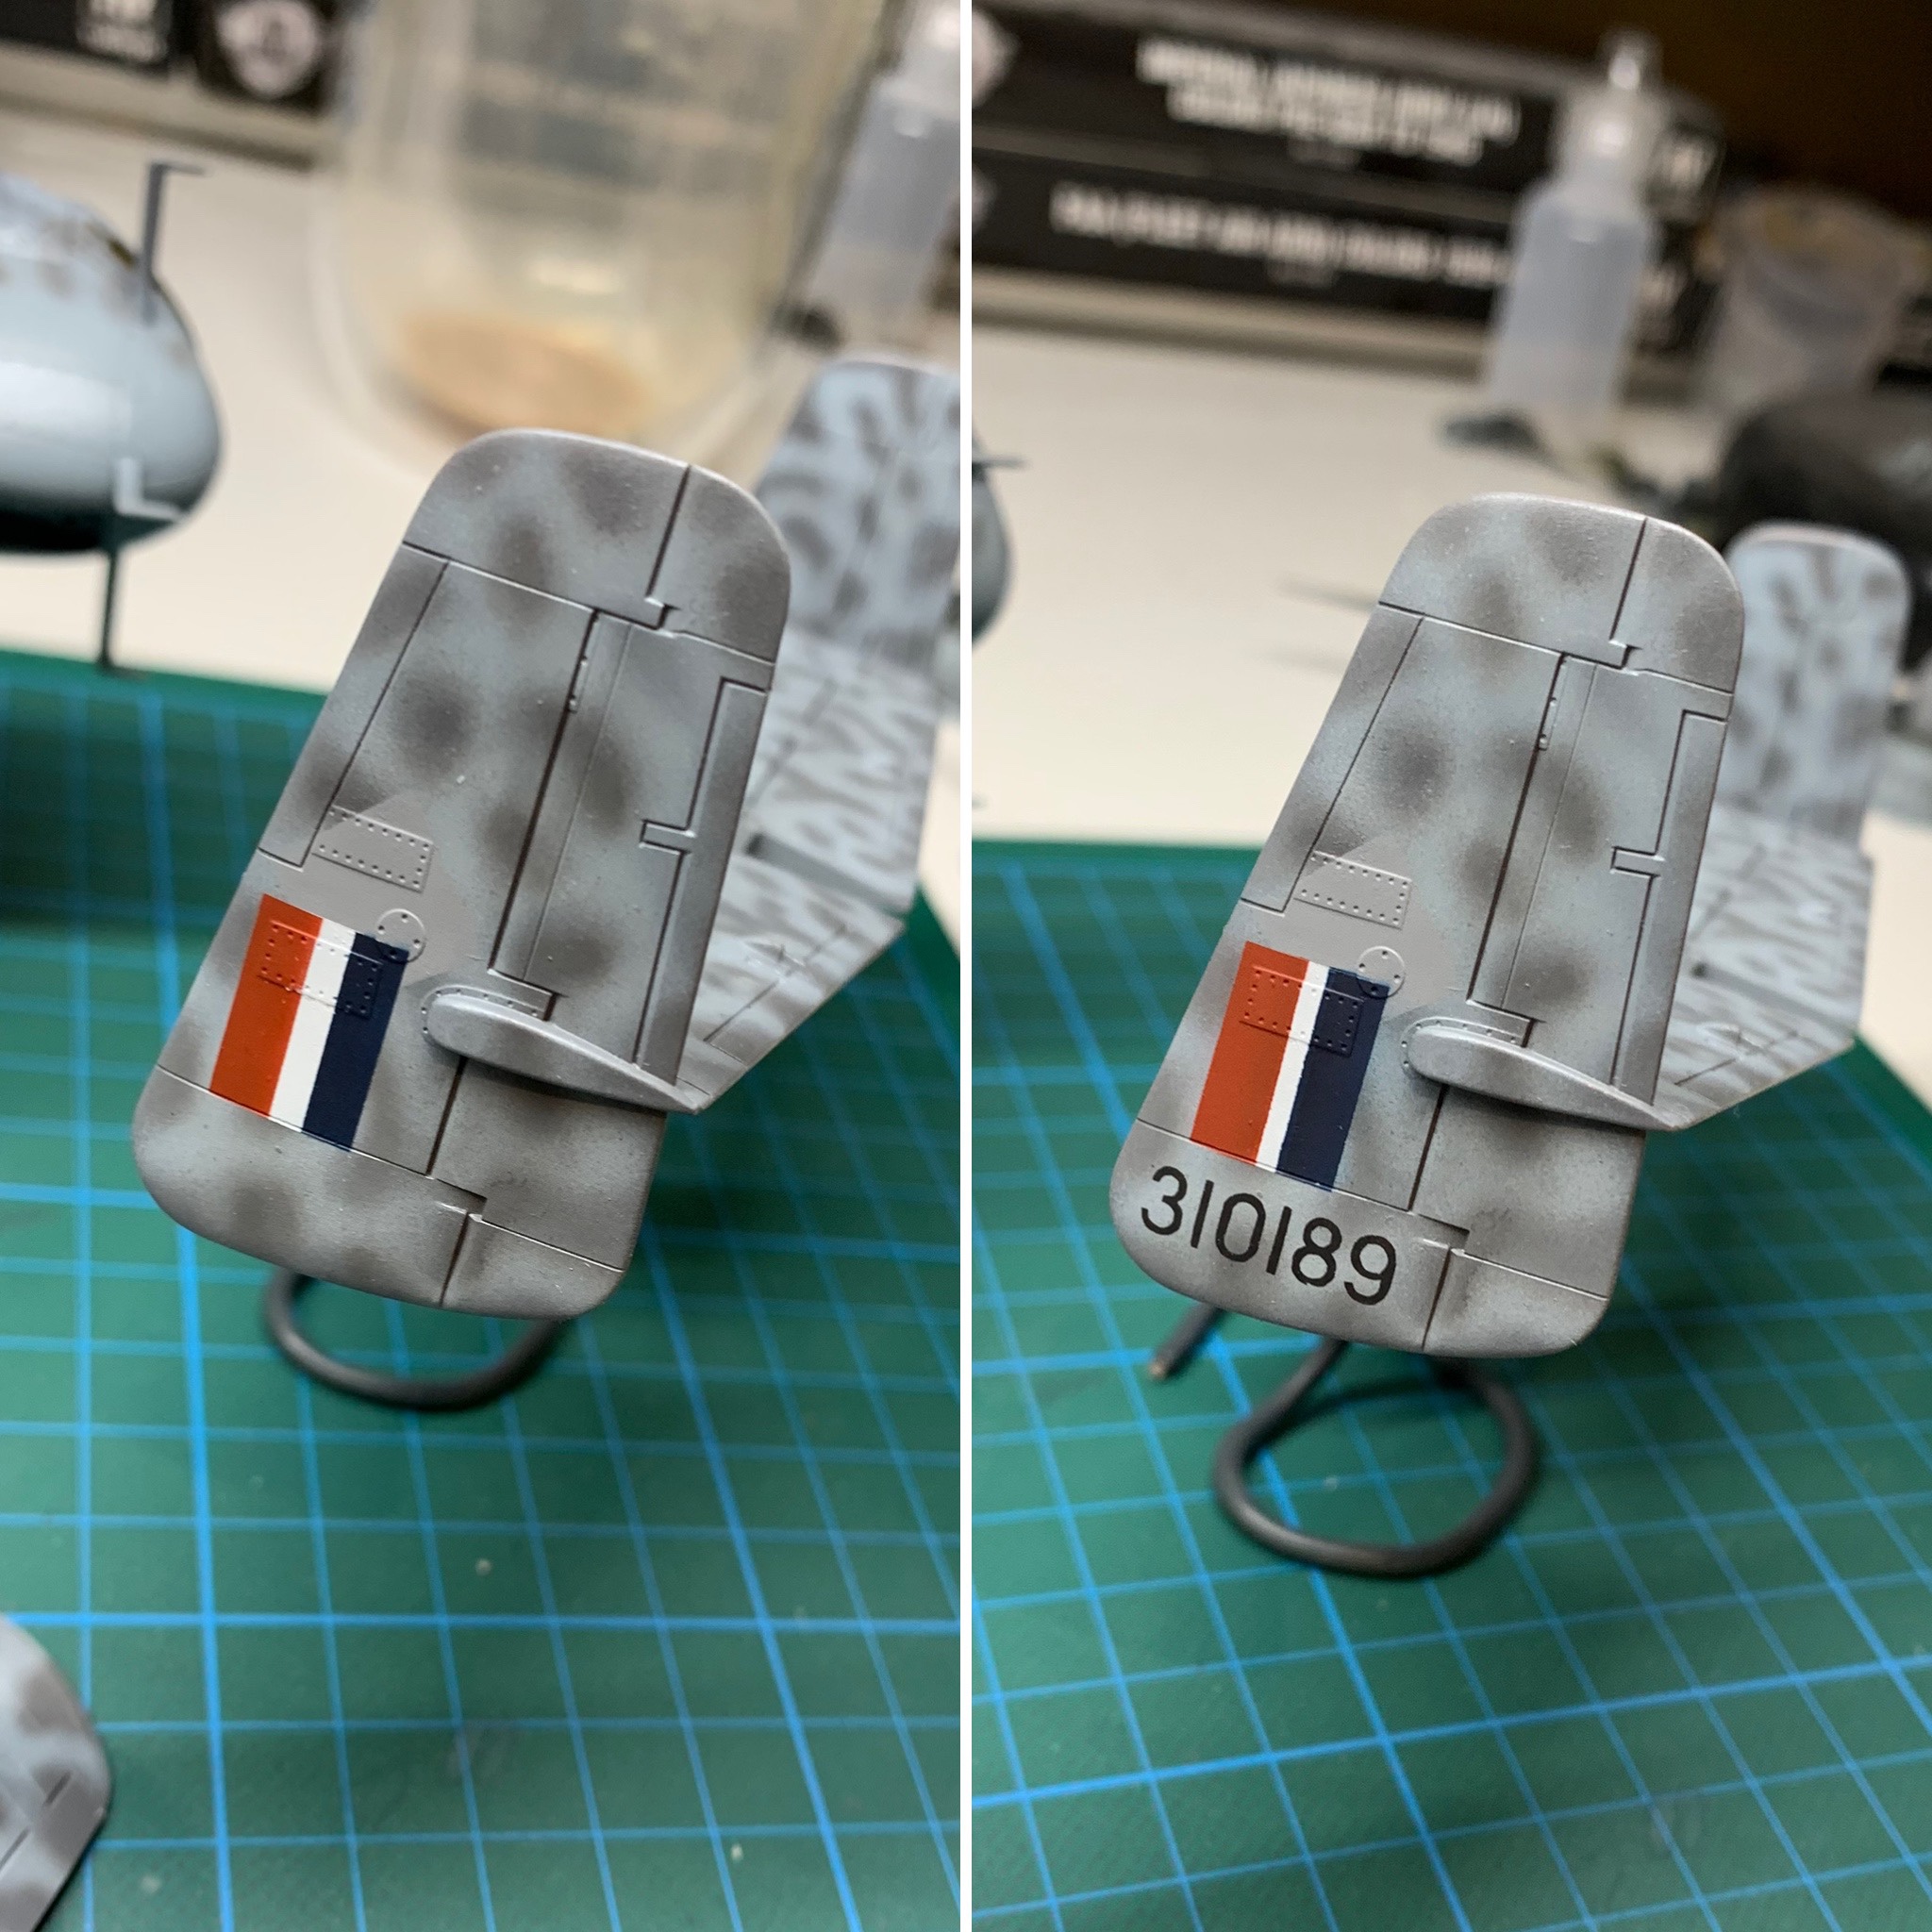
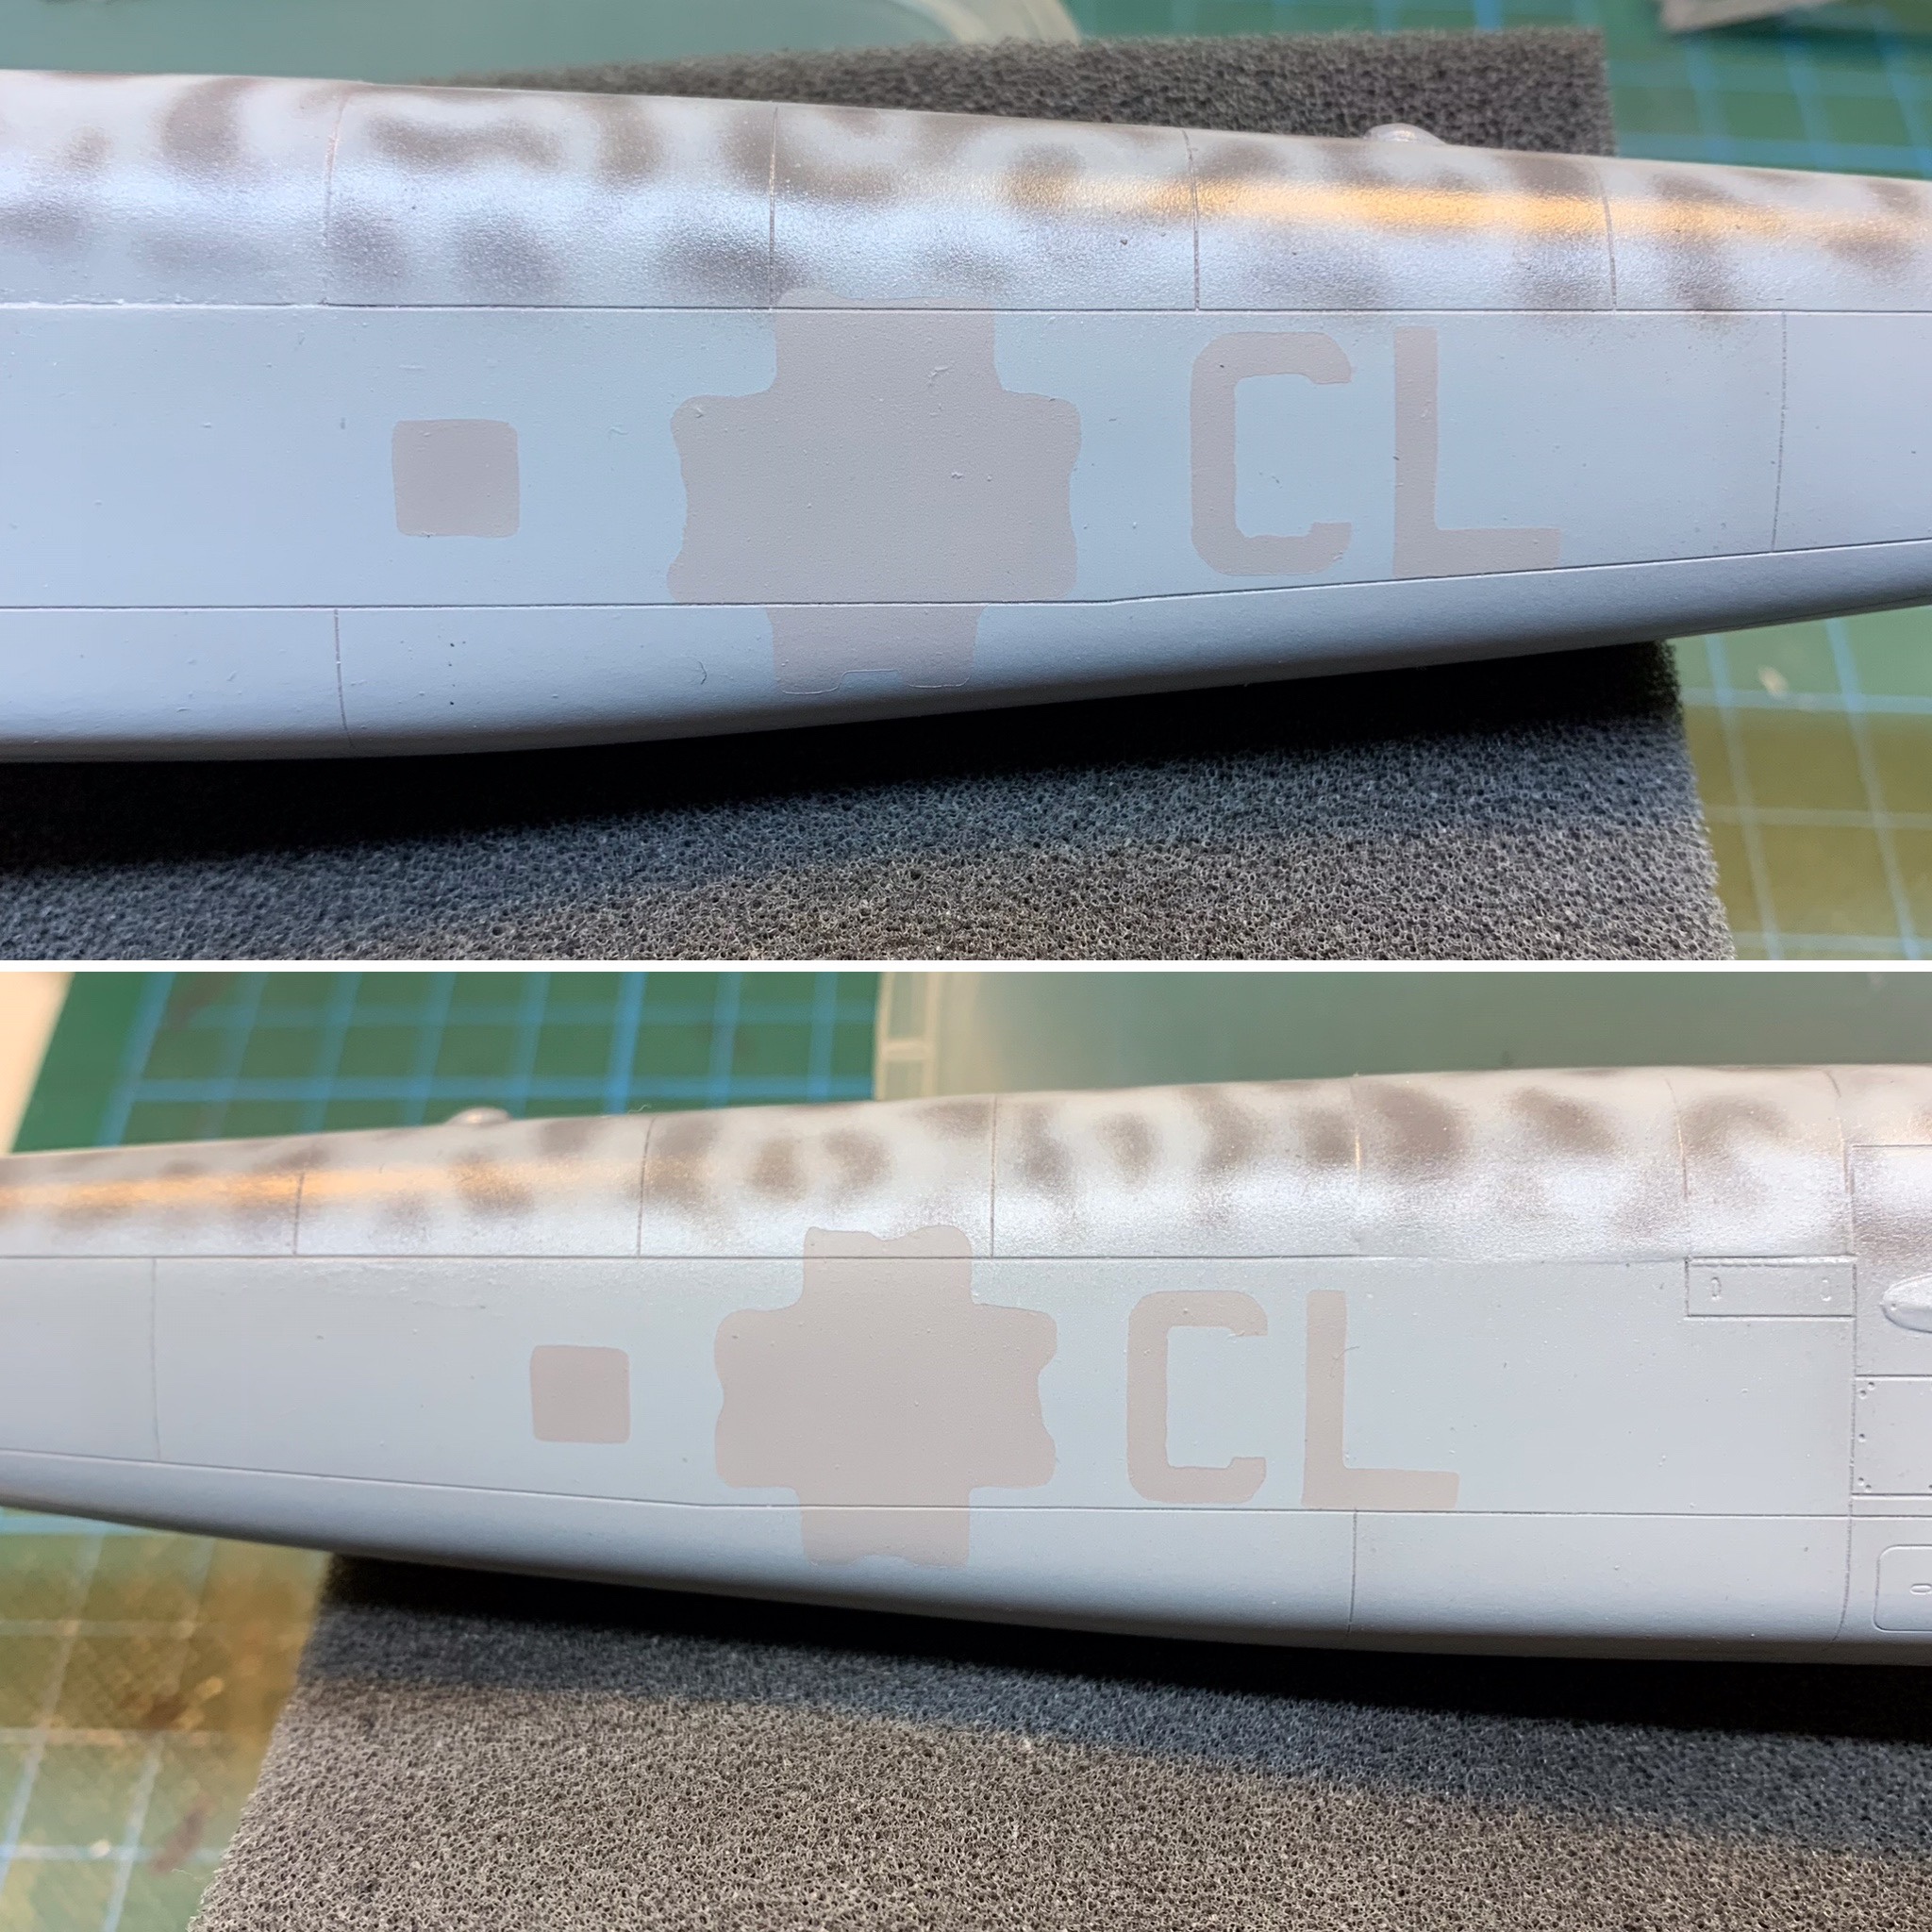
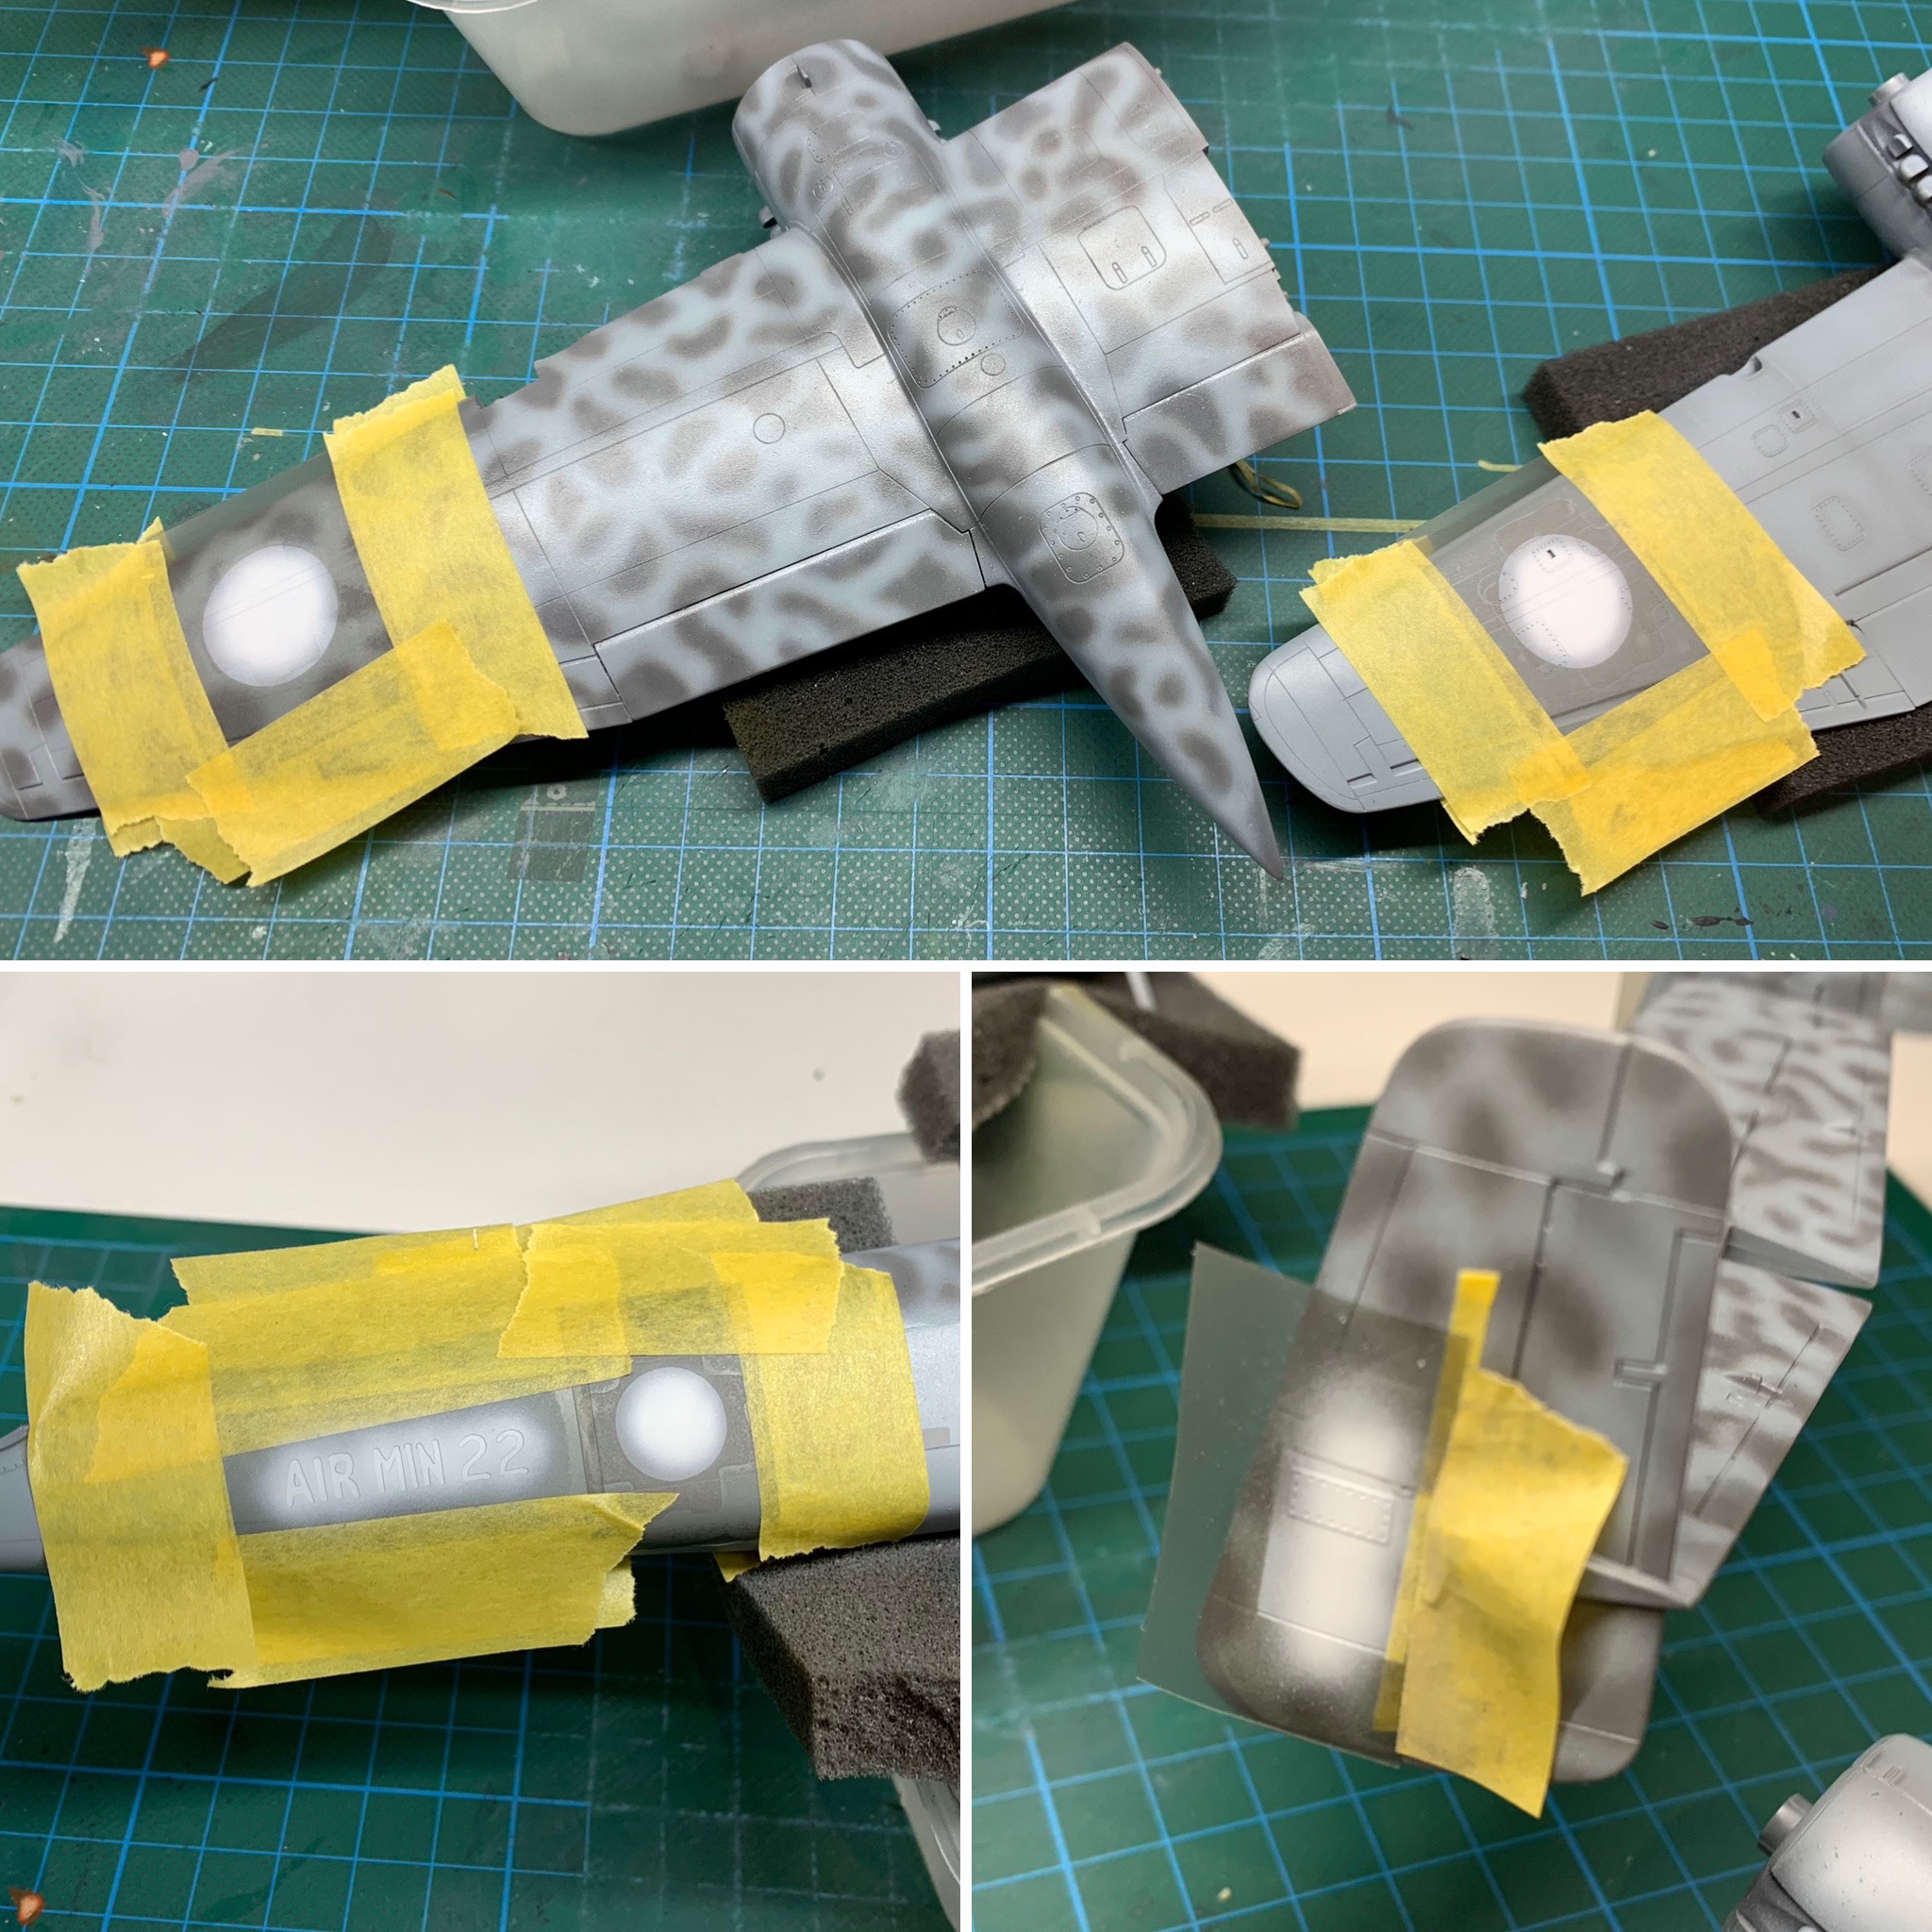

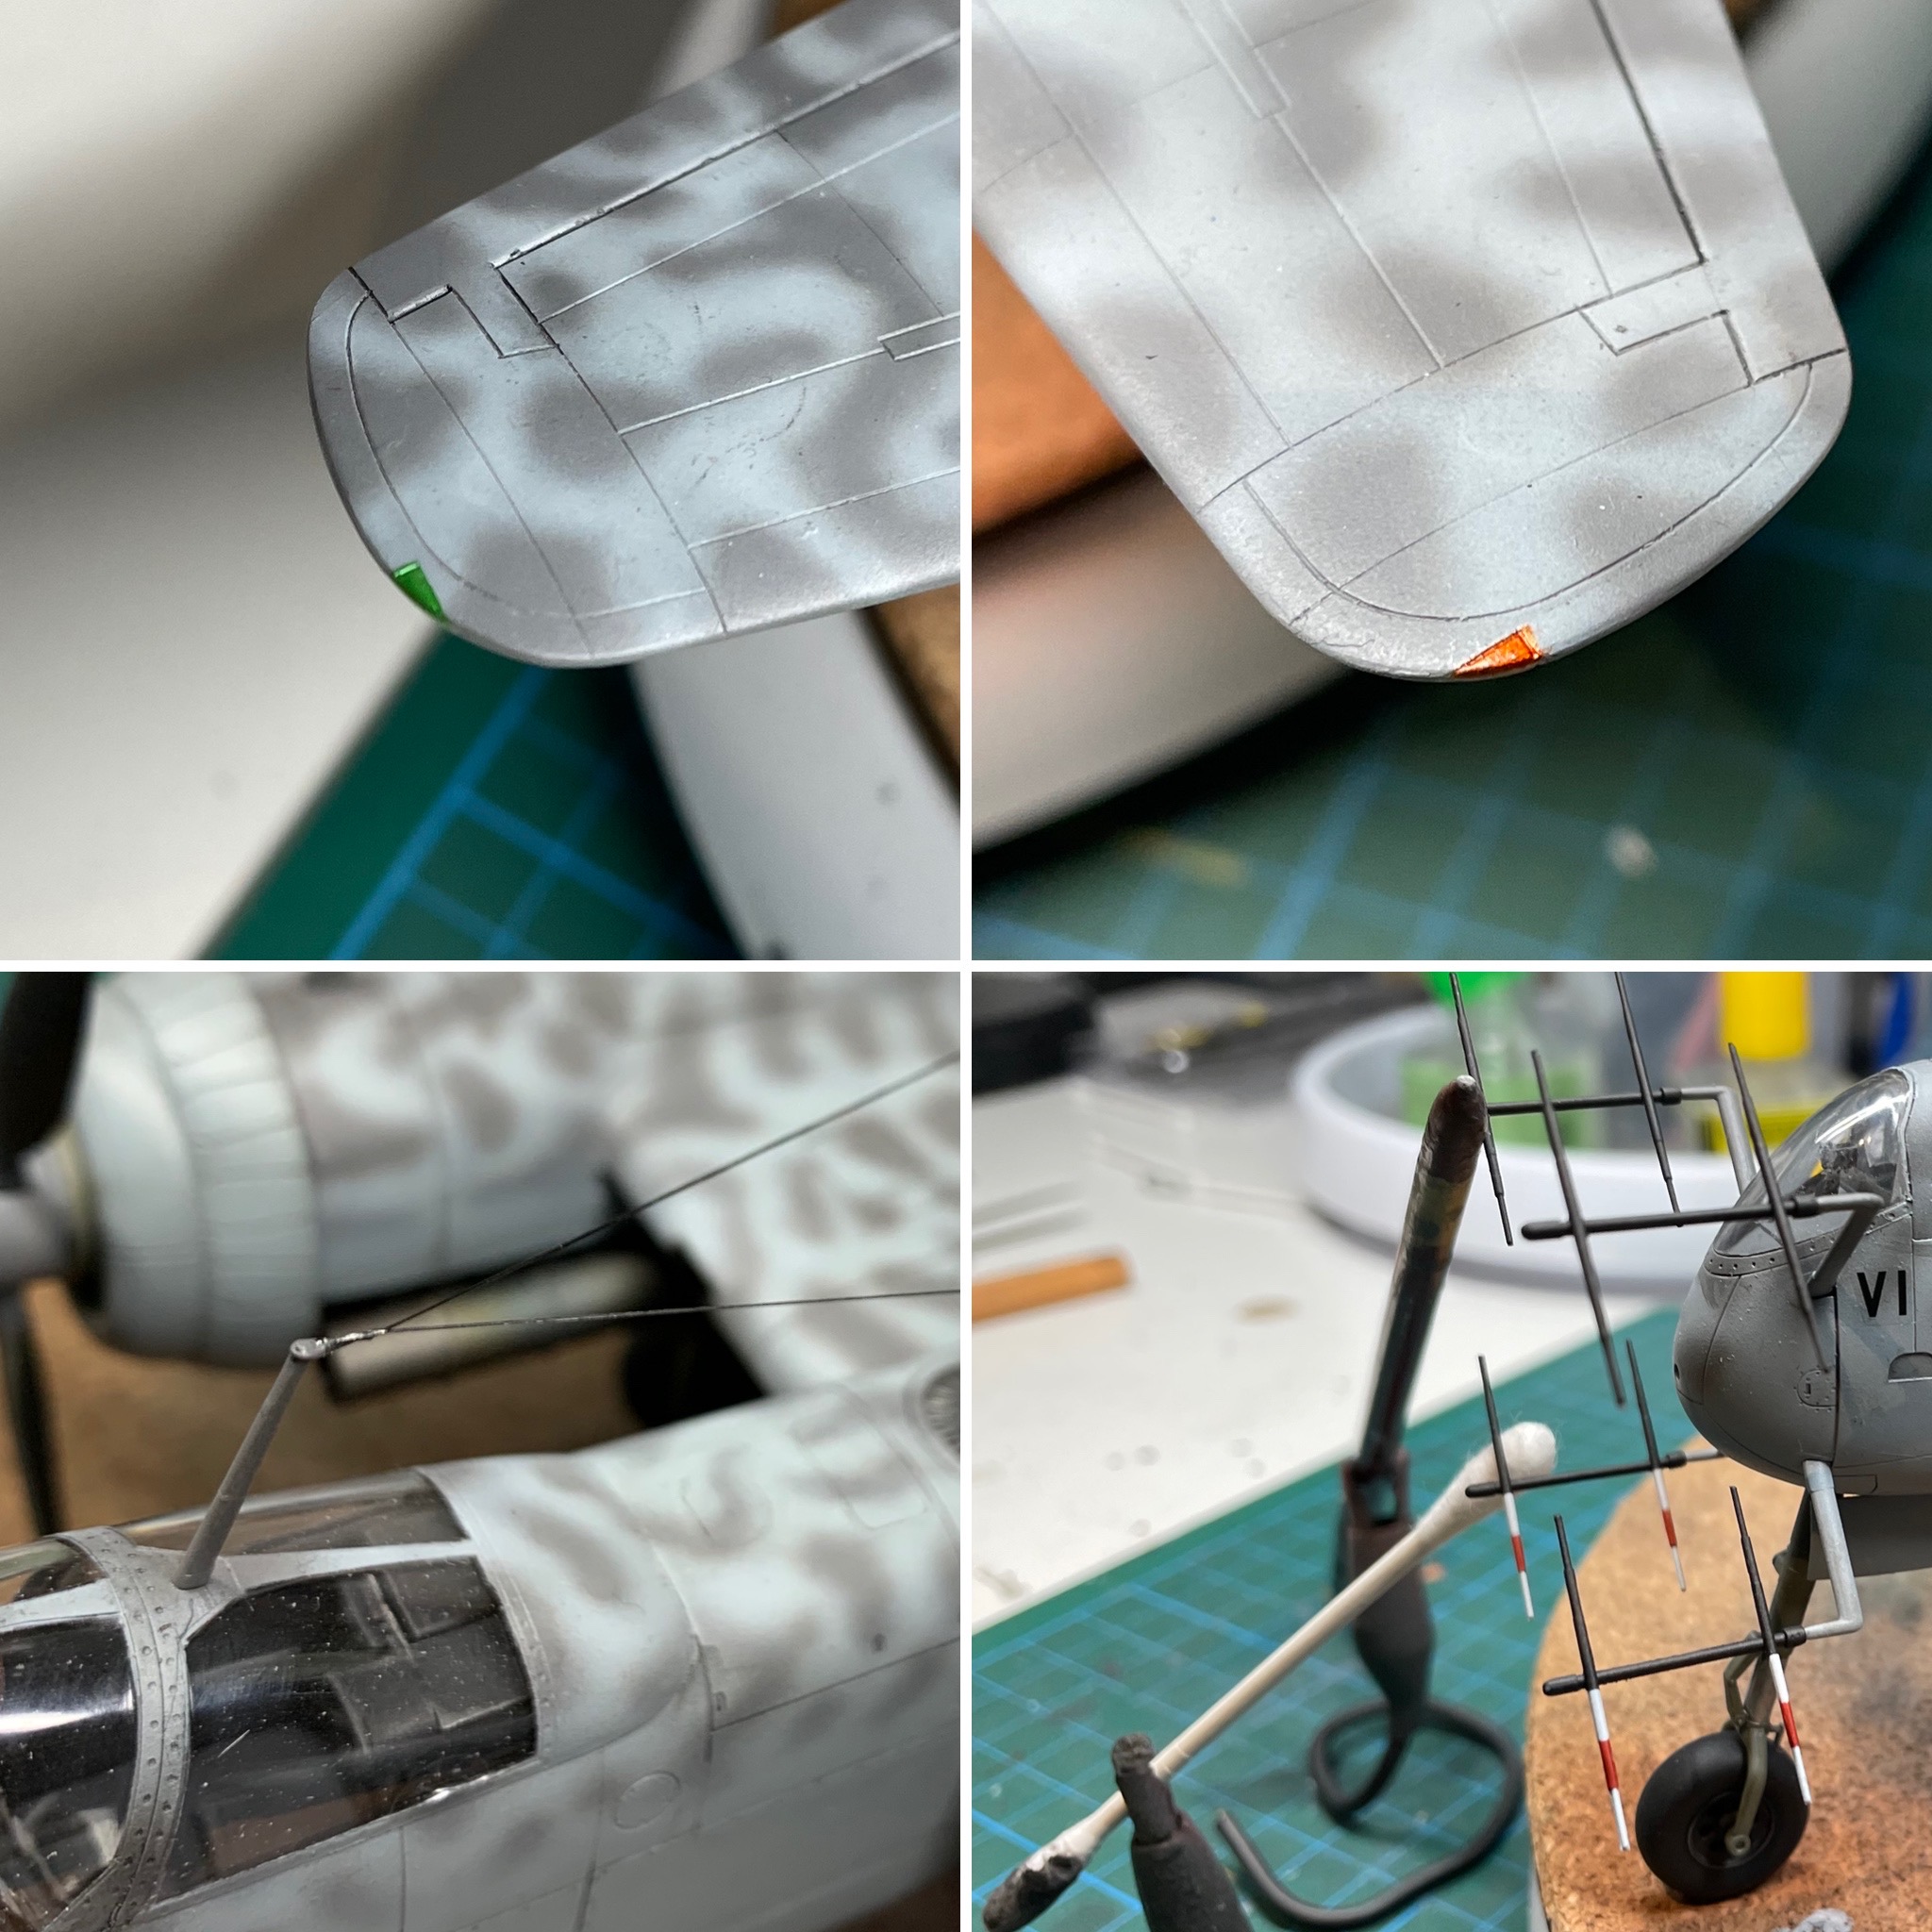
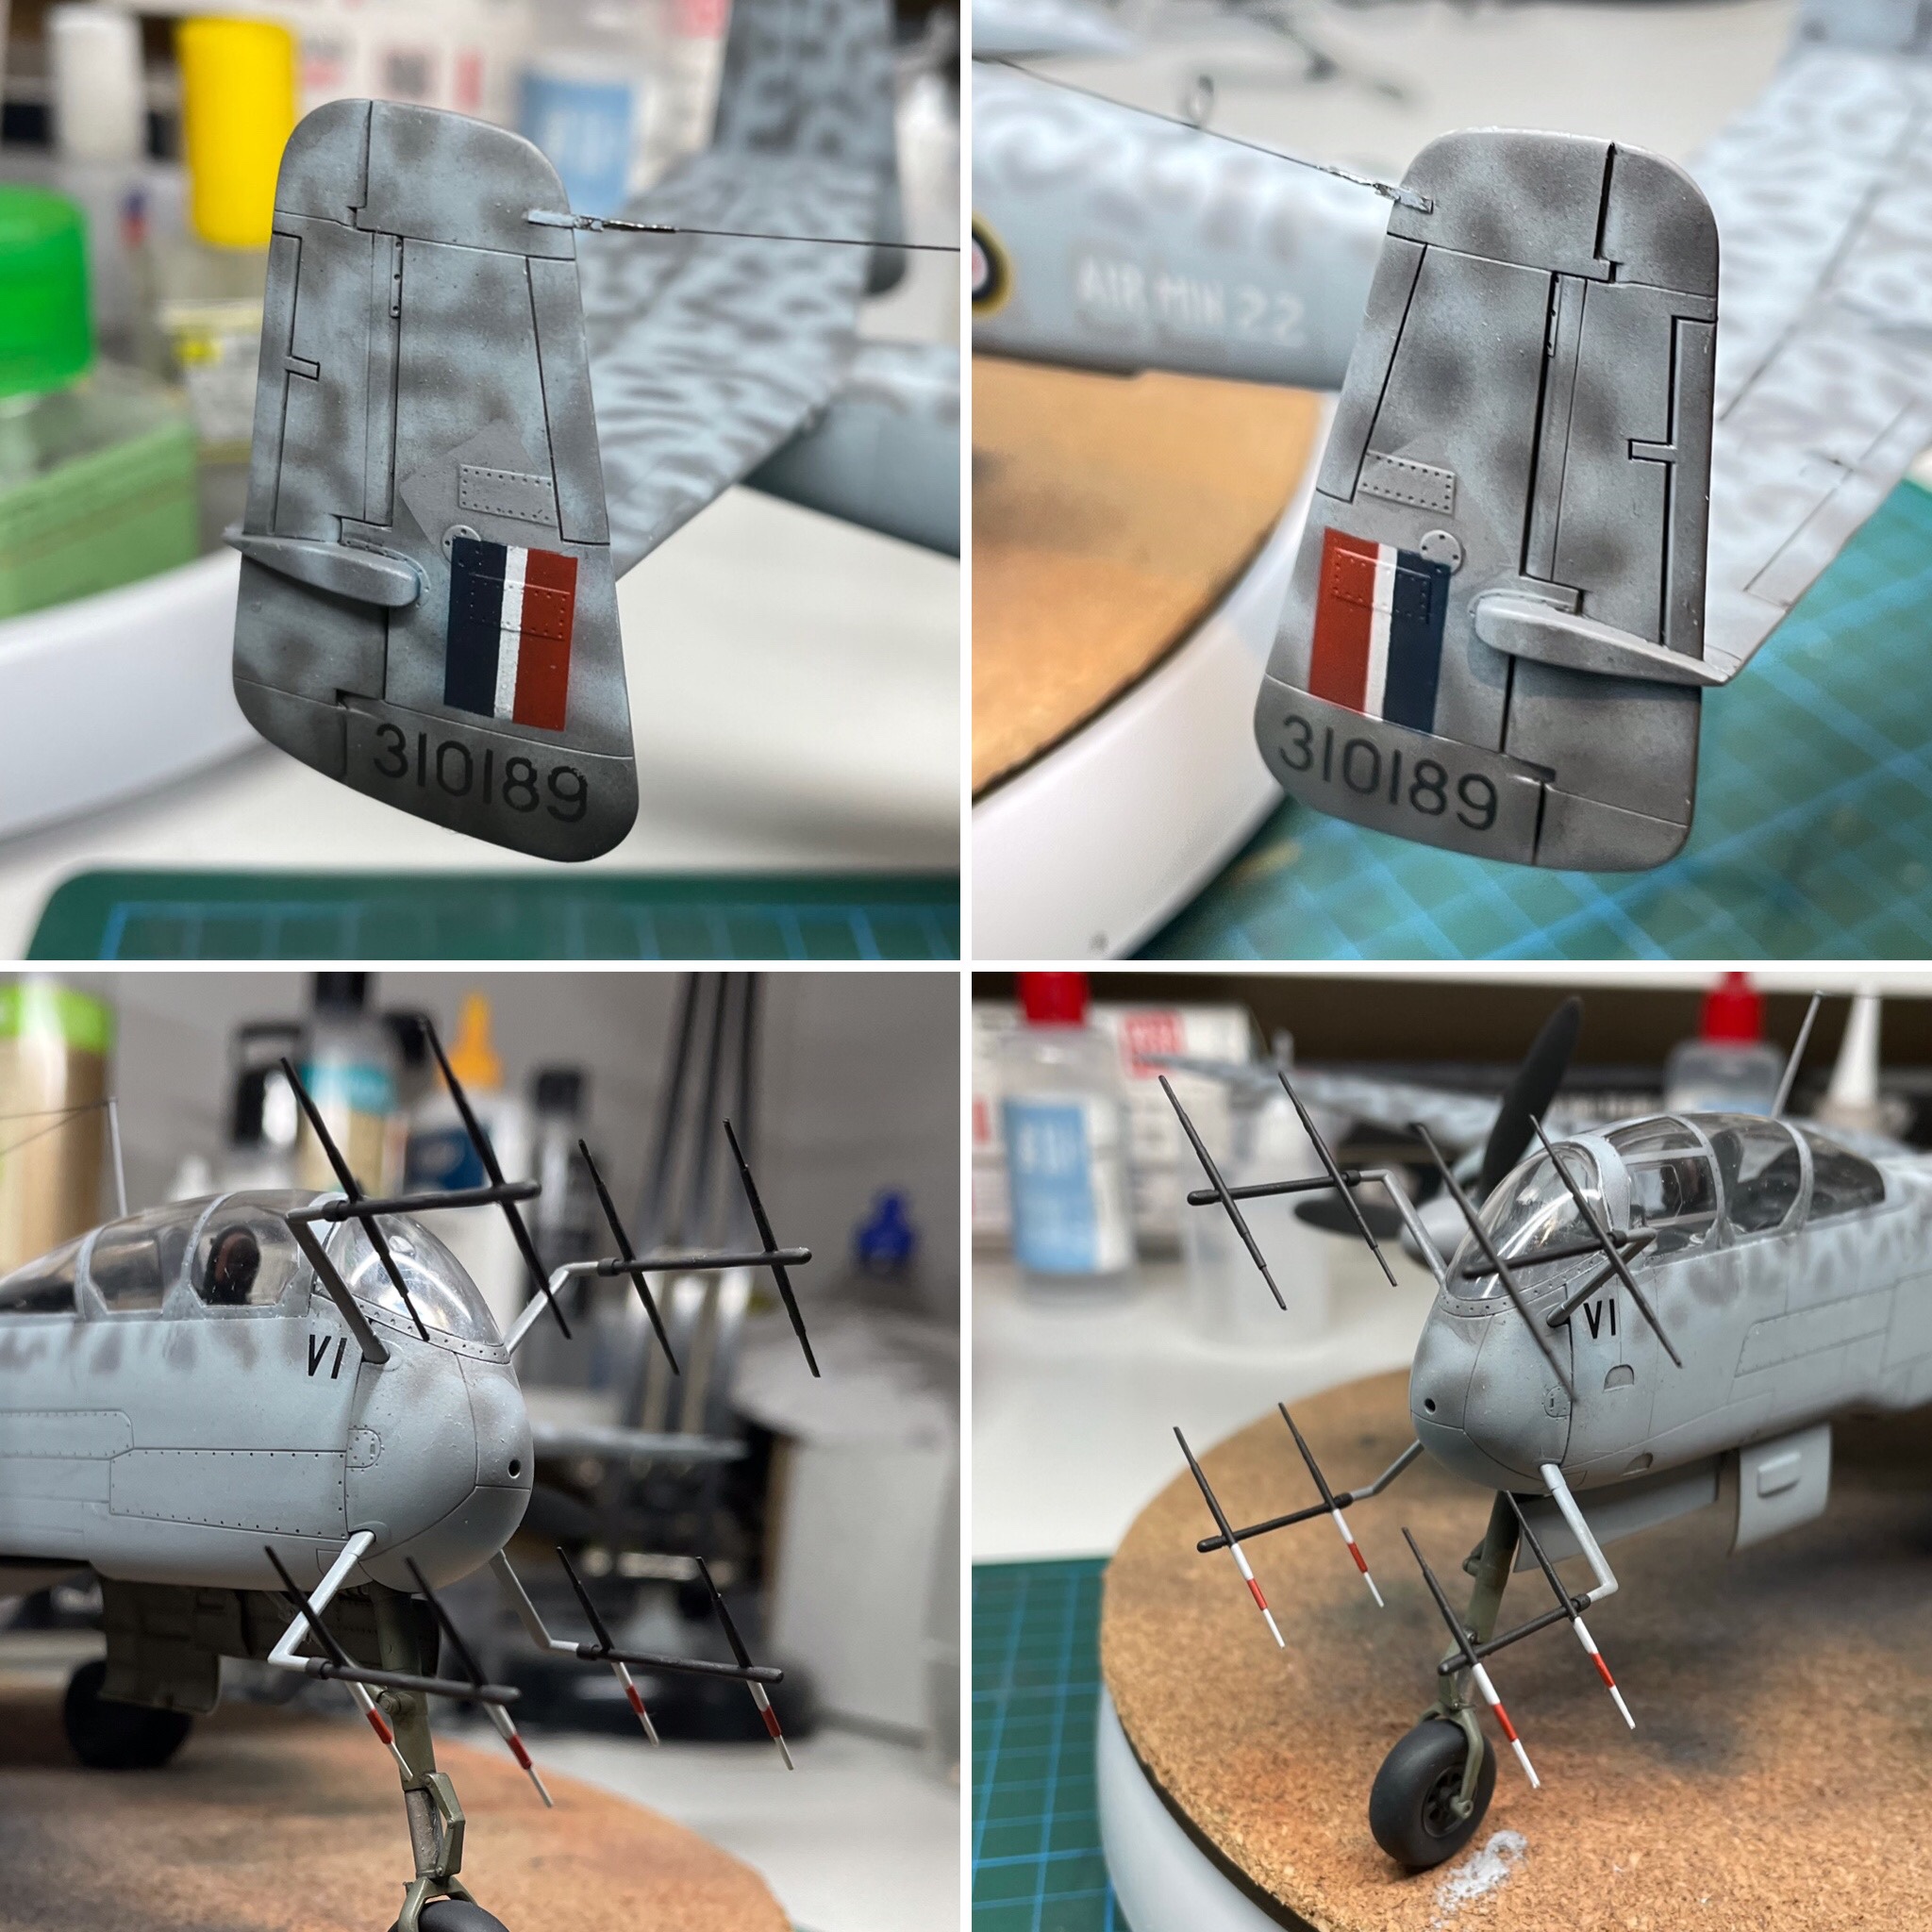
I didn’t experience any real issues applying the markings, except for the fin flash which were a little uneven to begin with. An easy enough fix. I painted “AIR MIN 22” in a freehand font though it is not clear if the aircraft actually wore its Air Ministry moniker at the time, and whether it was more loosely painted than some of the more formally applied ones. Artistic licence used there…
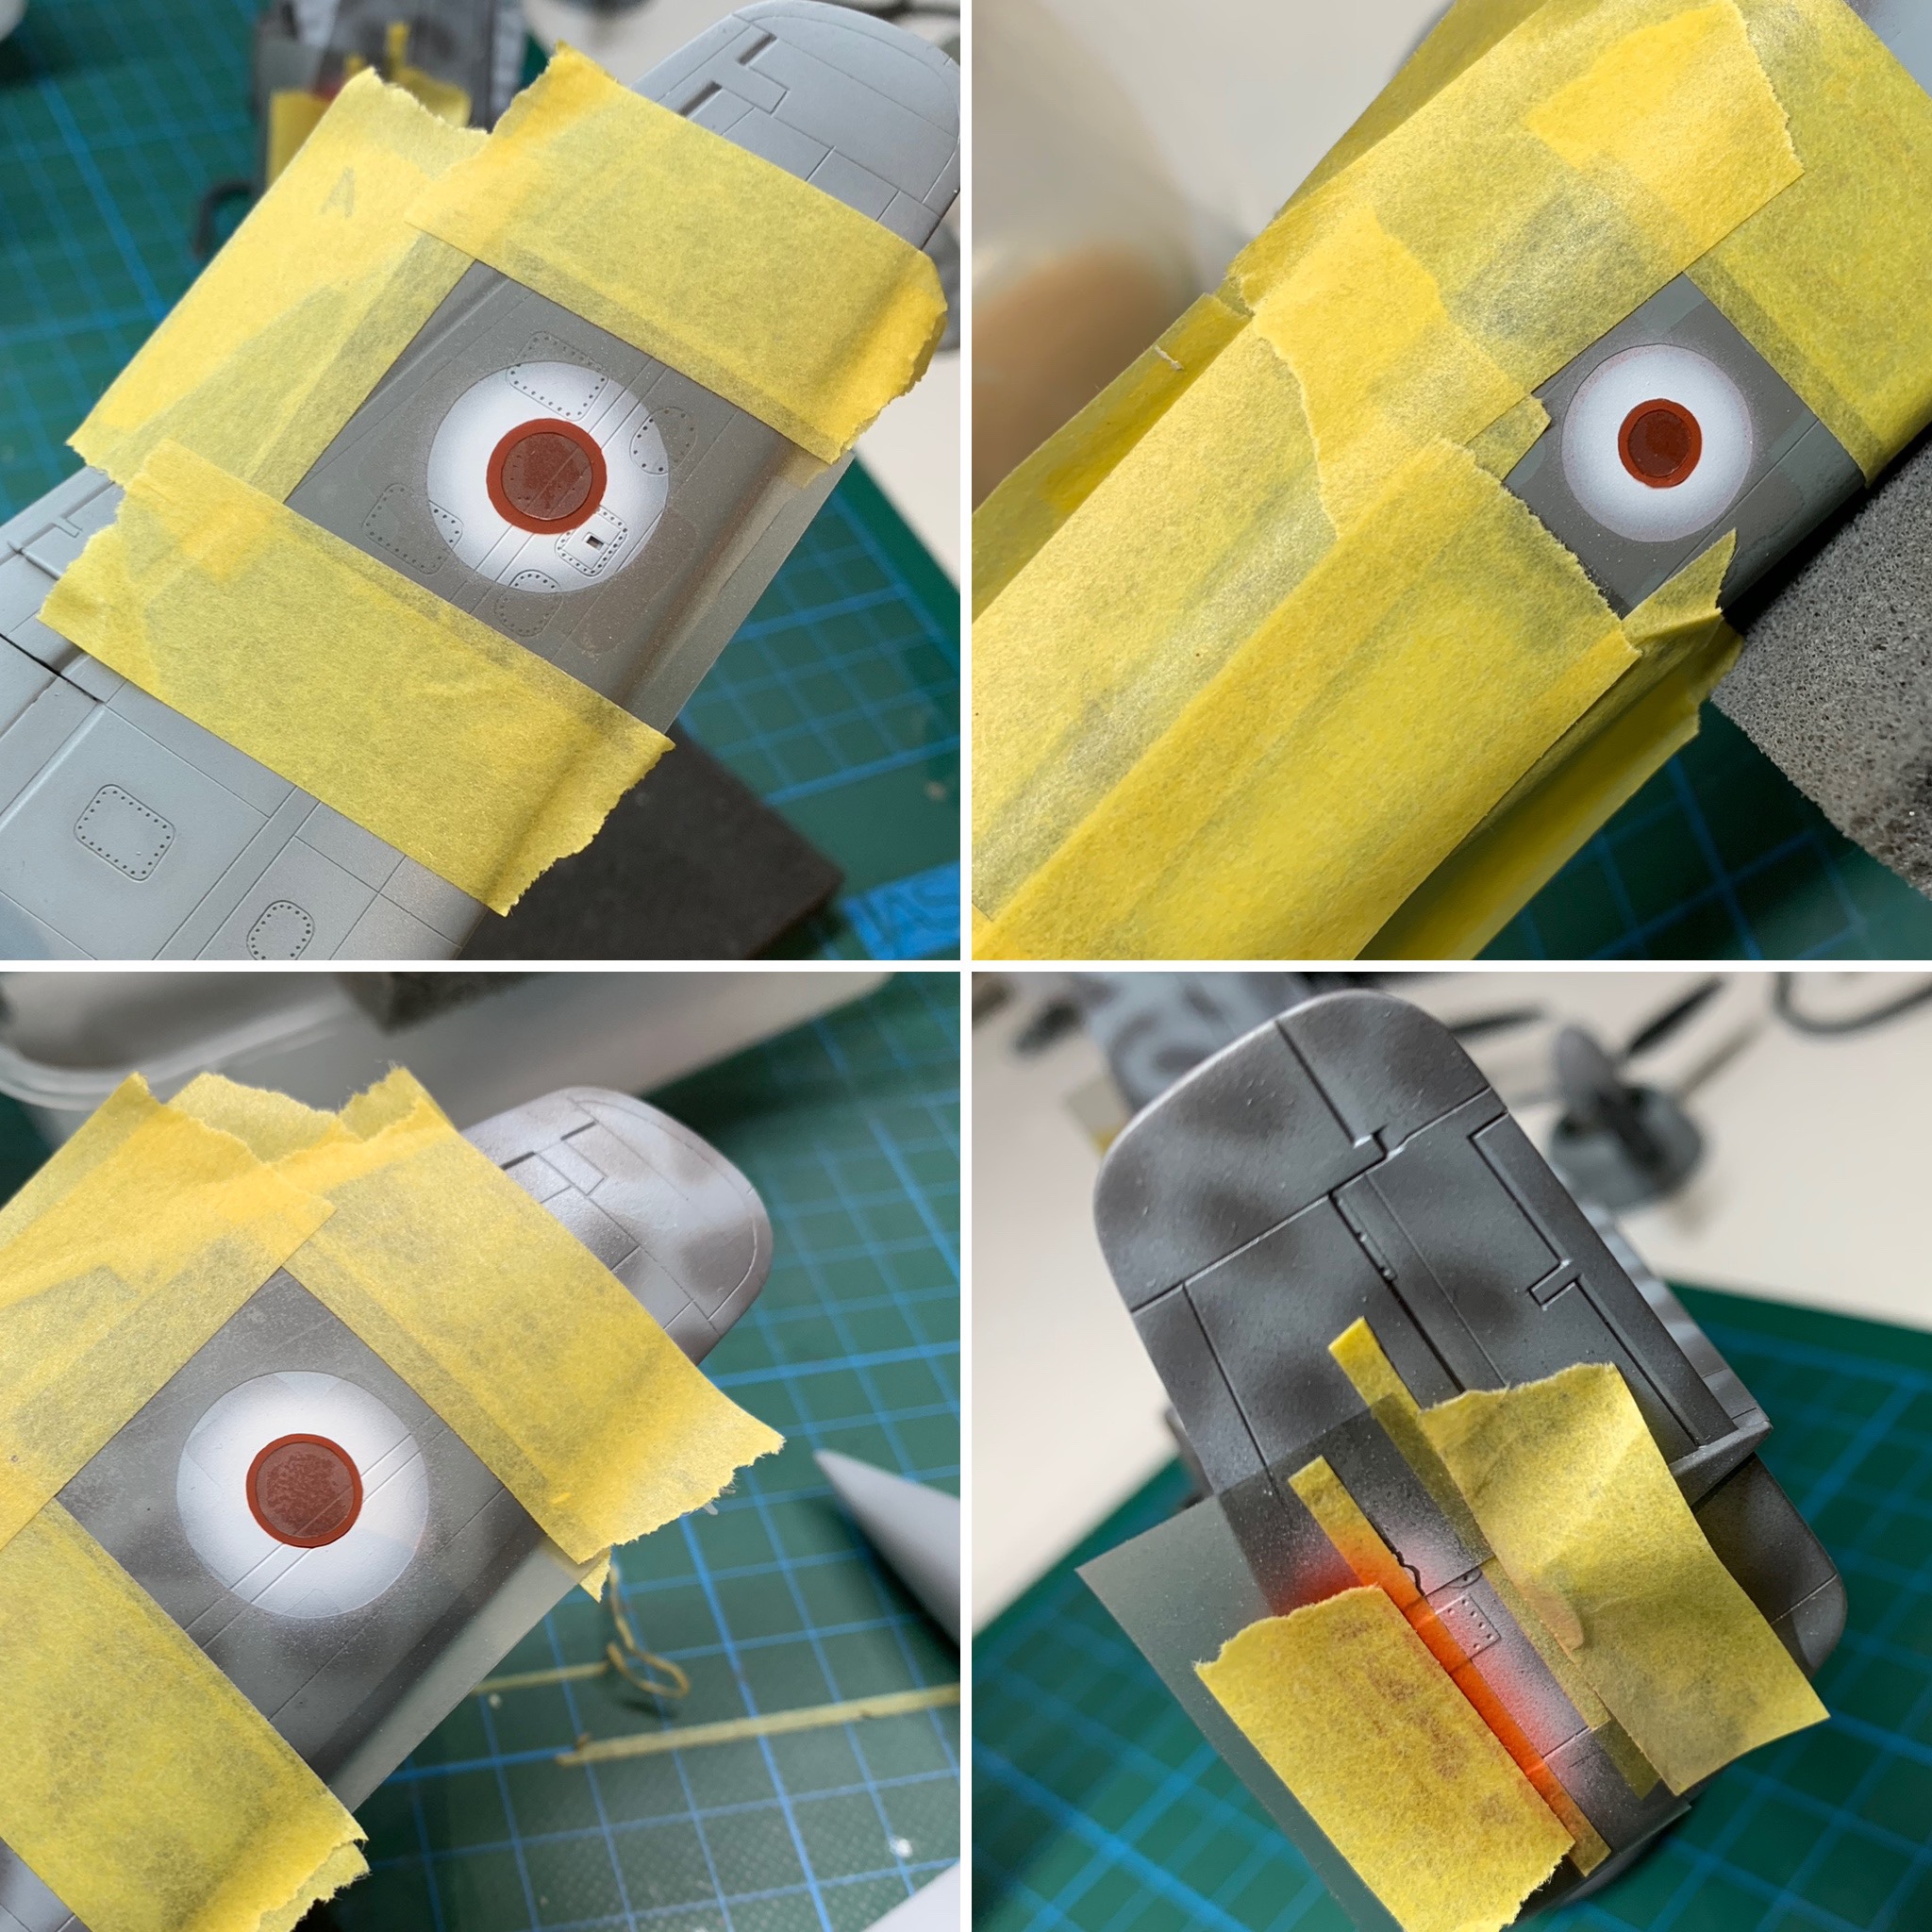
Weathering
In common with my other captured airframe builds I kept the weathering very light with just enough grime to suggest a used airframe, and just enough exhaust staining to represent light use such as for testing. I used my normal process of a wash and my airbrush for the exhaust. My favourite part was the work I did on the exhaust shrouds which were painted first with flat black, and then metallics, and then clear red, blue and yellow blended together to represent heat staining. I think they came out rather well, if I say so myself.
Click on any of the images below to scroll through the gallery.


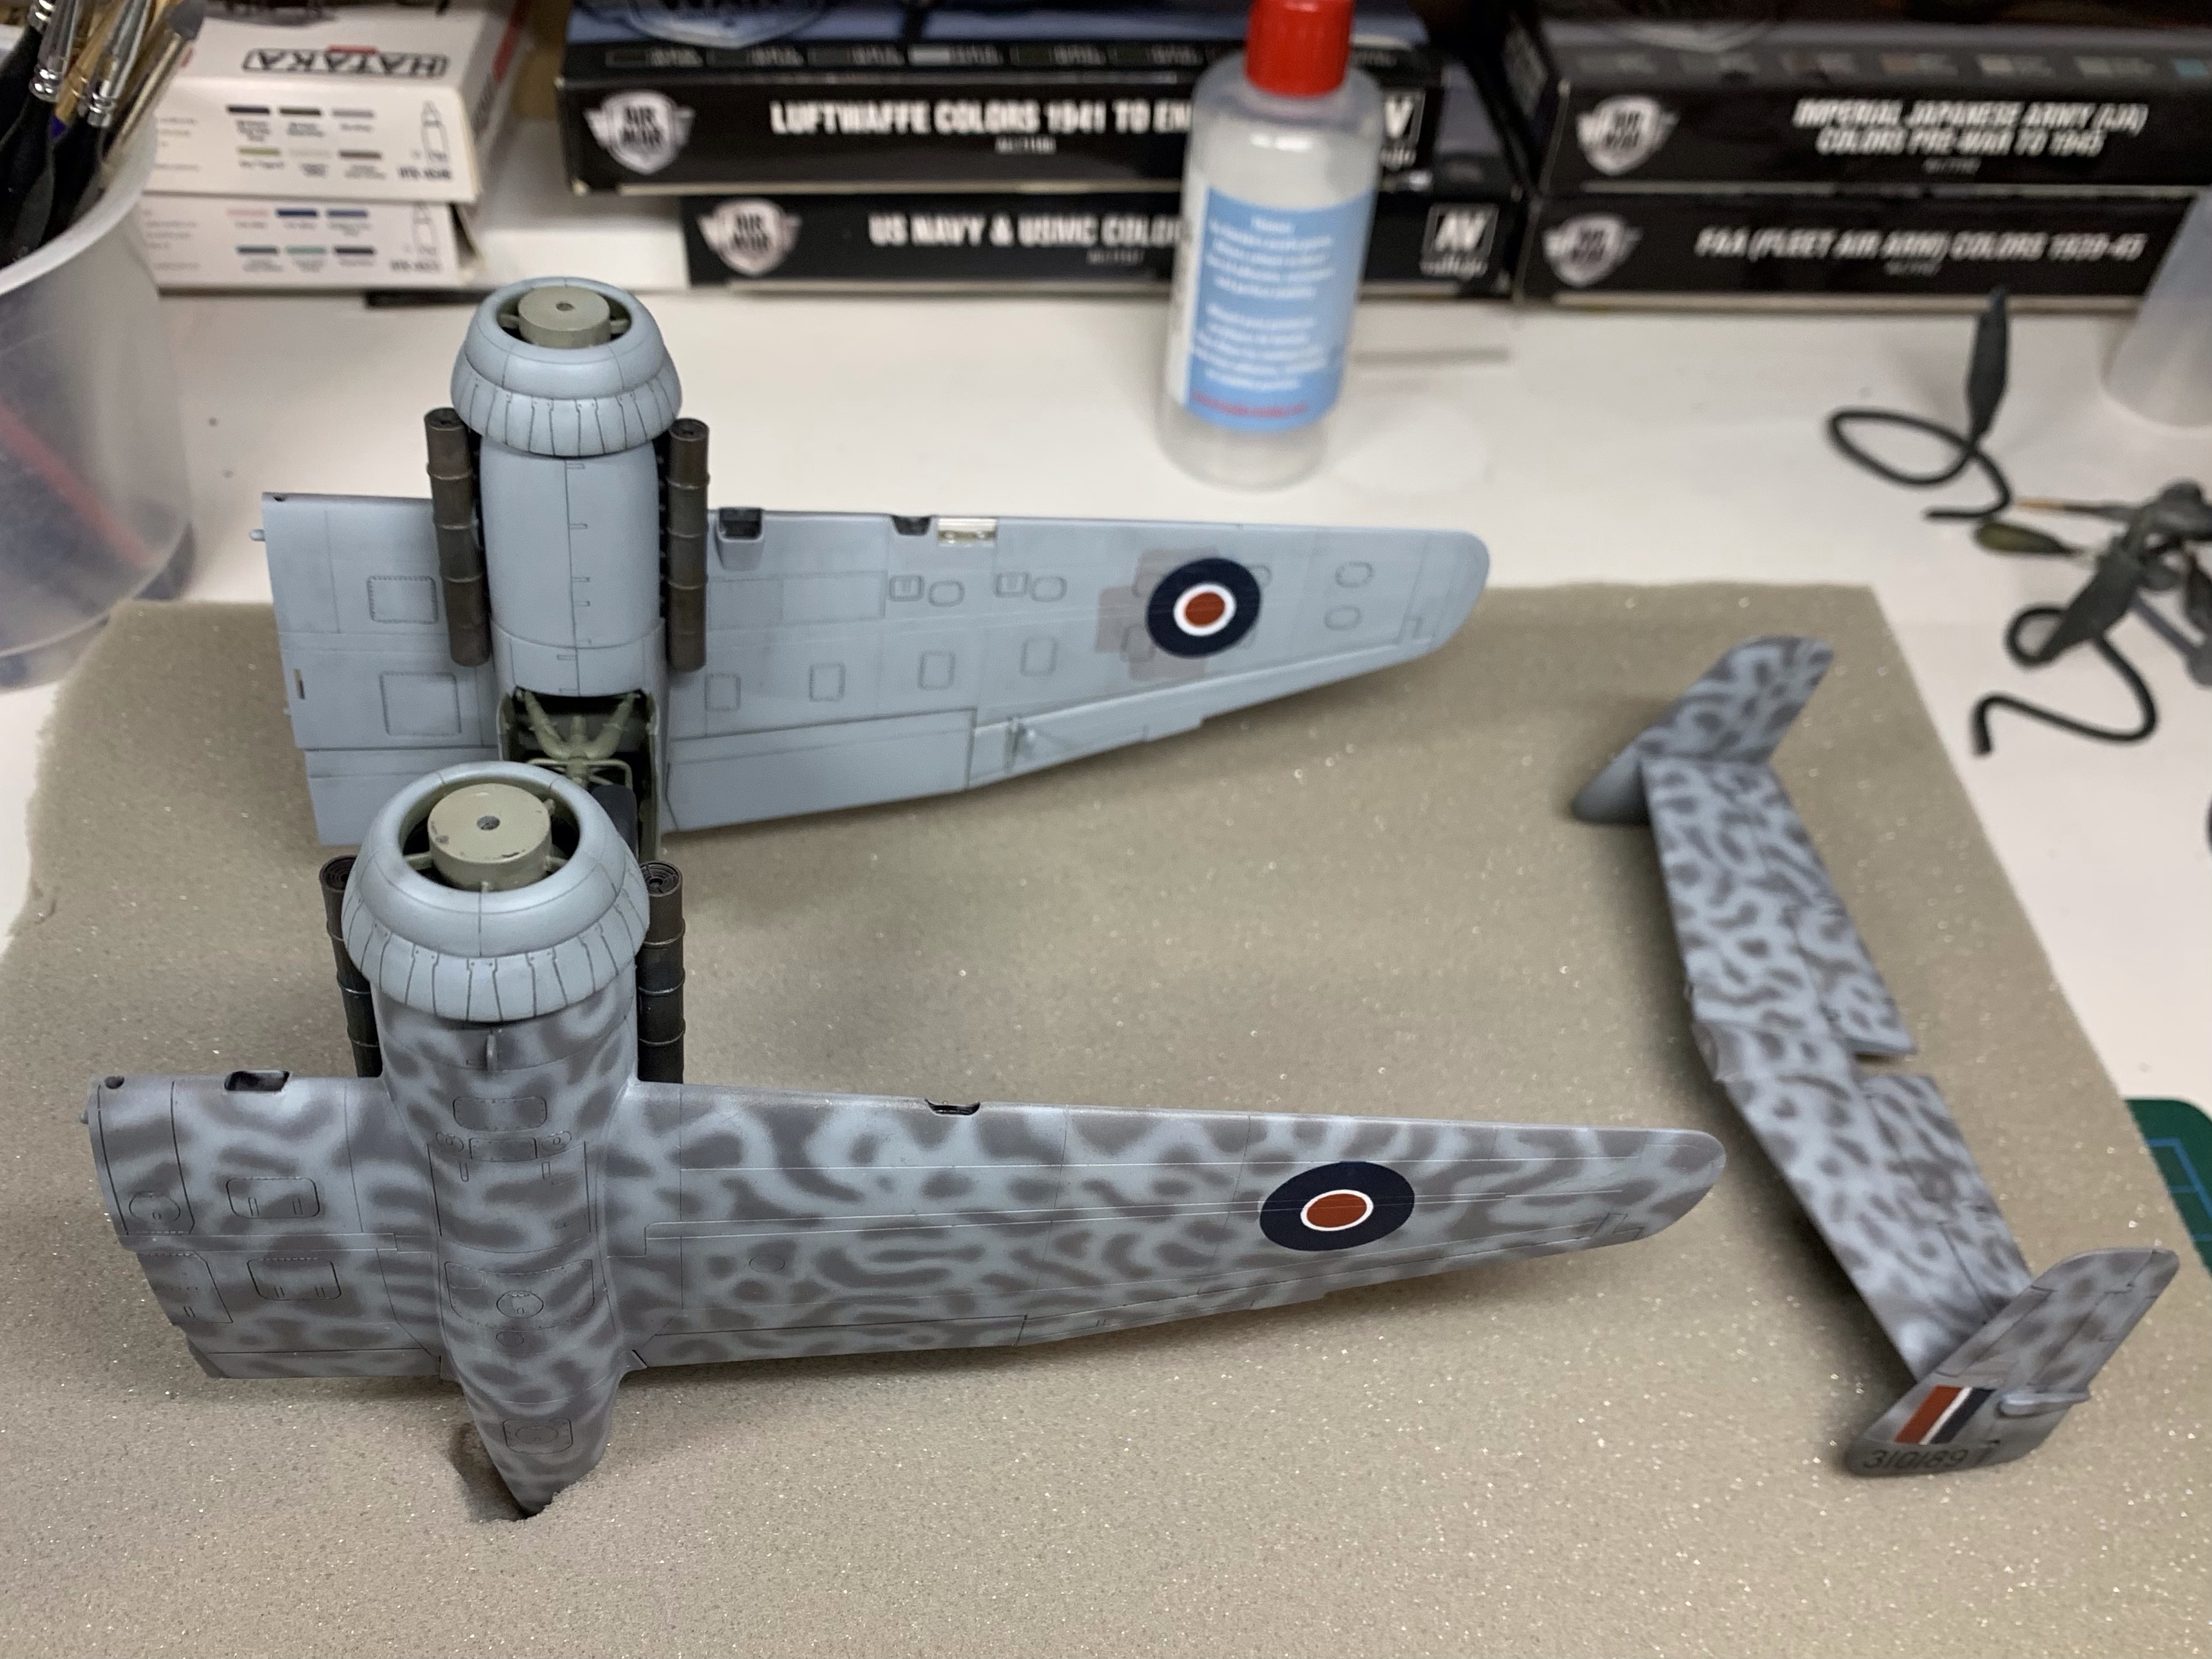
Next, I assembled the airframe. The tail snapped into place and didn’t even need glue . The Starboard wing was likewise, an excellent fit and required no cleanup or adjustment, I simply glued it into place. The port wing needed some work to achieve the best fit. There was a small gap across the rearward half of the seam which required a little putty wiped into the gap and then some paint to blend in the result. Balanced against the inconvenience of having to have painted it whole, not a lot of trouble at all.
Finish
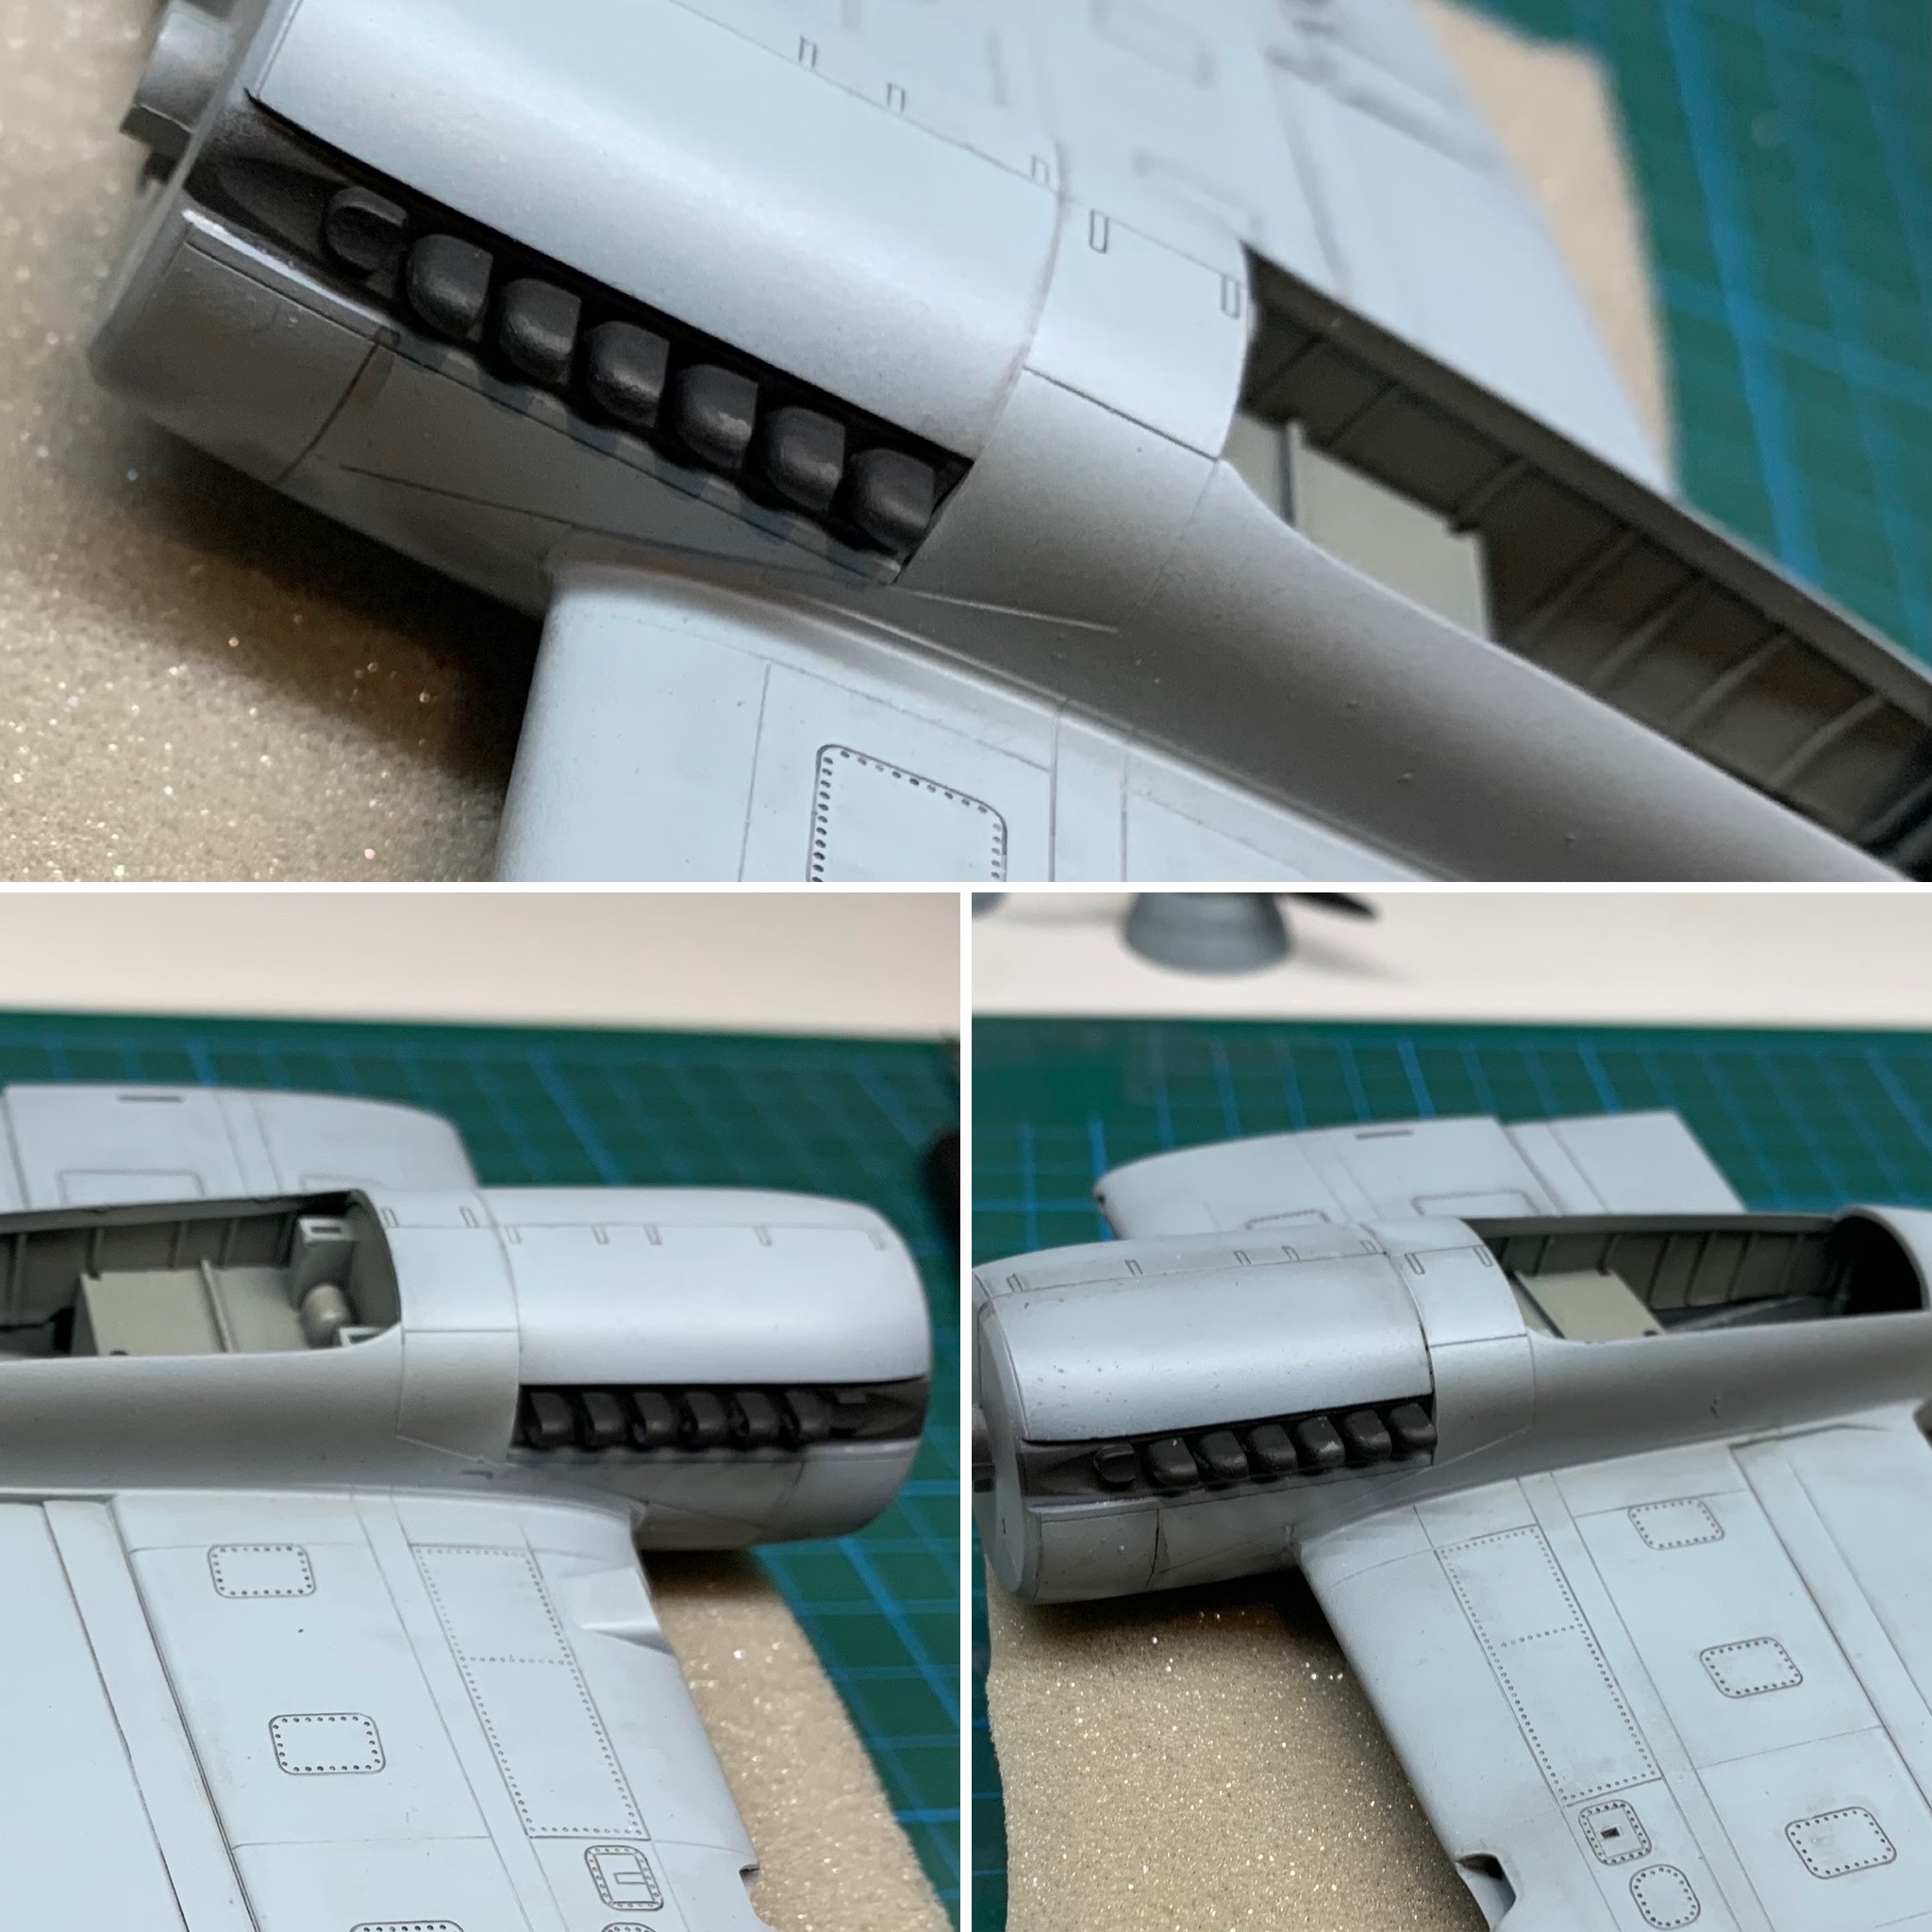
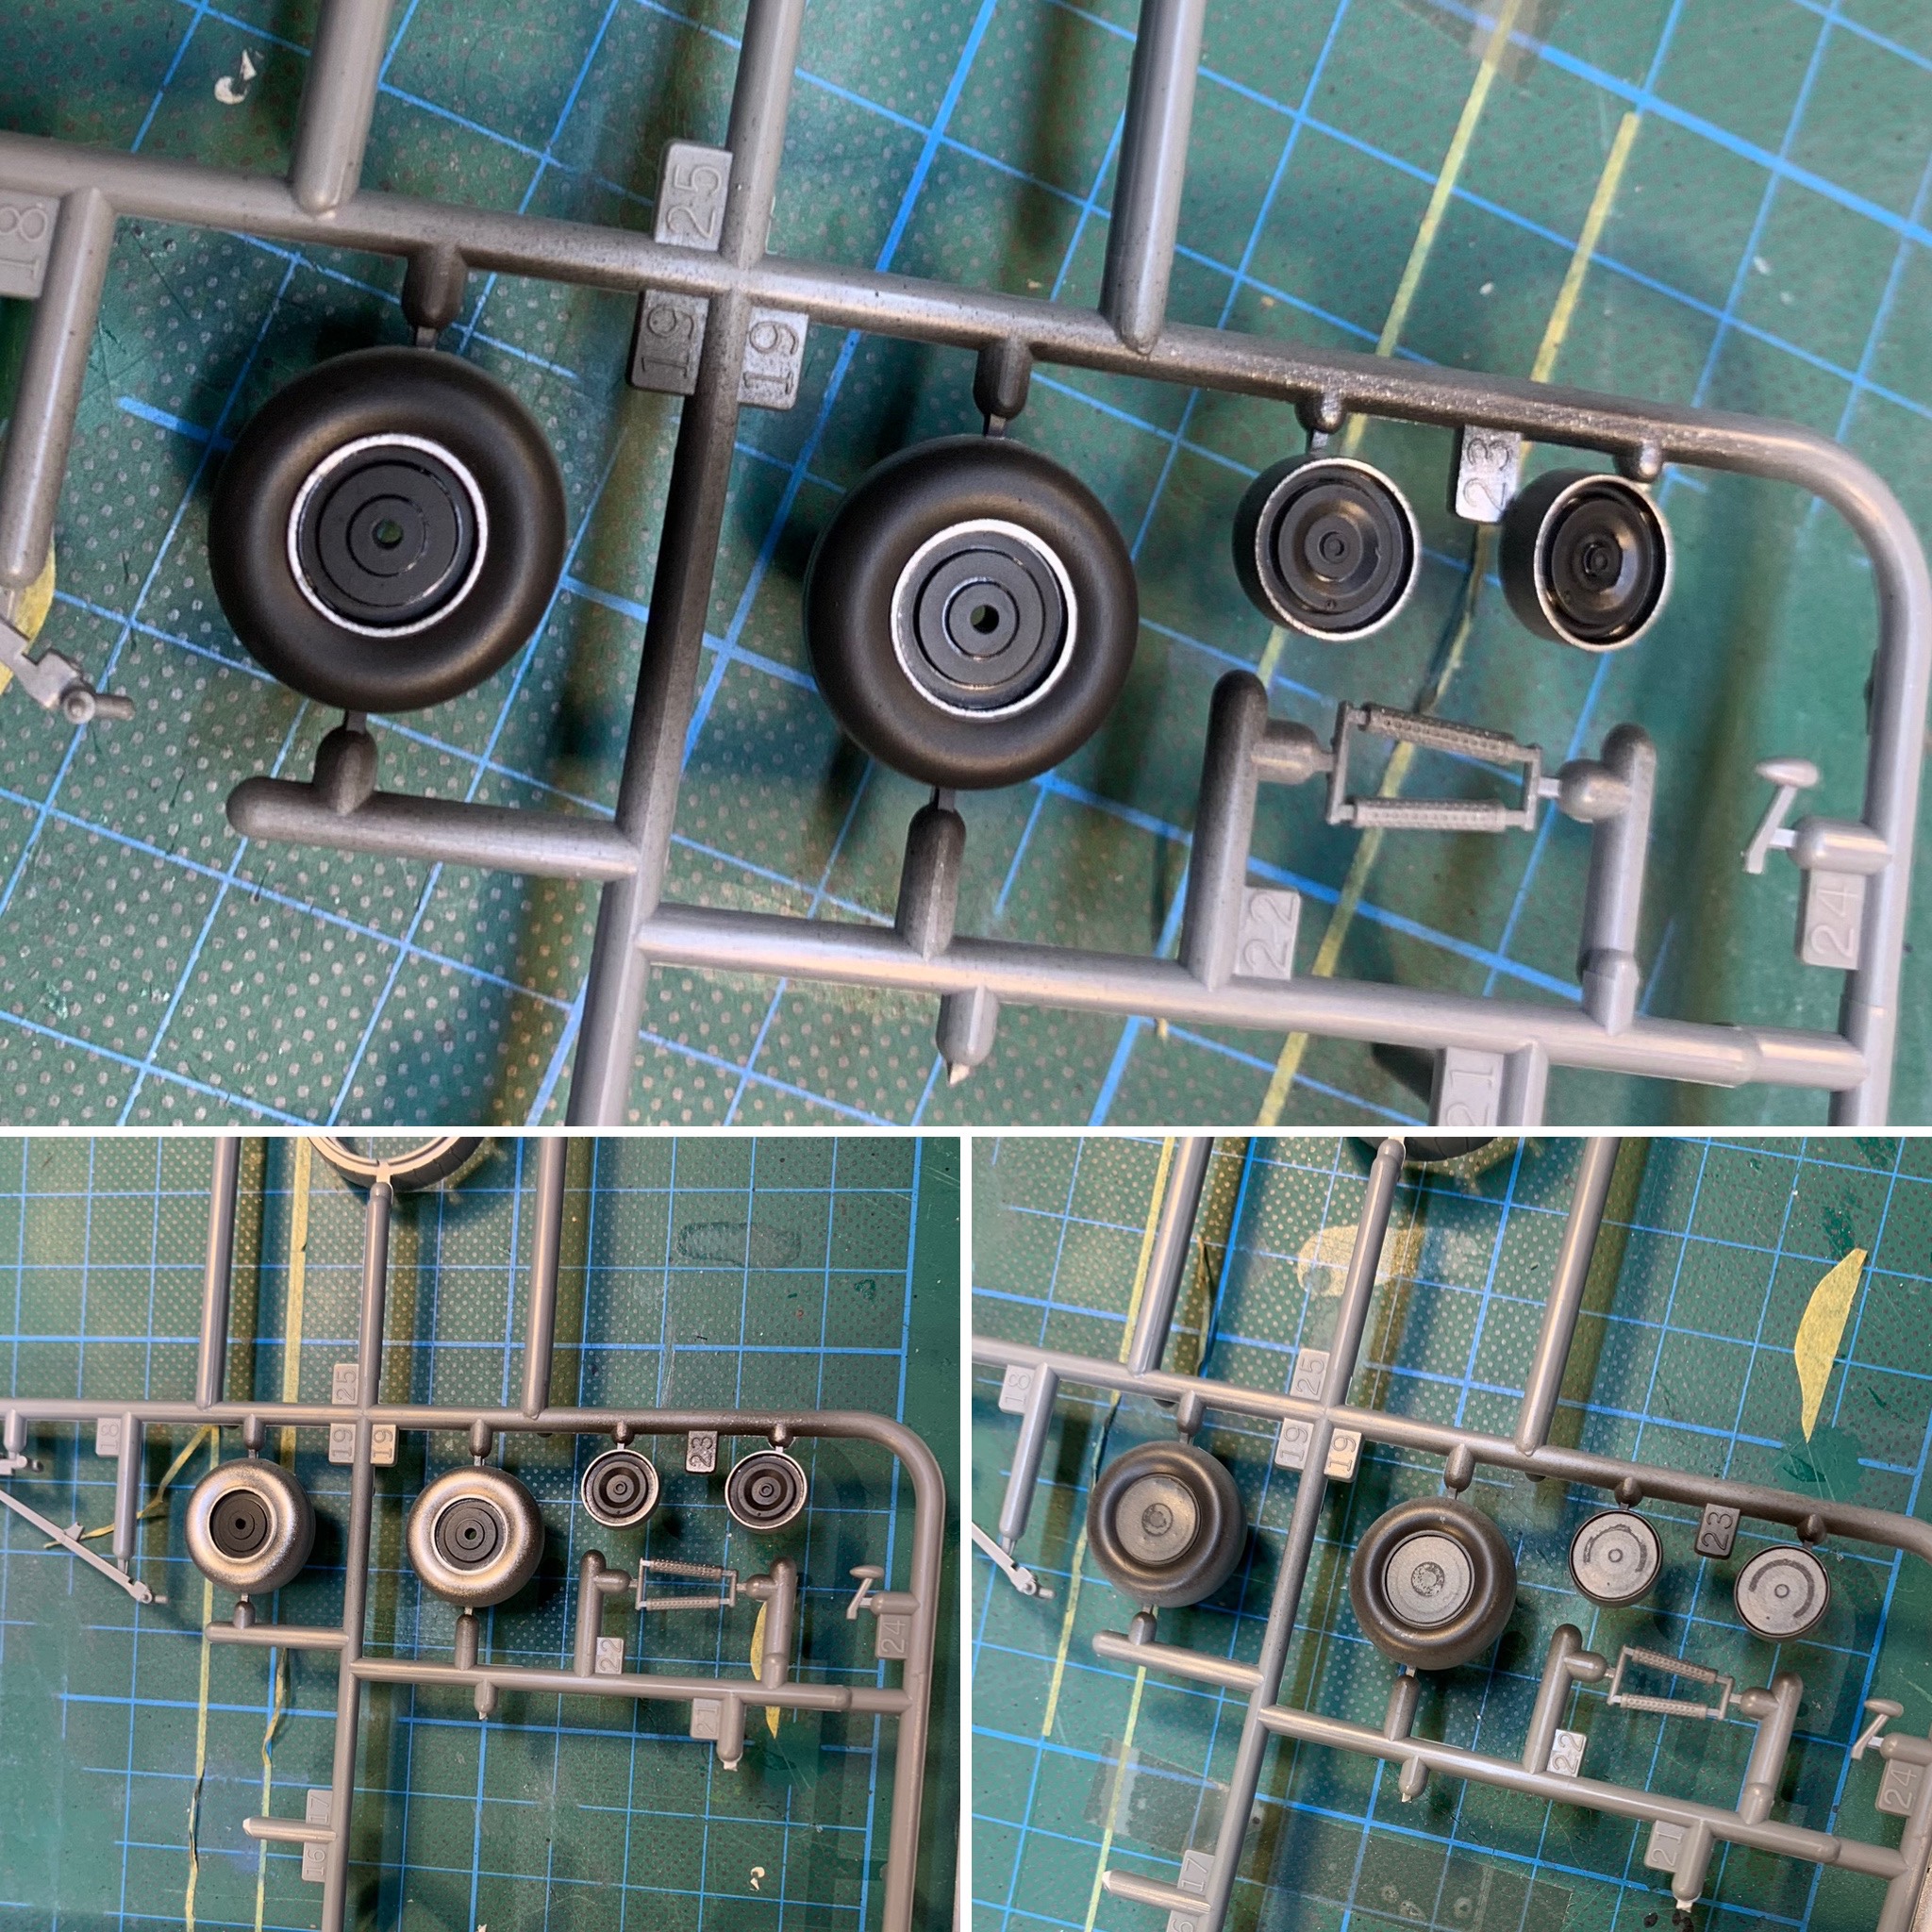
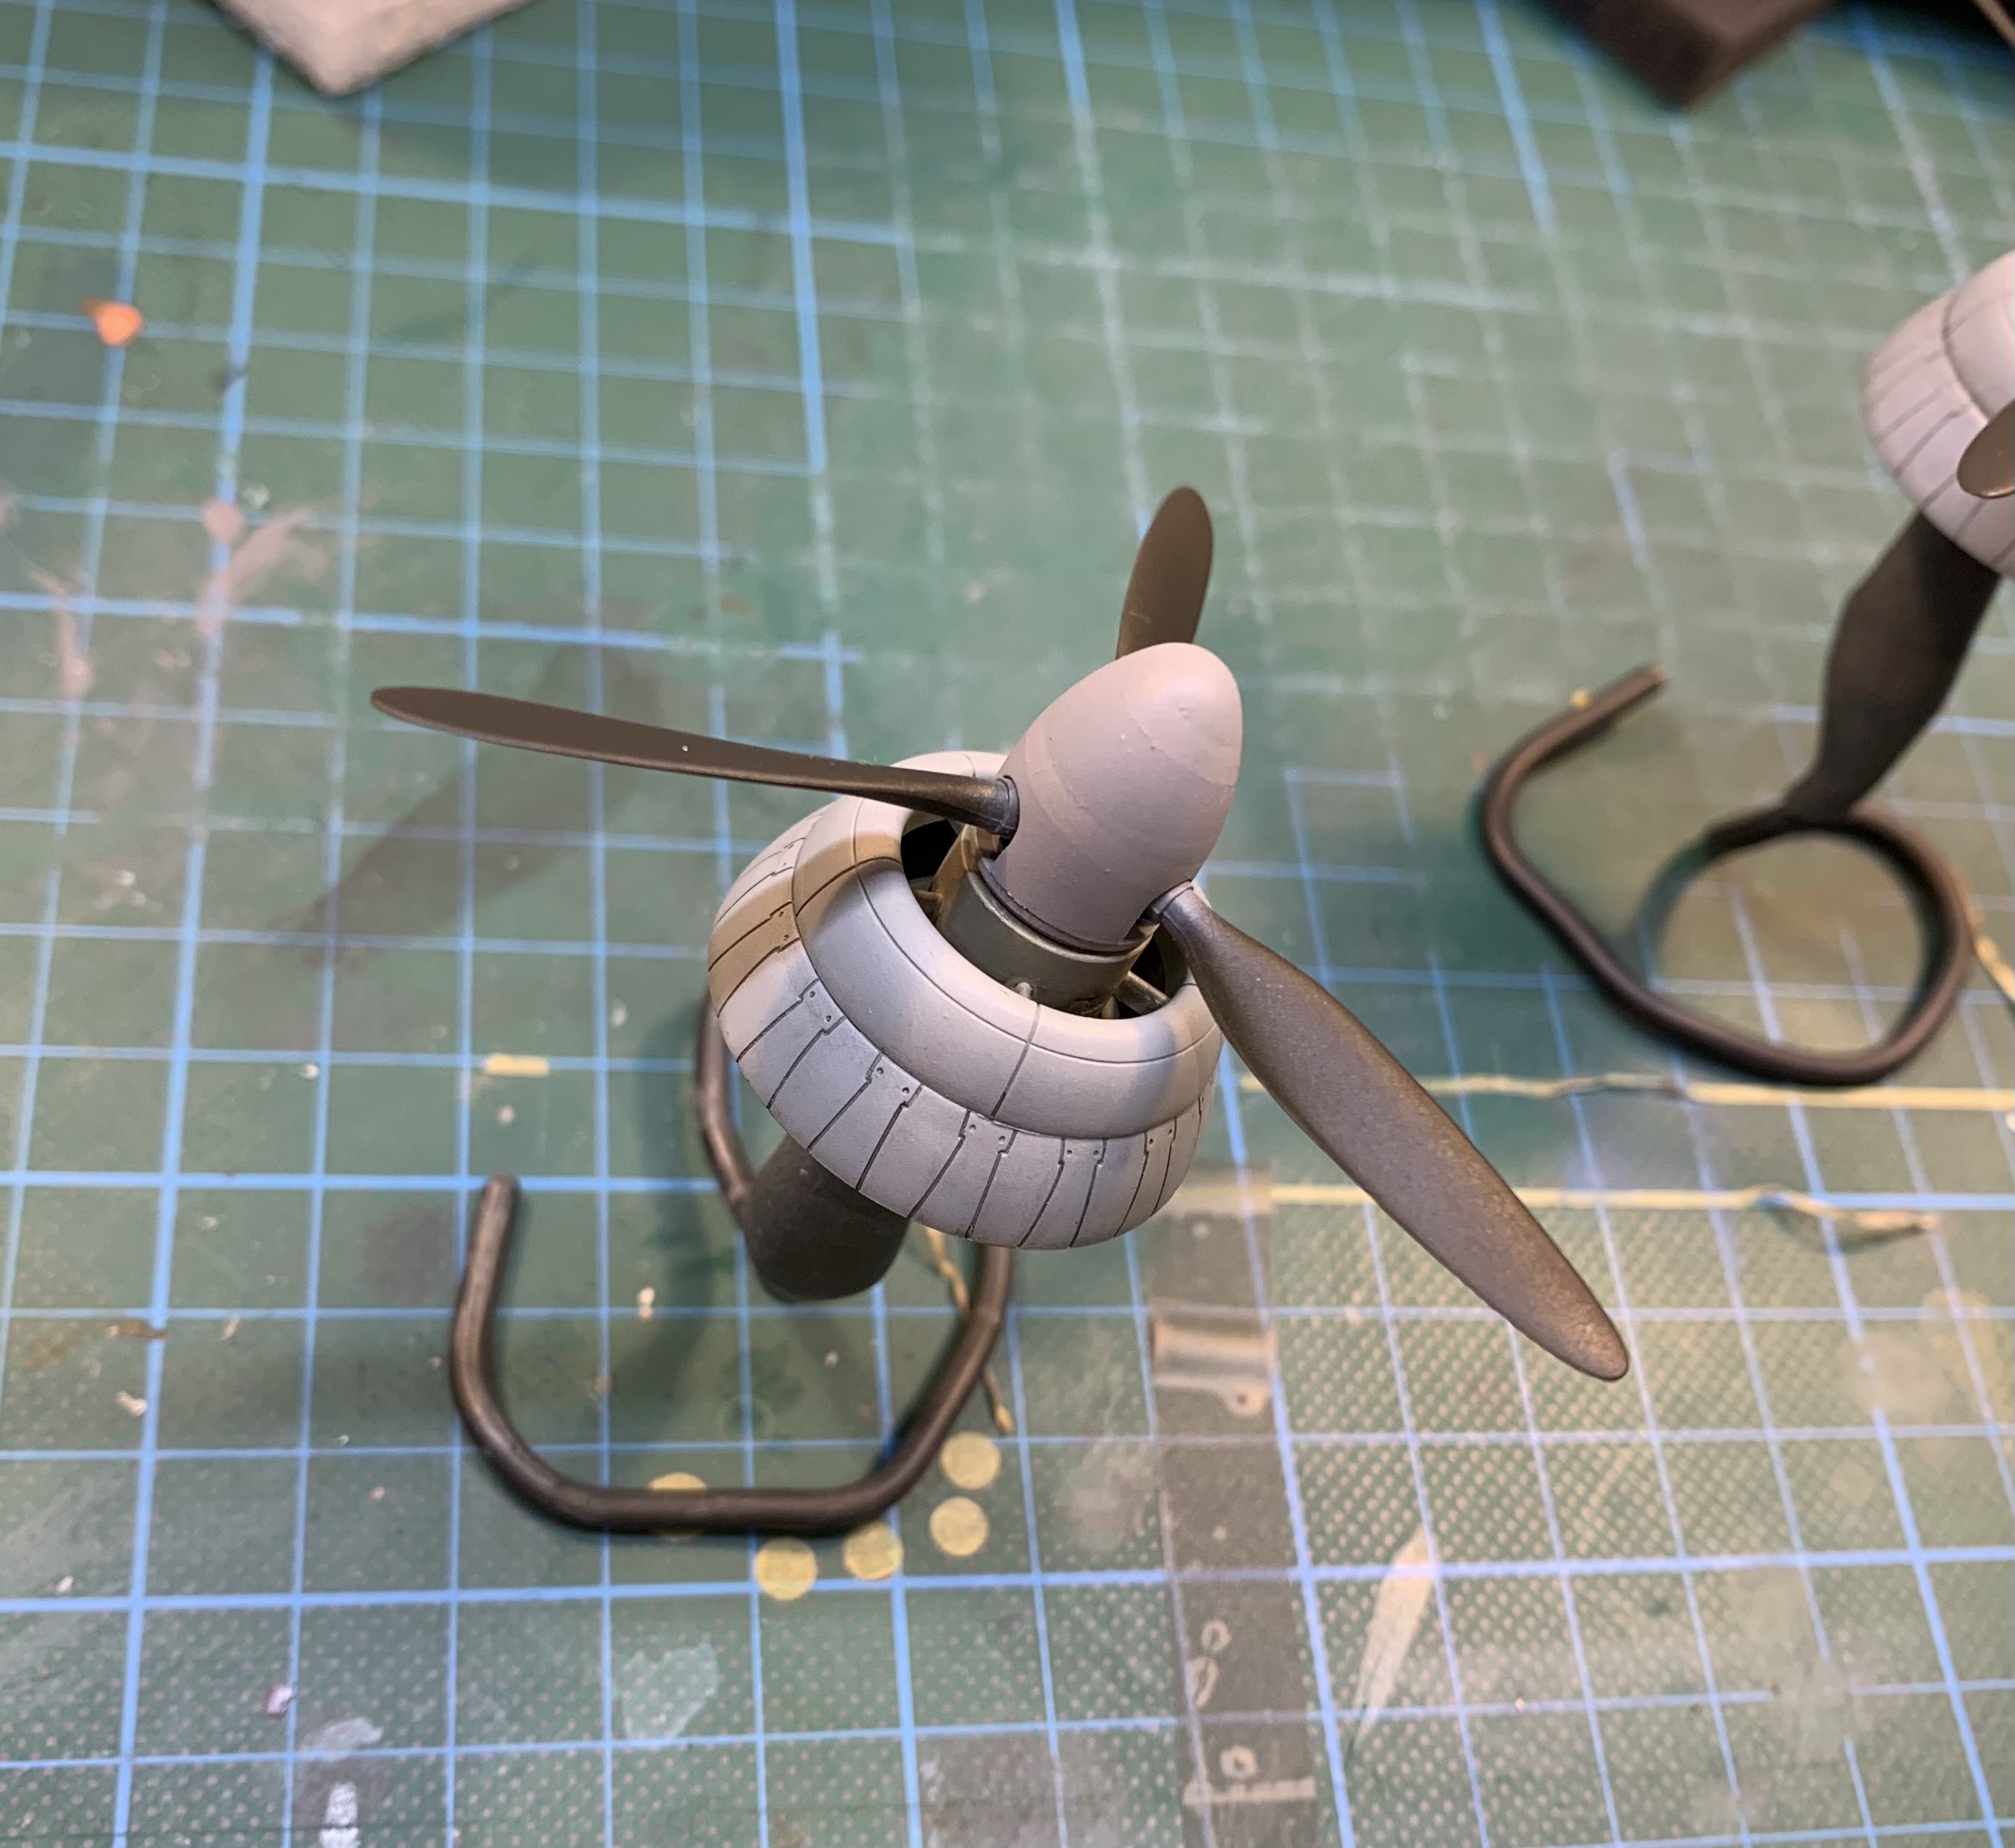
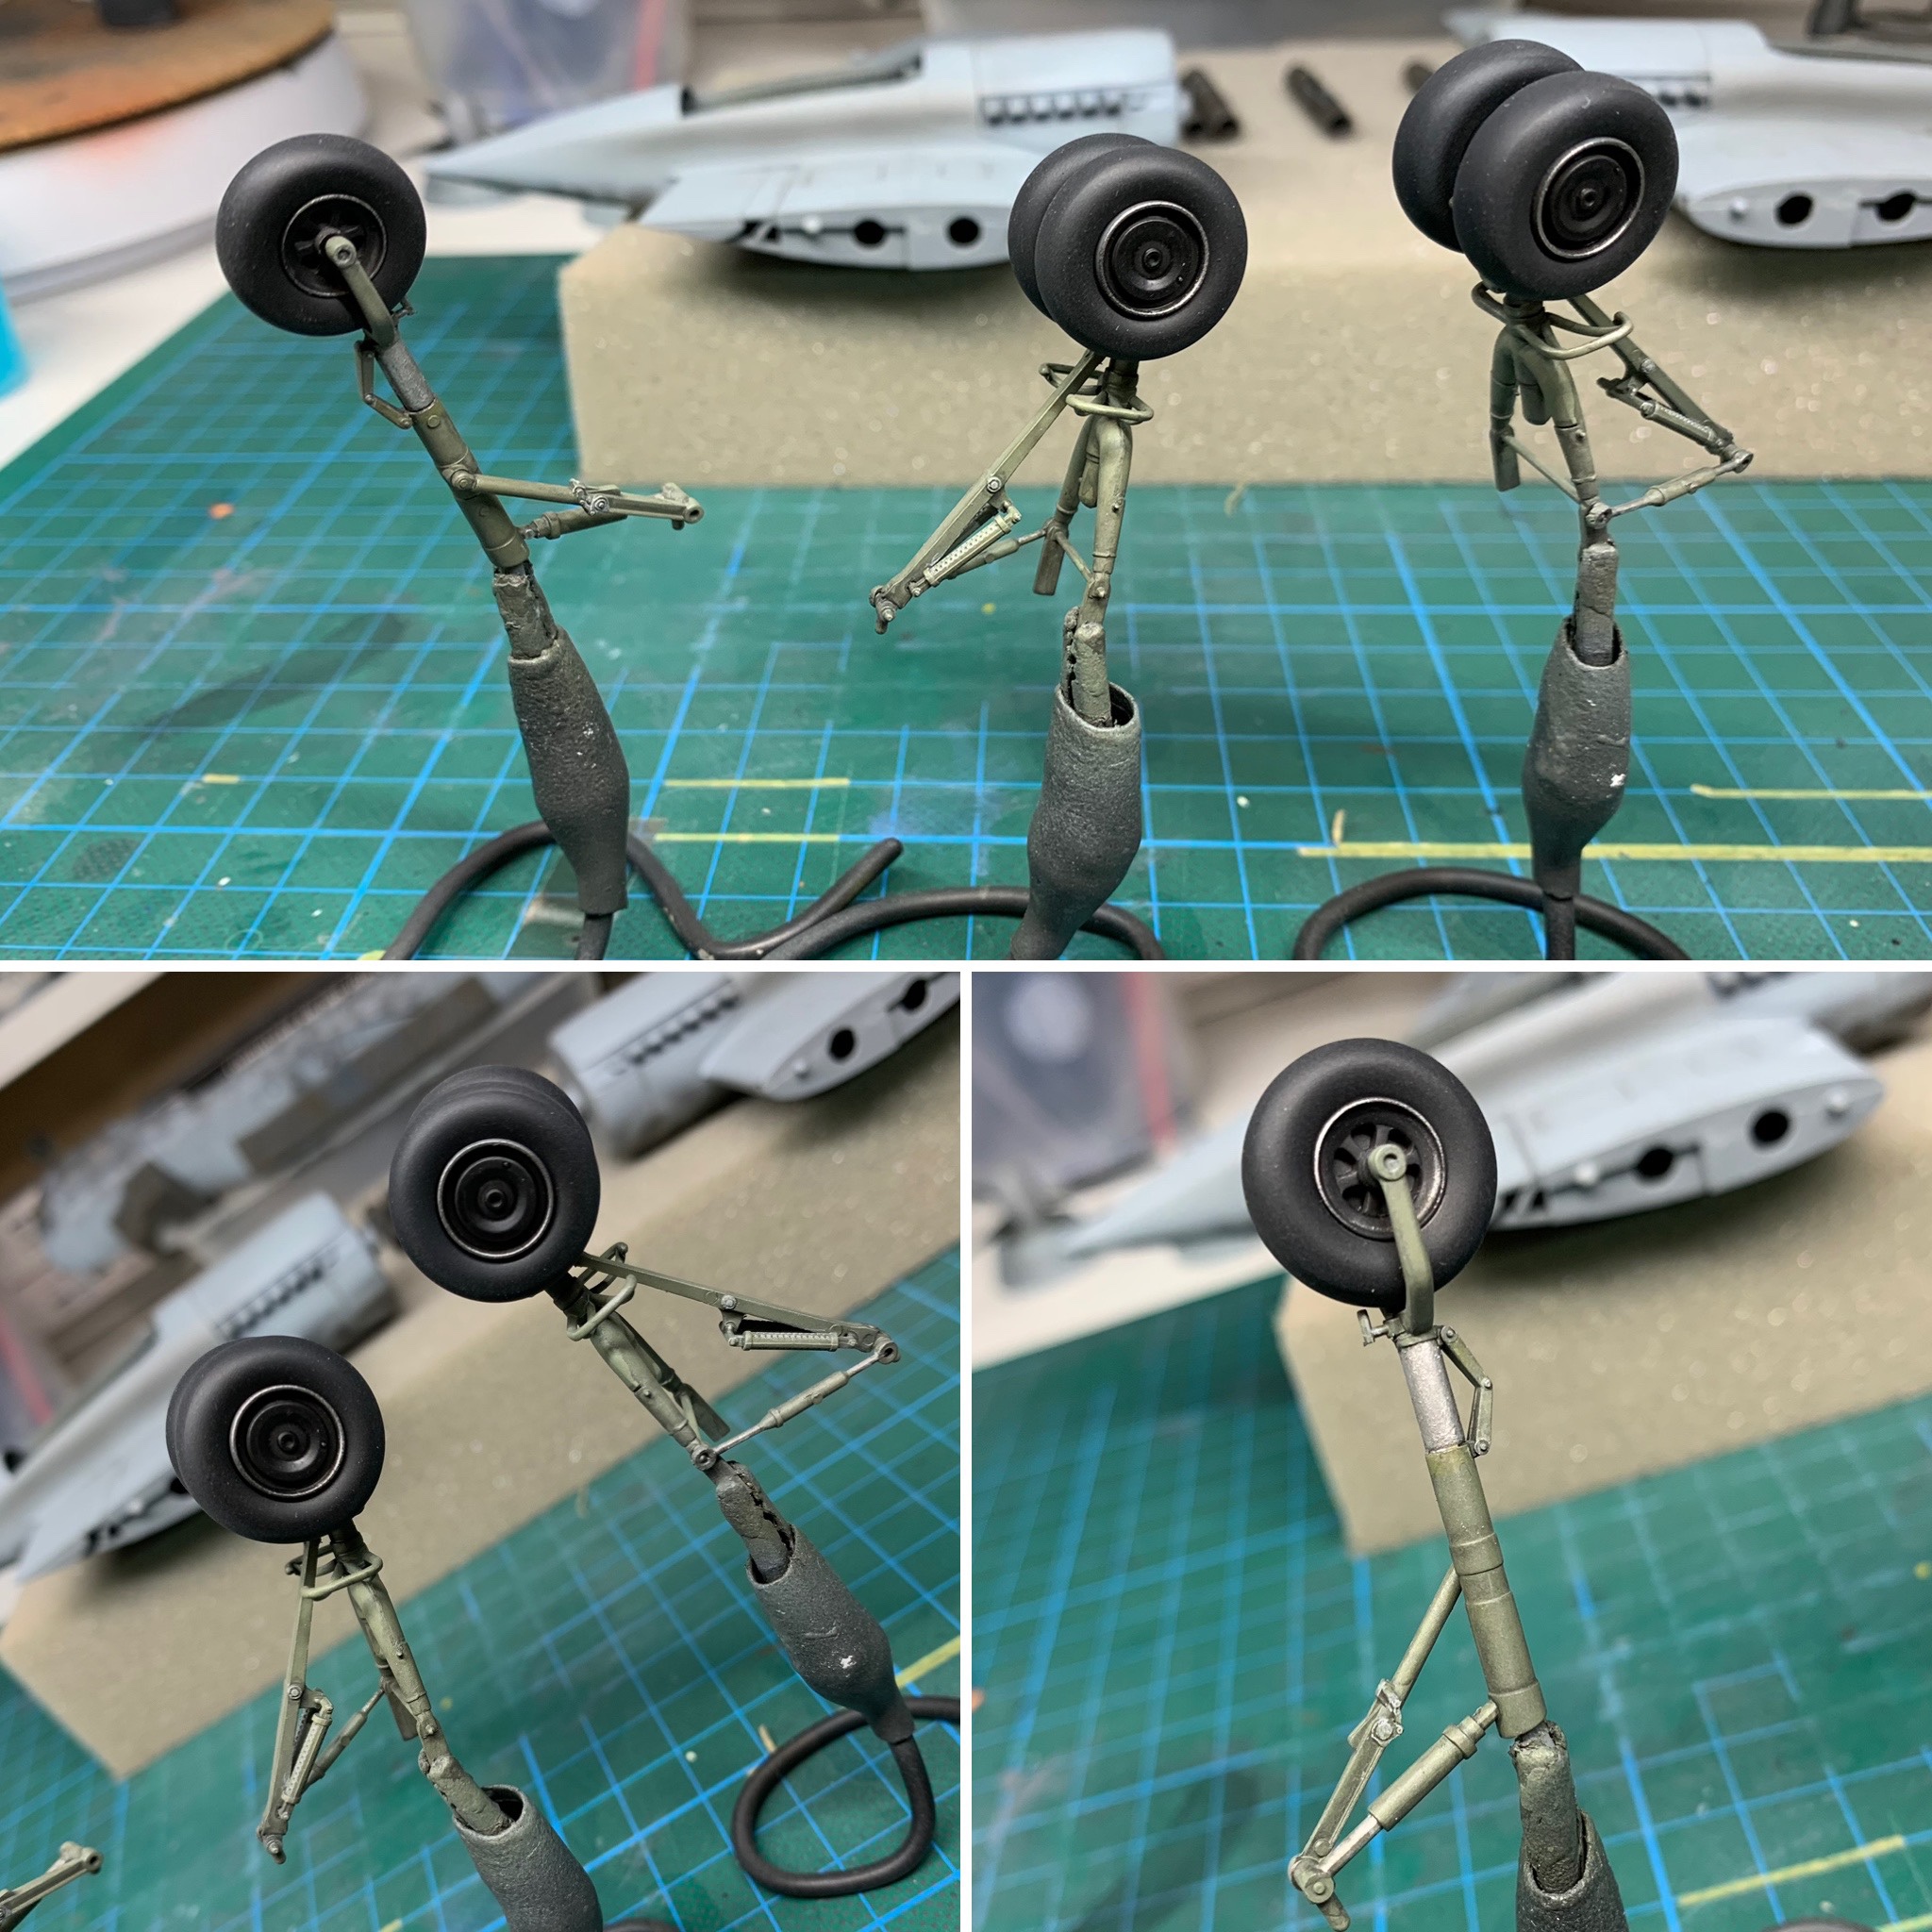
The final bits and pieces included the undercarriage, engines, propellers, and the radar array. I added the detail of a metallic rim to the wheels because I’m pretty sure I could see that in some of the contemporary photos. The propeller spinners had been over-painted with grey paint at some point by the RAF so I painted a spiral and then covered it with MSG. I put a little wear and tear into the propeller blades, but nothing very obvious. Lastly, I painted and added the radar and the antenna wire.
Click on any of the images below to scroll through the gallery.


This is an impressive model in terms of its size, and how well Tamiya engineered the kit. Aside from the self-inflicted troubles with the clear coat this was a very smooth model building experience. Although it’s a little esoteric as a subject and takes up a big space in the cabinet, I’d highly recommend the kit to anyone that wants to build an unusual but nonetheless impressive looking aeroplane model.
Gallery


References and Sources
The specific websites I used to research this piece are listed below. However, I used a different tool for much of the technical and historical research for this piece, ChatGPT. To be clear, ChatGPT did not write this piece, it actually doesn’t work that way. I used it to research the article in the same way as I might use Google, except ChatGPT allows for a more comprehensive search and intelligent follow-up questions. Essentially, it’s a search engine I can converse with. It doesn’t have all the answers, and sometimes it is wrong, but it’s an exceptional tool which I will make more use of going forward.
- https://www.silverhawkauthor.com/post/germany-luftwaffe-warplanes-1939-1945-messerschmitt-bf-109
- https://www.vintagewings.ca/stories/wtf
- https://www.si.edu/object/heinkel-he-219-2r4-uhu-eagle-owl%3Anasm_A19600322000
- https://www.smithsonianmag.com/air-space-magazine/in-the-museum-8-180969505/
- https://en.wikipedia.org/wiki/Heinkel_He_219
- https://www.key.aero/article/heinkels-nocturnal-hunter
- https://www.warhistoryonline.com/world-war-ii/owl-eagle-heinkel-he219-night-fighter.html
If you are interested in following the build as it unfolded, my full build diary is logged in the Britmodeller Aircraft WIP Section.
I really hope you enjoyed this article!
Making-History is a labour of love for me, but it’s becoming more expensive and time consuming. I’m loath to put advertising on it, so if you feel inclined please consider making a donation to help cover site hosting costs as well as the time it takes to produce its content. All donations get a receipt with my thanks.
Mark.
Make a one-time donation
Make a monthly donation
Make a yearly donation
Choose an amount
Or enter a custom amount
Your contribution is very much appreciated and 100% of it will be recycled back into Making-History.
Your contribution is appreciated.
Your contribution is appreciated.
Copyright ©2024
This article, its text, and photos of the model is my original work and except where noted is protected by copyright in its entirety. All research sources are listed in the References and Sources section above, including photos from official sources. All other images and quoted content were sourced from the internet and are used here under protection of fair-use. Any copyrighted content will happily be removed and/or credited forthwith upon request by its rightful owner.


Leave a comment