
Why So Dirty?
I’ve often wondered why Naval aircraft look so dirty. It seemed counter intuitive that there wasn’t enough time to keep them clean, so I looked it up. This is what I found.
- Operational Environment: Aircraft operating from carriers are often exposed to harsh conditions at sea, including saltwater, high winds, and various weather elements. This can contribute to the accumulation of dirt, salt residue, and other contaminants on the aircraft.
- High Operational Tempo: Carrier-based aircraft are frequently engaged in takeoffs, landings, and mission operations. The high operational tempo leaves limited time for thorough cleaning between sorties, especially during intense operations.
- Limited Maintenance Facilities: Carriers have limited space and facilities for maintenance compared to land-based airfields. Comprehensive cleaning and maintenance may be challenging to perform on a carrier deck, and sometimes aircraft are only given a basic wash to remove immediate concerns.
- Exhaust Residue: The powerful engines of carrier aircraft produce exhaust residues, which can contribute to the accumulation of soot and grime on the aircraft surfaces.
- Mission-Specific Loadouts: Depending on the mission, aircraft may carry external fuel tanks, ordnance, and other mission-specific equipment that can add to the overall appearance of dirtiness.
- Time Constraints: Quick turnarounds between missions are essential on carrier decks. This leaves little time for detailed cleaning, and the focus is often on ensuring the aircraft is ready for its next mission.
Despite their seemingly dirty appearance, U.S. Navy carrier aircraft undergo regular maintenance and inspections to ensure their operational readiness and safety. The external appearance might not always reflect the meticulous care that goes into maintaining the aircraft’s critical systems and components.
So, with that understood, what colour is it underneath all that grime?
Grey Isn’t Just Grey
The United States Navy uses a standardised grey paint known as “Haze Gray.” This colour is used for the majority of their aircraft, including carrier-based aircraft. The specific shade may vary slightly depending on the aircraft type and its intended operational environment. Haze Gray is designed to provide a good balance of visibility and concealment in various lighting conditions and environments, including over the ocean.
But, what colour is it, exactly?
“Haze Gray” used by the U.S. Navy does not have a specific Federal Standard (FS) number. Instead, the U.S. Navy uses its own set of colour standards, often referred to as Navy colours or Federal Standard 595 (FED-STD-595) colours. The specific shade of grey used on Navy aircraft is identified by its Naval Aircraft Gray colour, and it is assigned a colour code within the Navy’s system.
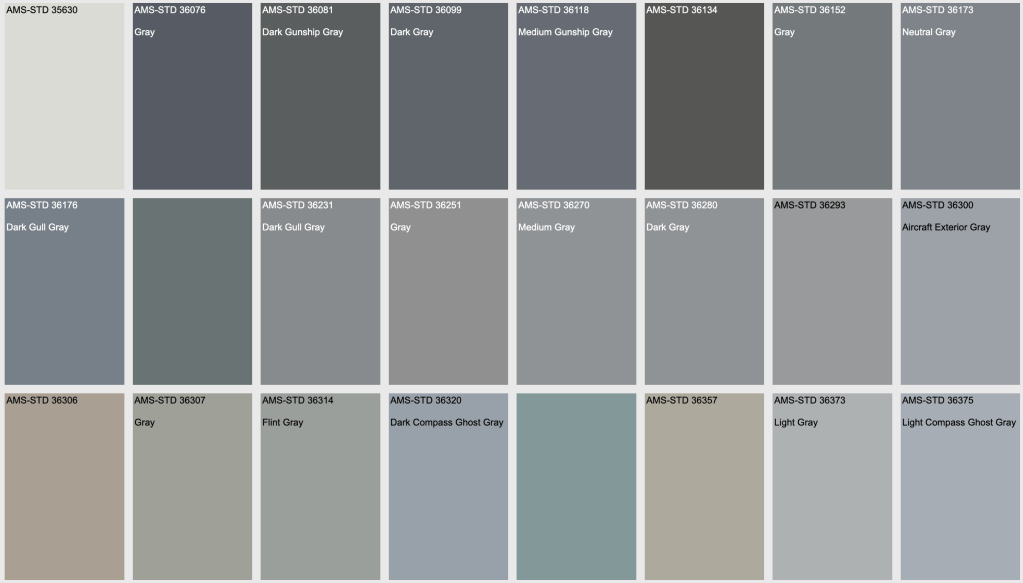
https://ams-std-595-color.com/
AMS-FED-STD-595 is a colour standard used by the United States government to specify colours for paint and coatings. It provides a standardised system for colour identification and communication, facilitating consistency in colour selection for various applications, including military and government projects.
The FED-STD-595 colour standard includes a range of colour swatches, each identified by a unique colour number. These colour numbers are composed of a combination of digits and letters, and they correspond to specific colours within the standard. For example, a colour number like “36375” refers to a particular shade.
While FED-STD-595 is widely used, different branches of the U.S. military, including the U.S. Navy, often have their own colour standards or specifications that might deviate slightly from the FED-STD-595. In the case of U.S. Navy aircraft, they may use specific shades like “Naval Aircraft Grey” rather than referencing an FS number directly.
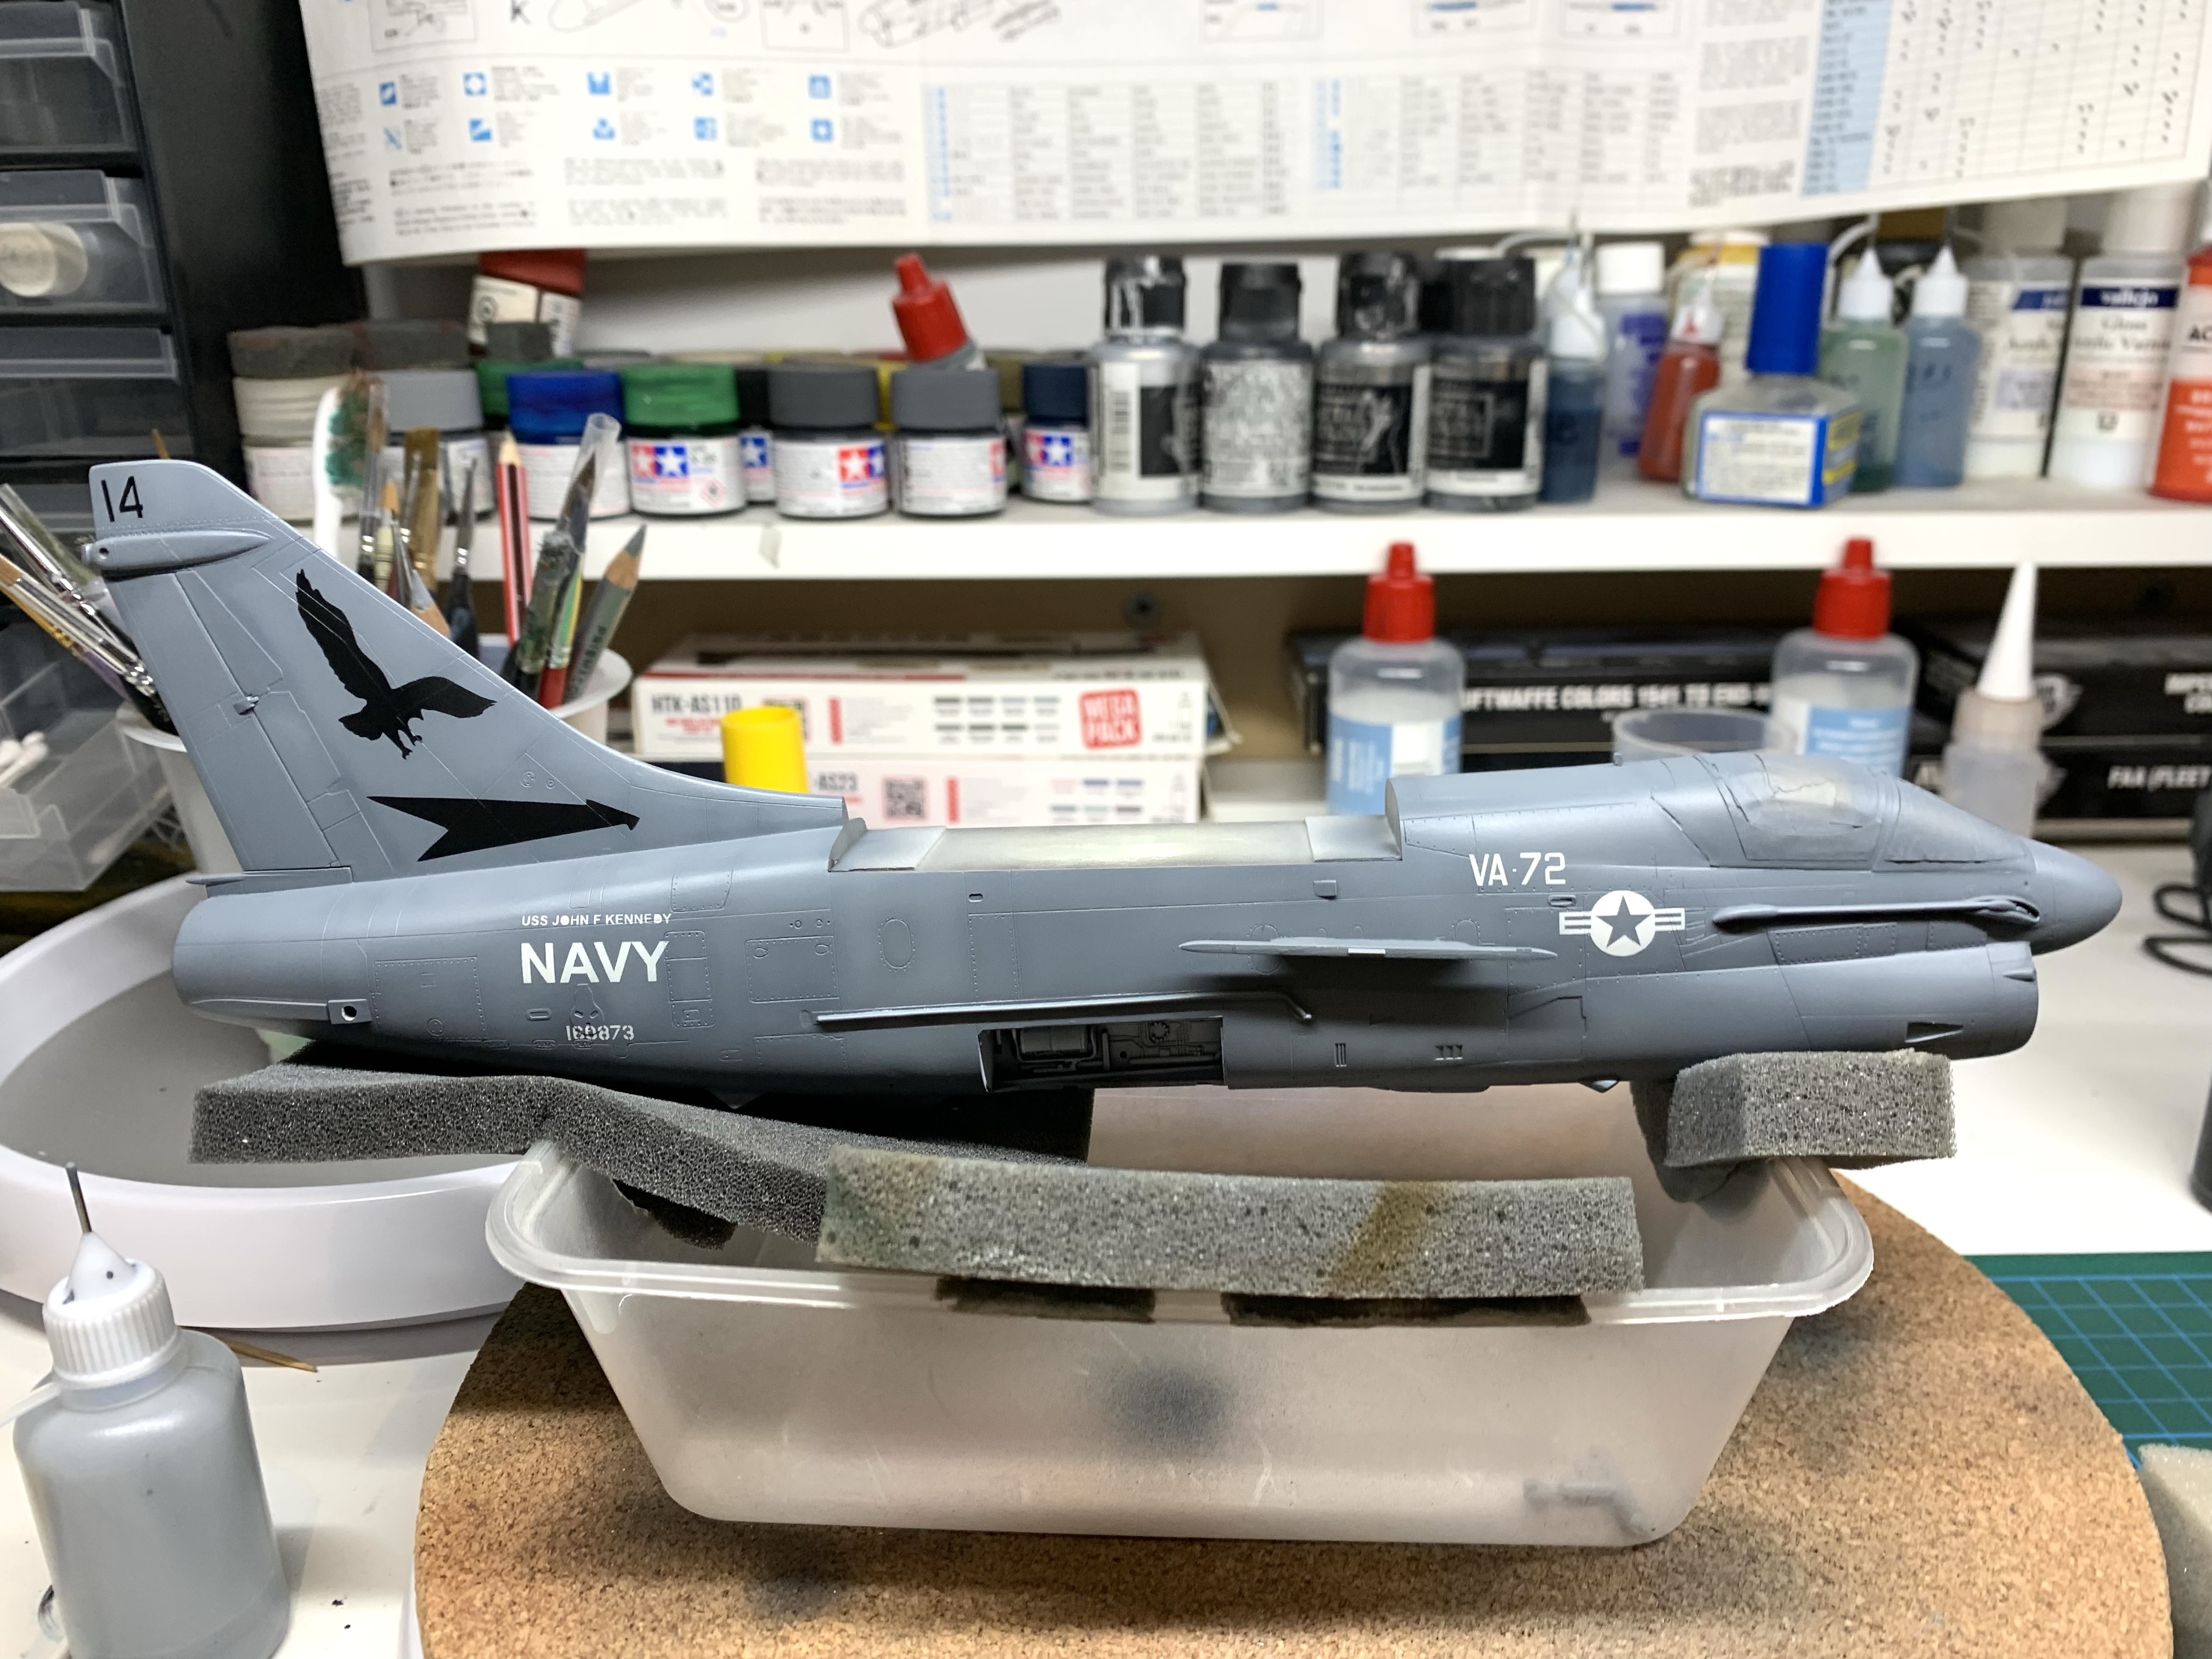
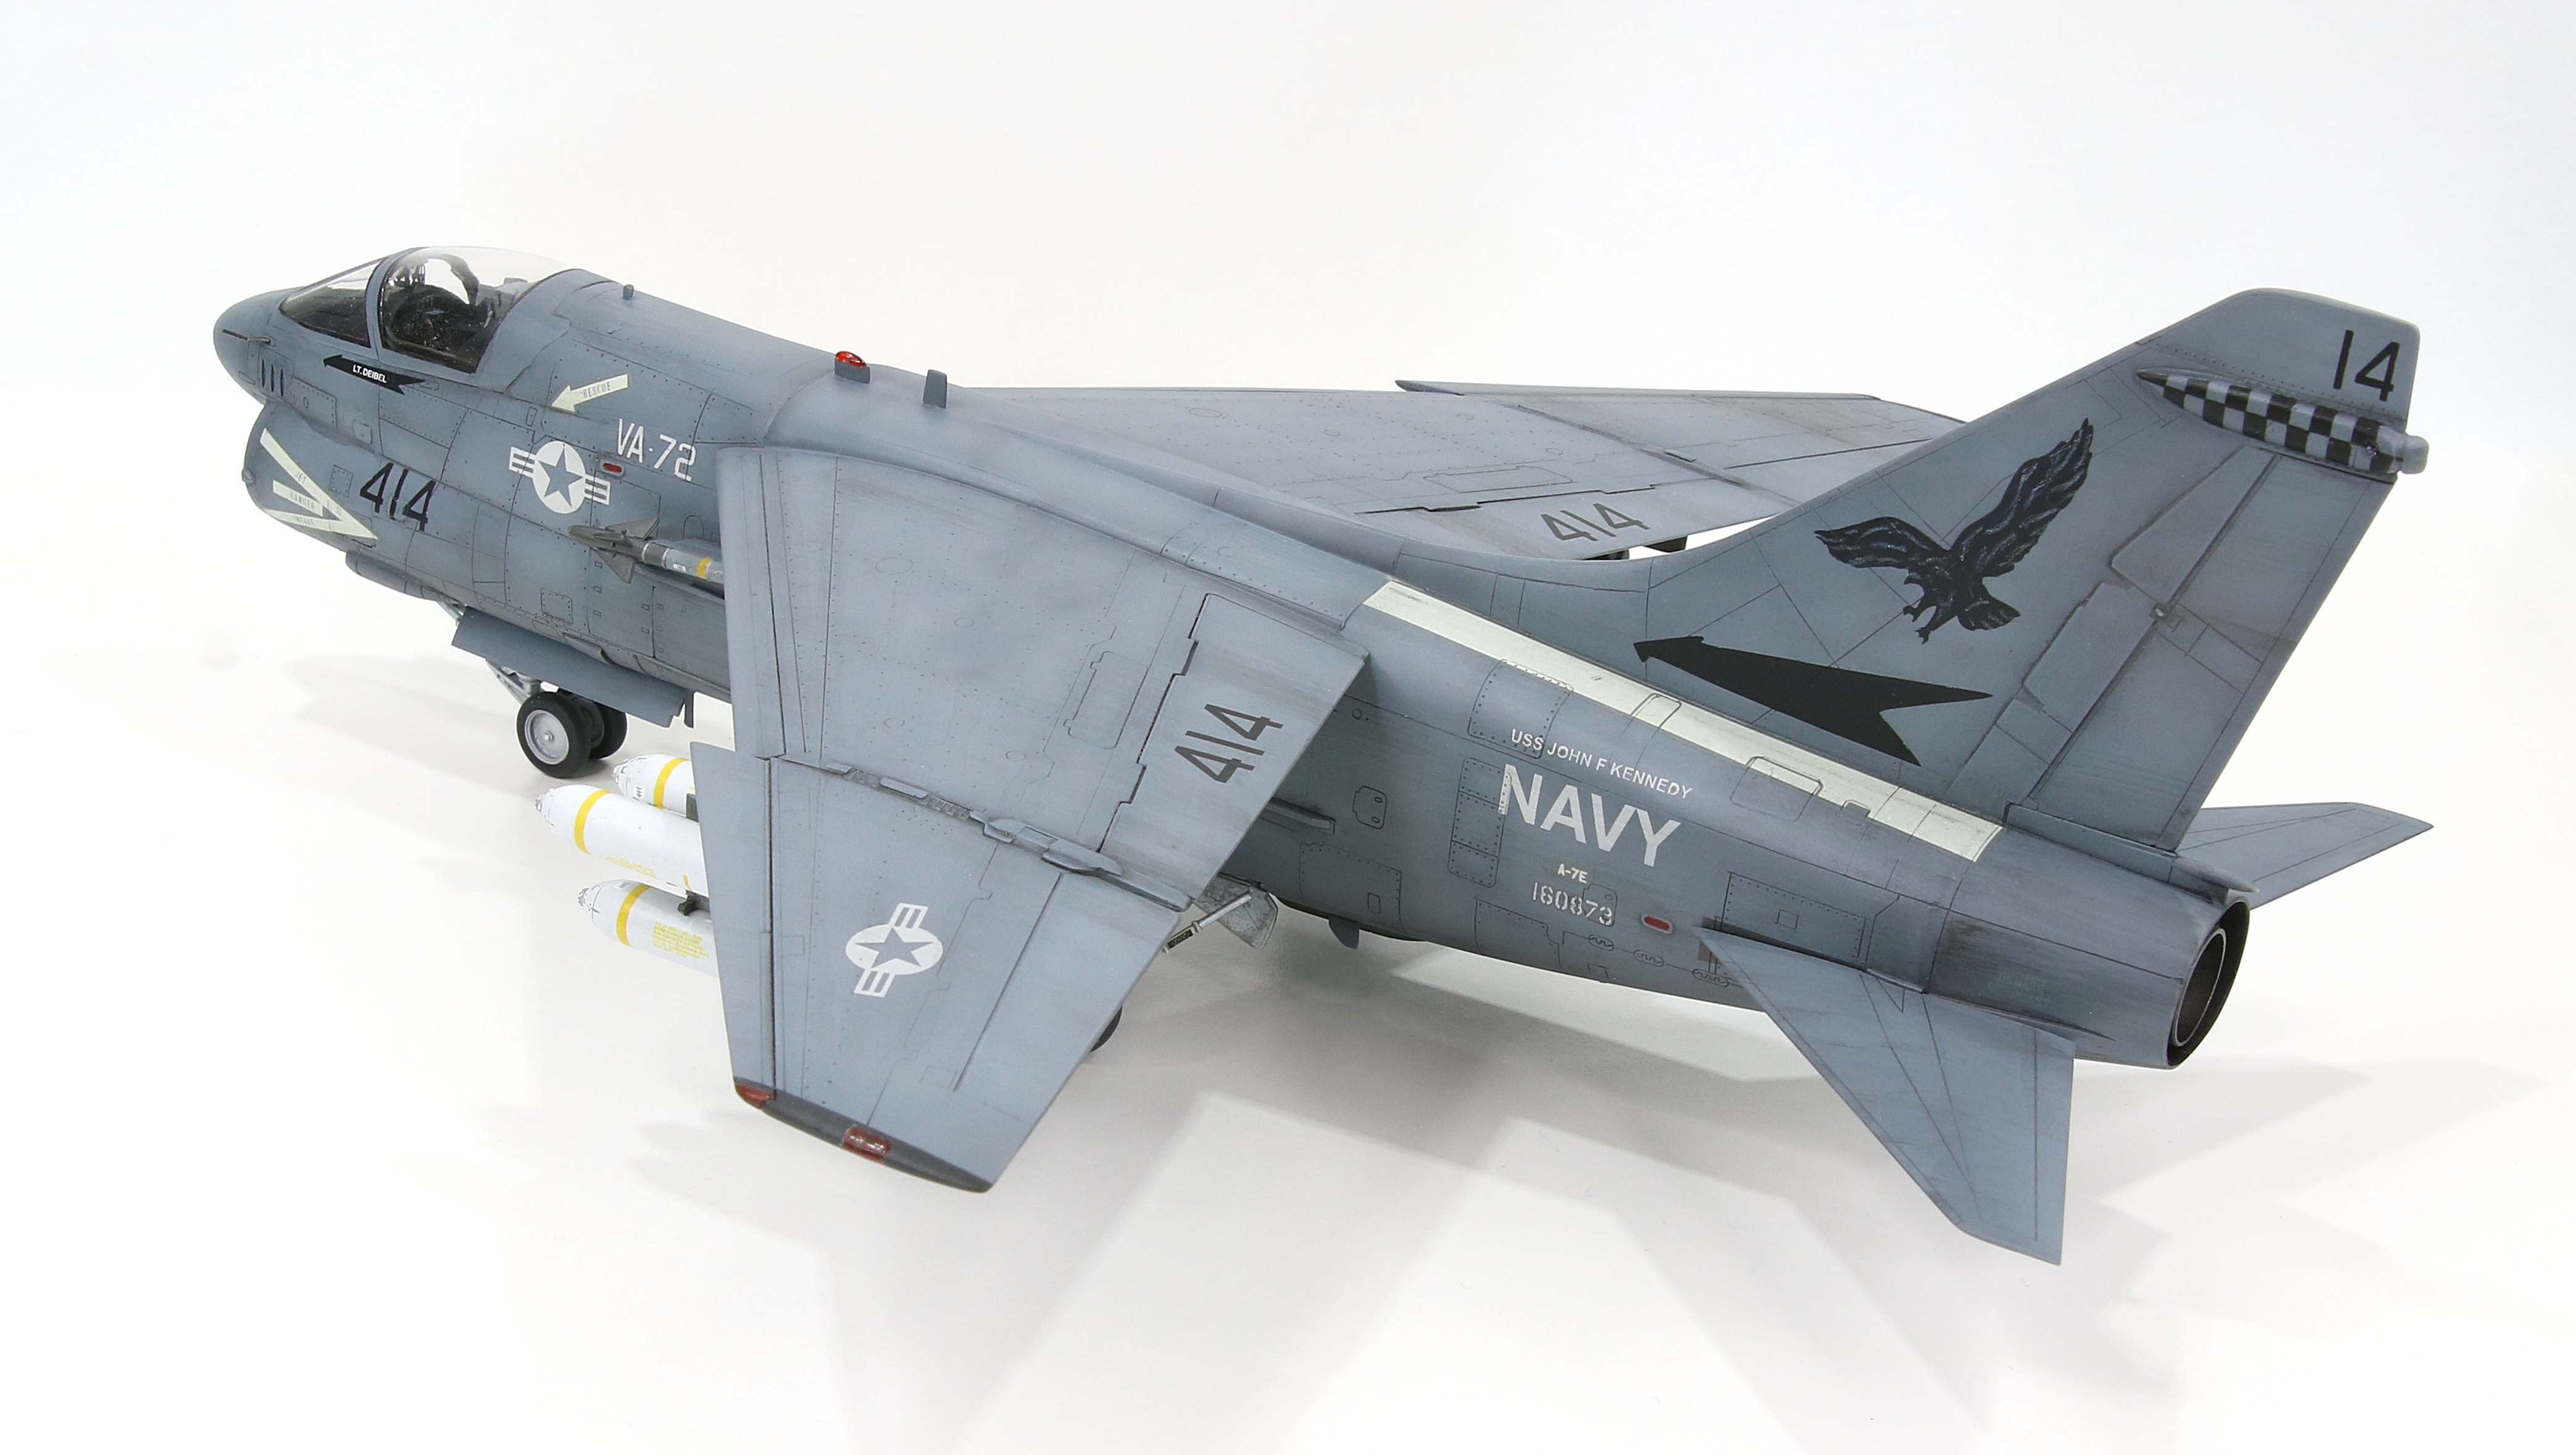
Hasegawa 1/48 A-7E Corsair II
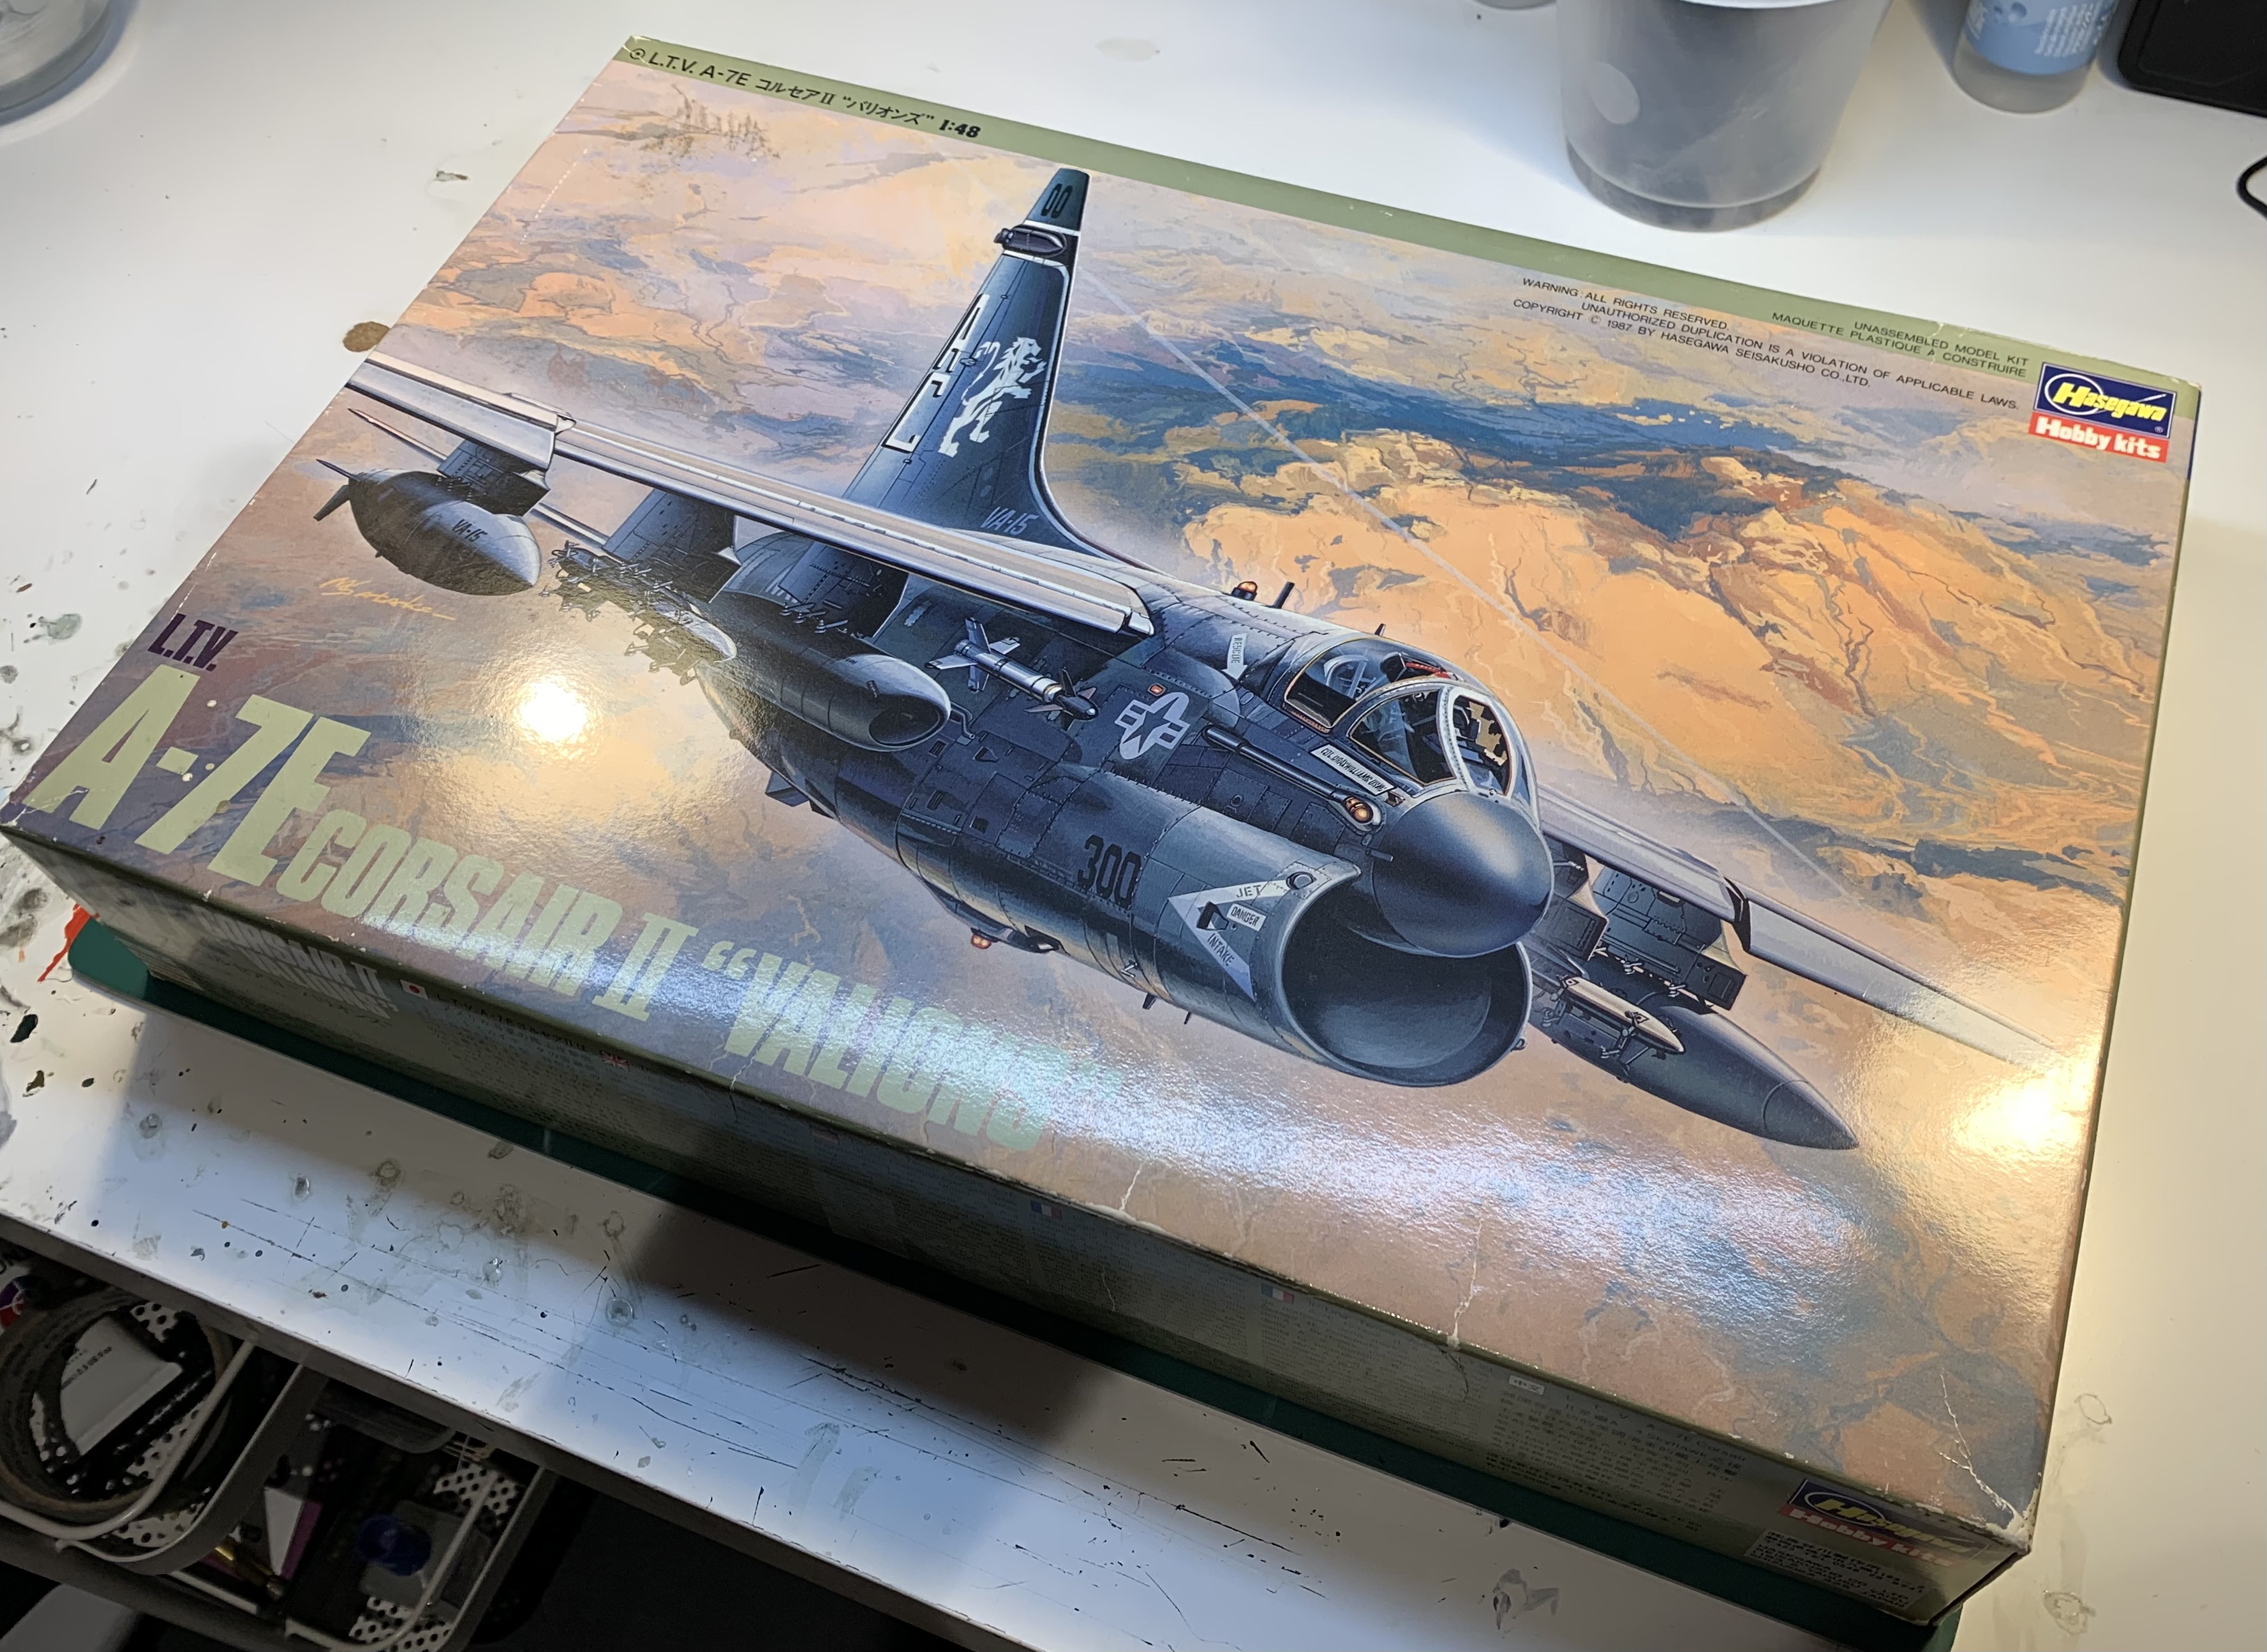

As I write, it is nearly a year since I started building this model. It was initially an exercise in building something different, i.e. a modern jet, but became an exercise in weathering instead. I planned a shiny CAG airframe as seen in the above photo of the aftermarket decals I bought, and I ended up with a dirty flat grey SLUF. I nearly gave up on it too, it sat for four months almost ready for paint but not quite there.
As usual, the journey in all its real-time detail is available to read on the Britmodeller WIP section (link in references, below), I’ll mostly rely on the photos to tell the story here except the markings and weathering section. Read on…
Build

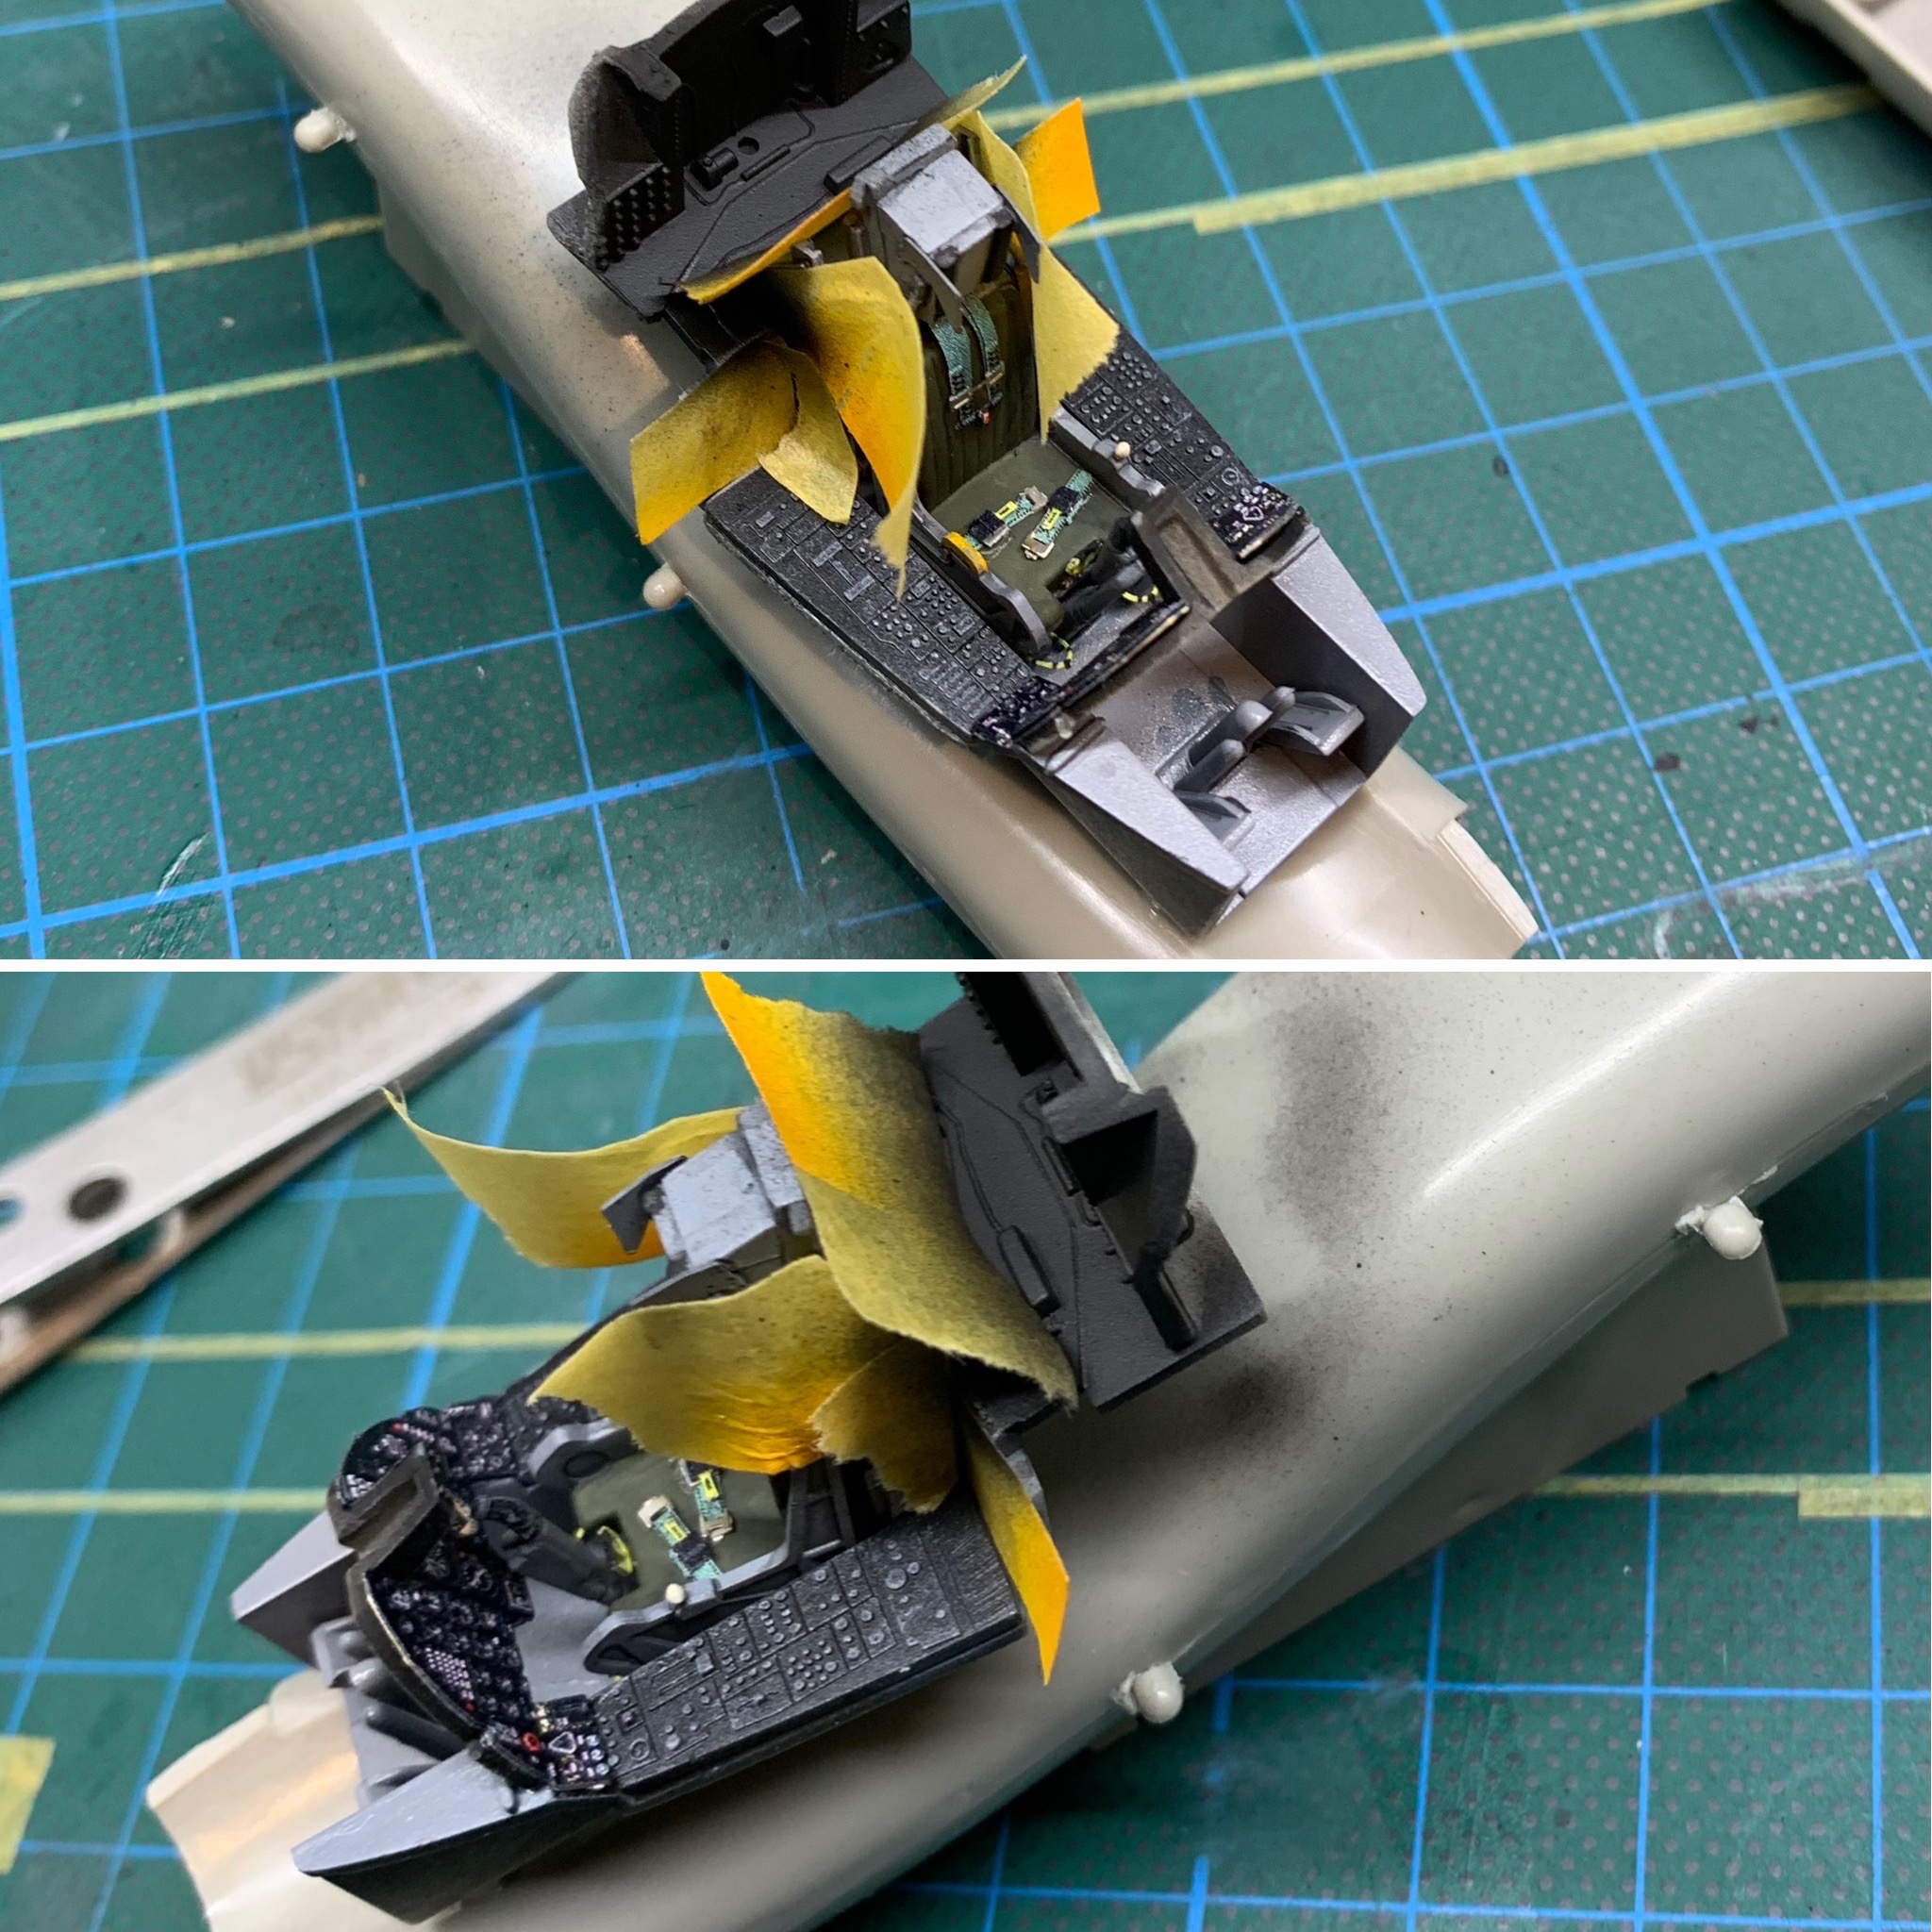
The seat is wrong. Oh well…
I used the Eduard detail set for the cockpit which incorrect seat notwithstanding came out very well. I really should have posed the cockpit open but I like the lines better with it closed. In lieu, I polished the canopy so that the internals can be seen reasonable well.
After the cockpit was done the rest of assembly was easy, even the closed panels, all of which fitted quite well.
Click on any of the images below to scroll through the gallery.


At this point I lost interest in the project and boxed it up for four months.
Paint
After completing a Tamiya Brewster Buffalo as a mojo-restorer I revisited my SLUF. It never sits well with me to have an incomplete model – I don’t have a shelf of doom – and besides, I’d come up with a new plan for this one that promised to be mush more fun.
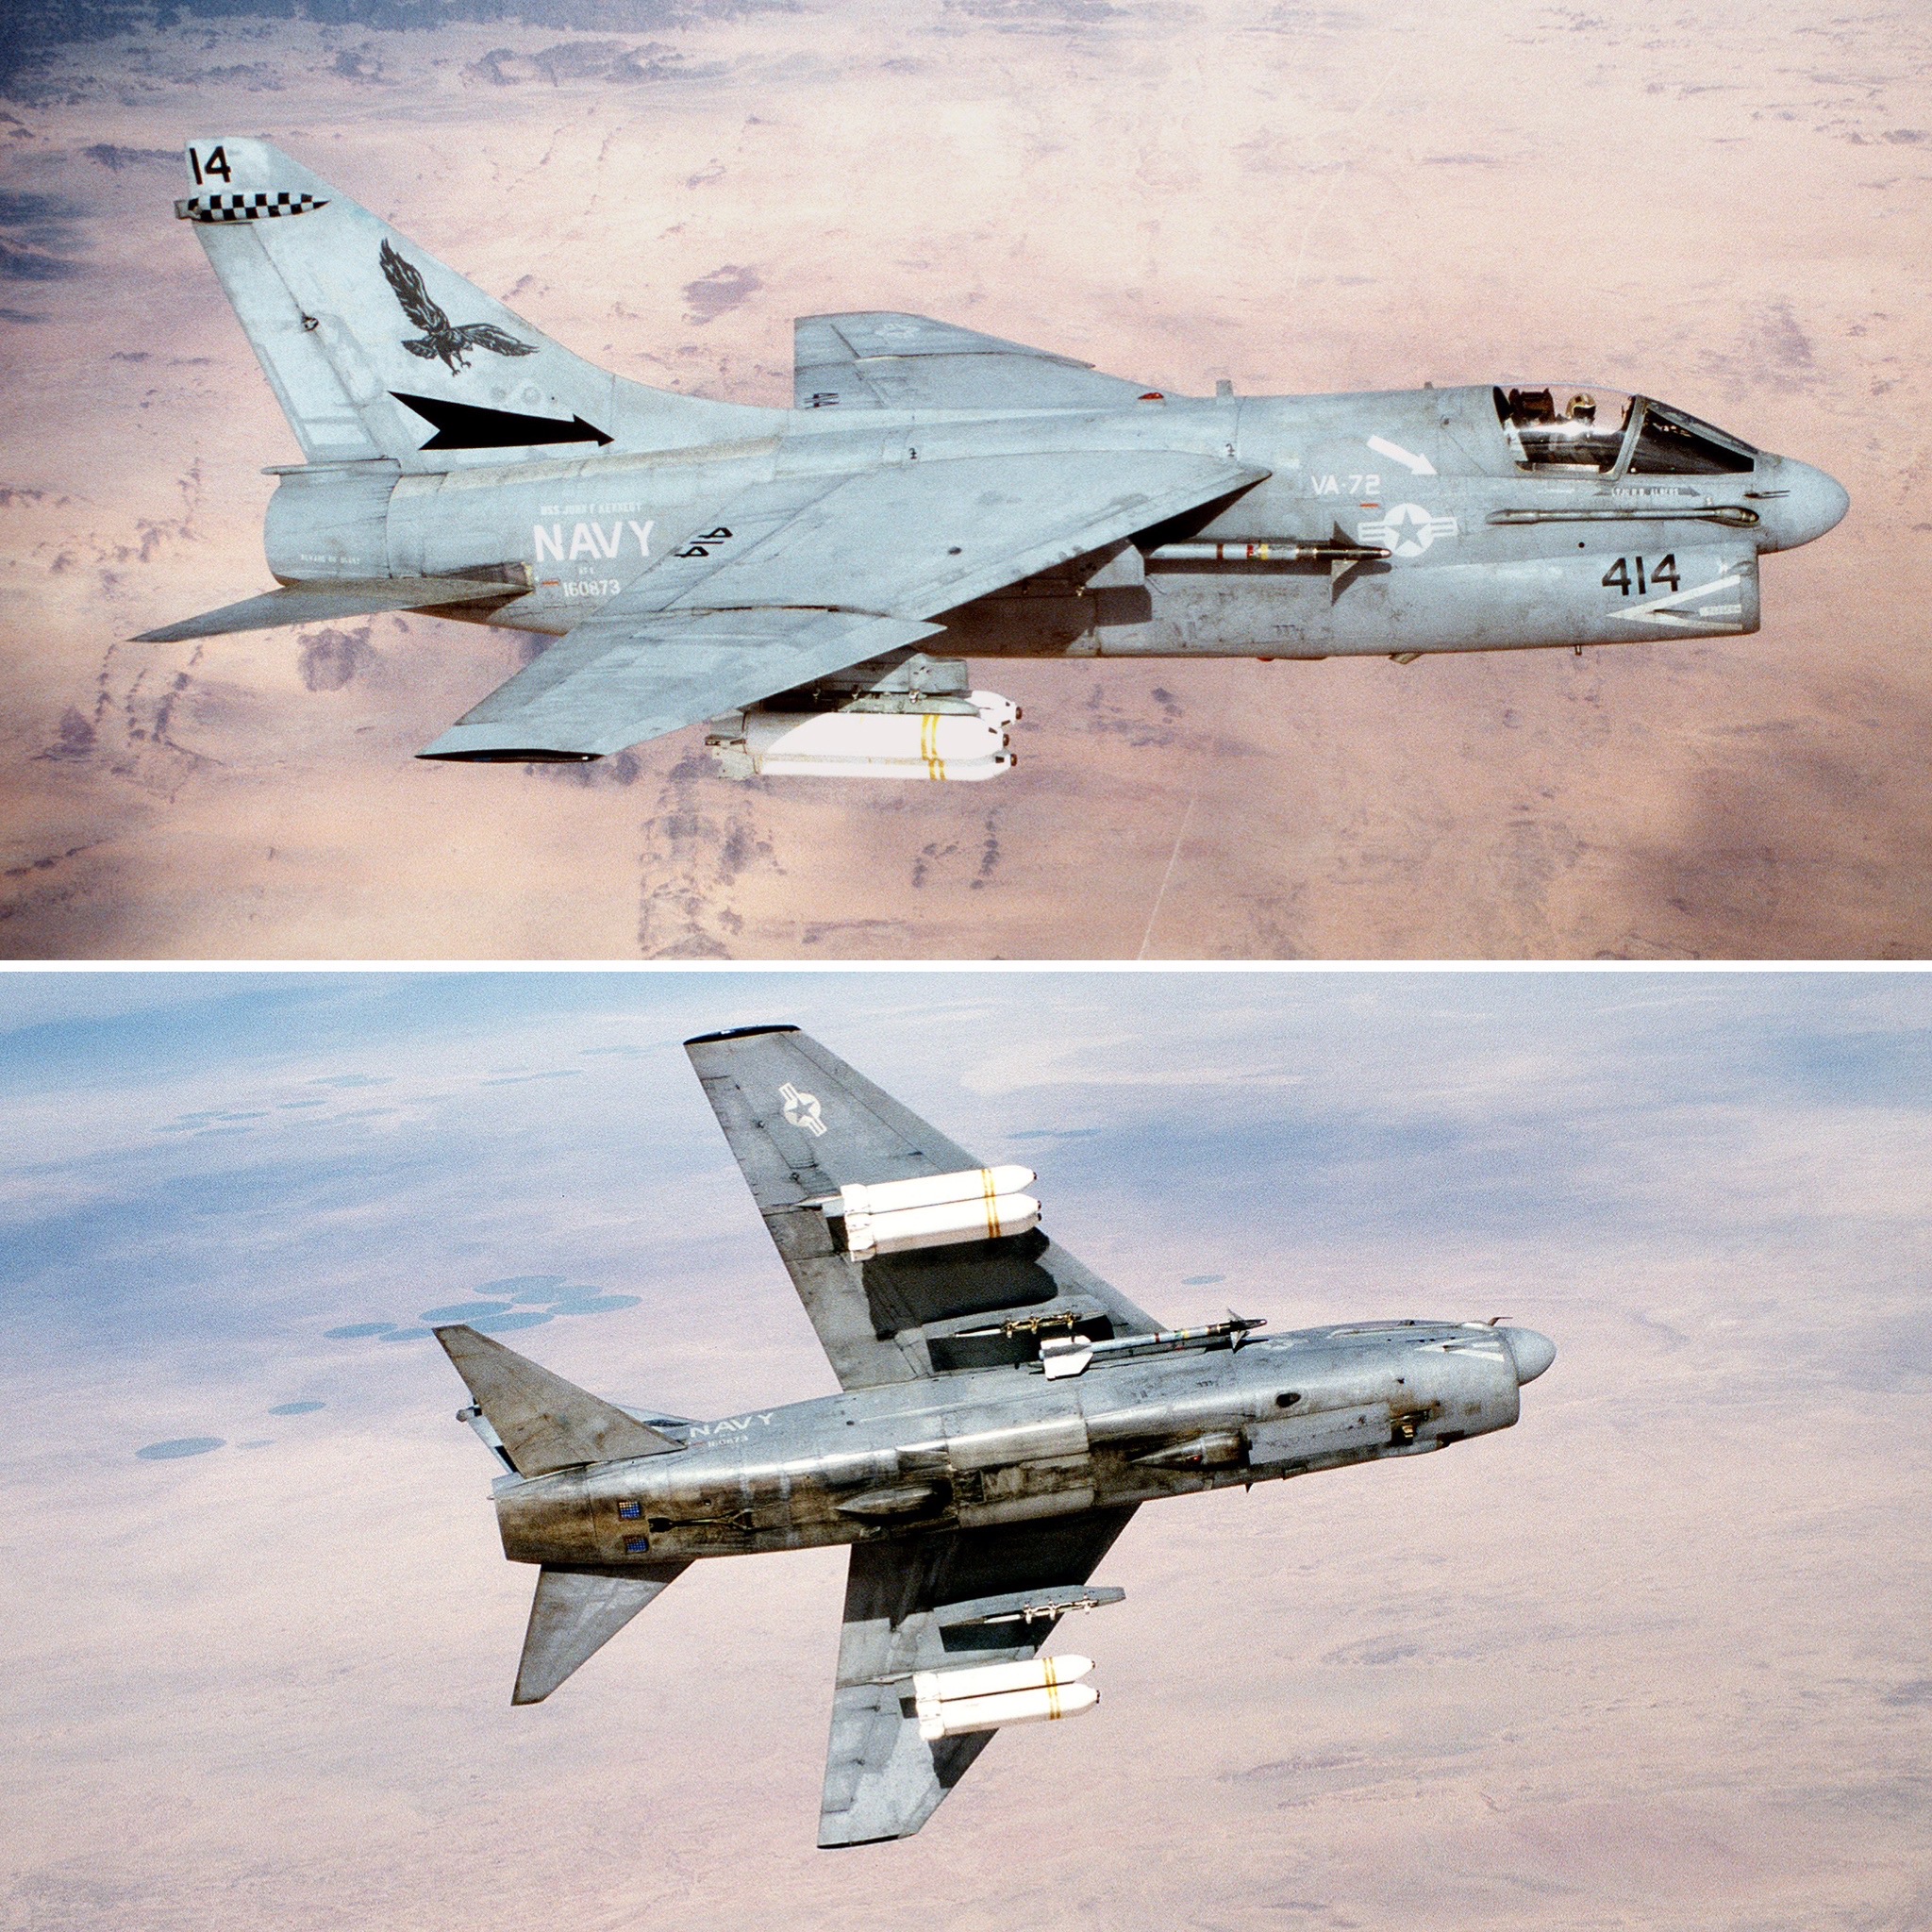
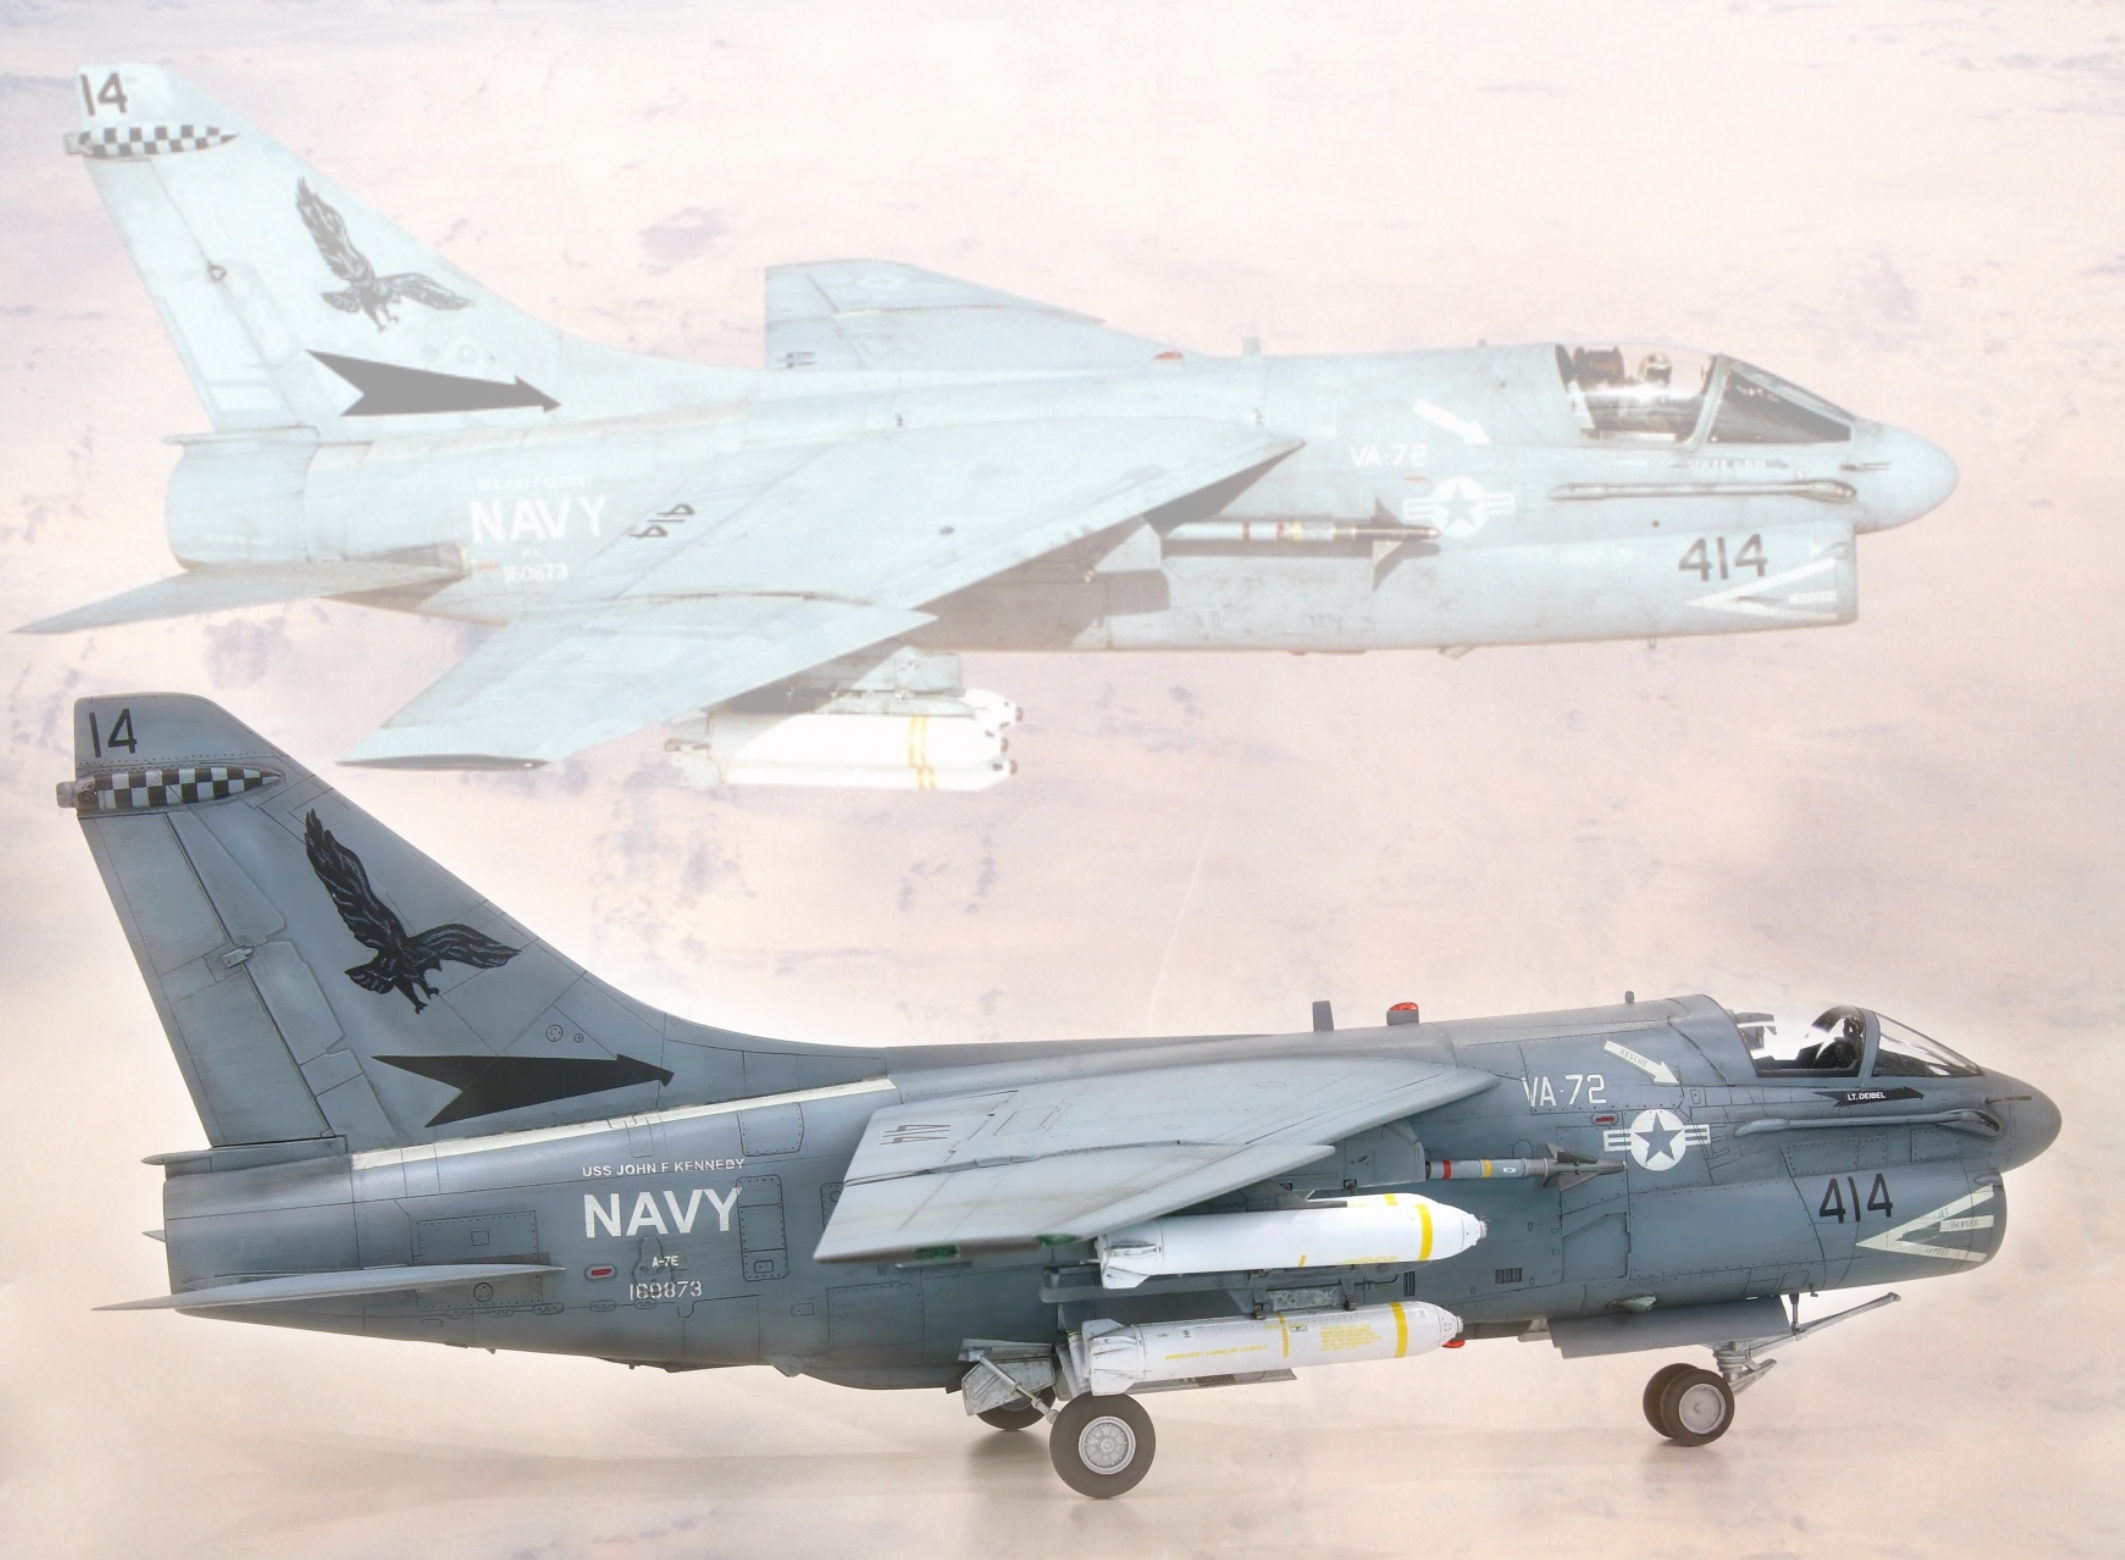
While noodling around on the internet looking for inspiration for this I came across these photos of a VA-72 SLUF during Operation Desert Storm. I had my subject; it came with great reference photos and looked to be an interesting painting, marking and weathering challenge.
My first conundrum was what grey to use? Of course, I could just apply the appropriate USN colour (36320 Dark Compass Ghost Grey, apparently) and be done with it but where’s the fun in that? Besides, looking at the photos above of the same airframe on the same day one would say that they are two different shades of grey. So, as is my wont, I looked at the photos, applied some thought and came up with the following reasoning:
- The lower photos is exposed better and likely to be a good representation of the grey
- While conversely the upper photo is clearly over-exposed blowing out the grey
- There is a lot of variation in the grey in both photos suggesting repair/repair/weathering
With that kind of freedom, I mixed up a base shade and started work.
Click on any of the images below to scroll through the gallery.
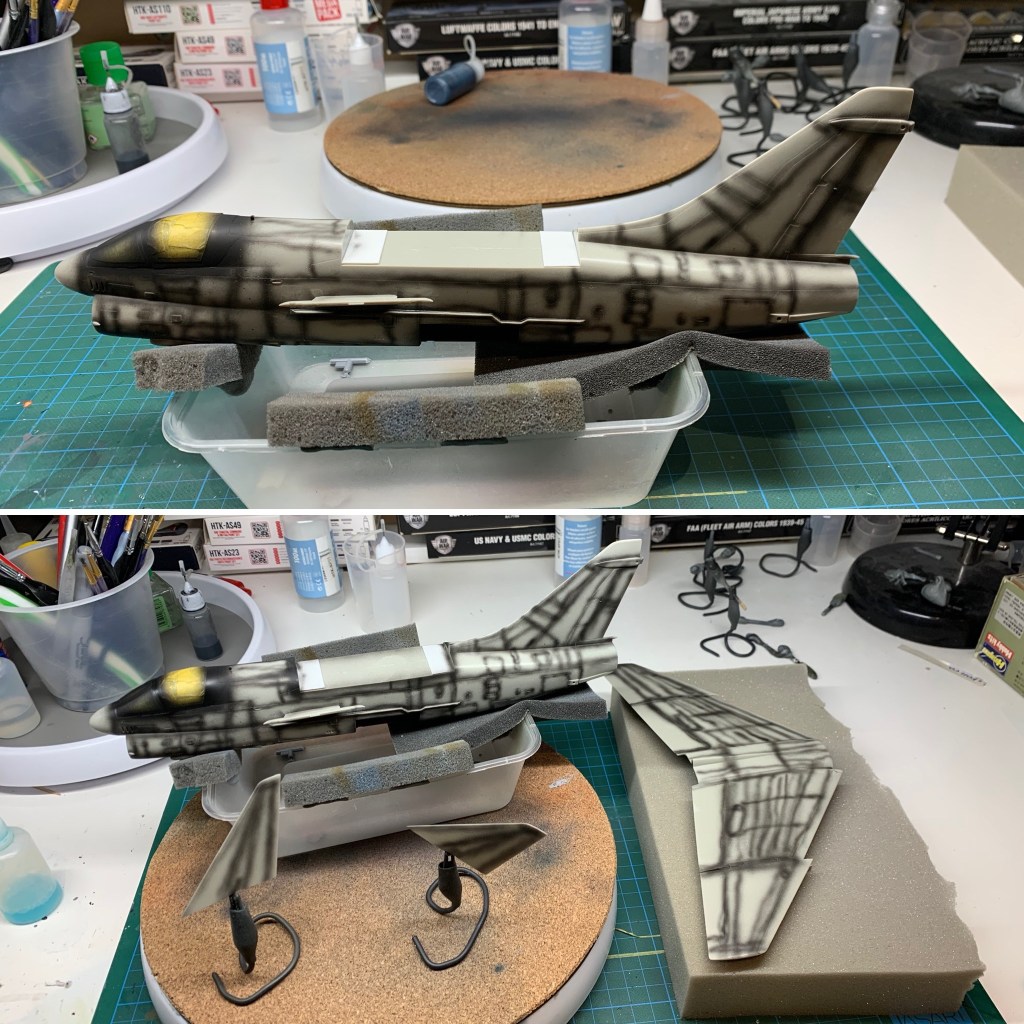
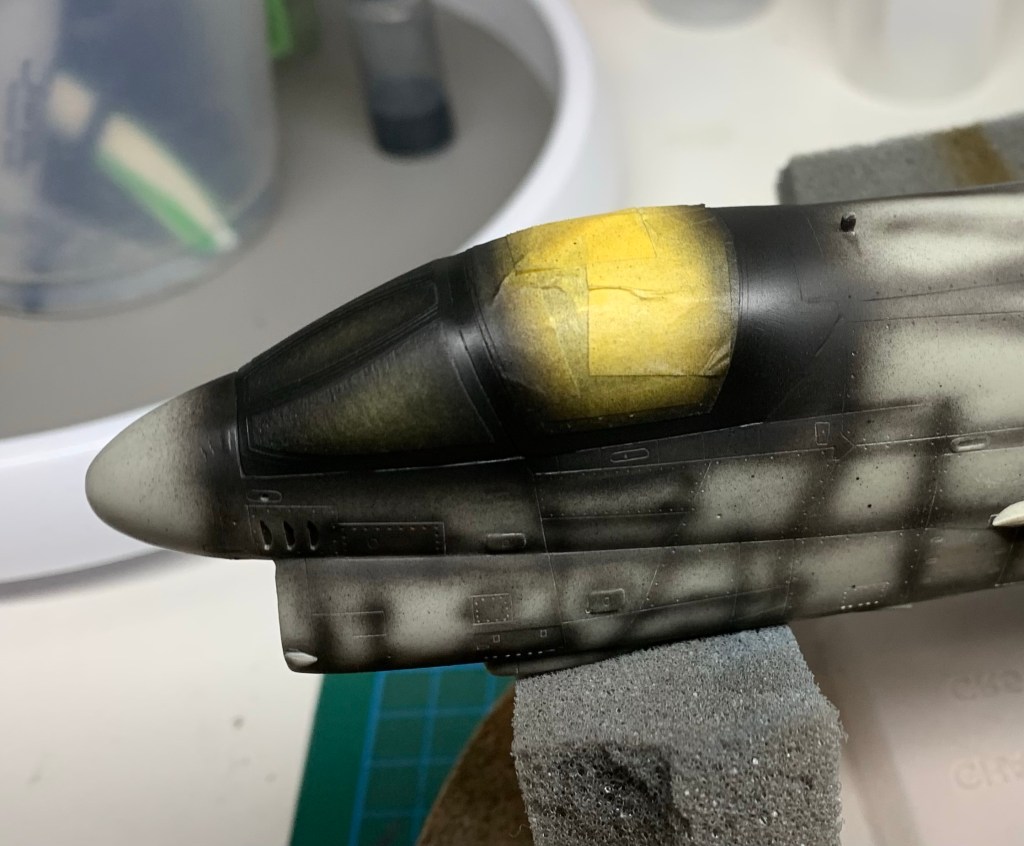


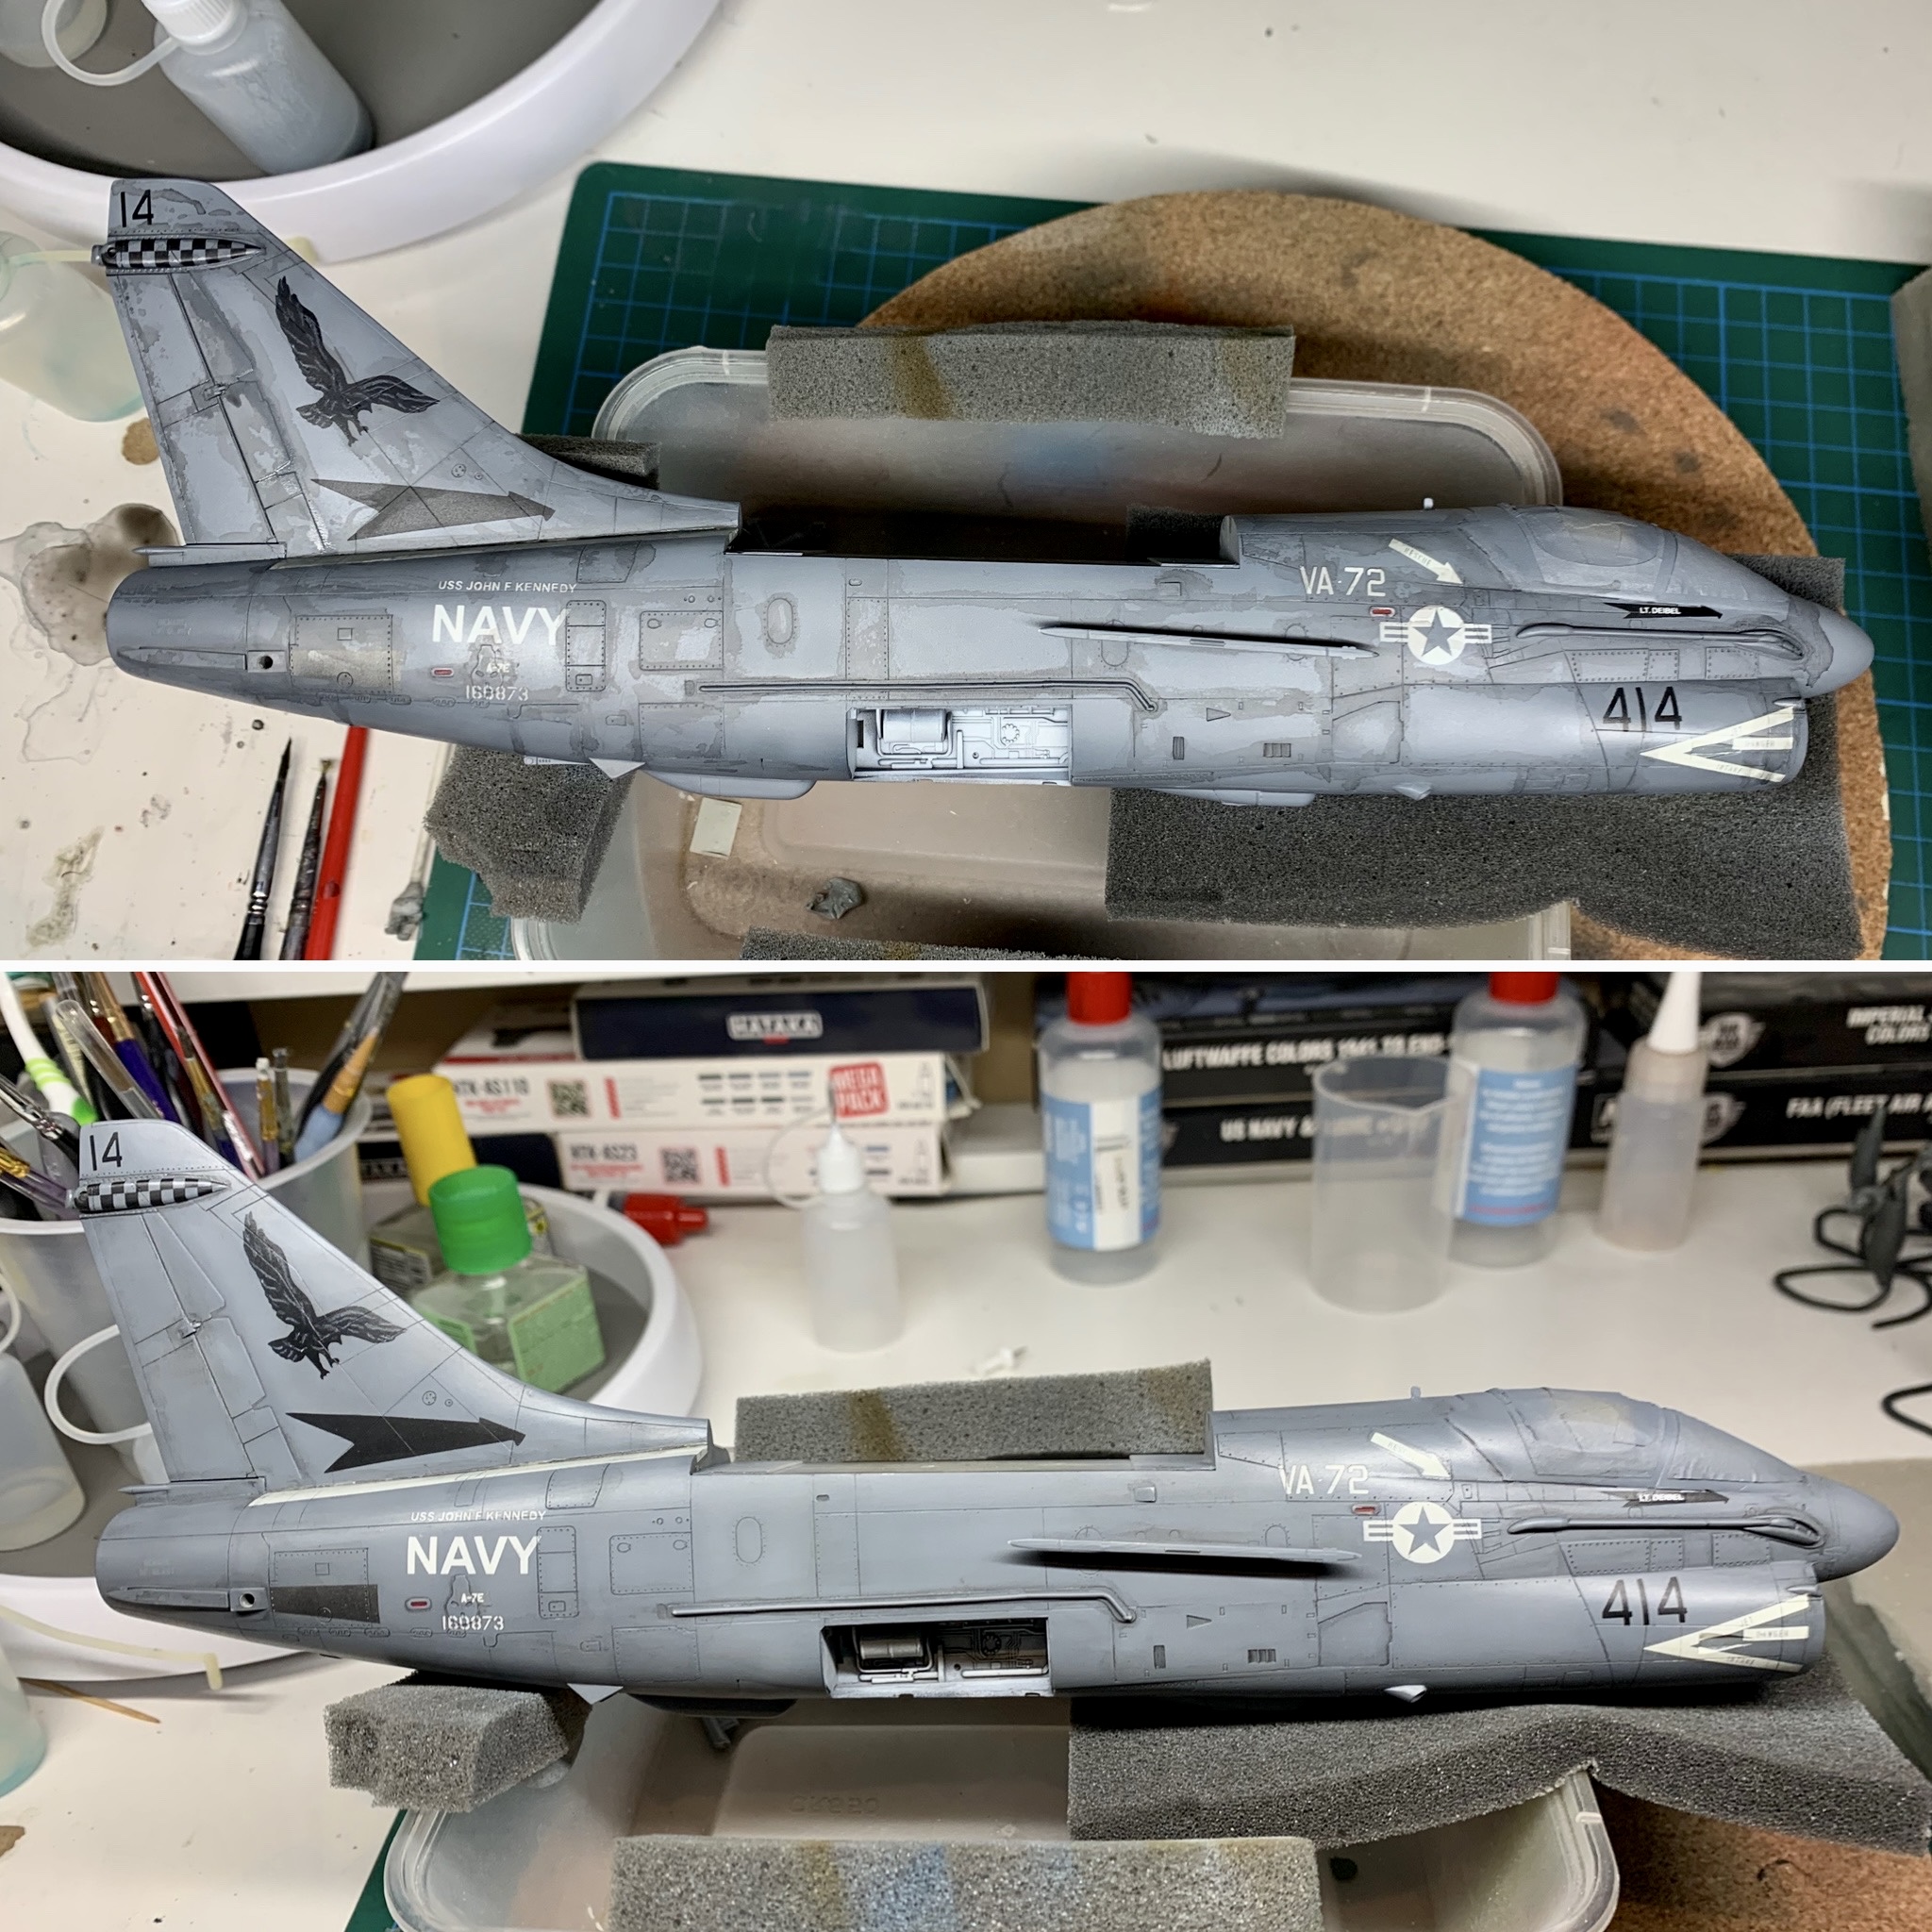
The base application was a little dark but that was by design. This allowed me to apply lighter and lighter misted coats to build the variation around the airframe in a way that replicated what I could see in the photos. It took a while but I was pretty happy with where it ended up.

Markings
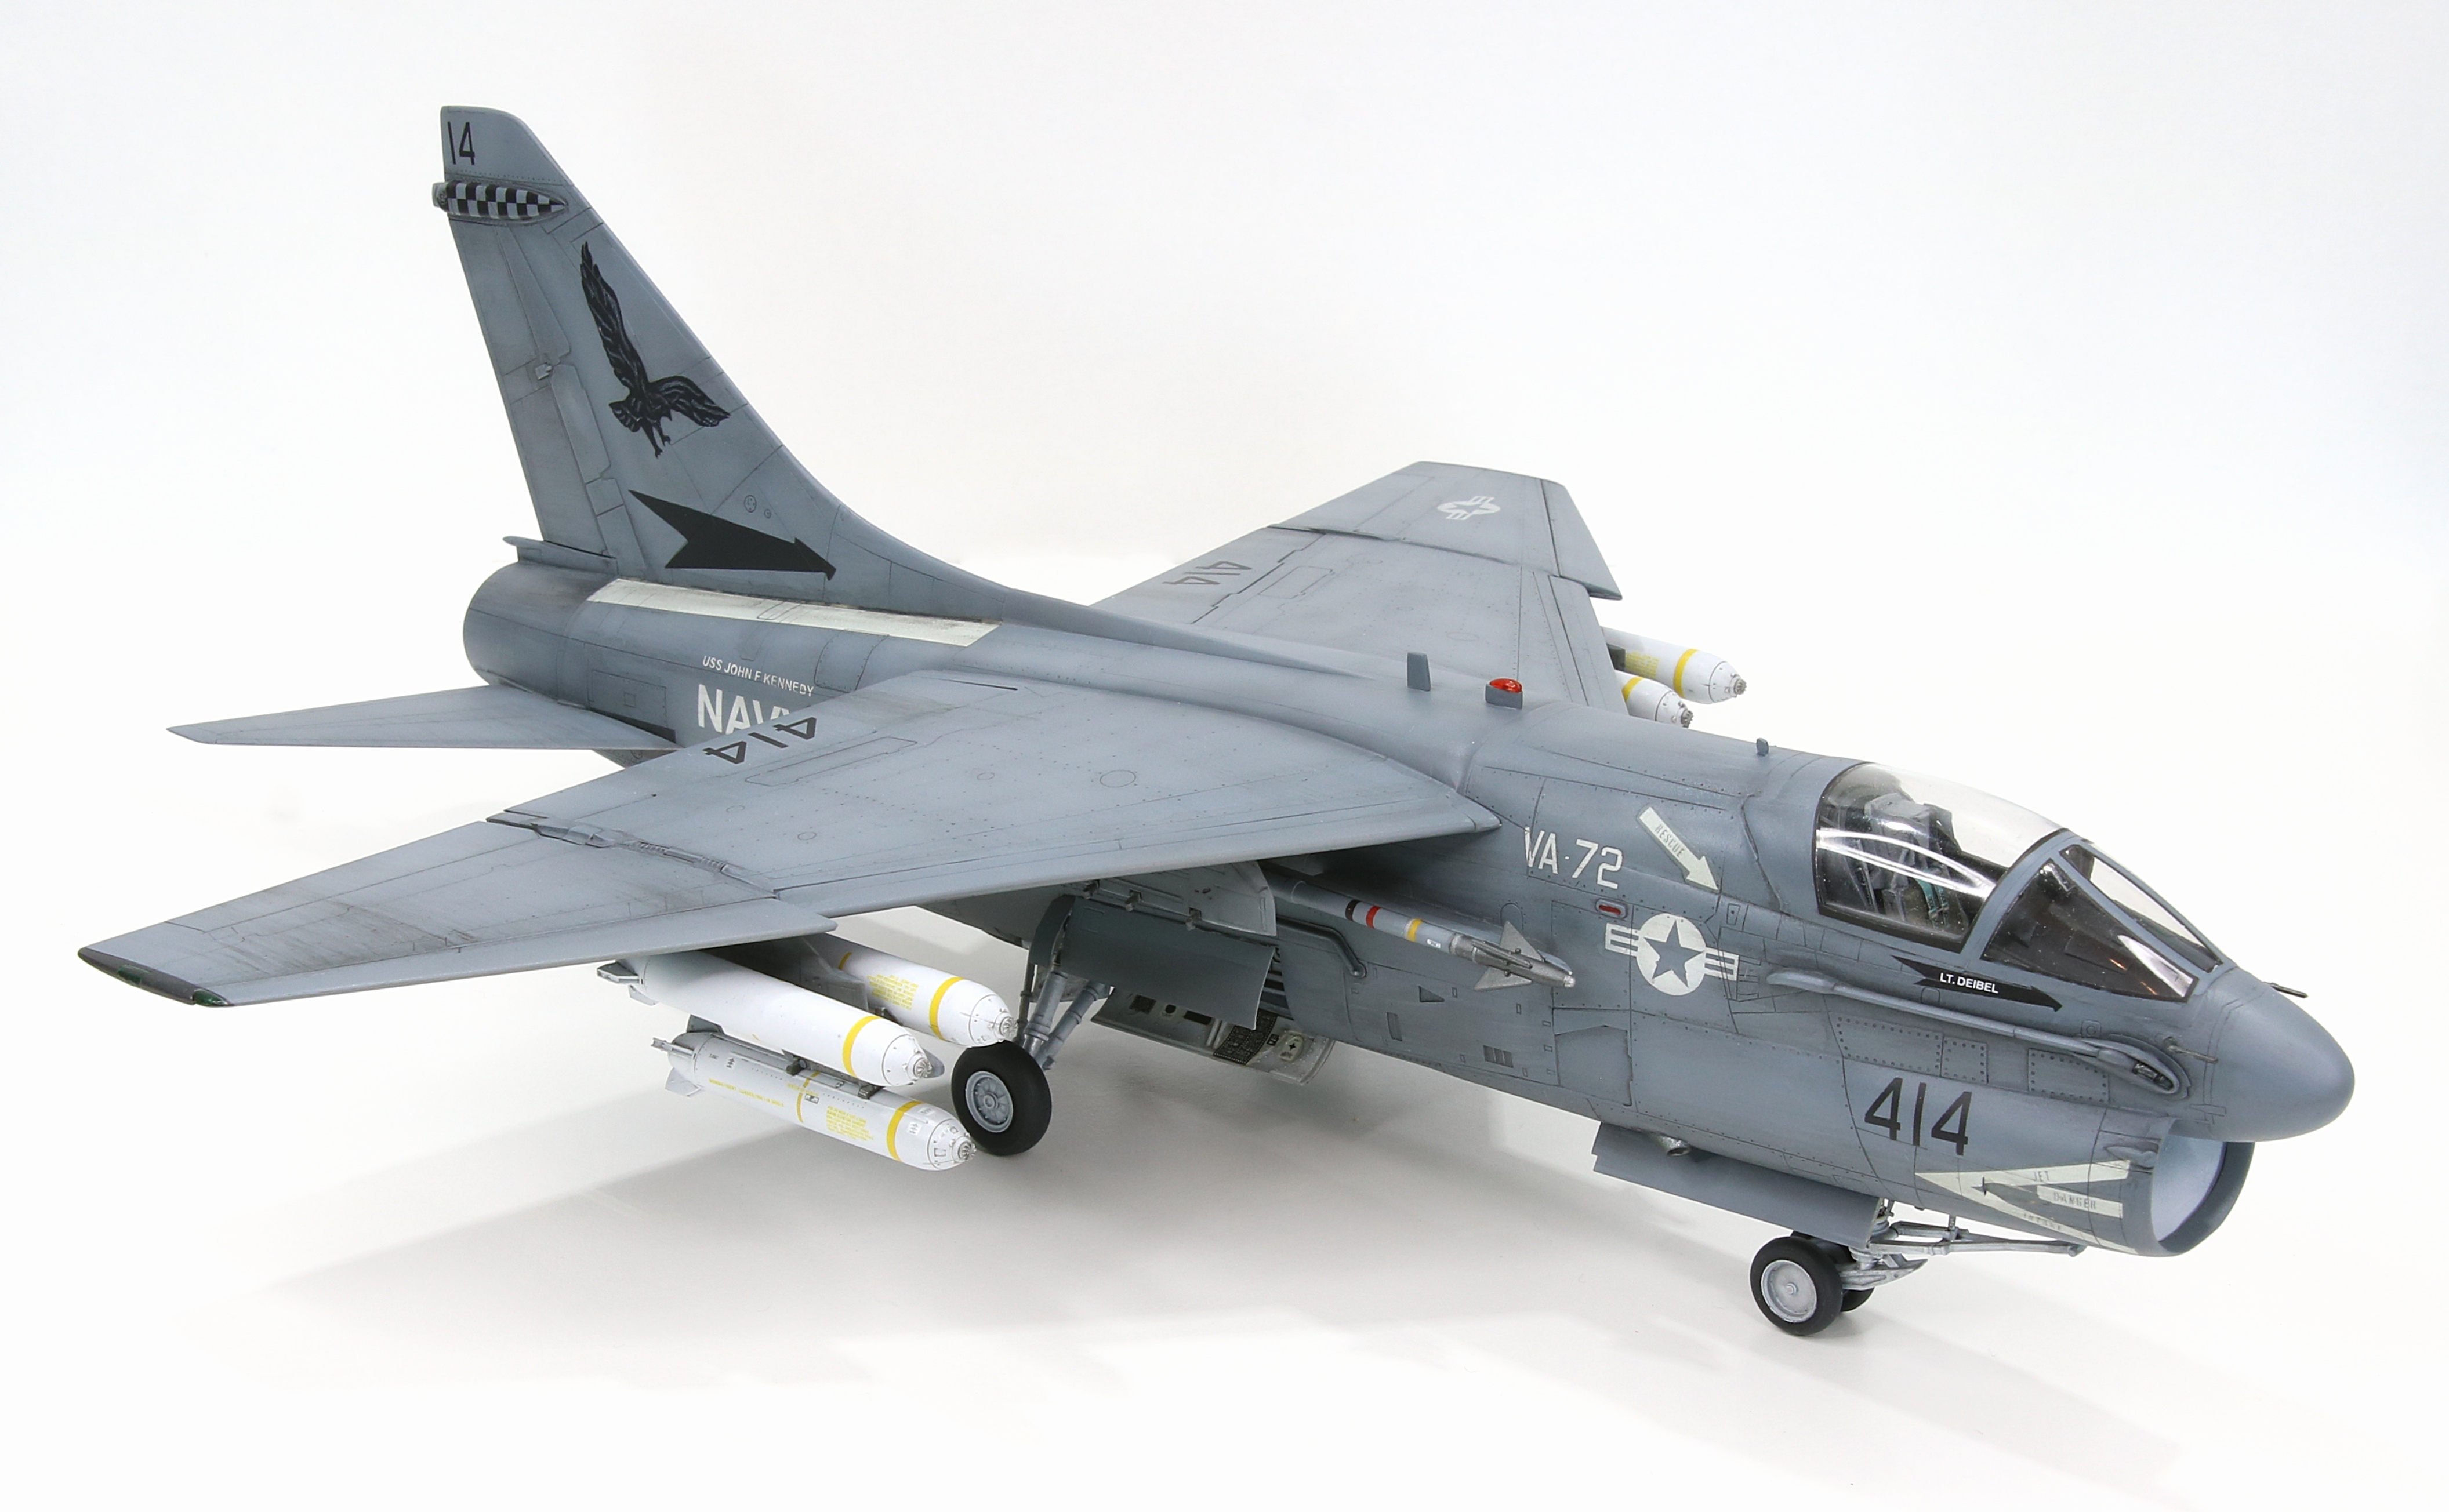
Between the photos of my subject aircraft and its contemporaries, I had no real trouble determining what markings I needed to apply. The kit included a similar scheme so I had a source for the markings I couldn’t paint like the airframe stencils, as well as the air intake and ejection seat warning arrow. I intended to paint the US markings in addition to the aircraft number, Bu. Number. I also needed to paint the USS Kennedy marking, which I thought was going to be tricky as its small size is at the limit of my stencil cutter’s ability to cut. The real challenge with this scheme though, was the eagle on the tail – not forgetting the chequer pattern, too.

The only way I could think painting the eagle was to make a mask for its overall shape and then fill the detail with a brushwork. The chequers would have to be masked with tape which is simple but painstaking work (which I didn’t take any photos of, either).
I painted the easy ,markings first such as the airframe number and insignia. The “USS John F Kennedy” turned out really well, I was worried its size would be too much of a challenge but I think it is spot on for a match. I needed to use the kit decal for the “A-7E” because that really was too small to paint.
The eagle and the arrow shape below it were easy enough to paint in themselves. I used a photo imported to the Silhouette software to trace the correct shape and once sized I cut the masks and painted. I sealed the shapes with some clear gloss and started to paint but it just wasn’t working as I’d hoped. I could wipe away my attempts so no danger of messing up the work already done but I was becoming a bit frustrated. Then, I hit on the idea of using coloured pencil. This turned out to be a much better idea. I drew the detail into the eagle shape. I one t over it a couple of times to achieve the desired density and it was done in a matter of minutes.
My final challenge was the pilot’s name under the cockpit. Obviously too small to paint, I rummaged around in my spare decals box and found a pilot’s name in white in the right size. This was really my only choice so I went with it.
Click on any of the images below to scroll through the gallery.


Overall, I think this might be finest work so far on markings alone. The chequer pattern as well as the eagle on the tail were challenging and turned out far better than I expected. Add in some new techniques learned on making the masks which enabled me to paint smaller letters than I’ve managed before, and this one is a success.
Weathering
As discussed at the beginning, and you can plainly see, this is a dirty bird. There are multiple streaks, areas of dirt and a general griminess to try and replicate. I approached representing that in three stages. First, as usual, a panel wash to emphasise the control surfaces and access panels.
Next I layered on a more general wash around areas that would attract grime. In order to achieve the look I was going for I had left the surface of the model only lightly clear coated as I wanted the wash to seep into the paint to replicate the way fluids can carry grime in a diffuse pattern around the centre of concentration. This worked quite well, though for someone who usually applies weathering quite sparingly this was an exercise in forcing myself to keep applying more. And more.
used a dampened swatch of an old cotton dress shirt to remove the wash rather than a cotton bud. I aimed to wipe the wash off leaving more residue than simply in the panels, I wanted it to look dirty rather than simply emphasise the panels. I like how it came out.
The final step was what I’ll call a “wet brush”. I used a broad brush wetted with my mix of grimy wash to streak staining along the airflow in both a general but also specific pattern. This was easy to overdo but I’m really happy with the effect.


There’s one more step to complete the upper surfaces weathering which will need some chalks. For that I will need the everything sealed up with a clear coat and while not pictured, that’s the current state of play. I’m going to use the chalks to add some more specific streaking such as can be seen above in the photo of “414” on its starboard wing and at the tail, for example. Overall I think it’s on track; I expect these effects to wane a little when I apply the final flat coat, and the overall look to lighten too as it’s probably a bit dark as-is.
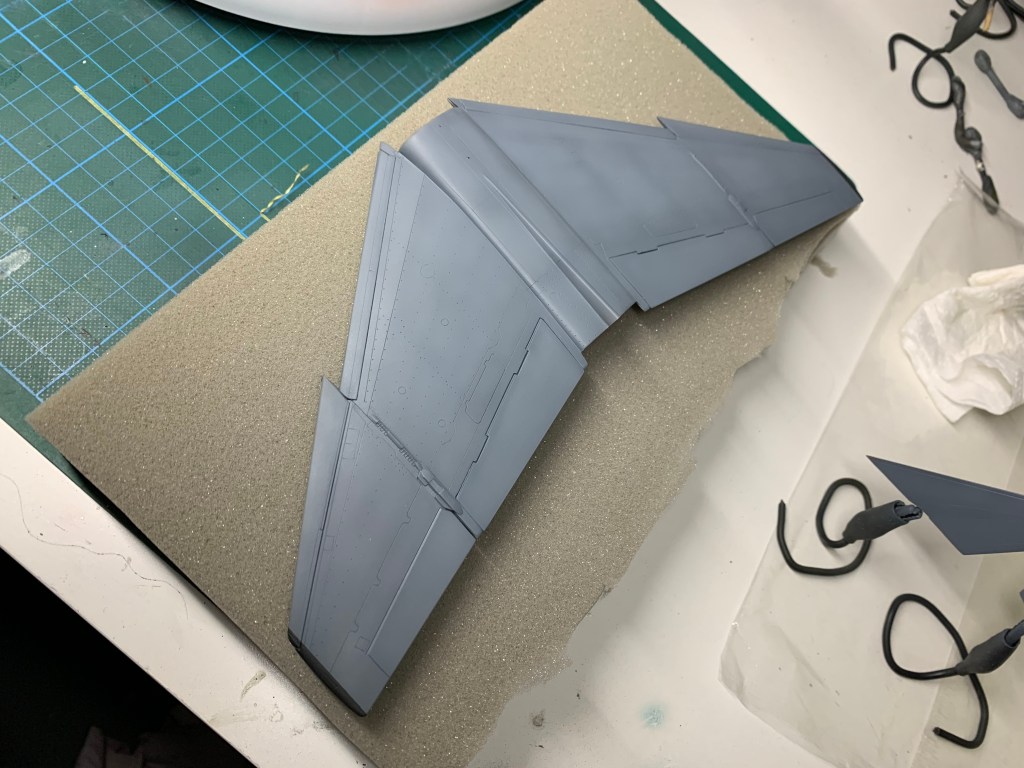
I mixed up some chalk powder and set to work with a 20mm flat brush and some water. I was free to play around with the effect because I’d sealed everything in with a lightly applied clear coat so wiping away mistakes or over zealous application would be easy. The technique I used was dabbing the wet damp brush into the chalk powder and then wiping the brush back along with the airflow. It took several passes to build to the effect I was after but I was happy with how it finished. Below is the final weathered finish on the upper wings (in this photo, the wings have been placed on fuselage but not glued). However, the final finish flat coat has not yet been applied.
The gloss finish is playing with the effects a little but these pics are a pretty good record of the finish I’m happy with. The finish flat coat will lighten the grey and accent the weathering a little more. The wings are now attached and there’s a little work to do on the seams but I’m happy with the raw join and it won’t take much to make the seam disappear sufficiently. I will need to do something about the mismatch greys though; for example the fin spine is considerably lighter on the wings section than it is on the fuselage section, and the contrast is a little too strong across the forward seam. Blending it and covering shouldn’t be an issue as there’s really not much of a step or gap to cover. That process will be documented in the next post.
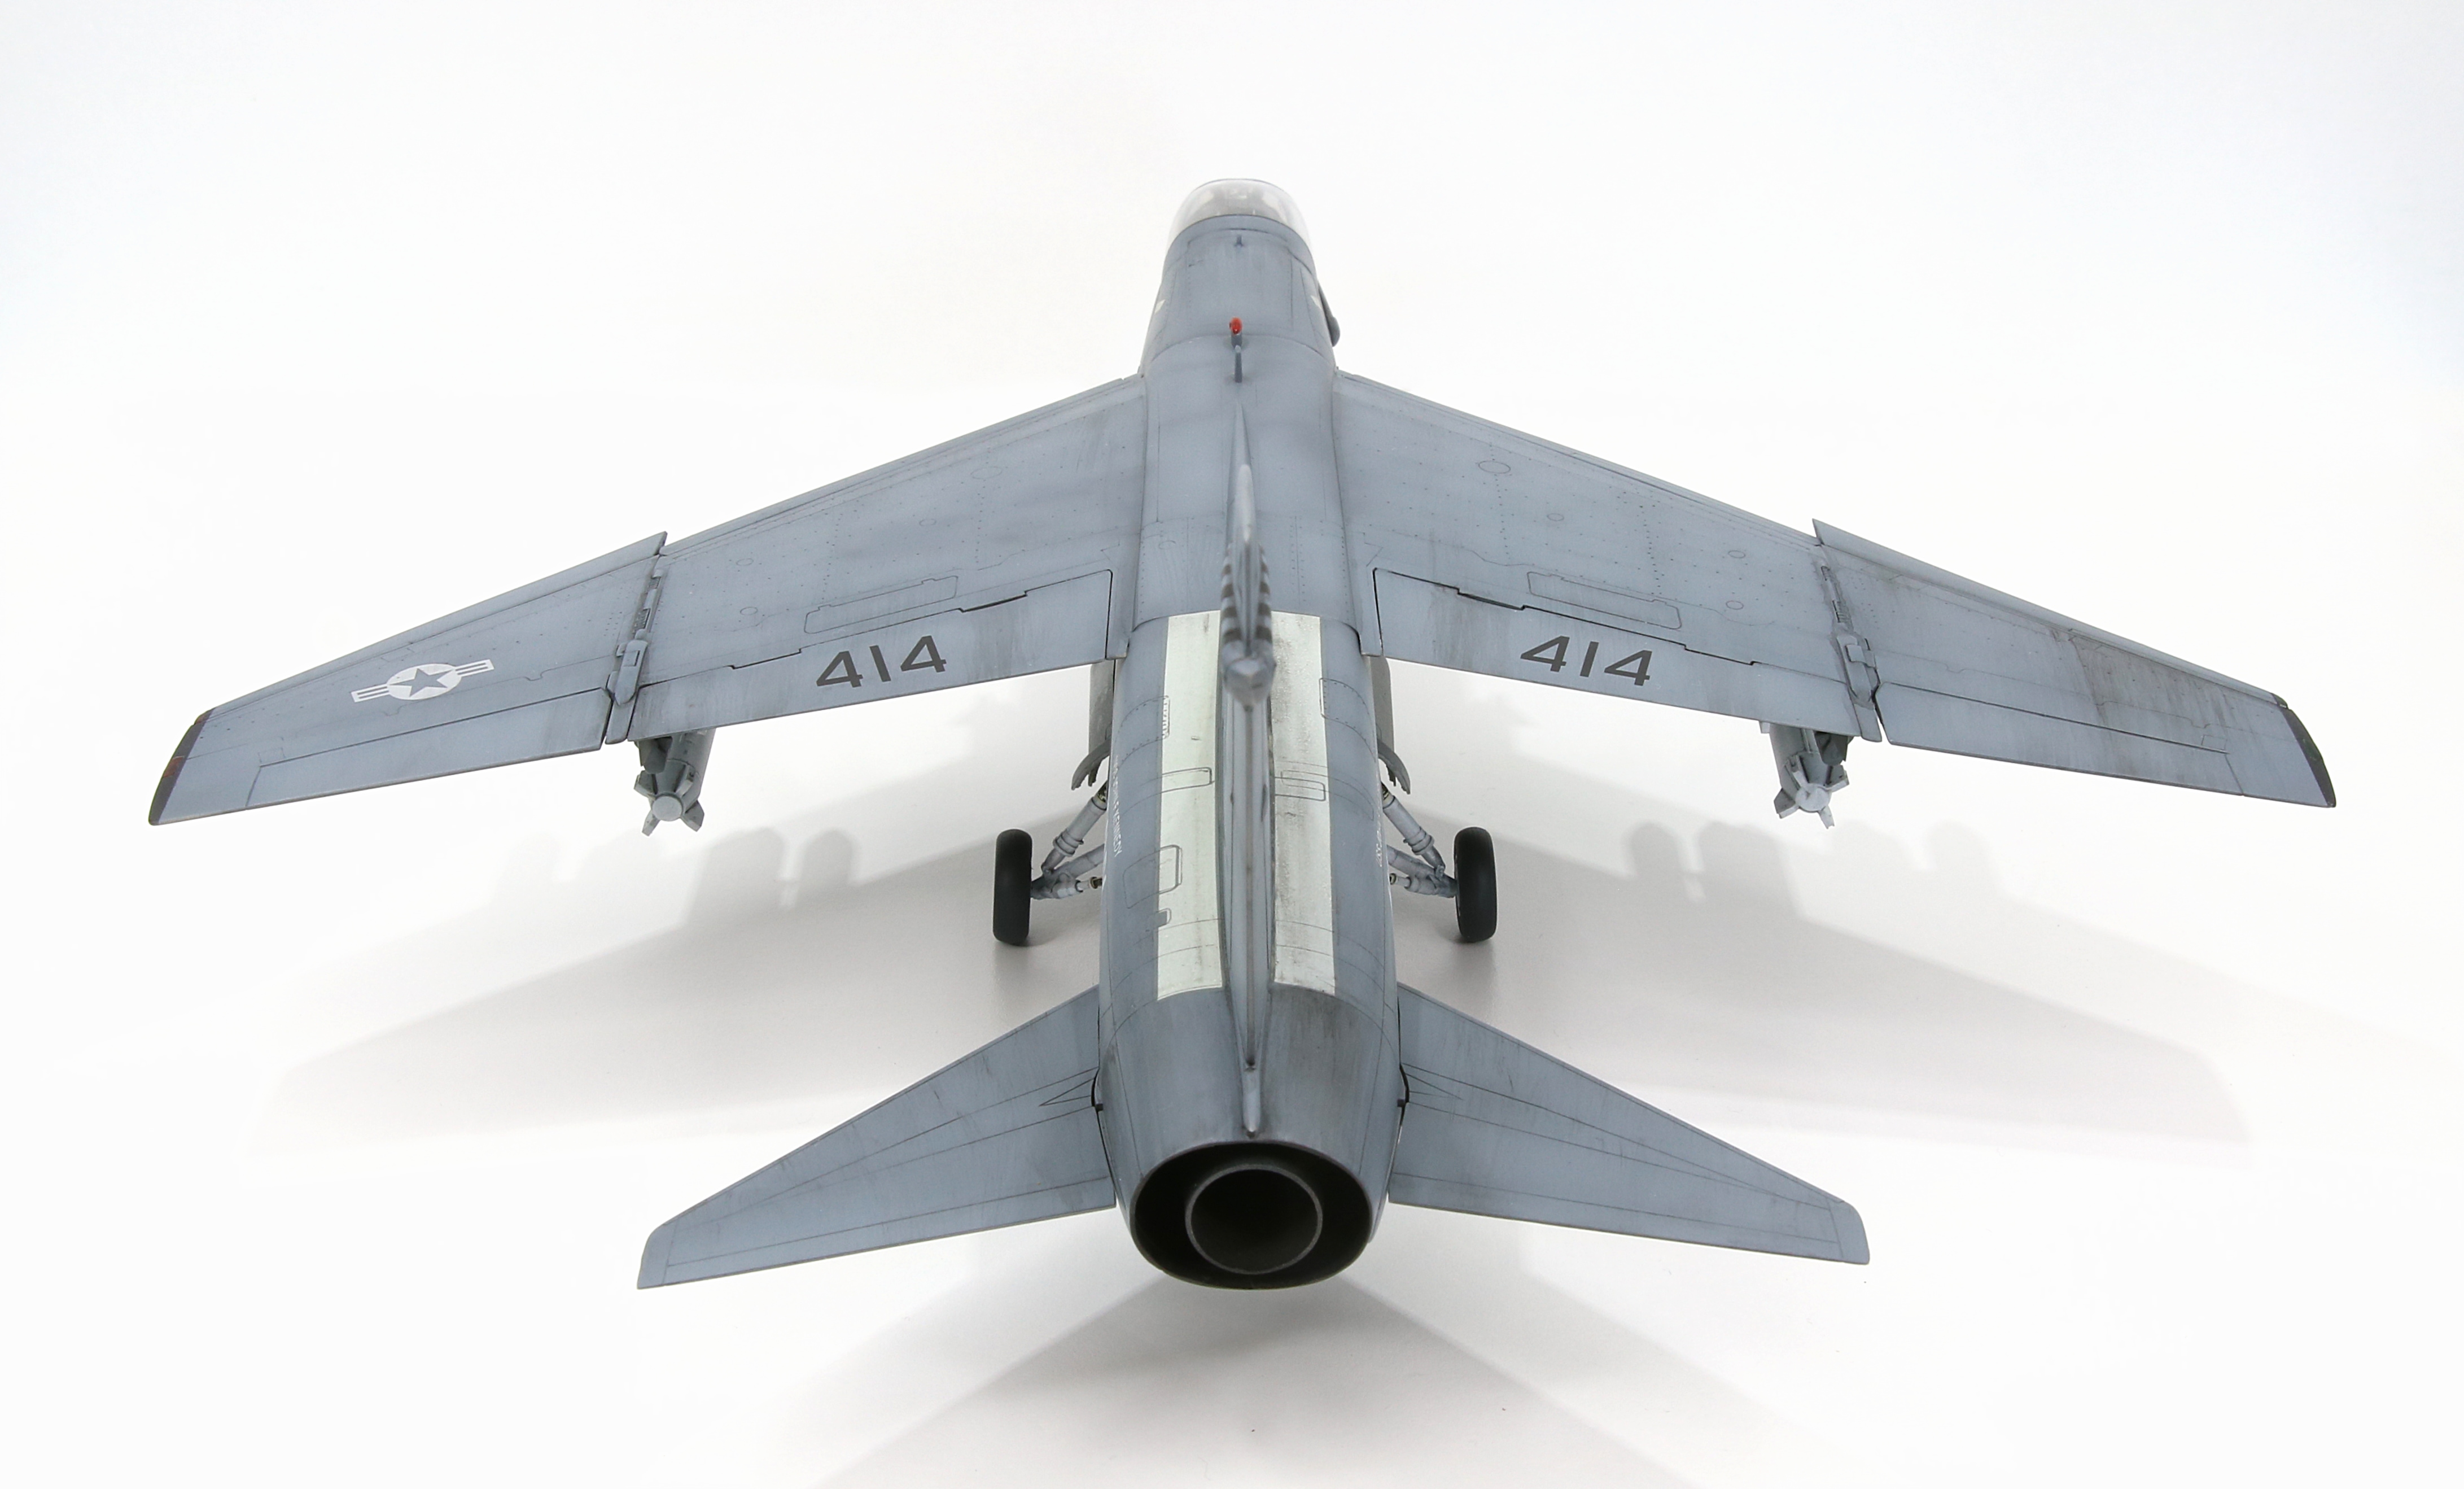
The undersides of the wings are completely finished, including the final flat coat. Note that the fuselage is not yet finished though; I’ve added all the grime and staining I could muster, but it’s not yet finish coated.
Click on any of the images below to scroll through the gallery.


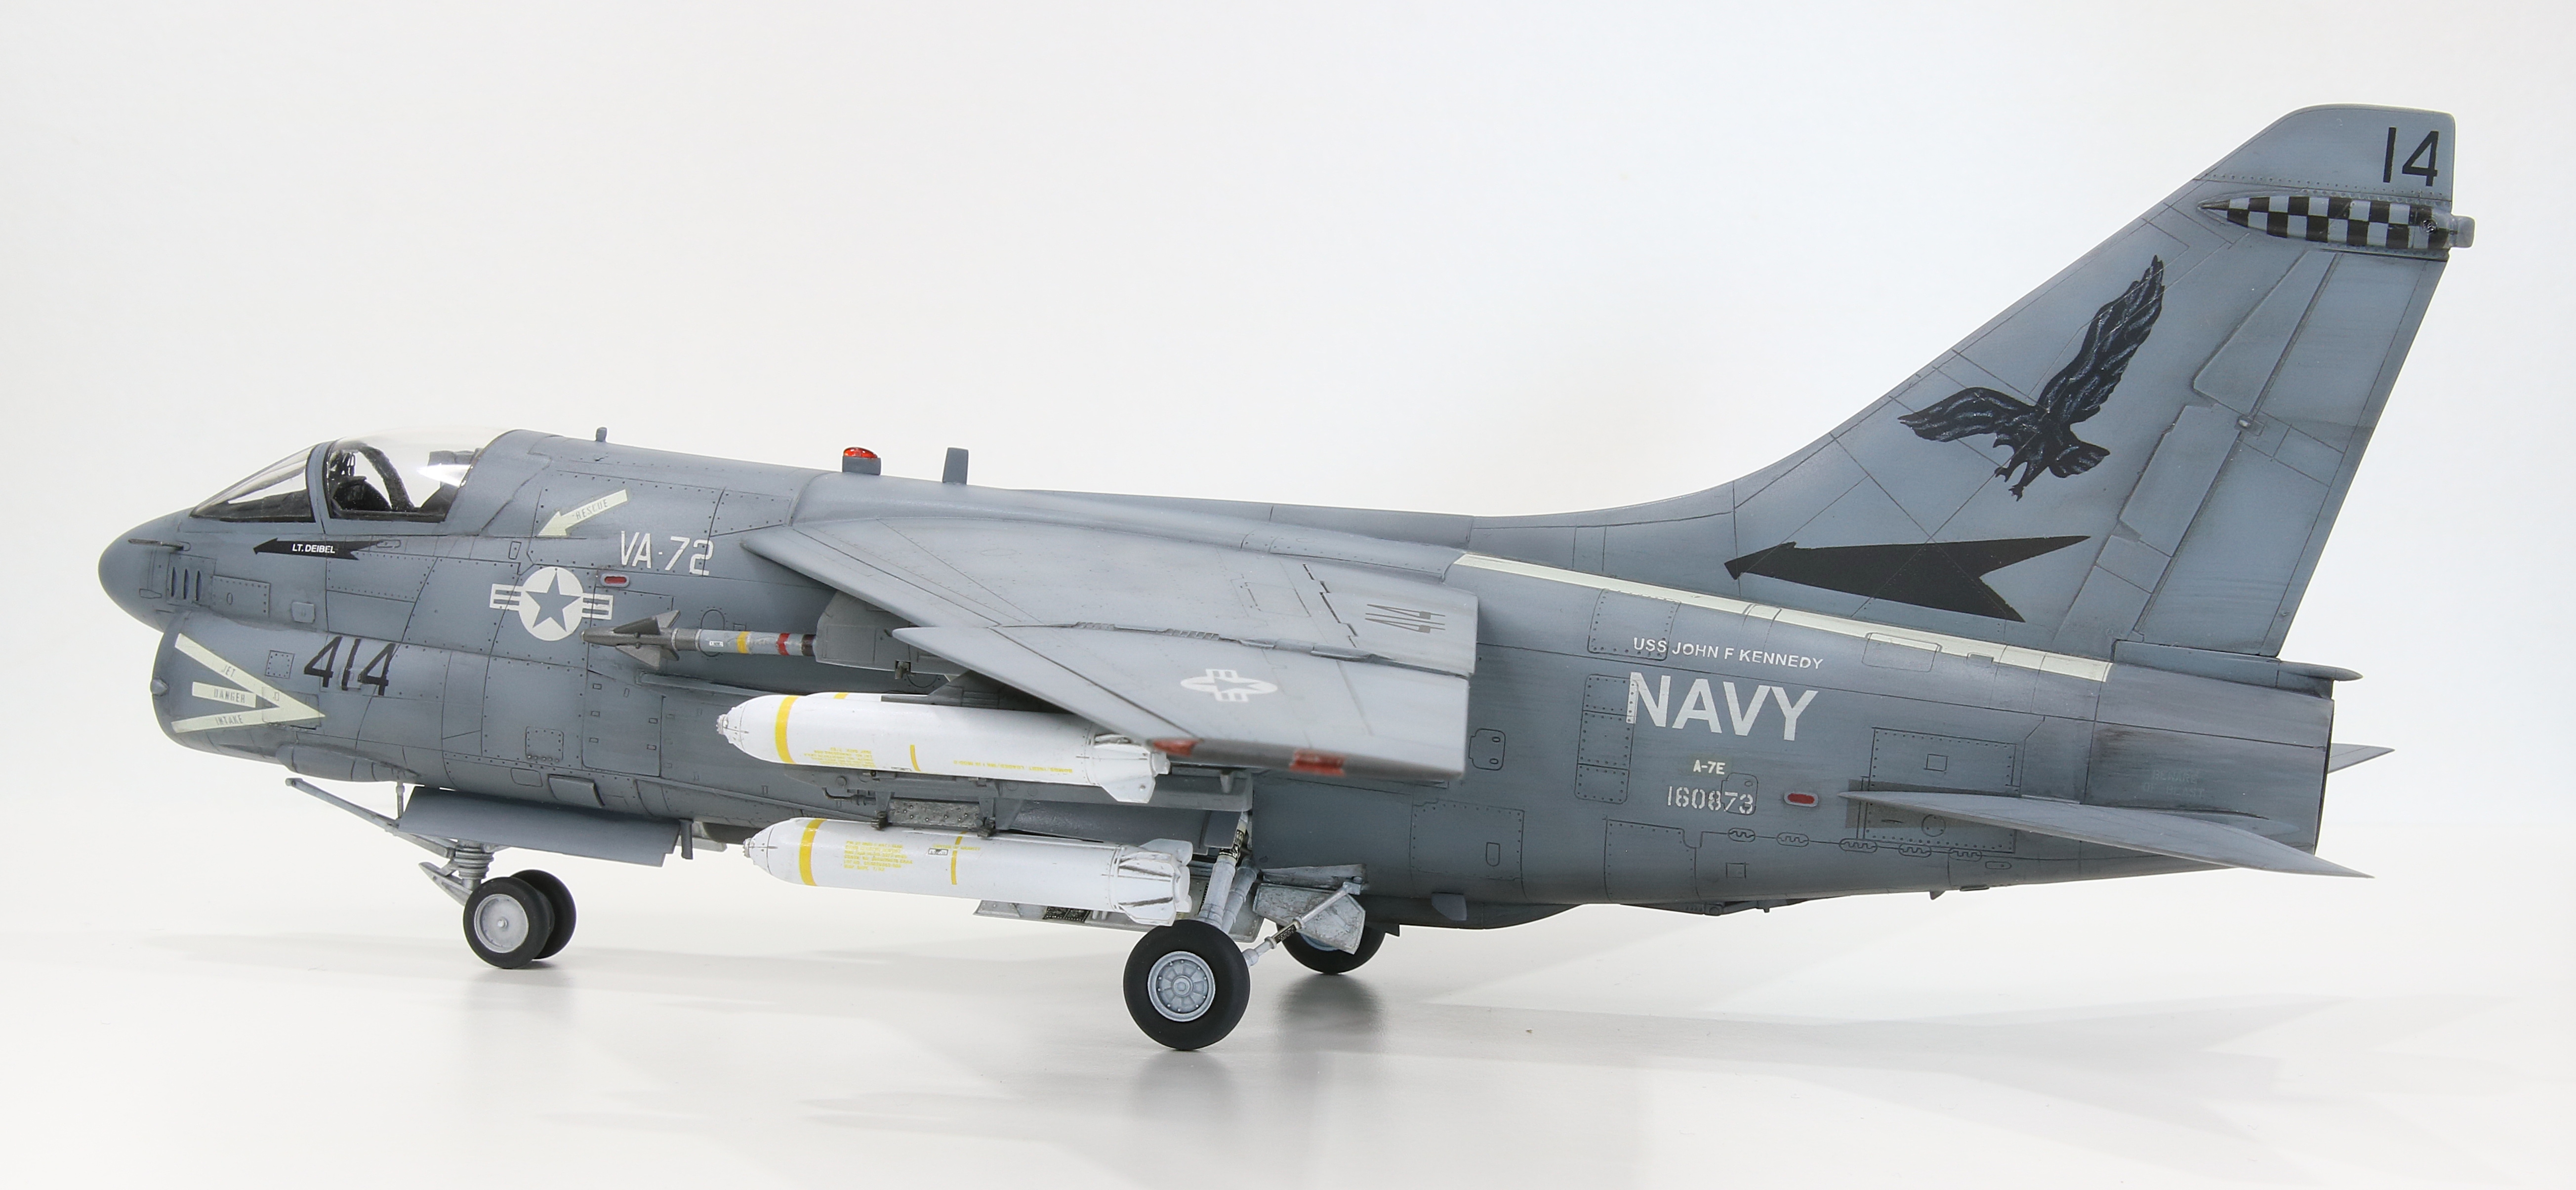
Finish
Yes, the bombs aren’t mounted correctly. Now that we have that out of the way, the rest of the finish was actually a lot of fun.
Click on any of the images below to scroll through the gallery.


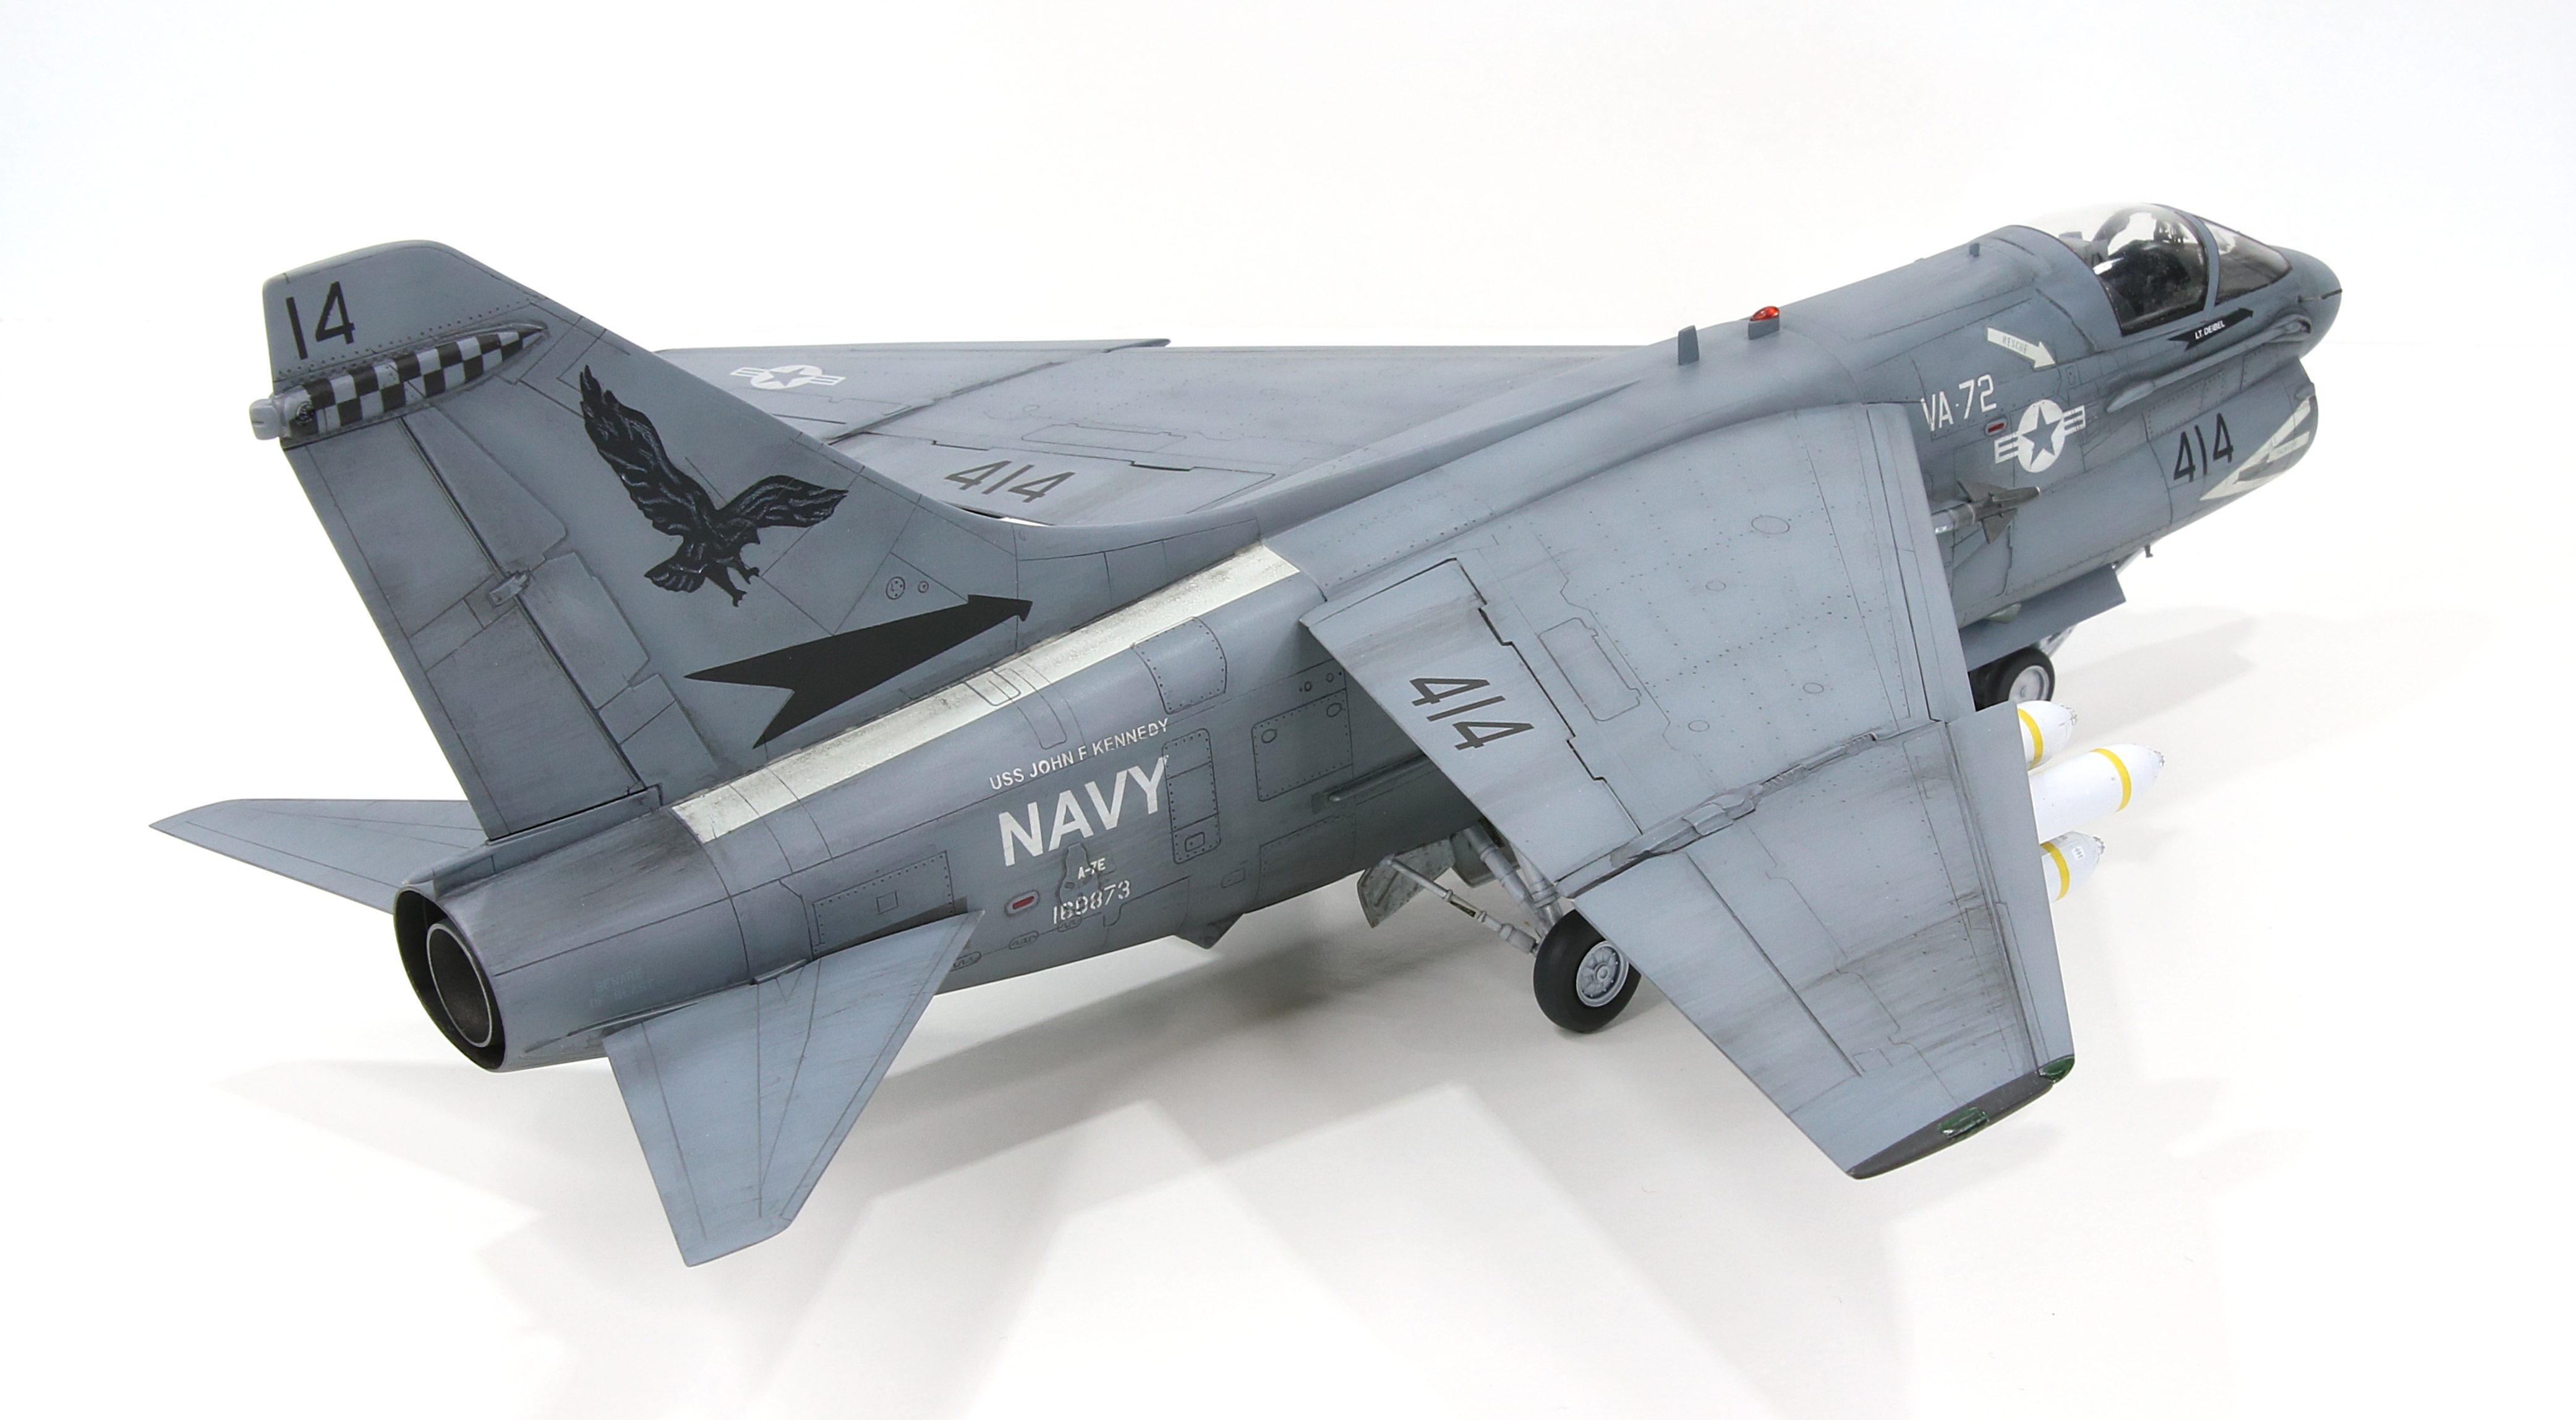
After a difficult start, this became a real pleasure. The kit was easy to work with and presents no issues to any reasonable competent modeller. More than that though, an embarked USN grey aircraft offers a tonne of weathering opportunities to try out. I think mine is still a little under-weathered and I could have pushed it quite a bit further.
It is in the end, building a grey navy jet is less a question of to Weather or Not, it’s a question of Weather It’s Enough.
If you are interested in following the build as it unfolded, as well as the research that led to the choice of markings, the full build diary is logged in the Britmodeller Aircraft WIP Section.
Gallery


References and Sources
The specific websites I used to research this piece are listed below. However, I used a different tool for much of the technical and historical research for this piece, ChatGPT. To be clear, ChatGPT did not write this piece, it actually doesn’t work that way. I used it to research the article in the same way as I might use Google, except ChatGPT allows for a more comprehensive search and allows for intelligent, contextual follow-up questions. Essentially, it’s a search engine I can converse with. It doesn’t have all the answers, and sometimes it is wrong, but it’s an exceptional tool which I will make more use of going forward.
I did use one site for reference on USN grey paint.
I really hope you enjoyed this article!
Making-History is a labour of love for me, but it’s becoming more expensive and time consuming. I’m loath to put advertising on it, so if you feel inclined please consider making a donation to help cover site hosting costs as well as the time it takes to produce its content. All donations get a receipt with my thanks.
Mark.
Make a one-time donation
Make a monthly donation
Make a yearly donation
Choose an amount
Or enter a custom amount
Your contribution is very much appreciated and 100% of it will be recycled back into Making-History.
Your contribution is appreciated.
Your contribution is appreciated.
Copyright ©2024
This article, its text, and photos of the model is my original work and is protected by copyright in its entirety, except where noted. All research sources are listed in the References and Sources section above, including photos from official sources. All other images and quoted content were sourced from the internet and are used here under protection of fair-use. Any copyrighted content will be happily removed and/or credited forthwith upon request by its rightful owner.


Leave a comment