Filton, South West England

On the 25th of September the Battle of Britain was entering its third month. While there may never be complete agreement on the specific the win/loss ratios, it is nevertheless true to say that through August and early September the RAF had barely managed to replace its losses in aircrew and aircraft. Aircraft production had been heavily targeted by the Luftwaffe and the RAF’s operational aircrew losses were only just matched by the training unit output; the exhaustion of both its physical and material reserves was a real and present danger.
The Luftwaffe was in similar straights; just ten days earlier it had been decisively repulsed when launching two full strength raids against the RAF’s Number 11 Group in South East England; every available RAF fighter was engaged in meeting the Germans that day, shooting down 60 Luftwaffe aircraft for the loss of 26 of their own. It was a decisive day in the Battle, two days later Hitler postponed “Operation Sealion” and the Luftwaffe began to shift its focus from the daylight bombing raids designed to wear down and defeat the RAF to night time assaults on cities, “The Blitz”.
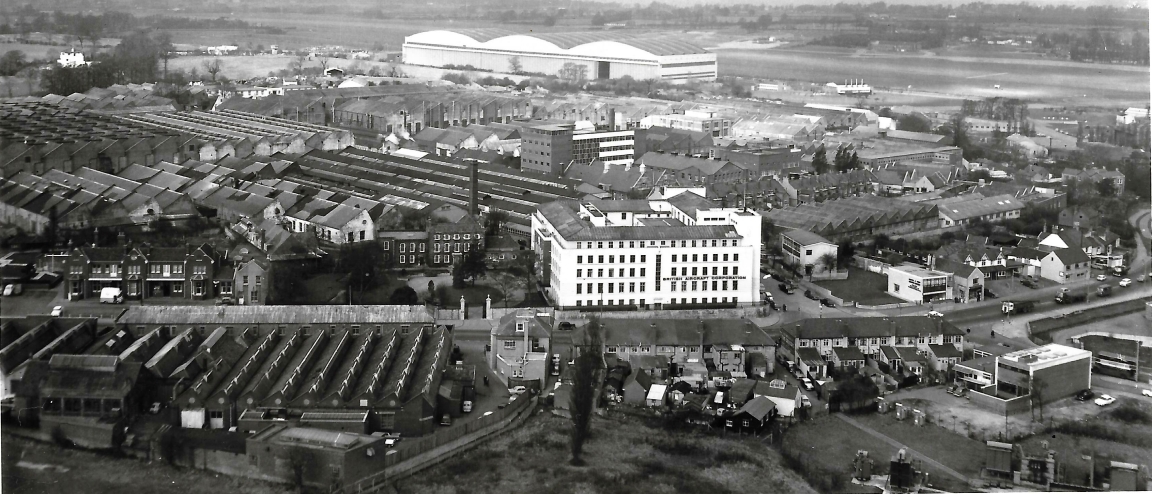
But, the transition wasn’t immediate, and it wasn’t to be without further losses to both the RAF and Britain’s capacity to supply it with aircraft. The Luftwaffe still had the capacity and desire to mount daylight raids against Britains aircraft production industry. One such target was the Bristol Aeroplane Company in Filton, small town to the north of Bristol. Nearby were other key suppliers such as Bristol’s own engine factory making Mercury & Hercules engines. Hundreds of civilians worked in these factories, thousands lived around them. On the 25th September 1940, in one of their last daylight raids the Luftwaffe sent eighty of their remaining bombers to Filton to destroy them.
Early Morning
At 861 Filton Avenue, just 600m southeast of the Bristol Aircraft Company the day likely began quite early for 29 year old Margherita Wilkins when her seven month old son Roger would have awakened looking for his morning feed. Her husband Harry was not at home, already serving the war effort.
Even before dawn at Balloon Barrage Site 35/6 in Filton, AC1 Thomas Stafford Parnall of No.935 (Balloon) Sq. RAF. would have been preparing his site in readiness for potential German raiders. The Ballon Barrage units were tasked with maintaining a hazard to low flying enemy aircraft. Thomas was from Penarth, just a little south of Cardiff in Wales on the other side of the Bristol Channel and had been busy throughout the summer; three weeks earlier an enemy aircraft had been brought down by one of the Barrage Ballon units in the area.

Not far from where Thomas Parnall was manning his ballon, 26 year old Gnr. Arthur Taylor from Liverpool was, as part of the 39th Searchlight Regiment Royal Artillery at the “Dazzle Defence” Site at Bailey’s Court Farm a little to the east of the Bristol Aeroplane factory, preparing for the day’s action, whatever it may turn out to be.
The Bristol Aeroplane Company’s works at Filton were the largest single aircraft manufacturing facility in the world, with a floor area of nearly 25 hectares. Each morning it opened its doors to hundreds of men and women employed in the production of the company’s twin engine fighter-bombers, the Blenheim and its successor, the Bristol Beaufighter. From the Toolmakers and assembly workers, engineers and draftsmen, pilots and managers, and the canteen workers keeping them all fed and well lubricated with endless supplies of tea, each played a vital role in the accreting production of these standout aircraft. Some journeyed from Bath, though many were more local, either from Bristol or in Filton itself, a few even close enough to walk.

Among them that morning were two 19 year olds, Joan Cook and Dorothy Coates, both from Bristol and perhaps travelling together – Dorothy had left her 18 month old baby at home with her mother; there were 25 year old Brian Anderson and 35 year old George Bird, both Privates in the 13th Gloucestershire (City of Bristol) Bn. Home Guard and tasked with providing security to the factory. Special Constable Gilbert Shortmen of the Bristol Special Constabulary would also have been travelling to the factory, soon be found manning his station at the factory gates. Inside, 55 year old Arthur Waller, 58 year old Thomas Pugh and 42 year old Mary Hobbs, all from Bristol, all possibly alighting from the same bus on a fair autumn morning at the Bristol Aeroplane Company in Filton.
Meanwhile, at RAF Warmwell some 80km to the south near Weymouth, RAF No.10 Group’s No. 152 Squadron was preparing for another day. Among its pilots, Sgt Kenneth C “Ken” Holland of B Flight is perhaps waking from the previous evening’s “relaxation”. At only 20 years old he was one of the younger pilots on the squadron, and no doubt even more conspicuous by his Australian accent. Holland had come to England in the mid 1930s from his home in Sydney, Australia to further his education. After finishing his schooling he attended Aeronautical College in Portsmouth and thence to the RAF Volunteer Reserve in 1939 as an Airman u/t Pilot.
Upon completion of his training in June 1940 he was posted to No.152 Squadron at Warmwell flying Spitfire Mk.Ia’s, just in time for the commencement of the Battle of Britain. Although not the busiest sector of the Battle, by now Holland had seen his share of action and had two victories credited to him; a Ju88 bomber shot down a week earlier on the 17th September and another brought down on the 19th. Sgt. Holland was certainly getting his eye in. No.152 Squadron’s job, along with the detachment of 609 Squadron also at Warmwell, plus the remainder of that Squadron and No.10 Group was to guard the western south coat of England as well as Bristol’s ports and the vital aircraft factories in both Yeovil and Filton.

Across the English Channel in occupied France the Luftwaffe’s Bomber Groups KG53, KG55 and Heavy Fighter Group ZG26 readied themselves for another day’s action. Flying Ju88, He111 bombers and Bf110 twin engine heavy fighters respectively, their crews attend the morning briefing. The Battle has not gone well for the Germans in general, and KG55 in particular has suffered many casualties throughout the summer. Their aircrew are becoming demoralised by the seemingly haphazard tactics coming from higher command. At the briefing this morning Hptm Helmut Brandt and his crew, Ofw Gunter Wittkamp, Ofw Rudolf Kirchoff, Uffz Hans Fritz Mertz, Gefr Rudolf Beck, are assigned He111P-1 wearing the squadron and aircraft code G1+EP and informed his target is the Bristol Aeroplane Company’s factory in Filton, near Bristol.
Mid Morning
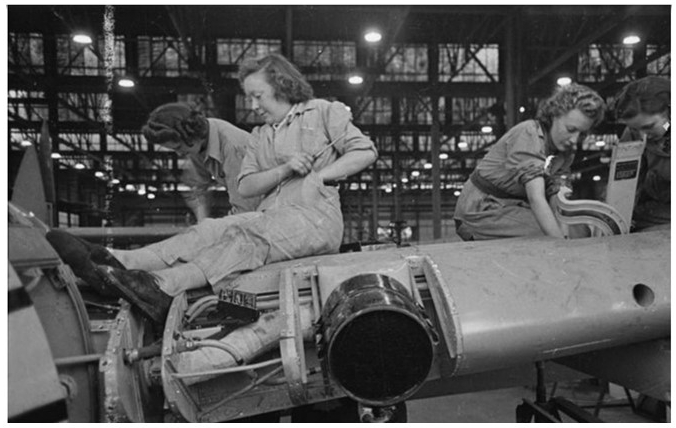
Morning tea break at BAC would have finished up at around 9.30am. Joan and Dorothy were by now back at their stations, along with Arthur, Thomas and Mary and the rest of the workforce. Production of Bristol’s new fighter-bomber, the Beaufighter was critical and the foremen and supervisors wouldn’t have allowed any lollygagging. Aircraft production was critical for Britain’s survival and much was hoped for in the new Beaufighter.
Thomas and Arthur were now scanning the blue skies above them. There was broken cloud cover this morning, which could hid approaching raiders and they needed to keep a sharp lookout. Thomas’ barrage balloons had been aloft for hours already while Arthur’s searchlights, used in daylight to literally dazzle enemy pilots, were in a state of readiness, generators on standby. It was approaching the time of day mostly likely to see raiders and the unit had to be ready.
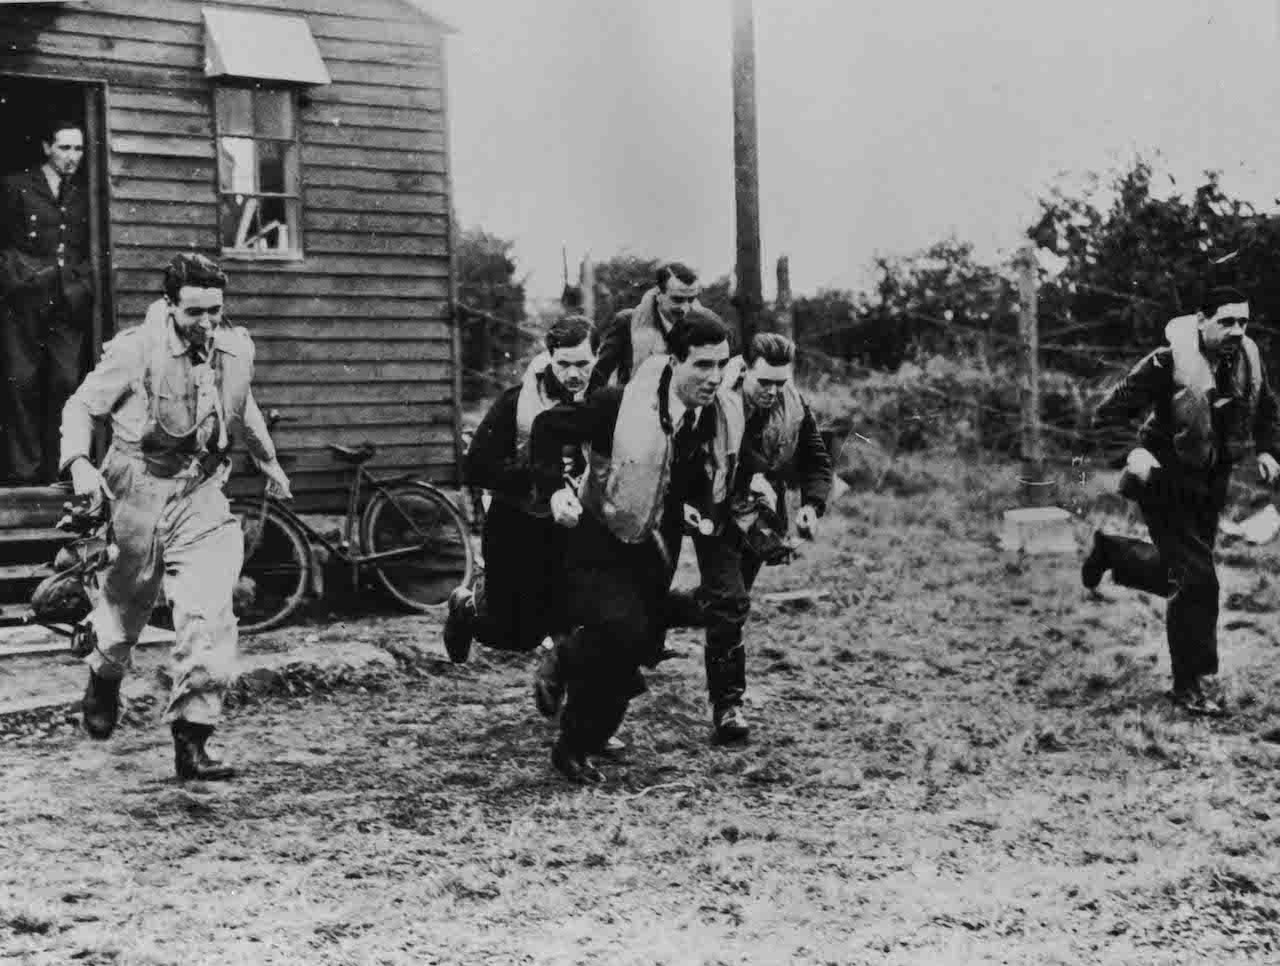
By 9.45am 152 and 609 Squadrons at RAF Warmwell were also coming to a state of readiness. Their Spitfires were fuelled and armed, the cockpits open with harnesses draped out of the cockpit to ensure the fastest possible ingress by their pilots.
The ground crew, affectionately known as “erks“had worked tirelessly on their Spitfires to ensure they were ready for action. With the scramble phone nearby, Sgt. Ken Holland along with his squadron-mates would be waiting for its ring. By this time they would have shaken off any ill effects from mess activity the previous evening; Pilots were legendary for mess activities, especially those in constant action. 152’s pilots had been busy lately, scrambling on most of the preceding several days and would know that the weather on this day, clear and warm as it was, and with broken cloud, lent itself to ideal flying weather; and not only for fighters.
At the same time 450km away in France, Brandt and his crew climbed into their aircraft and began their pre-flight checks. KG55 and KG53 were putting up some eighty He111 and Ju88 bombers for this raid, supported by 20 or so ZG26’s Bf110’s. Luftwaffe Intelligence believed the southwest sector to be lightly defended which afforded them an excellent opportunity to hit the BAC factory at Filton. They were right, only 152 and a section of 609 Squadron were available to defend the entire sector.

At 10am the bombers began to take off and assemble into their formations. It would take 20 to 30 minutes for all eighty aircraft to get airborne and form up. Fully loaded, the He111’s cruising airspeed was around 300km/hr, they would arrive over Filton, some 450km away at lunch time. This was by design; by arriving then they hoped to find the British defences slightly more relaxed, slightly less prepared; they needed all the edge they could find.
Late Morning

By 11.15am the British southern radar had alerted Fighter Command and No.10 Group that a raid was approaching the south west sector. In plotting the Germans’ course it appeared the Westland factory at Yeovil was the likely target as this had been the Luftwaffe’s pattern of attacking the British aircraft production capability. They had last bombed Yeovil in July, this was perhaps the return trip.
At 11.20am 152 and 609 Squadron scrambled to intercept the raiders. Control vectored them to intercept the Germans expected course to Yeovil. Among them was Sgt. Ken Holland flying his Spitfire Mk.Ia coded UM-C. Soon after becoming airborne he took his position in Blue flight, led by his Squadron Leader S/L Peter Devitt.
Just a few minutes later however, at approximately 11.35 the German bombers made their final course correction having reached the IP for their bomb run at Filton. They were still 50km south of target at this point but this change of course took them away from where the RAF Spitfires had been vectored. The Germans meanwhile probably couldn’t believe their luck; with only ten minutes remaining to target they hadn’t seen an enemy fighter, let alone been attacked.
By 11.40 the British realised their mistake and the Spitfires were redirected to chase down the German bombers. It was too late though, they wouldn’t be able to catch the Germans’ main force before they could release their bombs.
By now, the workforce at BAC were making their way to the factory’s six air raid shelters. Workers from the same sections of the factory were assigned to different shelters so that in the event a shelter was hit, no one area of production would be halted by loss of workers. BAC workers did not respond to the civilian air raid sirens which may have started at about the same time, instead, to reduce the possibility of panic the BAC band’s recording of ‘Marching through Georgia’ was broadcast to signal an impending raid. Dorothy, Joan, Arthur, Thomas and Mary would have left their work stations and hurriedly made their way to the shelters. Privates Brian Anderson and George Bird, as well as Special Constable Shortmen would be taking their places too, though not with the general workforce in the shelters. They would have their own designated place to shelter from the coming attack.
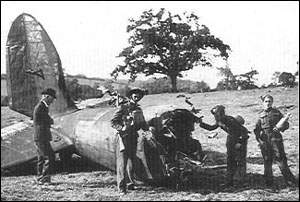
The Anti Aircraft batteries to the south of Filton began firing at the German aircraft at 11.47. Their efforts were immediately rewarded with the destruction of an He 111 which crashed in fields close to the nearby village of Failand, west of Bristol.
At the same time as the AA batteries were firing at the leading German aircraft, some of 609 Squadron’s Spitfires had managed to catch up to the rear of the Germans’ bomber formation. With no time to lose and no doubt frustrated at their initial wild goose chase, they immediately engaged and brought down at least one Ju88 belonging to KG53.
One minute later at 11.48am, the German bombers reached Filton and released their bombs.
11.48am
High altitude bombing was notoriously inaccurate in 1940 but conditions were perfect and due to the RAF’s late identification of their target, the Germans had not needed to contend with enemy fighters, they had a clear run to target. They made the most of their opportunity and in only 45 second they succeeded in dropping 168 bombs on the factory. Eight newly completed aircraft were destroyed, as was an important prototype for the new Beaufighter. Worse, six of the semi-underground air-raid shelters used by both BAC workers and Filton residents took direct hits. Among those killed in the shelters were Joan Cook, Thomas Pugh and Mary Hobbs. Privates Brian Anderson and George Bird, as well as Special Constable Shortmen were also killed at the plant. Arthur Waller and Dorothy Coates both suffered severe injuries and were taken to the Royal Bristol Infirmary. Arthur died there on the 27th September, Dorothy succumbed to her injuries on 5th October.
At the nearby Balloon Barrage Site 35/6 as well as the 39th Searchlight Regiment Royal Artillery “Dazzle Defence” site bombs had also fallen. Each location suffered one fatality, AC1 Thomas Stafford Parnall and Gnr. Arthur Taylor both lay killed at their action stations.
Not all the bombs dropped were on target. Bombs fell on Gloucester Road North, in Filton Estate, at Branksome Drive, on Filton Avenue, Southmead Road, at Southmead Estate in Filton as well as Lake Road, Henleaze and Eastfield in Westbury-on-Trym. At 861 Filton Avenue seven month old Roger Wilkins was killed, his mother Marguerite Wilkins died later the same day at Southmead Hospital.

11.50am
Hptm Helmut Brandt and his crew their He111P-1 coded G1+EP were now focused on making their way home. They knew that the RAF would stand between them and that objective, and would in fact be determined to make up for not stopping the raid in time. After closing his bomb bay doors Brandt turned his aircraft to starboard and set a course more or less south south west. He warned his crew to look out for British fighters and they prepared for the inevitable onslaught.
After having brought his Spitfire around towards Filton Sgt. Holland in UM-C could now see the the German aircraft to his front and, along with the rest of Blue Flight turned to engage the bombers. The heavy fighters assigned to protect KG53 and 55’s bombers were nowhere to be seen. No doubt he and his squadron mates could see the smoke rising from Filton off his port wing to the north.
11.52am
S/L Peter Devitt leads Blue Flight into the attack on the German aircraft, now spread across the sky in front of him, KG55 He111s mixed with KG53’s Ju88s. He sets his sights at a Ju88 and fires his Spitfire’s eight .303 machine-guns. He sees hits but return fire from the Ju88 is accurate and damages his Spitfire, including his fuel tank. Temporarily blinded by engine fluids streaming back across his bulletproof windscreen he nevertheless, and in a remarkable piece of airmanship makes a safe belly landing at Skew Bridge, Newton St Loe.
11.53am
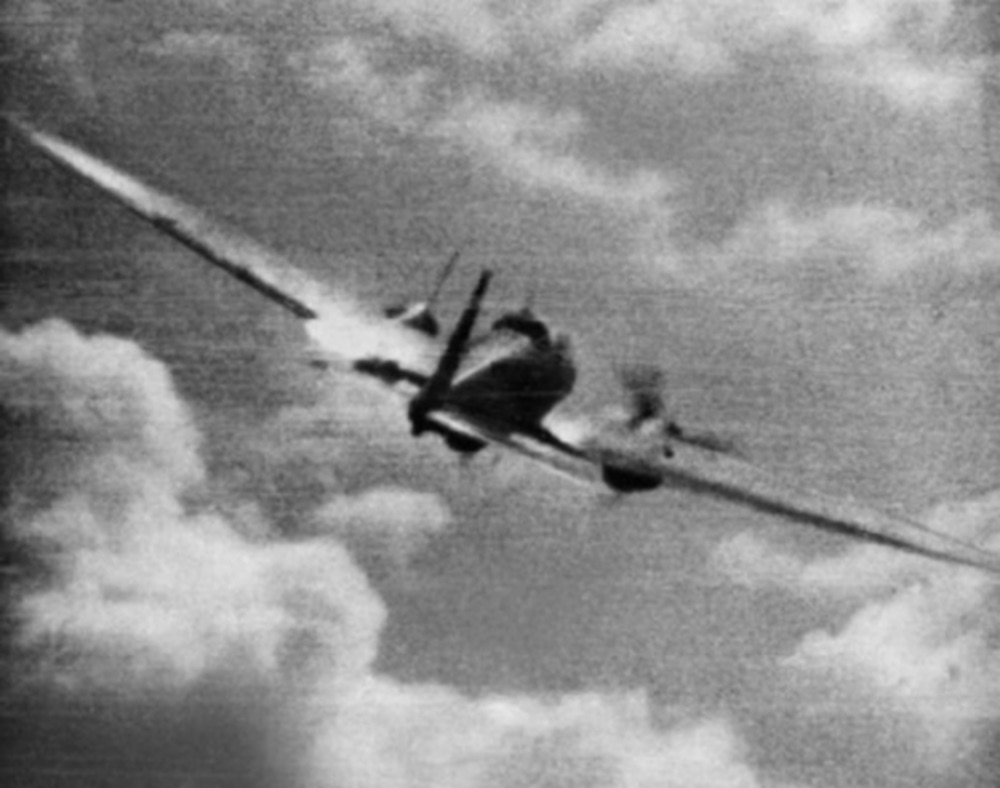
Ken Holland had more luck. His first pass was towards a KG55 He111 and at 400yds range he opened fire from astern and slightly to the port side of his target. He saw hits across the wings and fuselage and almost immediately smoke from the port engine. The enemy aircraft began losing altitude.
Helmut Brandt’s crew had reported a Spitfire coming to their tail but he was unable to make evasive manoeuvres in time to avoid Holland’s first pass raking his Heinkel with bullets. With his engines losing power he realised his aircraft was critically damaged and that he would have to find somewhere to land, immediately.
11.54am
Following Brandt’s stricken He111 down to 2000′ Holland brought his Spitfire around for another pass; he knew he had damaged the German but want to be sure it was going down. He executed his turn at a safe range before positioning himself at the rear of the stricken He111.
Brandt was too busy trying to keep his aircraft airborne long enough to make a forced landing to notice that the Spitfire which had inflicted fatal damage to his aircraft was coming back. He had casualties on board, and he was losing altitude and control. Nonetheless , his rear gunner was still at his station, and still determined to protect his aircraft and his crew-mates.
11.55am
Sgt. Ken Holland once again sets the He111 in his sights and presses the fire button on his joystick. At the same time its rear gunner, Uffz Hans Fritz Mertz sees the Spitfire closing, and fires.
11.56am
Both aircraft crash in fields near Wolverton, some 25km southwest of Filton. All but Brandt are killed when his bomber crashes. He is severely wounded but recovers, and is POW for the remainder of the war.
20 year old Sgt. Kenneth Christopher Holland is found dead in the cockpit of his crashed Spitfire, killed by a shot to the head. During later interrogation Brandt reported that Holland’s first burst had already crippled his bomber and that there was no need for him to go in for a second attack.

Afternoon
The raid lasted just 45 seconds. The damage wrought was horrific. At Bristol Aeroplane Company 91 workers were killed, anther 24 were killed in the surrounding streets. 315 people suffered wounds in the raid.
The RAF lost four aircraft in total, one pilot killed. The Germans lost six aircraft, eight crewmen killed, the rest prisoner. Two German aircraft crashed upon return to France.
A lone German Bf110 flew a reconnaissance mission to Filton to photograph the damage. It found significant damage to the factory, the raid was a major Luftwaffe success.
26 September
Recognising the lack of adequate fighter protection for the town’s critical aircraft factories, 504 Squadron was stationed at Filton the following day. The decision, albeit a late one, was justified two days later when a further raid was made on 27th September. The German fighter-bombers who came over this time were engaged by 504 Squadron’s Hurricanes in the only dogfight of the war to take place over Bristol. Ten German aeroplanes were shot down.
In a magnanimous gesture from a civilian population who had suffered through the devastating raid only two days previously, the German dead were buried with full military honours in Greenbank Cemetery in Bristol. It was reported that civilians in the streets removed their hats as the cortege passed: as one resident put it: “they were somebody’s sons”.
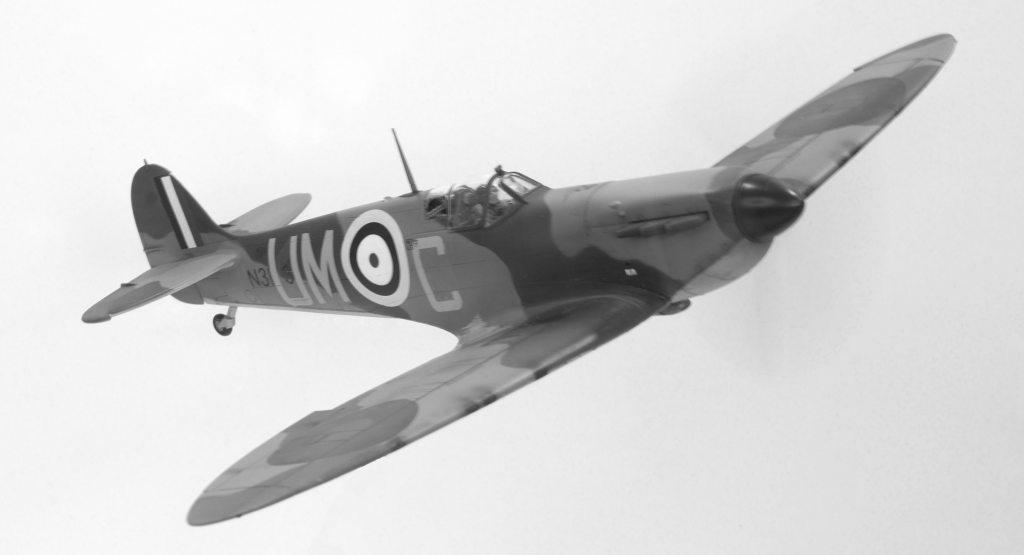
Airfix 1/48 Supermarine Spitfire Mk.Ia
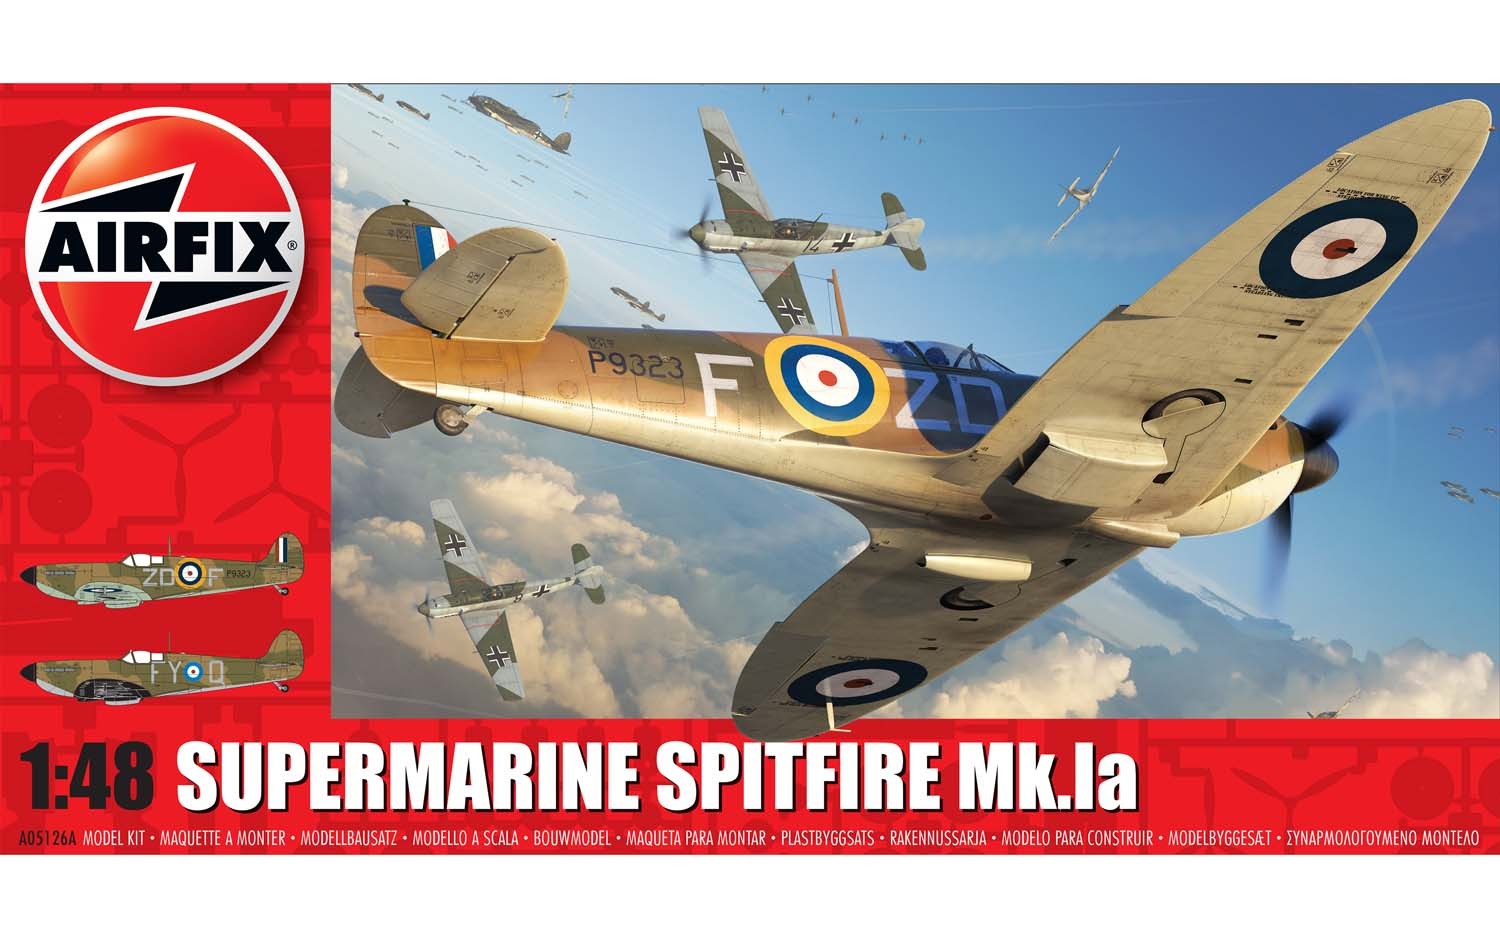
As I ran into a supply block on my “Bushranger” project I needed something quick and straightforward to build while waiting. I had this one in the stash and as I haven’t built a Battle of Britain Spitfire in decades, I thought it high time I did so.
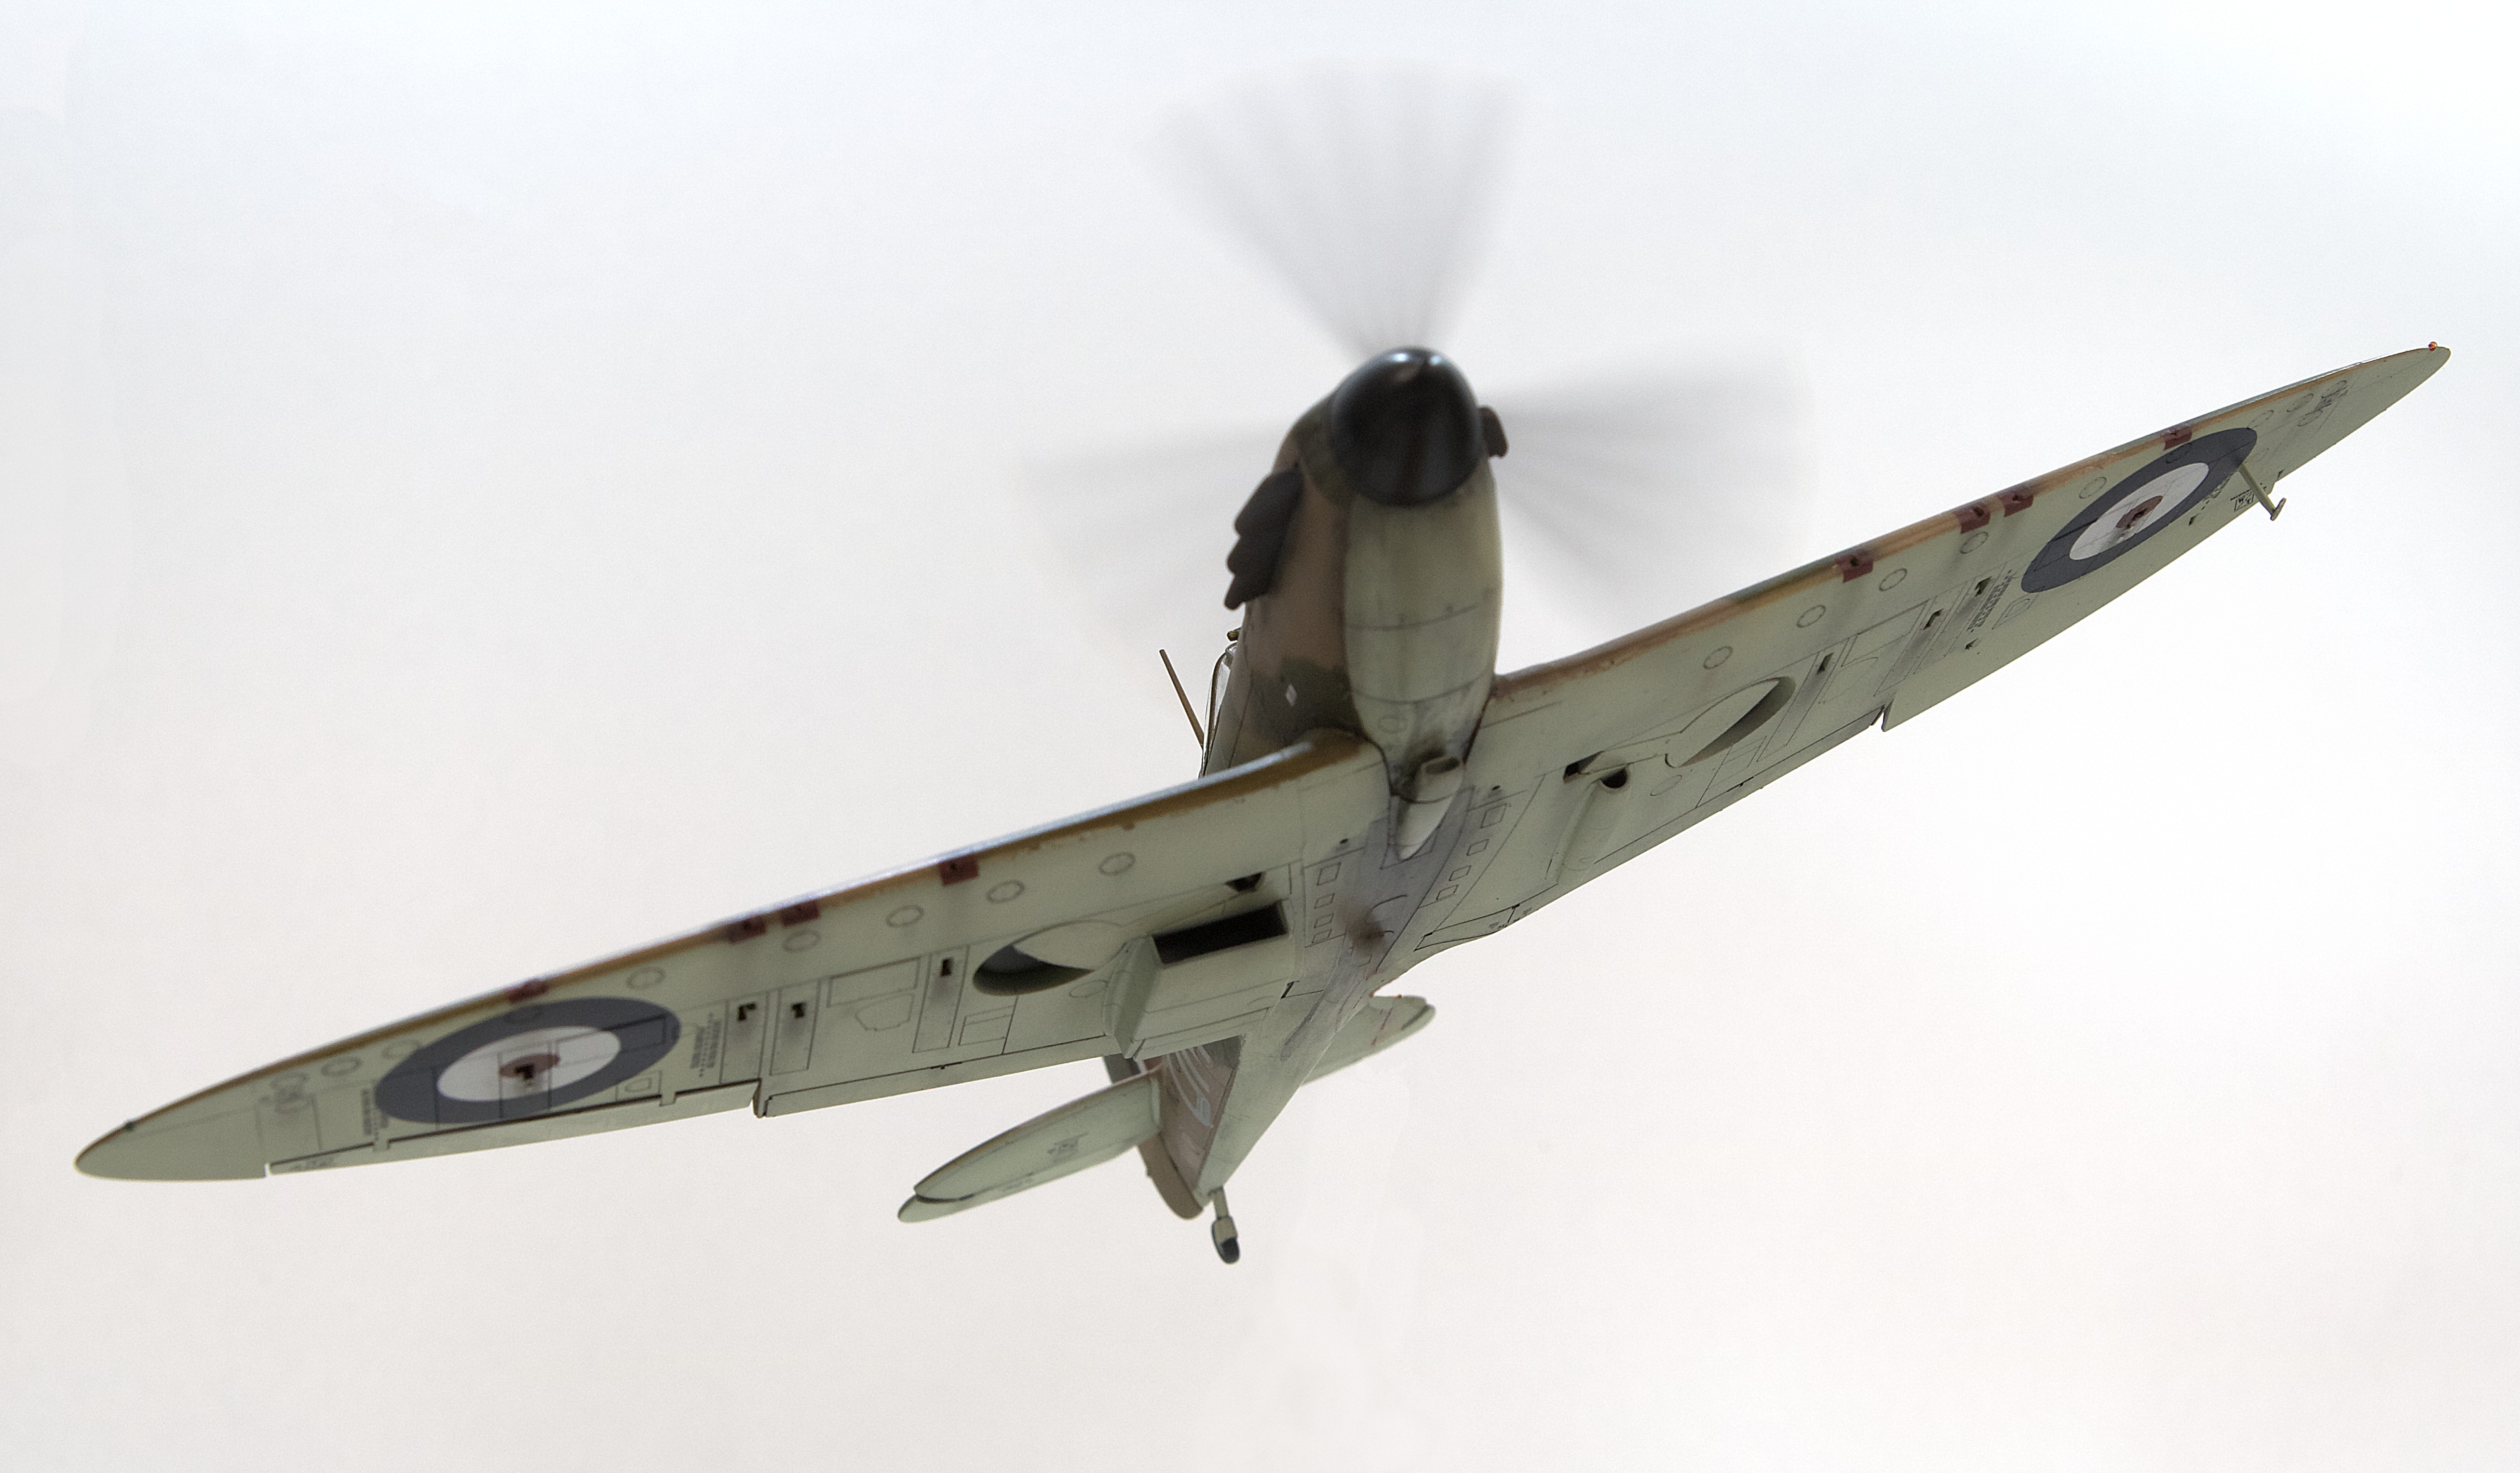
Quite soon after deciding to build a Spitfire I also decided on an Aussie pilot, and that I wanted to display this model in flight as the Airfix kit makes that quite easy to do with its separate parts for stowed undercarriage. This latter choice allowed me to move through the cockpit quite quickly as the pilot figure and closed canopy would hide most of it. However, it did leave me the task of painting the pilot, something I’ve not attempted in more decades than I care to remember…
Work begins in the usual manner, black basing the interior parts before a finish coat, wash and dry-brush.
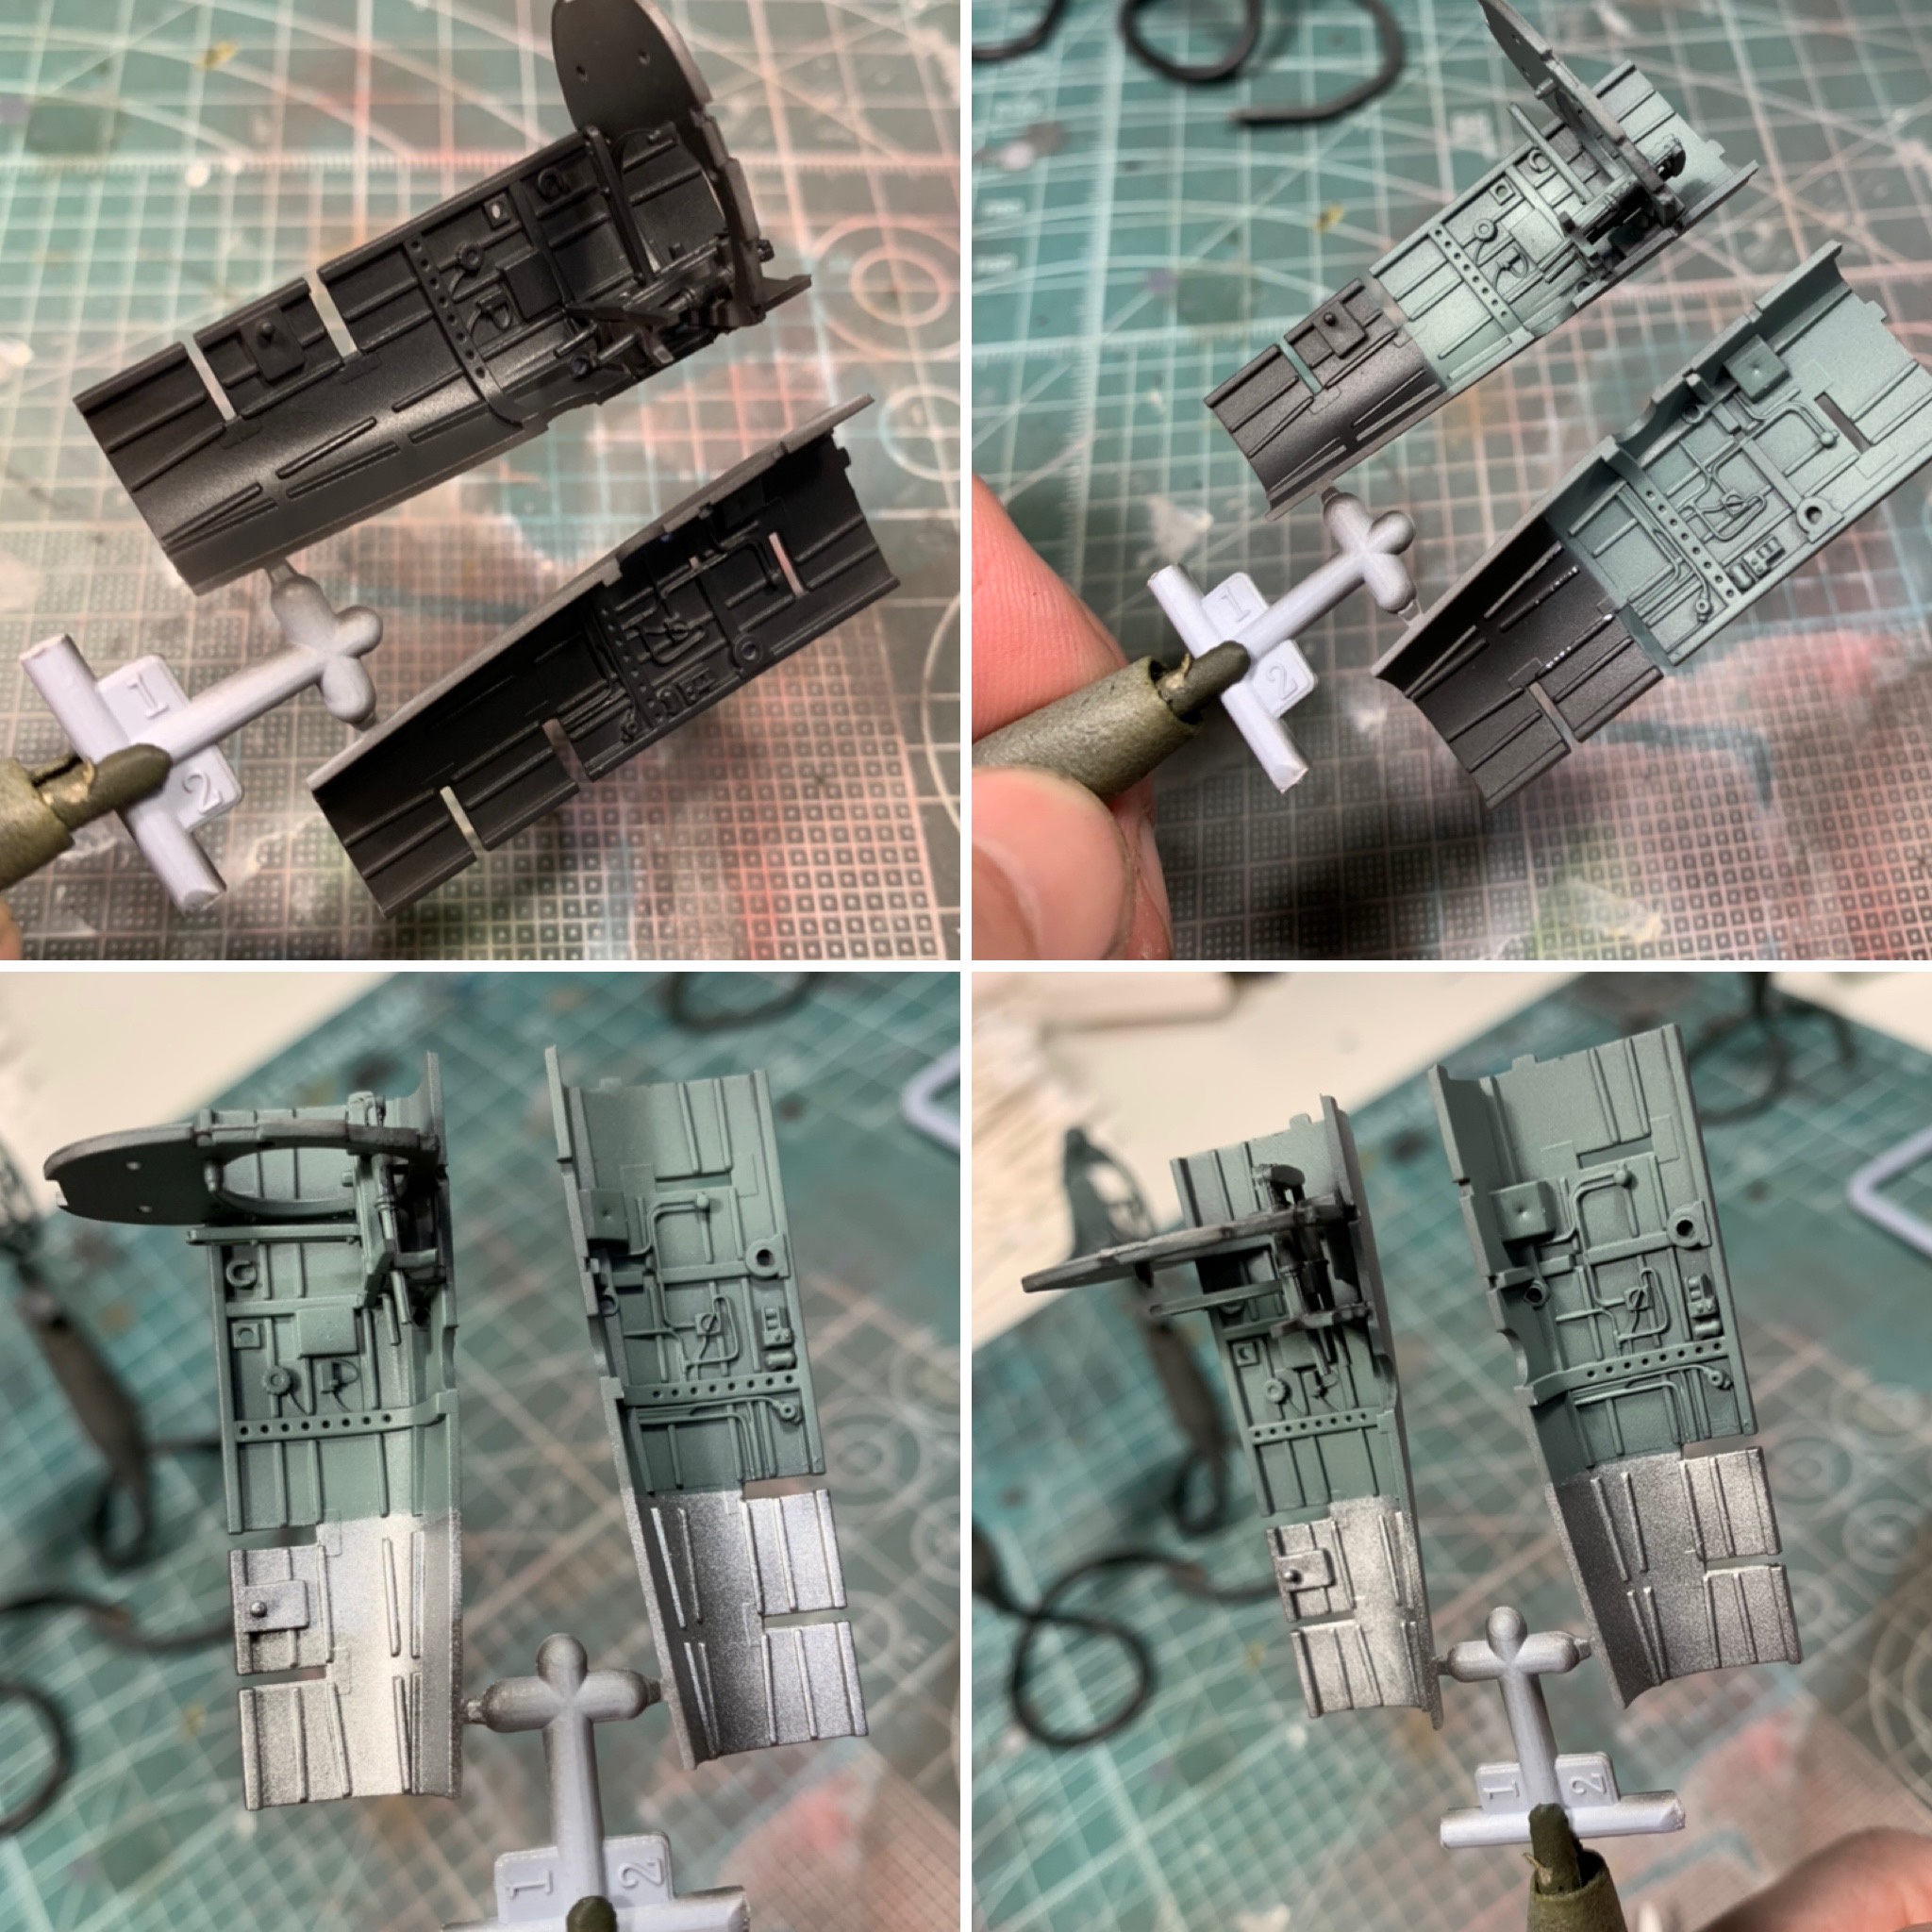
Next, cockpit assembly and work begins on the pilot. I painted him blue first, then simply detailed in the life vest and harness, plus the other elements of his dress like boots and socks before applying a dark wash and the dry-brush. The face was by far the most difficult part, mixing the right colour the most difficult part of that.

Once he was in, I was able to complete the rest of the construction quite easily, the kit cooperating with everything I wanted to do with it.
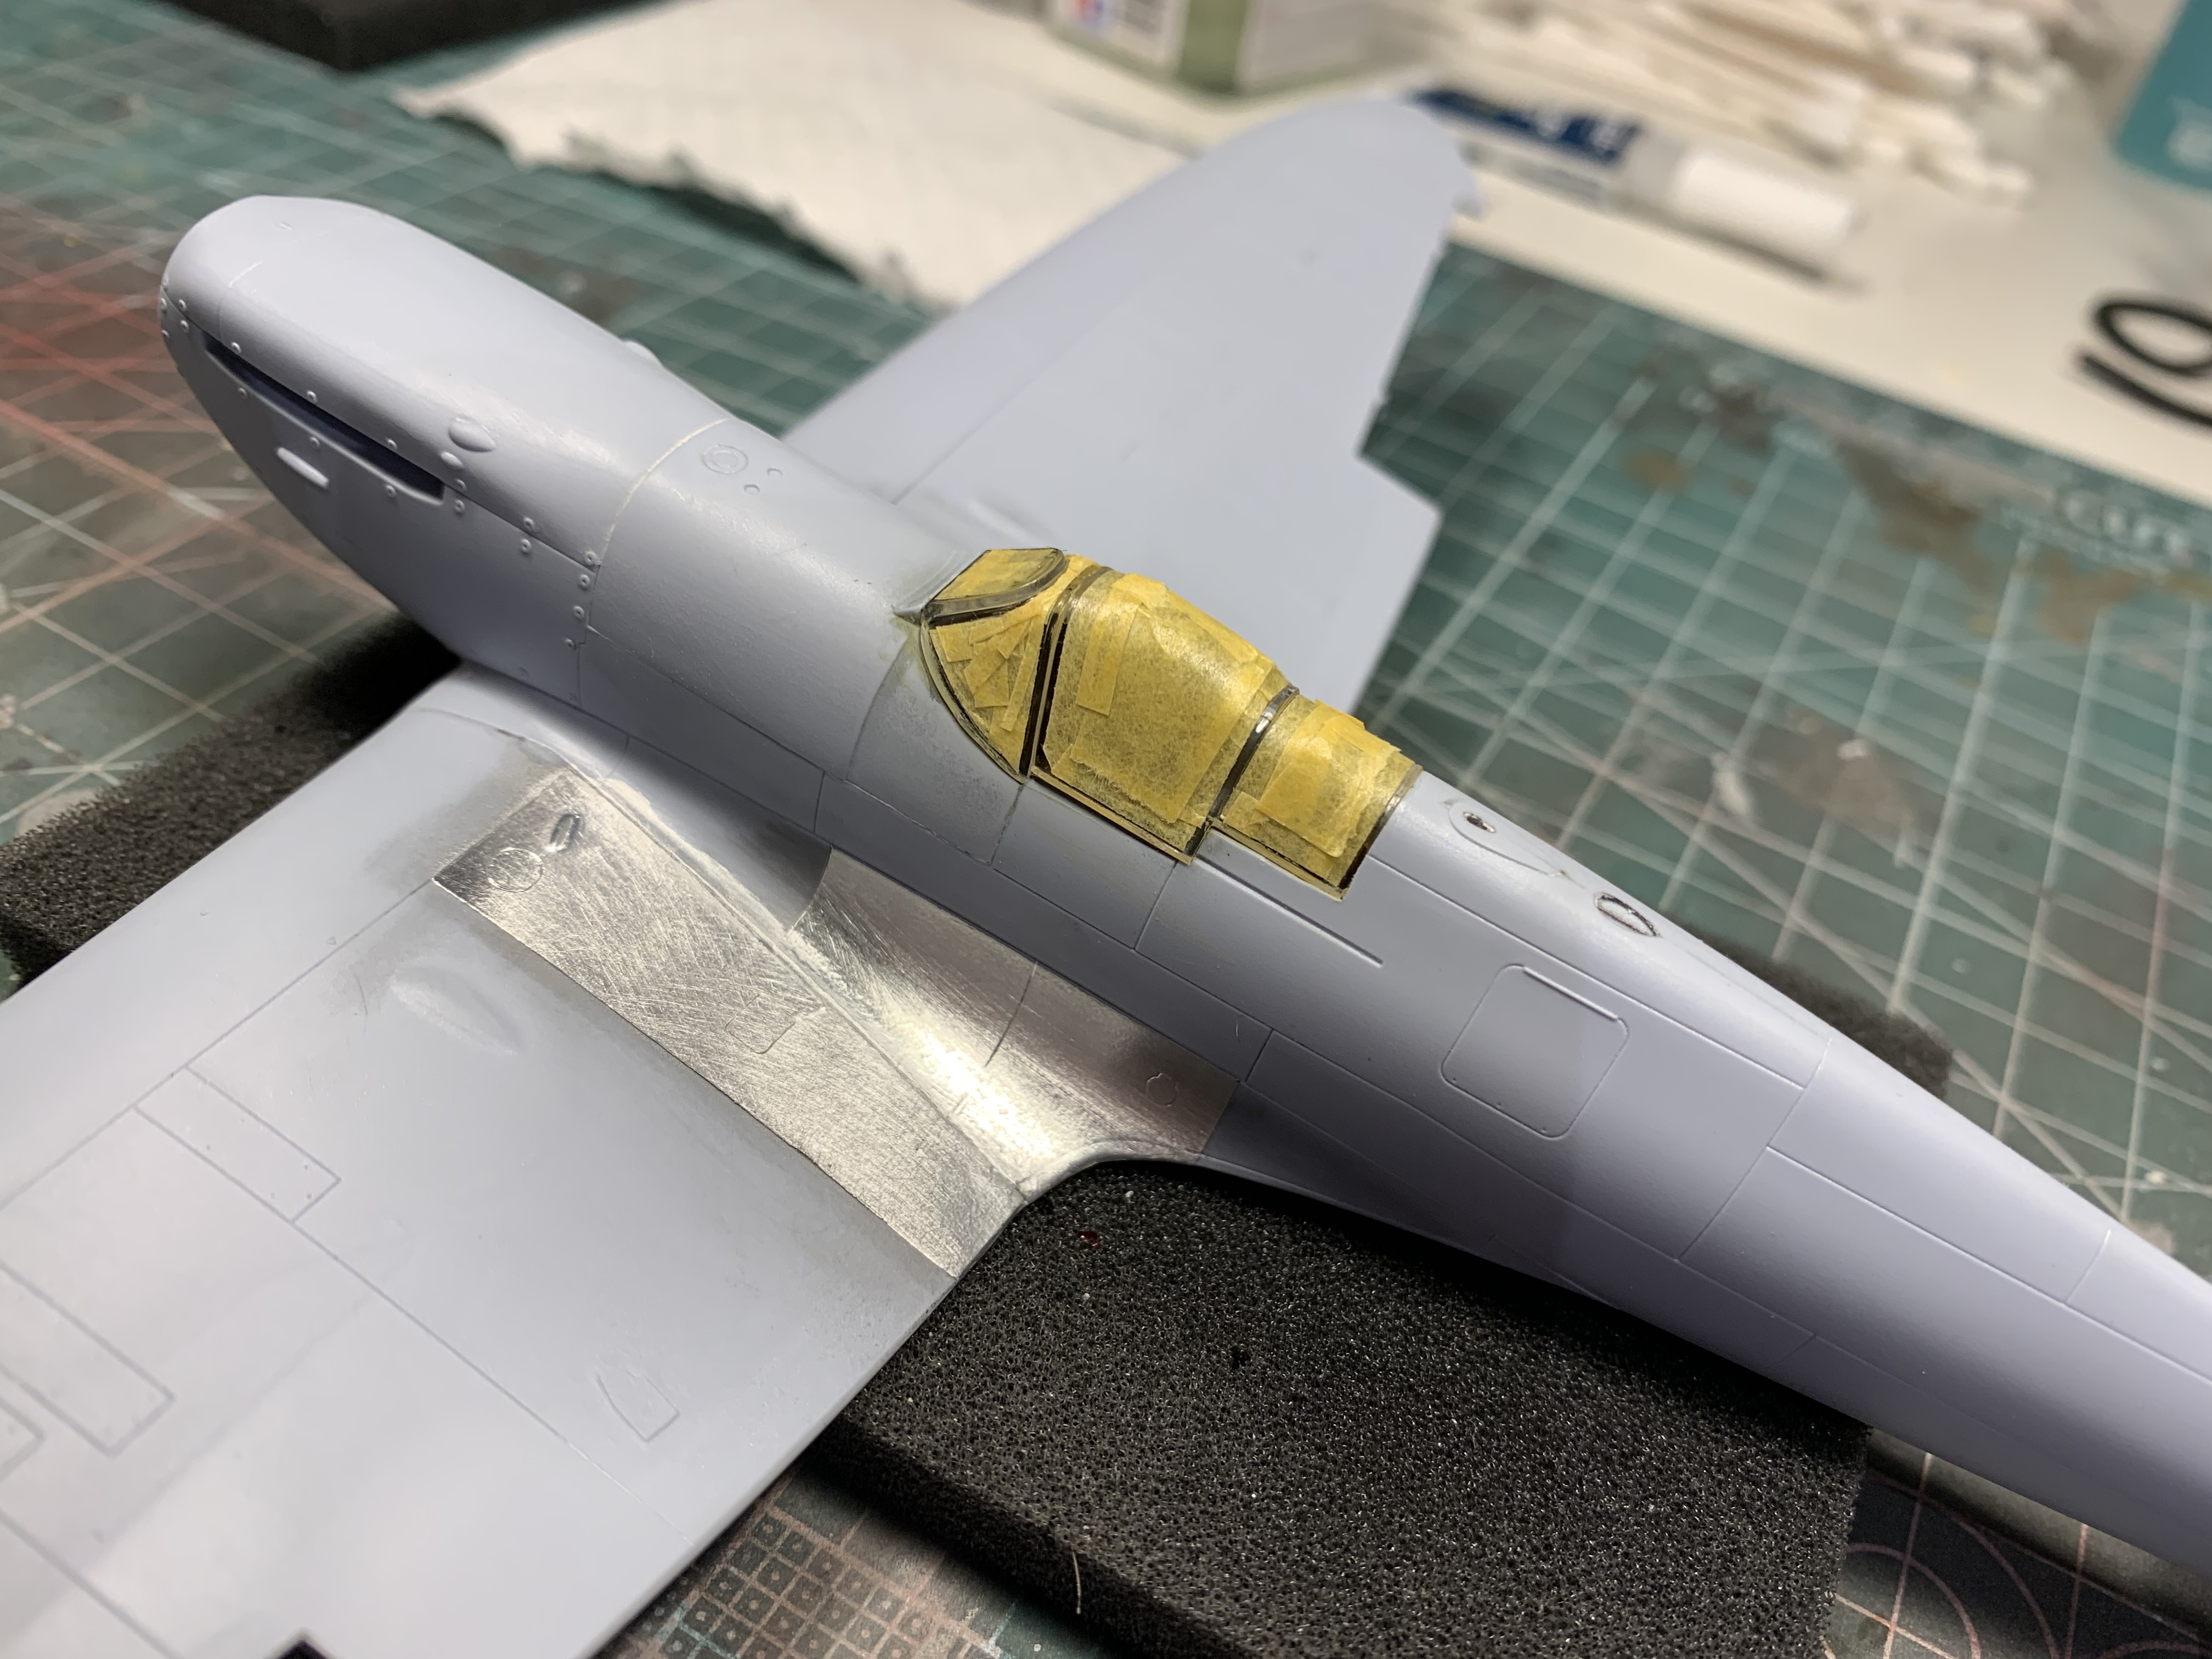
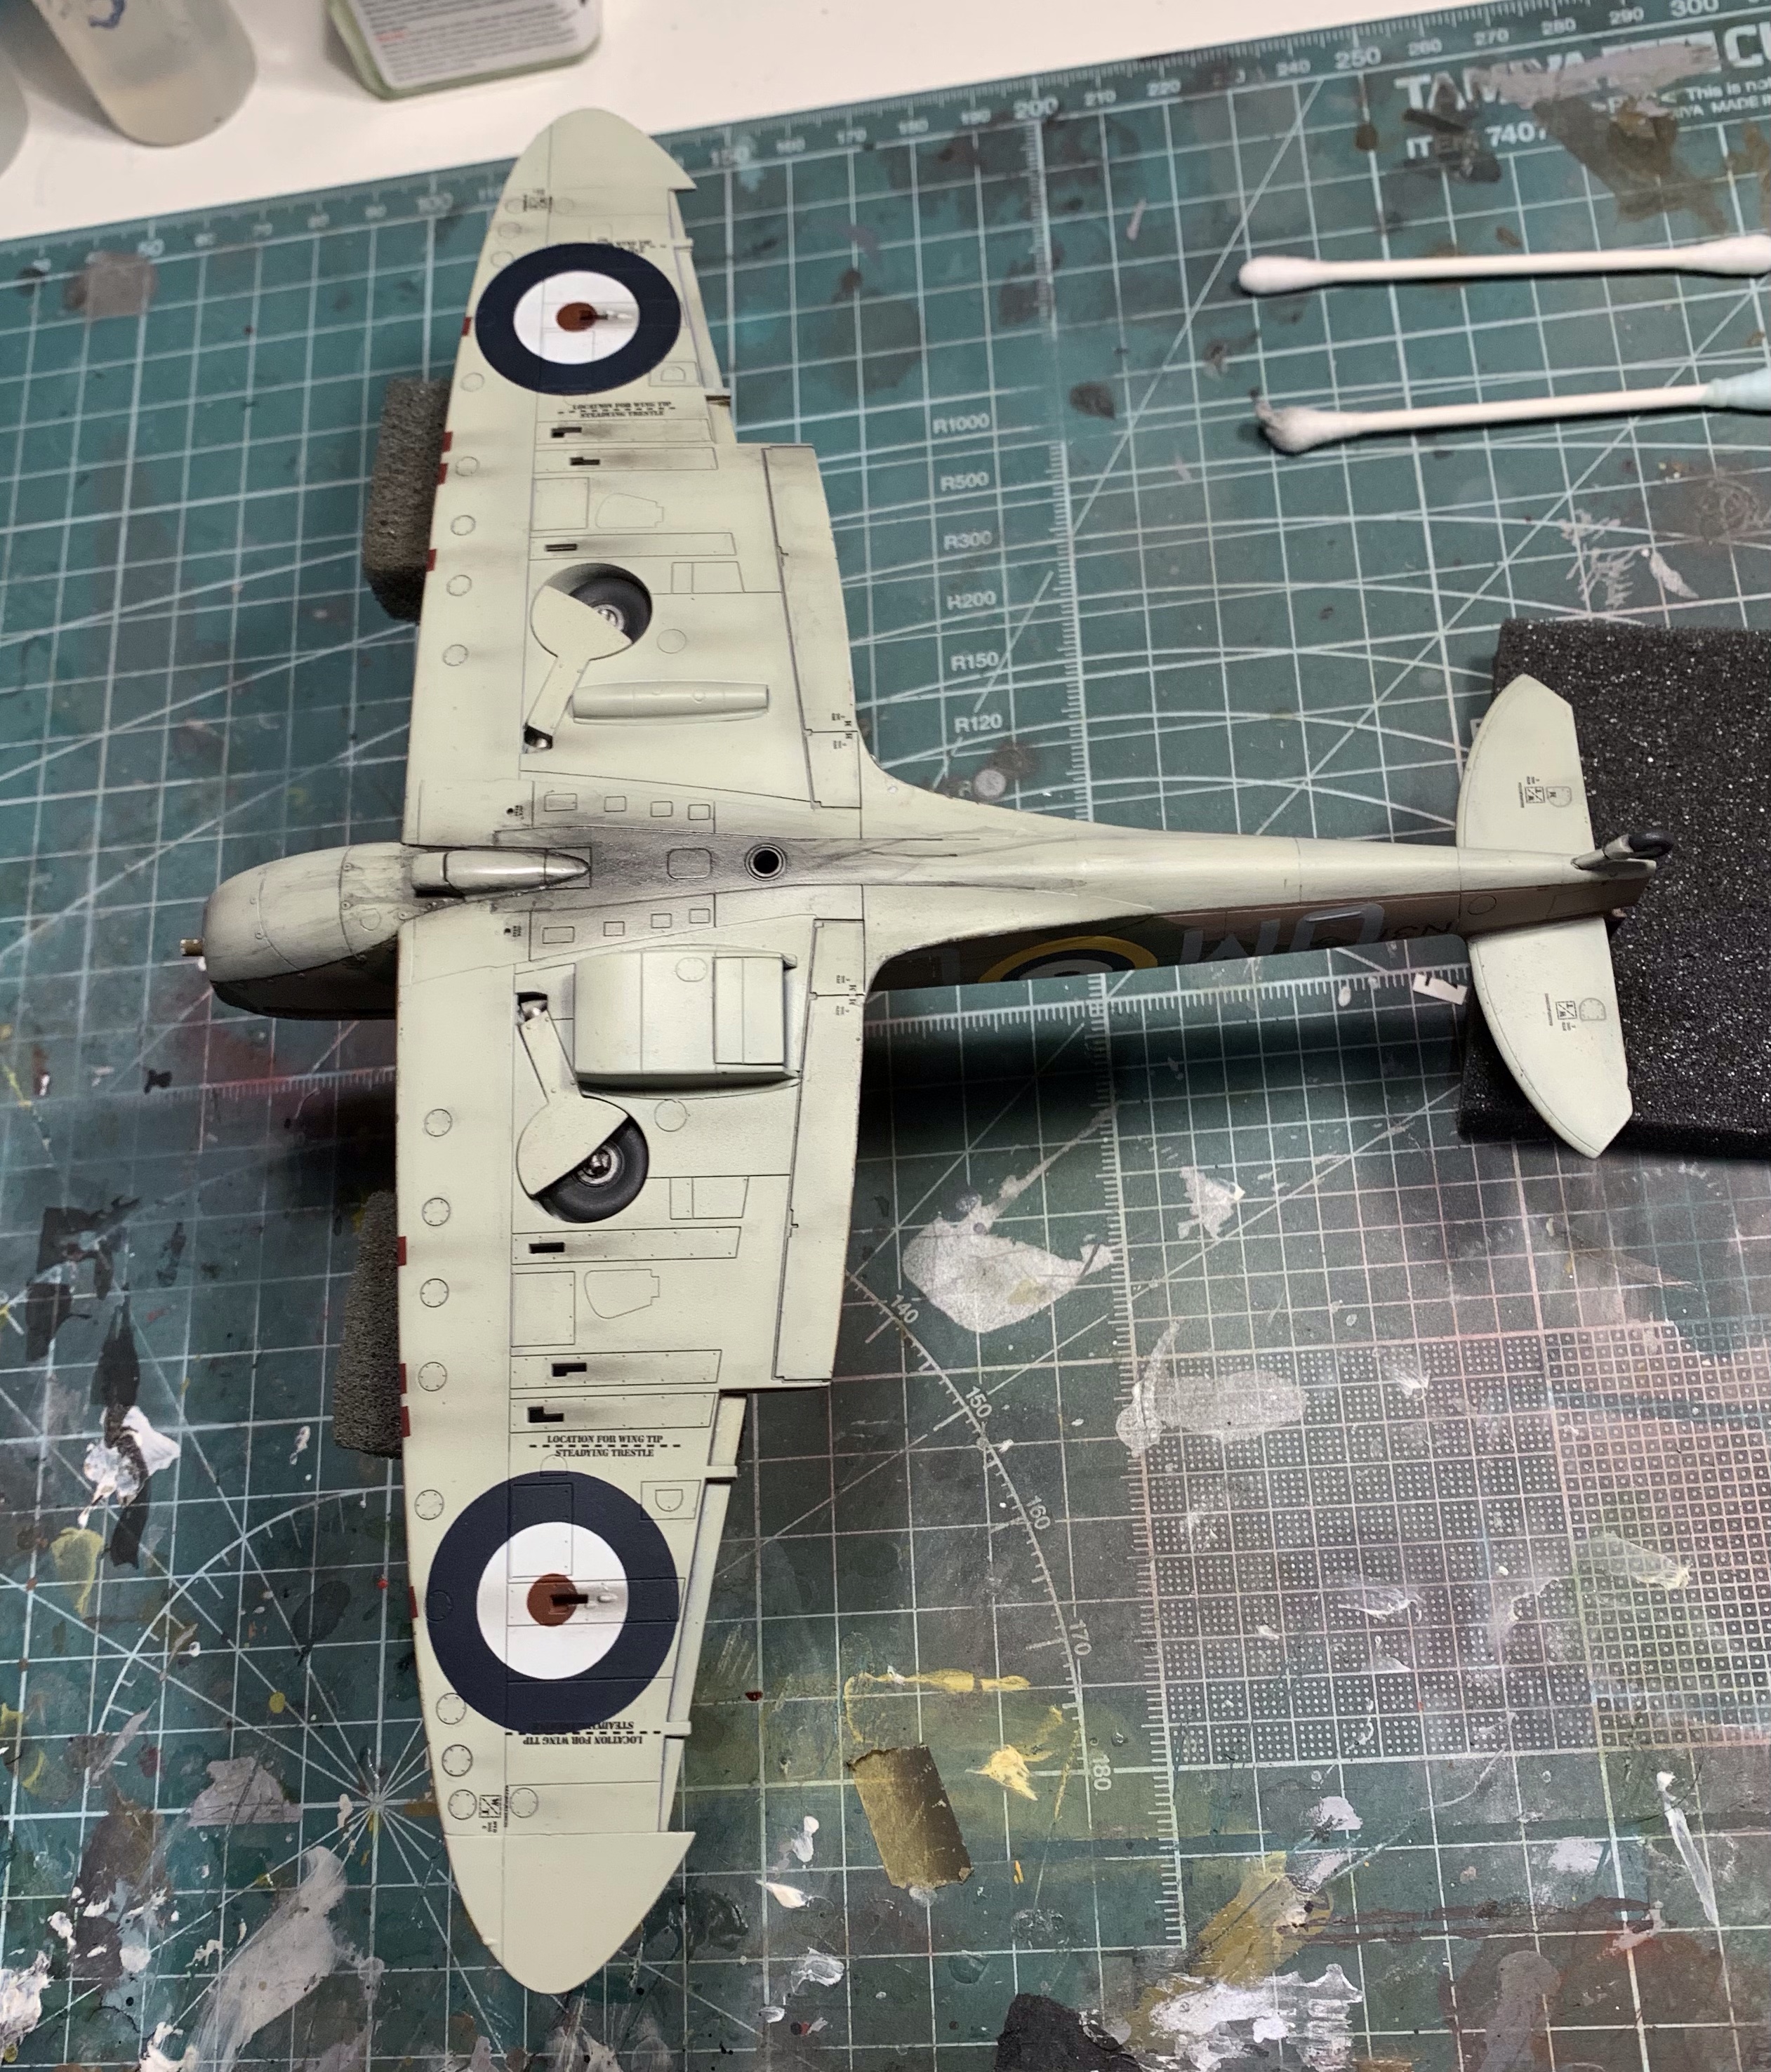
I wanted to try something for the weathering at the wing roots, that being the application of Bare Metal Foil which I could chip the paint off of later. To that end both wing roots were foiled in preparation. Once I’d completed a quick seam check and final wipe down it was ready for paint.
Paint and Markings
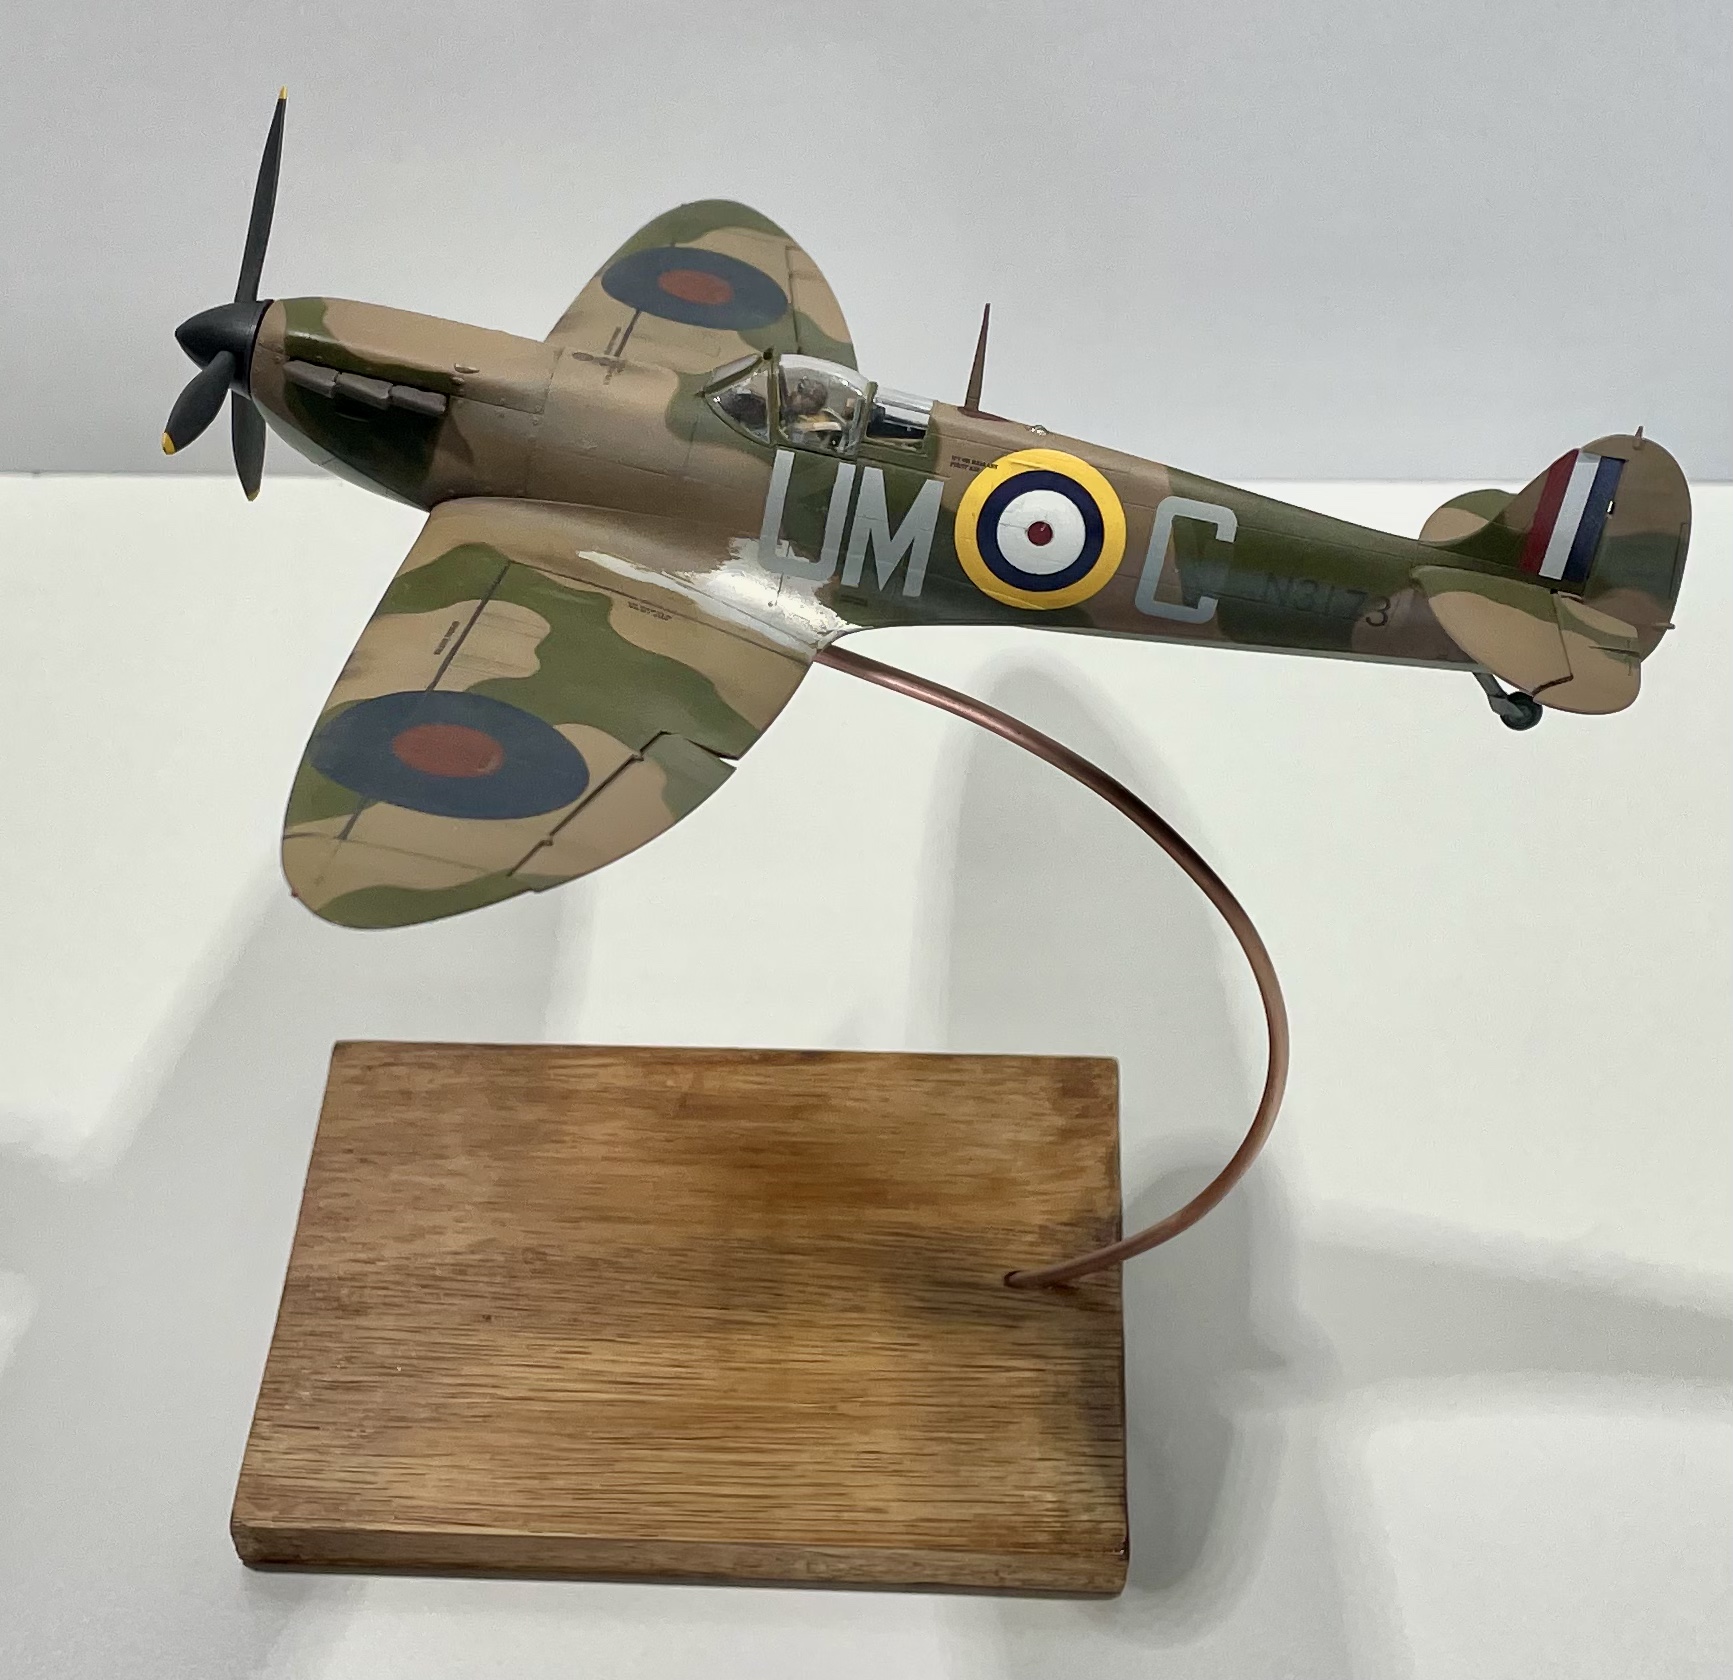
In deciding to build Sgt. Kenneth Holland’s Spitfire, my approach was necessarily based on his particular aircraft’s history. Spitfire Mk.Ia serial numbered N3173 was built at Eastleigh in November 1939 and was issued to No.54 Squadron in March 1940. Through the spring and early summer it was put to extensive use, including combat over Dunkirk, and usually piloted by a New Zealander, Pilot Officer Colin Gray. Towards the end of summer a heavy landing in saw it sent for repairs. It was subsequently issued to No.152 Squadron on 20th September where it was re-coded UM for 152 Squadron and given C as it’s own identifier.
In addition to knowing the airframe’s timeline, in particular its age and service history, it was also important to review relevant images. Below are my primary references in how to finish the paint and markings on my Spitfire.
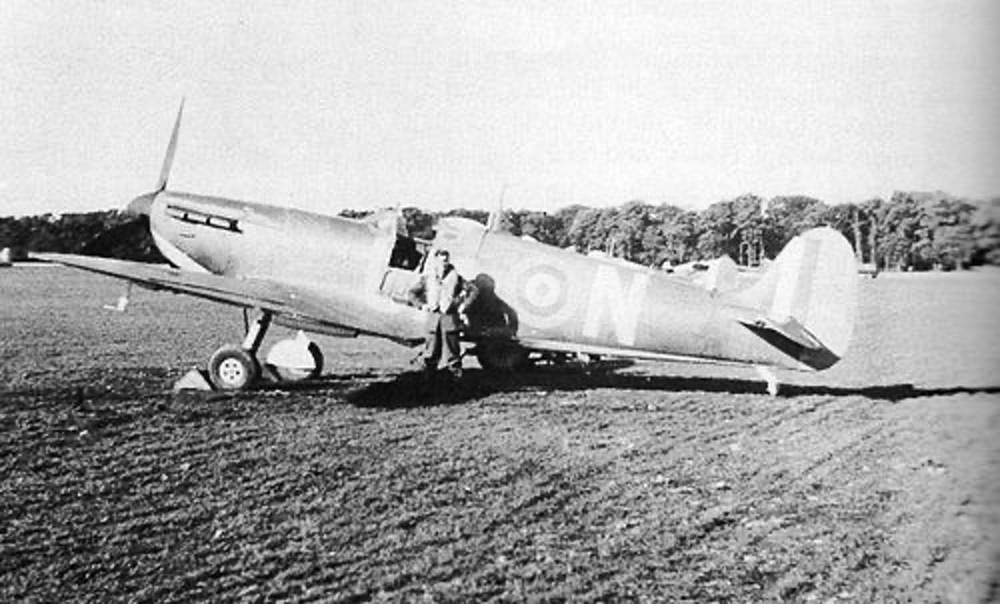
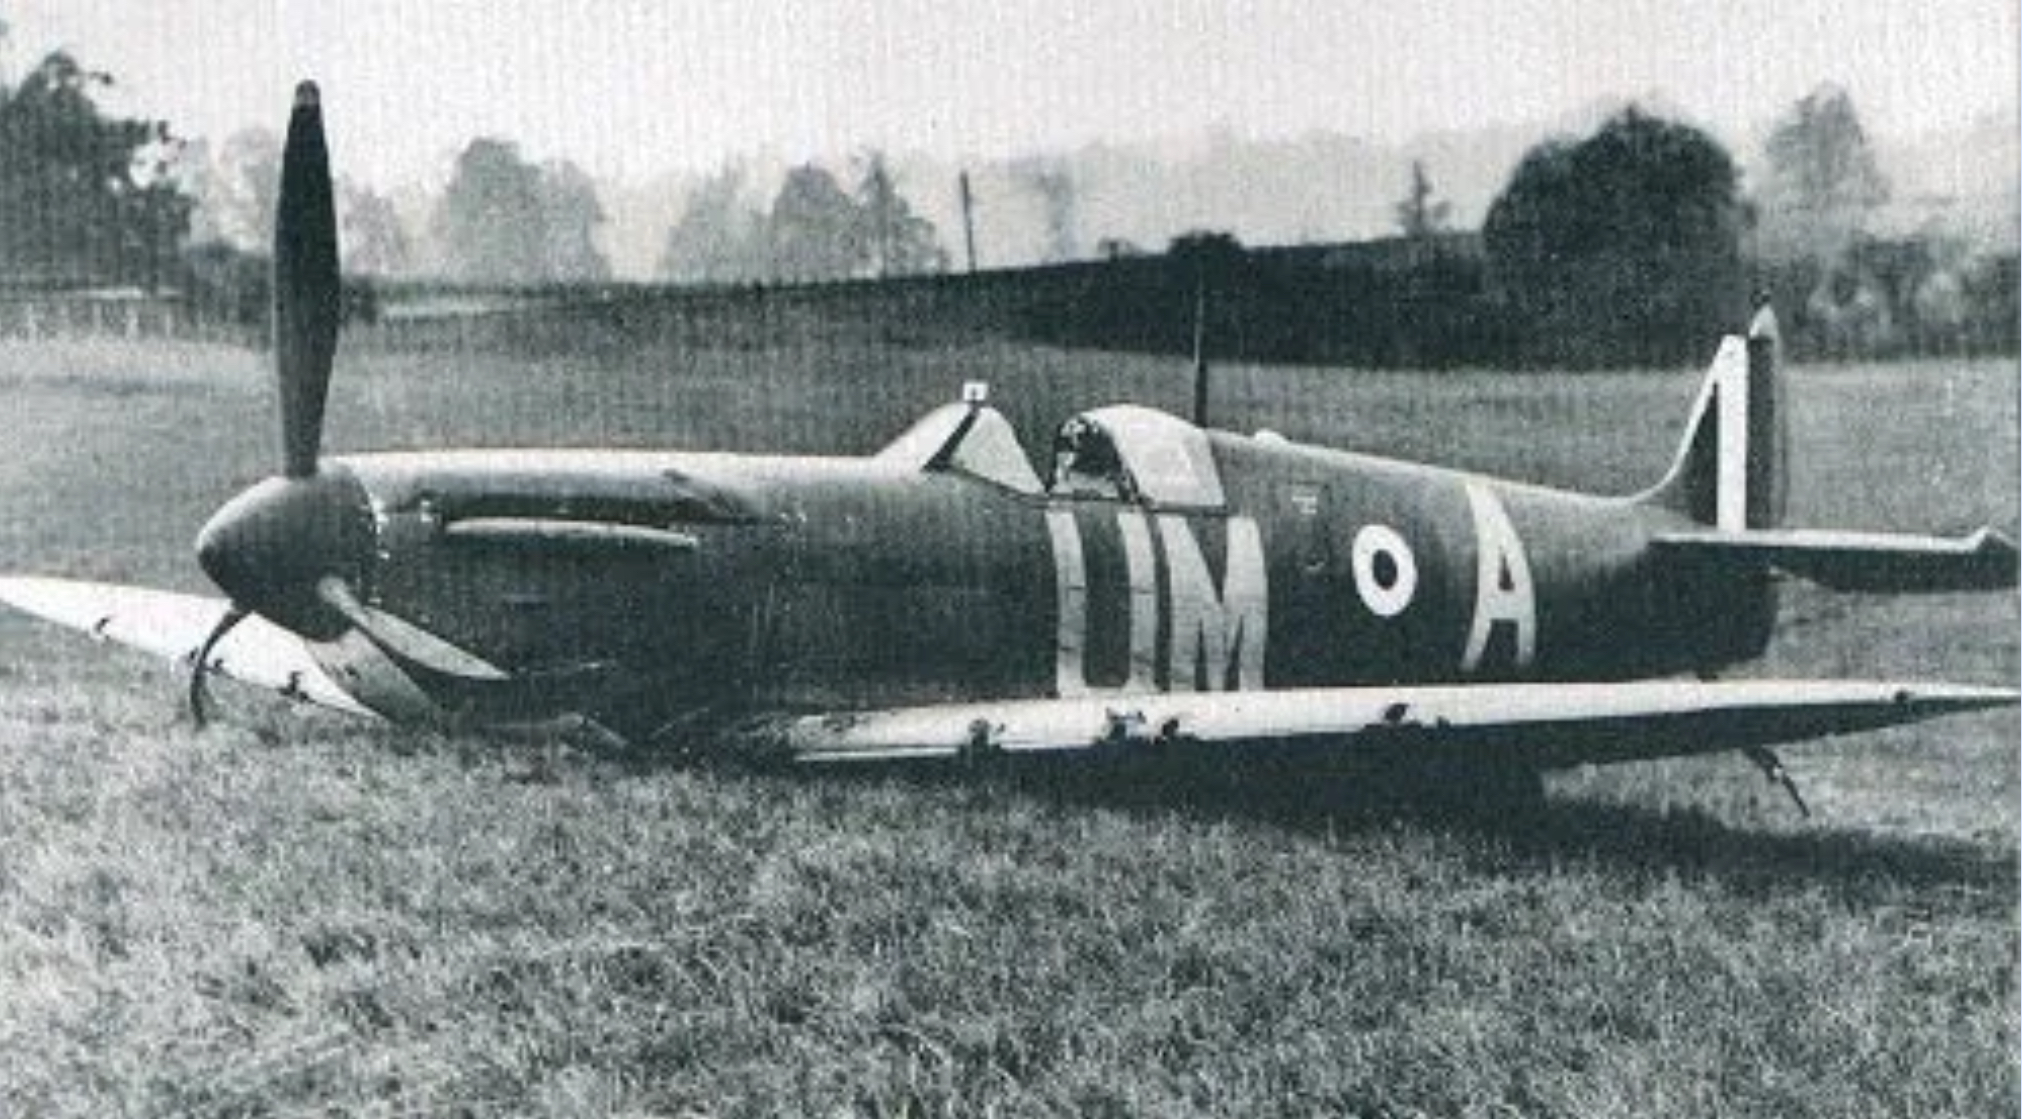
The first photo is of No. 152 Squadron’s S/L Peter K Devitt whose Spitfire Mk Ia UM-A belly landed after sustaining damage on 25th September in the same action as that which brought down Holland’s UM-C. Although not much can be gleaned about the weathering due to its quality, this image helped with the choices on the markings in particular, as well as some of the minor details like the antenna post.
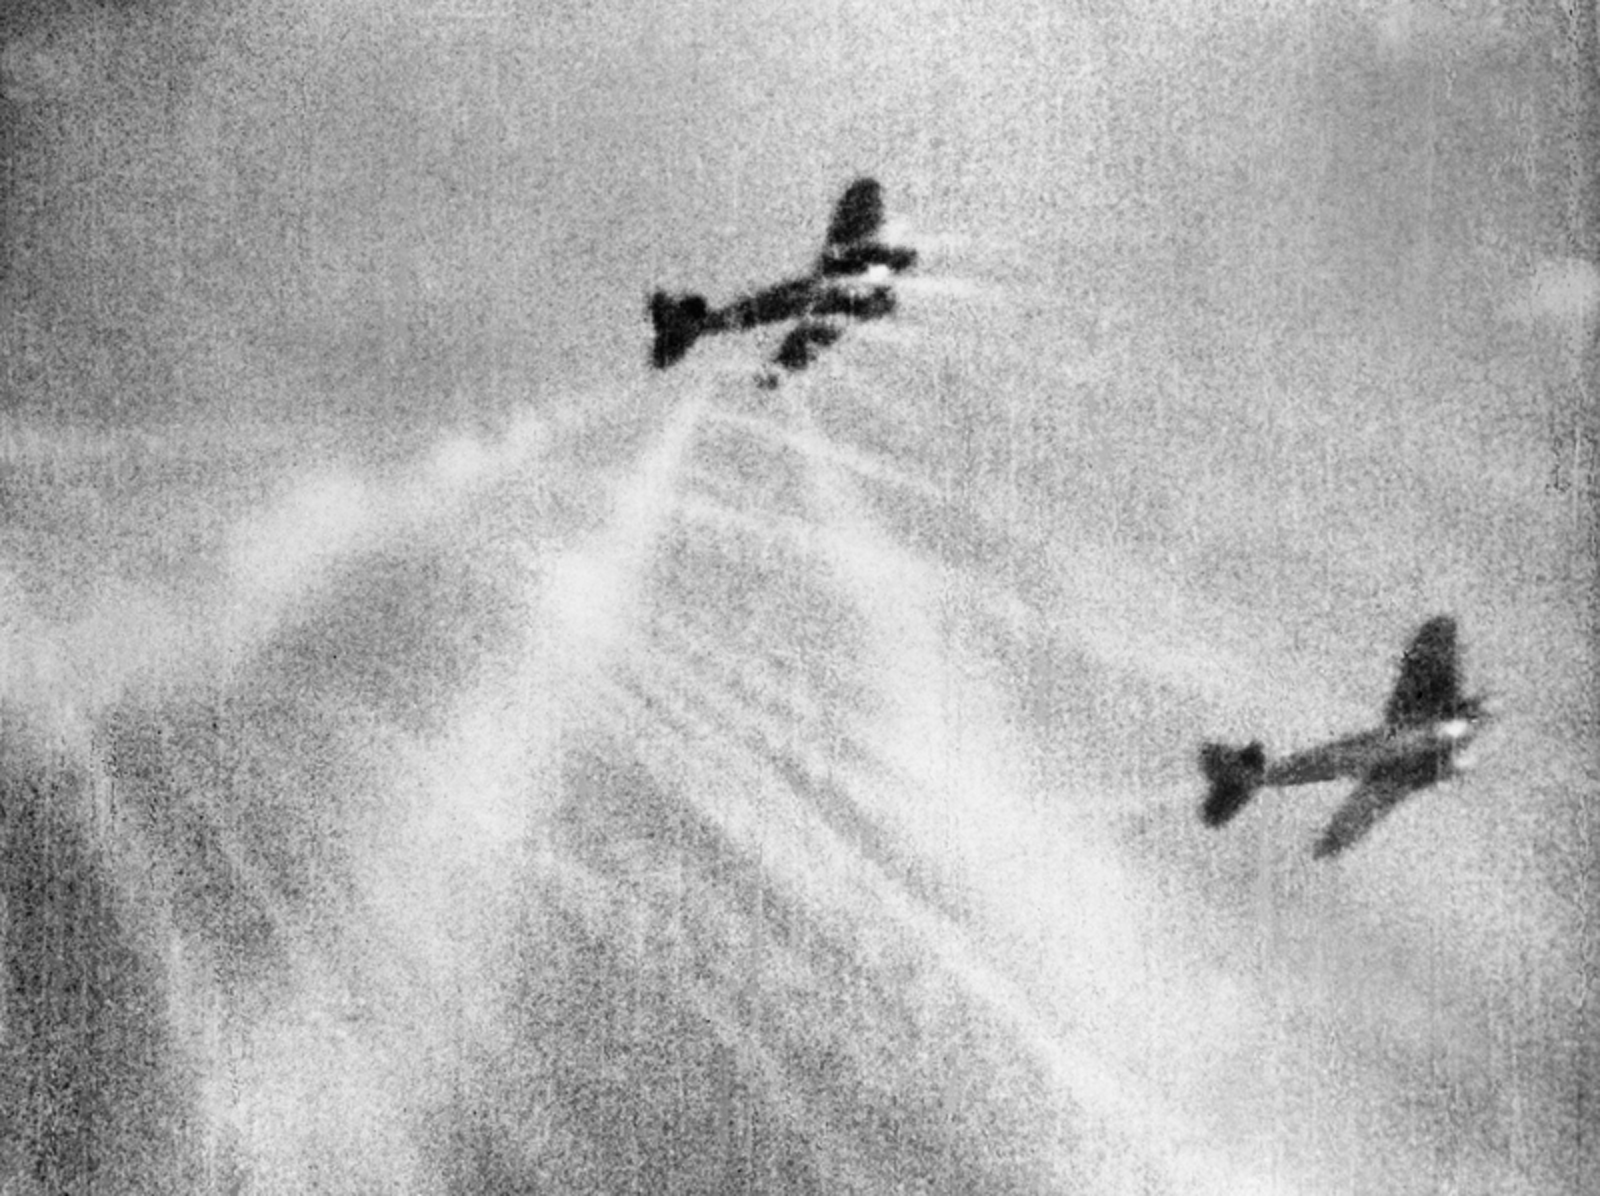
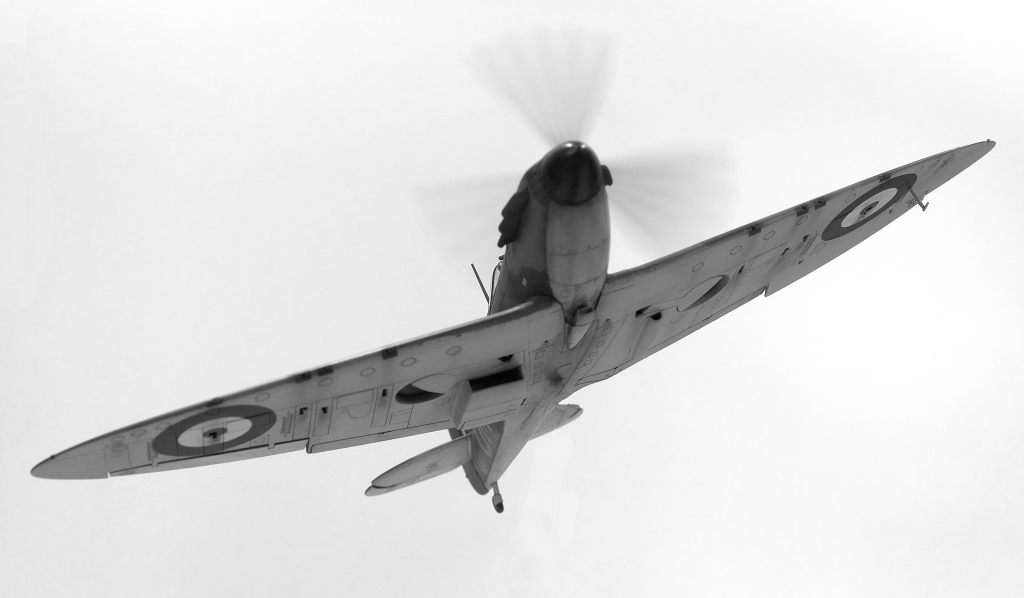
In terms of weathering is the photo below of a four month old Spitfire in early 1941. There’s lots to note here which had a direct bearing on how I approached the paint and weathering on my Spitfire.
- The paint is clearly distressed with significant tonal variety across the wings
- There are also variations in reflectivity; some areas look greasy/oiled
- There is fading evident in the surfaces exposed to direct sun, predominantly in the brown
- There is plenty of grime, noticeably around the gun and ammunition access panels
- The roundels exhibit fading/staining
- The paint is already worn away from the wing root, not much chipping elsewhere
- There is very little exhaust staining
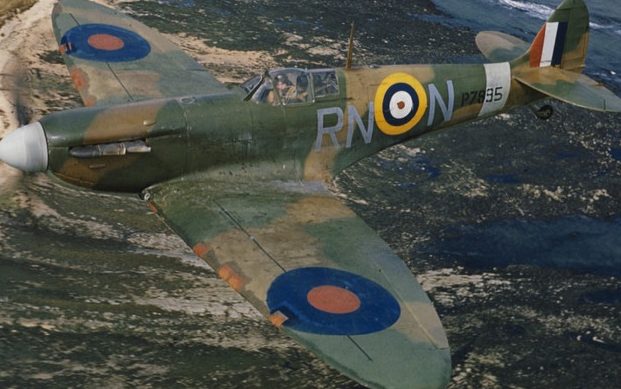
P7895 was a very worn Spitfire indeed! N3173 was older than this aircraft at the time it is modelled, and might therefore be expected to be even more worn. I didn’t think so though; while it had seen a lot of use, it had recently come from a maintenance unit. At this time in the Battle of Britain aircraft production was just keeping pace with losses and I while I didn’t think that it would have been repainted I did think it would have been cleaned up.
My plan therefore was to fade out the upper surfaces as they’d been in the sun for months and would have looked much like the photo above of RN-N. The same reasoning led me to believe the wing roots would still show considerable wear. That being the case, the new 152S codes would have been painted over the the old and on the bare metal left by the worn paint on the port wing root too; there would be evidence of the old codes being painted over. Although only a week with 152S when shot down N3173 was very active, there would be some grime. As it’s built and posed at the moment it was climbing to attack Hptm Brandt’s He111 there would be cordite stains at the guns and the shell ejection chutes. And finally, there would of course be the ubiquitous Spitfire oil stains.
Paint
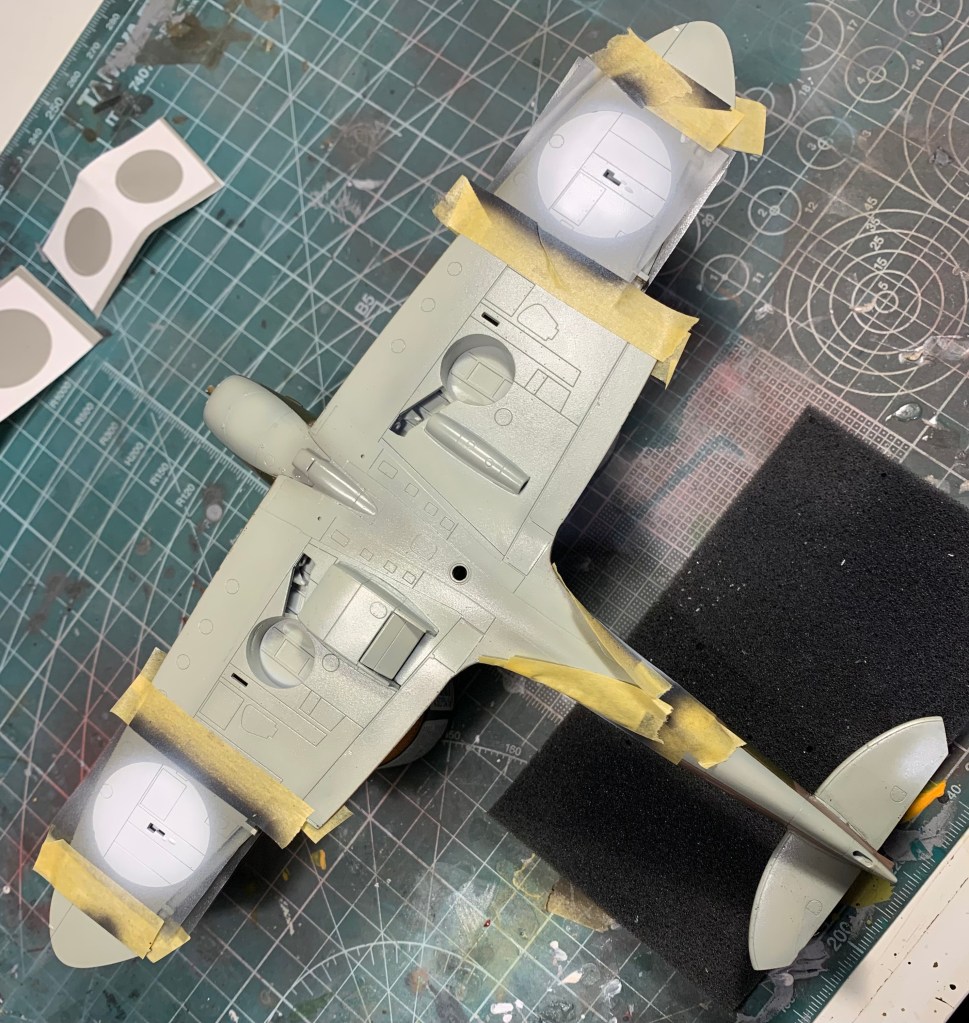
I usually begin with the underside and this one was no exception. First up, a pre-shade.

Next, a finely modulated coat of Sky Type “S” using Hataka acrylic paint as I’d had a good experience with it on the “G” for George Lancaster last year.

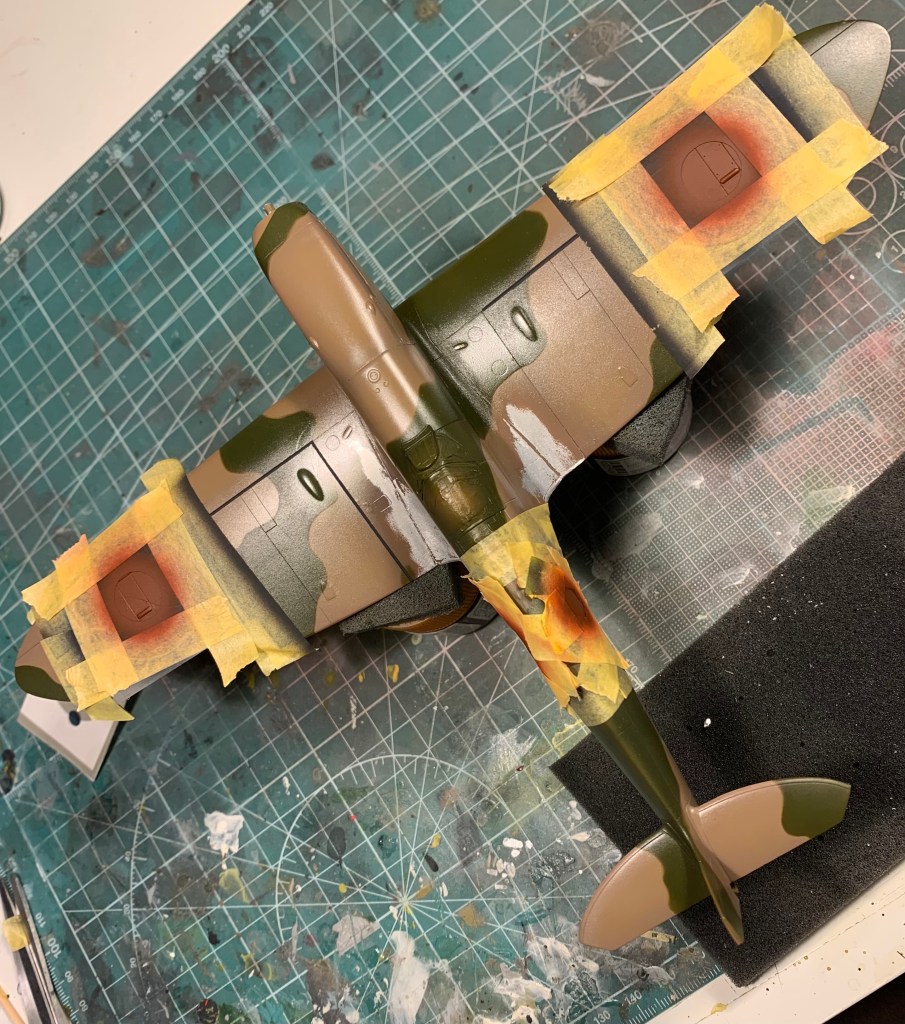
So far so good. Next, a pre-shade applied to the topsides and ready for the brown, also Hataka.
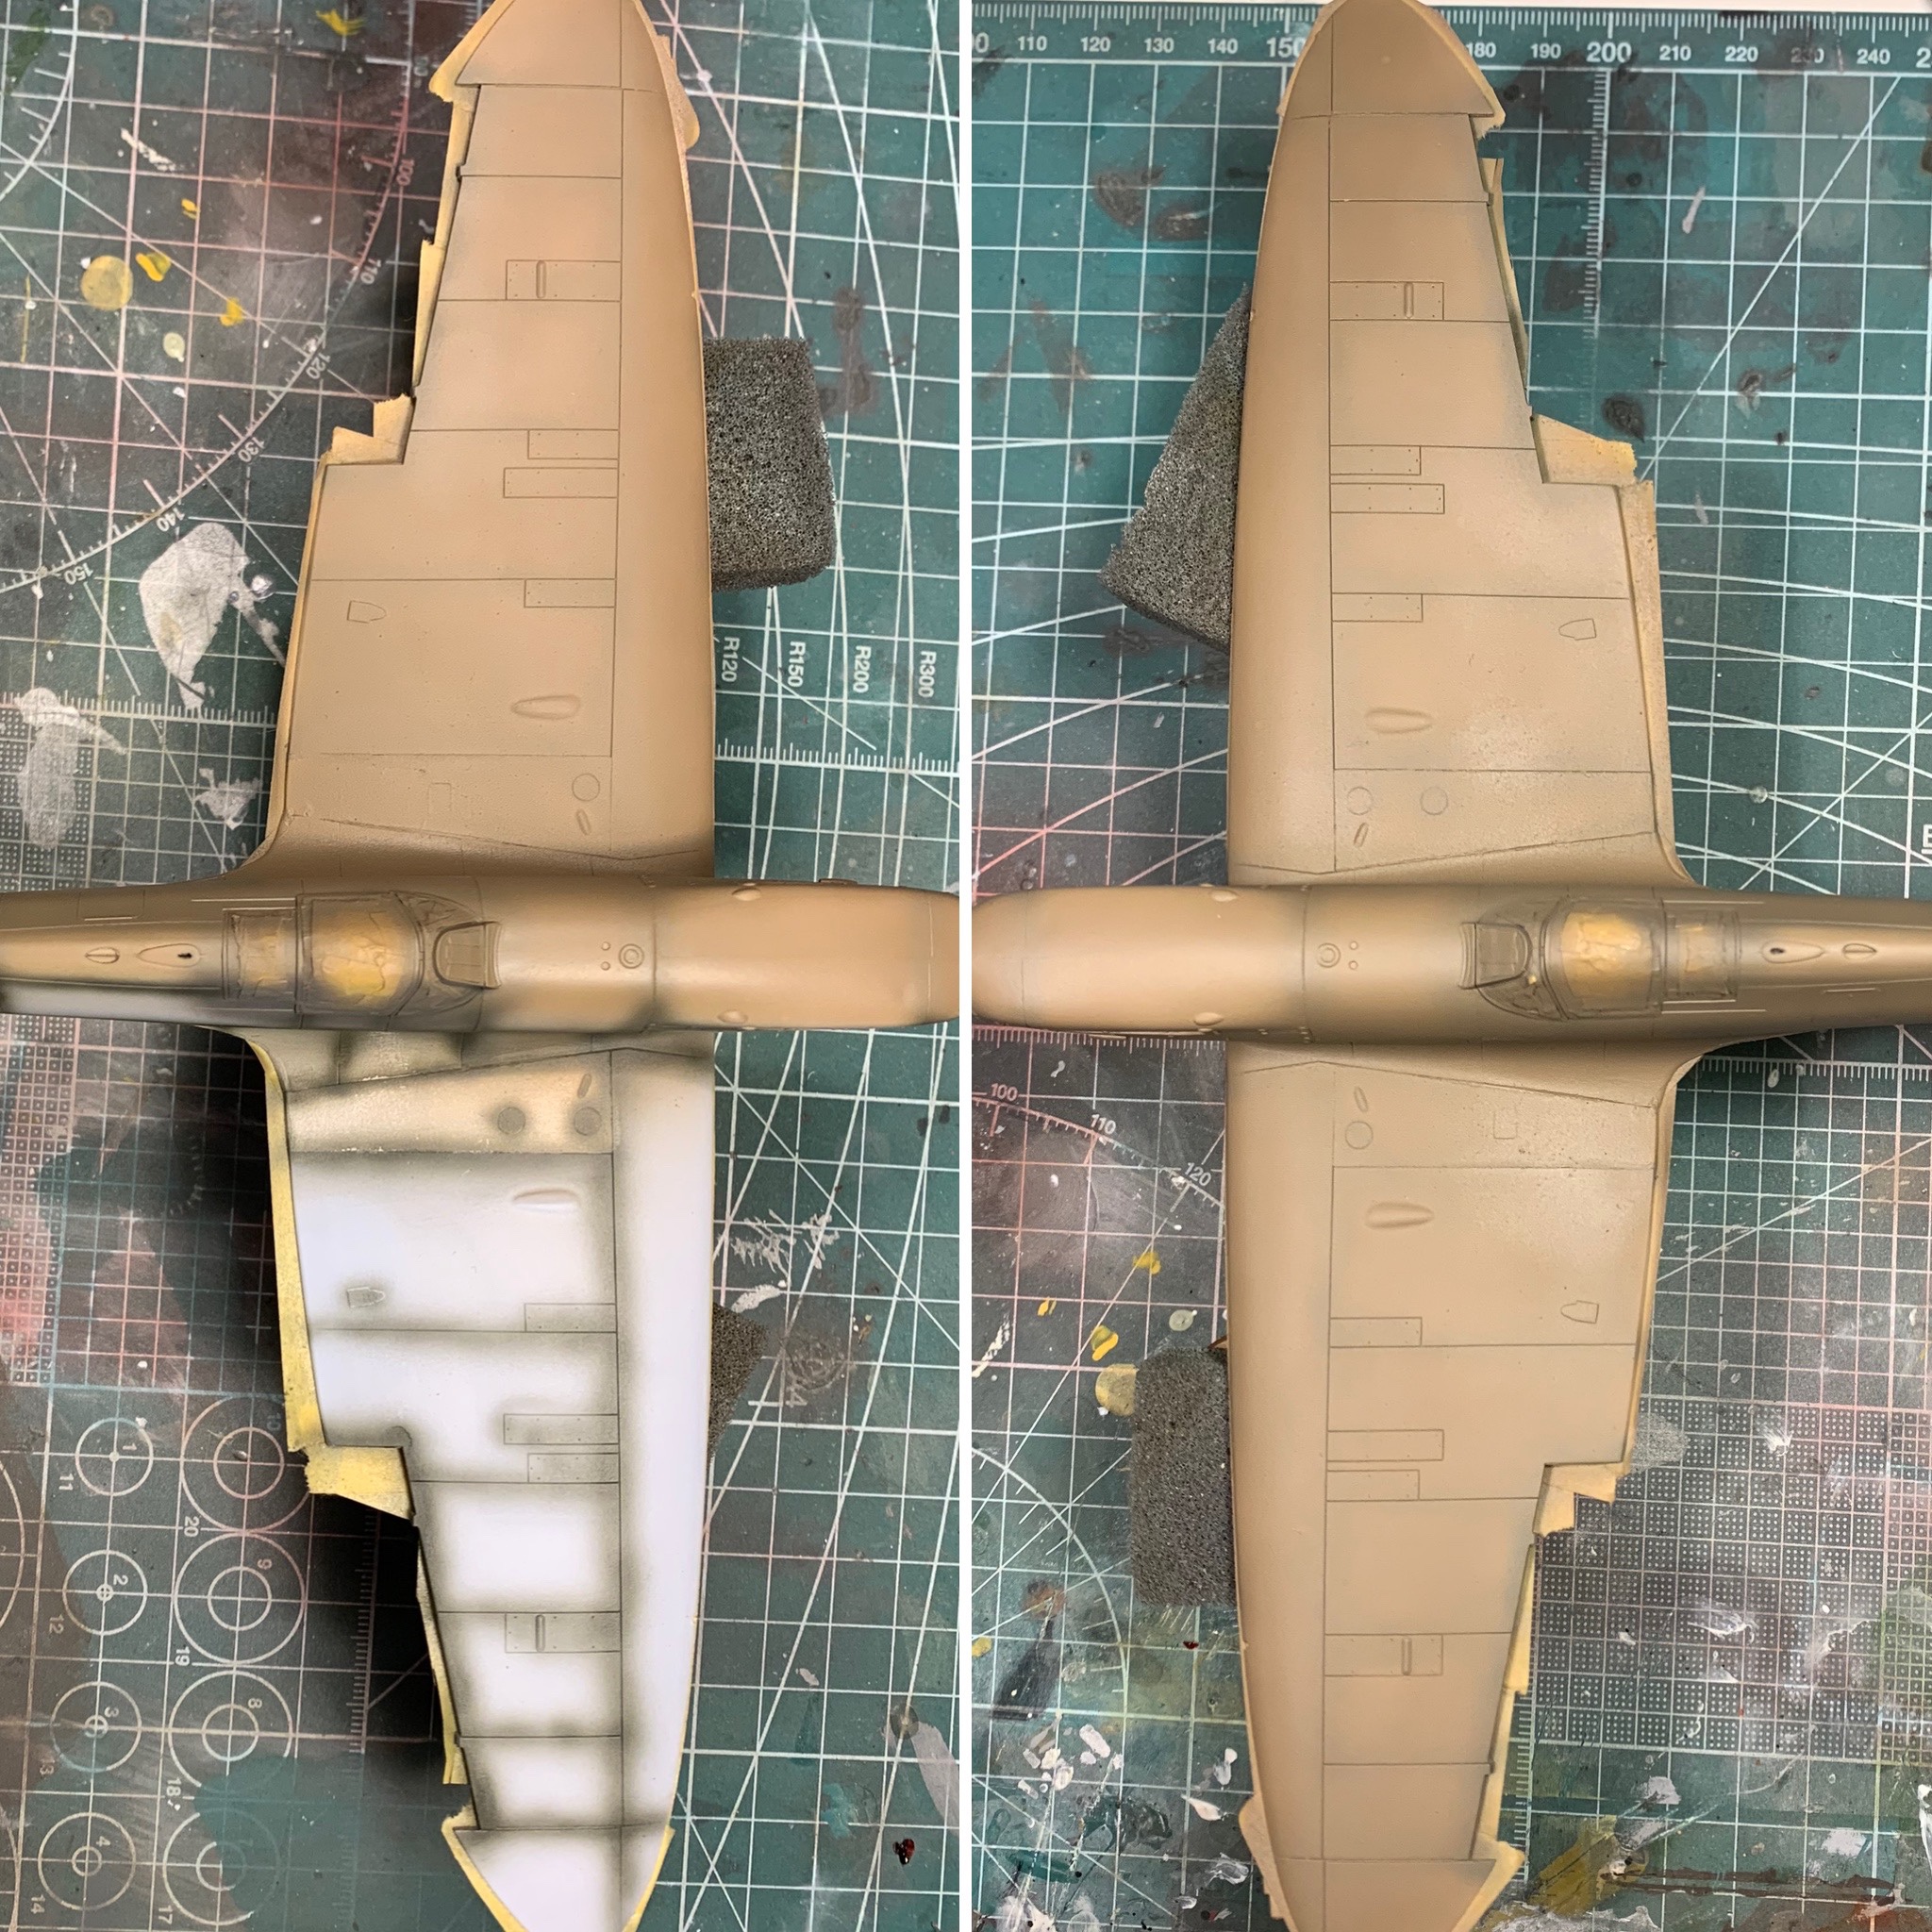
The brown was a little tricky to apply, I had trouble getting the thinning right and was getting a lot tip drying. Nonetheless, the coat was finished and looked good. I put the model aside to dry and moved on.
To cut a sad story short, the paint simply didn’t cure and I had to remove it. It looked great, but the slightest touch damaged the finish and then it scratched and that was that. Removing it was surprisingly easy to do, because it hadn’t cured. I hoped the now-masked under surface paint was still intact after the handling necessary to remove the brown.
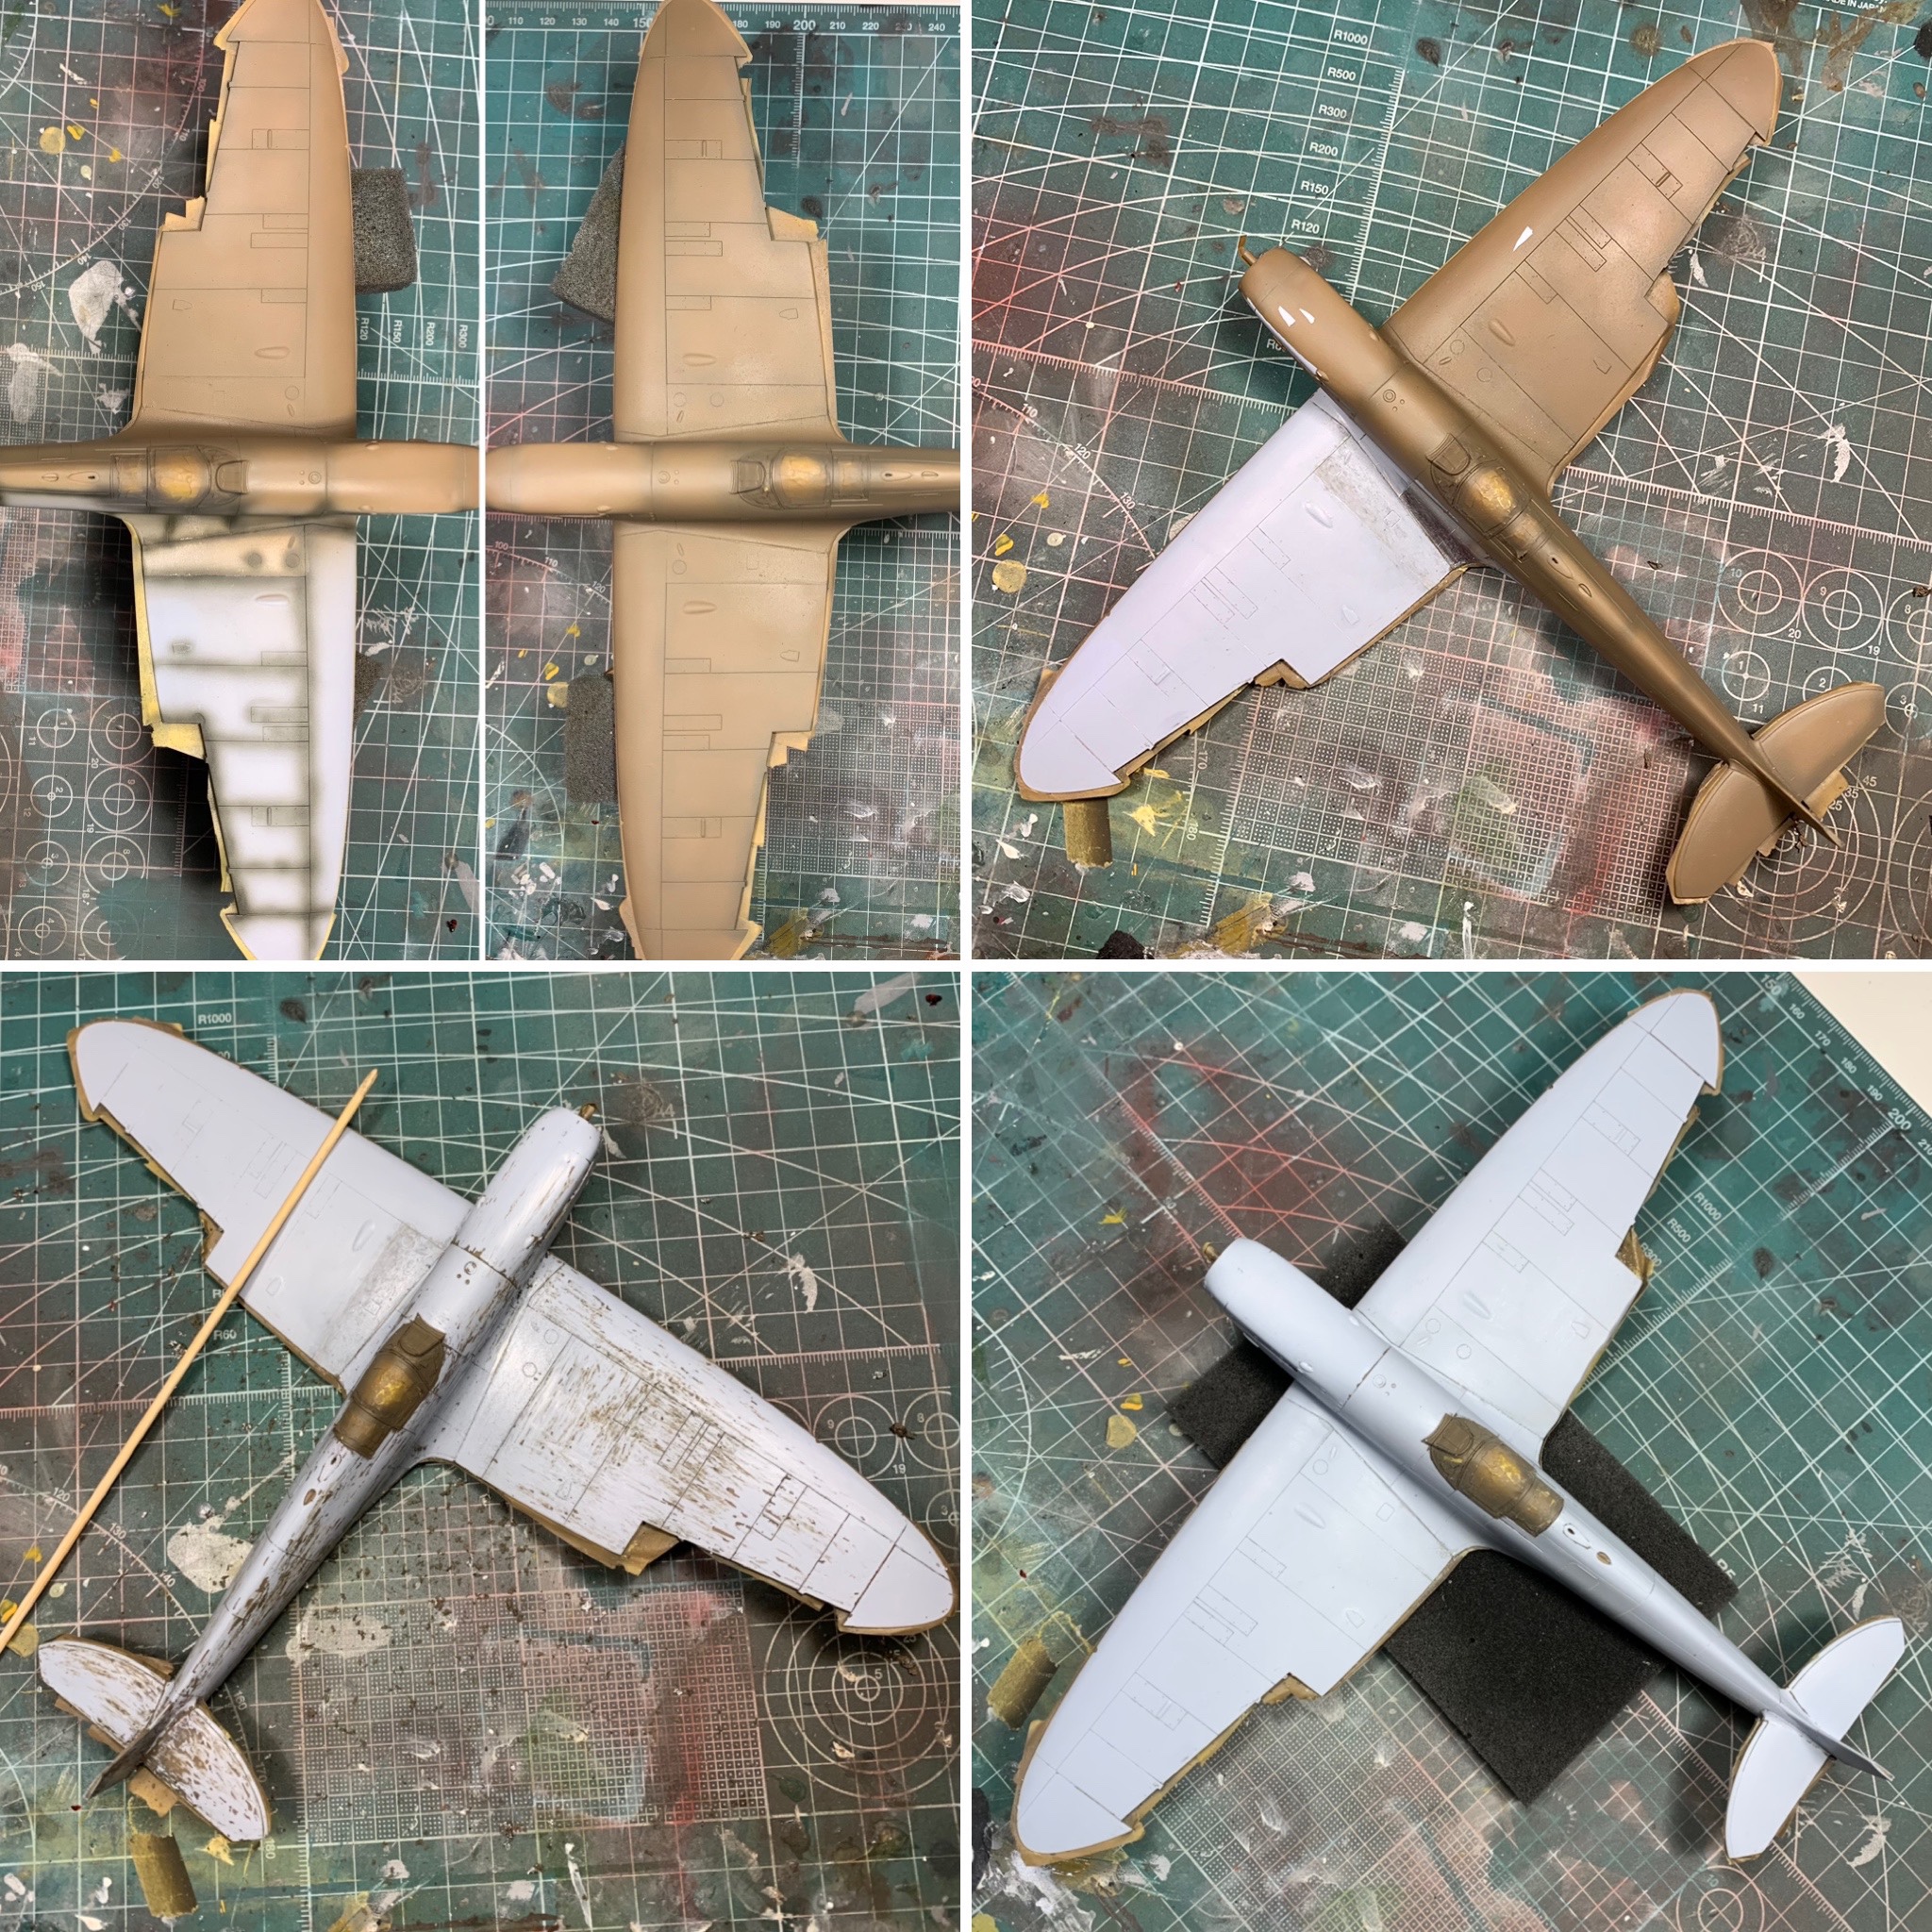
I decided to switch tack and use the craft acrylics I’d used previously on the Fw190D as that had worked out very well, the finish is basically bullet proof and I had the colours to mix the RAF Dark Earth and Dark Green.
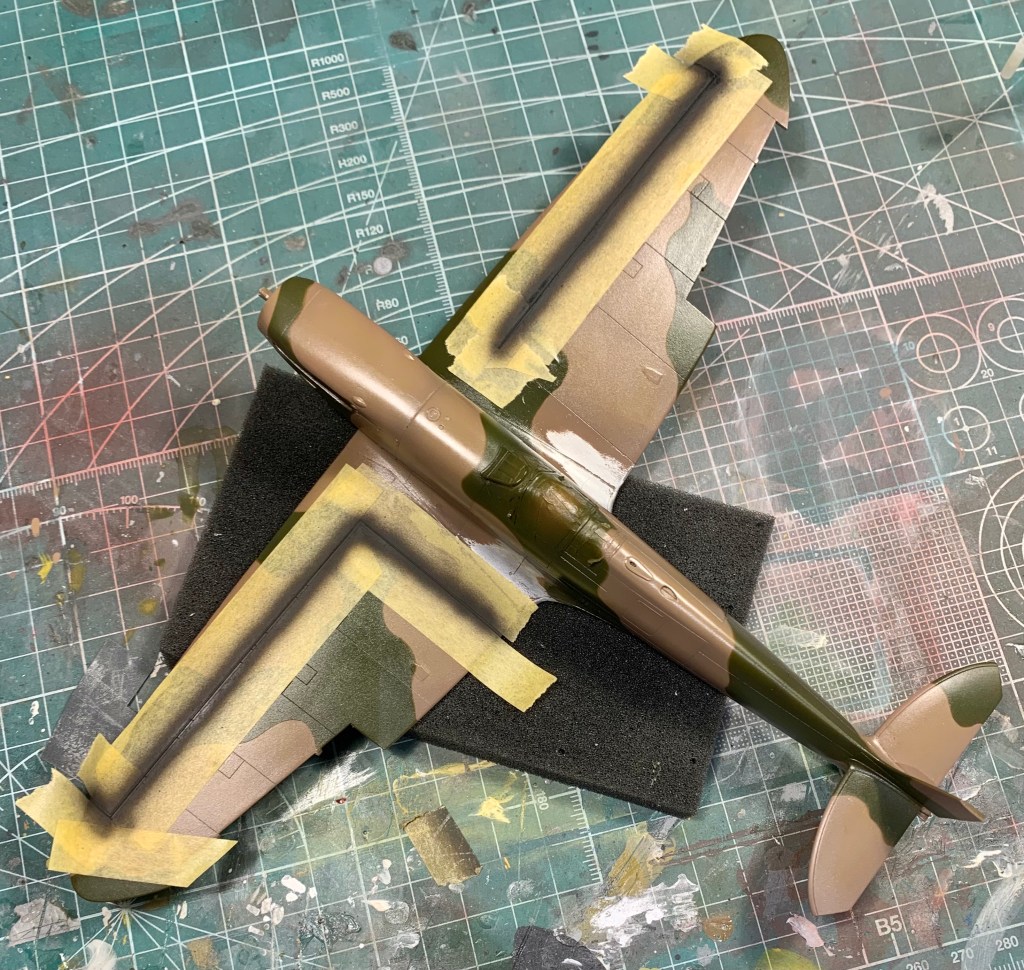
I worked in a fair amount of fading noting that brown tends to yellow under the sun. I over-applied the weathering in expectation that the subsequent coats of clear gloss and then the finishing coats would in and of themselves tone the contrast down.

I masked with blutack, though well pressed down because I wanted a hard edge to the scheme as was the norm at that point in Spitfire production. With masking done, I applied a dark brown pre-shade to begin the texturing process of faded paint.

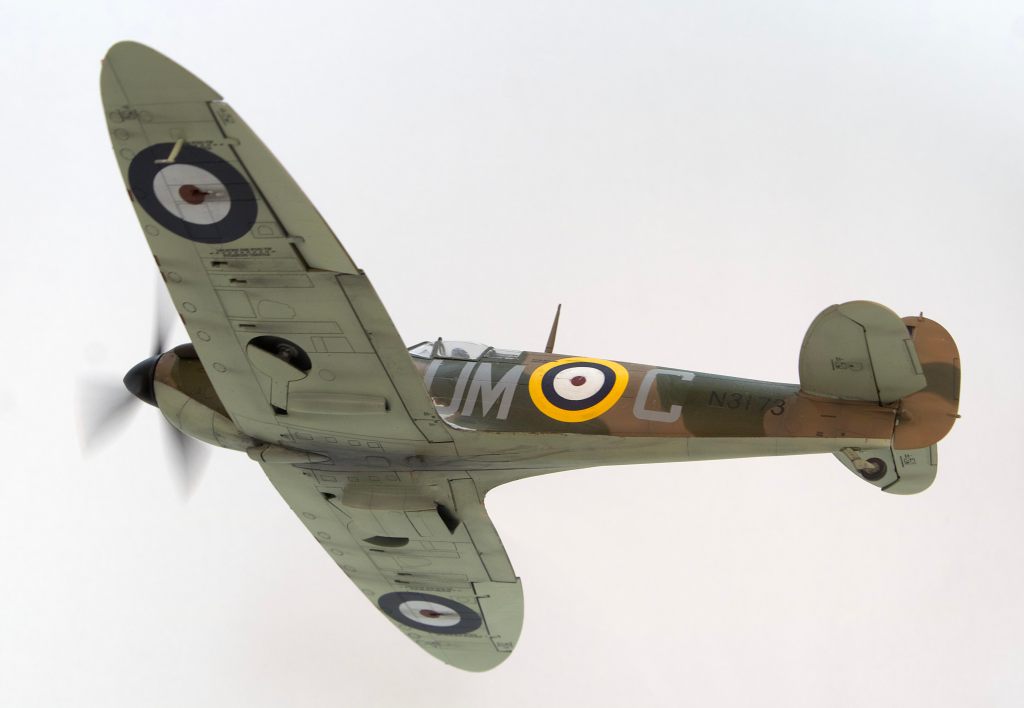
In this slightly blown out image the final paint scheme is evident, and was more or less exactly what I was aiming at. Both colours were expected to darker under gloss coat and remain so with the finish coat applied.
Next, I used both a toothpick as well as some 800grit emery cloth to remove the paint at the wing roots to expose the bare metal foil.
Markings
I decided to paint the “do Not Walk” lines as well as the roundels. This was a mostly straightforward process using the excellent masks from Pmask though I did have a moment of brain failure when I initially applied the wrong fuselage roundels.


I used decals for the fin flash as well as the squadron codes – I had to assemble one of the required “M” decals from pieces of other letters as I ran out of Ms. I used Future as the setting solution for the stencils and serial number to ensure no silvering.

One thing that did disappoint was the paint ridge on the port wing under the roundel, visible above. This was from the only masking where I used tape instead of blutack and a good reminder to be careful with paint build-up. I was hopeful it would disappear under the finishing coats – it mostly did.
Weathering
I followed my normal process with the weathering except for the application of the oil streaks. For these mixed a black goop of slightly more viscous wash and, using a small brush to carefully place a drop of “oil” near the carb intake, I blew it back with the air form my airbrush. This gave the realistic effect – I think – of exactly what happens in real life. To a lesser extent I did the same for the engine cowling. Otherwise I used a wash to accent the flaps and access panels and my airbrush with a thinned darkish mix for the other generic staining.
Lastly, I dulled down the finish from gloss using my usual “flat future” mix everywhere except the oil staining in the centre of the fuselage as that would have been shiny.
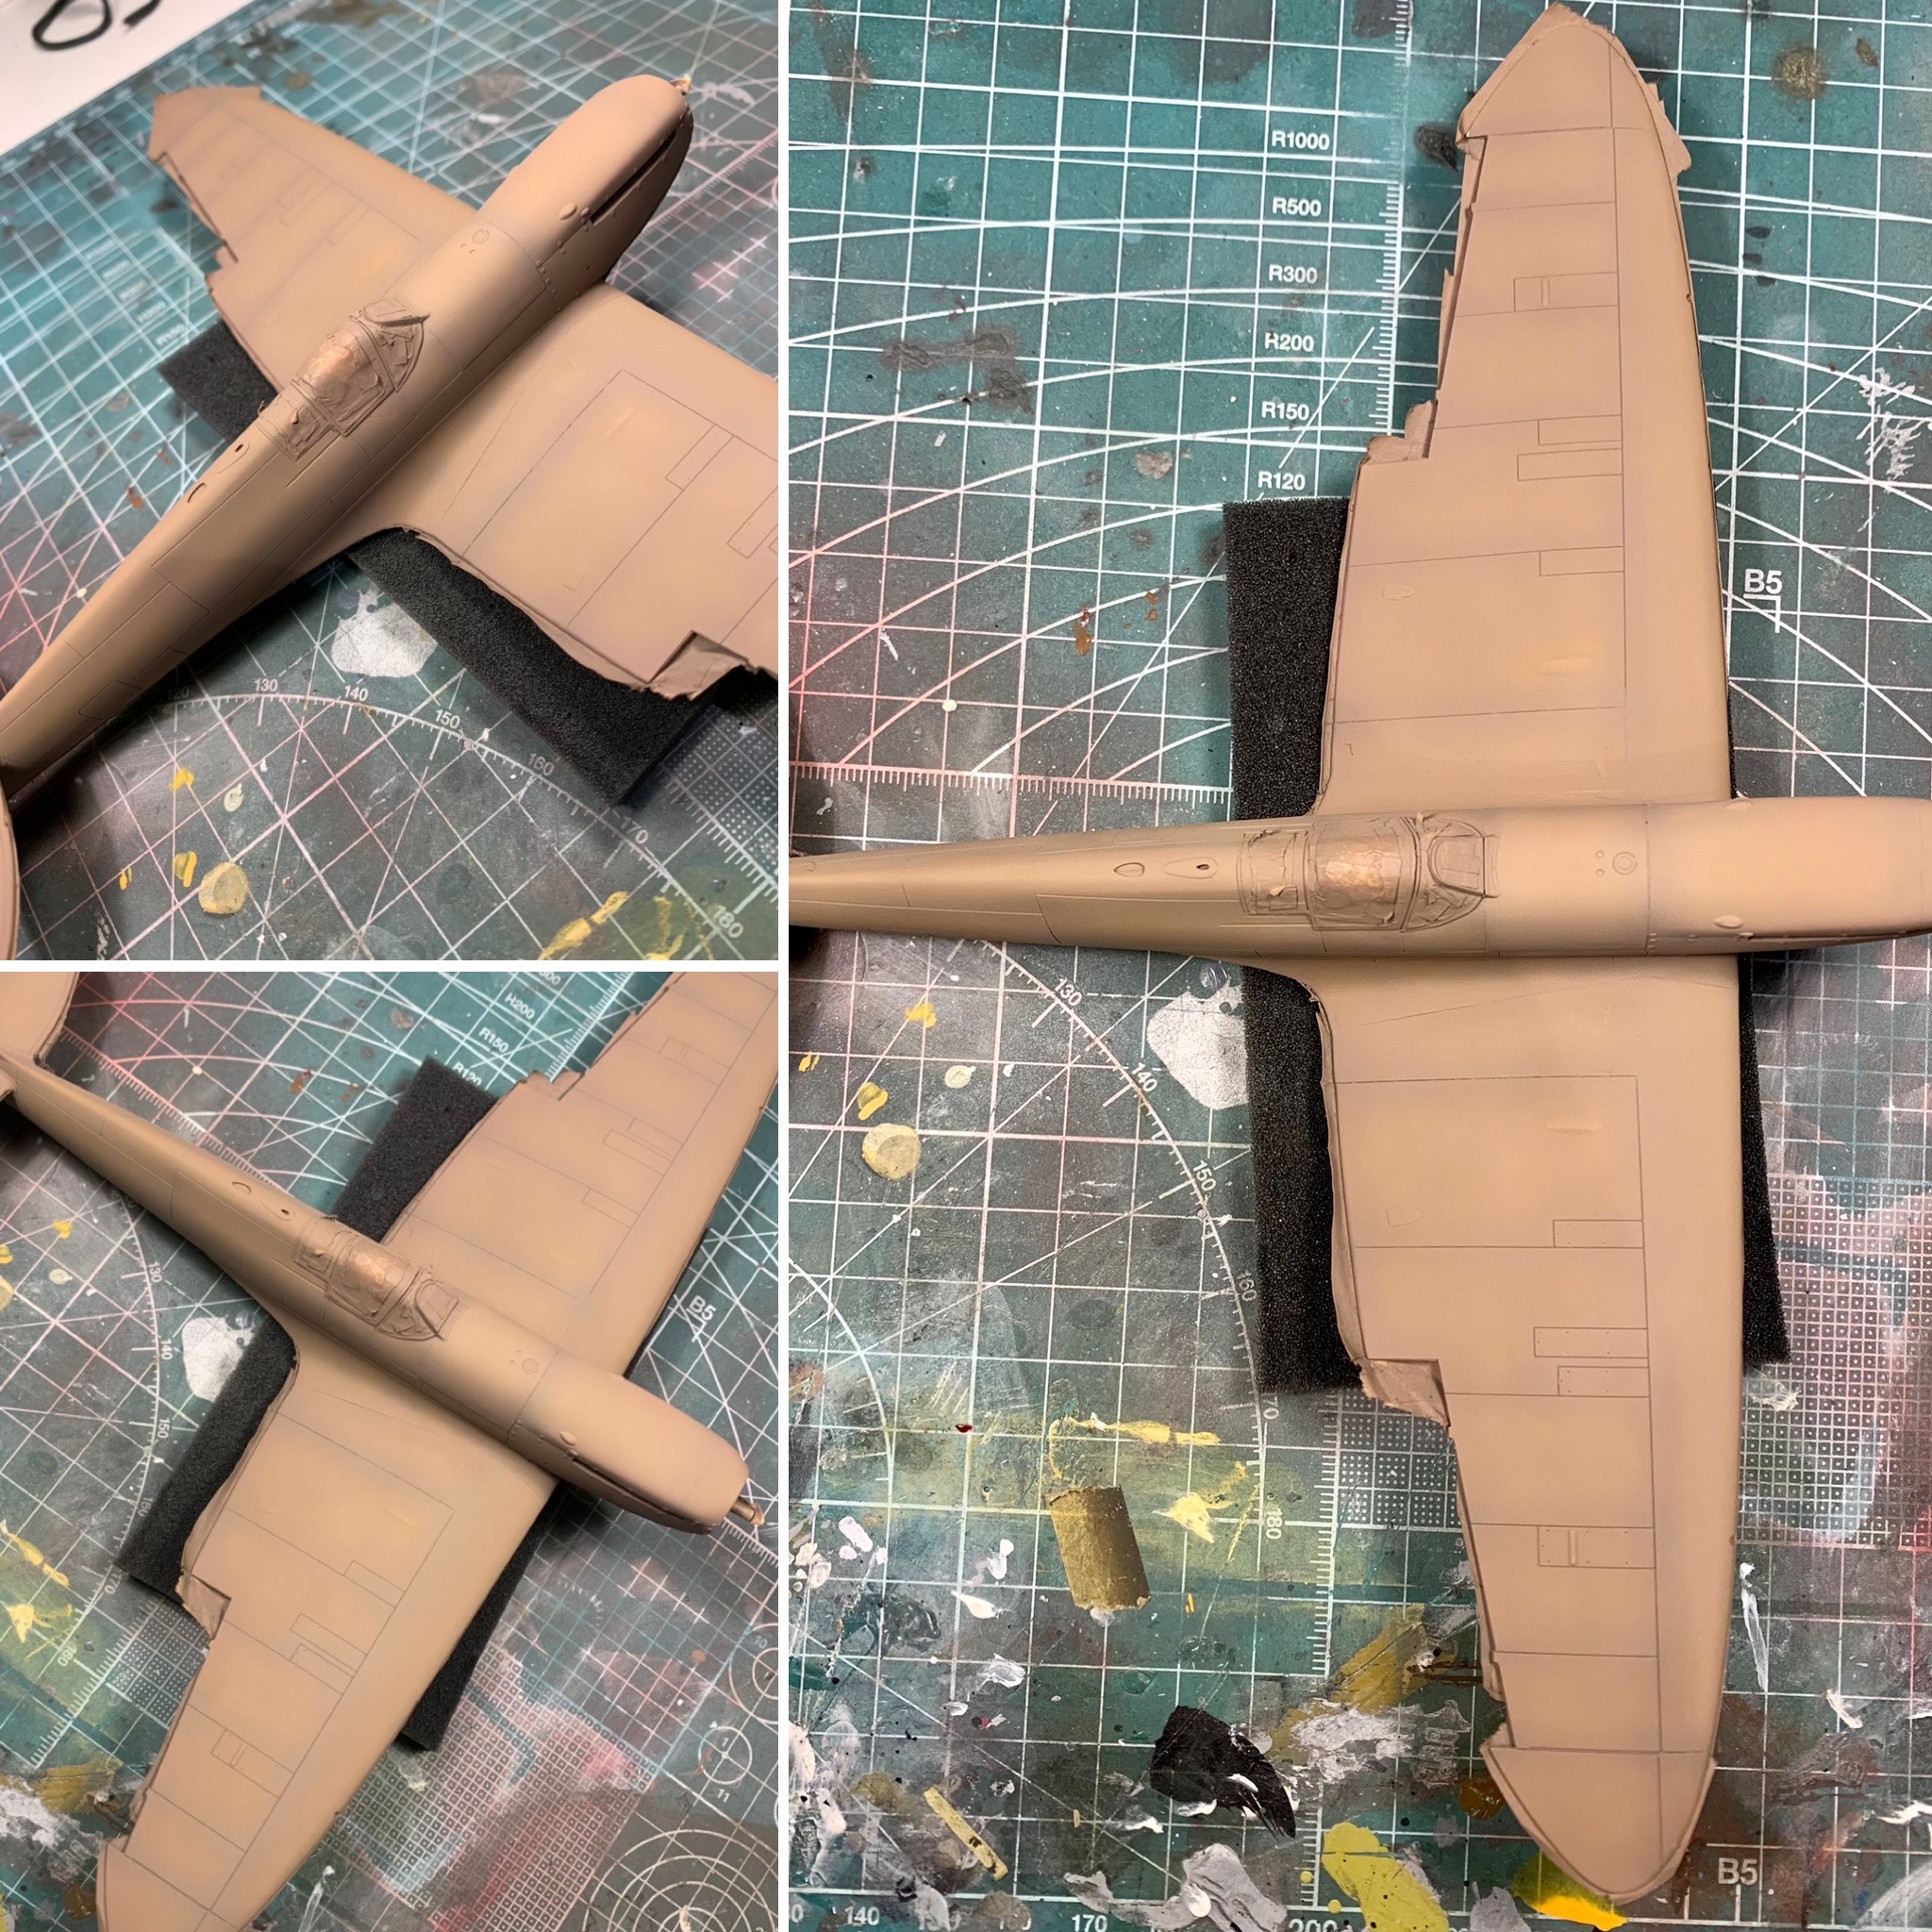
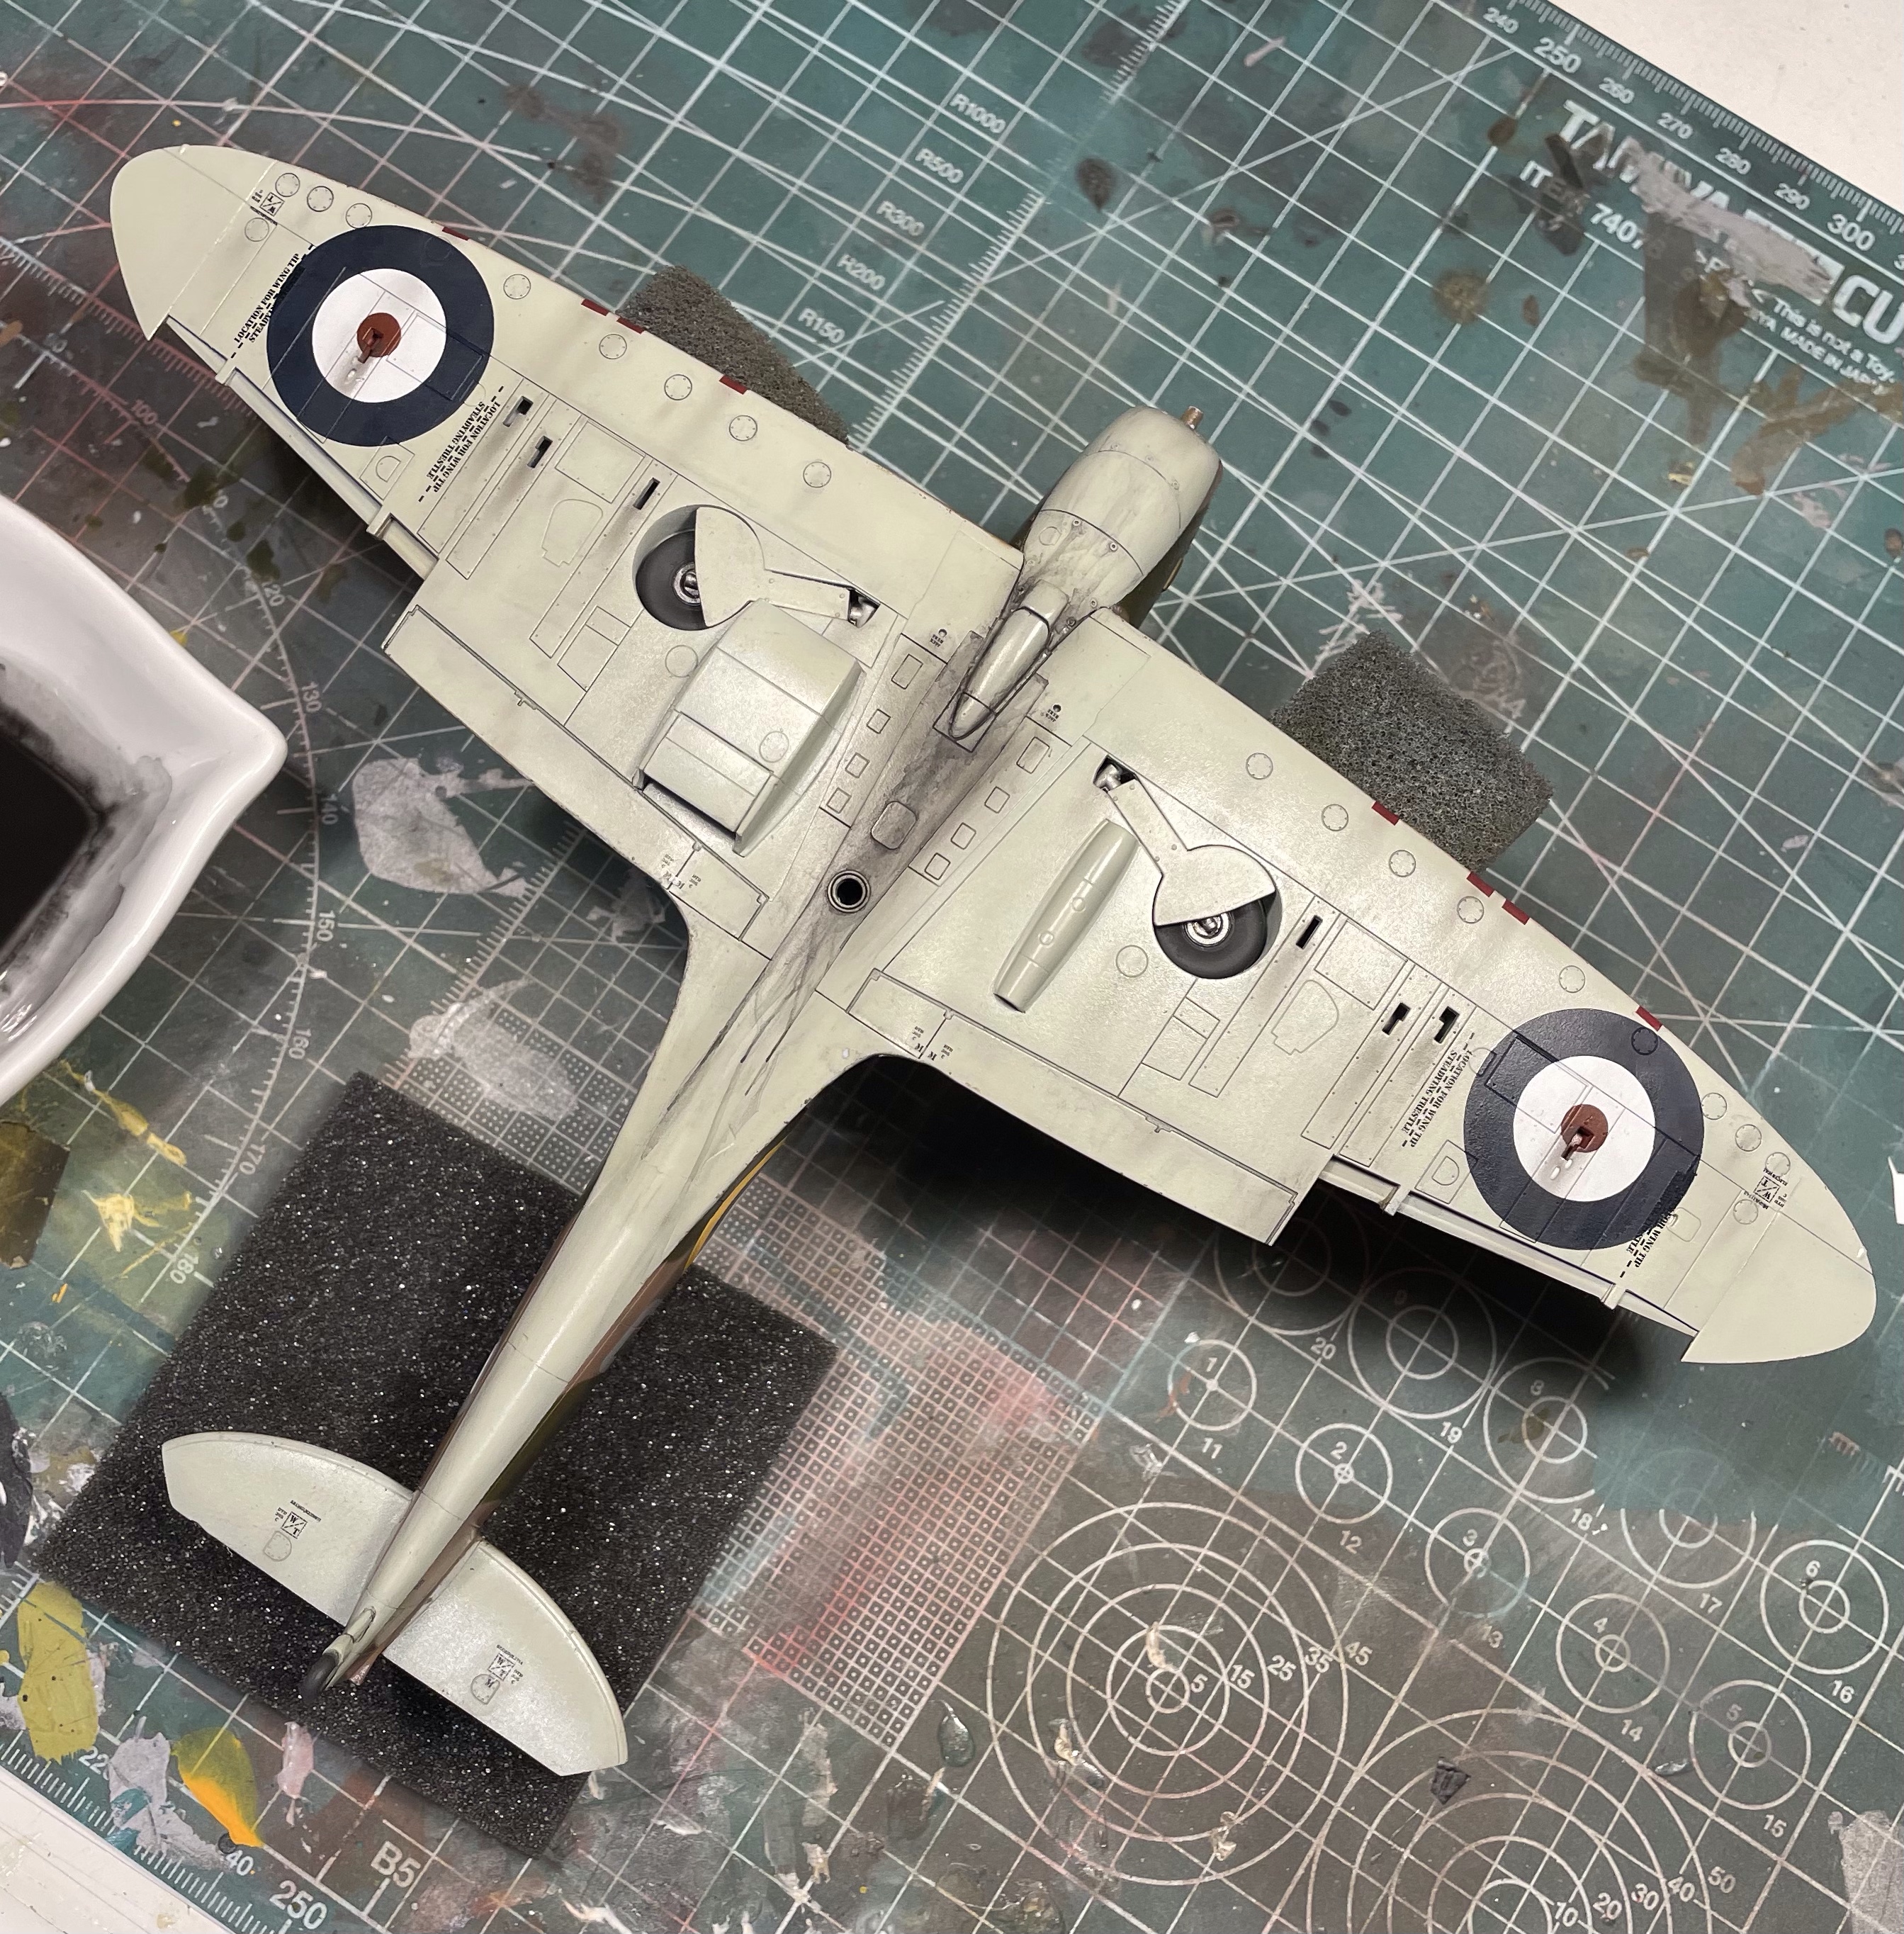
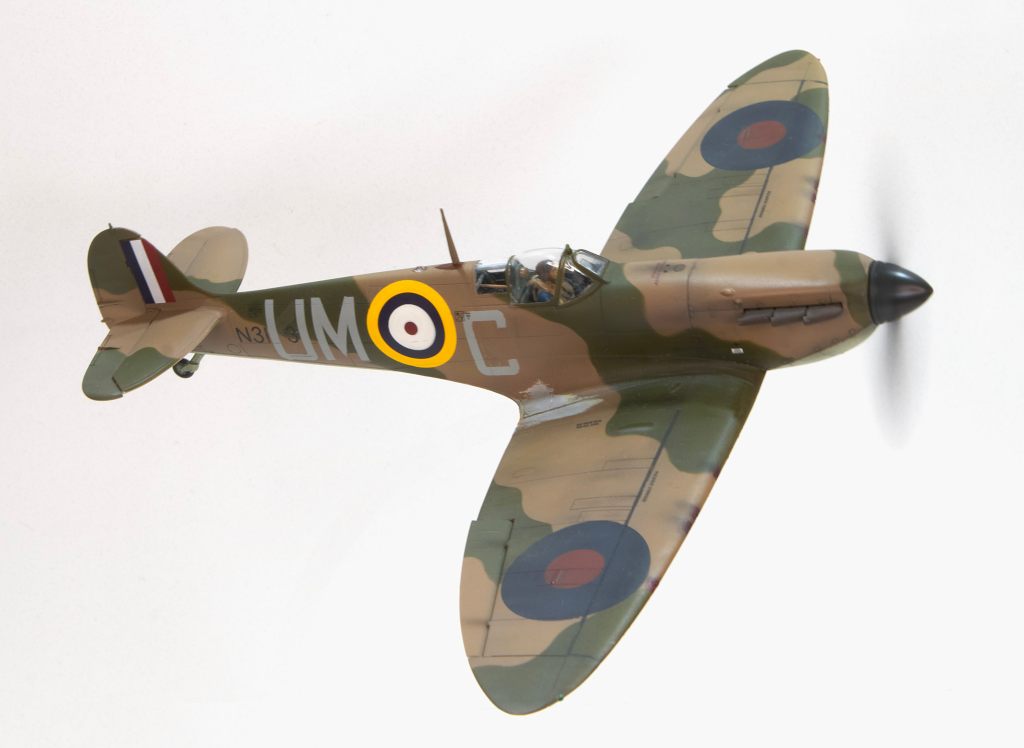
I turned the model over and began on the uppers in much the same vein. However, I felt that the tonal changes in the wing surfaces would require some oil. I used vegetable oil(!) to essentially stain the paint into varying hues.
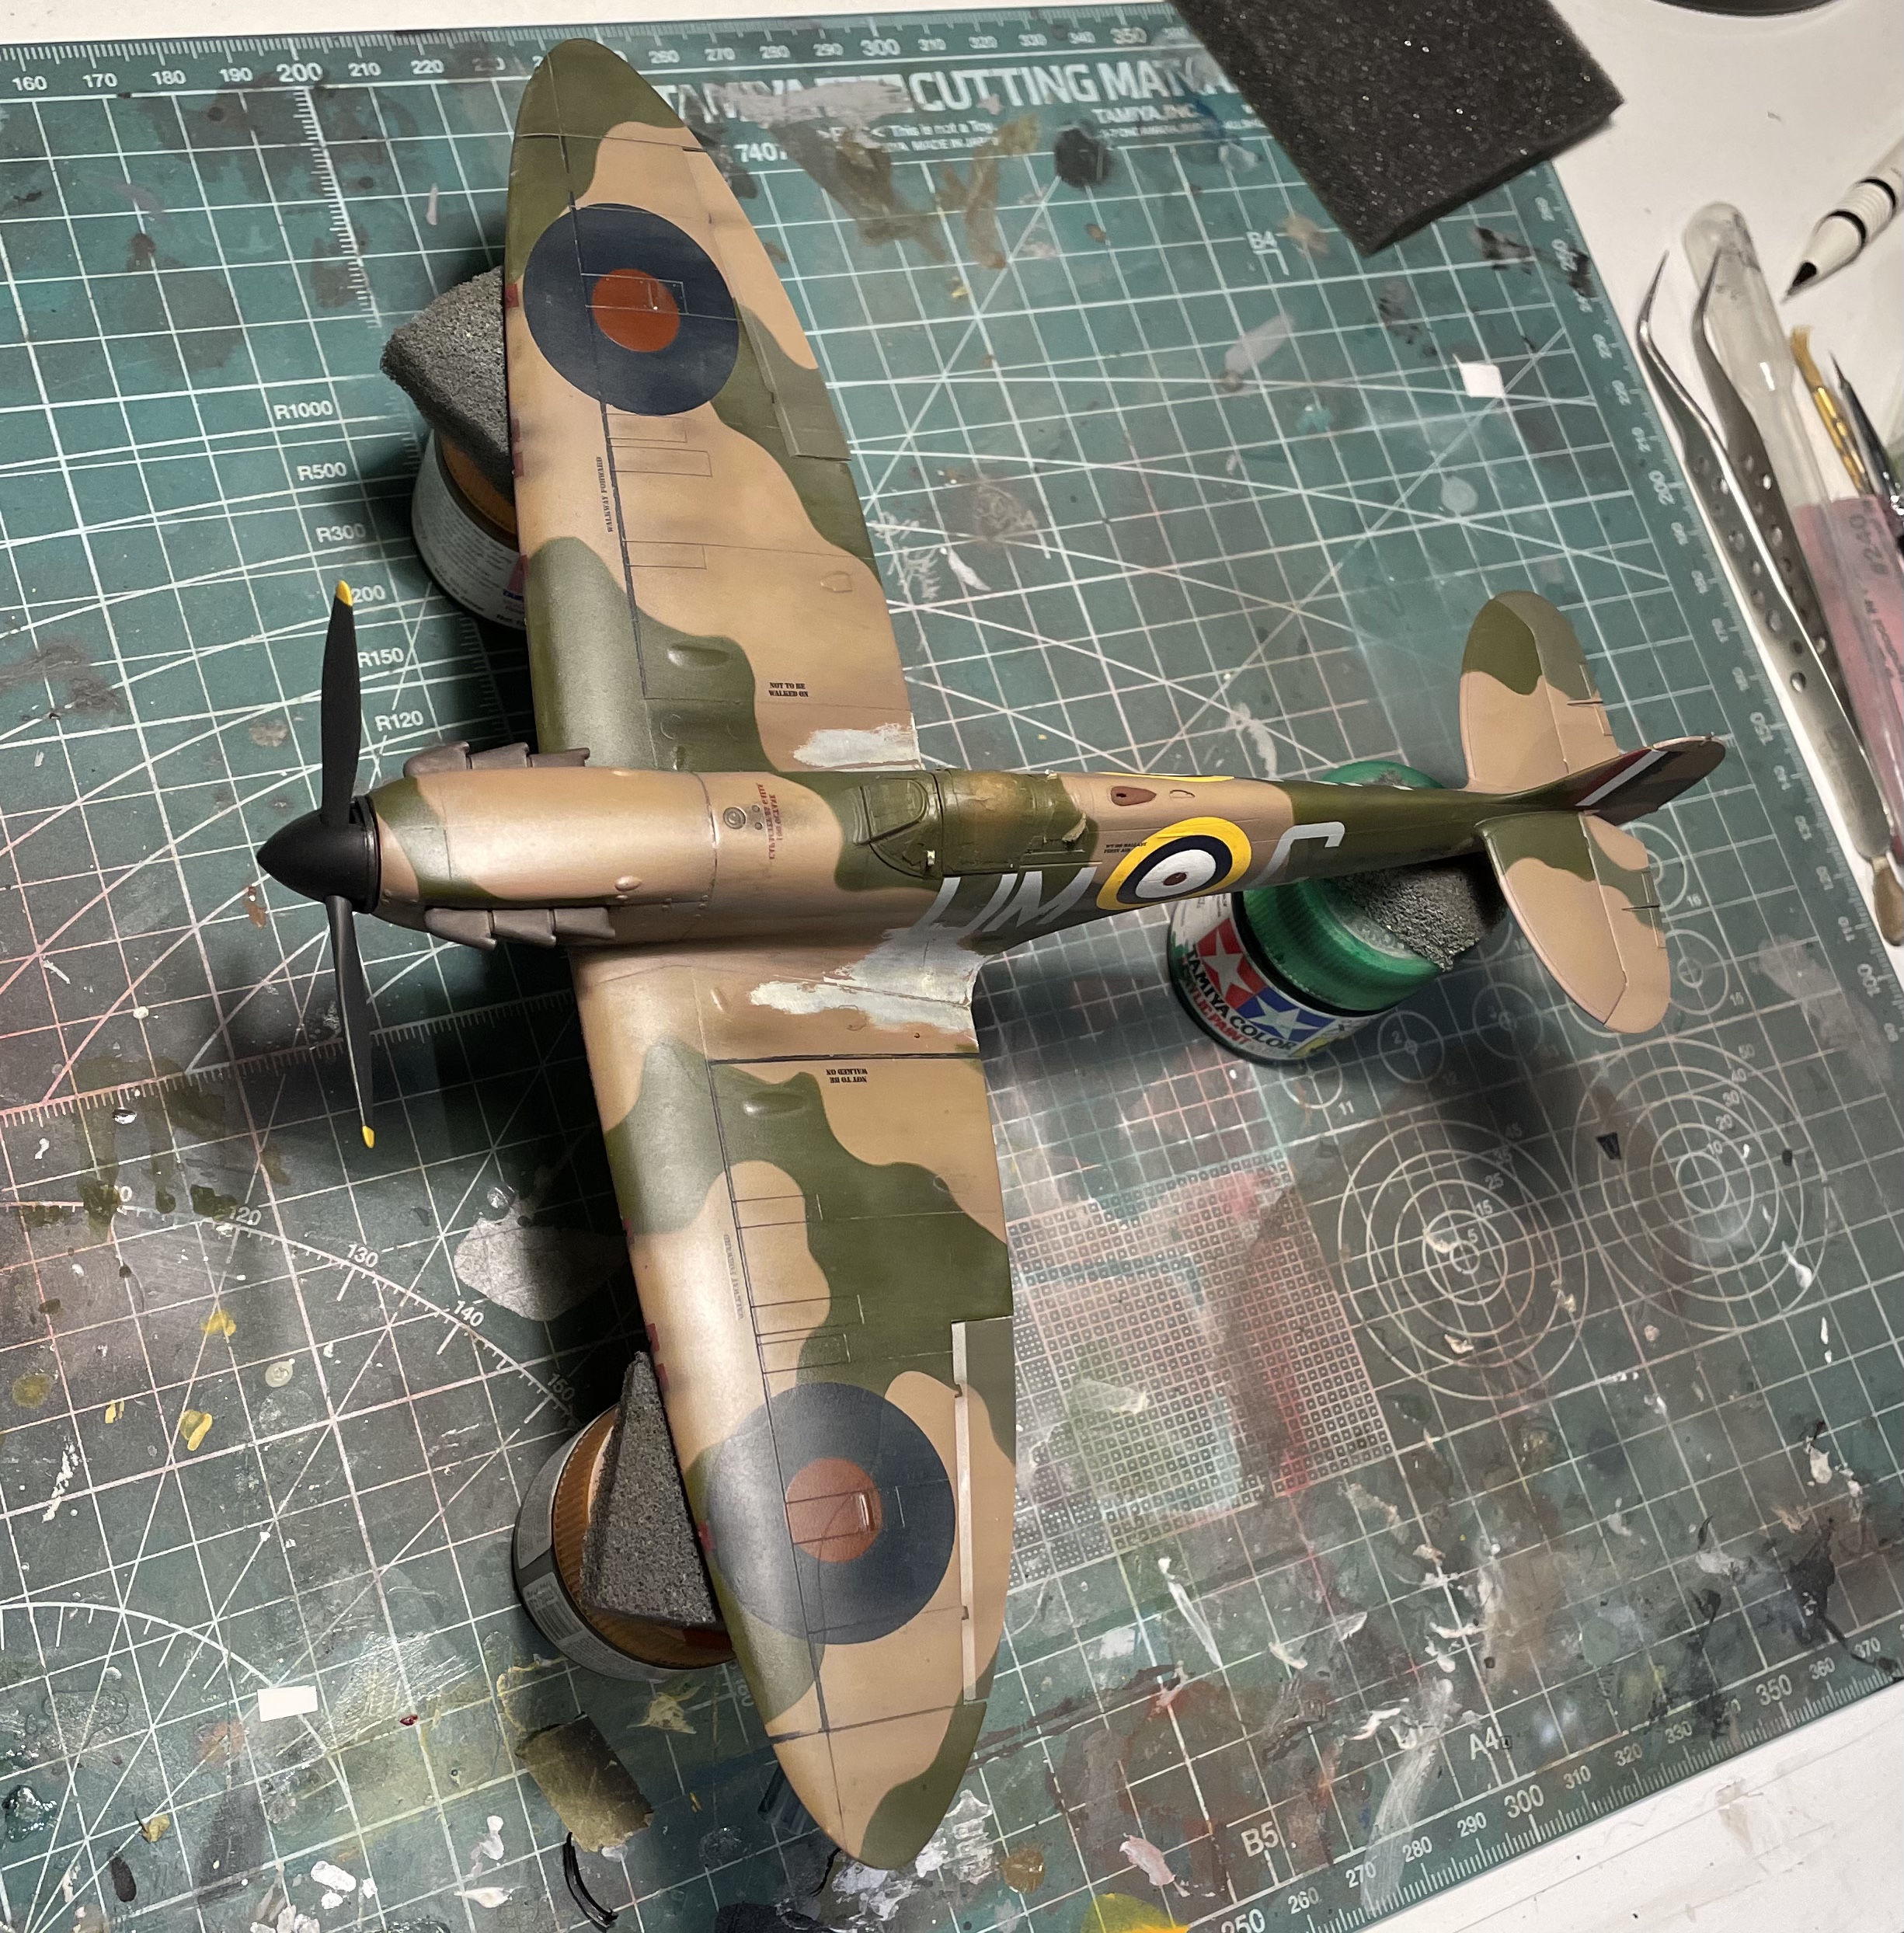
The differing tones and hues of the wings is seen to good effect in the image above. There vegetable oil was dabbed on with a piece of foam and mopped up with some kitchen towel and after a few hours it basically dried. There’s a bit of refining to do with this technique but I was pleased with how it turned out on this Spitfire.
The Finish
The remaining pieces were easy to apply. One of the advantages afforded by the Airfix kit in an in-flight display is the option to install a separate undercarriage for the purpose. They fitted well and looked good.
I removed the masking on the canopy and found the frame painting crisp and needing no cleanup. Radio upgrades were being installed at maintenance units from early September onwards so I trimmed the antenna post accordingly; hence no wire. I did not install IFF wires as that wasn’t installed until late September at the very earliest and this aircraft was active then until being lost on the 25th.
I built the simple stand out of a piece of Australian Yellow Oak and a thermocouple. One day I’ll get around to adding an engraved brass plaque identifying the aircraft and its Pilot.
I posed the control surfaces as if just initiating a climbing turn to starboard; the time would have been around 11.50am on the 25th September and 20 year old Sgt. Kenneth Holland was hunting his third German bomber victory in a week. He scored it too, but it cost him his life – one of the 540 RAF pilots to lose theirs during the Battle.
Gallery
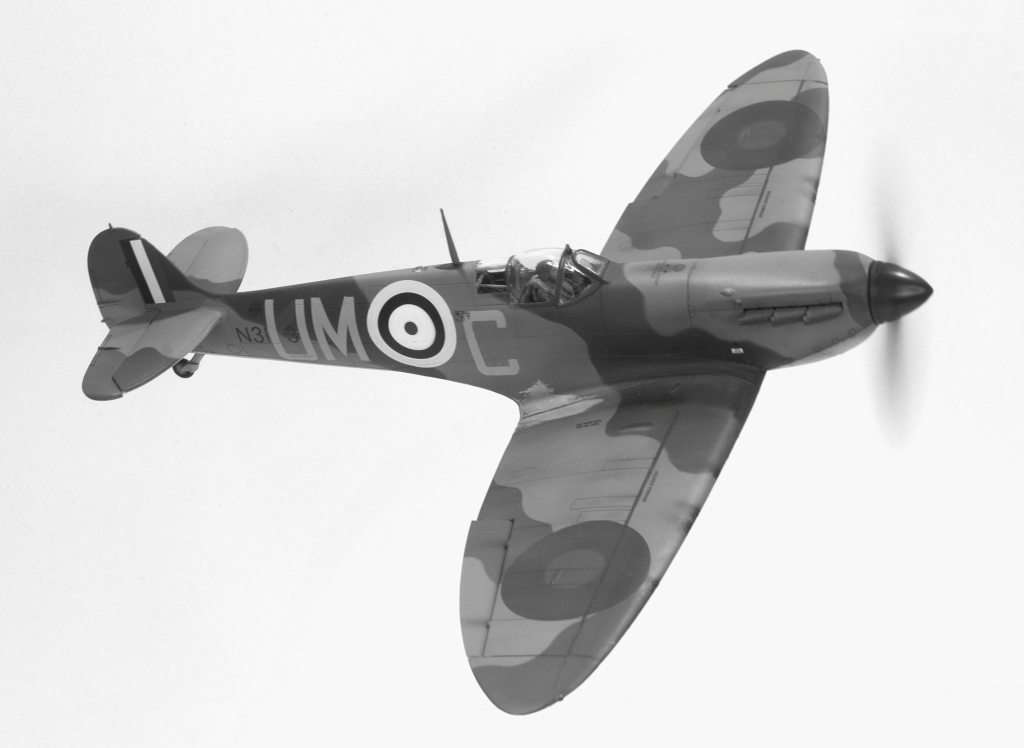
One of the advantages of an in-flight pose is the opportunity to create in-flight images. I therefore indulged, some of the results are below…


References and Credits
The following websites provided invaluable information in writing this piece.
- http://worldwartwodaily.filminspector.com/2016/09/september-25-1940-filton-raid.html
- http://fishponds.org.uk/bristolmem.html
- http://www.bbrclub.org/Barrage%20Balloon%20Cable%20Collisions%20with%20Aircraft%20in%20WWII.htm
- https://allspitfirepilots.org/aircraft/N3173
- http://www.bbm.org.uk/airmen/HollandKC.htm
- http://www.152hyderabad.co.uk/html/body_sgt_k__holland.html
- https://en.wikipedia.org/wiki/Bristol_Aeroplane_Company
- https://www.baesystems.com/en/heritage/filton–bristol
- http://www.bbm.org.uk/airmen/HollandKC.htm
- https://ww2db.com/battle_spec.php?battle_id=95
Copyright ©2022
This article, its text, and photos of the model(s) is my original work and is protected by copyright in its entirety, except where noted. All research sources are listed in the References and Credits section above, including photos from official sources. All other images were sourced from the internet and are used here under protection of fair-use. Any copyrighted images will be removed or credited forthwith upon request by its rightful owner.


Leave a comment